Article Contents:
- Why slats without finishing look incomplete
- Three options for the top finishing of a slatted wall
- Option one: polyurethane cornice
- Option two: wooden cornice or solid wood profile
- Option three: thin molding profile or trim
- Where the 'slats + cornice' combination is used
- TV area: main wall of the living room
- Wall behind the sofa: cozy accent area
- Hallway: where the first line matters
- Bedroom behind the headboard: decorative niche
- Study: strictness of lines
- Kitchen-living room: slatted zone for zoning
- Decorative box or ceiling projection
- How to choose a cornice for wooden slats: five parameters
- Parameter one: ceiling height
- Parameter two: slat width
- Parameter three: relief
- Parameter four: color and finish
- Parameter five: ceiling junction
- Installation technology: what you need to know before buying
- Installation sequence
- Glue for polyurethane cornice
- Expansion gap
- Priming Before Painting
- Five ready-made kits: what to buy for each task
- Kit 1: TV area with wooden slats
- Kit 2: slatted wall in the bedroom behind the headboard
- Kit 3: hallway with a full slatted wall
- Kit 4: study with dark slats and a strict cornice
- Kit 5: open-space with zoning using slats
- Table: which top element suits each situation
- How to combine wood texture and white polyurethane
- When the slats remain wooden and the cornice is painted
- When the slats are painted and the cornice is a single color
- When a wooden cornice unites the slats and ceiling
- Mistakes when buying: how not to waste money
- Buying slats without calculating the top joint
- Not accounting for the thickness of the cornice
- Installing a too massive cornice next to frequent thin slats
- Not leaving an expansion gap
- Forgetting about the ends of the slats in the side border area
- Mixing too many textures
- Not buying sealant for joints
- Not taking a spare
- Calculation for the TV zone: a practical example
- Additional keys and related catalog sections
- FAQ: questions everyone has
- Can you combine wooden slats and a polyurethane cornice?
- What to cover the top of a slatted wall with?
- What to buy for a slatted wall with stucco decor?
- Is a polyurethane cornice suitable for a modern interior next to slats?
- Can you paint a polyurethane cornice the color of the wall if the slats are dark?
- Is a bottom plinth needed for a slatted wall?
- How to calculate the number of slats for a TV zone?
- STAVROS: slats, cornices, and decor in one catalog
This is exactly the problem that the right combination solves:
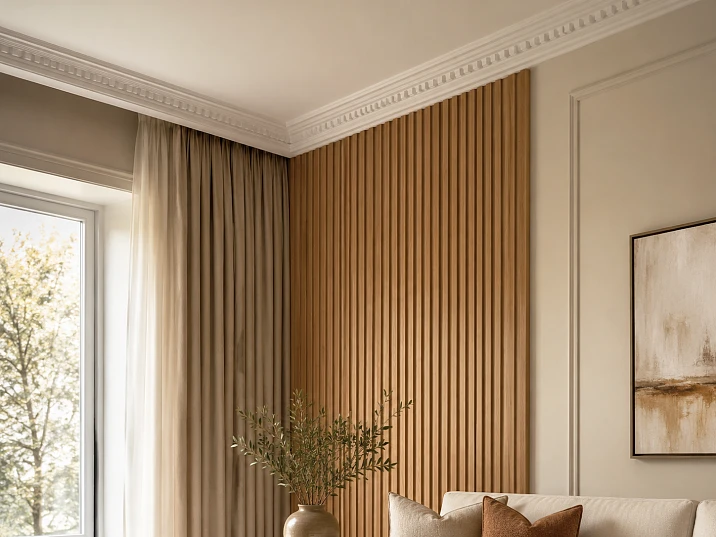
as the main decorative element and Wooden boards in interior or a polyurethane cornice — as an element that covers the top line, hides the gap, and connects the wall and ceiling into a single whole. This is not a decorative whim, it is architectural logic: any vertical plane must have a clear finish at the top. Without it, it's unfinished, even if everything else is done perfectly. Moldings made of polyurethane Why slats without a finish look unfinished
First of all — an honest conversation about a problem that many notice only after installation.
is installed vertically or horizontally, creates rhythm, adds texture, visually structures the space. All this works in the middle part of the wall — from eye level to shoulder level. But the wall has an upper boundary. And there, where the slat meets the ceiling, several typical problems arise.
Wooden plank for wall installed vertically or horizontally, creates rhythm, adds texture, visually structures the space. All of this works in the middle part of the wall — from eye level to shoulder level. But the wall has an upper boundary. And where the batten meets the ceiling, several typical problems arise.
Visible ends. The end of a slat is a cut of wood. It is technical, unfinished, and it is the first thing that catches the eye when looking at a slatted wall from bottom to top. Painting the ends is a partial solution. But if the ceiling is uneven (and in most apartments it is), the ends will still be at different heights.
Gap at the ceiling. Even with careful installation, a gap almost always remains between the top end of the slat and the ceiling — from 2 to 15 mm. In suspended ceilings, this gap is covered by a profile strip, but in regular concrete or drywall ceilings, it remains open. It looks like an unfinished putty crack, and it ruins the impression.
Break between the wall and the ceiling. The slatted area ends — and the ceiling begins. The transition between them is unclear, there is no horizontal line that would "close" the slatted plane from above. As a result, the wall with slats looks like an unfinished insert, rather than a well-thought-out design zone.
Lack of connection with the rest of the interior. If the room has other decorative elements — moldings, Polyurethane wall decor, Polyurethane Ceiling Moldings — a slatted wall without a top finish looks foreign. It does not speak the same decorative language as the rest of the space.
The solution to all these problems is a well-thought-out top transition. And here the buyer has several options, each with its own logic.




Three options for the top finish of a slatted wall
Before choosing a specific product, it is worth understanding what problem the top finish solves in each specific case.
Our factory also produces:
Option one: polyurethane cornice
Moldings made of polyurethane in the form of a cornice profile — this is a horizontal element that is installed along the top line of the slatted area. It simultaneously covers the ends of the slats and the gap at the ceiling, creates a clear horizontal line, and introduces decorative relief into the space.
The polyurethane cornice is attached with glue to the wall or to the ceiling surface at the very base of the slatted zone. The width of the front part is from 40 to 150 mm, depending on the ceiling height and the scale of the slats. The profile can be smooth (suitable for a modern interior) or with relief (for neoclassicism and soft classicism).
This option is the most versatile. It works with both thin slats 15×15 mm and wide boards 80×20 mm. The polyurethane cornice is easily painted in the color of the ceiling, the color of the wall, or a contrasting accent color.
Get Consultation
Option two: wooden cornice or solid wood profile
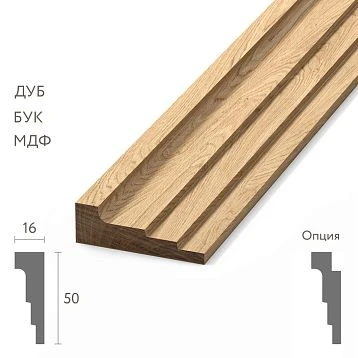
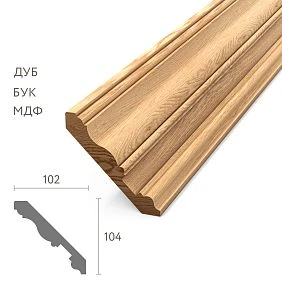
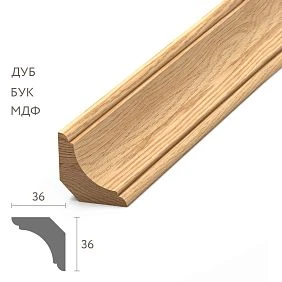
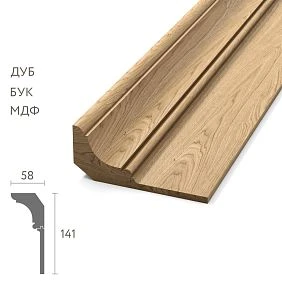
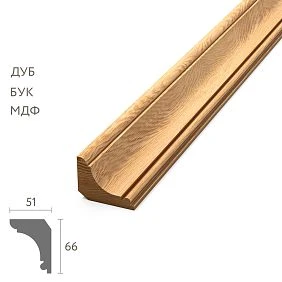
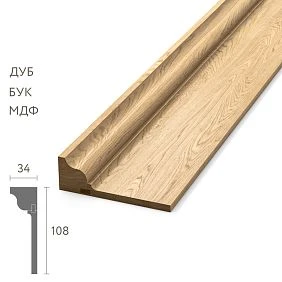
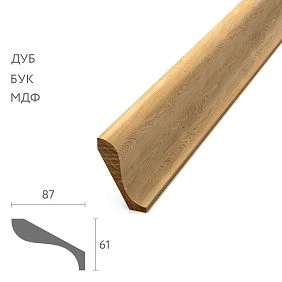
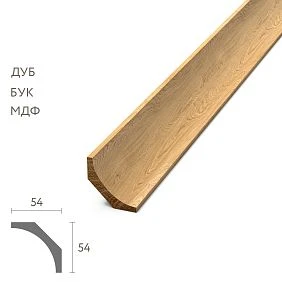
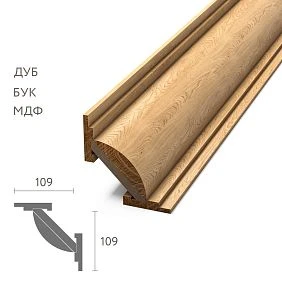
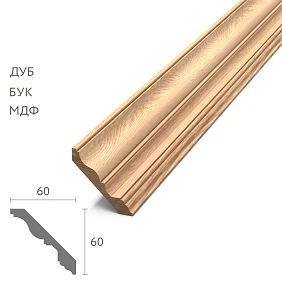
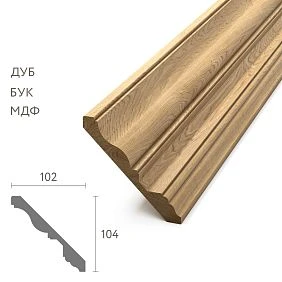
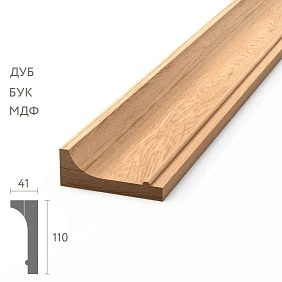
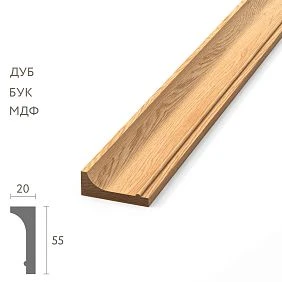
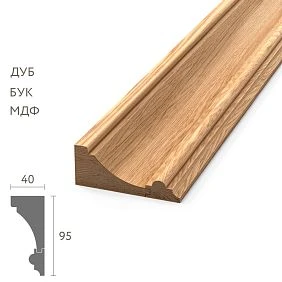
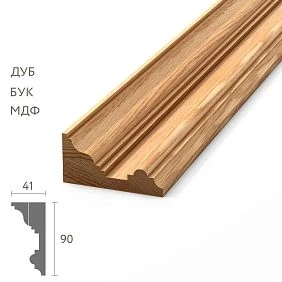
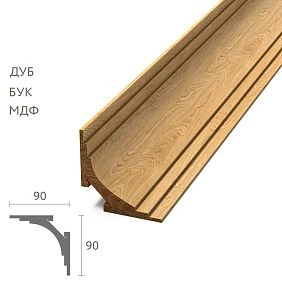
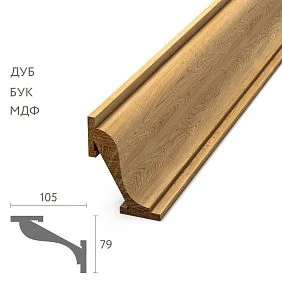
solid wood cornice — this is the completion of the slatted zone in the same material as the slats. A single piece of wood from top to bottom creates the feeling of a solid wooden volume — whether it's a slatted wall, a slatted panel, or a decorative box.
This option is appropriate when the slats remain in natural or tinted wood without painting, and a single piece of wood along the entire height is important as a stylistic principle. For a modern interior with dark slats and a dark wooden cornice — a very strong architectural solution.
Option three: thin molding profile or linear trim
Polyurethane trim — a thin straight profile that creates a horizontal line without pronounced relief. This is a minimalist solution for a modern interior, where the slats are the main element, and the completion should be "quiet," almost invisible.
Thin Trim 15–25 mm wide with a flat or slightly rounded front surface — this is a dividing line that neatly separates the slatted plane from the ceiling. It does not compete with the slats for attention and works as pure geometry.
Where the "slats + cornice" combination is used
In almost any area of a modern interior, this pair finds its application. Let's break down specific cases — not abstractly, but with an understanding of exactly what needs to be purchased for each situation.
TV zone: main wall of the living room
TV zone with wooden planks — the most popular use case. Vertical slats from floor to ceiling or from cabinet to ceiling create a visual dominant in the living room. The top joint problem is most noticeable here: the TV zone is always in focus.
What you need: Wooden plank — for the main vertical plane, a polyurethane cornice 60–100 mm — along the top line of the slatted zone, a thin molding — for the side borders of the zone (where the slats end and the regular wall begins). Along the bottom line — solid wood cornice or a horizontal slat-shelf for the TV.
Wall behind the sofa: a cozy accent zone
The slatted wall behind the sofa is a zone that everyone entering the room sees. Here, the slats can go up to the ceiling or end at the level of the top edge of the sofa back + 20–30 cm. In the second case, an "empty" wall remains above the slats.
If the slats go up to the ceiling — a cornice is needed. If the slats end in the middle of the wall — a horizontal of wooden strips as the top border of the zone, or a thin molding made of polyurethane molding.
Hallway: where the first line matters
In the hallway, the slatted wall often occupies the entire length of the corridor — from the front door to the far wall. The height of the slats is usually full, from the baseboard to the ceiling. It is here that the top finish is especially noticeable: a person entering the hallway sees the wall head-on.
For the hallway, a good combination is: Wooden planks + a thin polyurethane cornice + a baseboard made of . Clear lines, created using modern technologies, emphasize the strict aesthetics of the room. Each decorative element harmoniously fits into the overall concept, creating a sense of order and thoughtfulness.. Three horizontal lines — the bottom, top, and ceiling — create a clear geometry that turns a narrow corridor into an architecturally balanced space.
Bedroom behind the headboard: decorative niche
A slatted wall behind the bed's headboard is a decorative accent that replaces the headboard or creates an architectural backdrop for it. Here, the slats can run the width of the bed or the entire width of the wall.
The top finish in the bedroom is a calm polyurethane cornice without complex relief, matching the wall color or slightly lighter. It works "in silence": it does not distract attention from the slatted plane itself but creates a neat horizontal line. If a wall sconce is planned above the bed, the cornice is mounted above the light fixture.
Study: strictness of lines
In the office Wooden boards in interior are used to create a focal wall behind the desk or to design a bookshelf area. Strictness is important here: no ornamentation, minimal relief.
The best option is a thin smooth Polyurethane molding or a straight profile trim without decorations. It will close the gap and create a horizontal line without overloading the strict office atmosphere with unnecessary decor.
Kitchen-living room: slatted zone for zoning
In an open space, a slatted wall is often used for visual zoning. The slats run along one of the walls of the kitchen or living room area, creating a color and texture accent. In this case, the top finish connects the slatted zone with the general perimeter of the ceiling cornice — if there is one.
A good solution: a polyurethane cornice above the slatted zone of the same profile as the ceiling cornice around the perimeter of the entire room. This makes the slatted insert part of the architectural logic of the interior, rather than a random decorative spot.
Decorative box or ledge on the ceiling
A slatted ceiling insert element — a decorative box made of slats integrated into the ceiling — is a special case. Here the slats run horizontally, and the joint with the main ceiling requires careful molding framing around the entire perimeter of the box.
Polyurethane Ceiling Moldings here — exactly what is needed. The profile around the perimeter of the slatted insert element closes the joint, creates a clear boundary between the slats and the main ceiling, and adds architectural expressiveness.
How to choose a cornice for wooden slats: five parameters
Choosing a cornice is not a random matter. There are five parameters that determine whether the cornice will work with the slats or create a conflict.
Parameter one: ceiling height
The higher the ceiling, the wider the cornice can be. For ceilings of 2.7 m — a cornice width of 40–70 mm. For ceilings of 3.0 m and higher — 70–120 mm. A 150 mm cornice on a 2.5 m ceiling will look like a heavy overhanging beam.
Parameter two: width of the slats
Thin slats 12–20 mm require a thin, lightweight cornice. Massive slats 40–60 mm require a more substantial profile. The rule of proportion: the cornice should not be wider than 2–3 slats combined. Otherwise, the cornice visually "eats" the slat rhythm.
Parameter three: relief
An active cornice relief next to frequent slats creates visual noise. For a slatted wall with a frequent pitch of 20–30 mm (where slats and gaps alternate) — the cornice should be smooth or with minimal relief. For a slatted wall with a rare pitch (wide slats, large gaps) — a more pronounced cornice profile is possible.
Parameter four: color and finish
A cornice in the color of the ceiling is a "quiet" finish that does not compete with the slats. A cornice in the color of the slats creates a unified wooden volume. A cornice in a contrasting color is a designer accent that requires confidence in the decision.
A polyurethane cornice is easily painted in any color. A solid wood cornice is tinted, varnished, or painted. This gives complete freedom in choosing the finish.
Parameter five: connection to the ceiling
A polyurethane cornice is installed in the corner of the wall and ceiling, covering both bases. For a stretch ceiling — the cornice is mounted before stretching, along the wall, with an indent from the ceiling base equal to the thickness of the stretch fabric (usually 5–10 mm). For a concrete or plasterboard ceiling — tightly into the corner with sealing of joints.
Installation technology: what you need to know before purchasing
Installation sequence
Correct sequence:
-
Marking the cornice axis on the wall — strictly horizontal level
-
Installation of slats (if they go below the cornice — slats are installed first)
-
Installing the cornice over the ends of the slats or flush with their top line
-
Sealing the joint between the cornice and the ceiling
-
Puttying the joints of the cornice with the slats (if necessary)
-
Priming and painting the cornice
Detailed installation technology — in the article installing polyurethane molding.
Glue for polyurethane cornice
Polyurethane moldings attached with mounting glue — acrylic or solvent-based. Important: glue for polyurethane and glue for wooden slats are different compounds. Wooden slats are attached with liquid nails (polyurethane-based adhesive sealant) or self-tapping screws with adhesive fixative. More about choosing glue — in the article what to glue polyurethane molding with.
Expansion gap
Wood is a living material. It changes size with changes in humidity. A compensation gap of 3–5 mm must be left between the top end of the batten and the ceiling (or cornice). This gap will be covered by the polyurethane cornice. Without a gap, the battens may deform or warp when expanding.
Priming before painting
The polyurethane cornice is primed with an adhesion compound before painting. Wooden battens are primed with acrylic wood primer. If the cornice and battens are painted the same color, they are primed separately and painted together.
Five ready-made kits: what to buy for each task
Kit 1: TV area with wooden battens
Main material:
-
Wooden plank — calculated by height × number of battens + 10% spare
-
Moldings made of polyurethane — cornice profile by TV area width + 10%
-
Thin molding profile — along the side borders of the area
Consumables:
-
Mounting adhesive for battens (liquid nails) — 2–3 tubes
-
Mounting adhesive for polyurethane — 1 tube
-
Acrylic sealant for joints between the cornice and ceiling — 1 tube
-
Wood primer (for slats) and adhesion primer (for the cornice)
-
Finish paint — for the cornice (slats can remain natural wood)
-
Screws 3.0×35 mm for slats
Tools: spirit level, miter box or miter saw, nail punch, tape measure, painter's tape.
Set 2: slatted wall in the bedroom behind the headboard
Main material:
-
Wooden planks — across the width of the headboard or the entire wall
-
Polyurethane cornice — calm profile 60–80 mm in the color of the ceiling
-
Horizontal bottom slat as the zone's "baseboard"
Consumables:
-
Glue for slats, glue for polyurethane
-
Acrylic sealant
-
Primer, paint
Set 3: hallway with full slatted wall
Main material:
-
Wooden plank — to the full height and length of the wall
-
a polyurethane cornice — along the top line, 60–90 mm
-
Baseboard from . Clear lines, created using modern technologies, emphasize the strict aesthetics of the room. Each decorative element harmoniously fits into the overall concept, creating a sense of order and thoughtfulness. — along the bottom line
-
Polyurethane trim — for external corners, if the wall wraps around a doorway
Consumables:
-
Glue, screws, sealant, primer, paint
Set 4: study with dark slats and strict cornice
Main material:
-
Wide Wooden planks 40–60 mm in dark tinting
-
Thin smooth molding made of polyurethane decor — strict, without relief, 30–50 mm
-
solid wood cornice — matching the slats
Additional Items:
-
decorative polyurethane elements — spot application, if accent is needed
Set 5: open-space with zoning using slats
Main material:
-
Wooden planks — on the accent wall of the kitchen or living room area
-
Moldings made of polyurethane — cornice the width of the slat zone + a general perimeter cornice
-
Polyurethane wall decor — molding frames on adjacent walls for architectural unity
Principle: the cornice above the slat zone and the cornice around the perimeter of the room are of the same profile. Then the slats fit organically into the overall architecture of the space, rather than looking like a separate decorative insert.
Table: which top element suits each situation
| Situation | Recommended element | Width | Finish |
|---|---|---|---|
| TV zone, height 2.7–3.0 m | Polyurethane cornice | 60–90 mm | Ceiling color or contrast |
| Bedroom, headboard, thin slats | Smooth PU molding | 40–60 mm | Ceiling color |
| Hallway, full wall, slats to ceiling | PU cornice | 70–100 mm | Wall or ceiling color |
| Study, dark slats | Wooden cornice | 50–80 mm | Matching the slats |
| Open-space, zoning | PU cornice = common profile | 80–120 mm | Single with perimeter |
| Slatted ceiling insert element | PU ceiling molding | 60–100 mm | Ceiling color |
| Short slatted zone on half wall | PU linear molding | 15–25 mm | Wall color |
How to combine wood texture and white polyurethane
This is a question that arises for everyone who thinks about this combination. "Wood and white molding — isn't that a conflict?"
No. They are opposites that work together — like dark text on a light background. The warm wood texture of the slats and the cold white geometry of the polyurethane cornice create a contrast that generates tension and interest in the space.
The principle works under one condition: you need to choose a leading element. If the slats are leading (dark, wide, expressive), the cornice should be quiet — smooth, white, without excessive relief. If the cornice is more expressive (with relief, accent color), the slats should be calmer — light, thin, with an even rhythm.
Both elements cannot shout at the same time. One speaks — the other stays silent.
When the slats remain wooden and the cornice is painted
This is the most popular option. The slats in natural or tinted wood create an accent texture, and Moldings made of polyurethane above them are painted to match the ceiling — and 'disappear', creating a clear horizontal boundary without visual noise.
When the slats are painted, and the cornice — in a single color
If the slats are painted white, cream, graphite, or any other color — the cornice is painted the same color. Everything becomes monochrome, and the volumetric slatted texture comes to the forefront, freed from material contradiction.
When a wooden cornice unites the slats and the ceiling
solid wood cornice matching the slats creates a single wooden volume from the slatted plane to the ceiling. This is a heavier and richer solution — suitable for studies, libraries, masculine interiors, hunting lodges, country styles.
Mistakes when buying: how not to waste money
Buying slats without calculating the top joint
The slats are bought, installed — and only then the problem with the top joint is discovered. The cornice is purchased as a separate order, which takes a week. Installation is interrupted. This is a classic story. The shopping list is compiled entirely, before any work begins.
Not accounting for the thickness of the cornice
A polyurethane cornice has a projection from the wall — from 20 to 80 mm. If the slats are mounted directly to the wall, the cornice overhangs their surface. If the slats are on a frame with a 20–40 mm offset from the wall — the cornice must account for this offset and be installed at the level of the front plane of the slats, not at the base of the wall.
Installing a too massive cornice next to frequent thin slats
A 150 mm cornice above 15×15 mm slats with a 20 mm spacing is a disproportionate pair. A heavy cornice literally 'crushes' the light rhythm of the slats. For frequent thin slats — a cornice no more than 50–60 mm.
Not leaving an expansion gap
Already mentioned, but this is such an important mistake that it's worth repeating: between the ends of the slats and the ceiling (or the base of the cornice) — a gap of 3–5 mm. Without it, the slats may deform during seasonal wood expansion.
Forgetting about the ends of the slats in the side border area
The top ends are covered by the cornice — good. But the side ends of the slats, where the slatted area ends and the regular wall begins — what about them? Polyurethane trim in the form of a vertical profile or Wall Decor will cover the side borders as neatly as the cornice covers the top.
Mixing too many textures
Wooden slats + polyurethane cornice + relief moldings on the adjacent wall + decorative overlays + ceiling stucco — five textures and materials in one room. This is no longer an interior, but a warehouse showroom. Maximum two or three decorative elements, the rest is a neutral background.
Not buying sealant for joints
The joint between the cornice and the ceiling is where a crack almost always forms during shrinkage. Acrylic sealant applied to the joint after installation and before painting prevents the gap from appearing. One tube costs little, and the result is a joint without gaps a year after renovation.
Not taking a reserve
For the cornice — a 10% margin, for slats — 15% (due to trimming). Polyurethane cornice from one batch is uniform in color before painting. One purchased later may differ slightly.
Calculation for the TV zone: practical example
TV zone width 3.0 m, slat zone height from cabinet to ceiling — 1.8 m. Slats 20×20 mm, pitch 30 mm (slat + gap).
Slats: 3000 mm ÷ 30 mm = 100 slats. Length of each — 1800 mm. Total: 100 × 1.8 m = 180 linear meters. With a 15% margin: ~207 linear meters.
Cornice along the top line: 3.0 m + 10% = 3.3 m.
Molding along the side lines: 2 × 1.8 m = 3.6 m + 10% = ~4 m.
Glue for slats: ~4 tubes of liquid nails (50 slats per tube during installation).
Glue for polyurethane: 1 tube (cornice + side moldings).
Sealant: 1 tube of acrylic.
Wood primer: 0.5 L.
Adhesion primer for polyurethane: 0.3 L.
Paint (if cornice and moldings are painted): 0.5–1 L.
This is a real calculation for a standard TV area. Everything is purchased in one order, installation proceeds without interruptions.
Additional keys and related catalog sections
The buyer in this topic is simultaneously searching for several related categories.
Wooden furniture legs — for the TV cabinet that stands in front of the slatted wall. In the section solid wood furniture legs — a wide selection of shapes, including conical and turned ones for classic and modern interiors.
Decorative furniture handles — for TV cabinet drawers. In the section wooden handles — staples, buttons, and shaped handles made of solid beech.
Solid wood moldings — slats, baseboards, glazing beads — in the section solid wood trim.
Polyurethane ceiling decor — rosettes, ceiling cornices, decorative beams — in the section ceiling decor.
Polyurethane overlays for furniture — in the section decorative inserts for those who want to add accent elements to furniture near the slatted area.
FAQ: questions that everyone has
Can wooden slats and polyurethane cornice be combined?
Yes. This is one of the most successful combinations in modern interiors. Wooden planks provide texture and rhythm, and a polyurethane cornice covers the top joint, hides the gap, and connects the slatted plane to the ceiling.
What to cover the top of a slatted wall with?
Most often — with a polyurethane cornice profile installed along the top line of the slatted area. Alternatives: solid wood cornice matching the slats, thin Polyurethane trim as a minimalist line.
What to buy for a slatted wall with stucco decor?
wooden strip, Moldings made of polyurethane for the cornice line, Polyurethane wall decor for the side borders of the area, glue, sealant, fasteners, primer, and paint.
Is a polyurethane cornice suitable for a modern interior next to slats?
Yes, if you choose a cornice with a smooth or minimalist profile, without classic ornaments. polyurethane decor available in a wide range of profiles — from strict geometry to elaborate baroque stucco. For a modern interior, choose the former.
Can I paint a polyurethane cornice the color of the wall if the slats are dark?
Yes. A cornice in the color of the wall or ceiling becomes an 'architectural' element — it is there but does not catch the eye. The dark slats remain the main accent. This is an elegant and professional solution.
Is a bottom baseboard needed for a slatted wall?
Yes, the lower boundary of the slatted area also requires finishing. This can be a horizontal slat-baseboard, Polyurethane trim or a regular baseboard made of wall decor. The upper and lower boundaries together create a complete slatted plane.
How to calculate the number of slats for a TV zone?
Zone width ÷ (slat width + gap step) = number of slats. Add 15% margin for trimming to the resulting number. Slat length = height of the slatted zone + 3–5 mm compensation gap (which will be covered by the cornice).
STAVROS: slats, cornices, and decor in one catalog
STAVROS company produces wooden slats and milled products from solid beech and oak, as well as a full range moldings from polyurethane: cornices, moldings, baseboards, millwork, overlays, decor for walls and ceilings. All of this is in a single catalog, allowing you to select and order a set for a slatted wall in one place without searching through different suppliers.
STAVROS assortment includes: wooden plank, solid wood cornice, Polyurethane moldings and cornices, Polyurethane trim, Wall Decor, ceiling decor, Polyurethane decorative appliques и solid wood millwork.
STAVROS production operates in Saint Petersburg. Delivery across all of Russia and CIS countries. Showrooms in Moscow and Saint Petersburg — for those who want to compare textures in person and ensure quality before ordering.