Article Contents:
- 1. Determine what was ordered: slats or ready-made panels
- 2. What information to extract from the specification
- 3. Designate pitch and gap with different dimensions
- 4. How to calculate a row without an error of one gap
- 5. Check the edge margins and the central axis
- 6. Openings and equipment are checked individually
- 7. How to verify the layout on adjacent walls
- 8. Match the required height with the product length
- 9. The number of items on the wall does not equal the number of segments
- 10. Why 46.8 linear meters may require 20 planks
- 11. Material cannot be determined from a surface photograph
- 12. Approve the finish on the material of the selected version
- 13. Calculate ready-made panels by module
- 14. Depth and mounting are also part of the check
- 15. Cross-check the unfolded view, the 3D model, and the product drawing
- 16. What to record in the procurement list
- 17. What to recalculate when replacing an item code
- 18. How to transfer the verified specification to the order

A 30 mm wide slat with a 20 mm gap repeats every 50 mm. If the specification says "20 mm pitch", the installer will get a different task, and the kit assembler will have an incorrect basis for counting. On a small area, the error may go unnoticed until fitting; on a long wall, it will change both the number of parts and the position of the outermost slats.
Decorative slats are checked against the specification using the geometry of the entire layout. The selected product must be linked to the section width, gaps, edge margins, segment lengths and installation conditions. Only then can linear metres be converted into a specific number of planks or panels.
Below we will look at checking a finished project: what to clarify in the specification, how to recalculate a row, and which changes require new approval before purchase.

1. Determine what is ordered: slats or ready-made panels
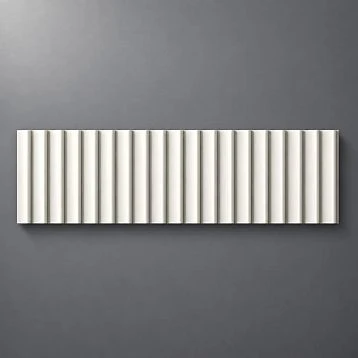
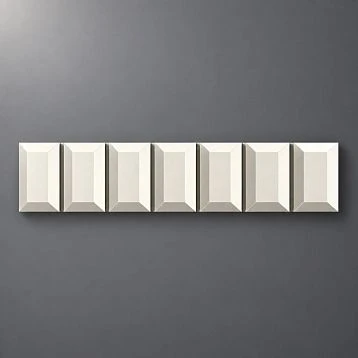
For individual slats, the number and arrangement of gaps are set by the project. For a ready-made slatted panel, the relative position of the elements is already tied to the module design. A surface that looks the same in the general image can be assembled in completely different ways.
| Question | Individual slats | Ready-made panel |
|---|---|---|
| What sets the pattern | Slat width, gap, starting reference | Geometry of the selected model |
| What is calculated first | Number of slats and segment lengths | Modules by zone width and height |
| How the edge is finished | By the position of the last slat and the outer margin | By module trimming and the selected end profile |
| What customers order | Planks of a specific length | Panels of a specific size |
In the section STAVROS slatted panels both panels and a separate interior slat RK-002 are presented. Therefore, the section name does not determine the purchase unit.
Specify the purpose separately: wall cladding, furniture facade, or spatial partition. A panel on a substrate and freestanding partition posts serve different purposes. You cannot transfer a solution from a picture to another type of structure without checking the fastening.




2. What information should be extracted from the specification
Start with the item code, material, size variant, and surface condition at delivery. Then locate the corresponding area on the layout drawing, its boundaries, and the starting point of the layout. If any of these links is missing, the line cannot yet be considered an unambiguous purchase order.
У interior slat RK-002 the product page offers MDF and MDF with oak veneer options, a length of 2750 mm, and several size variants. In addition to A, C, and L, D and E are also specified. For example, one variant is listed as 40 × 40 × 20 × 8 × 2750 mm. The abbreviated entry "RK-002, wood" would lose a significant part of the data.
Verify the meaning of the letters against the drawing. To calculate the row, you need the width that the installed slat occupies on the wall layout. You cannot automatically take the first number from the product page without checking the product's orientation.
Save the product link and the selected variant. If the material, length, or finish changes via a toggle within a single product page, a single page URL is not sufficient for ordering.
Our factory also produces:




3. Specify pitch and gap as distinct dimensions
The gap is the free distance between adjacent slats. The pitch is the distance between identical points on adjacent elements, for example between their axes. For identical straight slats installed in parallel in the same orientation:
pitch = slat width + gap.
With a nominal width of 30 mm and a gap of 20 mm, the pitch is 50 mm. These numbers are used to explain the calculation and do not relate to the RK-002 size variant.
The phrase "20 mm pitch" with a width of 30 mm cannot describe a normal row with open gaps: adjacent elements would begin to overlap. If the author meant the gap, this needs to be corrected in the documentation.
On the drawing, show both dimensions and indicate which edges they refer to. For a shaped profile or slats rotated relative to the wall, the visible gap and the distance between installation axes require a separate geometric check.
Get Consultation
4. How to calculate a row without an error for one gap
In a row of ten slats, there are nine gaps between them. The outer margins on the left and right are separate dimensions, so they cannot be automatically included in the number of inter-slat gaps.
For identical elements, the following relationship applies:
Row width = number of slats × slat width + (number of slats − 1) × gap.
The total width of the area equals the row width plus the left and right margins. The calculation should use the dimension after finishing and coordination of junctions, not the rough wall dimension before panels, architraves, or built-in furniture are installed.
If minimum outer margins are specified, the preliminary maximum allowable number of slats is found as follows:
Number of slats = (area width − minimum left margin − minimum right margin + gap) / (slat width + gap).
Round the result down: at this stage, the task is to fit whole slats under the given constraints. Then calculate the actual margins and check the composition. If the margins must be a strictly defined size, rounding alone will not solve the task: the quantity, width, or gap will have to be adjusted.
5. Check the outer margins and the center axis
Let's take a conditional zone 2400 mm wide, a 30 mm slat, and a 20 mm gap. According to the design, the edge margins must be at least 40 mm on each side. A preliminary calculation gives (2400 − 40 − 40 + 20) / 50 = 46.8. The maximum under these conditions is 46 slats.
Let's look at the neighboring options, centering each row relative to the zone.
| Quantity | Row width | Margin on each side | What is on the central axis |
|---|---|---|---|
| 45 slats | 2230 мм | 85 мм | Central slat |
| 46 slats | 2280 мм | 60 мм | Central gap |
| 47 slats | 2330 мм | 35 мм | Central slat |
The 47-slat option violates the accepted margin constraint. The choice between 45 and 46 is made with the composition in mind: the axis may require either a slat or a gap. For a symmetrical row of identical slats, an odd number gives a central slat, while an even number gives a gap.
Equal margins are not always needed. If there is a door on the left and a cabinet on the right, the asymmetry may be intentional. The main thing is to fix it with dimensions. The layout must not be changed during installation just because the installer wanted equal remainders at the edges.
6. Openings and equipment are checked individually
The total wall area does not show how many slats pass above the door, how many end near the cabinet, and which are split by a niche. Mark all constraints before the final calculation: casings, furniture, light fixtures, ventilation grilles, and electrical installation products.
Do not subtract the opening area from the total cladding area and do not convert the remainder into linear meters. An opening may cross several slats, leaving short sections above it, while adjacent planks keep their full height. A list of specific segments is required.
For sockets and switches, check the entire outer size of the frame, not just the center of the mounting point. With a 20 mm gap, a large unit will not fit "between the slats" just because its axis falls within the gap.
The solution may include a separate field, trimmed sections, or an agreed change to the layout. Relocating electrical points is coordinated with the design and the relevant contractor before purchase. An arbitrary local shift of several slats will disrupt the overall rhythm and require a new calculation.
7. How to check the layout on adjacent walls
For each corner, determine whether the rhythm continues or a separate zone begins. The same spacing on two walls does not yet mean a coordinated transition: the last slat of one plane may conflict with the first slat of the other.
Show the corner in plan. Take into account the depth of the profiles, the thickness of the base, and the termination design. At an internal corner, protruding slats can reduce the available space, while at an external corner you will need to decide which surface remains visible from the side.
If a corner piece is used, include its dimensions in the calculation. You cannot first fill both walls with rows all the way to the corner and then add an element between them that takes up part of the width.
On a curved section, the length of the zone is determined by the agreed layout surface. The length along the base and the length along the face points of the protruding decor differ. For a flexible panel, check the permissible geometry of the specific product; the ability to bend does not mean that any radius and any orientation are acceptable.
8. Match the required height with the product length
The slat in the image easily runs from floor to ceiling, but the order specifies a particular blank length. If you need a single continuous piece of 2780 mm, a 2750 mm product slat will not work even without allowing for trimming.
Determine the length by the actual installation boundaries. A slat may start above the skirting board, end below the cornice, or fit into a specially provided frame. Installation gaps are set according to the project and the product requirements; a universal size for all materials does not apply here.
If the length is insufficient, choose a different version in advance or agree on a horizontal joint. Its position is shown on the layout drawing: in one line for all slats, in different places, or in an area hidden by furniture. The joint remains part of the structure even if it is not visible from the main viewing point.
Do not expect to achieve the required height by reducing all the specified gaps. If the solution relies on a slat of exactly the same length as the finished part, separately check the possibility of end trimming and the actual room dimensions.
9. The number of positions on the wall does not equal the number of segments
After checking the row, compile a list of lengths. For a straight section it may consist of one position; for a wall with openings and niches, of several groups. Each group is assigned a length, quantity, and place of use.
For example, the layout retains 46 vertical positions, but six of them are intersected by a niche. If each such position keeps separate parts above and below, you get 40 solid slats and 12 short parts — 52 segments in total. At the same time, the number of verticals on the wall is still 46.
For a sloped top, do not use the average height of all slats. You need the lengths of individual parts or an unambiguous scheme for producing them. A change in height over even a small area can affect whether segments can be combined in a single blank.
In the calculation, keep the link between the short part and its location. This helps avoid confusing the top and bottom near an opening, especially if the grain direction must be matched on a transparent finish. After cutting, the part receives its own installation designation.
10. Why 46.8 linear meters may require 20 planks
Let's consider a separate hypothetical example of a length schedule, unrelated to the number of slats in the previous calculation. Required: 12 segments of 2400 mm and 15 of 1200 mm. The length of a commercial plank is 2750 mm. All finished segments must be continuous.
| Ready-made segments | Quantity | Net area | Placement in blanks |
|---|---|---|---|
| 2400 mm each | 12 | 28.8 m | One each: 12 planks |
| Two each of 1200 mm | 15 | 18 м | Two each, last one separate: 8 planks |
| Total | 27 | 46.8 m | 20 planks up to reserve |
By total linear meters, it would be 46.8 / 2.75 — after rounding, eighteen planks. However, after a long segment, no more than 350 mm remains before accounting for processing. A short part 1200 mm long does not fit into this remainder. Therefore, long and short segments are distributed across different blanks.
The final map accounts for saw cuts, end trimming, the condition of the blanks, and finishing requirements. Here the total length of twenty planks is 55 m, but the difference from the clean 46.8 m is not a reserve of finished slats: a significant part of it comes from short offcuts.
Reserve stock is allocated separately for the potential replacement of specific parts. If a single long continuous batten matters, a set of small offcuts does not replace it. Adding 10% to the linear footage without a cutting plan does not explain how many usable spare elements will end up on site.
11. Material cannot be determined from a photograph of the surface
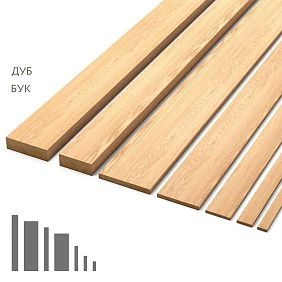
An oak grain pattern on the face side may belong to solid wood or to veneer on another substrate. For purchasing, these are different products, even if they look similar after finishing.
The mentioned RK-002 is available in MDF and MDF with oak veneer versions. The veneered version must not be recorded in the schedule as a solid oak batten. The material is retained in full, together with the selected dimensions and finish.
In the mouldings in solid wood and MDF first choose the construction for the task. Solid wood is considered when natural timber is needed throughout the part; a veneered product when a wood face surface on a suitable substrate matters; MDF without veneer for a consistent opaque finish.
Painting alone does not make different substrates interchangeable. Fixing, end faces, operating conditions and preparation are checked. For a batten visible from several sides, it is necessary to know which surfaces have a decorative coating and how the part will look after trimming.
12. Approve the finish on the material of the selected version
For a clear finish, not only the shade name matters, but also the wood grain, surface preparation, the coating applied and the gloss level. A sample in oak does not confirm the same result on beech, and a stain test on solid wood should not automatically be transferred to a veneered part.
If the project includes panel PAN-001, you can consider Sample OPAN-001 in the corresponding material. Such a sample helps evaluate specifically the panel texture; it does not replace a sample of an individual slat of a different construction.
Compare the color sample with the floor, furniture, and the background between the slats. On screen, the gap may appear black, whereas in the project there will be a painted wall of a different color. The background affects the perception of the entire row and also requires coordination.
Specify who finishes the face surfaces, side edges, and trimmed ends. If part of the work is performed after installation, check access to narrow gaps. The order must clearly state the delivery condition, and the project must show the final appearance and the approved sample.
13. Calculate finished panels by module
For a panel, determine the working coverage width, pattern direction, length, and the connection scheme of adjacent modules. The formula for the number of individual slats does not give the number of commercial units here.
У PAN-001 semicircular elements are mounted on a fabric backing. The size table includes, in particular, an MDF version 1010 × 8 × 2670 mm and oak and beech options 1010 × 8 × 2400 mm. When changing the material, the length must be checked again: the MDF size cannot be transferred to the wooden version based on the common model name.
First place the whole modules, then determine the edge parts. Dividing the zone width by the panel working width with rounding up is only an initial estimate. After that, check the joints, edge trimming, and the possibility of using offcuts in other areas. For several rows in height, horizontal connections are coordinated separately.
В the technological instructions for PAN panels cutting to width is provided between the glazing beads. This means the edge size must be compared with the actual panel pattern: an arbitrary strip from the calculation does not always correspond to a permissible separation line.
When selecting, wall panels keep the module boundaries on the layout drawing. The total cladding area is needed to estimate the volume, but it does not replace the placement map of whole and trimmed products.
14. Depth and fastening are also part of the check
A row may fit correctly in width and still conflict with furniture because of a protrusion. In the section view, show the entire assembly: the base, the substrate or mounting elements, and the profile itself. The depth from the original wall is determined by this construction.
If the system is installed on embedded supports, include them in the schedule with the specified fastening. The number of decorative strips alone does not describe the installation kit. The chosen installation method must define the supporting surfaces and access to the fasteners.
For slats on a furniture facade, check the opening, the adjacent door, and the handle protrusion. A fixed decorative element must not cover the gap between parts that must move independently.
Slats for interior zoning are checked separately from wall cladding. A freestanding partition has additional visible sides, and fastening to the top and bottom base becomes part of a standalone structure. Suitable front-side finishing does not yet confirm that the selected product is suitable for such an installation.
15. Cross-check the layout, the 3D model, and the product drawing
In the 3D model, check the rhythm, depth, shadow, and perception of the edge margins. On the working layout, check the exact zone boundaries, the first reference point, the quantity, and the lengths. The product drawing confirms the actual cross-section and the mounting arrangement.
Using 3D models and DWG STAVROS, verify the item code and size version. A finished slat cannot be compressed across its width to achieve the required gap while keeping the same product designation. After the geometry changes, the image no longer matches the part being purchased.
Check the number of repeats in the model. In the visualization, some slats may be hidden by furniture, and a placeholder material with drawn stripes contains no individual objects at all. Such a pattern is not a finished quantity schedule.
The layout is considered verified when the dimensions on the drawing yield the same quantity and the same edge margins as the model. If a discrepancy is found, first determine the current design solution, then correct the other documents.
16. What to record in the purchasing list
A single line "wooden slats — 50 m" is not enough. The list must link the product to the verified area and separate the quantity of installed elements from the quantity of purchased blanks.
| Field | What to fix |
|---|---|
| Designation | Project code and room |
| Product | Manufacturer, article number, link and selected finish |
| System type | Individual slat or panel |
| Product geometry | Cross-section, additional installation dimensions, commercial length |
| Material | Solid wood of a specific species, MDF, veneered MDF or another finish |
| Layout | Area width, spacing, gap, end margins and starting reference |
| finished parts | Number of items and list of cut lengths |
| Procurement | Whole slats or panels cut to size, reserve separately |
| Finishing | Delivery condition, finish, gloss, approved sample |
| Documents | Layout drawing, assembly, cutting plan, date and version |
For a panel system, specify the model geometry and module layout instead of an arbitrarily set gap between slats. For multiple zones, keep intermediate totals even if a single total quantity of one SKU is passed to the supplier.
Additional system elements are listed as separate lines: base, end caps, and specified mounting parts. They should not be considered automatically included in the price of the decorative slat without confirmation of the delivery scope.
17. What to recalculate when replacing an SKU
Changing the slat width affects the entire dimensional chain. Let's return to the conditional row of 46 slats 30 mm wide with 20 mm gaps and 60 mm margins. If instead of 30 mm you take 35 mm while keeping the quantity and gap, the row width becomes 46 × 35 + 45 × 20 = 2510 mm. It will not fit into a 2400 mm zone.
If the previous axes and 50 mm pitch are kept, the gap decreases to 15 mm. The row width will be 2285 mm, and the equal edge margins will be 57.5 mm each. The quantity stays the same, but the free spaces and appearance will change. This is already a new solution requiring approval.
Therefore, first determine what must remain unchanged: the gap, axes, edge margins, or quantity. It is impossible to keep all parameters when changing the product width.
Changing the depth requires checking the junctions, and changing the commercial length requires a new cutting plan. If the material changes, the finish and installation are re-evaluated. After approval, update the SKU in all related documents, not just in the purchasing table.
18. How to transfer a verified specification into an order
Before Buy wooden planks for decorationmatch the supplier's offer against the current schedule. Check full execution, length, material, finish, supply unit and quantity. If other linear profiles are needed, consider Wooden trim according to the same geometry verification rules.
To discuss the project via the section for designers and architects attach the elevation drawing, list of lengths and questions about joints. Specifying the delivery city and the required installation sequence will help clarify the package contents and order terms.
Upon receipt, verify the dimensions, execution and quantity of the blanks. Keep the marking and zoning, and separate the reserve from the material for cutting. Before mass trimming, compare the first layout with the actual boundaries of the finished wall.
Decorative slats per the specification can be ordered when the quantity is confirmed by the elevation drawing, the elevation drawing matches the actual product, and the cutting map converts design lengths into whole commercial units. Then the width, spacing, edge margins and finish remain consistent from design to installation.