Article Contents:
- Short answer: when decorative furniture overlays are needed
- What Are Decorative Overlays for Furniture
- Where to use wooden overlays
- On cabinets
- On dressers
- On Kitchen Facades
- On nightstands and consoles
- On display cabinets and sideboards
- What types of furniture overlays exist
- How to choose the size of the overlay
- How to choose an overlay style
- For classic furniture
- For neoclassical style
- For modern classic
- For restoration
- For children's or lightweight furniture
- Overlays, inlays, or moldings: what to choose
- How to combine overlays with handles
- How to combine overlays with legs and brackets
- Decorative overlays for painting
- How to update old furniture with wooden overlays
- Furniture elements: why the system matters more than individual parts
- Mistakes when choosing decorative overlays
- What to buy together with decorative overlays
- FAQ: questions about decorative overlays for furniture
- About the Company STAVROS
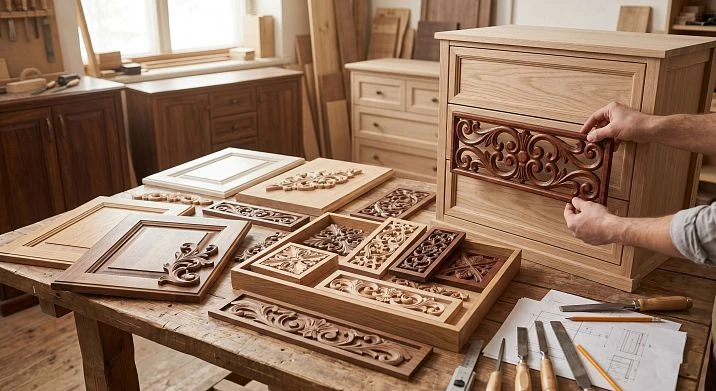
Look at your furniture carefully. Not at what is on it — but at the furniture itself. How expressive is the facade? Is there anything in it that catches the eye? Or is it just a smooth painted surface without character, without relief, without history?
It is for such cases that decorative inlays for furnitureexist. A small wooden element, glued or fixed to the facade, can completely change the perception of the item. This is not an exaggeration — it is a pattern you understand when you see the before and after.
Wooden decoration for furniture — a topic that has been underestimated for a long time. Handles were changed, facades were repainted, legs were added. But it is the overlays on furniture facades that provide what no other element can: relief, volume, a classic silhouette — and all this without replacing the body itself.

Short answer: when decorative overlays for furniture are needed
A direct answer — in plain text. You need decorative elements for furniture in the following situations:
-
The facades look too simple. A smooth panel without relief is not a style, it is a blank. The overlay adds dimension.
-
You need to update a wardrobe, chest of drawers, nightstand, or kitchen facade without completely replacing them. This is an economical and aesthetically precise path.
-
Furniture is transformed into a classic or neoclassical style. Overlays are the main tool for such a transformation.
-
You need to add relief without redoing the facades. The overlay is attached on top — the body remains untouched.
-
There is a restoration or update of old furniture. Overlays help restore the decorative language of the item.
-
Handles, legs, and facades have already been chosen, but something is missing. As a rule, what is missing is precisely the central decorative accent on the facade.
Each of these situations has its own solution. And in all cases, a properly selected wooden overlay is the most direct and obvious way to change the appearance of furniture.




What are decorative furniture overlays
The term is clear, but let's clarify it precisely — because this is where confusion with other wooden parts often arises.
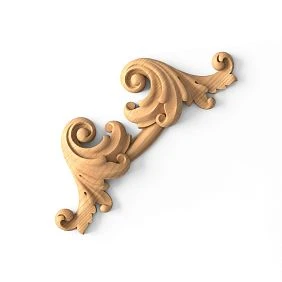
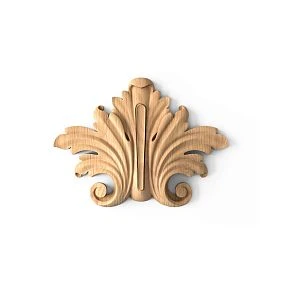
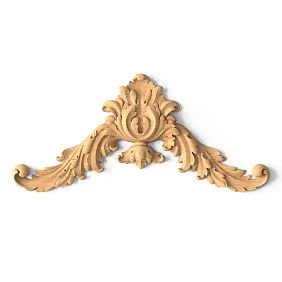
wooden furniture appliqués — these are individual elements made of natural solid wood (birch, alder, pine) that are attached to the surface of a facade, door, drawer, side panel, or decorative panel. Their task is to add relief, accent, ornament, or a compositional center to a flat surface.
Unlike wooden molding, which works as a line or frame, an overlay is precisely an element: independent, complete, with its own shape. It can be an oval, a rhombus, a flower, an architectural motif, a symmetrical ornament, or a geometric figure with a chamfer.
Unlike a handle, an overlay is not always functional — although some overlays combine a decorative and "orienting" function, marking the center of the facade or emphasizing the axis of symmetry of the drawer. It does not pull or press. It simply exists — and that is its value.
furniture appliqués come in a wide variety of shapes and sizes:
-
from small rosettes with a diameter of 30–40 mm for cabinet drawers — to large elements of 150×200 mm and more for cabinet doors;
-
smooth for painting or with a pronounced relief for natural varnish;
-
symmetrical and asymmetrical;
-
central (for the middle of the facade) and corner (for framing the perimeter).
It is Furniture Decoration using overlays is the most effective way to convert any piece into a classical register without a complete overhaul.
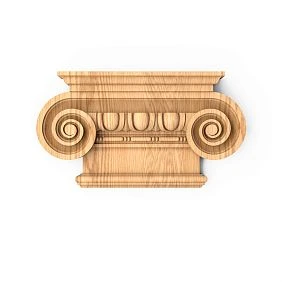
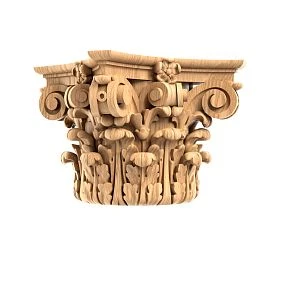
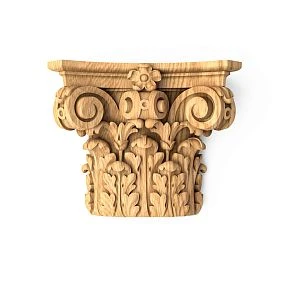
Our factory also produces:
Where to use wooden overlays
Get Consultation
On cabinets
A cabinet is the largest piece of furniture in a room. That is why it is the first to "suffer" from a lack of decor: a large smooth surface without relief looks monotonous.
Cabinet overlays placed:
-
in the center of each door — to create a visual focal point;
-
at the top of the door — to emphasize horizontal rhythm;
-
at the corners of the door panel — to frame the perimeter;
-
on the side panels — when the cabinet is not flush against the wall and the side is visible;
-
on decorative fronts — in areas without opening, where a purely ornamental accent is needed.
For a tall cabinet with two or three doors, vertical consistency is important: the overlays on all doors should be at the same height. This creates horizontal rhythm and a sense of thoughtfulness.
On dressers
A dresser is a piece with several drawers of the same or different sizes. Here, overlays work on the principle of "one drawer — one accent." Decorative overlays for a dresser are placed in the center of each drawer, symmetrically relative to the axis.
When the drawer handle is located in the center, the overlay can be placed either above the handle (creating a vertical axis of 'decor — handle'), or the handle is installed directly through the overlay — if the overlay has a mounting hole.
For a dresser with three drawers of different heights — the overlays on each drawer are of different sizes, but of the same style and proportion. This creates unity amidst diversity.
On kitchen facades
The kitchen is the most functional space. But that is precisely why a classic kitchen with decor on the facades looks so convincing: here the decor shows that this place is treated with respect.
kitchen appliqués used for:
-
on the facades of upper modules — to create a classic ensemble;
-
on the doors of a sideboard or display section — in combination with glazing and with wooden cornices;
-
on the lower facades — in the center of each door, with a vertical axis through the handle;
-
on the ends — when placed openly, with side surfaces visible.
For the kitchen, not only aesthetics matter, but also the coating. Wooden overlays in the kitchen must be coated with varnish or enamel — without coating, they absorb grease, steam, and dirt.
On cabinets and consoles
Small cabinets — bedside, under the TV, in the hallway — have small fronts. Here, neat, small decorative elements for furniture: small rosettes, oval overlays, corner accents.
Principle: the size of the overlay should not exceed 1/3 of the front size. A small cabinet drawer 40×15 cm — overlay no larger than 60×40 mm. Otherwise, the decor will "take over" the front, and the piece will lose its lightness.
A console is a special case. Here, overlays can be placed both on the drawer fronts and on the side planes, forming the decorative image of the console as a whole piece.
On display cabinets and sideboards
A sideboard and display cabinet are pieces originally designed for a formal appearance. Here Decor for classic furniture works to its full potential: large overlays on the lower fronts, more delicate ones on the upper fronts with glass doors.
in combination with with wooden brackets on the sides and solid wood moldings on the facades — overlays become part of the buffet's full decorative program.
What types of furniture overlays are there
Classification is not an academic exercise. It is a tool for making the right choice.
Central overlays. Placed in the geometric center of the facade. This is the "core" of the decor — the main accent around which the entire visual composition is built. Used on cabinet doors, dresser drawers, and lower kitchen module facades.
Corner overlays. Small elements installed at the corners of the facade. They create perimeter framing — especially effective when combined with perimeter layout. For classic furniture, this is one of the most traditional techniques.
Vertical decorative elements. Elongated overlays oriented vertically. They work well on tall, narrow facades — for example, on pencil cabinet doors or wardrobe sections. They emphasize the vertical line and add dynamism.
Horizontal elements. Elongated horizontally. Used for wide facades or to separate horizontal zones on double doors. They can also serve as a decorative belt in the middle part of the facade.
Carved overlays. Elements with pronounced relief: floral ornament, architectural motifs, geometric patterns. This is a high decorative register — for classic furniture, buffets, kitchens in Provence style, and country interiors.
Smooth overlays for painting. Without relief or with a minimal profile. Used on furniture for enamel when volume is needed, but not ornament. The overlay is painted in the color of the facade — and becomes part of the surface, not a "sticker" on top.
Symmetrical paired elements. Two identical elements arranged mirror-wise. Effective on wide double facades, on sideboards with paired doors, on chests of drawers with two drawers of the same size.
Small accents for drawers and cabinets. Compact overlays 30–80 mm. They do not overload small facades but add a decorative dimension where it would otherwise be unattainable.
Large elements for wardrobes and sideboards. Overlays from 100 mm and larger. They work as an architectural accent — visible from afar, they set the scale and character of the piece.
How to choose the size of the overlay
Size is the first question to resolve before choosing shape and style. The wrong size negates any design solution.
Matching the facade size. Basic rule: the central overlay occupies no more than 1/4 of the facade area. For a door 400×700 mm — overlay no larger than 100×175 mm. This is a conditional proportion, but it gives a correct starting point.
A small element on a large facade is a mistake. A tiny rosette on a door 600×900 mm looks accidental. The eye does not fixate, the accent does not work. Either a larger element is needed, or a system of several overlays — corner + central.
A large element on a small drawer is also a mistake. A large overlay on a cabinet drawer 350×120 mm "captures" all visible space and makes the piece heavy. A compact accent is needed here.
Symmetry is a mandatory condition. On paired facades, overlays must be absolutely the same size and located at the same height. Asymmetrical placement destroys the image of the piece.
Place for the handle. Before choosing an overlay, determine where the handle will be. The handle and overlay should not overlap each other. If the handle is in the center, the overlay shifts up or down. If the handle is at the top, the overlay is in the center or in the lower zone of the facade.
Overlay inside the layout. If the facade is designed wooden trim as a frame, the overlay should fit inside this frame without overlapping it. This is important to consider when using two decorative tools simultaneously.
How to choose an overlay style
The overlay style is the second question after size. And here the choice is determined by context: what kind of furniture, what kind of interior, what result is needed.
For classic furniture
Classic requires expressiveness. Carved furniture decor with floral ornament, architectural motifs, relief profiles — all this is organic in a classic context.
On a sideboard, display case, classic cabinet — the overlay should be part of the item's ornamental program. It combines with brackets on the sides, with crown molding on top, with turned legs below. It is a system where every detail supports another.
for classic furniture the unity of the carving style is important: if the overlays have a floral ornament, then the brackets and legs should be in the same decorative language.
For neoclassical style
Neoclassicism is "purified" classicism. Calm, symmetrical overlays without excessive relief. A profile with a soft relief, a strict form, without openwork details. Color — white enamel or light natural varnish.
For a neoclassical interior overlays for furniture fronts choose with moderate decor: a clear shape, a readable silhouette, a minimum of ornamental details. This is enough for style and does not overload the object.
For modern classic
Modern classicism is a dialogue between modern and traditional. The overlays here are minimal: a neat profile, a correct shape, painting in the color of the facade. The overlay is perceived not as "added decor", but as part of the facade itself — a three-dimensional detail born together with the object.
For this style, smooth overlays for painting work better than carved ones. The tone is the color of the facade or slightly darker for a slight volume.
For restoration
Furniture Decoration during restoration — a special task. Here you need not to invent a new decor, but to restore or continue the logic of the original object.
If a chest of drawers in the Empire style is being restored, the overlays must correspond to this style. If a Soviet cabinet is being updated for neoclassicism, overlays are added as a new decorative layer that changes the appearance of the object.
In both cases, it is important: the overlays must logically follow from the shape of the furniture. You cannot take a modern minimalist chest of drawers and add Baroque carved overlays to it — this is not restoration, it is a stylistic conflict.
For children's or light furniture
Children's furniture requires lightness. Simple geometric shapes, without heavy relief, without sharp edges. Small overlays with rounded corners are a good solution for children's cabinets, tables, and wardrobes.
Overlays, layout, or molding: what to choose
This is the question most often asked. Let's break it down honestly and specifically.
| Task | What to choose |
|---|---|
| Add a relief accent in the center of the facade | Decorative overlay |
| Make a frame on the facade | wooden floor |
| Design a long horizontal or vertical line | solid wood molding |
| Cover a joint or transition | Layout or glazing bead |
| Design the corner of the facade | Corner wooden element |
| Create a classic frame facade | Layout + overlay |
| Quickly update furniture | Handles + overlays + legs |
Key differences:
An overlay is a point. An element with its own shape that stands separately on the facade surface.
A layout is a line. A narrow profile used to build frames and contour designs. Wooden molding for furniture fronts — a tool of a different level.
Molding is a long decorative profile for walls or furniture surfaces. It is installed horizontally or vertically, creating rhythm and structure.
The best result in classic furniture design is when all three tools are used together: the layout forms the frame, the molding sets the rhythm, and the overlay becomes the center of the composition. This is a professional approach that distinguishes thoughtful design from random decor.
How to combine overlays with handles
A handle and an overlay are two elements on the same facade. Their proximity should be intentional, not random.
The handle should not overlap the overlay. This is basic, but it is regularly violated. If the overlay is already installed, the handle is attached considering its position.
First, the handle, then the overlay. The correct sequence: determine the location and type of handle, then choose the placement of the overlay. The handle is functional, its location is dictated by convenience. The overlay is decorative, it adapts.
Wooden knob handle + overlay. The knob takes up minimal space — its diameter is 30–50 mm. It is easy to place an overlay next to it as an independent accent. For a drawer of a chest or dresser, this is an ideal pair: the knob in the center, the overlay slightly above — or the overlay in the center, the knob inside it (if the overlay has a central hole).
wooden hook handle + overlay. The pull is horizontal, occupying a strip of space. In this case, the overlay is placed above or below the pull, or in symmetrical pairs on the sides. For a tall cabinet door, a pull in the middle + an overlay in the upper third is a classic and working solution.
Unified style of handles and overlays. wooden furniture handles And wooden overlays should be in a unified finish. White handles + white overlays. Natural lacquer on handles + natural lacquer on overlays. Mixing different tones on one item is visual noise.
Carving style. If the overlays are carved with a floral pattern, the handles should be in a similar style. A rough incompatibility of detail styles ruins the appearance of the item even if each individual element is of high quality.
How to combine overlays with legs and brackets
The decorative furniture system follows a vertical logic: legs at the bottom, overlays in the middle, brackets and cornice at the top. When all three levels are coordinated, the furniture reads as a single piece.
Wooden legs enhance the classic silhouette. A turned leg with a figured profile "lifts" the furniture, creating lightness. Buy legs for furniture without coating and paint together with the overlays in the same tone — this ensures monolithicity.
Decorative Bracket in the upper zone. Brackets on the sides of a sideboard or cabinet in conjunction with overlays on the facades are the upper and middle decorative levels of furniture. Together they form the architecture of the piece: not just a body with details, but a piece with character.
Furniture Bracket under a shelf or cornice. If the furniture has open shelves with brackets, overlays on the facades below create a visual connection between the zones. One style, one coating — and the shelf with brackets and the cabinet with overlays look like a single system, not a random arrangement.
The "2–3 elements" rule. Do not overload. Overlays + handles + legs are already three decorative levels. Adding layout, brackets, and moldings to them simultaneously should be done with caution. A professional principle: each added element should enhance the image, not create competition with the previous one.
Different pieces in the same interior. If there are several pieces in a room — a wardrobe, a chest of drawers, nightstands — the overlays should be in the same style on all pieces. This creates an ensemble, not a set of random items.
Decorative overlays for painting
Painting is the moment when a wooden overlay either "blends" into the furniture organically or looks like a glued-on decoration. The difference is in the technology.
Under enamel. The most common option for modern classics and neoclassics. decor for furniture For painting requires quality preparation: sanding with P150, then P220, antiseptic primer, two coats of enamel. Light sanding with P320 between coats for smoothness.
An overlay painted in the color of the facade visually "grows" out of the surface — it seems to be part of the facade itself, not a separate detail. This effect is what makes it so convincing.
Slight contrast. The overlay is slightly darker or lighter than the facade — a subtle accent. But this requires confidence: too much contrast turns the overlay into a "sticker." Rule: a difference of one to two tones on the same color scale.
Under clear varnish. If the furniture is natural wood, the overlay is coated with the same varnish. The wood grain and tone should be close: birch to birch, alder to alder. If the species differs slightly, stain helps bring the tones closer before applying varnish.
Under stain. Stain darkens and evens out the wood tone. For restoring old furniture, it's an opportunity to match the tone of new overlays to the existing finish. After staining, varnish is mandatory.
Sequence. A rule that cannot be broken: coating — before installation. Painting an overlay already glued to the facade is inconvenient: paint gets on the surface, corners are not evenly coated, the result is worse. Paint separately, install after complete drying.
Glue or fasteners. Most wooden overlays are attached with PVA furniture glue or double-sided mounting tape (for lightweight elements). Glue is applied to both surfaces with a 5–7 minute wait before joining. After pressing, secure until fully set.
How to update old furniture with wooden overlays
Here is a step-by-step path that works. This is not theory — it's a specific sequence of actions for a real result.
Step 1. Assess the condition of the facades. The facades must be smooth, without bulges or peeling. If the old coating is flaking, it must be removed before applying the new one.
Step 2. Identify the decorative areas. Not every facade needs overlays. Choose: cabinet doors, dresser drawers, kitchen module facades. Draw a layout of the overlays on paper or in your head.
Step 3. Select the size and style of overlays. Based on the facade dimensions, choose proportional overlays. The style depends on the direction of the furniture update.
Step 4. Check the placement of handles. If handles are being changed, first determine their new location, then the location of the overlays. If handles remain, overlays are selected considering their current position.
Step 5. Add legs or replace old supports. Wooden legs — a simple way to raise furniture, giving it lightness and a classic silhouette. If the furniture has no legs, adding legs together with overlays yields the most expressive result.
Step 6. If necessary, decorate the facades with molding. wooden floor creates a frame effect on the facade — a classic technique. Molding + overlay inside the frame = a full classic facade.
Step 7. Paint the furniture and decor in a unified system. All new elements — overlays, legs, handles — are painted in the same tone. The furniture is completely repainted: the old coating is sanded, primer is applied, then enamel. A unified tone for all elements is the key to the result.
furniture elements: why the system is more important than individual details
A single overlay is just a piece of wood on the facade. But an overlay as part of a system of parts is a completely different story.
Furniture where all decorative elements are coordinated — Handles, Legs, applique, Brackets и Crown Molding — makes a fundamentally different impression than a piece with a set of disparate parts. The first is perceived as a whole object with character. The second — as an attempt to do something that was not completed.
System thinking when choosing wooden furniture elements — is a skill that comes with experience. But the main principle is simple: before buying a separate part, ask yourself: how is it connected to other parts? What does it support? What does it enhance?
If there are answers — the part is correct. If there are no answers — stop and think.
Mistakes when choosing decorative overlays
Each of these mistakes cost someone time, money, or a ruined result.
Choosing overlays only by photo. A photo is not the size or the real texture. Always check the actual dimensions of the overlay relative to the specific facade.
Do not measure the facade before purchasing. This seems obvious — but it's the most common mistake. Measure the facade, subtract space for the handle, determine the maximum allowable overlay size — and only then choose.
Placing large decor on a small drawer. An overlay 120×80 mm on a drawer 300×100 mm — that's 80% of the visible surface. The drawer turns into an "overlay with small margins." This isn't decor — it's domination.
Not considering handle placement. The overlay is installed, then it turns out the handle lands right on it. Rework means lost time and surface damage.
Mixing different carving styles. Baroque ornament on overlays + geometric handles + Provencal legs. That's three different styles on one piece. Such a piece has no character — it has conflict.
Overloading the facade. Overlay + perimeter trim + large handles + another small overlay at the bottom — that's overload. The principle "more decor = better" doesn't work in furniture. What works is "enough and consistent."
Not planning the painting. Buying overlays, gluing them, and then trying to paint in place — that's a mistake with a predictable result: drips, uneven tone, poorly painted corners. Paint before installation.
Buying overlays separately from other elements. Overlays without legs, handles, and an overall concept — that's parts without a system. Plan your purchase comprehensively.
What to buy together with decorative overlays
For those building a system, not assembling a random set of parts:
wooden furniture appliqués — the central decorative element of the facade.
wooden furniture handles — functional accent in tone to overlays.
Wooden knob handle — for small drawer fronts of cabinets and chests of drawers.
wooden hook handle — for cabinet doors, kitchen and display cabinet fronts.
wooden furniture legs — lower decorative level in a single tone with overlays.
Buy legs for furniture uncoated — for self-painting to match the tone.
Decorative Bracket — for the upper zone of cabinets, sideboards, kitchens, and shelves.
Furniture Bracket — for load-bearing and decorative shelf supports.
wooden floor — for frame design of facades in combination with overlays.
Wooden molding for furniture fronts — molding for creating frames and contour designs.
Moldings from solid wood — for decorating walls and long furniture surfaces.
wooden cornice — for crowning cabinets, kitchens, and sideboards.
Wooden Picture Frame — for frames of paintings, mirrors, and panels to match furniture decor.
Classic Furniture — ready-made items with wooden decor, if you need a turnkey result.
FAQ: questions about decorative overlays for furniture
What are decorative overlays for furniture used for?
decorative inlays for furniture used to add relief and accent to facades, update a wardrobe, chest of drawers, kitchen, or cabinet, transition furniture to a classic style, and create a system of coordinated wooden details.
How does an overlay differ from a molding?
An overlay is an independent element with its own shape, installed as a separate accent. wooden floor — this is a linear profile used to build frames, lines, and contours on the facade surface. The best result is when both tools are used together.
Can wooden overlays be used on kitchen facades?
Yes. Kitchen decor Wooden overlays are a classic solution. Important: in the kitchen, overlays must be coated with varnish or enamel to protect against steam and dirt.
Can wooden appliqués be painted?
Yes. Wooden decoration Uncoated — a semi-finished product for self-painting. Enamel, varnish, stain + varnish. Sanding before coating is mandatory. Painting must be done before installation on the facade.
How not to overload furniture with decor?
Choose 2–3 coordinated elements: overlays + handles + legs. Or overlays + layout + handles. Each element should support the other, not compete with it. A uniform coating tone is a must.
How many overlays are needed for one door?
For a simple classic solution — one central overlay. For a more complex design — one central + four corner overlays. Or a central overlay inside a frame made of layout. It all depends on the size of the facade and the desired result.
About the company STAVROS
A facade without decor is a blank. A facade with properly selected wooden overlays, handles, and legs is furniture with character. STAVROS produces a full range decorative overlays for furniture of solid wood: central and corner elements, carved decor for facades, smooth overlays for painting.
Together with STAVROS overlays offers Wooden handles, Legs, Brackets, Moldings, Crown Molding и Pogonazh iz massiva — everything to make furniture look like a single well-thought-out piece, not a set of random solutions.
STAVROS — production of wooden decor for those who think systematically.