Article Contents:
- What to buy for a decorative door: complete list
- Wooden elements
- Polyurethane Elements
- Fittings and consumables
- Decorative door and decorative box: what is the fundamental difference
- The box covers the volume — the door preserves access
- Decorative masking versus visual inclusion
- Where a decorative door is needed: typology of objects
- Inspection hatch in the bathroom and toilet
- Electrical panel in the hallway or corridor
- Water, gas, and heat meters in the corridor
- Technical niche next to the kitchen
- Technical opening in a classic study or living room
- Wood in the door: where it is indispensable
- Frame trim: a sturdy foundation
- Wooden layout: decor and gap masking
- Furniture handle: tactile and visual accent
- Decorative wooden appliqués
- Polyurethane in the decorative door system: shell and masking
- Molding frame around the opening
- Overlays in the corners of the frame
- Molding Decor: Keystone
- Horizontal Rods and Connection to Molding System
- Ready-Made Kits by Object Type
- Electrical Panel in the Hallway: Functionality and Style
- Access Panel in the Bathroom: Minimalism and Moisture Resistance
- Technical Niche in a Classic Study: Architectural Frame Panel
- Meters in the Corridor: Double Door Without Extra Decor
- Niche for Painting: Full Concealment
- What to Buy Together: Final List for One Order
- Installation Nuances: What You Need to Know Before Starting
- Opening geometry: the beginning of everything
- Hinged frame: three installation rules
- Finishing: a single surface
- Mistakes when designing an access hatch
- About the Company STAVROS
- FAQ: Answers to Popular Questions
- How to beautifully cover an access hatch in an interior?
- Can an electrical panel be covered with a decorative door?
- What to buy for a technical niche door?
- Where is it better not to use polyurethane?
- How to make an access hatch invisible?
- Which handle to choose for a decorative door?
- How to choose the size of a molding frame for a hatch?
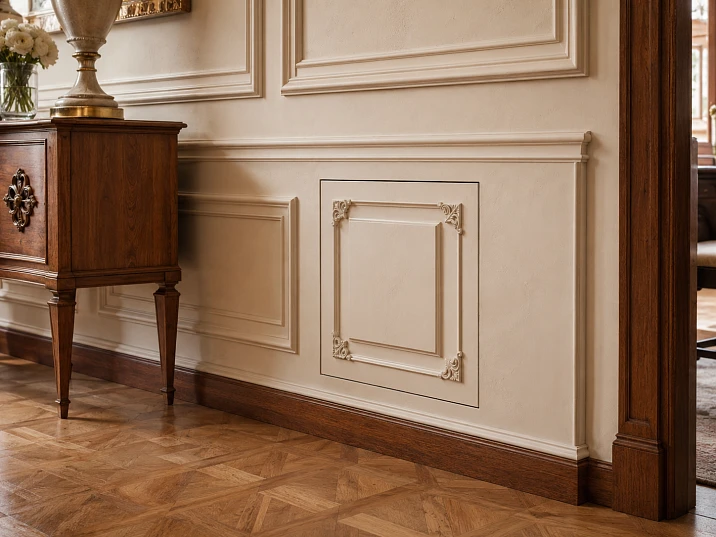
There are things in an interior that cannot be removed, but can be made invisible. An access hatch is one of them. It must be there: pipes need access, the electrical panel needs access, and meters need access too. This is an engineering reality that cannot be avoided. The only question is how it looks. A plastic cover with a white metal frame on a wall in a classic interior is like a nail in a parquet floor: technically justified, aesthetically unbearable.
A decorative door for an access hatch solves the problem differently. It does not hide the hatch—it makes it part of the interior. A wooden frame made of veneer wood, a neat furniture handle solid wood, a polyurethane molding trim on the wall—and the access hatch becomes an element of the decorative system, not a technical blemish on it. How exactly this works is the subject of this article.
What to buy for a decorative door: a complete list
Assembling the right kit the first time means saving time and avoiding three extra trips for missing items. The list looks longer than it seems at first glance.




Wooden elements
wooden floor — for framing the door leaf: four strips around the perimeter of the base, forming a rigid frame. A layout 30–50 mm wide creates a visible frame structure on the front surface of the door—it defines its stylistic character. A profiled layout with a bevel or rounding makes the frame softer and richer. A flat one makes it stricter and more concise.
Pogonazh iz massiva — for framing the entire opening around the hatch: overlapping strips around the perimeter of the opening that hide the gap between the door and the wall. A linear overlap 20–30 mm wide sits with one flange on the frame and the other on the wall surface, creating a clean junction line.
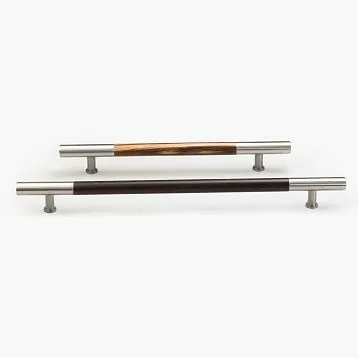
Furniture Handles made of wood—a key element of the door. It is the handle that determines how the door 'communicates' with hands. A wooden furniture handle—an arch or a knob—looks organic on a wooden frame, holds up well with repeated opening, and does not create a feeling of a 'metallic' accent against warm materials. Handle size: for a small door (up to 30×40 cm)—a handle 60–80 mm long or a knob 30–40 mm in diameter. For a large hatch (40×60 cm or more)—a handle 100–120 mm long.
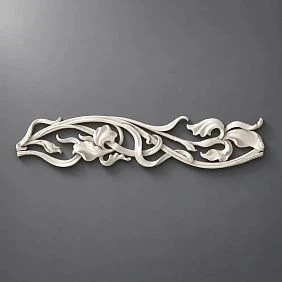
Wooden decoration — milled overlays and solid wood relief elements to enrich the front surface of the door. A small decorative overlay in the center of the door or a relief strip along its horizontal axis turns a frame structure into a panel door with rich decor.
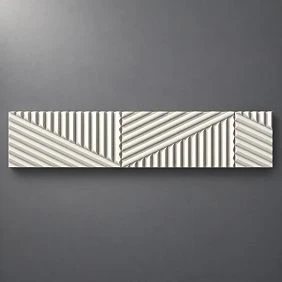
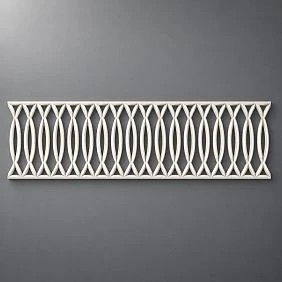
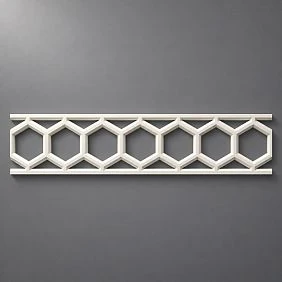
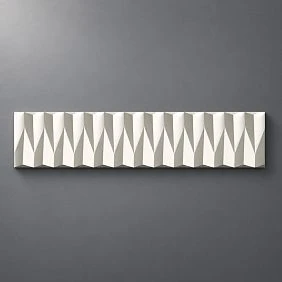
Our factory also produces:
Polyurethane elements
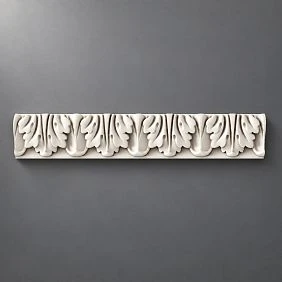
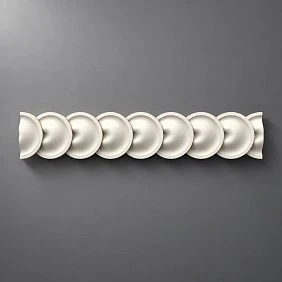
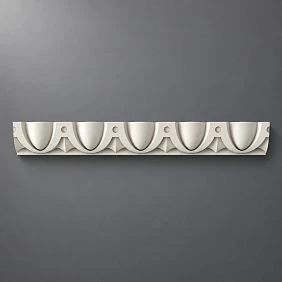
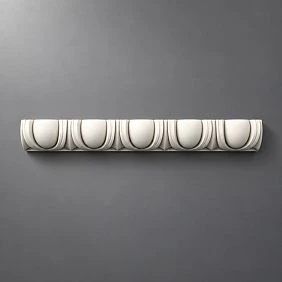
Moldings made of polyurethane — for a molding frame on the wall around the hatch opening. This is a decorative "mask": a molding frame installed on the wall with a 30–50 mm offset from the edge of the opening, integrating the hatch into the unified decorative system of the wall. The molding size is selected according to the door scale: for a small hatch 20×30 cm — molding height 20–25 mm, for a large one — 35–45 mm.
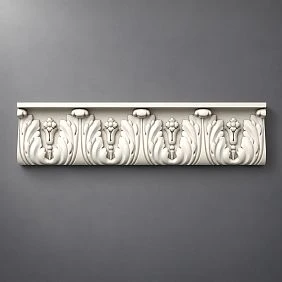
Polyurethane trim — for horizontal and vertical moldings on the wall next to the door, which include it in the overall molding system of the room.
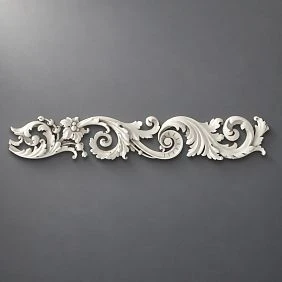
Polyurethane appliqués — corner decorative elements at the intersection points of molding frames. Decor for Molding — keystones in the center of horizontal molding strips above the door.
Get Consultation
Hardware and consumables
Door hinges — two or three hinges depending on height and weight. For a door weighing up to 2 kg, piano hinges or surface-mounted furniture hinges are suitable. For a heavy solid wood door — concealed hinges with a mounting plate.
Magnetic latch or turn latch — to keep the door in the closed position. The magnetic option is preferable: it does not create visible metal elements on the door surface and holds a lightweight structure well.
Glue for polyurethane (the correct choice of glue and application technology are discussed in the article what to glue polyurethane molding with). Finishing nails and screws. Acrylic sealant. Acrylic primer. Finish enamel or oil. Allowance for layout and moldings — 10–15%.
Decorative door and decorative box: what is the fundamental difference
This is not a minor clarification — it is a question on which the entire set of materials and the entire structural logic depend.
The box covers the volume — the door preserves access
A decorative box for pipes is a closed structure. Inside it, something is hidden, and that 'something' either requires no access at all, or access is provided by an inspection hatch. The box itself does not open — it is static.
A decorative door for an inspection hatch is an opening element. It is closed — and that is good. But it must open quickly, freely, and without damaging any decorative element. This is precisely where the key engineering and design challenge lies: to create an opening element that, when closed, looks like part of a wall or furniture, and when open, functions as a door.
Decorative masking versus visual integration
There are two fundamentally different approaches to designing an inspection hatch. The first is maximum masking: the door is painted in the exact tone of the wall, its moldings match the wall moldings, the handle is minimal or hidden — and when looking at the wall, the hatch is literally invisible. The second approach is visual integration: the door is designed as an independent decorative object, a framed panel, a small cabinet, or a miniature door with a handle — it is noticeable but does not stand out because it looks like an intended architectural element.
For a classic interior, the second approach is usually more convincing. Complete masking requires very precise color and texture matching, and the slightest deviation makes the hatch even more noticeable than if it were simply designed openly. A decorative wooden frame with molding trim is an honest and reliable method.
Where a decorative door is needed: typology of objects
Inspection hatch in the bathroom and toilet
The bathroom is the most common location for an inspection hatch: here, behind the wall, run the pipes for hot and cold water supply, faucets, and shut-off valves. The door here must be moisture-resistant: a wooden frame made of profiled trim with a moisture-resistant coating, polyurethane moldings — naturally resistant to moisture. The standard size of an inspection hatch in the bathroom is 30×30 or 40×40 cm.
Electrical panel in the hallway or corridor
The electrical panel is an object with requirements: it must have instant access in case of an emergency, and it cannot be closed without free opening. A decorative door for an electrical panel is precisely a door, not a box: it opens on hinges and is secured with a magnetic latch or a rotary bolt. An electrical panel of standard sizes (250×350 mm, 350×450 mm, 450×600 mm) requires a door with an allowance on all sides — at least 20–25 mm overlap of the opening edge by the frame.
Wooden handles for the electrical panel door must be large enough for a confident grip: an arc handle 100–120 mm long ensures comfortable opening even with a sharp movement.
Water, gas, and heat meters in the hallway
A manifold cabinet or niche with meters is a special case. There may be several devices of different depths, as well as supply pipes. The door must be rigid enough not to sag on large sizes. For a niche wider than 60 cm, a double-leaf design is used: two halves, each with its own hinge and its own handle. Each leaf is designed as an independent framed panel — with wooden trim around the perimeter and molding framing on the wall.
Technical niche near the kitchen
Pipes, valves, and meters near the kitchen — a high-traffic area. The door here is regularly opened and closed, and may be exposed to moisture, grease, and household chemicals. The wooden frame is made of beech with a hard enamel coating. The handle is small, comfortable, made of dense solid wood. Polyurethane moldings — only on the wall around, not on the door itself: in an area of frequent contact, polyurethane is inferior to wood in abrasion resistance.
Technical opening in a classic study or living room
In a living room or study, a technical niche is rare, but it does occur. Here, the door is already a full-fledged decorative object. A frame panel with wooden trim, a molding frame on the wall made of polyurethane, corner overlays, Decor for Molding at intersection points — here there is an opportunity to make the inspection door a real decoration.
Wood in the door: where it is indispensable
Frame strapping: a solid base
The frame strapping of the door — four planks made of solid wood trim, joined at the corners at 45° or with a tenon. This is the load-bearing base of the structure: hinges, handle, and magnetic latch are attached to it. It takes all mechanical loads when opening. Material — beech or oak: dense wood holds fasteners more reliably than pine, especially in the hinge area.
Frame thickness — 12–18 mm. Plank width — 30–50 mm. For a small door, 30 mm is sufficient. For a large electrical panel door — 40–50 mm, to ensure rigidity and sufficient area for hinge attachment.
Wooden layout: decor and gap masking
wooden floor — это видимая декоративная планка, которая накладывается поверх рамки или по периметру дверцы, перекрывая зазор между дверцей и стеной. Одна полка раскладки лежит на торце рамки, другая — на стеновой поверхности рядом с проёмом. При закрытой дверце раскладка полностью скрывает технологический зазор и создаёт чёткую декоративную линию по периметру.
Раскладка с профилированным сечением — полуовальным или ступенчатым — придаёт дверце рельеф классической мебельной рамки. Плоская раскладка с фаском — лаконичная и строгая версия. Ширина раскладки для дверцы: 20–30 мм для небольших проёмов, 30–45 мм для крупных.
Мебельная ручка: тактильный и визуальный акцент
Furniture Handles из массива — это деталь, которую видят и к которой прикасаются. Именно она определяет первое тактильное впечатление от дверцы. Деревянная дуговая ручка тёплая на ощупь, не скользит, не холодит пальцы и создаёт ощущение качественного изделия. В отличие от металлической фурнитуры, деревянная ручка при окрашивании в тон дверцы почти исчезает с поверхности — это важно при стратегии максимальной маскировки.
Варианты ручек из дерева: дуговая (скоба) длиной 60–130 мм, кнопка диаметром 25–45 мм, ручка-раковина (углублённая кнопка без выступа). Ручка-раковина — идеальный выбор для полной маскировки: она не выступает над поверхностью дверцы, и дверца при закрытом положении выглядит как плоская панель без фурнитуры.
Декоративные накладки из дерева
Wooden decoration на лицевой плоскости дверцы — это точечные акценты, которые обогащают поверхность рамки. Небольшая резная накладка в центре, рельефные планки вдоль горизонтальной или вертикальной оси, рамочная структура внутри деревянной обвязки — всё это делает дверцу богаче и убедительнее в классическом контексте. Важно: накладки монтируются только на деревянную часть, не на полиуретан — здесь нужна прочная основа под крепёж.
Полиуретан в системе декоративной дверцы: оболочка и маскировка
polyurethane decor занимает строго определённую зону — стена вокруг дверцы и декоративные линии, которые включают её в общую молдинговую систему помещения.
Молдинговая рамка вокруг проёма
Moldings made of polyurethane are mounted on the wall around the perimeter of the opening with an indentation of 30–50 mm from the edge of the wooden layout. This indentation forms a "mat" — a flat strip of wall between the wooden layout of the door and the molding frame. It is this distance that sets the scale of the entire decorative composition: too small an indentation creates overload, too large — the frame loses connection with the door.
Corner joints of the molding frame are cut at 45°: this is the standard for all rectangular molding frames. The detailed technique of cutting and installing corner joints is discussed in the article about installing polyurethane moldings.
Overlays in the corners of the frame
Polyurethane appliqués in the corners of the molding frame — this is an optional but very expressive element. A corner rosette with an ornament or a simple geometric corner overlay in each of the four corners of the frame eliminates the need for precise corner cuts of the molding and simultaneously decorates the structure. For small frames (door 30×40 cm), a corner overlay measuring 30×30 mm is the optimal format. For large frames (door 50×70 cm) — 45–55 mm.
Decor for moldings: keystone
Decor for Molding — a keystone element in the center of the horizontal molding above the door. This technique is characteristic of the design of doorways in an academic classical interior: the keystone emphasizes the central axis and gives the frame architectural weight. On a small door, the keystone should be moderate — 40–60 mm high.
Horizontal rods and connection with the molding system
If the room has a system of horizontal molding belts on the walls — the decorative door must be coordinated with them. Polyurethane trim is mounted horizontally on the sides of the molding frame of the door, continuing the overall system of horizontal lines. This is the most effective way to integrate the door into the wall: when a line running along the entire wall also passes through the level of the top or bottom of the door frame — it ceases to be a special object and becomes an element of rhythm.
Ready-made kits by object types
Electrical panel in the hallway: functionality and style
-
Wooden frame made of solid wood trim — door trim, 40 mm, beech
-
wooden floor — perimeter trim, gap overlap
-
furniture handle arched, length 100 mm
-
Piano hinges — along the entire height of the door
-
Magnetic latch
-
Moldings made of polyurethane — frame on the wall around the opening
-
Acrylic sealant, primer, white enamel
Result: the door looks like an element of a built-in wardrobe. When closed, the electrical panel is completely hidden. Opens with one motion by the handle.
Access hatch in the bathroom: minimalism and moisture resistance
-
Wooden frame made of beech 30 mm — with moisture-resistant impregnation
-
wooden floor — perimeter strips
-
Furniture knob button made of wood — does not protrude above the plane
-
Surface-mounted furniture hinges
-
Magnetic latch
-
Moldings made of polyurethane — narrow frame on tile or plastered wall
-
Polyurethane enamel with moisture-resistant properties
In the bathroom, maximum water resistance of all coatings is important. Wooden parts — 2 coats of acrylic primer + 2 coats of polyurethane enamel. Gaps — acrylic sealant with moisture-resistant additives.
Technical niche in a classic study: architectural frame panel
-
Oak wooden frame 40–50 mm — with shaped profile
-
wooden floor profiled — front frame
-
Wooden decoration — surface-mounted socket in the center of the door
-
furniture handle arched, 80 mm, oak
-
Moldings made of polyurethane — frame on the wall around the opening
-
Polyurethane appliqués — corner elements of the frame
-
Decor for Molding — keystone above the door
-
Acrylic primer + cream enamel matching the cabinet wall color
Result: the door looks like an architectural framed panel. The keystone above the frame adds grandeur. The cream enamel unifies wood and polyurethane into a single surface.
Meters in the hallway: double-leaf door without extra decoration
-
Two wooden frames made of solid wood trim — 30 mm, beech
-
Wooden handles — small buttons on each leaf
-
Surface-mounted hinges — two hinges per leaf
-
Magnetic latches — one per door leaf
-
Thin Polyurethane molding — a smooth frame around the entire opening
-
White enamel matching the wall color
Double-door solution — for niches 60 cm wide or more. Magnetic latches on each door leaf are mandatory: otherwise, during vibration or accidental touch, one of the doors opens by itself.
Niche for painting: full concealment
-
Wooden frame made from molding
-
wooden floor flat, without relief
-
Wooden shell handle — non-protruding
-
Polyurethane trim — horizontal and vertical rods continuing the wall molding system
-
Acrylic sealant — at all joints
-
Exact match of enamel color with wall color
With full masking, every millimeter matters. The gap around the door should be no more than 1.5–2 mm — enough for opening, but not enough to be noticeable. Sealant fills and levels the joint. Enamel is applied in a single layer to the wall and door — without a sharp boundary.
What to buy together: final list in one order
Wooden items:
-
wooden floor — with a 15% margin
-
Pogonazh iz massiva — trims and frame
-
Wooden decoration — overlays, relief elements
-
Furniture Handles — arches, buttons, or shells
Polyurethane items:
-
Moldings made of polyurethane — frame around the opening
-
Polyurethane trim — horizontal rods
-
Polyurethane appliqués — corner elements
-
Decor for Molding — keystones
Fittings and consumables:
-
Hinges (piano or surface-mounted furniture hinges)
-
Magnetic latch or turn latch
-
Finish nails and self-tapping screws
-
Polyurethane adhesive
-
Acrylic sealant
-
Acrylic primer
-
Finish enamel
-
Allowance of 10–15%
Installation nuances: what you need to know before starting work
Opening geometry: the beginning of everything
If the opening angles deviate from 90° by 2–5°, this is resolved by trimming the layout strips to the actual angle. A deviation of more than 5° requires correcting the opening with plaster or a leveling pad behind the frame.
If the opening angles deviate from 90° by 2–5°, this is resolved by trimming the layout strips to the actual angle. A deviation of more than 5° requires correcting the opening with plaster or a leveling pad behind the frame.
Hinged frame: three installation rules
First: hinges are installed before painting. Hanging hinges after final painting means damaging the surface. Marking the hinges, pre-installing the frame, checking the opening, then disassembling — and only after that, final painting.
Second: the gap between the frame and the opening is 2–3 mm around the entire perimeter. Smaller — the door will catch when opening. Larger — a visible gap will remain under the wooden trim.
Third: for a door weighing more than 1.5 kg — at least three hinge attachment points: top, bottom, middle. This prevents frame warping under its own weight after several months of use.
Finish: unified surface
The technology is the same as described for the box: wooden parts — sanding, dust removal, 2 coats of acrylic primer. Polyurethane parts — dust removal, primer. Joints between wood, polyurethane, and wall — acrylic sealant. Finish enamel — 2 coats with intercoat sanding at 220 grit. Result: a monolithic surface where the boundary between materials is only readable by relief.
With a full concealment strategy — finish enamel is applied to the door and the adjacent wall simultaneously: one tone, one texture. This is the only way to achieve complete visual blending.
Mistakes when designing an access panel
Closing the niche without access. A magnetic latch or slide bolt is mandatory. A permanently sealed panel is a potentially demolished wall in case of an emergency.
Forgetting about door opening. The molding frame on the wall is installed with a gap from the door frame edge — not flush. Otherwise, the frame will obstruct opening: the door will hit the molding at the first degree of rotation.
Installing a handle that is too large. The handle on an access panel door is not a cabinet handle. It should be functional but not prominent. A 200 mm pull handle on a 30×40 cm door is absurd. A 60–80 mm arched handle or a 30–35 mm button is the correct scale.
Not accounting for the gap around the panel. The wooden trim covers the gap — but first, this gap needs to be correctly set during frame installation. Too small a gap — the door stops opening at the slightest misalignment. Too large — the wooden trim covers it, but a cavity remains underneath that fills with dust.
Make the molding so that the door does not open. The molding frame should not extend onto the door plane. It is mounted strictly on the wall — with an indent from the edge of the wooden door trim. The indent is at least 5 mm, optimally 10–15 mm.
Do not connect the frame to adjacent moldings. A lone molding frame on the wall without connection to horizontal rods is a "frame for the sake of a frame." It draws attention to the door rather than integrating it into the system. Horizontal Polyurethane trim on both sides of the frame solves this problem.
Using polyurethane in a place of constant grip. Handle — wood. Hinge attachment point — wood. Wooden trim touched when opening — wood. Polyurethane in these points wears out and crumbles with regular mechanical contact.
Forgetting the magnetic latch. A door without a latch slams and opens on its own from house vibrations and accidental touch. A magnetic latch — 10–15 minutes of installation and endless comfort in use.
Not ordering extra trim and molding. Corner cuts, adjustments during fitting — standard material losses. 10–15% reserve is mandatory.
Choosing decor without considering wall color. All decorative details — wooden trim, moldings, overlays — will be painted. But relief matters: on a dark wall, rich relief reads well; on a light wall, it is barely noticeable. If the wall is light and monochrome, moderate relief of 8–12 mm creates the needed accent without overload.
About the company STAVROS
Every detail described in this article — wooden trim, furniture handles, solid wood moldings, polyurethane moldings and stucco — is produced by STAVROS. STAVROS's history began in 2002 in St. Petersburg with a small workshop of carved solid oak products. In the first few years of work — restoration and finishing projects in the Konstantinovsky Palace, the Hermitage, the Alexander Palace, the Trinity-Izmailovsky Cathedral, and the Sheremetev Mansion. This experience set the standard: every detail must work flawlessly — both technically and visually.
Today STAVROS produces a full line of moldings and trims from solid beech and oak, furniture handles, wooden decor, as well as a wide range of polyurethane stucco — moldings, cornices, overlays, trims, decor for moldings. Own production with 3D milling and manual finishing in St. Petersburg. Showrooms in St. Petersburg and Moscow. Contact us to confirm shipping to your destination. All links in the article lead to active catalog pages with current assortment.
FAQ: Answers to popular questions
How to beautifully cover an inspection hatch in an interior?
Decorative door made of a wooden frame and layouts with molding framing on the wall made of polyurethane is the most organic solution for classic and transitional interiors. A single color matching the wall makes the door part of the decorative system.
Can the electrical panel be closed with a decorative door?
Yes, provided it opens freely and does not violate fire safety regulations. A wooden frame on hinges with a magnetic latch ensures instant access. Wooden Handle for a comfortable grip. Molding frame on the wall for decorative framing.
What to buy for the technical niche door?
Pogonazh iz massiva и layout for the frame and architraves. furniture handle made of wood. Hinges and a magnetic latch. Moldings made of polyurethane for the frame on the wall. Glue, fasteners, sealant, primer, and enamel.
Where is it better not to use polyurethane?
In areas of constant hand grip, on hinges, and in places of mechanical contact when opening. Here, wood is the only correct material. Polyurethane — only on the wall around the door and in decorative points without load.
How to make an inspection hatch invisible?
Uniform painting of the door and wall in one tone, flat layout without relief, a recessed handle without protrusion, horizontal molding runs on the wall continuing through the level of the top and bottom of the door. With this approach, the door "dissolves" into the decorative wall system.
Which handle to choose for a decorative door?
Depends on the task: for concealment — a recessed handle or a wooden button without protrusion. For a decorative approach — an arched furniture handle handle 60–100 mm long. In a classic interior — a handle made of beech or oak with a profiled cross-section, painted to match the door.
How to choose the size of the molding frame for the hatch?
The molding on the wall is installed with an indent of 30–50 mm from the edge of the wooden trim of the door. The height of the molding profile is proportional to the size of the door: for a door 30×40 cm — molding 20–25 mm, for a door 50×60 cm — 35–45 mm. A too large molding on a small opening creates overload and attracts unwanted attention.