Article Contents:
- Why the Wall Behind the Sofa Deserves Its Own Layout
- The sofa creates a visual reference line
- Relief works differently from art or wallpaper
- Architectural detail is not a substitute for sound walls
- One wide picture-frame panel
- Two balanced frames with an intentional center gap
- Three vertical panels for a long living room wall
- A clean grid instead of traditional rectangles
- A subtle vertical accent rather than a complete frame
- Layout options at a glance
- Make a wall elevation in inches
- Determine the usable width rather than the nominal wall width
- Check depth, clearance, and light
- Align the feature with the seating group
- Give the bottom rail room above the cushions
- Leave a visual margin below the ceiling
- Example A: One horizontal frame behind a 78-inch sofa
- Example B: Three 30-inch panels over a long sofa
- Example C: Asymmetric composition with a chaise sectional
- Comparison of the worked designs
- Neoclassical: symmetry with restrained ornament
- Transitional: quiet picture-frame molding on walls
- Japandi-inspired: simple geometry and more negative space
- Traditional: more ornament, more planning
- Profile dimensions change the visual weight
- Fine profiles for delicate frames
- Mid-size and broader frames
- A rounded line for modern and monochromatic rooms
- Decorative corners and component compatibility
- What a kit does and does not solve
- Some collections mix polyurethane and MDF
- When to create a custom layout
- Use outside dimensions consistently
- Plan each cut against 102.36-inch stock
- Allow for the real cutting process
- Prepare the surface and protect the seating area
- Transfer the elevation and test the composition
- Select a compatible adhesive and temporary support
- Join, caulk, and finish without hiding problems
- Same-color paint emphasizes shape, not contrast
- Contrast turns the molding into a graphic feature
- Plan sconces and artwork before the trim
- Copying a photograph without measuring
- Using too many competing features
- Treating a decorative kit as a custom-fit solution
- Ignoring future furniture and wall access
- What is the best molding layout behind a sofa?
- Is accent wall molding different from picture-frame molding?
- Can a ready-made wall molding kit be all polyurethane?
- How much wall molding should I order?
- Should I put a frame directly over the sofa back?
- Can I paint polyurethane wall molding the same color as the drywall?
- Does STAVROS ship these products within the United States?
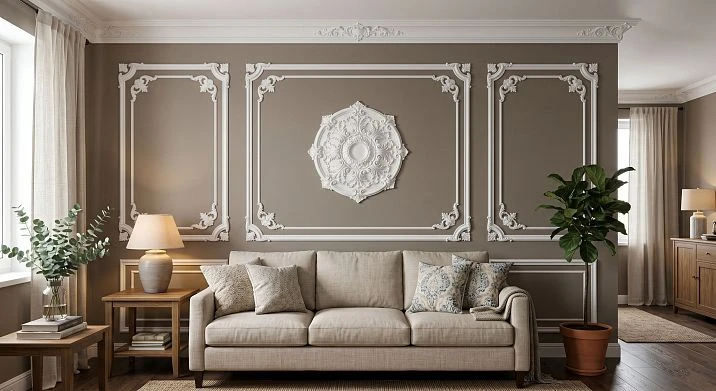
A living room accent wall does not need a new surface material to become a focal point. A carefully planned arrangement of accent wall molding can give the wall behind a sofa depth, rhythm, and a sense of architectural intention while retaining the existing painted drywall. The most successful designs respond to the sofa, ceiling height, nearby openings, lighting, and the way people actually see the room. They are not simply rectangles copied from a photograph.
This guide explains how to design a sofa-back feature with polyurethane molding, compare complete wall-decor kits with individual profiles, and calculate a workable cutting list. The focus is residential living rooms in the United States, with measurements in inches and feet. Product dimensions are also given in millimeters when they come from the STAVROS catalog. The result should be a wall that works with the furniture today and remains flexible enough to accommodate different upholstery, lamps, or artwork later.
Why the Wall Behind the Sofa Deserves Its Own Layout




The sofa creates a visual reference line
A three-seat sofa may occupy 78 to 96 inches of wall width, with its back 30 to 38 inches above the floor. When the seating group dominates the room, the artwork or molding behind it must relate to that mass. A narrow decorative frame centered on the entire wall can look disconnected if the sofa sits off-center. Conversely, filling every inch with wall trim can overwhelm the seating area. A good layout begins with a clear decision about which reference line will control the composition: the sofa centerline, the wall centerline, or an architectural feature such as the fireplace.
For most straightforward rooms, centering the decorative grouping over the sofa makes the seating area feel deliberate. This is a design choice, not a rule that every living room must follow. In an open-plan room, a feature can be centered on the conversation area even when the wall extends far beyond it. The alignment should be evident from the primary viewpoint at the doorway or opposite seating position.
Наша фабрика также производит:
Смотреть весь Каталог продукции
Relief works differently from art or wallpaper
Paint and wallpaper change color or pattern across a flat plane. Wall molding changes the plane itself. Even a shallow profile casts highlights and shadows that shift over the day. A same-color wall and trim can therefore feel finished without adding another strong color or graphic print. This can be especially useful with textured upholstery, large area rugs, or patterned drapery where a busy accent wall would compete with the furniture.
A molding composition can also support artwork. A wide rectangular frame can surround a painting without becoming its picture frame, and two smaller frames can define the spaces on either side of a central print. The key is to leave enough unoccupied area around the art. If you plan to rotate large artwork frequently, keep the decorative field simple rather than building a frame tailored to one exact canvas.
Получить консультацию
Architectural detail is not a substitute for sound walls
Decorative molding is a finish element. It does not straighten failing drywall, strengthen a cracked partition, or hide moisture damage safely. Inspect stains, active cracks, loose plaster, condensation, and peeling paint before making a design. Repair the cause first. A molding layout can conceal minor visual irregularities after proper substrate preparation, but it should not be used to bridge moving joints or to trap dampness behind applied elements.
Five Accent Wall Molding Ideas for the Space Behind a Sofa
One wide picture-frame panel
A single broad rectangle is the simplest approach when the sofa sits against a relatively uninterrupted wall. Keep the frame related to the seating width and leave a generous margin between its edge and nearby doors or corners. The frame can be relatively shallow vertically, like a long landscape-format panel, or taller when the ceiling and wall space permit. A horizontal frame often works well with modern sofas whose low back emphasizes the room's width.
Rather than choosing a fixed size before measuring, tape the outer corners on the wall. Stand at the room entrance and at the opposite seat. The frame should neither touch the sofa silhouette nor float so high that it seems unrelated. Consider a painted interior in the same color as the rest of the wall for a quiet effect, or a slight tonal change inside the frame for more definition.
Two balanced frames with an intentional center gap
Paired frames can support a central piece of art, a mirror, or a decorative light fixture. They can also stand alone, with the negative space between them acting as the central feature. Keep the two frames the same width when aiming for formal symmetry, and measure the space between their inside edges rather than positioning each one independently. This creates a stable rhythm even when the couch is replaced with a different model.
The gap is not wasted space. It can give the eye a resting point and may accommodate a wall outlet or a future small art object. If a sconce is planned, its mounting position and wiring must be decided before installing trim. Never place molding over an electrical box, switch, or required access point.
Three vertical panels for a long living room wall
Three repeated tall rectangles are useful when the sofa spans much of a long wall. Their widths can be equal, with a consistent gap, or the center panel can be wider if the room has a clear focal axis. Equal panels are easier to measure and cut. A wider middle panel looks more custom but demands extra attention to the alignment of its top and bottom edges with its neighbors.
Vertical frames can emphasize height, but only if their spacing respects the baseboard and ceiling trim. Crowding a panel between the top of the couch and the crown molding creates a stacked appearance. When the room has an eight-foot ceiling, a restrained layout often looks better than full-height ornament. Full-height panels are more suitable when the walls offer enough unobstructed space to create a coherent top and bottom margin.
A clean grid instead of traditional rectangles
For homeowners researching living room wall molding, an accent design can be a grid of horizontal and vertical runs rather than independent closed frames. This approach suits a transitional or contemporary room. A consistent spacing module makes the pattern easier to extend around a wide wall. The grid should be designed from the wall elevation, not assembled by repeatedly measuring from an uneven floor. Use a laser line or reliable level as the datum.
A grid may conflict with a sofa whose back, floor lamp, and side tables already create strong horizontal and vertical lines. Before committing, sketch the grid with furniture shown to scale. A small number of larger fields usually feels calmer than a dense checkerboard. Leave room for future artwork and furniture changes; a wall that can only accommodate one exact couch position becomes unnecessarily restrictive.
A subtle vertical accent rather than a complete frame
When a room has a curved sofa, an offset sectional, or a large painting, closed rectangles can be awkward. A pair of simple vertical moldings placed beside the main focal area may achieve enough definition. The lines can terminate at a planned upper and lower level, or continue into related architectural detailing elsewhere in the room. Avoid making unsupported claims that any straight polyurethane profile can be bent around a curved wall; a rounded profile is not automatically a flexible product.
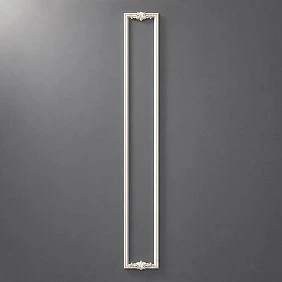
Vertical accents are also a useful answer in a very narrow living room, where a broad panel would leave insufficient wall margins. They can be visually integrated by painting the trim the same color as the wall. In this arrangement, the shadow line matters more than ornamental detailing, so a compact profile is usually easier to control than a large classical one.
Layout options at a glance
| Composition | Best starting condition | Main design risk | Measurement priority |
|---|---|---|---|
| One wide rectangle | Sofa against a clean uninterrupted wall | Frame too small or floating too high | Sofa center and visible wall height |
| Two matched rectangles | Central art or balanced seating | Unequal gaps and off-axis lighting | Equal outside dimensions and center gap |
| Three vertical panels | Long wall with regular proportions | Crowded end panels | Wall edges, repeated spacing, level top line |
| Simple grid | Contemporary room with broad blank wall | Too many lines competing with furniture | Consistent layout module and datum |
| Two vertical accents | Narrow wall or asymmetric sofa | Random-looking stops and terminations | Furniture alignment and planned endpoints |
Measure the Room Before Choosing Molding
Make a wall elevation in inches
Start with a straight-on sketch. Record the wall width and floor-to-ceiling height, then draw the actual baseboard, any crown molding, doors, windows, vents, outlets, and built-in furniture. Note the distance from each fixed feature to a common corner. Measure at more than one height because older walls may not be perfectly square. An elevation does not need architectural software; graph paper is sufficient if the measurements are clear.
Next, measure the sofa including arms. Note its height at the top of the back cushions, which can differ from the hard frame. Record the approximate location of side tables and floor lamps. For a sectional, include the chaise projection and the position from which the wall is most often viewed. When the back cushions reach higher than the frame, use the visible silhouette rather than the product's nominal dimension.
Determine the usable width rather than the nominal wall width
A 14-foot wall is 168 inches, but the usable decorative field may be much narrower. A doorway might interrupt one end, a floor lamp may sit in front of the other, and a thermostat can occupy the ideal frame border. The useful area is the uninterrupted portion within which the composition can sit without colliding with functional elements. Record that usable zone explicitly on the sketch.
For a first proportion check, a grouped composition near the width of the sofa or modestly wider is often reasonable. This is a visual starting point, not a construction standard. For example, a 90-inch sofa might support a decorative group roughly 94 to 108 inches wide, provided adequate end margins remain. Test with painter's tape. If the wall is narrow, it is better to reduce the decorative group than to push the molding almost into the corners.
Check depth, clearance, and light
A shallow trim that looks refined on a sample card can cast a strong shadow under a wall sconce. A broad profile may disappear behind the sofa's highest cushions. Verify the proposed moldings from the real viewing distance. The same painted profile can appear different at noon and after sunset as the direction of illumination changes. Temporary tape and small paint samples are more reliable than guessing from a website photograph.
Look closely at the distance between the bottom molding run and the sofa back. Leave enough visible painted wall that the panel remains legible when people sit on the couch or cushions are rearranged. Also check where picture hooks, curtain stacks, and electrical outlets fall. The layout should not force awkward furniture placement just to preserve symmetry.
Set the Proportions Without Relying on a Universal Formula
Align the feature with the seating group
Three different centerlines may be relevant: the center of the wall, the center of the sofa, and the visual center of the seating arrangement. In a simple rectangular room, they often coincide. In an open-concept plan, the sofa may be shifted toward the television or fireplace, making the wall center a poor guide. Choose the line that best matches the main composition, mark it, and use it consistently for paired or repeated frames.
For equal panels, work outward from that centerline. Measure the full group width, deduct planned margins and gaps, and divide what remains among the panels. For one wide panel, determine the outer edge first, then check that there is enough untouched wall at each end. Treat all dimensions as preliminary until you have a full-scale tape mockup.
Give the bottom rail room above the cushions
A useful initial mockup is to position the lowest molding line around 8 to 12 inches above the highest part of the sofa back. This is a design allowance, not a required code dimension. Some rooms benefit from a smaller gap, especially with a very low sofa, while a high-back couch may require more. View the wall from the opposite seat; if the bottom line disappears behind cushions, raise the composition or reconsider its height.
Do not assume the frame should begin at the same height in every home. A sofa that is 33 inches high creates a different visual envelope from a 40-inch reclining sofa. If you expect to replace the couch soon, choose a layout that does not depend on a clearance of only an inch or two. A little breathing space makes the trim look intentional and reduces future design constraints.
Leave a visual margin below the ceiling
An eight-foot room has 96 inches of total height before subtracting baseboard, ceiling trim, and furniture. If the lower panel edge sits 47 inches above the floor, there are 49 inches left to the ceiling. A 30-inch-tall rectangle leaves 19 inches for the top margin. Depending on the actual crown and nearby lighting, this can be a more balanced solution than trying to force a five-foot-tall frame into the same zone.
Rooms with nine- or ten-foot ceilings can support taller panels, but larger does not necessarily mean better. Consider whether the molding should visually relate to door casings, windows, or an existing chair rail. A deliberate alignment across architectural elements is often more convincing than a frame chosen only to fill space.
Three Worked Layouts for Different Living Rooms
Example A: One horizontal frame behind a 78-inch sofa
Imagine a room with a clean 12-foot-wide wall, an eight-foot ceiling, and a sofa measuring 78 inches across and 33 inches high. The design goal is a subtle raised border, not floor-to-ceiling paneling. Start with a proposed 92-inch-wide frame and a 30-inch height. Center it over the sofa, leaving 26 inches from each end of the frame to the 144-inch wall edges. Place the lower edge 45 inches above the floor. That gives about 12 inches of separation from the couch back, with the upper edge at 75 inches and 21 inches remaining to the ceiling.
The outside perimeter of that frame is 2 x (92 + 30) = 244 inches, or about 20.3 linear feet. This is the theoretical molding length, not the purchasing quantity. With STAVROS profiles supplied in 102.36-inch lengths, both 92-inch horizontal pieces require their own stock lengths. Two 30-inch sides can fit in a third length. The preliminary cutting plan therefore calls for three lengths, before allowance for imperfect material, test cuts, and any secondary border. Draw the exact miter method and identify outside long-point measurements before cutting.
A tonal paint scheme makes this broad shape feel integrated. Use the same wall color on the molding and inside the frame, then evaluate the shadow effect. If the sofa is already patterned or brightly colored, matching paint often produces better balance than a strong white outline. If the room later gets a larger sofa, the 92-inch frame still has a reasonable chance of working as a backdrop.
Example B: Three 30-inch panels over a long sofa
Consider a 13-foot-6-inch wall, a nine-foot ceiling, and a sofa 92 inches wide. A three-panel decorative group can measure 106 inches across: three panels each 30 inches wide, with two 8-inch gaps between them. The wall has 162 inches of total width, so a centered group leaves 28 inches at each side. That margin can accommodate breathing space beside curtains, though fixed obstructions still need to be checked.
Set the frames at 46 inches tall. A preliminary lower edge at 44 inches above the floor puts the top at 90 inches, leaving 18 inches to the 108-inch ceiling. Assuming a sofa back around 34 inches tall, the lowest rail remains visible with about 10 inches of clearance. Use this as a paper design first; if a doorway or wall sconce intersects the composition, revise rather than squeezing the panels.
Each rectangle needs two 46-inch sides and two 30-inch sides. Across all three panels, the cut list is six 46-inch pieces and six 30-inch pieces. The aggregate length is 456 inches. For a 102.36-inch stock profile, three lengths can each yield two 46-inch pieces, and two more lengths can each yield three 30-inch pieces. This gives a practical five-length cutting plan with room for normal saw kerf, although additional stock may be prudent if the wall is out of square or there are damaged cuts.
Example C: Asymmetric composition with a chaise sectional
A sectional with a chaise sometimes makes the overall furniture footprint much wider than the sofa back against the wall. Centering three equal frames on that full footprint can move the visual feature too far into a corner. Instead, center a pair of panels above the long upholstered back and let the chaise read as a secondary element. An alternative is one wide frame aligned with the seating cluster, even when the open wall to its left and right is unequal.
Suppose the main sofa back measures 86 inches but the chaise extends another 38 inches into the room. You could mock up a 94-inch-wide frame centered on the 86-inch portion while letting the chaise define the foreground. The decorative wall need not repeat the entire L shape. View the proposal from the room's main entry and compare it with the line of the area rug. If the feature still appears off-balance, relocate the sofa or use a simpler vertical pair rather than forcing formal symmetry.
Comparison of the worked designs
| Room and seating example | Initial molding group | Lower-edge mockup | Approximate stock plan |
|---|---|---|---|
| 12-foot wall, 78-inch sofa | One 92 x 30 in frame | 45 in from floor | Three 102.36 in lengths |
| 13.5-foot wall, 92-inch sofa | Three 30 x 46 in frames, 8 in gaps | 44 in from floor | Five 102.36 in lengths |
| Sectional with 86-inch main back | One roughly 94 in wide frame | Decide after tape test | Calculate after final frame height |
These are design exercises, not prescriptive dimensions. They deliberately show the measurement logic so it can be adapted to a room with different ceiling trim, furniture, or electrical obstacles. The final order should be based on a cut schedule for the actual selected molding and verified finished dimensions.
Choose a Style That Supports the Room
Neoclassical: symmetry with restrained ornament
Neoclassical living rooms often use repeated rectangles, balanced spacing, and clean architectural edges. The molded frames need not be ornate. A simple shaped profile around two or three large fields can create a recognizable rhythm without competing with modern upholstery. Keep the top and bottom edges aligned. If the room has elaborate furniture, select a quieter molding; if the furniture is spare, a more defined profile can supply the detail.
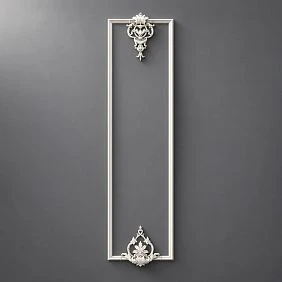
The STAVROS Neoclassic wall decor collection is a starting place to compare coordinated designs. Review each kit's complete materials and drawing rather than assuming every component is polyurethane. For example, some sets use polyurethane ornaments alongside primed MDF molding. This matters for ordering, paint preparation, and any project where only one material is permitted.
Transitional: quiet picture-frame molding on walls
A transitional room combines contemporary furniture with selected traditional features. One or two rectangles behind the sofa can bridge these elements. Avoid exaggerated scrollwork unless the rest of the interior is deliberately classical. A medium-width profile offers enough shadow to read from across the room. Keep the finish close to the wall color, or use a gentle contrast that coordinates with the ceiling and door casing.
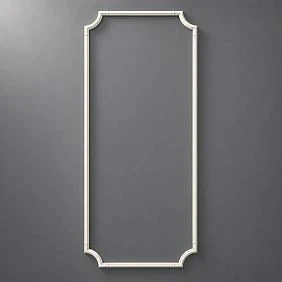
For a lighter approach, browse Neoclassic Light wall molding sets. Compare the actual kit footprint to the sofa-back elevation. It may make more sense to use a single collection element as part of a larger composition than to repeat a kit without checking how its width and height fill the available wall.
Japandi-inspired: simple geometry and more negative space
Japandi-inspired interiors usually benefit from fewer lines, a soft palette, and a clear hierarchy. A same-color applied border, a pair of vertical accents, or one uncomplicated framed field is more consistent than a dense set of ornate corners. A rounded cross-section can create a restrained shadow line, especially under indirect light. Natural wood furniture and textured linen already supply visual richness, so the molding should complement rather than compete.
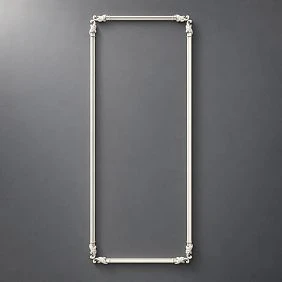
STAVROS offers a Japandi wall molding collection that includes polyurethane-focused compositions. The listed CPU-3-1 wall molding kit has an overall footprint of about 42.24 x 90.55 inches (1,073 x 2,300 mm). That height is an important reality check: the complete kit will occupy most of a conventional eight-foot wall before accounting for baseboard and crown molding. Use its product drawing to determine whether it fits; do not assume a catalog photograph represents the proportions of your living room.
Traditional: more ornament, more planning
A formal living room can support richer applied molding, decorative corner pieces, and central ornament. But high relief must be scaled to the wall. On a narrow sofa wall, an elaborate corner at each edge may make the composition feel crowded. Test a complete arrangement at full size, not one small sample. Traditional styling benefits when the wall pattern connects with the other architectural features of the house, such as door pediments and classical trim.
The Versailles Light decor collection provides an example of a more ornamented visual language. Review the listed component materials: in some STAVROS kits, the decorative pieces are polyurethane while the straight profiles are primed MDF. A mixed-material kit can be an intentional solution, but it should never be advertised as an all-polyurethane assembly without checking its bill of materials.
Which STAVROS Polyurethane Molding Profile Fits the Design?
Profile dimensions change the visual weight
An accent wall is often viewed from 8 to 15 feet away. A fine profile that feels prominent in a close-up photograph can disappear at that distance, particularly under flat lighting. Conversely, a wide shaped molding can overpower a small frame because the raised edge occupies too much of its area. Compare actual widths, not just style photographs. It is useful to tape paper strips at different widths to the wall and view them under normal lighting before committing.
The STAVROS polyurethane molding catalog includes the profiles below. The dimensions refer to the width of the molding face, its projection or thickness, and the standard length. Exact metric specifications should be retained on the cut sheet; the inch figures are rounded conversions for planning.
| STAVROS profile | Face width x thickness | Approx. U.S. size | Stock length | Suggested visual role |
|---|---|---|---|---|
| MLDPU-001 | 10 x 6 mm | 0.39 x 0.24 in | 102.36 in | Fine bead, secondary contour, small frames |
| MLDPU-004 | 15 x 8 mm | 0.59 x 0.31 in | 102.36 in | Compact shaped outline |
| MLDPU-002 | 22 x 11 mm | 0.87 x 0.43 in | 102.36 in | Clearer main panel border |
| MLDPU-003 | 35 x 12 mm | 1.38 x 0.47 in | 102.36 in | Broad architectural statement |
| MLDPU-027 | 14 x 9 or 20 x 12 mm | 0.55 x 0.35 or 0.79 x 0.47 in | 102.36 in | Smooth half-round effect in two sizes |
Fine profiles for delicate frames
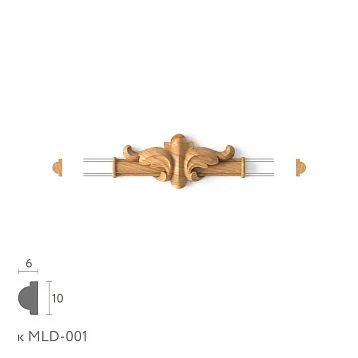
A fine border can be ideal on a small wall or as the inner edge of a larger double frame. The MLDPU-001 polyurethane bead molding measures 10 x 6 x 2,600 mm, about 0.39 x 0.24 x 102.36 inches. Its narrow shape is better suited to a controlled outline than to a heavily ornamented primary border on a very tall wall. If you use it as a secondary line, calculate that inner frame separately from the outer perimeter.
The MLDPU-004 polyurethane molding is 15 x 8 x 2,600 mm, about 0.59 x 0.31 inches in cross-section. It is compact but has a more shaped contour. For two medium-size sofa-back frames, it may be a useful middle ground between an almost invisible bead and a much stronger architectural strip. Choose based on the silhouette shown in the product drawing.
Mid-size and broader frames
The MLDPU-002 wall molding profile is listed at 22 x 11 x 2,600 mm, approximately 0.87 x 0.43 x 102.36 inches. Its larger scale can keep a panel visible across a living room without requiring extra decorative corner inserts. It is especially relevant for simple two-panel and three-panel layouts where the main outline must carry the whole composition.
For a more substantial border, MLDPU-003 polyurethane molding measures 35 x 12 x 2,600 mm, roughly 1.38 x 0.47 inches across its face and projection. It creates a stronger edge but also reduces the apparent open area inside a frame. Use the actual outside dimensions of the molding when judging frame proportions, and give the molding enough space from furniture and adjacent architectural trim.
A rounded line for modern and monochromatic rooms
The MLDPU-027 half-round polyurethane molding comes in 14 x 9 and 20 x 12 mm versions, both 2,600 mm long. Its rounded profile produces softer highlights than a stepped decorative molding. This may suit a minimalist accent wall or a double-frame composition where the inner line should be visually quieter. Specify the exact size variation in the order; the shared product code alone does not identify which cross-section you want.
A rounded face should not be confused with a bendable product. The standard MLDPU-027 is a straight linear molding. If a living room wall curves around a bay or a rounded column, that calls for a dedicated curved-surface strategy and confirmation of the product's suitability, not simply for choosing a round-looking molding.
Decorative corners and component compatibility
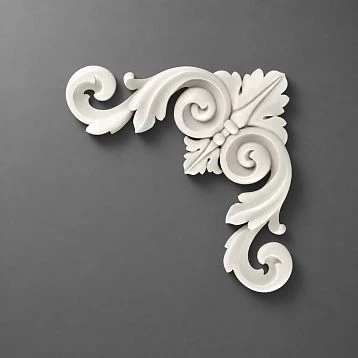
A straight profile can be paired with decorative corner or central elements, but compatibility must be checked against the actual profile family and dimension. The catalog's molding decoration elements are not universal joints. A corner insert meant for one contour may leave a visible mismatch with another. Before ordering, compare cross-sections or product drawings, and confirm whether the decoration replaces a miter joint or is applied over a conventional frame.
For a wall behind an active family sofa, detail can be concentrated higher above the upholstery rather than near the area where people lean or where cushions rub. Applied decor is intended as an architectural finish, not a grab bar or a surface designed to take repeated impact. If a small child could pull on a projecting ornament, reconsider the placement and attachment method.
Ready-Made Wall Molding Kits or Individual Lengths?
What a kit does and does not solve
A prepared kit can shorten the design process because the main elements belong to a coordinated visual family. The STAVROS wall molding kit department includes traditional and contemporary collections, each with its own component choices. A kit still needs to be positioned on an actual wall. It will not automatically center itself above a sofa, leave room for a thermostat, or adapt to an eight-foot ceiling just because a promotional image looks balanced.
Before ordering, download or inspect the drawing and read the materials list. Confirm the outside size, not merely the advertised width of the individual profiles. A kit's overall height may include tall elements intended for the full wall. Compare that dimension with the height remaining above your sofa. If the full composition is too tall, select another kit rather than assuming its elements can simply be shortened without affecting the design.
Some collections mix polyurethane and MDF
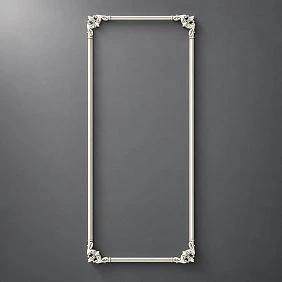
For example, the CPU-1-1 Neoclassic molding set is listed with ornamental polyurethane components and primed MDF straight molding, not as a single-material polyurethane assembly. The visual appearance of a molded corner does not establish the material of its adjacent rails. Mixed materials may require different handling when fitting or finishing, even though they can form a visually unified panel after painting.
By contrast, the listed components of CPU-3-1 use polyurethane molding with polyurethane corner pieces. Check the live bill of materials before ordering any particular version, because product specifications and availability can change. If the client has a strict all-polyurethane requirement, the correct question is whether every required component satisfies it, not whether the collection is located in a wall-decor category.
When to create a custom layout
Individual molding lengths are better when the wall is unusually wide, the sofa sits under a sloping ceiling, or fixtures make symmetrical catalog panels impractical. They also give more control over the inside dimensions of a frame and the thickness of the border. A custom layout requires a complete cut list and deliberate decisions about which joints will be mitered, whether decorative corners are needed, and how offcuts will be reused. It is not necessarily harder, but it involves more choices.
The most economical layout is not always the one with the shortest theoretical perimeter. If every major side is just longer than half a stock length, waste can rise even when the drawn wall looks simple. Compare a layout with two wide panels against one with three narrower panels using the actual stock length. You may find that a slight change in panel dimensions improves material utilization without noticeably changing the room's appearance.
| Ordering approach | Best for | Must verify before buying | Common overlooked cost |
|---|---|---|---|
| Coordinated wall decor kit | Known composition and matching ornaments | Overall size and every component material | Additional lengths, finish, accessories |
| Individual polyurethane lengths | Custom frame sizes and simple geometric walls | Profile size, stock length, matching contour | Offcuts, adhesive, corner test pieces |
| Mixed-material decorative system | Projects intentionally combining MDF and polyurethane | Substrate and coating compatibility for each part | Separate preparation and handling |
| Multi-profile layered frame | Larger wall with inner and outer outlines | Two complete cut lists and spacing between profiles | More joints and longer installation time |
Build a Cutting List Before Ordering Molding
Use outside dimensions consistently
A rectangular frame is typically described either by its outside dimensions or by the visible open field inside the molding. These are not interchangeable. With a 1-inch-wide profile, an outside width of 30 inches produces roughly 28 inches of clear internal width if the molding sits entirely inside the outside boundary. For mitered corners, a side measured from long point to long point has a different reference than a side measured along the inner edge. Record the reference on the drawing so that every cut follows the same convention.
For a simple rectangle, the nominal outside perimeter is twice the width plus twice the height. If one panel is 32 x 44 inches, the theoretical sum is 152 inches. For three such frames the sum is 456 inches. This establishes the total running footage but not the number of stock lengths needed. That quantity comes from arranging the individual pieces into a feasible cutting pattern.
Plan each cut against 102.36-inch stock
Many STAVROS MLDPU profiles listed in the catalog have a nominal stock length of 2,600 mm, approximately 102.36 inches. First make a table with one row for every required finished piece, including its orientation, reference dimension, and count. Group identical pieces. Then plan the longest pieces against the stock length and see whether shorter pieces can occupy the remaining space. Account for saw kerf, test cuts, imperfect ends, and a practical fitting allowance.
Do not simply divide the total linear inches by 102.36 and round up. Two pieces that are each 56 inches long cannot come from one stock length even though their combined need is only modestly more than one length. The arithmetic will underestimate material unless it reflects the physical cuts. Conversely, a planned batch of 46-inch and 30-inch sides may fit together efficiently when grouped deliberately.
Allow for the real cutting process
Prepare one test corner with the actual molding before cutting the entire order. Mark the front face and keep the orientation consistent, especially on asymmetrical profiles. A fine-tooth saw and a stable miter guide generally provide better control than trying to freehand every corner. Use the cutting method approved for the selected profile. On a wider molding, a slight error can leave a visible step at the junction even when the outer frame looks square.
If the room has crooked walls, avoid compensating by forcing a nominally rectangular molding frame to follow a wavy surface. A laser-defined true rectangle can sometimes be visually cleaner, provided its edges can adhere properly. Where the substrate deviates significantly, repair or level it first rather than concealing large gaps with excess caulk. Keep spare material for repairs or corrections, especially if replacements might not be available quickly.
Installing Polyurethane Wall Molding Behind a Sofa
Prepare the surface and protect the seating area
Move the sofa far enough forward to work safely and to check the complete layout. Protect flooring and furniture from dust and adhesive. Examine the paint for loose areas, water stains, gloss, and weak adhesion. Remove failing coatings and repair the underlying wall. Any necessary patching, sanding, or priming should be completed according to the wall-finish and adhesive manufacturers' directions before decorative profiles are applied.
Working on a painted wall is not always the same as bonding directly to sound drywall. The glue may be attached to the paint film rather than the wall beneath it. If that film peels, the molding can fail with it. Test the actual surface and verify compatibility among paint, primer, adhesive, and polyurethane. Fresh paint may need a curing period before bonding; check the product instructions instead of assuming it is ready as soon as it feels dry.
Transfer the elevation and test the composition
Use a level or laser to mark the top and bottom lines of each frame. For paired panels, establish the centerline first, mark the gap, and work toward the outside edges. Use low-tack painter's tape to create a mockup before any adhesive is opened. Look from multiple positions, sit on the sofa, and check that the lowest trim line remains visible above the cushions. Adjust now; moving a glued molding is much more difficult.
Once the layout is approved, mark the individual piece numbers and cut lengths on a paper schedule. Lightly mark the reference edge for each miter so opposite pieces do not become mirror-image mistakes. A dry fit on the floor allows you to confirm that corner profiles align and decorative ornaments are correctly oriented. For kits, check the supplied schematic before making modifications.
Select a compatible adhesive and temporary support
Use an adhesive recommended by the manufacturer for both polyurethane and the actual wall finish. Solvent compatibility and substrate conditions matter. Apply it in the manner and amount specified by its instructions; excessive adhesive can create visible squeeze-out and may complicate painting. A long piece may need temporary tape, supports, or another approved holding method while the bond develops. The adhesive label, not a universal time estimate, determines cure and handling time.
Do not rely on molding adhesive to retain heavy art, mirrors, shelving, or electrical fixtures. Those items need their own appropriate structural anchors. Decorative wall molding is not a substitute for fastening loads to a suitable substrate or framing member. Where working near live wiring or installing a new sconce, follow local electrical requirements and use a qualified professional when necessary.
Join, caulk, and finish without hiding problems
Miter corners carefully, check the front-face alignment, and let the adhesive cure as directed. Small finish gaps may be treated with a compatible paintable filler or caulk when appropriate; large gaps indicate a cutting or substrate problem that should be corrected. Smooth the filler and remove residue before it sets on the visible face. Sand only in accordance with the material and coating recommendations so the profile's molded edges are not rounded off.
If the design includes an inner and outer frame, complete the main frame and verify its geometry before laying out the secondary line. This reduces accumulated measurement errors. After finishing, inspect the work under raking light because daylight from a side window can reveal uneven joints that looked acceptable under frontal ceiling lighting. A careful final inspection is more valuable than rushing to reinstall the sofa.
Paint and Lighting Ideas for an Accent Wall
Same-color paint emphasizes shape, not contrast
Painting the molding and background the same color turns the feature into a relief composition. Light hits the raised edge and creates a changing shadow rather than a hard graphic outline. This works well with warm whites, muted grays, clay tones, and restrained greens. It can also make the wall feel cohesive when the room contains a large patterned rug or dramatic upholstery.
A single coordinated paint system reduces color-matching issues, but it does not mean that any wall paint will adhere to every polyurethane finish. Follow the molding manufacturer's recommendations for preparation and primer. If the product is factory-primed, confirm the topcoat's compatibility rather than sanding or re-priming automatically.
Contrast turns the molding into a graphic feature
A light molding on a dark wall creates a stronger grid. This can be effective in a formal room but also increases the visibility of every corner and spacing error. On a wall with three or more frames, test the full pattern first; contrast that looks subtle on a short sample may feel busy across a 12-foot wall. If the room already has strong black window frames or dark door casings, related trim colors can establish continuity.
For a softer contrast, use slightly different shades of the same color family. This preserves architectural definition while avoiding the effect of outlining every panel with a marker. The exact finish will change with lighting, so evaluate a real sample both in daytime and in the room's usual evening light.
Plan sconces and artwork before the trim
A sconce can emphasize the raised frame, but its light beam may exaggerate a poorly aligned corner. Establish the fixture's position before finalizing a panel. Leave the electrical box accessible; do not cover it with molding or filler. If artwork is planned, leave enough uninterrupted wall for hanging hardware and for the piece to feel visually distinct. The molding should form a setting, not an obstacle course around the art.
Where the sofa is used for reading, lighting function comes before the decorative effect. Light placement should serve people seated on the couch without glare. A balanced accent wall can include one intentional empty field for a future artwork, rather than trying to fill every surface with trim. This also makes the room easier to update without removing the architectural framework.
Mistakes That Make a Sofa Accent Wall Look Unplanned
Copying a photograph without measuring
Internet photographs conceal important differences in ceiling height, sofa back height, and camera angle. A composition that fills a ten-foot wall can overwhelm an eight-foot room. Before ordering, check the actual wall elevation and use tape for a realistic scale test. Compare the profile width against the proposed panel dimensions, not against a product photograph that may be taken from inches away.
Using too many competing features
A room with a patterned sofa, large gallery wall, strong wallpaper, and ornate applied molding may have no visual hierarchy. Choose one feature to lead. If the sofa fabric and art already dominate, keep the trim simple and paint it to match the wall. If the furniture is quiet, the molding can carry more detail. Avoid mixing unrelated profile families merely to use leftover material unless the joint and style are deliberately resolved.
Treating a decorative kit as a custom-fit solution
A kit helps coordinate elements, but its dimensions and materials are fixed by the selected product configuration. It does not eliminate the need for measuring, a drawing, or a cut list. Confirm whether straight profiles are included, whether they are polyurethane or primed MDF, and whether the ornaments suit the chosen frame dimensions. Browse the STAVROS wall molding collections and compare the actual construction rather than shopping by style name alone.
Ignoring future furniture and wall access
A panel placed only an inch above today's sofa back can disappear when the room gets new furniture. A decorative rail over an outlet or thermostat can create a maintenance problem. Account for realistic changes, maintain clear access to functional elements, and avoid bonding trim across building movement joints. The best accent wall is not merely attractive at installation; it remains practical for the room's everyday use.
Frequently Asked Questions
What is the best molding layout behind a sofa?
There is no universal arrangement. A single wide frame works with many simple walls; two balanced panels are useful around art; three vertical panels can organize a long wall. Choose after measuring the usable wall area and sofa height. The main alignment should relate to the seating area or room architecture, and the bottom of the molding should remain visible above the sofa from normal viewing positions.
Is accent wall molding different from picture-frame molding?
Accent wall molding describes the visual application: decorative trim used to make a wall stand out. Picture-frame molding describes one common arrangement, where straight profiles create applied rectangular outlines. The same polyurethane profile can be used in other arrangements, including grids and vertical lines. Product selection should consider the desired shape, width, and material rather than treating these phrases as entirely separate products.
Can a ready-made wall molding kit be all polyurethane?
Some can, but it must be confirmed from the specific kit's bill of materials. The STAVROS CPU-3-1 listing uses polyurethane profiles and corner elements. Other collections may combine polyurethane ornaments with primed MDF straight runs. Read the actual component list and finish requirements before calling a complete set all-polyurethane. Do not infer a uniform material merely from its category placement.
How much wall molding should I order?
Calculate each frame's individual sides and make a cut list. The theoretical perimeter of a rectangle is 2 x (width + height), but the actual stock quantity depends on how those sides fit into the supplied lengths. For the MLDPU profiles discussed here, 2,600 mm is about 102.36 inches. Allow for saw kerf, test joints, errors, and any extra decorative border. A simple division of total inches by stock length is only an initial check.
Should I put a frame directly over the sofa back?
It is usually better to leave a visible gap, particularly if loose cushions rise above the frame of the sofa. Mock up a lower-edge position several inches above the highest upholstery, then adjust to the available height and the upper margin. The exact gap depends on the sofa and room; it is not a building-code measurement. Make sure the trim remains visible even when the sofa is occupied.
Can I paint polyurethane wall molding the same color as the drywall?
Yes, when the product and chosen coating system are compatible. A monochromatic finish is a common way to emphasize relief without strong color contrast. Verify whether the molding is pre-primed and use recommended preparation, primer, and topcoat. Let adhesives, fillers, and coatings cure according to their instructions. Test the sheen because raised surfaces may reflect light differently from flat drywall.
Does STAVROS ship these products within the United States?
The English-language catalog provides product information and prices, but a U.S.-facing webpage alone does not establish domestic stock, delivery time, or guaranteed shipment to every U.S. address. Check current availability, shipping eligibility, packaging, import considerations, and the complete landed cost with STAVROS before placing an international order. Avoid treating general catalog lead times as a firm U.S. delivery commitment.
Final Design Checklist
The most reliable living room accent wall starts with a measured elevation and a clear relationship to the sofa. Choose one layout, check its proportions with tape, select a molding profile appropriate to the viewing distance, and calculate a real cut schedule. If using a kit, verify its full footprint and the material of every component. If combining individual profiles, check joint compatibility before ordering.
The STAVROS polyurethane wall molding range and coordinated wall decor collections offer two different routes to a finished composition. Both work best when the dimensions, substrate, lighting, and painting sequence are planned together. Done carefully, wall molding gives the space behind the sofa a defined architectural role without making the living room dependent on a single wallpaper pattern or a particular piece of art.