Article Contents:
- Short answer: CPU.VRS-060 is a panel or a set of parts
- What is confirmed for CPU.VRS-060
- Why the photo of the finished interior is misleading
- What elements make up CPU.VRS-060
- What 441 × 1700 × 22 mm actually means
- Width 441 mm
- Height 1700 mm
- Thickness 22 mm
- First, the article and documents
- Then, the quantity
- Separately, left and right orientation
- After that, the condition of the relief
- Finally, the length of the profiles
- Narrow pier between doors
- Wall above the console
- Area near the mirror
- Space between sconces
- Tall hall or stairwell
- Furniture facade or door
- Self-installation is justified when
- A regular finisher is suitable when
- A molding installer is needed when
- Pre-assembly on the shield
- Strength
- Evenness
- Cleanliness
- Compatibility
- Light as part of the finish
- The kit itself
- Delivery and lifting
- Wall preparation
- Markup and design
- Cutting and assembly
- Installation materials
- Painting
- Working at height
- Control sample
- One panel above the console in an apartment
- Two symmetrical panels on either side of the mirror
- Series of panels in a corridor or hotel
- Panel on a stair landing
- Panel in a bedroom
- Panel in a study
- Panel in a restaurant or salon
- Expect a solid panel
- Order from a photo without a drawing
- Not checking the specification
- Count the molding stock as defective
- Start by gluing the central part without a general scheme
- Cut all profiles according to the first measurement
- Confusing L and R
- Do not account for the 22 mm thickness
- Select glue only by the word "universal"
- Glue onto weak paint
- Fill large gaps with finishing compound
- Do not include painting in the estimate
- Order several sets without a sample
- Do not photograph the layout
- Leave installation to "any finisher"
- Does CPU.VRS-060 come as a ready-made panel?
- What does the size 441 × 1700 × 22 mm mean?
- Why are the moldings longer than the finished panel?
- Is glue included with CPU.VRS-060?
- Can I install the kit myself?
- Is it necessary to do a dry layout?
- Can I change the height of the panel?
- How do I know if the CPU.VRS-060 will fit a narrow wall?
- Do I need to paint polyurethane decor?
- Can I glue the panel to a painted wall?
- What should I do if there are leftover pieces?
- What is more important — the photo or the DWG?
- How is CPU.VRS-060 different from C.VRS-060?
- Can I use CPU.VRS-060 on a door?
- Who should perform the miter cut?
- How do I check the kit upon receipt?
- What to include in the full budget?
- Where to see other options for polyurethane decor?
- Can I order several CPU.VRS-060 and assemble them one by one?
- Why can't I glue the parts one by one straight out of the package?
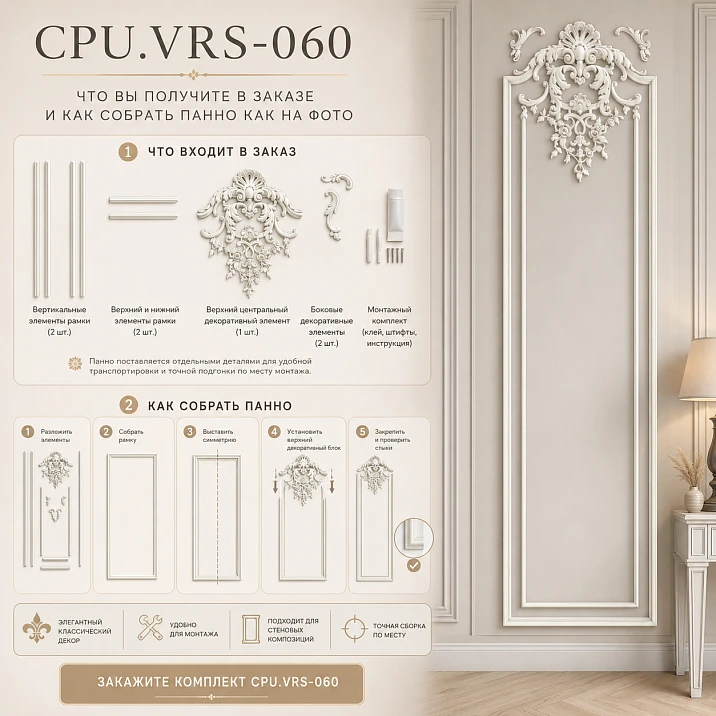
In the photo, CPU.VRS-060 looks like a finished vertical panel: the ornament is aligned along the axis, the moldings form a clear silhouette, paired parts are arranged symmetrically, joints are invisible, the surface is painted in one color. Such a shot can easily be taken literally: chose a size, placed an order, received a ready-made composition, and glued it to the wall. But the actual delivery format is different.
CPU.VRS-060 is a set of polyurethane decor from which a panel measuring 441 × 1700 × 22 mm is assembled. The elements arrive uncut and unglued. The moldings are supplied with a margin, and the parts with molding shoulders have extra length for trimming. In other words, the buyer receives not a monolithic panel, but a prepared set of parts that needs to be laid out according to the drawing, adjusted to the project size, joined, fixed to the base, and finished.
The difference is fundamental. The price of the product and the cost of the result on the wall are not the same thing. In addition to the set itself, the project may include drawing verification, surface preparation, marking, cutting, mounting compounds, temporary fixation, joint treatment, priming, painting, and the master's work. If these stages are not considered before purchase, the beautiful panel unexpectedly turns into an unplanned renovation with questions that have to be resolved after delivery.
This article will help you understand what is included in CPU.VRS-060, why the moldings are longer than the finished composition, how to evaluate the wall, who to trust with assembly, what to add to the order, and by what signs to check the result before final gluing. If you have already decided on the model, you can open the product page and buy the CPU.VRS-060 setbut first it's better to go all the way from photo to finished wall on paper.
Short answer: CPU.VRS-060 is a panel or set of parts
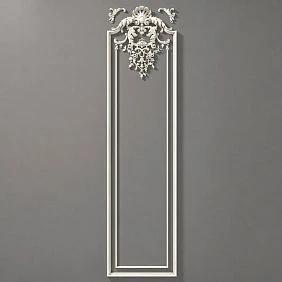
CPU.VRS-060 is a kit for creating a vertical decorative composition. It is not a single solid panel measuring 441 × 1700 × 22 mm. The specified dimensions refer to the assembled design view. The delivery includes separate polyurethane overlays and moldings that still need to be trimmed and joined.
Key facts to know before placing an order:
-
kit material — polyurethane;
-
design size of the composition — 441 × 1700 × 22 mm;
-
parts are supplied unglued;
-
factory cut is not made;
-
moldings come with extra length;
-
parts with molding shoulders have additional length for trimming;
-
an up-to-date drawing is needed for assembly;
-
glue, wall preparation, cutting, joining parts, painting and installation cannot be considered automatically included in the cost of the product;
-
before payment, you need to check the current specification of the kit and the quantity of each item.
Why doesn't the manufacturer send the panel as a single monolithic sheet? Because the composition consists of elements of different shapes and lengths. The allowance allows you to adjust the lines according to the drawing and compensate for the material that will be used when forming the joints. In addition, individual parts are easier to check, lay out and tie to the real wall than trying to adapt a ready-made large panel to the room without the possibility of adjustment.
However, the freedom of adjustment requires precision. You cannot cut moldings "by eye", start gluing with the first part, or consider the left and right elements interchangeable. First, the composition is assembled dry, then the dimensions and symmetry are checked, after which they proceed to installation.




What is confirmed for CPU.VRS-060
| Parameter | Confirmed value | What this means for the buyer |
|---|---|---|
| Article number | CPU.VRS-060 | The card, drawing and packing list are checked against the article number |
| Product type | Decorative set | The order contains several elements, not one monolithic part |
| Material | Polyurethane | For installation and finishing, choose compounds compatible with polyurethane and the base |
| Design size A × B × C | 441 × 1700 × 22 mm | This is the dimension of the assembled composition, not the size of a single part in the package |
| Delivery condition | Unassembled | After delivery, unpacking and assembly are required |
| Cut | Not performed | Lengths and connections are formed according to the drawing |
| Gluing | Not performed | Elements are connected and fixed on the object or on a prepared panel |
| Moldings | Supplied with margin | The remainder after precise trimming does not in itself indicate a configuration error |
| Elements with shoulders | Lengthened for sawing | An uncut part may be longer than the final size in the diagram |
| Drawing | Presented for the product | Before cutting and installation, work with the current version |
This table is more important than the general promise of "easy installation." The low weight of polyurethane does simplify moving and fixing parts, but it does not turn a complex symmetrical composition into a sticker. The precision of a panel is determined not only by the weight of the elements. It depends on the axis marking, the quality of the saw cut, the matching of paired parts, the preparation of the base, and the accuracy of the joints.
The phrase "decor set" also requires correct understanding. It means that the main decorative components are selected for one composition. It does not mean that glue, primer, paint, tools, a wall template, or installer services are necessarily included inside. The completeness of each order is checked against the card and specification, and consumables are formed separately for the specific project.
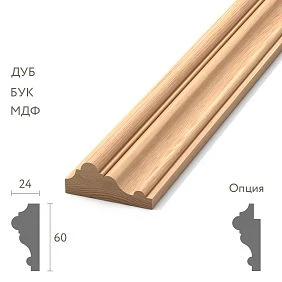
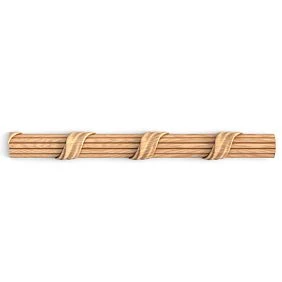
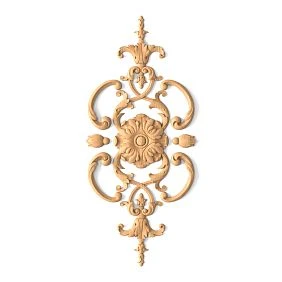
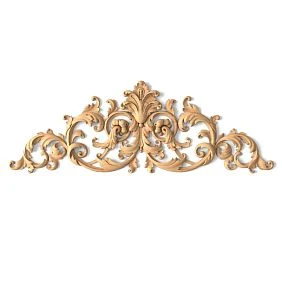
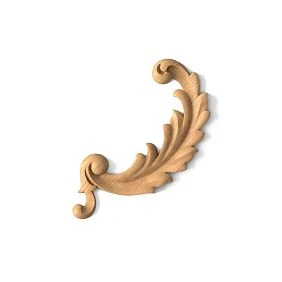
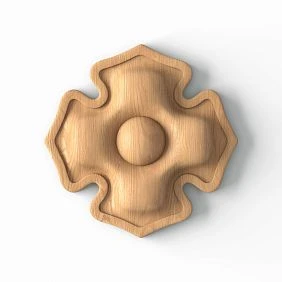
Our factory also produces:
Why a photograph of a finished interior is misleading
Interior photography shows the final stage of the project. It includes work that the buyer does not see:
-
the wall was prepared and leveled;
-
the composition axis was determined;
-
the top and bottom marks were calculated;
-
the details were laid out according to the scheme;
-
the left and right orientation was checked;
-
the moldings were trimmed;
-
the joints were formed;
-
the elements were secured;
-
the visible seams were treated;
-
primed the surface;
-
painted the decor and wall;
-
removed temporary fixation and traces of installation operations.
The image does not have to show packaging and the process, but the buyer must distinguish three different things: the product, the installation semi-finished product, and the finished interior result. CPU.VRS-060 is a product kit. After layout and cutting, it becomes a prepared composition. After installation and finishing, it becomes a panel resembling a photograph.
The problem arises when these stages are mentally compressed into one. A person sees the assembled sample and assumes that the product will arrive in exactly that form. Then they open the packaging, find separate profiles, paired overlays, and elongated sections, after which they decide that the order was assembled incorrectly. In fact, the allowance and separate delivery are provided for by the design of the kit.
It is useful to ask the seller a direct question in advance: "What do I physically receive — a solid panel or individual elements?" For CPU.VRS-060, the answer is unambiguous: separate uncut and unglued parts. The second question: "What needs to be done to get the look as in the photo?" The answer already depends on the wall, the project, the experience of the installer, and the chosen finish.
Get Consultation
What elements make up CPU.VRS-060
According to the current description of the kit, the composition includes decorative overlays and two types of moldings. Before payment, the composition must be re-checked against the current product card, drawing, and packing list: the specification must correspond exactly to your order as of the date of placement.
| Element | Quantity according to the current description | Role in the composition |
| NPU.VRS-001-1 | 1 pc. | Large central or top ornamental detail |
| NPU.VRS-001 | 1 pc. | Second major compositional element |
| NPU.VRS-008L | 1 pc. | Left paired detail |
| NPU.VRS-008R | 1 pc. | Right paired detail |
| NPU.VRS-002-4L | 2 pcs. | Left elements for symmetrical nodes |
| NPU.VRS-002-4R | 2 pcs. | Right elements for symmetrical nodes |
| MLDPU-001 | 2 pcs., total length specified as 3.2 m | Thinner lines and connecting sections |
| MLDPU-002 | 2 pcs., total length specified as 3.55 m | More pronounced molding sections |
The quantity in the table should not be taken as an eternal, unchanging norm. Before publishing the project and paying for the order, cross-reference four sources: the card, DWG, the diagram image, and the packing list. If a different article number or a different length is indicated anywhere, the discrepancy must be clarified before starting work.
Pay special attention to paired items marked L and R. The letters indicate left and right orientation. Such parts cannot be put into one box "because they are roughly the same shape" and taken in turn. During dry layout, each must take its place. If the left and right parts are mixed up, the pattern loses symmetry, and the joints may not align with the direction of the moldings.
Moldings MLDPU-001 and MLDPU-002 do not serve as random framing but connect individual panels into a vertical pattern. Therefore, the length of each section is determined by the composition diagram, not by the free space between adjacent elements after they are glued. The correct sequence is the reverse: first the complete drawing and layout, then the section dimensions, and only then the cutting.
What 441 × 1700 × 22 mm actually means
The three numbers on the card seem simple, but they cause the most errors. The buyer measures the wall section, sees 441 mm width and 1700 mm height, confirms the panel fits, and considers the problem solved. In practice, you need to check not just one rectangle, but the entire area around it.
Width 441 mm
The width of the composition shows the design transverse dimension of the assembled decor. For a narrow wall section, this is a convenient reference, but you cannot place the panel flush against door casings, a corner, a mirror, or furniture just because mathematically a few millimeters remain.
The ornament needs visual breathing room. Too close proximity to a casing creates the impression that the panel was randomly squeezed into the remaining wall space. A socket or switch that is too close disrupts symmetry. A console that is too wide may overlap the lower part of the composition. Therefore, side margins sufficient for the specific interior are added to the 441 mm.
Height 1700 mm
The height of 1700 mm makes CPU.VRS-060 a noticeable vertical composition. It works well on a high wall, in a wall section between doors, above a console, next to a mirror, in a hall or study. But this height cannot simply be measured from the floor.
First, determine the bottom point. It may depend on the baseboard, the height of the console, countertop, furniture back, or the bottom line of adjacent panels. Then check the top mark relative to the ceiling cornice, sconce, painting, ventilation grille, and other elements. If the panel is placed between architectural lines, its center should be aligned not with the geometric center of the wall in general, but with the center of a specific decorative zone.
Thickness 22 mm
Thickness indicates the maximum relief projection. This is not just a technical number. The decor will cast a shadow, noticeably protrude above the plane, and interact with side light. Near a door leaf, check the opening trajectory. Near a cabinet, check the facade extension. Near a sconce, check the light direction. In a narrow passage, check the risk of snagging.
Thickness also affects joint treatment. You cannot try to hide an erroneous step between elements with a thick layer of compound: the relief will lose clarity. It is better to achieve proper fit during dry layout than to mask a geometric error after gluing.
Design, transport, and actual dimensions are three different concepts
CPU.VRS-060 is useful to evaluate immediately in three dimension systems.
Design dimension — 441 × 1700 × 22 mm. This is what the finished composition shows according to the drawing.
Transport dimension of parts — length and width of individual elements in packaging. Moldings and elongated arms may be larger than the corresponding sections of the finished panel because they contain allowance.
Actual installation area — the wall section considering side margins, furniture, cornices, baseboards, sockets, switches, sconces, and opening doors.
If these concepts are mixed, false conclusions arise. For example, a long molding is mistaken for incorrect configuration, although it still needs to be cut. Or, conversely, it is assumed that the panel fits because the rectangle 441 × 1700 mm fits into the wall space, but they forget about the protruding trim and the socket that falls exactly into the ornament.
Before ordering, create a wall diagram with dimensions. Do not limit yourself to the width and height of the free area. Mark all permanent objects. Note where the vertical axis of the panel runs and which object will be in front of it. If the room drawing is already ready, you can order the layout of a decorative composition, to link the CPU.VRS-060 with a real architecture, not with an abstract white wall.
Why moldings are supplied with a margin
The margin is not extra goods or a production inaccuracy. It is needed to form the final lengths after checking the entire composition. During cutting, some material is inevitably lost. In addition, the actual joint is determined not only by numbers, but also by the shape of the adjacent overlay, the direction of the profile, and the accuracy of the preliminary assembly.
The buyer sometimes reasons like this: the finished height is known, so each molding should arrive already cut to size. But the panel does not consist of a single vertical profile. It has transitions, decorative nodes, paired elements, and sections with their own shoulders. If everything is cut in advance without reference to a specific layout, the slightest discrepancy turns into a noticeable gap.
The margin provides the ability to:
-
adjust the line according to the actual scheme;
-
account for the material lost during cutting;
-
check the interface with the decorative overlay;
-
correct a small error in the initial marking before final cutting;
-
select the most neat section of the profile;
-
collect repeating compositions with identical geometry.
But the reserve is not infinite. You cannot assume that from one set you can arbitrarily enlarge the panel or compensate for a serious error. The amount of available reserve is checked against the actual length of the parts and the drawing. If you need to change the height of the composition, this must be agreed upon before cutting.
Trimmings after installation do not prove that too much was ordered. Their appearance is natural. What matters is something else: the remainder should result from a thoughtful layout and precise cut, not from chaotic attempts.
Dry layout: the moment when mistakes can still be corrected
Dry layout — assembly without final glue. For CPU.VRS-060, this is not unnecessary caution, but a central stage. It is here that it becomes clear whether the actual configuration matches the diagram, whether the L/R elements are correctly distributed, whether there are enough moldings, and whether the panel reads as a single whole.
The composition can be laid out:
-
on a clean, level floor;
-
on a large work table;
-
on a temporary board;
-
on the prepared panel;
-
against the wall along the applied markings, if the parts are securely held without damage.
The surface must be flat and clean. The relief cannot be placed on construction debris, self-tapping screws, coarse dust, or abrasive particles. Even a small hard fragment can leave a mark on the front side.
Start not with the molding, which is easiest to measure, but with the axis of the composition and large supporting elements. Central overlays set the scale. Paired parts confirm symmetry. Moldings connect the nodes after their mutual position is understood.
During dry layout, check:
-
availability of all SKUs;
-
quantity of each item;
-
direction of left and right elements;
-
total width;
-
total height;
-
alignment of axes;
-
distances between repeating parts;
-
position of molding shoulders;
-
allowance for trimming;
-
visible damage;
-
quality of future joints;
-
compliance of photo and drawing.
Take a photo of the layout from above. The image will serve as a working map when transferring to the wall. Next to each paired part, you can place a temporary paper label. Inscriptions on the front surface are undesirable: the marking method should prevent damage and traces under the finish.
How to accept CPU.VRS-060 after delivery
Inspection begins before opening the packaging. Take a photo of the general view, markings, and visible damage to the container. Then open the set carefully, without using tools in a way that the blade could touch the relief.
It is better to perform the check using the following logic.
First, the article number and documents
Make sure the order specifies CPU.VRS-060. Find the current specification and drawing. If documents are received separately, save them together with photos of the packaging. For convenience, it is to download the DWG of the polyurethane decor and send the file to the designer or installer before starting the trimming.
The drawing is not needed for a formal archive. It defines the relative position of elements and helps distinguish the design length from the allowance. If the installer sees the set for the first time, send them the DWG in advance. A situation where the master gets acquainted with the diagram already on site after opening the packages increases the risk of hasty decisions.
Then the quantity
Check each item by article number, not by general appearance. Overlays from the same collection may look similar in pattern. Record the actual quantity of NPU.VRS-001-1, NPU.VRS-001, pairs of NPU.VRS-008L/R, NPU.VRS-002-4L/R, and moldings MLDPU-001/002.
It is useful to create a simple list: article number, expected quantity, received quantity, condition, note. Such a table is especially needed if several CPU.VRS-060 are ordered. Do not mix parts from different sets before checking. First confirm the completeness of each set, then decide how to organize the serial layout.
Separately — left and right orientation
L and R must form pairs. Arrange them mirror-wise according to the scheme. If a left part arrives again instead of a right part, the problem may only become noticeable during assembly. Therefore, checking by quantity "eight overlays in place" is insufficient.
Do not determine the side from memory or a random photo angle. Orientation is linked to the drawing. Temporary markings must be clear to all participants: designer, cutting master, installer, and painter. If the set moves between the workshop and the site, labels are preserved until final installation.
After that — the state of the relief
Inspect protruding areas, thin edges, and ends of moldings. A small technological surface that will be removed during processing and damage to the face relief are not the same thing. Record all doubts before cutting and painting.
Look at the parts under side light. It better shows chips, dents, bends, and dirt. Do not immediately try to sand a questionable area: first determine whether it belongs to the face zone and how it should look after assembly.
Finally — the length of profiles
Measure the moldings, but do not cut them. Compare the length with the specified footage and the future scheme. Excess is expected; shortage requires clarification.
Profiles are stored on a flat support. Do not lean long parts against a wall so that they bend under their own weight for a long time. Protect them from impacts, heat, and construction dirt before installation.
If a discrepancy is found, do not try to "assemble it as it goes." After trimming, it is harder to determine the original cause. First, stop work, preserve the packaging, and record the problem.
Will CPU.VRS-060 fit your wall
A beautiful panel may not fit not because it is too large or too small. The reason often lies in the wall's architecture. Before ordering, it is useful to not only take measurements but also create a frontal sketch with real objects around.
Narrow wall space between doors
A width of 441 mm makes the composition a candidate for narrow vertical zones. But check the trims, door opening directions, and symmetry of free spaces. If one door is located closer, the panel may appear shifted even with precise geometric installation.
Measure the wall space in several places. Walls and openings are not always parallel. Indicate on the sketch the actual width of the trims and the protrusion of handles. If the door opens towards the panel, check not only the door leaf but also objects that may be carried through the opening.
Wall above the console
CPU.VRS-060 reads well as a vertical axis above the console. First, determine the width of the furniture and the height of the tabletop. The lower part of the decor should not accidentally "sink" behind the object, and the upper part should not hit the cornice. The center of the panel is usually aligned with the center of the console, but the final decision depends on the entire wall.
If there are lamps, vases, or tall objects on the console, draw their approximate silhouette on the sketch. The panel should remain readable in actual use, not just in an empty visualization.
Area next to the mirror
The panel and mirror can form a pair if they match in scale and height lines. Too close placement creates competition between two framed objects. Leave a meaningful gap between them and check the reflection: the mirror can visually double the ornament.
Pay special attention to the side shadow. The mirror frame and a relief with a thickness of 22 mm can produce lines of different depths. This contrast can be expressive, but it is better to see it on a mockup before purchase.
Space between sconces
Placement between two lights emphasizes the relief. However, light reveals any misalignments and uneven joints. Mark on the diagram not only the sconce bodies but also the direction of the light flow. Check that the molding does not intersect with the cable outlet.
Lights should not overlap large panels. If the sconce axes are already set, the panel is tied to them. If the electrical work has not been done yet, first approve the overall composition, then place the outlets.
High hall or stairwell
A vertical format suits a tall wall, but installation becomes more complicated due to access. The budget includes scaffolding, lifting, safe fastening, and working at height. Dry layout is easier to do on the floor, and then transfer the already marked system to the wall.
On the stairs, the panel is perceived in motion and from different heights. The geometric center of the wall may not coincide with the main viewpoint. Take photos from the lower and upper landings and overlay the composition outline.
Furniture facade or door
Individual elements of the collection can be used on furniture and doors, but CPU.VRS-060 as a complete set is designed for a large composition. Before transferring to a moving leaf, you need to check the weight, thickness, opening, hinge position, gaps, and finishing possibilities. You cannot automatically reduce the wall scheme to fit the door leaf without a new project.
If the complete set does not fit or looks too busy, it is useful to look at vertical stucco decor and assemble a more compact solution from one overlay or another composition.
Wall marking: not just drawing a vertical line
Marking begins with understanding the compositional center. A spirit level helps maintain verticality, but it doesn't indicate where the panel should be relative to furniture and openings. This task is solved before the tool.
On the wall, mark:
-
axis CPU.VRS-060;
-
upper boundary;
-
lower boundary;
-
side limits;
-
position of large overlays;
-
control points of paired elements;
-
molding zones;
-
sockets and switches;
-
sconce outlets;
-
edge of the baseboard;
-
bottom line of the cornice;
-
door trajectory;
-
furniture outline.
Markings should be visible to the installer but not interfere with gluing and subsequent finishing. Do not apply heavy markers where the line may show through the paint. Do not rely on a single long measurement from the floor: the floor and ceiling may have deviations, and the decorative composition should appear level relative to the key interior lines.
For repeating panels, make a template of control points. This is especially useful in a hallway, hotel, restaurant, or large lobby. However, even with a template, check each wall separately. A socket, junction, baseboard, or local unevenness may differ.
Good markings remain clear even if the craftsman returns to work the next day. Label control lines, record distances in a working diagram, and save photos. Do not assume that the position of each detail can be restored from the overall silhouette.
Who should assemble the panel: the owner, the finisher, or the stucco installer
Self-assembly is possible, but an honest assessment of skills is more important than the desire to save money at one stage. CPU.VRS-060 requires reading the drawing, working with paired parts, precise cutting, vertical marking, choosing the mounting compound, and careful joint treatment.
Self-installation is justified when
-
you have worked with moldings before;
-
you can read drawings and transfer dimensions;
-
you can make a clean profile cut;
-
you understand how to prepare a specific base;
-
you can assemble symmetrical compositions;
-
you are ready to do a dry layout first;
-
you have a level work surface;
-
you understand that an incorrect cut may require replacing the part.
Independent work should not start with the words "let's try it on the wall." First, a safe training stage is needed. Test the tool on a scrap of compatible material, practice the joint, and do a test painting.
A regular finisher is suitable when
A master confidently works with decorative profiles, knows the properties of polyurethane, and can finish joints for painting. The mere fact of experience in wall puttying does not prove the ability to assemble ornamental panels. Show the contractor the drawing and ask how they plan to perform layout, marking, and symmetry control.
The answer "we'll glue everything first, then fix it" should be alarming. For CPU.VRS-060, the main geometric decisions are made before the glue.
A stucco installer is needed when
-
the panel is installed in a prominent, formal location;
-
the cuts are complex and repetitive;
-
the wall is high;
-
the project includes several identical compositions;
-
the finish emphasizes the relief;
-
nearby are lights that will reveal unevenness;
-
a guaranteed clean interface of elements is required.
Before signing a contract, it is useful to look not only at general photos of the renovations, but also at close-ups of the joints on the completed stucco. Ask whether the cost includes dry layout, marking, joint treatment, and preparation for painting.
Pre-assembly on a panel
Sometimes it is more convenient to assemble the composition on a prepared base and then mount it as a larger block. But this scheme cannot be considered universal. The material of the panel, its weight, rigidity, method of attachment to the wall, and behavior of the finish must be checked. The decision is made by the designer or the master responsible for the entire assembly.
The main criterion is simple: a person must be able not just to glue lightweight parts, but to obtain a precise vertical system from several unmitered elements.
Miter cut: why the phrase 'cut at 45 degrees' is dangerous here
The universal advice 'all moldings are cut at 45 degrees' is not applicable to any point of CPU.VRS-060. The angle and shape of the joint depend on the drawing, profile, and adjacent decorative part. Some sections may be joined differently. It is impossible to assign the same miter cut to all elements without a diagram.
Correct logic:
-
perform a full dry layout;
-
check the central axis;
-
set the design distances between large overlays;
-
determine the actual length of each molding section;
-
mark the direction of the cut;
-
allow for fine adjustment;
-
make a trial joint;
-
check the joint in the overall pattern;
-
only then move to the next section;
Cutting the entire set at once according to the size list is risky. If the first base mark is wrong, the error will repeat. It is better to work from control points and regularly reassemble the composition.
The face side of the profile must be protected. Burrs, chips, and crushed relief are harder to fix than a small technological mark on an invisible area. The tool is selected based on the shape and material, not on the principle of "this already cut the baseboard."
The cut is made considering which part will remain in the composition. Before each cut, mark the waste side. This simple habit protects against the mistake of placing the correct size on the right part but cutting the needed section instead of the excess.
The base determines half the result
Even a precisely assembled panel will not look neat on an unprepared wall. The base is checked for four parameters: strength, evenness, cleanliness, and compatibility with the mounting compound.
Strength
Weak paint, peeling putty, or dusty plaster can separate along with the decor. The adhesive does not hold "to the wall in general" but to the specific top layer. If it is not strong, a powerful mounting compound does not save the joint.
Check questionable areas before marking. Local repairs after panel installation are more difficult: you have to protect the relief and restore the finish around it.
Evenness
A small overlap sometimes covers a local deviation. A tall composition 1700 mm long emphasizes a wave. The molding may touch at two points and gap in the middle. Attempting to fill a large gap with glue changes the fit and complicates the alignment of adjacent elements.
Apply a long straight batten to the installation area. An unevenness invisible on an empty wall becomes obvious next to the straight line of the molding.
Cleanliness
Dust, grease, and residues of unstable finishes reduce adhesion. But the cleaning method depends on the surface. You cannot soak the base, sand the decorative coating, or apply random primer without checking.
After construction work, let the dust settle, then clean the wall using a method that does not damage the coating. Do not transfer dirt from the floor and packaging to the mounting surface.
Compatibility
The mounting compound must be suitable for both polyurethane and the wall. Concrete, plaster, painted surfaces, MDF panels, wood, and board materials require different assessments. Therefore, the word "universal" on the packaging does not eliminate the need to read the instructions.
Before starting work, it is useful to study the recommendations for installation and finishing, and coordinate the specific technology with the manufacturer of the compound and the master responsible for the project.
The adhesive should not be a random purchase at the checkout
The question "is the adhesive included in CPU.VRS-060" should be asked before payment. If separate inclusion is not confirmed, mounting materials are formed as a separate item. Their quantity depends on the base, application method, contact area, and the contractor's technology.
In the catalog you can select glue and finishing materials, but the choice should not be based solely on the product name. First, determine:
-
wall material;
-
the condition of the coating;
-
the size and shape of the parts;
-
the need for temporary fixation;
-
the time available for adjusting the position;
-
the conditions in the room;
-
the method of subsequent painting;
-
requirements for visible joints.
Product card TYTAN Prof. Classic Fix 100 ml may be useful as one of the options to consider, but a specific composition cannot be declared the only correct one for any wall. Check the instructions, permissible substrates, and application technology.
Detailed material on how to choose mounting adhesive for decor, helps distinguish the properties of the composition from the advertising word "universal". For CPU.VRS-060 this is especially important: the panel consists of several elements, and an error in adhesion repeats along the entire height.
Before purchasing the composition, calculate not only the volume, but also the number of package openings, working time, and installation sequence. If the adhesive sets quickly, the installer must confidently align the parts according to the markings. If the position can be adjusted longer, temporary fixation should be provided.
How to treat joints without losing the relief
After installation, individual parts should be perceived as a single composition. But the desire to completely "smear everything" can ruin the panel. A thick layer of material smooths out edges, covers fine ornamentation, and creates noticeable drips under side lighting.
First, achieve precise geometry. The better the joint is fitted, the less final correction is needed. Then use compatible materials for joints and finishing. The specific system is selected considering polyurethane, mounting composition, and future paint.
Control order:
-
ensure the elements are fixed in the design position;
-
check for the absence of a step between adjacent parts;
-
remove excess mounting compound before complete hardening, if the technology allows;
-
fill only the necessary areas;
-
preserve the relief lines;
-
after drying, evaluate the joint under side light;
-
perform a test priming;
-
check if the boundary has appeared after the first coat.
The finish coating unifies elements but does not fix incorrect assembly. If the axis is shifted, paint will not restore symmetry. If the profile is cut short, thick filling will remain visible. If L/R parts are swapped, monochrome painting will not restore the ornament direction.
Special attention is paid to the transition from a smooth molding to a relief overlay. Here it is easy to create a thickening that looks like an accidental bulge. The joint is checked not only by touch but also by light: a directed lamp shows
Light as part of the finish
Side light enhances volume. It also reveals wall unevenness and rough joints. Before painting, turn on sconces and main lighting, look at the panel in the morning and evening. A surface that is smooth under frontal light may look different at a sharp angle.
Full budget: how much does a finished panel cost, not just the product
The customer sees the price of CPU.VRS-060 in the product card, but the total project cost consists of several parts. It is convenient to divide the budget into mandatory, conditional, and organizational expenses.
The kit itself
This is the cost of the set of polyurethane parts according to the current product card. It is not equal to the cost of the installed and painted panel. The price may change, so it is checked immediately before ordering, not taken from an old article or saved image.
Delivery and lifting
Terms depend on the order and address. For long moldings, it is important to preserve geometry during transportation and handling. The cost and method of delivery are checked when placing the order.
Storage space is cleared in advance at the site. The kit should not lie in a passage for several days, where profiles could be bumped by tools or furniture.
Wall preparation
The budget may include removal of weak coating, local leveling, priming, and restoration of finishes around the installation area. The scope is determined after inspecting the wall.
If the renovation is already complete, preparation requires protecting the floor, furniture, and adjacent surfaces. This is also work, not a free addition to gluing the decor.
Layout and project
A simple single pier can be marked out according to the drawing. For multiple panels, a staircase, or a wall with furniture, professional layout is useful.
Design work is especially important when the CPU.VRS-060 is combined with cornices, baseboards, mirrors, and other frames. Without an overall scheme, each element may be beautiful on its own, but the wall may look disjointed.
Cutting and assembly
This is a separate job. The higher the requirements for symmetry and joints, the more time preparation takes. A series of identical panels requires a template and repeatability control.
Check whether the master's price includes dry layout. Some quotes only account for time on the wall, although most precision is achieved on the work surface before installation.
Installation materials
Glue, joint compound, finishing materials, primer, and paint should not be considered included without confirmation.
Consumables are purchased with a reasonable reserve, but not at random. Excess complex tinted coating may be useful for repairs, while unsuitable glue will remain a waste.
Painting
The price depends on the application method, number of layers, color, gloss, and decorative effects. Patina or complex multi-color finishes increase labor intensity.
If the wall is already painted, you need to decide whether only the decor is painted or the entire surface is redone. Local touch-ups may differ in shade and texture.
Work at height
A stairwell, high hall, or upper part of a wall may require scaffolding and additional safety measures. Such work cannot be calculated as standard floor installation.
Control sample
When ordering several sets, it is reasonable to fully assemble and paint one composition, then repeat the approved technology. This increases preparatory costs but reduces the risk of reworking the entire series.
The budget formula looks like this:
CPU.VRS-060 + delivery + base preparation + design layout + cutting + installation materials + assembly + joint treatment + priming + painting + master's work + access to the installation area.
It is impossible to name a universal final amount without a site. But you can include all expense items in advance and compare master proposals based on the same scope of work.
What to buy together with CPU.VRS-060
The kit should not be sent to the site alone if there is no drawing, installation materials, and approved finishing. At the same time, there is no need to buy everything. The basket composition is formed based on the wall and installation method.
| What to add | Purpose | When especially needed | What to check |
| Current DWG | Layout, dimensions and trimming | Always before cutting | File version and article match |
| Mounting compound | Fastening of parts | With any installation method | Compatibility with polyurethane and wall |
| Material for connections | Processing visible joints | When elements form a single line | Coverage compatibility and relief preservation |
| Primer | Preparation for painting | If provided by the finishing system | Compatibility with wall, decor, and paint |
| Paint | Unified finish | For most interior scenarios | Color, gloss, application method |
| Temporary fixing agents | Holding until strength is achieved | For vertical installation | To avoid damaging the front surface |
| Template or printout | Transfer of control points | For a series of panels | Scale and alignment to the wall |
| Layout service | Connection of panels with furniture and openings | For a complex wall | Completeness of initial dimensions |
If you are just forming a concept and haven't decided yet whether you need CPU.VRS-060, you can Buy Polyurethane Molded Decoration after comparing kits, individual overlays, and moldings. For a classic composition, it is useful to study the stucco decor of the "Versailles" collection and check how the main kit combines with adjacent elements.
A related purchase should answer a specific question. Glue is needed for installation. A drawing is for layout. Material for joints is for a unified look. Another overlay is needed only when it is included in the project, not because it belongs to the same collection.
CPU.VRS-060 and C.VRS-060: the same pattern does not make the products identical
STAVROS has a wooden kit C.VRS-060 with a similar compositional logic and the same main dimension. But the polyurethane CPU.VRS-060 and the wooden C.VRS-060 cannot be considered the same model in different colors.
The material affects weight, processing, finish, joints, fastening, and perception of relief. Wood has its own texture and requires a different approach to connections. Polyurethane is chosen for a stucco wall solution that, after painting, can be perceived as part of the wall. The wooden option is suitable for projects where the material and carving character should be read differently.
The comparison should be built around questions:
-
what material is already present in the interior;
-
will the decor be painted in the wall color;
-
Is visible wood texture needed;
-
Who performs trimming and installation;
-
What base is prepared;
-
How are adjacent panels and furniture styled;
-
Is a single material with other elements needed.
If the project requires wood, you can check C.VRS-060 in beech or oakBut this article focuses on the polyurethane CPU.VRS-060 and does not replace a separate technological comparison of materials.
| Criterion | CPU.VRS-060 | C.VRS-060 |
| Main material | Polyurethane | Beech or oak |
| Perception after finishing | May blend with the wall like a stucco relief | Can emphasize the wooden character and texture |
| Trimming | Performed according to a scheme considering polyurethane elements | Requires a technology suitable for wood |
| Selection of mounting materials | For polyurethane and base | For wood and base |
| The buyer's main question | How to assemble individual elements into a single panel | How to connect wooden decor with furniture and finishes |
How not to confuse CPU.VRS-060 with a finished wall panel
A finished wall panel is usually perceived as a large solid or pre-assembled module. CPU.VRS-060 is a set of decorative elements used to create panels. The final result may resemble a solid panel, but the installation method is different.
Verification features:
-
the name indicates a decorative set;
-
the composition lists several SKUs;
-
there are separate L/R elements;
-
there are moldings with length specified;
-
delivery without cutting is specified;
-
delivery without gluing is specified;
-
moldings have a margin;
-
there is an assembly drawing.
A terminology error affects expectations. The customer tells the craftsman "a finished panel will be delivered," the craftsman plans only gluing, but on site a set of parts is found. It becomes necessary to urgently find a place for layout, a tool for cutting, and time for finishing joints.
The correct wording for the estimate: "a set of individual polyurethane elements for assembling the vertical panel CPU.VRS-060." It immediately shows that the work includes more than one installation action.
To understand the types of wall decor, you can read how panels and moldings made of polyurethane are arranged. This will help distinguish a complete composition from a single overlay, frame, and large panel.
Practical scenarios: how order preparation changes
One panel above a console in an apartment
Accurate dimensions of the wall, furniture, and baseboard are needed. The buyer can perform the visual layout independently, but it is better to entrust the cutting to a person with experience working with profiles. The cart includes CPU.VRS-060, suitable mounting materials, and a finishing system. Before ordering, check whether the console will overlap the lower ornament.
If the console has not been purchased yet, several possible heights are marked on the wall. This makes it clear which item better supports the vertical composition rather than accidentally dividing it in half.
Two symmetrical panels on either side of a mirror
The main task is repeatability. Both sets must be laid out simultaneously to compare details and lengths. Marking is done from the mirror axis. You cannot assemble the first side completely and "repeat by eye" the second. A template and control marks are mandatory.
Check that light falls equally on both sides. Uneven lighting can create the impression that one set protrudes more than the other.
Series of panels in a corridor or hotel
Specifications, package labeling, a unified cutting scheme, and an approved sample are important. One panel is assembled completely, checked under working lighting, and only after approval are the rest started. The estimate includes sorting of sets and storage of long profiles.
Each composition is assigned a wall or room number. Cut parts are not mixed between sets, even if they appear identical.
Panel on a stairwell
In addition to the composition, the issue of access is decided. The work platform must allow holding long parts along the axis. Marking is checked from several levels because a person sees the panel while moving up and down. Self-installation without suitable scaffolding creates a risk for both the craftsman and the decor.
Panel in the bedroom
Here, a calm monochrome finish is often chosen. It is necessary to check that part of the relief does not end up behind the headboard, nightstand, or tall lamp. If the panel becomes the background of the bed, its axis is tied to the furniture, not just the wall.
Panel in the study
CPU.VRS-060 can be placed next to a desk, bookcase, or fireplace. The dark color enhances shadows and requires careful joints. Light from table and wall lamps is checked before finishing.
Panel in a restaurant or salon
Consider foot traffic, regular cleaning, and the possibility of local repair of the finish. It is better not to place the lower part in an area of constant impact from chairs or carts. Keep the diagram, leftover finishing materials, and kit data for subsequent maintenance.
When CPU.VRS-060 is suitable and when it is better to choose another solution
CPU.VRS-060 is suitable if you want a narrow, tall composition with pronounced classical symmetry and are ready to go through the full assembly process. The kit is appropriate on a wall where there is enough space for the 441 × 1700 mm dimensions and side margins. It is convenient when you need a ready-made set of matching overlays and moldings, rather than selecting each element independently.
The product is especially interesting:
-
for classic and neoclassical interiors;
-
for an accent wall section;
-
for the wall above a console;
-
for paired installation;
-
for a hall, study, or bedroom;
-
for a project where the decor is painted together with the wall;
-
for a client who is willing to work from a drawing;
-
for professional finishing with invisible joints.
In such projects, the kit helps avoid searching for individual overlays and moldings one by one. The main parts are already assembled into a common decorative concept. The buyer only needs to check the actual composition, connect the panel to the wall, and choose the installation technology.
It is better to choose another option if:
-
a ready-made solid module without cutting is needed;
-
there is no space for dry laying;
-
the wall is not prepared and renovation is not planned;
-
the project does not allow painting work;
-
the pier is too narrow for the composition and side margins;
-
sockets or doors intersect the main pattern;
-
a minimalist single element is required;
-
the contractor is not ready to work with the drawing;
-
the budget only covers the price of the card;
-
the customer does not want to see any installation stages after delivery.
Rejecting a specific set does not mean rejecting stucco. Sometimes instead of CPU.VRS-060 it is better to choose one vertical overlay, a simple frame made of moldings, or a composition of a smaller height. The right product is not the one that looks more impressive separately, but the one that can be convincingly and technically correctly integrated into your wall.
Mistakes that turn a beautiful set into an expensive rework
Expecting a solid panel
This is the main mistake. CPU.VRS-060 comes as separate parts. The installation plan must include assembly, cutting, joining, and finishing. If the craftsman only included gluing the finished element in the estimate, the calculation is incomplete.
Order from photo without drawing
The photo shows the design but does not provide dimensions for each section or the sequence of trimming. It does not allow precise determination of the molding arm positions. An up-to-date DWG is needed for cutting.
Cannot verify the specification
Even if the total number of parts seems correct, a specific left or right position may be missing. Check the article numbers, not just the item count in the package.
Consider the molding allowance as waste
Extra length is needed for adjustment. It cannot be cut before layout. First, determine the design section, joint direction, and cut line.
Start by gluing the central part without an overall scheme
The center may be correctly positioned locally, but the entire composition may not fit between the cornice and baseboard. The first glued part must be confirmed by full marking.
Cut all profiles based on the first single measurement
The error in the base mark will repeat on other sections. After each key cut, reassemble the composition and compare with the drawing.
Confusing L and R
Paired elements have a direction. After gluing, the error becomes part of the wall. Marking is preserved from acceptance to installation.
Do not account for the 22 mm thickness
A door, furniture facade, or light fixture may conflict with the protruding relief. Check not only the frontal plane but also the lateral projection.
Choose glue only based on the word "universal"
The composition must be suitable for the wall and polyurethane. Check the instructions and the condition of the base. The name does not replace technological compatibility.
Glue onto weak paint
The decor is held together with the top layer of the wall. If the layer peels off, the connection is unreliable. Base preparation is done before marking and installation.
Fill large gaps with finishing compound
This way, geometry and relief are lost. It is better to redo the fitting before finishing. The material for joints is intended for neat finishing, not for compensating for an incorrect size.
Do not include painting in the estimate
Unassembled elements after installation require a unified finish, unless a different type is specified in the project. Without this, the panel may look like a set of glued parts.
Order several sets without a sample
A serial error is more expensive than a single one. First, approve one panel: dimensions, cut, joints, color, and appearance under working lighting.
Do not photograph the layout
After transferring parts to the wall, it is easy to forget the position of similar elements. Photography and marking reduce the risk of confusion.
Leave installation to 'any finisher'
Experience in ordinary repairs does not always mean the ability to assemble a symmetrical stucco composition. Check experience with moldings and ornamental joints.
How to order CPU.VRS-060 from STAVROS without unnecessary assumptions
Open the product card and check the article, size, material, current price, available conditions, and current specification. Then download the drawing. Do not place an order based only on an interior photo.
Before contacting, prepare:
-
wall size;
-
photo of the pier;
-
ceiling height;
-
baseboard and cornice dimensions;
-
position of sockets and switches;
-
dimensions of nearby furniture;
-
number of panels;
-
base material;
-
planned color;
-
installer information;
-
question about the composition and footage of moldings;
-
question about installation materials.
The request formulation can be as follows:
A CPU.VRS-060 kit is required for a wall measuring ___ × ___ mm. Please confirm the current composition, quantity of each overlay, footage of MLDPU-001 and MLDPU-002, the design size of the finished composition, availability of allowance for trimming, and the current DWG. The wall base is ___. Installation will be performed by ___. Planned finishing is ___. Please clarify which installation and finishing materials are not included in the kit and must be ordered separately.
Such a request is not overloaded with design reasoning, but contains information that affects the purchase. The manager sees not an abstract interest in stucco, but a prepared project.
If you are still choosing between several kits, compare not only the price and photo. Evaluate the size, actual configuration, number of paired parts, need for miter cutting, and the amount of work after delivery. One set may cost less but require more complex installation; another may better suit the wall and reduce the risk of rework.
Control check before the first cut
Before cutting, answer the questions:
-
are all items found;
-
does the quantity match;
-
Are the L/R parts laid out correctly?
-
Is the current diagram open?
-
Is the design size confirmed?
-
Is there enough space on the wall?
-
Are the baseboard and cornice accounted for?
-
Does the socket intersect the panel?
-
Is the door opening checked?
-
Is the vertical axis marked?
-
Is there a margin on each profile?
-
Is the shape of each joint clear?
-
is the right tool selected;
-
is the base prepared;
-
is the installation compound checked;
-
is the color approved;
-
is there space for dry layout;
-
is the correct composition photographed;
-
is the installation sequence determined;
-
is the finishing included in the budget.
If at least one question is unanswered, it's better to postpone the cut. A pause before cutting costs almost nothing. Replacing an erroneously shortened part costs time and money.
For several identical panels, add five more points: is the reference sample approved, are the sets numbered, is the template prepared, is the light on the walls the same, and is the paint formula preserved. A series requires not only the precision of each composition but also the repeatability of the result.
Frequently asked questions about CPU.VRS-060
Does CPU.VRS-060 come as a finished panel?
No. The kit is supplied as separate uncut and unglued elements. The finished panel is formed after layout, trimming, installation, and finishing.
What does the size 441 × 1700 × 22 mm mean?
This is the design dimension of the assembled composition: width, height, and maximum thickness. Individual uncut elements may have different shipping dimensions.
Why are the moldings longer than on the finished panel?
They are supplied with extra length for precise fitting and mitering. Leftover material after installation is expected and is not automatically a sign of incorrect configuration.
Is glue included with CPU.VRS-060?
Glue cannot be considered included without direct confirmation of the configuration. Installation materials are selected separately for polyurethane and the specific substrate, unless otherwise agreed in the order.
Can the kit be installed independently?
Yes, if you have experience reading blueprints, cutting profiles, marking, and finishing joints. For your first complex panel, it's wise to hire a master or at least delegate operations where errors are irreversible.
Is a dry layout mandatory?
Yes. It allows you to check the quantity, L/R orientation, overall geometry, and molding allowance before irreversible cutting and gluing.
Can the panel height be changed?
The possibility of change depends on the drawing, profile stock, and ornament proportions. You cannot simply increase distances between parts without a design check: the composition may lose its balanced proportions.
How do I know if CPU.VRS-060 fits a narrow wall space?
Compare not only the width of 441 mm, but also side margins, trims, rosettes, door openings, and the visual axis of the wall. Create a front elevation sketch with adjacent objects.
Does polyurethane decor need painting?
The finish depends on the project. To make individual elements appear as a unified composition, general preparation and painting are usually planned. The specific system is agreed upon in advance.
Can the panel be glued to a painted wall?
The possibility depends on the durability of the paint and the compatibility of the mounting compound. If the top layer is peeling or chalking, it must be prepared before installation.
What to do if there are leftover pieces?
Keep small leftovers until the work is complete. They may be useful for a test coat, tool adjustment, or checking the finishing compound. The fact that there is leftover material is normal.
What is more important — a photo or a DWG?
A photo is useful for the external appearance, while an up-to-date drawing is needed for dimensions and assembly. Parts cannot be cut based on a photo.
How does CPU.VRS-060 differ from C.VRS-060?
The main difference is the material. CPU.VRS-060 is made of polyurethane, while C.VRS-060 is a wooden set made of beech or oak. Installation, processing, and finishing require different approaches.
Can CPU.VRS-060 be used on a door?
The full set is designed for a large composition. For a door, you need to separately check the size, thickness, weight, opening, and fastening. The wall layout cannot be automatically transferred.
Who should perform the miter cut?
A person who can read a drawing, work with a profile, and be responsible for the accuracy of the entire composition. This could be an experienced finisher or stucco installer.
How to check the kit upon receipt?
Photograph the packaging, check parts by article numbers and quantity, separately check L/R pairs, relief condition, moldings, and the presence of an up-to-date diagram.
What to include in the full budget?
Cost of CPU.VRS-060, delivery, wall preparation, layout, cutting, installation materials, assembly, joint treatment, priming, painting, and the master's work.
Where to see other options for polyurethane decor?
In the catalog of polyurethane products and the vertical overlays section. This is useful if the full kit is too large or busy for a specific wall section.
Can I order several CPU.VRS-060 and assemble them one by one?
You can, but it's better to fully approve one sample first. After checking geometry, joints, and color, the other compositions are assembled using a single template.
Why can't you glue the parts one by one straight out of the package?
Because a single part does not show the overall size and symmetry. An error in the first position will shift the moldings and paired elements, and will only be discovered closer to the end of installation.
Conclusion: a beautiful panel starts not with glue, but with the right expectation
CPU.VRS-060 attracts with its finished look. In the photo, it is a sleek vertical composition where each overlay is in its place, the moldings are precisely joined, and the color unifies the details with the wall. But you need to buy not a photo of the result, but a kit to create it.
The right expectation sounds like this: the order will contain individual polyurethane elements that need to be checked, laid out, trimmed, joined, secured, and finished. The size 441 × 1700 × 22 mm refers to the assembled panel. A margin of moldings is needed for fitting. L/R parts require precise orientation. Glue, craftsman work, and painting are accounted for separately if their inclusion is not confirmed.
This format is not a drawback. On the contrary, it allows you to get a complete composition from pre-matched elements and fit it to the drawing. The drawback only becomes a purchase without understanding the process.
STAVROS offers CPU.VRS-060 as part of a polyurethane decor system, where the product can be linked to drawings, the Versailles collection, installation materials, and a project layout. Before ordering, open the product page, confirm the contents, download the DWG, measure the wall, and decide who is responsible for assembly. Then the path from the box of parts to the panel as in the photo will be predictable, and the result will be assembled not by luck, but according to a clear plan.