Article Contents:
- Short answer: what to check before ordering L-096.1
- What the L-096.1 baluster is
- Why a clear name matters more than a beautiful metaphor
- Total height of 1000 mm and mounting height are not the same thing
- The L-096.1 drawing should be studied before calculating quantity
- Straight balustrade: where errors are especially visible
- Inclined stair flight: why one height is not enough
- When a baluster can be adjusted, and when the assembly needs to be changed
- Fitting of the L-096.1 itself
- Adjustment of the surrounding structure
- Oak
- Oak
- Need to design a long balustrade for the double-height space
- A visually light railing is required
- Need a finish under enamel
- Visible array texture required
- Buying only from a photo
- Treating 1000 mm as the finished fence height
- Trimming the ornament without checking
- Using calculations based on a narrow baluster
- Starting installation from one edge
- Leaving the remainder in the outermost interval
- Deploy adjacent elements with different sides
- Mix beech and oak without a project
- Order part Standard, part Prestige
- Drill the handrail until products are obtained
- Do not provide a reserve
- What is the size of L-096.1?
- Can 1000 mm be considered a ready installation height?
- Can L-096.1 be trimmed in height?
- Is L-096.1 suitable for an inclined flight?
- Is it suitable for a horizontal landing?
- Why is the 170 mm width so important?
- How to calculate the number of balusters?
- Can one L-096.1 be installed on each step?
- Do I need to make a 1:1 template?
- Which is better under enamel: beech or oak?
- When to choose oak?
- What does Standard or Prestige mean?
- Do I need to order all balusters at once?
- Do I need a spare baluster?
- Can L-096.1 be combined with simple posts?
- How to arrange the transition from the flight to the landing?
- Can adjacent balusters be installed with different sides facing out?
- What to do if the required cut line passes through the ornament?
- Where can I compare L-096.1 with other models?
- Where can I buy L-096.1?
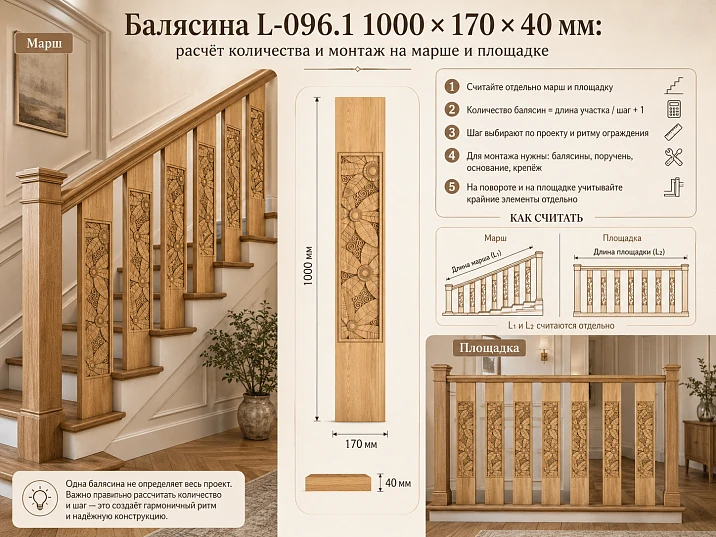
A flat carved baluster may look the same in a photo, but behave completely differently on a straight balustrade and an inclined stair flight. On a landing, its upper and lower edges remain horizontal, while on a flight, the handrail rises at an angle. This changes the visible height of the part, the position of the pattern relative to the steps, and the possibility of adjustment. If you start with cutting rather than with a drawing and layout, you can damage the ornament, get elements that look different, and discover the error only after the entire batch has been manufactured.
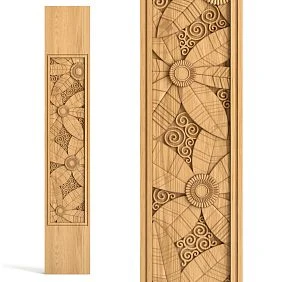
The L-096.1 baluster, sized 1000 × 170 × 40 mm, belongs to flat wooden models with a carved art-deco pattern. It is chosen not only as a separate decorative post. The buyer needs to understand in advance whether the 170 mm width is suitable for a specific railing, where the mounting zones are located, whether the length can be adjusted, what spacing will result between elements, and how to connect an inclined flight with a horizontal landing. Only after this does it make sense to determine the quantity, material, and surface preparation level.
In the card, you can view the flat baluster L-096.1 1000 × 170 × 40 mm, choose beech or oak and check the available Standard and Prestige options. However, the product card does not replace a staircase project. The total height of the product does not automatically equal the final mounting height, and the same item cannot be cut identically for a flight and a landing without verification.
Short answer: what to check before ordering L-096.1
Before purchasing L-096.1, it is necessary to perform not just one measurement, but a full layout of the railing. First, obtain the current drawing of the product and find on it the upper and lower zones that may be involved in mounting. Then determine the actual distance between the base and the handrail on a straight section, the angle of the flight, the thickness of the handrail support strip, the depth of seating, and the position of the carved pattern. After that, build a full-size template and repeat it across the entire section with the intended spacing.
The main rule is simple: the decorative part cannot be cut at random. The admissibility of changing the length is determined by the drawing and the node design, not by a photograph. If the required mounting height requires the cut line to enter the ornament, the surrounding structure is adjusted, another model is chosen, or a non-standard solution is agreed upon. A carved baluster should not turn into a randomly shortened blank.
The quantity calculation also does not start with dividing the section length by the width of one baluster. The formula includes the clear length between posts, the width of L-096.1, the design clearance, the center-to-center spacing, the end intervals, and transitions between sections. For a flight, the position of each post relative to the steps and the inclined handrail is additionally checked. A universal safe clearance for all stairs is not provided here: it is determined by the designer and the requirements applicable to the object.




What is the L-096.1 baluster
L-096.1 is a flat wooden baluster for decorative stair railings. Its shape differs from a round turned post: with a width of 170 mm, the product is perceived as an expressive vertical panel with a cut-out or carved pattern. The thickness of 40 mm gives the part volume, so it is noticeable not only from the front but also in side projection. This format is especially important in open halls, stairs with a double-height space, and railings that are viewed from multiple directions.
The confirmed parameters of the model are collected in the table.
| Parameter | Confirmed value | What this means for the project |
|---|---|---|
| Article number | L-096.1 | In the specification, the full designation with a dot must be indicated |
| Type | Flat carved baluster | The layout differs from the calculation of narrow turned posts |
| Size | 1000 × 170 × 40 mm | All three dimensions are checked against the drawing and the installation site |
| Pattern style | Art Deco | The ornament must maintain the same orientation throughout the row |
| Material | Beech or oak | The wood species is chosen together with the finishing scenario |
| Preparation | Standard or Prestige | The level of preparation is agreed upon for the entire batch |
| Conditions | Custom-made | Quantity and execution are better approved before processing the batch |
| Main check | Drawing and layout | A single photo cannot determine the allowable fitting |
The size 1000 × 170 × 40 mm should not be read as a ready-made promise that the baluster will fit without changes into any railing about a meter high. The first number describes the overall dimension of the product, but the mounting system may include seating into a bottom rail, a handrail element, a groove, or another design node. The visible part after installation depends on these decisions. Similarly, the width of 170 mm affects not only the appearance but also the number of elements, gaps, and the position of the end balusters.
The buyer purchases the baluster itself, not a finished stair railing. The handrail, posts, base, fastening scheme, and safety of the entire structure are designed separately. Therefore, the article helps prepare an order for decorative elements but does not replace the structural calculation of the staircase.
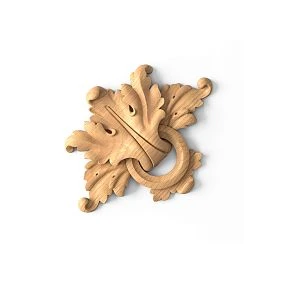
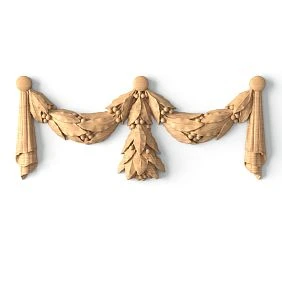
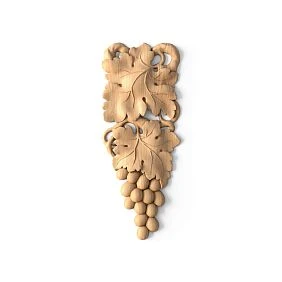
Our factory also produces:
Why a clear name is more important than a beautiful metaphor
For the buyer, the topic should immediately answer three questions: what product is being discussed, what is its size, and what problem the material solves. Therefore, the title "Baluster L-096.1 1000 × 170 × 40 mm: calculation of quantity and installation on a flight and landing" is more accurate than a figurative phrase about trimming the ornament. It does not make one guess that the article is about stair railings and contains a commercially important article number.
Such a title also separates new material from general publications about wooden balusters. The reader does not get another overview of types, species, and styles. They immediately enter a specific project situation: one wide flat model must work on inclined and horizontal sections, and its quantity and installation need to be calculated before ordering.
Inside the article, the artistic feature retains its significance. The carved pattern cannot be considered a secondary decoration that can be trimmed anywhere. But this idea is revealed through clear actions: open the drawing, determine the mounting zones, build a template, calculate the center-to-center spacing, check the transition to the landing, and only then order the set.
Get Consultation
Total height of 1000 mm and mounting height are not the same thing
One of the most common mistakes when buying balusters is comparing only the number 1000 mm with the desired railing height. The buyer sees a meter-long post and assumes it immediately fits under the handrail. In practice, there may be differences between the overall dimension of the product and the visible height after installation.
The result is affected by the lower and upper nodes. The baluster may fit into a groove, be fixed between planks, adjoin a stringer, or be installed in another element prepared by the project. Even a small seating depth changes the position of the ornament's center. If all posts on the landing are installed identically, the offset can still be detected by a trial assembly. On a flight, the error repeats along the inclined line and becomes more noticeable from a distance.
Before ordering, you need to record separately:
-
the overall dimension L-096.1 according to the card and drawing;
-
the clear distance between the lower base and the handrail;
-
depth of the upper seating;
-
depth of the lower seating;
-
intended fitting line;
-
boundaries of the carved pattern;
-
visible height after installation.
These values cannot be replaced with a single line like "need a baluster 1000 mm high." Such a record does not show whether trimming is required and whether the ornament will remain intact. For a sloped flight, it is also necessary to check whether the conditions are the same for all elements or whether the position relative to the steps creates different seating situations.
The drawing L-096.1 must be studied before calculating the quantity
A drawing is not an application that is opened after delivery. It is needed before choosing the final scheme. It determines where the contours of the product run, how the artistic part is positioned, and which straight sections can potentially be used for installation or adjustment. Without this, you cannot confidently tell the craftsman that the baluster is allowed to be shortened from the top, bottom, or simultaneously from both sides.
The working sequence looks like this:
-
Open the current drawing L-096.1.
-
Compare the front and side views.
-
Mark the boundaries of the carved pattern.
-
Find the straight upper and lower parts.
-
Overlay the proposed seating lines.
-
Check the thickness of the handrail and bottom rail.
-
Construct the profile of the inclined section.
-
Make a 1:1 template for at least one post.
-
Repeat the pattern several times with the calculated step.
-
Check the row from the hall side and the stairwell side.
In the product card, you should view drawing L-096.1 and compare it with the current modification. Do not use a randomly saved image without checking its relevance. If the designer lacks data, the issue must be resolved before placing the order.
Straight balustrade: where errors are especially visible
On a horizontal platform, the top and bottom of the row form parallel lines. Each baluster stands vertically, so even a small difference in height, orientation, or lateral offset is quickly read by the eye. The wide element of 170 mm enhances this effect: L-096.1 is perceived not as a thin post, but as a repeating decorative module.
For a straight balustrade, check the clear length between posts, the position of the first and last baluster, the width of the edge fields, the same center-to-center spacing, and the actual gap. Then assess where the center of the ornament will be. If the row is visible from the first floor or through a double-height space, it is useful to create a frontal elevation of the entire section rather than limiting to a top view.
Special attention is required at turning and support posts. The remaining length cannot be automatically left at the edges. For example, if the main row is calculated with equal spacing, but a significantly larger field remains next to the post, the composition looks unfinished. Correct not the last gap, but the entire row: the quantity and center-to-center spacing are recalculated from scratch.
On a straight section, it is easier to perform a trial layout, so the platform is often used as a control zone. However, its parameters cannot be mechanically transferred to the flight. The inclined handrail changes the fitting conditions and the visual position of the pattern.
Inclined stair flight: why one height is not enough
On the flight, the top railing line runs at an angle. The bottom support can follow the line of the stringer, steps, or a separate sub-baluster rail. As a result, a rectangular baluster interacts with two inclined boundaries, and its carved pattern must maintain the same position throughout the entire row.
Before calculation, it is necessary to know the angle of ascent of the flight and the actual distance between the lower and upper mounting lines. You cannot take a typical angle from someone else's project. Even stairs with similar floor heights differ in the number of steps, tread, rise, stringer construction, and handrail position.
For L-096.1 on the flight, check:
-
whether angular fitting is permissible in the upper straight zone;
-
whether fitting is permissible in the lower straight zone;
-
whether the ornament remains intact;
-
whether the cut lines are positioned identically on all posts;
-
whether the center of the pattern is preserved relative to the steps;
-
whether an excessively thin wood edge appears;
-
whether the 40 mm thickness matches the prepared assembly;
-
how the outermost baluster connects to the starting and turning post.
If the artistic contour comes close to the intended cut line, the baluster cannot simply be "shortened in place." First, consider changing the seating depth, plank thickness, or height of the surrounding assembly. Sometimes it is better to choose a different model than to damage the L-096.1 pattern.
When a baluster can be adjusted and when the assembly needs to be changed
Adjustment is permissible not because the product is wooden and can be sawed, but because the specific cut line is in a straight zone intended for this purpose and does not weaken the part. This is confirmed by the drawing, the project, and the decision of the craftsman responsible for the stair assembly.
Two routes can be considered.
Adjusting the L-096.1 itself
This route is possible when the necessary correction falls within the straight upper or lower section. All parts of the row are marked using one template. On an inclined flight, the same angle and the same position of the line relative to the ornament are controlled. After trial processing of the first baluster, the fit is checked, and then the solution is transferred to the remaining elements.
Adjusting the surrounding structure
If the cut line enters the artistic part, the pattern is not changed, but the installation scheme is. Depending on the project, the thickness of the handrail support plank, groove depth, lower support part, handrail height, or the composition of the transition assembly can be reconsidered. Any change must preserve the structural reliability of the railing.
The meaning of this approach is commercially important: the customer orders not just the required number of identical parts, but a set that can actually be installed without losing the pattern. If a problem is discovered after manufacturing, replacing part of the batch will not fix the erroneous geometry of the entire flight.
Full-size template 1:1 before ordering
A photo on a screen poorly conveys the scale of 1000 × 170 × 40 mm. It is especially difficult to assess the width of 170 mm and the density of the future row. Therefore, it is useful to make a full-size template. It does not have to replicate the relief—an accurate outer contour, ornament lines, and installation zones are sufficient.
To check a straight section, the template is fixed vertically between the conditional base and the handrail. Then several copies are made and placed with the assumed center-to-center spacing. This shows whether the railing becomes too dense and whether the pattern is lost due to a small gap.
For a flight, a side projection is required. On a sheet or stand, the stringer line, steps, handrail, and posts are marked. Templates are placed along the design axes. After that, one stands at the lower and upper points of the stairs and assesses whether the ornament is perceived as a unified rhythm.
The template must contain:
-
full contour of L-096.1;
-
center line;
-
top and bottom of the pattern;
-
intended trim line;
-
depth of the upper seating;
-
depth of the lower seating;
-
the side taken as the front;
-
direction of top and bottom.
Such a check costs significantly less than reworking a finished batch and helps calculate the quantity more accurately.
A width of 170 mm changes the entire railing calculation
L-096.1 is noticeably wider than many turned and narrow flat balusters. Therefore, the existing layout prepared for another model cannot be used without recalculation. Even if the section length and the number of posts seem suitable, the actual gap and visual density of the row will change.
The width affects several parameters at once:
-
the number of elements in one section;
-
the distance between adjacent balusters;
-
the center-to-center spacing;
-
the margins near the posts;
-
the visibility of the carved pattern;
-
volume of wood in the railing;
-
amount of material and finishing work;
-
perception of the staircase from the hall side.
When calculating, do not confuse the gap and the center-to-center spacing. Center-to-center spacing is the distance between the central axes of adjacent parts. The gap is the open distance between their nearest edges. For identical balusters, these values are related by the width of the element, but in the project both need to be controlled. The row may look uniform along the axes and still not meet the required gap.
A wide decorative module also requires free space around the pattern. If L-096.1 is placed too tightly, individual motifs visually merge. If too sparsely, the posts cease to be perceived as a single system. The balance is sought on the layout and full-size template, not just in the size table.
How to calculate the quantity of L-096.1 without random leftover
The calculation begins with dividing the railing into independent sections. An inclined flight, a horizontal landing, a short turning fragment, and a second-light balustrade are not combined into one formula. Each section has its own clear length, posts, edge zones, and viewing conditions.
For preliminary layout, the following logic is used:
-
Measure the clear length between support or turning posts.
-
Determine the boundaries within which the baluster axes can be located.
-
Select a preliminary number of elements.
-
Calculate the uniform center-to-center spacing.
-
Calculate the actual gaps taking into account the width of 170 mm.
-
Check the first and last intervals.
-
Verify the solution against project and safety requirements.
-
Repeat the calculation for each individual section.
-
Add a reserve only after the main layout is approved.
You cannot first place two end posts and then fill the middle "as it turns out." This method almost always creates a last incorrect interval. Also, do not keep a pre-selected step at any cost. Sometimes adding or excluding one baluster makes all gaps noticeably more even.
The quantity for the order equals the sum of approved elements on all sections plus the agreed reserve. For a complex carved batch, it is reasonable to provide at least one spare part, especially if fitting and individual finishing are ahead. However, the reserve should not mask the absence of a precise layout.
Calculation example for a straight stair landing
Consider a conditional design example. It shows the sequence of actions but does not set universal regulatory distances.
Suppose the clear length between two posts is 2400 mm. The designer determined the zones of edge offsets and the allowable range of gaps. First, different quantity options are checked — for example, 9, 10, and 11 balusters. For each option, the center-to-center step and the open distance between parts with a width of 170 mm are calculated.
With nine elements, the row may appear visually sparse. With eleven, it may be too dense, especially if the pattern has large gaps. Ten elements can provide a calmer rhythm. But the final choice cannot be made by feel: the actual gaps are compared with the design requirements, and the edge intervals with the central ones.
After choosing the quantity, a frontal layout is constructed. On it, the following are marked:
-
left column;
-
right column;
-
axes of all balusters;
-
contours with a width of 170 mm;
-
edge intervals;
-
central gaps;
-
upper and lower installation lines;
-
position of the ornament.
Then several 1:1 templates are placed on the actual site. If the edge fields look cramped or excessively wide, the entire step is recalculated rather than adjusting only the first and last baluster.
Example calculation for an inclined flight
On a flight, it is more convenient to consider the length of the section along the mounting line rather than only in the horizontal projection. Additionally, the positions of steps and posts are taken into account. A conditional example may include a flight with ten steps, but the number of balusters does not have to equal the number of steps: this depends on the chosen scheme and structural requirements.
First, on the side drawing, the lower and upper posts are marked. Between them, the handrail line and the lower mounting line are drawn. Then, the proposed axes of L-096.1 are marked. On each axis, the baluster outline is placed, and it is checked whether the pattern is positioned identically relative to the inclined boundaries.
Three situations are possible:
-
one baluster per step;
-
two posts are installed on some steps;
-
The axes are distributed independently of the steps along the total length of the flight.
No scheme is selected automatically. A width of 170 mm may make the option with two elements per step too dense, and the option with one insufficient for a specific project. The decision is made by the designer after checking clearances and fastening.
Particular attention is paid to the first and last posts. Their position determines the transition to the posts and the visual connection with the landing. It is not allowed for the main row to be uniform while a random large gap appears near the turning post.
Why the edge intervals cannot be left "by remainder"
The residual principle seems convenient only at the stage of quick marking. The master chooses a familiar step, places elements along the section, and divides the remainder between the ends. For wide carved balusters, this approach is especially noticeable. A field appears next to the post that differs from all other gaps and disrupts the rhythm.
The correct scheme is built the other way around. First, the boundaries of the section and the number of elements are determined, then all axes are evenly distributed. The edge intervals may differ from the central ones if this is provided for by the composition and the post node, but they should not arise randomly.
When checking, the following questions are asked:
-
whether the left and right edges are perceived equally;
-
whether the outermost baluster is pressed against the post;
-
whether an empty section has formed;
-
does the rhythm of adjacent sections match;
-
whether the ornament conflicts with the decorative part of the post;
-
whether access to the mounting joint remains.
If the answer is unsatisfactory, the quantity or center-to-center spacing is changed. Sometimes it is enough to shift the entire row by a few millimeters, but this is done on the drawing before drilling the handrail and base.
Transition from an inclined flight to a landing
The transition node is the most complex part of the composition. The inclined handrail meets the turning post, after which a horizontal balustrade begins. For the balusters, not only the top line changes, but also the perception of the ornament. If both rows are calculated independently, the turn looks like a random break.
It is convenient to design a sequence of three elements:
extreme baluster of the flight → turning post → first baluster of the landing.
For this group, the distances between axes, the width of the fields near the post, the height of the visible part, the direction of the pattern, and the position of the front side are checked. The turning post may be wider than L-096.1, so identical numerical intervals do not always give the same visual impression. A frontal and perspective check is needed.
If the landing is visible from below, the first horizontal baluster should continue the rhythm of the flight, not start a new random row. Sometimes this requires a slight change in the quantity on the landing. It is important not to try to preserve a pre-selected spacing at the cost of a poor transition.
In the specification, the flight and the landing are indicated as separate lines, but the material, preparation, and finishing system are kept unified. This makes it easier to control the set and avoid mixing parts during installation.
Identical orientation of the pattern throughout the entire row
A flat carved baluster has a pronounced frontal plane. Even if the geometry seems symmetrical, the product must be checked against the drawing and the sample. In a row, it is important to determine in advance which side is considered the front, where the top and bottom are, and in which direction the motif is oriented.
Before installation, each part is marked. A simple system may include a section number and a sequence number: M1-01 for the first baluster of the first flight, P1-01 for the first baluster of the landing. The front side is marked separately. Such marking is useful after a trial layout and finishing, when visually similar elements are easy to confuse.
Special attention is required if the railing is viewed from two sides. From the staircase side and from the hall side, the pattern may be perceived differently. The designer chooses a priority view or checks that both sides look neat.
Rotating one baluster in the opposite direction creates a noticeable error. Fixing it after drilling and finishing is difficult. Therefore, orientation is included in the installation template and schedule, rather than left to the installer's discretion.
L-096.1 on the landing, in the hall, and near the second light
A wide flat baluster is especially expressive in areas visible from the front. The horizontal balustrade of the second light allows the ornament to be perceived as a whole row. Here, uniform height, even spacing, and precise verticality are important.
In the hall, the railing often becomes part of the overall interior composition. L-096.1 can support the geometry of doors, panels, or furniture in the art deco style. But the connection should be built on the repetition of lines and material, not on an excessive number of different ornaments.
For a long balustrade, it is worth checking whether the row becomes too saturated. Sometimes carved balusters are better combined with calm posts and a laconic handrail. Such contrast helps keep the pattern as the main decorative element.
On a short landing, a width of 170 mm may limit the quantity. If, after meeting the clearance requirements, only two or three balusters fit, it is necessary to assess whether the composition looks random. In some projects, it is more appropriate to choose a model with a smaller width. In the catalog of wooden balusters for stairs you can compare L-096.1 with other options.
Combination with handrail, posts, and base
L-096.1 has an active pattern, so surrounding elements do not need to be equally complex. Often, a calm structural frame gives the best result: a straight handrail, a simple post, a neutral under-rail strip, and a laconic stringer.
When selecting, not only the style but also the dimensions are checked. The thickness of the baluster of 40 mm must match the grooves, strips, and fastening scheme. The handrail and base are designed so as not to weaken the wood or leave unprotected thin edges.
The kit composition may include:
-
balusters L-096.1;
-
starting and turning posts;
-
handrail;
-
under-rail strip;
-
lower support rail or string;
-
fasteners and embedded elements per project;
-
materials for finishing;
-
control sample of the coating.
Specific compatibility with a particular railing or post model is not claimed without drawings. All connections are checked in a single project. Purchasing only balusters without a solution for the top and bottom nodes creates a risk that the finished batch will not fit into the prepared structure.
Art Deco balusters: how not to overload the interior
Drawing L-096.1 belongs to Art Deco, but this does not mean that the entire interior needs to be filled with ornament. A strong repeating motif works better when adjacent surfaces give it visual space.
On the staircase, you can leave the steps and string calm, and support the pattern with the geometry of door panels, lamps, or wall panels. It is not necessary to literally copy the motif. Similar rhythm, verticals, and proportions are enough.
To select neighboring models, it is useful to look at Art Deco balusters for stairsThis helps to understand the scale of the collection and compare options, but L-096.1 remains an independent model with its own width and pattern.
The error occurs when complex posts, a rich handrail, ornamental stringers, and active wall decor are added to carved balusters. As a result, the individual model gets lost. The commercially correct choice is not the most saturated set, but a coordinated system in which each product has a clear role.
Beech or oak for L-096.1
Both wood types are available for the model, but the choice is not only about the name of the wood. You need to consider the future finish, texture visibility, and combination with other staircase elements.
Beech
Beech is often considered for opaque enamel or uniform colored finishes. When the staircase should be white, graphite, dark blue, or painted in another opaque color, the calm wood structure helps focus attention on the shape of the carving. Beech is also suitable if the balusters need to be color-matched with painted posts and handrails.
Oak
Oak is chosen when the texture of the solid wood is intended to remain visible. Oil, clear varnish, stain, or semi-transparent tinting can highlight the natural grain. On wide surfaces of 170 mm, the texture reads more strongly than on a thin turned post, so the finish sample should be evaluated on material similar in area and treatment.
It cannot be said that one wood type is always better than another. What matters more is that the entire set—balusters, posts, handrail, and other wooden parts—is coordinated by material or deliberately combines different wood types. Randomly mixing beech and oak in one row after a clear finish will be noticeable.
Standard or Prestige
The level of preparation affects the amount of subsequent work, especially with a large number of carved elements. Standard and Prestige should be chosen uniformly for the entire batch. You cannot order part of the row in one execution and part in another, expecting that the difference will disappear automatically after painting.
When choosing, consider:
-
transparency of the future coating;
-
visibility of side faces;
-
complexity of the carved pattern;
-
number of balusters;
-
capabilities of your own painting preparation;
-
requirements for finishing work deadlines;
-
need for identical results across the entire row.
For opaque enamel, the surface still requires technological preparation for the chosen system. For transparent finishes, traces of processing, uneven sanding, and local defects are especially noticeable. Therefore, the decision is made together with the finishing contractor.
Prestige does not cancel the test coating and inspection before installation. Manufacturer preparation and final finishing on site are different stages. Before ordering, it is useful to clarify the current content of options in the product card and with the STAVROS manager.
It is better to choose the coating before installation
A carved row is difficult to paint quality after final installation, especially in areas adjoining the handrail and base. Therefore, the finishing system is chosen in advance and checked on a control sample.
The working sequence can be as follows:
-
Check the entire batch by quantity and execution.
-
Perform a dry layout.
-
Mark orientation and areas.
-
Prepare a test sample.
-
Approve the color and degree of transparency.
-
Process surfaces in the technological sequence.
-
Protect areas that must remain suitable for installation.
-
Allow the coating to achieve the necessary readiness.
-
Install elements with clean tools.
-
Perform the local finishing specified by the system.
Specific coatings and processing modes depend on the selected materials. General recommendations can be found in the article on how to choose a coating for wooden balusters.
For transparent finishing, it is especially important to distribute parts across sections before applying the final coat. The shade and texture of natural wood may vary. Pre-layout helps assemble a visually calm row.
What to buy and check together with L-096.1
Purchasing balusters separately from other railing parts is justified only when the upper and lower nodes are already designed. In other cases, it is better to consider the set together. This does not mean that all items must be from the same collection, but their dimensions and mounting surfaces must match.
| What to check or add | Why is this needed | Main risk | Useful transition |
| Handrail and under-rail strip | Determine the upper seating and visible height | The groove or strip does not fit the 40 mm thickness | Verify against project drawings |
| Lower rail, string, or base | Form the lower mounting assembly | The trim line merges into the ornament | Check the side projection |
| Starting and turning posts | Complete sections and transitions | Extreme intervals look random | Build the overall layout |
| Remaining balusters | Needed if the project combines several models | Different scale and incompatible rhythm | Compare L-096.1 with other models |
| Art Deco elements | Help maintain the stylistic consistency | Too many competing ornaments | View other items from the Art Deco collection |
| Finishing materials | Form the final color and protection | Different preparation of staircase parts | Make a single test paint-out |
| Reserve L-096.1 | Covers complex fitting and future repairs | A late single piece may differ | Order together with the main batch |
The fastener is not specified in the table because its type depends on the staircase design, base material, and design solution. Fasteners cannot be selected based only on the baluster thickness. The joint must ensure the stability of the entire railing and meet the requirements of the specific project.
How not to confuse L-096.1 with another baluster
Baluster article numbers can be similar, and catalog photos do not always convey scale. Before placing an order, check the full designation L-096.1, dimensions 1000 × 170 × 40 mm, material, and preparation option. The dot in the article number is important: it should not be omitted in the specification or replaced with a random spelling.
L-096.1 differs from a narrow turned baluster not only in appearance. It requires a different row calculation. It also differs from a decorative overlay: the baluster is part of the railing as a vertical element, not just attached to a solid panel. At the same time, the presence of a carved pattern does not mean that the product itself is a ready-made safe railing system.
It is useful to read in advance, how flat balusters differ from turned and volumetric ones. After the general comparison, return to the specific drawing L-096.1 and check
Need to design a long balustrade for a double-height space
The priority becomes the frontal rhythm. First, select the quantity along the entire length, then control the edge intervals and section joints. It is advisable to order the entire batch at once and pre-distribute the wood across visible zones.
A visually light railing is required
A width of 170 mm and an active pattern may be too massive. In this case, it is better to look at a model with a smaller width or a different design. Choosing L-096.1 just because you like a separate photo is not advisable.
Enamel finish is required
Beech can be considered, but the final choice is made together with the overall staircase system. Surface preparation, test coating, and accessibility of all edges are checked before installation.
Visible solid wood texture is required
Oak is suitable for transparent and tinting scenarios if coordinated with other elements. On a wide flat part, the texture is noticeable, so sorting and layout are done before finishing.
Installation marking: first axes, then drilling
Marking cannot be done by sequential transfer from an already installed baluster. A small error at each step will accumulate and show up at the end of the section. First, the general geometry is marked on the base and handrail: extreme boundaries, post axes, axes of all balusters, and control dimensions.
For a straight section, a common baseline is used. A laser level or other precise tool helps check verticals. For a flight, an angle template and a unified reference system are needed. All axes are marked before drilling on at least one full section.
After marking, a dry check is performed:
-
whether the upper and lower axes match;
-
are the intervals the same;
-
does the fastener not fall into the weakened area;
-
is the required seating depth maintained;
-
do the balusters not conflict with the steps and posts;
-
whether the ornament remains intact;
-
whether the front sides are oriented the same way.
Only after a control inspection do they proceed to preparing the seating locations. The specific fastening technology is determined by the staircase design. A universal scheme for concrete, wood, metal, or a combined base cannot be assigned in a single article.
Why it is better to order the entire batch at once
The carved row is perceived as a single composition, so differences between late and early batches may be noticeable. Ordering at the same time helps to coordinate the material, preparation level, and quantity before finishing begins.
Main reasons:
-
the entire row has one confirmed modification;
-
the material is selected for the overall system;
-
Standard or Prestige are not mixed;
-
a single incoming inspection can be performed;
-
it is easier to sort parts by texture;
-
the test paint sample applies to the entire batch;
-
mounting templates are prepared once;
-
the reserve is on site immediately.
Ordering balusters one at a time as you install is inconvenient. If after the first flight it turns out that more elements are needed for the landing, timelines and visual consistency may change. Therefore, the quantity is approved for all sections, including short transitions and reserve.
In the product card you can buy balusters L-096.1 made of beech or oak after completing the layout.
When L-096.1 is truly suitable
The model is appropriate when the project needs an expressive flat rhythm, there is enough space for a width of 170 mm, and the structure allows preserving the carved pattern. It works well on stairs visible from the front, on second-light balustrades, in spacious halls, and in interiors with art-deco geometry.
A suitable project usually has the following features:
-
the staircase drawing is prepared before ordering;
-
the top and bottom nodes are coordinated with a thickness of 40 mm;
-
the installation height allows preserving the pattern;
-
the gaps and spacing are calculated for a width of 170 mm;
-
the transitions to posts and landing are drawn;
-
material and covering are selected for the entire staircase;
-
it is possible to order the set as one batch.
In this scenario, L-096.1 works not as a random decoration, but as a systematic railing module.
When it's better to choose a different model
Honest commercial material should indicate limitations. L-096.1 is not suitable if the required height requires deep cutting through the ornament, or if the staircase is too compact for a wide element. It is also not a good choice when the project requires an almost transparent railing made of thin posts.
Another model is considered if:
-
the 170 mm width does not allow maintaining the design clearances;
-
the handrail or base is not designed for a 40 mm thickness;
-
the mounting area is too small;
-
it is necessary to frequently change the length of elements;
-
a round turned profile is required;
-
the interior style does not support art deco;
-
it is impossible to ensure reliable structural installation;
-
The finishing budget does not account for the intricate carved row.
In these cases, it is useful to open general rules for selecting flat wooden balusters and choose a geometry that better suits the object.
Main mistakes in selection and installation
Buying only from a photo
In a photo, it is impossible to accurately assess the width of 170 mm, the thickness of 40 mm, and the position of the pattern after installation. The fix is a drawing and a 1:1 template.
Consider 1000 mm as the finished height of the railing
The total length does not account for the seating. The fix is a separate calculation of visible and installation height.
Trim the ornament without checking
Cutting may disrupt the pattern and make parts uneven. The fix is to determine straight mounting zones according to the drawing.
Use calculation based on the narrow baluster
Width of 170 mm changes the quantity and the gap. The fix is a new layout for L-096.1.
Start installation from one edge
Accumulated error will appear at the last post. Fix — full axial marking of the entire section.
Leave remainder in the extreme interval
Rhythm breaks near the post. Fix — recalculate all axes.
Rotate adjacent elements with different sides
Even slight asymmetry is noticeable. Fix — marking the front side and position number.
Mixing beech and oak without a project.
With transparent finish, the difference will be obvious. Fix — single material or pre-designed combination.
Order part Standard, part Prestige
Different levels of preparation will complicate the finish. Fix: uniform execution of the entire batch.
Drill the handrail before receiving the products
Actual inspection may reveal discrepancies. The fix is a dry layout and a control piece.
Not providing a reserve
Damage to one carved baluster will halt installation. The fix is an agreed reserve in the overall batch.
How to place an order for L-096.1 at STAVROS
Before ordering, prepare a short but precise specification. It should convey not only the article number but also the application context.
Example:
We need flat balusters L-096.1 sized 1000 × 170 × 40 mm. Material — oak. Finish — Prestige. Main batch — 24 pcs., reserve — 1 pc. The balusters are used on one inclined flight and a horizontal landing. Drawing and layout are attached. Please confirm the current modification and order parameters.
Before placing an order, check:
-
article number;
-
sizes;
-
material;
-
Standard or Prestige;
-
quantity for each section;
-
reserve;
-
current price;
-
production conditions;
-
delivery procedure;
-
availability of the current drawing.
Card L-096.1 serves as the point of purchase, and the article is the preparation route. After checking, you can order the L-096.1 kit. If the calculation shows that the model is not suitable, it is better to return to the category and choose a different baluster than to modify the ornament after manufacturing.
Flight, landing, and transition node: comparative table
The same item number is used in different geometric conditions, so the calculation cannot be copied from one section to another. The table helps to see what exactly changes.
| Section | Main geometry | What to check for L-096.1 | Typical mistake | Correct solution |
| Horizontal platform | Parallel lines of the base and handrail | Vertical, visible height, uniform step, edge margins | Hide the remaining length near one post | Recalculate all axes over the full section |
| Inclined flight | Handrail and bottom line run at an angle | Fitting angle, mounting zones, ornament position, connection to steps | Trim all parts in place without a template | Build side projection and a single template |
| Transition to platform | Handrail direction changes | The outermost baluster, turning post, first platform post | Calculate two rows independently | Design three elements as one assembly |
| Second-light balustrade | Long frontal view | Rhythm along the entire length, wood texture, verticality | Split the section into inconsistent fragments | Create a general elevation and distribution of the batch |
| Short section | Limited length between posts | Ability to place a wide model without violating clearances | Preserve L-096.1 at any cost | Compare the model with a narrower baluster |
The comparison shows why you cannot write only "L-096.1 — 20 pieces" in an application. This may be sufficient as a product line for production, but it is insufficient as a project specification for the buyer. You need to understand how many parts belong to the flight, how many to the landing, where the reserve is located, and whether the fitting conditions are the same.
Acceptance of the batch before finishing and installation
The received batch is checked before painting and certainly before installation. After coating or trimming, it is harder to separate the issue of product quality from the consequences of work at the site. The inspection is carried out in a dry, well-lit room where the elements can be laid out without risk of damage.
First, the quantity is verified. The main set and the reserve are counted separately. Then the article, size, material, and selected preparation option are checked. Several parts are compared for overall geometry by applying them to a flat reference surface or template. The goal is not to independently assign production tolerances, but to identify obvious non-conformity with the ordered item before installation.
After the quantitative check, a visual layout is performed. For transparent or semi-transparent finishes, oak balusters are distributed so that adjacent elements do not create a sharp random contrast. For opaque enamel, more attention is paid to the uniformity of thread preparation and the accessibility of all faces.
It is useful to prepare an acceptance sheet:
| Control | What is recorded | Why is this needed |
| Quantity | Main and reserve elements | Eliminate installation stoppage due to shortage |
| Article number | L-096.1 on the entire batch | Do not mix similar models |
| Size | Compliance with the ordered modification | Check compatibility with the template |
| Material | Beech or oak | Do not mix wood species before clear finishing |
| Preparation | Standard or Prestige | Maintain a uniform level of the entire composition |
| Orientation | Top, bottom, and front side | Prepare marking of sections |
| Distribution | Flight, landing, reserve | Do not swap parts after test coatings |
If an issue is found, the batch is not mass-trimmed immediately. First, preserve the packaging and marking, photograph the parts, verify the order, and contact the seller. This sequence protects both the buyer and the contractor from a situation where the source of the discrepancy can no longer be determined.
Storage and preparation on site
Before installation, balusters must be protected from mechanical damage and sudden changes in conditions. The carved contour is vulnerable to impacts, and a wide flat part should not be used as a support for other materials. Elements are stored so that they do not rest on protruding parts of the pattern.
It is not allowed to unpack the entire batch in advance and distribute it across the construction site without marking. It is better to preserve grouping by sections: flight, landing, balustrade, reserve. After dry layout, each part is assigned a number. The number is transferred to the packaging or to a safe technological mark that will not damage the future finish.
Before treating the wood, the contractor must ensure that the conditions on site are suitable for the chosen finishing system. The article does not specify specific humidity, temperature, or holding time, because these parameters depend on the coating material and the technological map. They are taken from the documentation of the finishing material manufacturer and the work project.
Special attention requires a test baluster. It cannot be thoughtlessly taken from the main quantity if no reserve is provided. The control sample must reflect the same material and preparation as the working batch. On it, the color, texture manifestation, filling of carved recesses, and quality of side edges are checked.
Control after installing the first fragment
Even with a detailed layout, the entire row should not be installed at once. First, a control fragment is assembled, which includes several adjacent balusters and, if possible, the connection to the post. On a flight, such a fragment should show the cut line and the position of the pattern under the inclined handrail.
Not only individual connections are checked, but also the overall view from several points. From the bottom of the stairs, errors may be visible that are not noticeable to the craftsman at the installation level. From the hall side, the vertical rhythm and uniform orientation are assessed. On the landing, they look along the row to see deviations in height and plane.
After the control assembly, they answer the questions:
-
does the actual clearance match the project;
-
are the axes aligned equally;
-
is the pattern preserved;
-
does the trim line not look random;
-
is the transition to the post suitable;
-
is there enough space for final fastening;
-
Does the finishing require additional protection during assembly?
Only after a positive check are the template and technology transferred to the rest of the batch. If the error repeats in the control fragment, it is corrected in the project or layout, rather than compensated by individual random fitting of each subsequent baluster.
FAQ: questions about baluster L-096.1
What is the size of L-096.1?
The confirmed model size is 1000 × 170 × 40 mm. All three dimensions need to be considered in the project: total length, width of the flat element, and thickness.
Can 1000 mm be considered the final installation height?
No. The actual visible and installation height depends on the upper and lower nodes, seating depth, and possible adjustments. First, study the drawing.
Can L-096.1 be trimmed in height?
Only if the adjustment line is in the permissible straight zone and the solution is confirmed by the drawing and project. Cutting the artistic part at random is not allowed.
Is L-096.1 suitable for an inclined flight?
It may be suitable, but this is checked against the specific flight angle, installation height, seating lines, and pattern position. There is no universal answer for all staircases.
Is it suitable for a horizontal landing?
Yes, the model can be considered for a straight balustrade if gaps, spacing, edge intervals, and fastening are calculated.
Why is the 170 mm width so important?
It affects the number of balusters, actual gaps, and visual density of the railing. Calculations based on a narrower model cannot be used.
How to calculate the number of balusters?
Each section is measured separately, a preliminary quantity is selected, the center-to-center spacing and gaps are calculated, edge intervals are checked, and the solution is coordinated with the designer.
Can one L-096.1 be installed on each step?
Sometimes this layout is possible, but it is not universal. It all depends on the geometry of the steps, baluster width, gaps, and the fastening system.
Is it necessary to make a 1:1 template?
For a wide carved model, this is very useful. The template shows the real scale, the position of the pattern, and the lines of possible fitting.
Which is better under enamel: beech or oak?
Beech is often considered for opaque finishes, but the decision depends on the entire staircase and the chosen coating system. The wood species cannot be selected in isolation from other elements.
When to choose oak?
Oak is appropriate if visible texture is required under oil, clear varnish, stain, or translucent tinting.
What does Standard or Prestige mean?
These are product preparation options. Current content should be checked in the card and with the manager. A single option is chosen for one row.
Do I need to order all balusters at once?
Yes, this is preferable for a single row. It makes it easier to coordinate the execution, distribute the parts, and perform a common test finish.
Is a spare baluster needed?
For a complex batch, it is reasonable to provide a reserve, especially if fitting and individual finishing are ahead. The quantity of reserve is agreed with the project.
Can L-096.1 be combined with plain posts?
Yes. Plain posts and a handrail can better highlight the carved pattern than a set of competing ornaments.
How to design the transition from the flight to the landing?
It is necessary to simultaneously calculate the end baluster of the flight, the turning post, and the first baluster of the landing. Their intervals and orientation should be perceived as a single unit.
Can adjacent balusters be installed with different sides?
This should not be done without a special design solution. The face side and direction of the pattern are determined in advance and marked.
What to do if the required cutting line passes through the ornament?
Consider changing the surrounding unit, a non-standard solution, or another model. The artistic part should not be damaged for the sake of fitting.
Where can I compare L-096.1 with other models?
You can view in the category wooden balusters for stair railings and choose a variant of a different width or shape.
Where can I buy L-096.1?
Current options for material, preparation, price, and order terms are checked in the STAVROS product card.
Conclusion
Baluster L-096.1 1000 × 170 × 40 mm requires a design choice. It cannot be evaluated only by its beautiful pattern or overall height. The width of 170 mm changes the row calculation, the inclined flight requires a separate fit check, and the transition to the landing must be designed as a single composition.
The correct sequence is as follows: obtain the drawing, determine the mounting zones, measure each section, build a 1:1 template, calculate the axes and gaps, check the edge intervals, choose beech or oak, approve Standard or Prestige, and only then place the entire batch. This approach preserves the ornament, reduces the risk of rework, and helps achieve an even row on the flight and landing.
On STAVROS, you can check the L-096.1 card, compare it with other balusters, and order a set after approving the layout. If the staircase geometry does not allow preserving the pattern and safely installing a wide flat post, it is better to choose a different model rather than adjust L-096.1 at the cost of damaging the decorative part.