Article Contents:
- What are 3D slatted panels and how are they different from regular ones
- Why relief matters more than it seems
- Where to use 3D slatted panels: choosing the right area
- TV area and wall behind the TV
- Wall behind the sofa and behind the bed
- Hallway and corridor
- Home office and workspace
- Kitchen-living room and open floor plans
- Walk-in closet and spa bathroom
- How to choose relief depth: the main parameter of 3D panels
- Shallow relief: soft texture without dominance
- Medium relief: a universal choice
- Deep relief: an architectural statement
- The influence of lighting on the perception of 3D relief
- MDF, solid oak, or panels for painting: which material to choose
- Slatted MDF panels for painting
- Wooden slatted oak panels
- Wood-look panels
- What to choose: summary logic
- Which baseboard to choose for 3D slatted panels
- Wooden baseboard: organic unity
- MDF baseboard for painting
- Baseboard height and its significance
- Baseboard matching panel, door, or wall color
- How to finish ends, corners, and bottom of 3D panels
- End cap: an essential element
- Internal corners
- External Corners
- Junction with door casing
- Top edge: molding or open end
- Color of 3D slatted panels: how to avoid mistakes
- Wood-look panels: a warm natural accent
- White and light panels for painting
- Dark panels: power and depth
- Wall-colored panels: invisible relief
- Contrast accent wall
- How not to overload the interior with 3D slatted panels
- Mistakes when choosing 3D slatted panels
- How to calculate 3D slatted panels for a wall
- Where to buy 3D slatted panels, baseboard, and accessories
- FAQ: Answers to Popular Questions
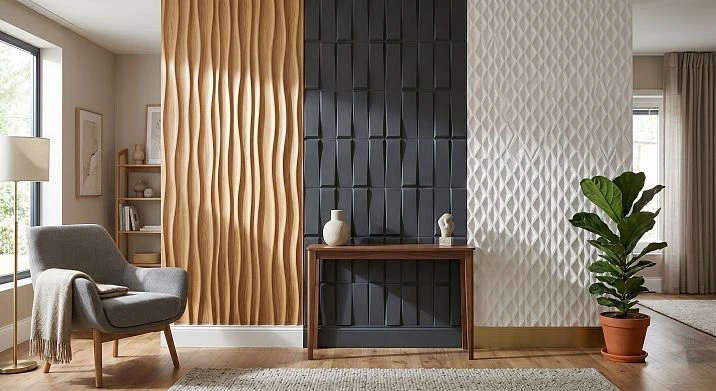
There are walls that are silent. And there are walls that speak — they create a mood, set the rhythm of the space, hold the gaze. 3D slatted panels are exactly the second case. Volumetric relief, vertical rhythm of slats, play of light and shadow — all this turns an ordinary wall into an architectural accent around which the entire interior is built. But for the result to be exactly that, and not a disappointment, you need to wisely choose the depth of the relief, material, color, and — no less important — properly think through the baseboard, ends, corners, and junctions.
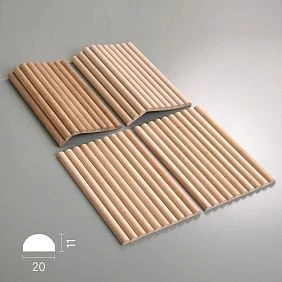
What are 3D slatted panels and how they differ from regular ones
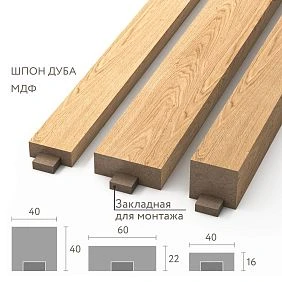
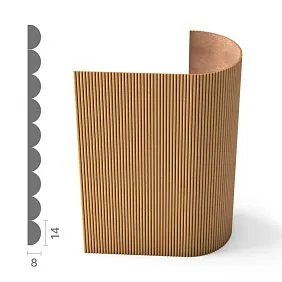
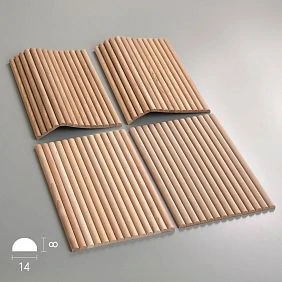
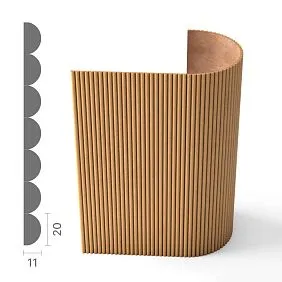
In the classic sense, a slatted panel is a set of parallel planks (slats) fixed on a common backing. The slats protrude above the surface, creating a pronounced texture. In regular panels, the height of this protrusion is minimal: the relief is readable but perceived more as a texture rather than volume.
3D slatted panels are a different story. Here, the depth of the relief is fundamentally different: the slats protrude significantly above the substrate, forming a true three-dimensional layer. It is this layer that creates the notorious "3D effect" — a sense of depth that changes depending on the viewing angle and light direction. With side lighting, shadows from the slats fall on the substrate, creating expressive contrast. With frontal light, the panel looks different — calmer, smoother. This play is one of the main values of volumetric slatted panels.
The fundamental difference from flat film or veneered panels is that the 3D effect here is real, not drawn. No imitation — only the honest physical form of the material, which can be touched by hand.
decorative slatted panels with volumetric relief are most often used as accent finishing: one wall in the living room, the wall behind the bed in the bedroom, the feature wall in the study, or the TV area. Exactly where a visual focus, a point of attraction for the eye, is needed.




Why relief is more important than it seems
Many buyers look only at color and material, overlooking the depth of the relief. Meanwhile, it is the depth that determines the character of the panel. A relief of 10–15 mm gives a soft, calm texture — it enriches the wall without dominating. A relief of 25–35 mm is already a pronounced plasticity that works as an independent design element. In a small room, deep relief can create a feeling of heaviness and crampedness. In a spacious hall or a high-ceilinged study, on the contrary, it gives the space scale and character.
The vertical rhythm of the slats is not just decor. A frequent step (slats every 10–15 mm) creates a rich, active surface, reminiscent of a classic organ or library shelving. A wide step (40–80 mm) gives a calmer, airier rhythm. Between these two poles lies a vast space for choice, and it is important to understand which rhythm suits your space.
Our factory also produces:
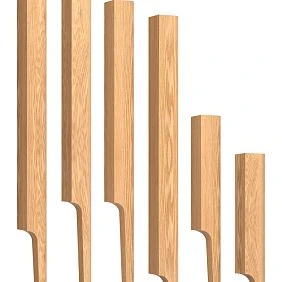
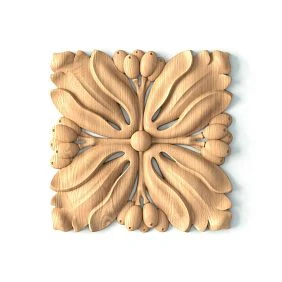
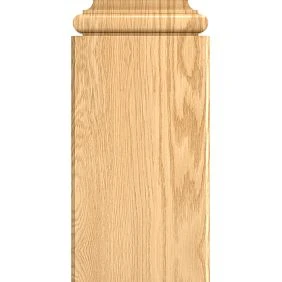

Where to use 3D slatted panels: choosing the right zone
Before talking about relief and color, you need to answer the question: where exactly will the 3D slatted wall panels be placed? This is not rhetoric — the place of application largely determines all other selection parameters.
Get Consultation
TV area and wall behind the television
This is perhaps the most popular application of volumetric slatted panels. Vertical slats create a deep, calm background against which the television looks organic — not like a "screen on the wall," but as part of a well-thought-out composition. Backlighting built between the slats enhances the 3D effect in the evening. For the TV area, panels with moderate relief — 15–25 mm, with an even rhythm and a neutral color that does not compete with the screen — work well.
Wall behind the sofa and behind the bed
The accent wall in the living room and the headboard in the bedroom are classic accent zones for 3D slatted panels. Here it is important to consider the scale: if the sofa is long and the wall is wide, panels with a wide pitch and moderate relief will create a monumental, calm look. If the room is small, it is better to choose panels with a fine, frequent relief and not too much protrusion depth.
Hallway and corridor
In the hallway and corridor 3D slatted wall panels solve several problems at once: they create a sense of structure in a narrow space, visually 'stretch' the height, and add tactile richness of the material upon entering the apartment. The hallway is the first thing a guest sees. And it is here that oak wood slats with a clear coating work well: a warm, lively tone immediately sets the atmosphere of the entire home.
Cabinet and Workspace
In the study, slatted 3D panels create a background of concentration and order. The vertical rhythm of the slats sets a working mood and disciplines the eye. For a home office, panels for painting in a deep dark color — graphite, anthracite, dark blue — or solid wood panels with a dark walnut or wenge tint are well suited.
Kitchen-living room and open-plan layouts
In open spaces, slatted panels are often used as a zoning element: a wall with 3D relief visually separates the living room area from the dining area, marking an accent without physical division. In this case, it is important that the panels match the finish of the kitchen set and the flooring — especially if wooden flooring or parquet is used.
Dressing room and spa bathroom
In dressing rooms and spa bathrooms, slatted panels are increasingly appearing as an element of premium design. Here, as a rule, compact formats are used — a separate wall or panel behind the lighting area. For wet rooms, it is necessary to choose panels with an appropriate coating that is resistant to humidity fluctuations.
How to choose relief depth: the main parameter of 3D panels
Relief depth is a technical indicator with direct design significance. It determines how expressive the wall will be under different lighting and from different distances.
Shallow relief: soft texture without dominance
Relief up to 15 mm is a 'delicate' 3D texture. It enriches the surface without overloading the space. Shadows are soft, transitions are smooth. This relief works well in small rooms, bedrooms, children's rooms — where an atmosphere without excessive activity is needed.
Shallow relief also pairs well with rich colors: dark blue, emerald, burgundy. With a deep uniform tone, small shadows create the necessary volume without turning the wall into a source of visual noise.
Medium relief: a universal choice
Relief of 15–25 mm is the optimal range for most living spaces. Such panels provide a pronounced 3D effect that is readable from several meters away but does not overwhelm small rooms. Medium relief is most often chosen for TV zones, living rooms, and hallways.
Deep relief: an architectural statement
Relief of 25 mm and deeper is serious plasticity that requires appropriate space. In a spacious hall or a high-ceilinged office with ceilings of 3 m and above, such panels create a monumental image. An important nuance: with deep relief, installation quality requirements significantly increase — any unevenness in the base becomes more noticeable, and junctions with baseboards, ends, and corners require more careful finishing.
The influence of lighting on the perception of 3D relief
Lighting is a partner of the 3D panel, not a background. Directional spot lighting at an angle to the wall maximizes the relief: shadows become sharp, volume increases. Diffuse overhead lighting smooths the effect. Side floor lamps or wall sconces directed along the panel give the most dramatic result. If you plan to use backlighting, choose panels with moderate or deep relief: that's where lighting gives the maximum return.
MDF, solid oak, or panels for painting: which material to choose
MDF slatted panels for painting
MDF slatted panel for painting — this is a primed surface ready for any final paint coating. MDF provides a perfectly smooth base: no knots, no fibers, no natural irregularities. After painting, the surface looks monolithic — as if the wall is cast from a single material.
That's why MDF panels for painting are favorites in modern minimalist interiors. White slats on a white wall create a subtle play of volume and light that cannot be captured in a photo — it can only be felt in the space. Dark gray paint on a 3D MDF panel gives the effect of expensive concrete with a lively relief. Matte enamel in sage or dusty rose turns an accent wall into the main decoration of the bedroom.
An important nuance: MDF panels should be coated with high-quality water-based paints — they do not deform the material and provide an even layer. For textured surfaces, it is better to use a spray gun rather than a roller: it evenly paints both the ends of the slats and the base between them.
Oak wooden slatted panels
Oak Slat Panel — this is a living material with a natural character. Wood fibers create a pattern that cannot be replicated: each slat is unique. Under transparent oils and varnishes, oak reveals a warm golden tone with expressive grain and subtle transitions. Tinted coatings allow you to achieve the desired shade — from Scandinavian ash to rich tobacco or almost black.
Wooden 3D slatted panels carry a special tactile value: a warm surface, natural texture, the feel of a material that 'breathes' and lives. That's why they look so organic in interiors with wooden floors, wooden doors, and solid wood furniture. A single species creates a sense of integrity — as if the interior grew from one source.
For rooms with a normal microclimate (humidity 40–60%, temperature 18–24°C), oak wooden panels last for decades without losing shape. Oak with a density of 700–750 kg/m³ is one of the most stable options for interior finishing.
Wood-look panels
This is an intermediate category: MDF base with a decorative coating that imitates wood texture. These panels are more affordable, do not react as sensitively to humidity fluctuations as natural wood, and provide a more predictable result. For budget and mid-range projects, this is a reasonable solution. However, when compared to natural oak, the difference in tactile sensations and visual depth is obvious: imitation remains imitation.
Wood-look panels are well-suited for commercial interiors — offices, restaurants, hotels — where appearance matters, but using natural solid wood is not feasible due to cost or operational reasons.
What to choose: summary logic
| Task | Optimal choice |
|---|---|
| Monochromatic modern interior | MDF for painting |
| Warm natural accent | Oak solid wood |
| Minimalism + Scandinavian style | MDF for painting in white/gray |
| Classic + natural materials | Solid oak with clear coating |
| Budget project with wood effect | Wood-look panels |
| TV zone with backlighting | MDF for painting or oak |
| Study with dark accent | MDF for painting in a dark tone |
Which baseboard to choose for 3D slatted panels
The baseboard is not an 'add-on' to slatted trim. It is the final chord that determines whether the wall looks finished or not. When working with 3D panels, this issue becomes even more acute: the deep relief makes the bottom joint of the panel with the floor especially noticeable. If the baseboard is chosen carelessly, it is immediately visible.
Wooden baseboard: organic unity
Wooden baseboard made of solid oak or beech — an ideal partner for wooden slatted panels. A single material, a single species, a single coating system: all this creates an interior ensemble in which each element is connected to the others. If desired, the baseboard and panels can be tinted in one color — then the transition from floor to wall becomes almost invisible, and the space visually 'grows'.
For MDF panels for painting, a wooden baseboard also works — especially if it is painted in the same tone as the panels. This solution is relevant for interiors where one color covers everything — from floor to ceiling. Soft sage, warm white, muted terracotta — these colors apply equally well to MDF slats and solid wood baseboards.
MDF baseboard for painting
MDF baseboard is logical where all finishing is made of MDF and a single paint job is planned. Its main advantage is a perfectly smooth surface that provides an even color without showing texture. The downside is lower durability compared to solid wood: under mechanical impact, MDF baseboard leaves dents that are difficult to repair invisibly.
Baseboard height and its significance
Baseboard height for 3D slatted panels is a fundamental issue. A standard baseboard 60–80 mm high works well in most situations. A high baseboard — 100, 120, or 150 mm — creates a more majestic, classic look. It pairs well with deep panel relief: large scale at the bottom supports the volume at the top.
Important: baseboard height affects the length of panel trimming from the bottom. If you install a high baseboard of 120 mm, the lower end of the panel must go behind its top edge — with a small margin. Therefore, the baseboard height must be determined before starting panel installation, otherwise you will have to redo it.
Baseboard matching the color of the panel, door, or wall
Three logics for combining baseboard with slatted panels:
Baseboard matching the color of the panels — creates a single vertical volume from the floor to the top edge of the finish. The most monumental solution.
Baseboard matching the color of the doors — provides a horizontal connection of all wooden elements in the room. Door, casing, baseboard, window slope — all in one tone. The wall with 3D panels then reads as an independent accent.
Baseboard matching the color of the floor — creates a smooth transition from the flooring to the wall, 'dissolves' the lower joint. Relevant for interiors with wooden floors and wooden panels of the same species.
How to finish the ends, corners, and bottom of 3D panels
This is the part of the work that is thought about last — and that's exactly why it most often looks sloppy. For 3D slatted panels, an open end is not just unsightly. It's visible: the cut with the slat profile, the backing layer, possible traces of glue or fasteners. An uncovered end turns expensive finishing into unfinished work.
End strip: a mandatory element
An end strip is a narrow decorative batten installed along the edge of a panel wall. It covers the side cut and creates a clean finish line. For wooden panels, the end strip is made from the same solid wood — oak to oak, same species, same coating. For MDF panels, an MDF strip for painting is used.
Internal angles
The inner corner is the most delicate area. Here, two panel sheets meet, and a clean joint must be ensured. The professional solution is a special corner profile that hides both ends. If a profile is not used, the ends are cut at 45 degrees and joined in the corner. For wooden panels, this option is acceptable with high cutting precision; for MDF, it requires careful puttying and painting.
External angles
The outer corner is an even more demanding area. Here, the panel is "on display" from both sides simultaneously. A corner profile for the outer corner is a mandatory element when working with 3D panels. It protects the corner from chipping (and the 3D relief in the corner is especially vulnerable to mechanical damage) and creates a clear vertical finish line.
Junction with door casing
One of the most common questions when installing slatted panels is how to join the panel with wooden casings. There are two main scenarios:
Scenario 1: casings are not yet installed. In this case, the panels are mounted first, and the casings are installed on top — covering the panel end. This is the cleanest and simplest option: no additional profiles are needed.
Scenario 2: casings are already in place. The panels are trimmed flush with the casing, and the joint is covered with a thin molding or wooden moldingAt the same time, it is important to choose a layout of the same species and tone as the trim — otherwise the joint will look like a "patch."
Top edge: molding or open end
If the panels do not reach the ceiling, the top end also needs to be finished. wooden molding — the optimal solution: it covers the end and forms a horizontal line that completes the accent wall. The molding can be chosen of the same species as the panels, or in the color of the baseboard — to create a horizontal frame around the slatted panel.
If the panels reach the ceiling — the top joint is covered with a ceiling molding or combined with a stretch ceiling system. In this case, the installation gap is hidden by a decorative layout around the perimeter.
Color of 3D slatted panels: how not to make a mistake
Color is a dialogue. Panels talk to the floor, to the furniture, to the doors, to the textiles. The more accurately the color is chosen, the more convincing the interior sounds as a whole.
Wood-look panels: a warm natural accent
Wooden slatted panels made of oak with a transparent or tinted coating are a warm, lively accent that works in almost any interior. Golden oak pairs well with beige, cream, and terracotta tones. Dark oak with a wenge or walnut tint — with gray, white, and graphite base colors.
Key rule: the wood must be connected to something else in the interior. Wooden floor, wooden furniture, Wooden casings — at least one element should "respond" to the panels, otherwise the wall will look like a random accent.
White and light panels for painting
White 3D slatted panels are a classic of Scandinavian and Japanese styles. White relief on a white wall creates the effect of a fine sculpture: volume is visible, shadows are visible — and the color does not clash with anything. This is a solution for those who value restraint and the ability to speak in a whisper.
Light gray, milky, beige tones are even warmer options for living spaces. They make the accent wall noticeable but not aggressive.
Dark panels: strength and depth
Graphite, anthracite, dark blue, almost black — these are colors for bold solutions. A dark 3D wall in a living room or study creates a sense of depth and weight. An important condition: a dark slatted wall requires good lighting — without it, the space can become heavy and oppressive. Directional light from above or backlighting between the slats mitigates this risk and reveals the relief in full force.
Panels in the color of the wall: invisible relief
One of the most sophisticated techniques is to paint the panels the same color as all the other walls. Then the 3D effect is read solely through chiaroscuro: the wall seems to "breathe" without announcing itself loudly. This is a solution for subtle connoisseurs who know how to notice nuances.
Contrast accent wall
When one wall is done in a radically different color than the others, the slatted relief enhances this contrast. A dark blue slatted wall against a background of white others is no longer just an accent, it's an architectural statement. It's important to maintain proportion: one accent wall — maximum in a room. If slatted panels are on two or three walls simultaneously — the space loses its structure.
How not to overload the interior with 3D slatted panels
This question is rarely asked — and it's a shame. 3D panels have a high visual load: deep relief, rhythmic pattern, play of shadows. With skillful use, this is an advantage. With excess, it's a problem.
A few principles that help find balance:
-
One accent wall is the basic rule. The other walls should be neutral: smooth plaster, wallpaper with minimal pattern, uniform paint
-
Coordinating rhythm and scale — narrow frequent slats in a large room look nervous; wide rare slats in a small room look heavy. Choose the slat spacing proportional to the wall area
-
Material unity — if wood is chosen, then the baseboard, trim, and furniture elements should also be wooden. If MDF for painting, all wooden trim is painted in a single tone
-
Light as a partner — plan lighting together with the choice of panels, not after installation
-
Don't mix shades — light oak and dark oak on one wall or in one space without clear separation create a sense of randomness
Mistakes when choosing 3D slatted panels
Experience from installing thousands of projects allows us to compile a comprehensive list of what goes wrong. Here are the most typical mistakes:
-
Choosing too deep a relief for a small room — a 30 mm relief in a 12 m² room creates the feeling that the wall is "collapsing"
-
Not planning the baseboard — ordering panels and then discovering that the baseboard doesn't match in height, color, or material
-
Not covering the ends — side cuts of panels without end strips look unfinished and are vulnerable to mechanical damage
-
Mixing different wood shades — light oak on the wall and dark walnut on the floor can conflict if there is no connecting element
-
Not considering lighting — choosing panels with deep relief and placing them in an area without directional light: the 3D effect will be almost invisible
-
Placing active 3D panels on all walls — the interior loses its focal point, becomes restless and tiring
-
Not calculating the quantity — taking panels without a reserve for trimming and discovering a shortage on the last wall
-
Forgetting about trim — when a slatted wall adjoins a doorway, the trim requires reinstallation or replacement
Each of these mistakes can be solved at the planning stage. Fixing them after installation is significantly more expensive and difficult.
How to calculate 3D slatted panels for a wall
Calculation of 3D panels follows the same principles as for standard slat panels, but with several additional factors taken into account.
Step 1. Measure the width of the wall. If the wall contains a doorway, measure each section separately.
Step 2. Find out the working width of one panel — the width that is visible after installation.
Step 3. Divide the wall width by the working width of the panel. Round the result up.
Step 4. Add a margin for trimming: at least 10–15%, for complex walls with niches and protrusions — 20%.
Step 5. Consider the height of the panels. If the standard panel length does not match the finishing height, each panel is trimmed, and the offcut is typically not used elsewhere.
Step 6. Add all related elements to the calculation: baseboard (in linear meters), end strips (by the height of open edges), molding (by the length of the top border), corner profiles (by the number of corners).
It is the complete calculation of the set that gives the real budget figure — not just the cost of the panels.
Where to buy 3D slat panels, baseboard, and accessories
When buy 3D slat panels for walls — it's already decided, the next question arises: where to get everything else? The situation where panels are bought in one place, baseboards in another, moldings in a third, is familiar to many. And it almost always ends the same way: something doesn't match in color, something doesn't align in profile, something has to be redone.
A systematic approach is when all elements are selected from a single catalog, produced according to uniform standards, and designed to work together.
The STAVROS catalog features all items for complete 3D wall finishing:
-
Rafter panels — made of MDF for painting and solid oak, with various slat profiles and spacing, for flat and accent walls
-
decorative slatted panels — with a pronounced three-dimensional relief for creating accent 3D walls
-
Primed MDF slat panel — ideally prepared for final painting, for monochrome and multi-color solutions
-
Oak Slat Panel — natural solid wood with a living texture, for warm and natural interiors
-
Wooden baseboard made of solid oak and beech — several profiles and heights, for any style and finishing height
-
Wooden moldings — for the top edge, decorative frames, and finishing joints
-
Wooden trim — end caps, trims, and filler strips for all junctions
-
Wooden casings — for framing doorways in a unified system with slatted finishes
-
Wooden items — a complete range for those building interiors from natural materials
When the entire set is selected in one place, installation goes without surprises. The baseboard fits the panel without gaps, the end cap covers the cut exactly to the profile, the casing overlaps the panel edge — and it all works as one system, not as a collection of parts from different manufacturers.
STAVROS is a manufacturer of wooden products from solid natural wood: oak, beech, ash. Years of experience and uniform quality standards allow us to create complete finishing systems where each element matches the next. That is why when choosing 3D slatted wall panels, it makes sense to consider the entire set at once — from the panels themselves to the baseboard and the last filler strip.
FAQ: Answers to popular questions
How are 3D slatted panels different from regular ones?
The key difference is in the depth of the relief. Regular slatted panels create a textured surface with minimal protrusion. 3D panels have a pronounced volumetric layer: the slats significantly protrude above the backing, creating a true plasticity of the surface. This provides a play of light and shadow and a sense of depth that changes with different lighting and viewing angles.
Which baseboard to choose for 3D slatted panels?
A solid wood baseboard for wooden slatted panels; an MDF baseboard for painting for MDF panels. The height of the baseboard should be determined before panel installation: it affects the length of the bottom cut. The color of the baseboard can match the color of the panels, doors, or floor — depending on the chosen design logic.
Where is the best place to use 3D slatted panels?
TV area, wall behind the sofa or bed, hallway, study — these are classic application zones. The main principle: one accent wall in the room. The other walls should remain neutral so that the textured wall reads as the focal point of the space.
Which is better: wood-look panels or panels for painting?
Wood-look panels made from solid wood provide a warm, natural effect with a living texture — no imitation can replace them. Panels for painting made from MDF allow you to achieve any color and create a monochrome or multi-color solution. The choice is determined by the interior style, color scheme, and how important the naturalness of the material is.
Do I need to cover the ends of 3D slatted panels?
Absolutely. An open end is incompleteness, vulnerability, and an unsightly cut. An end strip or trim profile made from the same material as the panels covers the cut and creates a clean finish line. This applies to both side ends and the top edge of the panel if it does not reach the ceiling.
How to avoid overloading the interior with 3D panels?
Limit yourself to one accent wall, choose a relief proportionate to the room area, match the panel color with the flooring and furniture, and plan the lighting. The panels should be the dominant feature — but not a source of chaos.
Can 3D slatted panels be used in the hallway?
Yes, and this is one of the most advantageous applications. Vertical slats visually 'stretch' the height of a narrow corridor, wood adds warmth at the entrance, and the relief creates a sense of a well-thought-out interior from the first step. It is important to choose a moderate relief — the hallway is usually small, and a deep relief is inappropriate here.
How to calculate the quantity of 3D slatted panels?
The wall width is divided by the working width of one panel. 10–15% extra is added to the result for trimming. Areas with doors and niches are calculated separately. The panel calculation is supplemented by the calculation of all related elements: baseboard, ends, moldings, corner profiles.