Article Contents:
- Carved furniture leg MN-006: two versions that differ not only in height
- MN-006 120×63 mm
- MN-006 160×84 mm
- Beech MN-006
- Oak MN-006
- Why does E change when the height increases
- Finished height of the baseboard
- Lower plane of the body
- Bottom construction
- Actual position of the leg
- Foot pad
- Floor deviation
- Height
- Thickness
- Shaped top of the profile
- Wall unevenness
- Why a side cut is needed
- The bottom is actually above the top line of the baseboard
- Rear legs are shifted inward of the body
- The plinth runs behind the cabinet below the bottom
- Real fitting confirms no contact
- The cabinet becomes higher than the plinth
- There remains clearance for floor unevenness
- Easier to get a readable bottom gap
- More convenient cleaning
- When 160 mm is excessive
- Impact on appearance
- Impact on the seating position
- Impact on the cabinet edge
- Commercial significance
- Reference vertical coordinate
- Reference horizontal coordinate
- Bottom thickness
- Height of the lower edge of the cabinet
- How far the rear legs are recessed from the back plane
- Is there a back panel below the bottom
- Is there a lower decorative rail
- Cable entries
- Do the lower drawers open after lifting
- But shifting the legs is not a free trick
- Option A. Keep the baseboard
- Option B. Interrupt the baseboard locally
- Option C. Leave the dresser slightly away from the wall
- Furniture may be moved
- The apartment is rented out
- The dresser is mass-produced, not built-in
- The baseboard is expensive or has a complex finish
- After dismantling, an unfinished area will be visible
- Oak
- Oak
- Beech for covering enamel
- Oak for visible texture
- Wood species does not solve the baseboard problem
- Compatibility first
- FUR-022
- FUR-028
- Why you cannot simply add the support height to A
- Layout 120×63
- Layout 160×84
- What is checked
- Why a layout is better than a stand only by height
- Back panel flush with the bottom
- Back panel extends below the bottom
- Back panel recessed inward
- What to note in the side view
- The question worth asking
- Baseboard below the bottom plane of the cabinet
- Baseboard equal to the bottom plane
- Baseboard slightly above the cabinet
- Baseboard significantly above the cabinet
- How to record it in the specification
- Cost of four FUR-022
- Cost of four FUR-028 according to the current card
- Step 1. Apply center of gravity and main loads
- Step 2. Check bottom deflection
- Step 3. Check visual offset
- Step 4. Check baseboard
- Low version template
- High version template
- What must be imitated
- If the leg is 120 mm, it almost coincides with the top of the baseboard
- At 160 mm
- Why you don't need to invent a margin "just in case"
- Mistake 1. "120 mm = 120 mm, so it fits"
- Mistake 2. Choosing 160 mm "just in case"
- Mistake 3. Not measuring the baseboard overhang
- Mistake 4. Forgetting the back wall
- Mistake 5. Treating A as pure clearance
- Mistake 6. Using a foot as a height spacer
- Mistake 7. Ignoring the FUR-028 discrepancy
- Mistake 8. Shifting legs inward without calculation
- Error 9. Look only at the side view
- Error 10. Cut the baseboard before final fitting
- Error 11. Consider 160 mm best for cleaning without checking all furniture
- Error 12. Not considering adjacent furniture
- Error 13. Buying oak before choosing the height
- Error 14. Not checking four points of the floor
- Error 15. Striving for zero gap with the wall at any cost
- Step 1. Is the bottom of the cabinet above the baseboard with clearance?
- Step 2. Can the cabinet be left at a small distance from the wall?
- Step 3. Can the rear legs be structurally shifted inward?
- Step 4. Does MN-006 160×84 fit and look proportional?
- Step 5. Can the baseboard be locally removed without losing the room's versatility?
- Scenario 1. MN-006 120 mm passes without changes
- Scenario 2. MN-006 160 mm solves the skirting board
- Scenario 3. MN-006 120 mm, rear supports shift inward
- Scenario 4. Skirting board is interrupted behind furniture
- Conditional formula
- What sizes are available for MN-006?
- How does MN-006 120 differ from 160 mm?
- Can I place a dresser on MN-006 next to a 120 mm baseboard?
- Is a 120 mm leg sufficient with a 120 mm baseboard?
- What should be measured first?
- How to measure the dresser's clearance?
- Do I need to consider the baseboard thickness?
- What is E in MN-006?
- Why does E change?
- Can MN-006 160 not fit, even though it is taller?
- Do I need to cut the baseboard behind the dresser?
- Can the back legs be shifted inward?
- Can the dresser be left 10–15 mm from the wall?
- What to choose — beech or oak?
- How is "Standard" different from "Prestige"?
- Which glider is suitable for MN-006?
- What is the size of FUR-022?
- What is the size of FUR-028?
- Can 5 or 11 mm of the glider be added to the leg height?
- How many MN-006 are needed for the dresser?
- How much do four MN-006 120 mm beech gliders cost?
- How much do four MN-006 160 mm beech gliders cost?
- How much do four oak MN-006 120 mm cost?
- How much do four oak MN-006 160 mm cost?
- Is it worth buying 160 mm "just in case"?
- When are 160 mm justified?
- When is 120 mm better?
- Where to buy wooden furniture legs?
- Where to buy legs for a dresser?
- Where to buy MN-006?
- How to order MN-006?
- How to check the current price?
- Can I cut the baseboard if the apartment is being rented out?
- What to do if the dresser is built-in?
- Does the dresser need to be secured to the wall?
- Does a high plinth affect stability?
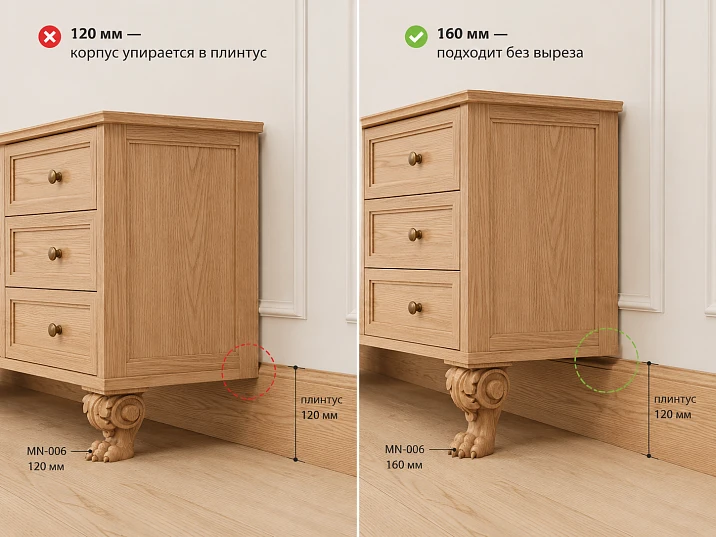
120 mm leg and 120 mm plinth are not an equality on which an order can be based.
The numbers match only in the catalog. In the room, they refer to different geometries.
For MN-006, size A=120 mm describes the leg height. For a plinth, 120 mm is the height of the finishing profile along the wall. To ensure the dresser actually moves close to the wall without cutting into an already installed plinth, a completely different parameter needs to be checked: at what mark the lower rear edge of the body will be relative to the top point of the plinth, and whether the body itself can pass over its protrusion from the wall.
If the dresser's bottom after installing MN-006 120 mm ends up exactly at the 120 mm mark, that does not mean a good fit. The actual floor may have unevenness, the foot adds its own mounting height, the rear panel of the body may extend below the bottom, and a shaped plinth can protrude from the wall by 15–16 mm or more. Additionally, the rear legs may not be at the very rear edge but shifted inward—then the plinth passes behind them entirely, and the conflict is resolved not by height but by the bottom plan.
The MN-006 160 mm version is also not a "simple insurance of another 40 mm." The card shows:
-
MN-006 120 mm → E=63 mm;
-
MN-006 160 mm → E=84 mm.
The high leg becomes not only taller but also larger. It can provide useful clearance above the plinth, but at the same time change the dresser's proportions, take up more space in the corner joint, and come closer to the body's edge.
Therefore, the decision before purchasing looks like this:
baseboard 120 mm → its actual height and overhang → lower mark of the body → rear offset of the legs → geometry of MN-006 120/160 → support foot → dry fit.
Only after this can you determine which version actually allows placing the dresser close to the wall.
For most typical cases, the logic is as follows:
-
if the lower plane of the body with MN-006 120 mm actually ends up higher than the baseboard with sufficient clearance, and the rear legs do not conflict with its overhang, the low version may be sufficient;
-
if 120 mm provides almost zero clearance, the floor is uneven, or the rear part of the body drops below the bottom, 160 mm provides a safer geometric margin;
-
if the rear legs can be structurally shifted inward and the baseboard passes behind them, the height does not need to be increased just for the wall;
-
if the 160 mm MN-006 ruins the proportions or E=84 mm does not fit, it is more reasonable to reconsider the position of the supports or the assembly itself rather than buying the high version "just in case."
The MN-006 card confirms two standard geometries: 120×63 mm and 160×84 mm, beech and oak, with sanding quality "Standard" and "Prestige." For a dresser, four identical supports are usually required, so an error in choosing the height is immediately multiplied by four.
At the time of verification, for "Standard" quality, the prices are:
-
beech 120 mm — 3,380 ₽;
-
oak 120 mm — 5,210 ₽;
-
beech 160 mm — 6,650 ₽;
-
oak 160 mm — 9,110 ₽.
Four tall beech MN-006 legs cost 26,600 ₽ versus 13,520 ₽ for four low ones. For oak, the difference is even greater: 36,440 ₽ versus 20,840 ₽. Therefore, buying 160 mm just as insurance against a high baseboard is an expensive solution if 120 mm already fits the actual geometry.
Once the side cut is confirmed, you can buy carved furniture legs MN-006 in the required height, rather than choosing them by matching two catalog numbers.
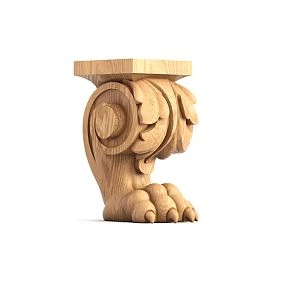
Carved furniture leg MN-006: two versions that differ not only in height
| Option | A | E | Materials |
|---|---|---|---|
| MN-006 low | 120 мм | 63 мм | Beech / Oak |
| MN-006 high | 160 мм | 84 мм | Beech / Oak |
Difference by A:
160 − 120 = 40 mm.
Difference by E:
84 − 63 = 21 mm.
Relative to the low version, size E increases by approximately:
21 / 63 × 100 ≈ 33%.
That is, the high leg is noticeably larger in scale.




MN-006 120×63 mm
This is a more compact version.
It is especially interesting if the furniture should remain visually low and the baseboard can already be bypassed due to the design of the bottom or the position of the rear supports.
Our factory also produces:
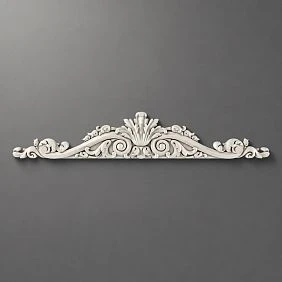
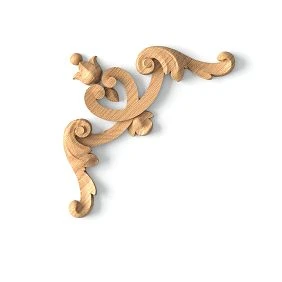
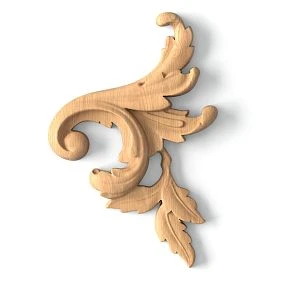
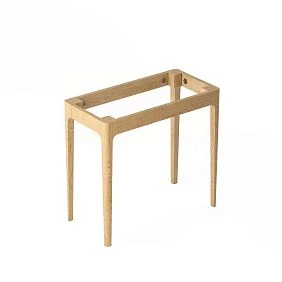
Adds an additional 40 mm in height, but requires more space in horizontal geometry.
For a low dresser, these 40 mm can significantly change the visual proportion.
Beech MN-006
Get Consultation
Beech is convenient when the supports are planned to be painted with opaque enamel.
Oak MN-006
Oak is logical if the natural texture should remain visible and support the tabletop, facades, or other wooden decor.
Why does E change when the height increases?
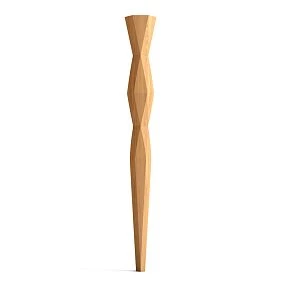
MN-006 is a carved furniture support, not a rectangular beam of uniform cross-section.
The taller version has a different scale of the carved body. Therefore, it cannot be substituted into the old corner joint just because the article number is the same.
The higher version has a different scale of the carved body. Therefore, it cannot be substituted into the old corner joint just because the article number is the same.
Buying furniture legs with a 120 mm plinth: why A=120 mm does not guarantee free passage of the cabinet body
If you need buy furniture legs for an already finished room, it is not the leg height itself that is checked, but the finished lower mark of the cabinet body.
Finished plinth height
It is not taken from the collection name. It is measured on the wall.
In fact, it can be:
-
exactly 120 mm;
-
119 mm;
-
122 mm;
-
differ at corners due to the floor.
Lower plane of the cabinet body
This is a line that should pass above the top edge of the plinth if the back wall of the furniture meets the wall.
Bottom construction
The body may have:
-
recessed bottom;
-
protruding bottom frame;
-
decorative apron;
-
back wall below the bottom.
It is the lowest rear element that determines the conflict.
Actual leg position
If the leg is not attached directly to the bottom surface but fits into a mounting assembly, the finished height may differ from simple A.
Glide
Its mounting height affects the final elevation.
Floor deviation
If the floor near the wall is higher than in front, the dresser may lower relative to the baseboard specifically in the rear area.
Tall wooden baseboard and dresser: height is only half the task
Even if the cabinet passes over the baseboard vertically, it may not move close to the wall due to the baseboard's protrusion.
For example, the baseboard has:
-
height of 120 mm;
-
a depth of 15–16 mm.
If the rear plane of the dresser extends below its top edge, these 15–16 mm physically push the furniture away from the wall.
Height
Determines whether the cabinet can pass over the baseboard.
Thickness
Determines how much the baseboard pushes the cabinet forward.
Curved top of the profile
The maximum overhang may not be at the bottom, but higher.
Wall unevenness
The plinth may not stand perfectly straight.
Why a side cut is needed
Only 120 mm is visible in the front view.
The cut shows:
-
a wall;
-
the thickness of the plinth;
-
body;
-
the leg;
-
a gap.
And it is the cut that answers the question “will the dresser fit against the wall.”
MN-006 120 mm: when a low carved leg can really work
The low version cannot be rejected just because the baseboard is also 120 mm.
There are several working scenarios.
The bottom is actually above the top line of the baseboard.
For example, the body design has its own lower offset above the top of the leg.
Then the finished bottom mark may end up higher than 120 mm.
The rear legs are shifted inward into the body.
The baseboard runs in the gap between the wall and the rear supports.
The baseboard runs behind the body below the bottom.
If the lower plane is above it, the furniture fits closer.
The actual fitting confirms the absence of contact.
This is the main criterion.
Not a catalog.
Not arithmetic.
But a finished or full-size mockup of the node.
MN-006 160 mm: when the extra 40 mm are really useful
The cabinet becomes higher than the baseboard
The most obvious reason.
There remains a margin for floor unevenness
If the baseboard and floor have slight deviations, the margin reduces the risk of local contact.
Easier to get a readable bottom gap
The dresser looks visually "detached" from the floor.
More convenient cleaning
But the clearance should be evaluated by the actual lowest element of the body, not just by the A leg.
When 160 mm is excessive
If 120 mm already provides a good margin, the additional 40 mm are purchased without functional necessity.
Why MN-006 160 mm is not just MN-006 120 mm plus 40 mm
| Parameter | 120 мм | 160 мм |
|---|---|---|
| A | 120 | 160 |
| E | 63 | 84 |
High version:
-
40 mm higher;
-
21 mm larger in E.
Impact on appearance
The carved leg becomes more noticeable.
Impact on the mounting position
E=84 mm requires more space.
Impact on the cabinet edge
If the leg is close to the side panel, the increased dimension may change the visual offset.
Commercial rationale
Purchasing the more expensive 160-millimeter version should solve two tasks:
-
provide the required clearance;
-
fit within its own geometry.
Buy wooden furniture legs: first make a side cutaway "wall — baseboard — dresser"
If you need Buy wooden furniture legs, the most useful document for this task is not the dresser's front view, but a single side cutaway.
It should include:
-
finished wall;
-
real wooden plinth;
-
height of its top point;
-
maximum projection from the wall;
-
the lower plane of the housing;
-
back panel of the dresser;
-
MN-006 in the selected height;
-
position of the rear leg;
-
thrust bearing;
-
floor unevenness, if measured.
Such a cross-section in a minute shows what cannot be understood from two numbers "120 and 120".
Control vertical coordinate
You need to determine:
Hbody-bottom = distance from finished floor to the lowest rear element of the body.
This mark must be above the actual top point of the plinth if the cabinet is to pass over it.
Condition:
Hcabinet-bottom > Hplinth
with a design allowance determined by the actual furniture and floor unevenness.
The article does not prescribe universal 3, 5, or 10 mm. Such a gap is checked on the specific site.
Reference horizontal coordinate
If the cabinet drops below the top line of the plinth, its distance from the wall must be known.
Minimum:
Scabinet ≥ Tplinth
where T is the actual maximum protrusion of the plinth.
But here too, the back panel, cables, ventilation, and the way the furniture opens must be considered.
What to measure on a finished dresser
Even if the legs haven't been purchased yet, the body itself provides almost all the information.
Bottom thickness
It affects the mounting assembly.
Height of the lower edge of the body
Not per the drawing, but actually.
How far the rear legs are recessed from the rear plane
This is one of the main dimensions.
If the rear leg is set 80–100 mm inward, the baseboard can pass behind it without any increase in A.
Is there a back panel below the bottom
Sometimes the thin back wall drops below the main plane of the body.
Then it will be the first to hit the baseboard.
Is there a lower decorative rail
It can also be located below the bottom.
Cable inlets
If a wire runs behind the dresser, don't aim for absolute contact with the wall.
Do the lower drawers open after lifting
Increasing the height by 40 mm changes the position of the furniture relative to the floor, handles, and neighboring objects.
Is it necessary to place the back legs flush against the wall at all
No.
This is one of the most effective ways to resolve the conflict without buying a taller leg.
Let's imagine a top view.
The baseboard protrudes 16 mm from the wall.
The rear plane of the cabinet is positioned close to the wall.
If the rear MN-006 legs are set 100 mm inward from the rear edge, the baseboard can pass behind them, and the cabinet itself can remain above its top part.
But shifting the legs is not a free trick.
The load transfer scheme changes.
The support moves further from the edge of the cabinet.
The cantilevered section of the bottom may increase.
Therefore, the position of the legs is confirmed by the furniture designer.
You cannot advise "just move them inward" without checking the cabinet.
Example #1: plinth 120×16 mm, bottom of the body 128 mm
Conditional project:
-
plinth — 120 mm in height;
-
overhang — 16 mm;
-
bottom of the rear edge of the body — 128 mm;
-
floor is level;
-
rear supports do not interfere.
Vertical clearance:
128 − 120 = 8 mm.
In this case, MN-006 120 mm may be sufficient if these 128 mm are achieved in the actual assembly and the clearance is confirmed on site.
Buying 160 mm just for the baseboard is not necessary.
Example #2: the bottom of the cabinet comes out to exactly 120 mm
The catalog match seems ideal.
In practice, this is the riskiest scenario.
Stock:
120 − 120 = 0 mm.
Any floor deviation, a slight protrusion of the baseboard, or the mounting size of the foot changes the position.
If the dresser must pass over the baseboard, zero clearance cannot be considered a comfortable design solution.
Example #3: the bottom of the cabinet is 116 mm, but the rear legs are deeply recessed
Vertically, the cabinet is lower than the baseboard.
It seems that the low MN-006 is not suitable.
But if the back wall of the dresser physically does not reach the wall, and the baseboard falls into the technical gap behind the body, the furniture can stand normally.
Here, horizontal geometry decides.
Example #4: MN-006 160 mm lifts the body, but E=84 mm does not fit
The additional 40 mm perfectly solves the baseboard.
However, the wide version conflicts with the corner block of the body.
This option cannot be considered the best.
You need to either change the mounting assembly, or return to 120 mm and solve the baseboard differently.
Buy legs for the dresser or cut the wooden baseboard behind the furniture
There are three normal strategies.
Option A. Keep the baseboard
Adjust the height and position of the legs so that the body passes above or stands in front of the profile without an unsightly gap.
Advantages:
-
the wall finish remains intact;
-
the dresser can be moved;
-
after dismantling, the furniture will not leave a "hole" in the baseboard.
Option B. Interrupt the baseboard locally
Suitable for built-in or nearly stationary furniture.
Advantages:
-
the body can be placed closer to the wall;
-
no need to increase the legs just for the sake of the finish.
Disadvantages:
-
when rearranging the furniture composition, the wall section will remain unfinished;
-
a neat end of the baseboard is required;
-
Additional work arises.
Option B. Leave the dresser slightly away from the wall.
The simplest.
The baseboard remains.
Legs are chosen based on the design and height of the furniture.
Disadvantage — a visible gap behind the cabinet.
When cutting the baseboard behind the dresser is not worthwhile
Furniture may be moved.
Today the dresser stands here, in a year — on another wall.
The apartment is rented out.
Flexibility of layout is more important than the perfect fit of one item.
Serial dresser, not built-in
There is no point in adapting the finish to an item that is not part of the architecture.
Baseboard is expensive or complex to finish
A local gap is difficult to restore later.
After dismantling, an unfinished area will be visible
This increases the cost of future renovations.
When a tall baseboard behind a stationary dresser can be omitted
If the furniture:
-
design;
-
attached to the wall;
-
designed for long-term use;
-
covers the section completely;
-
will not be rearranged.
Then the local absence of the baseboard may be technically normal.
But in our scenario, the baseboard is already installed, so its removal is a separate operation that needs to be accounted for.
What costs more: four MN-006 160 mm or a local rework of the baseboard
For the 'Standard' quality, the current difference in the product is very noticeable.
Beech
4×120 mm:
4 × 3 380 = 13 520 ₽.
4×160 mm:
4 × 6 650 = 26 600 ₽.
The difference:
13 080 ₽.
Oak
4×120 mm:
4 × 5 210 = 20 840 ₽.
4×160 mm:
4 × 9 110 = 36 440 ₽.
The difference:
15 600 ₽.
This is the budget against which alternatives should be compared.
If a local professional rework of the baseboard and restoration of the finish cost significantly less, and high legs are not needed for the design, 160 mm may turn out to be an unjustifiably expensive insurance.
If the baseboard is complex, expensive, runs continuously throughout the room, and furniture may be rearranged — preserving the baseboard may be more valuable than the difference in leg price.
Why you can't use only the cost of the baseboard
Even a cheap plank can be expensive to replace after a completed renovation.
The estimate includes:
-
dismantling;
-
end cutting;
-
end finishing;
-
wall restoration;
-
reinstallation;
-
color matching.
Beech MN-006 or oak: the material is chosen after geometry
Beech under covering enamel
On the current card, beech under enamel is the base option.
If the dresser is painted, this is often logical.
Oak for visible texture
Oak is justified if the carved leg must remain natural or tinted.
The wood species does not solve the baseboard problem.
Height A and size E depend on the version, not on the wood.
Compatibility first.
You cannot buy an expensive oak set until you have checked:
-
120 or 160;
-
the position of the rear legs;
-
baseboard;
-
foot cap.
"Standard" or "Prestige" for carved MN-006
The card offers two sanding qualities.
Standard — machine sanding, lower price.
Prestige — more thorough manual preparation.
For carved profiles, this matters because the relief is harder to finish sanding after purchase.
But the main question of the article remains geometric.
If the workshop has its own quality preparation area, "Standard" may be rational.
If the legs need to go to finish faster, "Prestige" reduces internal work.
FUR-022 or FUR-028 foot: should it be considered when checking height
The MN-006 card recommends both options.
FUR-022
The current card shows 30×30×5 mm, price at the time of check — 170 ₽. This is a SUPER GLIDE foot.
You can buy the foot pad FUR-022 after selecting the leg.
FUR-028
There is an important discrepancy in the current card.
The product name says d=28 mm, but the size table currently shows 25×25×5 mm, price — 70 ₽.
Therefore, for precise furniture, you don't need to automatically use the old figure of 28×28×11 mm or assume that the foot pad will add exactly 11 mm of height.
Before ordering, the actual mounting dimension should be confirmed.
Link: buy felt furniture pad FUR-028.
Why you can't simply add the foot pad height to A
The overall product dimension and the actual addition after installation may differ.
You need to look at the assembled support.
FUR-022 vs FUR-028: what matters more for the plinth
Not the material in contact with the floor, but the real final position of the cabinet body.
But after geometry, there's also an operational choice:
-
FUR-022 — sliding option;
-
FUR-028 — felt.
For four legs, the same type is needed, unless the project specifies otherwise.
How to check MN-006 before purchasing four legs
It is not necessary to order four supports for testing.
You can make two mockups.
Mockup 120×63
Height 120 mm, dimension E=63 mm.
Mockup 160×84
Height 160 mm, E=84 mm.
What is checked
-
lower mark of the housing;
-
baseboard;
-
rear offset;
-
corner node;
-
visual proportion.
Why the layout is better than the stand only in height
A 160 mm block will show ground clearance, but will not show E=84 mm.
And this is a key risk of the tall version.
How to do a dry fit of the body without MN-006
Temporary supports must be stable and used only to check geometry.
Need to reproduce:
-
height;
-
position of supports;
-
size in plan.
Do not operate furniture on improvised stands.
What to measure on the wall before fitting
At least three points along the baseboard:
-
from the left;
-
in the center;
-
from the right.
The floor height can vary.
If the floor has a slope of 4 mm
The zero scheme 120/120 becomes especially risky.
At one end, the allowance may disappear.
If the baseboard is nominally 120 but actually 123 mm
Same problem.
The catalog height does not replace the actual measurement.
If the baseboard has a shaped top
Need to measure the maximum height, not the visual horizontal shelf.
If the baseboard is pulling away from the wall
Its protrusion increases.
The dresser may stop earlier.
If the wall itself is uneven
Even without a baseboard, the cabinet will not fit perfectly flush.
Then the requirement of "no gap" needs to be reconsidered.
Dresser against the wall: why the back panel is sometimes more important than the legs themselves
The buyer can perfectly match MN-006 in height and still not be able to push the dresser against the wall.
The reason is the back structure of the cabinet.
Back wall flush with the bottom
Then the lower plane of the housing is checked.
Back wall drops below the bottom
It is the first to meet the baseboard.
For example:
-
bottom at 130 mm mark;
-
back wall drops to 115 mm;
-
baseboard — 120 mm.
Everything looks good along the bottom.
In fact, the back wall conflicts.
Back wall is recessed inward
This is more convenient: the plinth can pass through the technological space behind the cabinet.
What to record in the side view
Not "bottom of the dresser = 130 mm".
But separately:
-
bottom of the base;
-
bottom of the back panel;
-
bottom of the decorative apron;
-
the lowest rear element.
Scenario: plinth 120 mm, but its offset is only 12 mm
If the cabinet is lower than the top line of the plinth, the dresser will move away from the wall by at least approximately the maximum profile offset — if no other elements interfere.
12 mm is sometimes visually almost imperceptible.
Then there's no point in overpaying for the MN-006 160 mm just for the absolute contact of the back wall with the wall.
A question worth asking
Does the project really require "flush"?
Or is a gap of 12–15 mm acceptable?
If acceptable, the leg height is chosen based on the furniture, not the baseboard.
Scenario: baseboard protrusion of 25 mm
The gap is already more noticeable.
Especially on a tall, narrow dresser.
Then there are three options:
-
raise the body above the profile;
-
shift the rear legs and body geometry;
-
interrupt the plinth.
Why should the overhang be measured at the maximum point of the profile
A shaped plinth may have:
-
a narrow base;
-
a convex top;
-
a decorative shelf.
If you count only the thickness at the bottom, the body will hit higher.
Scenario: 120 mm plinth and cable behind the dresser
Sometimes a small gap from the wall is useful.
It provides space for:
-
power cable;
-
charging;
-
router;
-
backlighting;
-
ventilation.
In such a project, the desire to "remove all 15 mm" may be pointless.
Scenario: a dresser has an outlet directly behind its body
If the plug protrudes more than the baseboard, it determines the offset.
MN-006 160 mm does not solve the outlet problem.
This is a good example of why the entire unit needs to be viewed as a whole.
Scenario: the dresser is secured to the wall to prevent tipping.
The mounting system may require a certain distance between the back panel of the furniture and the wall.
You cannot first push the cabinet flush against the wall and then think about how to install the safety bracket.
Especially for a tall dresser.
Why legs do not solve the stability of a tall cabinet
Increasing from 120 to 160 mm changes the height of the center of gravity of the finished furniture.
The article does not claim that the taller version automatically makes the dresser less stable, but the entire cabinet must be checked as a system.
If the furniture is tall, narrow, or has heavy drawers, wall anchoring may be a separate mandatory element of the project.
Scenario: the bottom drawer is almost at floor level.
Transition 120 → 160 raises it by 40 mm.
This can be useful for cleaning.
But it may disrupt:
-
ease of access;
-
the height of the handles;
-
connection with adjacent furniture.
Scenario: dresser is placed next to the bed
The height of the tabletop or upper surface may be related to the mattress.
The additional 40 mm changes the ergonomics.
If 160 mm is purchased only for the baseboard, you need to ensure that the furniture has not become too tall.
Scenario: dresser under the windowsill
The tall MN-006 can lift the body into the windowsill.
Then 160 mm are completely excluded, even if they pass well above the baseboard.
Scenario: mirror above the dresser
Changing the body height changes the composition:
-
distance to the mirror;
-
countertop level;
-
placement of light fixtures.
Scenario: the dresser is already made for 120-mm legs
Then the switch to 160 mm needs to be checked not only by E.
May change:
-
visible lower rail;
-
height of the facade relative to the floor;
-
leg-to-body ratio;
-
mounting unit.
If the body is still being designed
This is the most convenient moment.
You don't have to blindly choose between a "low" and "high" leg; you can first draw the plinth in a side view.
Buying legs for a dresser, wardrobe, and cabinet: when MN-006 doesn't need to be forced to work
If both standard versions are inconvenient, it's better to look at other supports in the category buy legs for a dresser, wardrobe, and nightstand.
For example:
-
120 mm is not enough for ground clearance;
-
160 mm is too high;
-
E=84 mm is too large;
-
E=63 mm fits, but A=120 is too small.
Then another model may provide a more accurate combination of height and dimensions.
Why you don't need to choose a different leg based only on A
The same mistake will repeat.
Need to check:
-
A;
-
plan dimensions;
-
installation;
-
material;
-
hardware.
How to compare MN-006 with an alternative
| Parameter | MN-006 120 | MN-006 160 | Alternative |
|---|---|---|---|
| A | 120 | 160 | ___ |
| E | 63 | 84 | ___ |
| Bottom of the cabinet | ___ | ___ | ___ |
| Passes over the baseboard | Yes/No | Yes/No | Yes/No |
| Visual proportion | ___ | ___ | ___ |
| Kit price | ___ | ___ | ___ |
This makes it clear that the task is not just about height.
Baseboard height and leg height: four possible combinations
Baseboard below the bottom plane of the cabinet
Ideal option.
Profile thickness has almost no effect on the cabinet.
Baseboard equal to the bottom plane
Boundary.
Need a margin.
Baseboard slightly higher than the cabinet
A horizontal conflict appears.
Can be solved with an indent or a different height.
The plinth is significantly higher than the cabinet body.
If the furniture must stand flush, the geometry needs to be changed.
Why a 120 mm plinth may actually be higher than a 120 mm leg.
If MN-006 fits into the cabinet body or mounting assembly in such a way that not all of height A works as a pure lift.
Therefore, the formula cannot state:
bottom of cabinet = leg height A.
You need to:
bottom of cabinet = actual assembled structure.
Why the support pad can be important, even if it adds only a few millimeters.
In the borderline 120/120 scheme, every millimeter matters.
But using the foot as a "leg extender" is incorrect.
Its main function is contact with the floor.
Height is a consequence.
Why FUR-028 needs to be rechecked especially carefully now
The current card contains an inconsistency:
-
name — d=28 mm;
-
table — 25×25×5 mm.
This is exactly the case when you need to request confirmation from the manager for an accurate project.
How to write in the specification
Not:
FUR-028 +11 mm.
But:
FUR-028, actual mounting height after installation — to be confirmed.
FUR-022: a more unambiguous card
Current table:
30×30×5 mm.
Price — 170 ₽.
But here too, the actual lift of the finished leg should be checked during installation.
How many support pads to buy
For four MN-006 — usually four identical support pads, unless the project specifies otherwise.
Cost of four FUR-022
4×170 = 680 ₽.
Cost of four FUR-028 per current card
4×70 = 280 ₽.
The difference is small relative to the price of the legs.
Therefore, the floor glide is chosen based on the floor and usage, not as a way to save on height.
Furniture fittings for table legs: what else is in the MN-006 card
The card recommends:
-
FUR-001-1;
-
FUR-001;
-
FUR-012;
-
FUR-022;
-
FUR-028.
It is useful to open for the project Furniture leg hardware, but the assembly is done after choosing the leg and the joint.
Why the top mounting hardware and the bottom floor glide cannot be mixed in one solution
The top hardware is responsible for the connection to the body.
The bottom one is responsible for contact with the floor.
If MN-006 160 does not fit into the corner joint, FUR-022 will not fix that.
Position of the rear legs: how far they can be shifted inward
There is no universal number.
But you can build a check.
Step 1. Mark the center of gravity and main loads
In a simplified furniture diagram, this is done by the designer.
Step 2. Check the deflection of the bottom
The farther the support is from the edge, the larger the cantilever.
Step 3. Check the visual offset
From the side, the leg should not look randomly recessed.
Step 4. Check the baseboard
Does it pass behind the cabinet body.
When shifting the rear legs is especially convenient
If the dresser has:
-
deep body;
-
rigid bottom;
-
internal support frame;
-
large stability margin.
When shifting is risky
if:
-
narrow body;
-
thin bottom;
-
heavy tabletop;
-
heavy load on the drawers;
-
high center of gravity.
Scenario: front legs at the edge, rear legs shifted inward
This is common logic, but it changes the visual symmetry from the side.
If the side panel is open, the rear leg may seem too deeply hidden.
Scenario: all four legs shifted inward equally
The dresser gets a uniform offset and passes more freely over the baseboard.
But the area of the support rectangle decreases.
Why this needs to be checked for stability
The narrower the support base, the more important the furniture's behavior with open drawers.
How to check without calculation "by eye"
First CAD or drawing.
Then prototype/dry assembly.
Is a cutout in the baseboard needed if the dresser stands 5 mm from the wall
Possibly not.
If the gap visually doesn't bother and the furniture attachment works.
There's no need to strive for absolute contact as an end in itself.
Why 5 mm sometimes looks worse than 15 mm
A very narrow gap can be perceived as an installation error.
A more readable technological gap can be visually more honest.
How to check the gap
Place the housing on the MN-006 templates and look:
-
frontally;
-
from the side;
-
under side lighting.
What to do if the baseboard has just been installed
Don't rush to cut.
First check both heights of MN-006.
What to do if the baseboard has been in place for a long time and the finish is hard to replicate
Preserving the profile has additional value.
160 mm may be more expensive, but cheaper than future finish repairs.
Buying a wooden baseboard: when it's really relevant to the article
If the existing baseboard is damaged or you need to restore a section after remodeling, you can open to buy wooden baseboard.
But in a normal scenario, the article should not push for replacing an already installed profile.
The main task is to preserve it, if that is reasonable.
Materials and quality of wooden products
After selecting the height, you can compare materials and quality of wooden products.
For MN-006, this is useful when choosing:
-
beech/oak;
-
Standard/Prestige;
-
for enamel/for tinting.
Delivery conditions for furniture legs
Before ordering four supports, it is useful to check delivery conditions for furniture legs.
Especially if one version is available from stock, and the other is made to order.
How to check MN-006 on site without buying four sets
Instead of using expensive legs as a measuring tool, you can make two full-size templates.
Low version template
-
height 120 mm;
-
E=63 mm.
High version template
-
height 160 mm;
-
E=84 mm.
The template does not have to replicate all the threading. For an initial check, it is sufficient to reproduce:
-
height;
-
maximum dimension in the critical area;
-
the actual attachment point to the body, if known.
What must be simulated
Not just the leg.
You need to place a real cabinet or its exact mock-up on top.
Otherwise, it becomes a test of 'does the block fit at the baseboard,' not 'does the dresser fit.'
ControlCarved geometry and baseboard: why the side silhouette of the dresser matters
With a low version, the cabinet appears closer to the floor.
A tall one opens up more air.
The baseboard then becomes a visible horizontal line behind the furniture.
If a 120 mm leg almost aligns with the top of the baseboard
The plinth can visually "cut" the carved leg at the level of the body.
At 160 mm
A separate strip of wall appears between the top of the plinth and the body.
This can look lighter.
But it can also emphasize the plinth itself more strongly.
How to evaluate the side view before ordering
Take a photo of the wall.
In a graphic editor or simply with a paper mockup, raise the body by 120 and 160 mm.
It is important not to make a photorealistic render.
You need to compare exactly the silhouette.
How the baseboard affects the shadow under the dresser
At 120 mm, the shadow is denser.
At 160 mm, more light gets under the furniture.
If the wall behind the dresser is light, a high gap can make the baseboard more noticeable.
What happens with under-lighting
If the dresser has LED lighting, a high baseboard can cast its own shadow.
Then the joint needs to be mocked up with the light on.
Uneven floor: how many points to measure
For a regular dresser, it's enough to check the areas of the four legs.
Record the height relative to one conditional horizontal line.
Why you don't need to invent a reserve "just in case"
If the actual difference is 2 mm, you can account for 2 mm.
Don't buy 40 mm of extra height just because of an abstract floor unevenness.
If the floor near the wall is 6 mm higher
The bottom of the cabinet in the rear area actually lowers relative to the baseboard.
The boundary 120-mm scheme may stop working.
If the floor in front is higher
The dresser tilts backward without adjustment.
This also affects the gap.
Can the unevenness be solved with an adjustable foot?
Only if the selected fitting is truly adjustable and compatible.
FUR-022 and FUR-028 from this article are other types.
You cannot attribute to them an adjustment function that the card does not claim.
How to check the actual height after installing the foot pad
Assemble one test support.
Measure:
from the floor to the upper mounting plane of the leg.
This is better than adding up the catalog.
Why size E matters for the plinth, even though it seems unrelated
The tall version is wider.
If the rear leg with E=84 mm is recessed inward, its front edge shifts further into the body.
This may bring it closer to the box, fastener, or partition.
Conditional example of the rear leg position
Let the distance from the rear edge of the housing to the center of the leg be 60 mm.
If we conditionally consider dimension E to be symmetrical relative to this axis:
for 63 mm, half is 31.5 mm.
For 84 mm — 42 mm.
The front/rear boundary changes by approximately 10.5 mm on each side.
This is only a geometric illustration, because the actual contour of the leg needs to be viewed according to the drawing.
But it shows why E cannot be ignored.
If E=84 extends beyond the rear edge of the housing
The leg may visually protrude.
Then 160 mm is not suitable, even if the baseboard is fully resolved.
If E=84 intersects the mounting block
The joint needs to be changed.
If E=63 has a large margin
The low version is simpler.
Wooden baseboard: why the cutout must have finished ends
If the decision is still made in favor of a local break, the baseboard should not look like a randomly sawed-off plank.
You need to decide:
-
end;
-
finish;
-
gap to the cabinet;
-
possibility of future restoration.
The article does not provide a universal technology for mitering a specific baseboard, because the profile may vary.
Where to end the baseboard relative to the dresser
It is not necessary to end exactly at the edge of the cabinet body.
Sometimes it is more reasonable to end slightly inside its footprint so that the end is not visible from the side.
But after moving the furniture, the hidden section will become noticeable.
If the dresser is 1200 mm wide
A baseboard cutout of almost 1.2 m is already a significant change to the trim.
If it is a small cabinet 400 mm
A local gap is easier to restore.
How the amount of furniture affects it
If a series of three dressers stands along the wall, the baseboard cutouts can turn a continuous line into a set of fragments.
Then tall legs or another furniture scheme become more attractive.
If the furniture is built in between walls
The baseboard behind it may indeed be unnecessary.
But this needed to be decided before its installation.
In our scenario, it is already there, so dismantling is extra work.
If the apartment is rented out daily
It is better to keep the baseboard.
Furniture changes more often, the renovation should be universal.
If this is a hotel or aparthotel dresser
An additional clearance of 160 mm can simplify cleaning, but the carved tall leg must withstand the operational load of the entire unit.
The article does not assign load without design data.
If this is children's furniture
Stability and wall anchoring need to be assessed separately.
Do not choose height based only on cleaning and baseboard.
If this is a narrow tall cabinet
Increasing legs by 40 mm affects stability more visually and structurally than for a wide low dresser.
If this is a wide low dresser
160 mm can look proportional and give a nice clearance.
How to check stability in a household mockup
Do not rock an unfixed body on temporary supports.
First, constructive confirmation.
Then, a ready-made assembly.
Errors when choosing MN-006 near a high baseboard
Error 1. "120 mm = 120 mm, so it fits"
Why it happens: identical numbers.
Consequence: zero clearance or contact.
How to prevent: measure the bottom of the housing.
Error 2. Choosing 160 mm "just in case"
Consequence: overpaying 13–15 thousand rubles for the "Standard" set and possible incorrect proportion.
Error 3. Not measuring the baseboard protrusion
The height passes, but the cabinet body is still far from the wall.
Mistake 4. Forgetting the back panel
It is lower than the bottom and touches first.
Mistake 5. Treating A as pure ground clearance
The mounting unit changes the final elevation.
Mistake 6. Using the foot plate as a height spacer
It is selected based on the floor, not to compensate for the baseboard.
Mistake 7. Ignoring the FUR-028 discrepancy
Using the old height without checking is a risk to the precise project.
Mistake 8. Shifting the legs inward without calculation
The load scheme is changing.
Error 9. Look only at the side view
E=84 may not fit in the plan.
Error 10. Cut the plinth before final fitting
Then it turns out that 120 mm was fine anyway.
Error 11. Considering 160 mm best for cleaning without checking all furniture
The dresser becomes too tall.
Error 12. Not considering neighboring furniture
The height line breaks.
Error 13. Buying oak before choosing the height
Expensive material doesn't solve geometry.
Error 14. Not checking the four points of the floor
The boundary gap disappears in one corner.
Error 15. Striving for zero gap with the wall at any cost
Sometimes cables, ventilation, or mounting require space.
When MN-006 120 mm is NOT yet needed to buy
It's too early to order the low version if:
-
the baseboard is measured only from the catalog;
-
the actual top point of the profile is unknown;
-
the offset from the wall is not measured;
-
The bottom plane of the housing is not yet defined;
-
The back wall of the dresser is not accounted for;
-
The position of the rear legs is not approved;
-
The foot pad is not selected;
-
The housing currently exists only as a general sketch;
-
The decision is based on the match of "120 mm leg = 120 mm baseboard."
When MN-006 160 mm is NOT needed to be purchased yet
The tall version should not be taken as a safety net if:
-
120 mm already provides a real margin;
-
the dresser becomes too tall;
-
E=84 mm does not fit into the mounting joint;
-
the rear legs can be correctly shifted inward;
-
the baseboard still does not interfere due to the structural gap;
-
additional height is not needed for cleaning or design;
-
the cost difference has no functional justification.
When carved wooden legs MN-006 can already be ordered
The order is ready if the entire chain is completed.
-
The plinth has been physically measured.
-
Its maximum height is known.
-
The maximum projection from the wall is known.
-
The dresser body is finally designed or assembled.
-
The lowest rear element of the body has been measured.
-
The position of the rear legs has been approved.
-
MN-006 120×63 has been checked.
-
MN-006 160×84 has been checked.
-
The proportion of the furniture in both heights has been assessed.
-
Beech or oak has been selected.
-
'Standard' or 'Prestige' has been selected.
-
Furniture fittings selected.
-
For FUR-028, the actual size is confirmed if it is used.
-
Stability and body mounting checked.
-
current price and availability have been rechecked.
How to place an order for MN-006
A working specification might look like this:
MN-006 / A=120 mm / E=63 mm / beech / Standard / for enamel / 4 pcs. / plinth H=___ mm, T=___ mm / lower body mark ___ mm / rear leg offset ___ mm / FUR-022 4 pcs. / assembly checked.
Or:
MN-006 / A=160 mm / E=84 mm / oak / Prestige / for tinting / 4 pcs. / plinth H=___ mm / body clearance ___ mm / FUR-028 4 pcs., actual mounting size confirmed / project approved.
After checking, you can order MN-006 120 or 160 mm.
If you need not a specific article but a choice among unpainted supports, you can open Buy unpainted wooden legs.
Checklist before payment for four MN-006
| Parameter | 120 мм | 160 мм |
|---|---|---|
| A | 120 | 160 |
| E | 63 | 84 |
| Bottom of the body after assembly | ___ | ___ |
| Top of the baseboard | ___ | ___ |
| Vertical clearance | ___ | ___ |
| Baseboard protrusion | ___ | ___ |
| Rear leg offset | ___ | ___ |
| Corner joint fits | Yes/No | Yes/No |
| Furniture proportion fits | Yes/No | Yes/No |
| Price for 4 pcs. | ___ | ___ |
| Thrust bearing | ___ | ___ |
| Total | buy/not | buy/not |
This table is more useful than the question "what's better — 120 or 160?" because it shows why a specific option was chosen.
Decision tree in five minutes
Step 1. Is the bottom of the cabinet higher than the baseboard with clearance?
Yes → proceed to E and design.
No → check 160 mm or horizontal clearance.
Step 2. Can the cabinet be left at a small distance from the wall?
Yes → 120 mm may be sufficient.
No → continue.
Step 3. Can the rear legs be structurally shifted inward?
Yes → check load and stability.
No → continue.
Step 4. Does MN-006 160×84 fit and look proportional?
Yes → the tall version becomes a strong candidate.
No → another model or work with the baseboard.
Step 5. Can the baseboard be locally removed without losing the room's versatility?
Yes → compare the cost of this modification with the surcharge for 160 mm.
No → keep the plinth and change the furniture geometry.
Scenario: the dresser should stand almost flush, but not absolutely.
The client allows a 10 mm gap.
The plinth protrudes by 16 mm.
If the rear structure of the cabinet already has a technological setback of 8 mm, the additional real gap due to the plinth may be small.
This needs to be measured.
It is not necessary to raise the entire dresser by 40 mm for the sake of a few millimeters at the wall.
Scenario: the plinth runs only between the rear legs.
Let the rear legs be spaced apart, and the plinth runs behind the cabinet between them.
Then it is important to check the edges of the legs, not just the central part of the plinth.
Scenario: shaped baseboard is thicker at the top edge
The dresser may fit in height, but the back panel touches the decorative protrusion.
Then the horizontal layout is more important.
Scenario: baseboard is thin, but the dresser has a protruding back panel
Protruding fasteners or a back rail may become a new constraint.
Scenario: cable channel is built into the baseboard
Cutting such a profile behind furniture is especially undesirable.
Access to the cable must be preserved.
Scenario: outlet is located above the baseboard
A tall MN-006 may make it easier to reach the plug from below, but this is not a universal advantage.
Scenario: robot vacuum cleaning
Not only vertical clearance is needed, but also sufficient passage depth.
A high leg itself does not guarantee that the robot will go under the dresser if there is a lower rail.
Scenario: baseboard is removed without damaging the wall
Then local rework is cheaper.
Scenario: baseboard is glued and painted together with the wall
Rework is more complicated.
Why the baseboard decision is related to future renovation
If the dresser is replaced, the high baseboard must become continuous again.
A preserved profile is always easier.
What to keep after installation
Useful to keep:
-
assembly drawing;
-
selected MN-006;
-
finish;
-
type of floor glide;
-
short plinth sample;
-
remaining leg material, if any.
This helps during repairs.
Comparison of four solutions for the same tall plinth
After all measurements, it is useful to place not two legs, but four full scenarios side by side. This removes the false choice of "120 or 160" and shows that leg height is only one way to solve the joint.
| Solution | Plinth is preserved | Furniture height changes | Cabinet rework needed | Reversibility |
|---|---|---|---|---|
| MN-006 120 mm, housing passes | Yes | Minimally | No | High |
| MN-006 160 mm | Yes | +40 mm relative to low version | possibly due to E=84 | High |
| MN-006 120 mm + rear legs offset | Yes | No | yes, per design | Medium |
| Local skirting board break | not on site | No | no/minimal | Low |
Scenario 1. MN-006 120 mm passes without changes
This is the simplest option.
The baseboard remains intact.
The dresser retains its intended low proportion.
The set is cheaper than the tall version.
This scenario is especially good if the actual clearance is confirmed not "to zero" but with a clear margin.
Scenario 2. MN-006 160 mm solves the baseboard
This option costs more but does not require altering the wall finish.
It is especially logical if the extra 40 mm are useful simultaneously for:
-
cleaning;
-
for visual relief of the dresser;
-
access to cables;
-
composition with adjacent furniture.
If the only reason is fear of the baseboard, and 120 mm actually fits, the surcharge is not justified.
Scenario 3. MN-006 120 mm, rear supports shift inward
This is a structurally interesting solution.
The dresser maintains its height.
The baseboard passes behind the cabinet.
But the load-bearing scheme changes. Therefore, saving on legs does not automatically mean a cheaper project: reinforcement of the bottom or new placement of fasteners may be needed.
Scenario 4. The baseboard is interrupted behind the furniture
The most "architectural" alteration.
It is rational when the furniture is actually built-in and will stay in place for many years.
For a regular dresser, this path reduces the flexibility of the room.
How to choose a solution based on life-cycle cost, not just today's receipt
The low MN-006 may be cheaper now, but if an expensive baseboard is cut out for it, future furniture rearrangement creates new renovation.
The high MN-006 is more expensive now, but keeps the finish universal.
Therefore, you can consider not only:
the price of legs today,
But:
the price of legs + the price of alteration + the price of future restoration.
Conditional formula
C solutions = C legs + C body modifications + C work with the baseboard + C future restoration.
For movable furniture, the last component is especially important.
Why 160 mm can be more advantageous in a rental apartment
Not because high legs are 'better.'
But because the baseboard remains continuous and the apartment is not tied to one dresser.
After replacing furniture, the finish is ready for a new item.
Why 120 mm can be more advantageous in a custom built-in composition
If the dresser is designed as a permanent part of the interior, a local break in the baseboard may be completely invisible and have no operational downside.
Then there is no point in paying for an extra 40 mm just for reversibility that is not needed.
Dry acceptance before the final finish of the legs
Before painting or tinting, it is useful to assemble one support in a real assembly.
Checked:
-
actual height;
-
position relative to the baseboard;
-
E;
-
mounting hardware;
-
thrust bearing;
-
bottom clearance.
If after finishing it turns out that the height or assembly needs to be changed, rework is more expensive.
What to photograph for the furniture maker and designer
Four shots:
-
side view of the dresser and baseboard;
-
bottom view of the position of the rear leg;
-
common facade with 120 mm layout;
-
common facade with 160 mm layout.
So one specialist evaluates the structure, the second evaluates the proportion, and both discuss one real object.
Passport of the 'MN-006 + high plinth' assembly
| Field | Value |
|---|---|
| Skirting board height | ___ mm |
| Maximum overhang | ___ mm |
| Bottom of the base | ___ mm |
| Bottom of the back wall | ___ mm |
| Rear offset of legs | ___ mm |
| Selected MN-006 | 120×63 / 160×84 |
| Thrust bearing | ___ |
| Actual clearance | ___ mm |
| Gap from wall | ___ mm |
| Baseboard is preserved | Yes/No |
| Cabinet is modified | Yes/No |
| Solution approved | Yes/No |
Such a passport is especially useful if the dresser is later repeated in another room or in a series.
FAQ
What sizes does MN-006 have?
120×63 mm and 160×84 mm in parameters A×E.
How does MN-006 120 differ from 160 mm?
The tall version is 40 mm higher and has a larger E size: 84 instead of 63 mm.
Can the dresser be placed on MN-006 next to a 120 mm baseboard?
Yes, if the finished bottom mark of the body and its rear geometry pass above or in front of the actual baseboard.
Is a 120 mm leg sufficient with a 120 mm baseboard?
Not necessarily. The coincidence of two numbers does not guarantee clearance.
What should be measured first?
The actual height and projection of the baseboard, then the lowest rear element of the body.
How to measure the clearance of a dresser?
From the finished floor to the lowest rear part of the body after installing legs and hardware.
Do I need to consider the thickness of the baseboard?
Yes. It determines the horizontal offset of the furniture from the wall.
What is E for MN-006?
This is the size of the product according to the drawing. For the 120 mm version E=63, for the 160 mm version E=84.
Why does E change?
The tall MN-006 has a different scale of carved geometry.
Can the MN-006 160 not fit, even though it is taller?
Yes. E=84 mm may conflict with the corner joint or the edge of the cabinet body.
Is it necessary to cut the baseboard behind the dresser?
Not always. First, check the height, overhang, rear offset of the supports, and the possibility of leaving a small gap.
Can the rear legs be shifted inward?
Possibly, if the design and load scheme allow it. The decision must be confirmed by a furniture designer.
Can the dresser be left 10–15 mm from the wall?
If the design, mounting, and operation allow it — yes. Absolute flush contact is not always required.
What to choose — beech or oak?
After choosing the geometry. Beech is suitable for covering enamel, oak — for visible natural texture.
How does 'Standard' differ from 'Prestige'?
"Standard" — machine sanding, "Prestige" — more thorough manual preparation.
Which glider is suitable for MN-006?
The card recommends several options, including FUR-022 and FUR-028.
What is the size of FUR-022?
The current card shows 30×30×5 mm.
What is the size of FUR-028?
The current card has a discrepancy: the name indicates d=28 mm, but the table shows 25×25×5 mm. For precise furniture, the size needs to be confirmed before ordering.
Can you add 5 or 11 mm of the glider to the leg height?
Not automatically. The actual mounting height of the assembled unit is needed.
How many MN-006 are needed for a dresser?
For a standard four-leg design — four, if the project is indeed designed for four legs.
How much do four MN-006 120 mm beech legs cost?
At the current "Standard" price — 13,520 ₽.
How much do four MN-006 160 mm beech legs cost?
26 600 ₽.
How much do four oak MN-006 120 mm legs cost?
20 840 ₽.
How much do four oak MN-006 160 mm legs cost?
36 440 ₽.
Is it worth buying 160 mm "just in case"?
No. The extra cost is significant, and the taller version may create a new conflict with E.
When are 160 mm justified?
When 120 mm do not provide sufficient clearance, the high version fits, looks proportional, and the extra ground clearance is functionally needed.
When is 120 mm better?
When it already passes over the baseboard or the conflict is resolved by the position of the rear supports.
Where to buy wooden furniture legs?
In the general section of STAVROS furniture legs.
Where to buy legs for a dresser?
In the profile category for dressers, cabinets, and nightstands.
Where to buy MN-006?
In the MN-006 product card.
How to order MN-006?
After verification, select A/E, material, quality, quantity, and hardware.
How to check the current price?
Open the product card before payment. Prices and availability are updated.
Can the baseboard be cut if the apartment is rented out?
Technically possible, but from the standpoint of finish versatility, it is often disadvantageous: furniture may be replaced.
What to do if the dresser is built-in?
Then a local break in the baseboard may be more acceptable if the furniture is truly permanent.
Do I need to secure the dresser to the wall?
This depends on the design, height, stability, and furniture manufacturer's requirements. Choosing MN-006 does not replace checking against tipping over.
Does a high baseboard affect stability?
The baseboard itself does not, but decisions made for its sake—higher legs or shifted supports—can change the furniture's geometry and require verification.
Final algorithm before ordering MN-006
-
Measure the actual height of the baseboard.
-
Measure the maximum protrusion from the wall.
-
Check the floor at four support points.
-
Measure the bottom plane of the housing.
-
Check the back wall and decorative elements.
-
Mark the position of the rear legs.
-
Construct a side section.
-
Make a mockup MN-006 120×63.
-
Make a mockup MN-006 160×84.
-
Check the clearance of 120 mm.
-
Check the horizontal offset.
-
Check E=63.
-
Repeat everything for 160×84.
-
Compare the visual proportion.
-
Decide whether a small gap from the wall is acceptable.
-
Check the possibility of structurally shifting the rear legs.
-
Compare the cost of 120/160.
-
Compare it with the cost of locally redoing the baseboard.
-
Choose birch or oak.
-
Select "Standard" or "Prestige".
-
Choose the support foot.
-
Confirm the actual size of FUR-028 if it is used.
-
Check stability and wall mounting.
-
Recheck the price and availability.
-
Only after this, order four MN-006.
Conclusion
The coincidence of 120 mm at the plinth and 120 mm at MN-006 looks like a ready answer only until the first side cut.
In fact, the plinth and the leg describe different parts of the assembly. To make the dresser fit against the wall without a cutout in the plinth, you need to know not only the A of the leg, but the actual mark of the lowest rear element of the body, the maximum thickness of the plinth, the position of the rear supports, and the real mounting height with the foot pad.
MN-006 120×63 mm may be completely sufficient if the body after assembly is above the top line of the plinth or the rear legs are shifted inward so that the plinth passes behind the furniture. In this case, buying the 160 mm version does not solve a new task — it simply raises the dresser another 40 mm and almost doubles the cost of the beech "Standard" set.
MN-006 160×84 mm becomes rational when the low version leaves zero or insufficient clearance, and the additional 40 mm is really needed. But at the same time, E increases from 63 to 84 mm, so the high leg requires a separate check of the corner assembly and the body proportions.
At current prices, four beech MN-006 "Standard" cost 13,520 ₽ at 120 mm height and 26,600 ₽ at 160 mm height. For oak — 20,840 ₽ and 36,440 ₽. This is a big enough difference not to buy the high version "just in case."
There is also a third solution: not to change the height, but to keep a small gap from the wall or structurally shift the rear supports inward. It often allows keeping the plinth intact, but the position of the legs must be confirmed by a furniture designer.
Cutting out a wooden plinth locally makes sense primarily for truly stationary built-in furniture. For a regular movable dresser, such a break makes the finish dependent on a specific item and worsens future maintainability.
Regarding hardware, you need to be especially careful with FUR-028: on the current official card, the name d=28 mm and the table 25×25×5 mm do not match. Therefore, for boundary clearance, its actual mounting height needs to be confirmed, not automatically using the old figure.
The final selection sequence is very short:
plinth → side cut → lower body mark → rear support offset → MN-006 120×63 → MN-006 160×84 → price → hardware → order.
If the low version fits with a normal margin, there is no reason to overpay for 160 mm just because of an already installed plinth. If it doesn't fit, the tall MN-006 becomes a strong option only after checking E=84 mm and the overall proportion of the dresser.
After such a check, you can buy carved furniture legs MN-006 already at the height that actually solves the specific 'dresser + tall wooden plinth' joint.