Article Contents:
- NPU-463.1 is a ceiling decorative overlay, not a socket for a single spotlight
- What is confirmed about NPU-463.1
- First step — do not buy, but cut out a template 330 × 260 mm
- What indentation to leave from the spot
- Marking starts from the centers of the spotlights
- How to check the free field between two rows of spots
- Do not rotate NPU-463.1 by 90° automatically
- Four basic placement schemes relative to light
- One trim between four recessed spotlights
- Trim between two parallel rows of lights
- One trim in a free area without spots
- Two NPU-463.1 symmetrically
- Four spots around an empty center
- Large living room, spots only along the perimeter
- Two spots almost coincide with the side edges of the trim
- Overlay inside the ceiling frame, and spotlights outside
- Spotlights are inside the same frame
- One overlay above the table, light around
- Symmetrical overlays in the bedroom

The ceiling is already finished. The spotlights are wired, the holes are made, the housings are in place, and the lighting scheme works. Only after this did you see the ceiling decorative overlay NPU-463.1 with a baroque floral ornament and decided to add it to the composition.
The question here is not whether the ceiling molding is beautiful in general. The question is much more practical: where to physically place an overlay measuring 330 × 260 × 12 mm if the light points can no longer be freely moved?
The NPU-463.1 has a real dimension, and each spotlight has its own outer diameter, mounting hole, hidden housing, and manufacturer's installation requirements. Therefore, the correct sequence is the reverse of typical ceiling design: first, we fix the existing lighting scheme, then we look for a free field for the molding, rather than trying to force the spots to 'adapt' to already purchased decor.
The main task before ordering is to find a clean area on the ceiling of at least 330 × 260 mm, where the overlay does not cover the visible part of the spotlights, does not interfere with their maintenance, and does not conflict with the technical requirements of the specific model. In this case, you need to look not only at the edge of the decorative element, but also at how its baroque pattern reads relative to the rows of light.
If a free field is found and the composition looks convincing, you can buy the ceiling overlay NPU-463.1 only after a full-size fitting. If 330 × 260 mm does not fit between the spotlights, the decision must change before purchase: a different position of the overlay, a different orientation, a symmetrical pair in other areas, or different decor.

NPU-463.1 is a ceiling decorative overlay, not a rosette for a single spotlight
This distinction determines the entire layout.
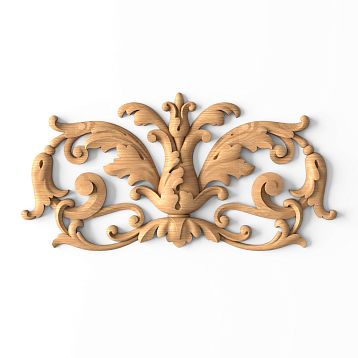
NPU-463.1 is a polyurethane overlay, not a ceiling rosette with a mandatory central hole for a chandelier. Its size is 330 × 260 × 12 mm. The front features a pronounced floral ornament with Baroque plasticity.
Therefore, you don't need to start with the question: "Which spotlight should I place in the center of NPU-463.1?"
The scenario is different. The overlay creates a decorative accent on the free ceiling field. Fixtures can be placed nearby, around it, along the axis of adjacent zones, or in a symmetrical grid, but NPU-463.1 itself does not have to become the base for a light fixture.
If there are already light points in the existing ceiling, this even simplifies the task: their coordinates are known. You only need to correctly find a place for the new decorative element.




What is confirmed about NPU-463.1
| Parameter | Value | What this means for a ceiling with spotlights |
|---|---|---|
| Article number | NPU-463.1 | We consider a specific product, not "molding in general" |
| Type | Ceiling decorative overlay | Looking for a separate free field |
| Size | 330 × 260 × 12 mm | The minimum dimension of the part itself is known in advance |
| Material | Polyurethane | The overlay is made of polyurethane molding |
| Ornament | Baroque floral | Not only the geometry matters, but also the direction of the pattern |
| Price at the time of writing the article | 3 520 ₽ | The current product card is checked before payment |
| Central hole for a light fixture | Not stated as a product feature | We do not design a spotlight 'through the overlay' without a separate solution |
| Universal offset from the recessed spotlight | Not specified | The indent cannot be invented as a single number for all models |
The last line is especially important. A ceiling light can have different outer diameters, different frame designs, and different ventilation and maintenance requirements. Therefore, the article will not give a fictitious rule like "always leave 50 mm."
Our factory also produces:


The first step is not to buy, but to cut out a template 330 × 260 mm
Take cardboard or thick paper and cut out a rectangle 330 × 260 mm. This is the overall template for NPU-463.1.
It does not replicate the baroque contour and does not show the 12 mm relief depth, but it immediately answers the main question: where this trim physically fits between already installed light points.
Hold the template up to the ceiling or temporarily attach it with painter's tape in several possible positions. Look at the ceiling not only directly from below, but also from the entrance, from the sofa, from the dining table, from the center of the room, and along the main axis of the space.
A position that technically fits does not necessarily look right.
Why one rectangle is not enough
The template shows the outer dimensions, but not the actual pattern.
The trim has relief and ornament. You need to consider:
-
where the pattern is denser;
-
where the leaf elements come closer to the edge;
-
how the direction of the ornament is read;
-
which edge is visually perceived as the top;
-
how the shadow from the relief will neighbor the light spot.
Therefore, after the dimensional test, a second stage is needed — evaluation of the actual image or the overlay itself in the chosen position.
Do not consider the spot light as just a small glowing point
What is visible from below is only the front part.
The luminaire has at least several sizes:
-
outer diameter or size of the visible frame;
-
mounting hole;
-
hidden housing;
-
area that may be needed for removing the luminaire during maintenance.
For decorative layout, the visible frame is primarily important. For technical suitability, the requirements of the specific model also matter.
Therefore, if NPU-463.1 visually fits between two glowing circles, it does not mean that the mounting area is free.
Get Consultation
What indentation to leave from the spotlight
There is no universal number.
The correct offset is one that simultaneously:
-
does not overlap the outer frame of the luminaire;
-
does not hinder its removal or replacement;
-
matches the luminaire manufacturer's instructions;
-
leaves a visually clean gap;
-
does not make the pattern literally "press" against the housing.
If the fixtures are already installed, you can start with their actual external dimensions and the requirements from the datasheet. Then add a visual gap to the technical minimum that suits the composition.
That is, first safety and maintenance, then aesthetics.
Why you can't assign "10 cm from each spot" to all ceilings
Two recessed spotlights can differ by several times.
One is a small recessed light with a thin frame. Another is a large swivel spot. The third is a surface-mounted cylinder. The fourth is a frameless model.
They all have different geometries.
Therefore, a number without reference to the model will either be redundant or insufficient.
Marking starts from the centers of the lights.
The most convenient way to work with a ready-made scheme is to transfer it to the plan.
Mark the center of each luminaire: S1, S2, S3, S4, and so on. Then measure the distances between the centers.
After that, it becomes clear where there is a rectangular field for the NPU-463.1.
If four spots form a rectangle
This is one of the most successful scenarios.
Four luminaires surround the central empty field. Need to check:
-
the distance between the left and right rows;
-
the distance between the top and bottom rows;
-
the actual outer diameters of the luminaires;
-
the required technical clearances.
If after subtracting these zones a rectangle of at least 330 × 260 mm remains, the NPU-463.1 can be tried on in the center.
But do not make conclusions based only on the center-to-center distance.
How to check the free space between two rows of spotlights
Let the distance between the centers of two luminaires horizontally be D. The outer radius of each luminaire is r. The additional technical and visual clearance required specifically in your project is g.
Then the approximate clear width between two identical fixtures:
Wclean = D − 2 × (r + g).
For NPU-463.1 to fit with its long side between them:
Wclean ≥ 330 mm.
If the plate is turned the other way:
Wclean ≥ 260 mm.
This is not a rule for installing fixtures. It is only a way to check the free decorative space after the value of g has already been determined based on the actual model and project.
We check the same thing vertically
For the top and bottom rows:
Hclean = Dv − 2 × (r + g).
Then we compare with 260 or 330 mm depending on the orientation of the trim.
Thus, from the subjective 'it seems to fit' we get a proper geometric check.
If the luminaires are of different sizes
We use two radii:
Wclean = D − (r1 + g1) − (r2 + g2).
This is especially relevant if different types of light are combined in the ceiling. For example, a regular spot and a swivel luminaire may require different amounts of space.
Do not automatically rotate NPU-463.1 by 90°
The dimensions of 330 × 260 mm allow physically representing two orientations: 330 mm horizontally or 330 mm vertically.
But the decorative pattern has its own direction. So first look at the actual product card or item and determine whether the composition allows rotation without the feeling that the decor is 'lying on its side'.
Geometric possibility and artistic orientation are not the same thing.
An elongated trim should support the direction of the ceiling
If the room is long, orienting the long side of NPU-463.1 along the main axis can visually support the space. If the composition is built across, a rotation may be appropriate.
But first, the pattern of the detail itself is always checked.
Four basic placement schemes relative to light
One trim between four spotlights
Spots form an outer grid. NPU-463.1 occupies the free center.
Advantages:
-
the overlay does not compete with a separate luminaire;
-
light forms a symmetrical frame around the decor;
-
easy to check the center;
-
one purchase gives a complete accent.
Before ordering, you just need to make sure that the clean field is really sufficient.
Overlay between two parallel rows of light
For example, two rows of spotlights run along a corridor or kitchen. A central axis remains between them.
NPU-463.1 can be placed on this axis if the width is sufficient.
Then not only the distance to the nearest lights matters, but also the rhythm. The overlay should fall either exactly between a pair of spots, or on a separate compositional axis, but not randomly shift from the logical center.
One overlay in a free zone without spots
Part of the ceiling can be completely free: above the console, above the central zone of the room, inside a molding frame, or between functional light groups.
Then the task is simpler.
You need to check the dimensions, the direction of the pattern, and the connection with the overall ceiling geometry.
Two NPU-463.1 symmetrically
If the room is elongated and one rosette looks random, consider two identical positions: one at each end of the room, above two symmetrical zones, or between repeating groups of spots.
But the solution should come from the ceiling plan, not from the desire to 'add more molding'.
How many rosettes to buy
The basic formula is simple:
one designed decorative position = one NPU-463.1.
If there is one free zone on the ceiling — one unit. If there are two symmetrical zones — two. If there are four repeating fields — four.
There is no need to increase the quantity until each overlay has received an exact coordinate on the ceiling.
Table of quantity and cost
At the time of writing the article, one NPU-463.1 costs 3,520 ₽.
| Number of rosettes | Cost of the NPU-463.1* units themselves |
| 1 | 3 520 ₽ |
| 2 | 7 040 ₽ |
| 3 | 10 560 ₽ |
| 4 | 14 080 ₽ |
| 6 | 21 120 ₽ |
*Excluding mounting materials and other ceiling composition elements. The price is re-checked before payment.
Why you shouldn't first buy four overlays and then look for a place for them
On a finished ceiling, the constraints are already set.
Spots cannot be mentally 'moved'.
Therefore, first the layout, then the quantity. Otherwise, you can end up with four beautiful elements for which there are only two real free zones.
How to create a ceiling plan without a professional program
You need a tape measure, a sheet of paper, a pencil, room dimensions, and coordinates of the light fixtures.
Draw a rectangle of the ceiling. Mark the centers of all spots. Indicate walls, doors, and major furniture axes. Then draw 330 × 260 mm rectangles to scale.
Even a simple drawing quickly shows places that don't work in reality.
A scale of 1:20 is convenient for a household plan.
At a scale of 1:20:
-
330 mm becomes 16.5 mm;
-
260 mm becomes 13 mm.
You can cut out several small paper templates and move them around the plan.
This is much faster than repeatedly lifting a real template to the ceiling.
But we still check the final decision at a 1:1 scale.
The small plan shows the geometry.
The full-size template shows the visual scale.
Both stages are necessary.
The lights set a rhythm that the molding must respect
If the spots are spaced at equal intervals, NPU-463.1 should not randomly break this grid.
For example, if the same interval repeats between fixture centers, but the overlay is shifted relative to all axes, the ceiling may look messy even with sufficient physical distance.
Therefore, we are looking not just for an empty space, but a compositionally logical empty space.
What is more important: the center of the room or the center of the light grid?
It is not always a single point.
The fixtures could be shifted relative to the geometric center due to furniture, kitchen, passage, work area, beam, or ventilation.
If NPU-463.1 refers specifically to the lighting composition, it is more reasonable to tie it to the rhythm of the fixtures rather than automatically to the center of the room.
If it is an independent architectural accent, it may be the opposite.
Furniture also affects the ceiling layout
Imagine a living room.
The spots are symmetrical on the ceiling, but the sofa and dining group create two functional zones.
One NPU-463.1 may look more logical above one zone rather than in the mathematical center of the room.
Therefore, a good ceiling plan takes into account lighting, molding, furniture, passages, and the main viewpoint.
The overlay should not accidentally "stick" to one spot.
One of the most common visual mistakes is when a decorative element is placed slightly closer to one light fixture than to the neighboring one, without a clear reason.
The eye immediately notices the flaw.
If the composition is symmetrical, distances should be meaningfully equal.
If it is asymmetrical, the asymmetry should look intentional.
How to check symmetry without complex instruments
After temporarily fixing the template:
-
measure the distance from its left edge to the nearest spot;
-
the same on the right;
-
from the top;
-
from the bottom.
If the layout was intended to be symmetrical, the values should match the design logic.
Do not measure only to the center of the fixture
Two luminaires with different outer diameters can have the same centers but different visual gaps.
For aesthetics, the distance from the edge of the visible fixture frame to the nearest edge of the overlay is more important.
For technical verification — also the requirements of the specific luminaire.
Why baroque ornamentation strengthens symmetry requirements
NPU-463.1 is not a neutral smooth plate.
The baroque floral pattern itself creates a strong axis and guides the eye.
If nearby spotlights are arranged in a strict grid, a small random shift becomes more noticeable.
Therefore, the template is especially important.
The light spot also participates in the composition
Even if the luminaire housing is physically far from the overlay, a directional spot can cast a bright spot directly on the relief.
This is not necessarily bad.
Side lighting can beautifully emphasize the depth of the baroque pattern.
But a beam that is too close or too harsh can create a heavy shadow and visually fragment the ornament.
Therefore, turn on the light during the fitting.
Check the overlay under evening lighting
During the day, the ceiling may look perfect.
In the evening, shadows become stronger, the real angle of light is visible, the decorative relief reads differently, and a single spot can produce an unwanted glare or a dark stripe.
The template does not create a real relief, but even from a photo of the card, you can preliminarily understand where the main elements of the pattern are directed.
After purchase, a dry fitting of the overlay itself before gluing is especially useful.
Do I need to place NPU-463.1 exactly between two spots?
Not necessarily.
This is just one of the most understandable options.
Sometimes it's better to place it between four, shift it to a separate free zone, assemble two symmetrical trims, or include it in the ceiling frame.
The main thing is not to violate the technical zone of the fixtures and the overall rhythm.
Can the overlay be placed flush against the fixture frame?
You shouldn't make such a decision based only on visual perception.
You need to leave space that allows removing the fixture, complies with its instructions, doesn't overlap the housing with decorative relief, and looks clean.
The exact value depends on the specific model.
Why light maintenance needs to be considered now
In a few years, you may need to replace the light source, remove the driver, replace the spot itself, repaint the ceiling, or check the wiring.
If the molding closely surrounds the frame, a simple operation can become more complicated.
Therefore, "it's already installed and working" doesn't mean access will never be needed again.
Do not cover the mounting hole with a decorative trim.
Even if the visible fixture is smaller, its mounting cutout may be larger.
If NPU-463.1 extends into this area, a conflict may occur when removing the housing.
Therefore, before installation, you need to know the actual size of the opening.
Do not cut NPU-463.1 around the spot without necessity.
Sometimes an idea arises:
"The overlay doesn't fit by 30 mm — let's make a cutout for the light fixture."
For a specific baroque ornament, this is risky.
The cutout can ruin the pattern, disrupt symmetry, weaken the edge, and create an accidental coupling.
If such a modification is not part of the design, it is better to first look for another position for the plate.
NPU-463.1 cannot be considered a ceiling socket and drilled in the center "out of habit"
The product has a different typology.
If the designer specifically wants to integrate the luminaire into the overlay, that is a separate individual solution that requires checking the geometry and technology.
The basic scenario of the article is to place the plate next to existing lighting, not to cut it out for the light.
When one NPU-463.1 is especially logical
If there is a central free field on the ceiling, a symmetrical grid of four spots, a separate decorative zone, a niche between two rows of light, or a molding frame without a central element.
In these cases, one baroque accent can complete the composition without rewiring the electrical system.
When two overlays are more logical than one
If the room is elongated, has two equal functional zones, is divided by light groups, or is built on mirror symmetry.
Then one overlay may look lost, while two can support the rhythm.
But each must have a free field of 330 × 260 mm.
When it is better not to buy NPU-463.1
If the only possible spot overlaps a spotlight, comes too close to the housing, interferes with maintenance, requires cutting the ornament, disrupts the entire lighting grid, or is located in a random narrow leftover between fixtures.
In this case, it's better to choose a smaller overlay or a different type of decor.
The ceiling composition should first work without the product in hand.
This is a useful rule.
If you cannot draw the exact location of NPU-463.1 on the plan, it is too early to buy it.
After purchase, a psychological desire to "fit it somewhere" appears.
It is better when the article already has a coordinate.
How to record NPU-463.1 in the ceiling plan
For example:
NPU-463.1 — 330 × 260 × 12 mm — 1 pc. — center along the X axis of the room, between fixtures S2/S3/S6/S7, orientation per the approved sketch.
Such a record is much more useful than "stucco molding on the ceiling — 1 pc."
What to measure before ordering
Minimum set:
-
room size;
-
coordinates of all nearest spots;
-
outer diameter of each;
-
mounting hole diameter;
-
the free margin;
-
direction of NPU-463.1;
-
number of overlays;
-
distance to moldings and cornices.
If the ceiling is stretch, suspended, or has another special construction, the installation of the decor itself must be separately coordinated with the ceiling system. This article does not replace the technology of the specific base.
Where to buy the NPU-463.1 itself
After checking the template, you can order NPU-463.1 made of polyurethane as a standalone decorative piece.
You don't need to buy a whole ceiling system if the project only requires one overlay.
But if the free field is not suitable, it is better to return to the catalog before payment.
Polyurethane overlays: when a different size is needed
In this section you can buy polyurethane overlays of various shapes and scales.
This is useful if NPU-463.1 is too wide, too tall, too saturated for the light grid, or requires space that isn't available between the spots.
Changing the coordinates of the lights for the sake of one overlay on an already finished ceiling is usually more difficult than choosing a different size of decor.
Do not replace NPU-463.1 with a smaller one based only on numbers
330 × 260 mm is not just an area.
Baroque ornament has a visual scale.
If the reduced product has a completely different pattern, the composition will change.
Therefore, we look not only for "what fits," but also for "what solves the same decorative task."
The ceiling category helps to see the scale
If you need not a single element, but a more developed composition, you can Buy ceiling molding and evaluate ready-made ceiling solutions.
But with existing spots, any ready-made scheme still has to be adapted to the already specified light coordinates.
The general catalog is needed only after checking a specific product.
If NPU-463.1 is not suitable, You can buy ready-made stucco matching the Baroque style. Calculate the quantity: linear meters of cornices and moldings, number of rosettes, pilasters, consoles, corner elements. Add a ten to fifteen percent allowance for trimming. you can already use a precise constraint:
a ceiling plate smaller than the specific free field is needed.
Then the search becomes targeted.
If NPU-463.1 does not fit, we change the size of the decor, not the meaning of the project.
Ceiling molding made of polyurethane is convenient because the same design principle can be implemented with elements of different scales. Therefore, rejecting a specific article does not mean rejecting the idea itself.
If the free space between the lights is smaller than the required 330 × 260 mm, first record the actual maximum you have. For example, not "we need small molding," but "we need a decorative ceiling overlay that, together with technical clearances, fits into the free zone between existing spots."
This way the formulation becomes project-oriented.
A polyurethane ceiling overlay should be selected to match the existing geometry, not the other way around. Before buying stucco molding for the ceiling, you need to know not only the room size but also the coordinates of the lighting. Similarly, if you want to buy decorative stucco molding for a finished ceiling, first determine the free spaces.
Molding and recessed lights coexist well when each element has its own zone. The light itself does not have to be hidden in the decor, and the decor does not have to surround every light source.
That is why the NPU-463.1 stucco molding is considered here as a separate Baroque accent: it either gets a full 330 × 260 mm space with the necessary gaps, or the project moves to another overlay without attempting to trim the ornament for an already installed spot.
What to buy together with NPU-463.1
For a simple composition:
| Position | Purpose | Is it mandatory |
| NPU-463.1 | Main decorative accent | Yes, if this item is selected |
| Mounting compound | Attachment to the base | According to ceiling technology |
| Finish paint | Painting/integration into the ceiling | As per project |
| Other overlays | Symmetry or additional zones | Only per sketch |
| Moldings | Frame geometry | Only if provided |
Spotlights are not included in this table: they are already installed.
Do not buy additional trims for the sake of "balance" before marking
Balance is created not by the number of items, but by geometry.
Sometimes one NPU-463.1 in the center of four spots looks complete.
Sometimes two are needed.
Sometimes none fit.
Only the plan gives the answer.
If the lights are placed asymmetrically
This happens in the kitchen, walk-in closet, or hallway.
Don't force-center NPU-463.1 relative to a random grid.
You can tie it to furniture, a doorway, a molding frame, or a separate ceiling zone.
But then it's important that the asymmetry looks intentional.
If one spot is too close, and the others fit
This is a common situation.
Don't immediately shift the entire trim by a small random amount.
Check three routes:
-
a different orientation of NPU-463.1;
-
a different free zone;
-
Less overhead.
A random shift often looks worse than a deliberate replacement.
If the spots are rotatable
Consider not only the housing, but also the direction of the beam.
A rotatable luminaire can illuminate a wall or an object, and NPU-463.1 should not accidentally block or distort the intended lighting task.
Check all working positions of the spot.
If the spots are dimmable
Check the composition at several brightness levels.
At maximum light, the relief may look too contrasty.
With soft light, on the contrary, the baroque pattern reads deeper and calmer.
This is not a technical limitation, but a way to choose the best position.
If the light is warm or cold
Color temperature changes the perception of shadows and the tint of the stucco.
If NPU-463.1 is planned to be painted in the ceiling color, be sure to evaluate the paint sample under the existing lighting.
Buying new lighting just for the molding is not required, but the color of the decor should be tested in real conditions.
Ceiling rosette and spotlights can complement each other
Lighting fixtures do not necessarily have to be perceived as an obstacle.
With proper layout, they emphasize the relief, form a light frame, enhance symmetry, and make the baroque pattern noticeable in the evening.
The problem starts not because of the proximity itself, but because of random distances and technical conflicts.
The interval from light to molding should be not "maximum" but reasonable.
Too large a gap can also ruin the composition.
If the spots are very far apart, they stop visually connecting with the trim.
Therefore, after meeting technical requirements, the distance is chosen based on the ceiling pattern.
Again: there is no single correct number for all rooms.
How to take a photo of the ceiling for a remote consultation
Measure:
-
ceiling strictly from below;
-
general view from the entrance;
-
close-up of the nearest spots;
-
tape measure between the centers of the lights;
-
outer diameter of one spot;
-
proposed location of NPU-463.1 with paper template.
This way, the manager or designer will see not an abstract question, but real geometry.
What to write to the STAVROS manager
Example of a proper request:
"I want to install NPU-463.1 330 × 260 × 12 mm on an already finished ceiling between recessed spotlights. I am attaching a plan with spot centers, outer diameters, and a photo of the 330 × 260 mm template. I need one/two mounting plates. Please confirm the product and mounting materials for my base."
This is much more useful than "will it be okay with the spots?"
How not to confuse NPU-463.1 with a ceiling rosette
A rosette usually forms a composition around a central light fixture or chandelier.
NPU-463.1 is an independent ornamental overlay.
Therefore, it is logical to place it between spotlights, inside a free ceiling panel, as a paired accent, or as part of a decorative frame.
This frees the project from the false requirement of "finding the center for the lamp."
Why the 330 × 260 mm shape is useful between spots
It is more compact than a large ceiling rosette and yet noticeable enough as a separate accent.
The rectangular dimensions are convenient to check in a grid of spotlights.
But we must not forget that the real Baroque contour does not fill the rectangle evenly. Therefore, the final visual assessment is made based on the pattern itself.
One overlay in a square grid of light
If the room is nearly square and four spots form a square around the center, the NPU-463.1 can become an internal accent.
First, we check whether 330 mm is enough along one axis, whether 260 mm is enough along the other, whether the ornament can be oriented exactly this way, and whether the visual fields are equal.
If everything matches, this is one of the cleanest schemes.
Two overlays in a long room
If the fixtures come in two identical groups, one NPU-463.1 can be placed inside each.
Then identical coordinates relative to the light groups are important.
The pair should look like a system, not like two separately attached parts.
Three overlays — only if the ceiling really has three zones.
An odd number is easy to justify in a corridor or a long enfilade.
But in an ordinary living room, three NPU-463.1 units can overload the ceiling.
The quantity follows from the architecture, not from the desire to use all the free space.
If the overlay falls inside the molding frame
Then there are two constraints at the same time:
-
spotlights;
-
the frame boundary.
The NPU-463.1 must have sufficient clearance to both.
Do not place it so that one edge almost touches the molding, while the other has a large gap.
If the ceiling cornice is already installed
The cornice forms the perimeter.
The overlay is an inner accent.
Usually they don't conflict if the distance and scale are coordinated.
But in a small room, large perimeter decor plus several baroque overlays can visually weigh down the ceiling.
You don't need to link each overlay to a separate light fixture.
One spot — one overlay — another spot — another overlay.
Such a literal rhythm is rarely necessary.
The molding can work at a larger compositional level, uniting several light sources.
What to do if the ceiling is already fully painted.
Installation becomes more delicate.
You need to check the compatibility of the base and adhesive, avoid damaging the coating, mark carefully, avoid extra marks, and decide in advance whether the overlay will be painted after installation.
The technology for a specific coating is better coordinated separately.
If the ceiling is stretch
This topic requires a separate solution for the base.
You cannot automatically glue a decorative element the same way as to a rigid plaster ceiling.
A structure designed for a specific stretch ceiling system is needed.
Therefore, the article about the layout relative to spots does not replace the installation technology for a stretch ceiling.
If the ceiling is plasterboard or plastered
Even on a rigid base, it is necessary to check the strength of the finish layer, evenness, compatibility of the mounting compound, and preparation for painting.
The NPU-463.1 itself has a thickness of 12 mm, so the relief is visually noticeable and requires careful adherence to the plane.
Paint before or after installation
This depends on the chosen finishing system.
If the overlay should blend with the ceiling, it is often convenient to achieve a unified finish after installation and treatment of the joint with the base.
If it will be contrasting, a different sequence is possible.
But the main point in this article is to first confirm the location, and only then discuss the finish.
Baroque patterns and modern spot lighting do not contradict each other
Modern spots and a classic ornamental trim can work together.
Contrast can even be interesting:
-
a strict light grid;
-
flexible plant decor;
-
a unified ceiling color.
A problem arises only when details physically interfere with each other or are in random geometry.
A ceiling without a chandelier does not mean a ceiling without a center.
Even if there is no central pendant, a compositional center can exist.
It is created by furniture, a light grid, a ceiling frame, or the architecture of the room.
NPU-463.1 can emphasize this center without installing a chandelier.
But there is no need to create a center where there isn't one
In a passage corridor or a complex kitchen, the ceiling can be functionally asymmetric.
Then a local surface-mounted fixture in a separate zone looks more honest than trying to invent a grand center.
How to order NPU-463.1 without mistakes
Before adding the product to the cart, you should have answers:
-
where is the exact center of the overlay;
-
how is the 330 × 260 mm size oriented;
-
what are the nearest spots;
-
what is their outer size;
-
what technical clearance does their manufacturer require;
-
does the overlay interfere with maintenance;
-
how many such items are actually on the ceiling;
-
what mounting is provided for the base.
If at least the first six points are unknown, the purchase is premature for now.
Practical situations on a finished ceiling
Four spots around an empty center
This is the clearest option for NPU-463.1.
Four spotlights are already placed at the corners of a conditional rectangle. In the center there is no chandelier, sensor, ventilation grille, or other equipment.
Procedure:
-
measure the distance
Large living room, spots only around the perimeter
The center of the ceiling is free.
This is a favorable situation for one large decorative element.
NPU-463.1, measuring 330 × 260 mm, can be placed in the central zone without directly linking it to each spot.
Then the lights work along the perimeter, and the molding acts as a separate central accent.
The main question is no longer technical but compositional: is one overlay enough for the scale of the room.
If it seems too small, you don't have to buy four identical elements. You can consider a more advanced ceiling system.
Two spots almost align with the side edges of the overlay
This is a borderline case.
Physically, the template can fit.
But visually, the two lights will look "glued" to the molding.
Additionally, maintenance needs to be checked.
If there isn't a confident free gap, it's better not to consider such a layout as final.
A slight shift of the overlay can only help when it preserves symmetry and connection with the overall grid.
The overlay is inside the ceiling frame, and the spotlights are outside.
A good and clear scheme.
The molding creates the external geometry.
NPU-463.1 works inside.
The spotlights remain outside the inner decorative field.
The main thing here is not to press the overlay against the edges of the frame.
The baroque pattern needs visual air.
The spots are located within the same frame
Then the space is divided by three participants:
-
NPU-463.1;
-
spotlights;
-
the molding contour.
You need to check the distances to both the spots and the frame simultaneously.
If there is little free space, it is better to abandon the extra decorative layer.
The ceiling does not become better just because all possible categories of molding are used on it.
One overlay above the table, light around
If the furniture is already in place, the center of the table becomes a strong axis.
NPU-463.1 can be attached to it, and spotlights can be left around as functional light.
This option is especially logical if there is no hanging chandelier on the ceiling.
But first check whether the furniture arrangement will change.
Ceiling decor usually lasts longer than the position of a single table.
Symmetrical overlays in the bedroom
Suppose the ceiling is divided into two identical decorative zones on either side of the central axis, and the spotlights repeat this symmetry.
Two NPU-463.1 can support a composition.
Quantity in the cart — two pieces.
Before purchasing, it is useful to attach two paper templates at the same time. One overlay may look good on its own, but a pair may be too heavy.
How to understand that one NPU-463.1 is not enough
There are several signs:
-
very large ceiling area;
-
the overlay looks like a random small dot;
-
a lot of unorganized space remains around it;
-
The lighting scheme is built with large groups;
-
the ceiling frame is significantly larger than the overlay itself.
But the answer is not always a second identical overlay.
Sometimes a different scale of decor is needed.
How to understand that two is already too many
If each overlay starts competing with a separate group of spots, a cornice, and a molding frame at the same time, the ceiling can become overloaded.
A good test is temporary templates.
If without them the ceiling seems empty, and with two it immediately feels heavy, the right solution might be one cover plate in the main zone.
Matrix for choosing the placement of NPU-463.1
Situation Solution There is a clear center between four spots Try one NPU-463.1 There are two identical free zones Check the symmetrical pair Between spots less than the 330 × 260 mm footprint Look for another plate size The plate overlaps the mounting hole Do not use this position without redesigning The ornament visually collides with the light fixture Enlarge the field or choose a different decor Rotating 90° physically helps First check the direction of the pattern The spots are positioned asymmetrically Attach the overlay to another strong axis or abandon it Light hits the relief directly Check the evening view before installation Stretch ceiling First decide on the method of attachment to the ceiling system There is space only after trimming the ornament First, look for another position/article Ceiling molding with recessed lights starts not with decor, but with a map of occupied zones
On the finished ceiling, there are areas where a new overlay cannot or should not be installed.
This:
-
visible light fixture housings;
-
mounting holes;
-
service areas;
-
ventilation elements;
-
sensors;
-
hatches;
-
cornices;
-
already installed molding.
After applying these zones, free areas remain.
It is from these that the location is chosen.
This order is much more reliable than first drawing NPU-463.1 in a nice center and then discovering a spot there.
Don't forget about sensors, grilles, and fire devices
The ceiling may contain more than just light.
If there is a technical device nearby, it cannot be covered with a decorative panel or have access to it blocked.
Specific requirements depend on the device.
Therefore, the ceiling map should include everything that is already in the plane.
Why it's better to design a ceiling decor with recessed lights in layers
It is convenient to think of the ceiling as four layers.
The first layer is technical equipment.
Lights, ventilation, sensors.
The second is geometry.
Axes, frames, zone boundaries.
The third is decor.
NPU-463.1 and other overlays.
The fourth is light and shadow.
How switched-on spotlights show the relief.
If you start with the third layer, it is easy to miss a technical conflict.
The buyer doesn't need to become a lighting engineer.
To solve this specific task, you don't need to calculate the thermal regime of the recessed light yourself.
You need to take the instructions or datasheet of your model and comply with the published requirements.
If the document is lost, it's better to identify the model before installing the molding.
Don't invent a technical clearance based on a photo.
Why 12 mm thickness also matters
NPU-463.1 protrudes from the ceiling plane.
This is not a flat pattern.
With side lighting, the relief creates a shadow.
If the spotlight is too close, the shadow can become very contrasty.
Additionally, the protruding edge should not interfere with the physical removal of the adjacent light fixture.
The shadow from the 12-millimeter relief cannot be assessed from the top view plan.
The plan shows only 330 × 260 mm.
An evening check reveals the volume.
Therefore, the final layout must pass two tests:
-
geometric;
-
light.
How to perform a light test before gluing
If the NPU-463.1 itself has already been purchased:
-
do not apply adhesive;
-
carefully apply it to the marked spot;
-
turn on all working light groups;
-
look from the main points;
-
rotate the swivel spots to their normal positions;
-
evaluate the shadows;
-
Only after this, fix the final coordinate.
If the overlay has not been purchased yet
Use a cardboard template and a printout/image of the ornament.
This will not give a real shadow, but will allow checking the overall size and visual center.
If the geometry is already questionable on the template, it is too early to buy the product.
How NPU-463.1 differs from a random decorative insert
Its size is large enough to be perceived as an independent Baroque accent.
Therefore, a small positioning error is more noticeable than with a small overlay.
This model requires a meaningful axis.
That is why the ceiling overlay NPU-463.1 330 × 260 mm should appear in the bill of quantities only after the coordinate is approved.
Commercial route: what to buy after approving the location
If NPU-463.1 fits:
-
determine the quantity;
-
add the required number of plates;
-
select the mounting compound for the base;
-
determine the finish;
-
if necessary, add only those moldings or plates that are already on the plan.
If it doesn't fit:
-
measure the maximum free field;
-
open the section Polyurethane decorative appliques;
-
choose already within the real constraint;
-
make the template again.
Why should the query “buy a ceiling rosette” end with the size of the free field
The phrase "I want to buy a ceiling trim" is still too broad.
For a finished ceiling, the correct wording is:
"I need a trim that fits into the free field X × Y between existing lights."
After that, the catalog becomes a solution tool, not just a showcase.
Ceiling molding should not force redoing already working lighting
If the lighting scheme suits the owner, there is no reason to automatically move the spotlights for one decorative element.
Moving is possible only as a separate conscious decision with an electrical installation check.
In most cases, it is wiser to adapt the molding to the existing lighting.
When moving a spotlight is worth discussing at all
Only if:
-
NPU-463.1 is fundamentally important for the design;
-
the light fixture can indeed be safely moved;
-
the ceiling structure allows for modification;
-
the new lighting position remains functionally correct;
-
the cost and traces of repair are justified.
But this is no longer a simple scenario of "buy a cover and glue it on."
Why the article does not provide instructions for relocating the electrical wiring
Because the customer's question is different.
He wants to understand where to place a specific molding with the light already installed.
If the solution requires intervention in the electrical system, that is a separate job for specialists.
How to avoid keyword stuffing and ceiling overload at the same time
The ceiling demonstrates the same logic as the text: you don't need to use everything at once.
NPU-463.1 is the central product.
Moldings, cornices, and other overlays are only additions.
If decorative polyurethane stucco is needed, it is selected after the main composition has already been decided.
Mistakes when placing NPU-463.1 near spotlights
Mistake 1. Buying the overlay before measuring the free field.
The size is known in advance — 330 × 260 mm.
Mistake 2. Measuring the distance only between the centers of the spotlights.
Need to consider the external dimensions of the luminaires.
Mistake 3. Inventing a universal offset.
It depends on the fixture model and its requirements.
Mistake 4. Not considering the mounting hole.
The visible frame may be smaller than the technical zone.
Mistake 5. Treating NPU-463.1 as a spot socket.
This is a separate decorative overlay.
Mistake 6. Cutting an ornament for a luminaire without a project.
You can ruin the pattern and symmetry.
Mistake 7. Rotating the overlay just because it fits that way.
First, the direction of the ornament is checked.
Mistake 8. Placing decor randomly closer to one spot.
This is noticeable in a symmetrical grid.
Mistake 9. Looking only in daylight.
In the evening, the relief changes due to shadows.
Mistake 10. Not considering rotating spots.
The beam can change direction.
Mistake 11. Ignoring luminaire maintenance.
The housing will eventually need to be removed.
Mistake 12. Gluing the overlay before the final fitting.
First, do a dry layout.
Mistake 13. Buying several pieces at once without a plan.
Each must have a coordinate.
Mistake 14. Thinking that more decor is automatically better.
A baroque overlay is expressive on its own.
Mistake 15. Ignoring the furniture axis.
The ceiling is perceived together with the interior.
Mistake 16. Placing the overlay too close to the ceiling frame.
Decor needs visual air.
Error 17. Gluing onto a stretch ceiling using rigid ceiling technology.
The base requires a separate solution.
Error 18. Do not check the adhesive compatibility with the coating.
The finished ceiling already has a finish.
Error 19. Consider the shadow from the relief as a defect only after installation.
It can be checked in advance.
Error 20. Moving spots mentally, although the ceiling is already finished.
The new molding must work with the actual layout.
Quick algorithm in ten steps
Step 1. Find all nearby spots.
Step 2. Measure their outer dimensions.
Step 3. Clarify the model's technical requirements.
Step 4. Cut out a template 330 × 260 mm.
Step 5. Find at least two possible positions.
Step 6. Check the orientation of the ornament.
Step 7. Compare visual gaps.
Step 8. Turn on the light and evaluate the composition.
Step 9. Determine the exact number of overlays.
Step 10. Only after this, place your order.
Checklist before purchase
Question Yes No Is there a free field of at least 330 × 260 mm? Moving on Looking for another size Are the lights still available? Moving on Changing the position Are their manufacturer's requirements met? Moving on Installation is not ready Is the ornament oriented correctly? Moving on Checking the flip/another product Do the gaps look meaningful? Moving on Adjusting the coordinate Does the light nicely show the relief? Moving on Trying another position Does each overlay have an exact coordinate? The count can be calculated We are not buying the series Does the base allow the selected installation? Assembling the cart First, we decide on the technology What exactly to order if everything matches
If you need one overlay:
-
NPU-463.1 — 1 pc.;
-
mounting material — to the base;
-
finish — according to the project.
If two:
-
NPU-463.1 — 2 pcs.;
-
the remaining items are counted separately.
No additional ceiling elements need to be purchased automatically.
When to view the entire catalog of overlays
If NPU-463.1 doesn't fit, there's no need to abandon the idea of a stucco accent.
You can buy a polyurethane overlay of a smaller format and preserve the composition principle.
The main thing is to go through the same cycle again with the new dimensions.
When to view the entire catalog of moldings
If it turns out that a linear frame, cornice, or another type of decor suits the ceiling better, you can order polyurethane molding already based on the new task.
But NPU-463.1 does not need to be turned into a molding, rosette, or cornice just to ensure it fits into the project.
FAQ: NPU-463.1 and recessed spotlights
What is the size of NPU-463.1?
330 × 260 × 12 mm.
What is it made of?
made of polyurethane.
Is it a ceiling rosette?
No. It is a decorative overlay, which the product card positions, among other things, as ceiling stucco molding.
Can a spotlight be placed directly in the center of NPU-463.1?
This scenario is not a basic product feature. For an already finished ceiling, it is safer to look for a free field next to the fixtures rather than cutting through the overlay without a separate project.
What is the minimum offset to leave from the spotlight?
There is no universal number. You need to consider the external size of the specific fixture, its mounting and service area, and the manufacturer's requirements.
Is it enough to simply leave 330 × 260 mm between the centers of the fixtures?
No. You need to subtract the sizes of the fixtures themselves and the necessary gaps.
How to check if the overlay will fit?
Make a paper template 330 × 260 mm and apply it to the ceiling.
Can NPU-463.1 be rotated 90°?
Physically, the dimensions allow checking this orientation, but first you need to assess the direction of the baroque ornament.
What to do if one side fits, but the other touches a spotlight?
Check another position, orientation, or a smaller trim. Do not auto-crop the pattern.
Should the trim be placed exactly in the center of the room?
No. Sometimes the center of the light grid, furniture zone, or ceiling frame is more important.
Can the NPU-463.1 be placed between four spotlights?
Yes, if after accounting for dimensions and technical clearances, sufficient free space remains.
Can it be placed between two spotlights?
Yes, if the geometry and lighting requirements allow.
Is one trim needed or two?
The quantity is determined by the number of designed free zones, not by the room area itself.
How much does NPU-463.1 cost?
At the time of writing the article — 3,520 RUB. Before payment, the price should be checked in the product card.
Can it be used on an already painted ceiling?
Installation can be considered after checking the base, existing coating, and compatibility of the mounting compound.
Can it be glued to a stretch ceiling?
A separate technology designed for the specific stretch ceiling system is needed. The mounting method from a rigid ceiling cannot be transferred automatically.
Why is it important to include spotlights during fitting?
The light shows the real shadow from the 12 mm thick relief.
If the light is directed straight at the overlay, is that bad?
Not necessarily. It can beautifully highlight the relief. The actual result needs to be assessed.
Do I need to leave access to the light fixture?
Yes. The light fixture may require maintenance or replacement.
Can the edge of the mounting hole be covered with molding?
Such a solution may hinder removal of the housing. It is better to avoid overlap without a special design.
Do I need to drill NPU-463.1 for a spot light?
The basic scenario is no. It is a standalone trim, not a ready-made socket with a hole.
What to do if the free area is smaller than 330 × 260 mm?
Look for another trim size or another position.
Where can I see other trims?
In the STAVROS polyurethane trims catalog.
Can two identical trims be placed in a long room?
Yes, if there are two equivalent zones and the layout looks symmetrical.
Does each trim need to be linked to a separate spot?
No. The decor can work at a larger compositional level.
How to measure the distance to the light fixture for the visual appearance?
From the edge of the visible frame of the spot to the nearest part of the trim's outline.
How to account for the technical clearance?
According to the specific fixture's documentation and maintenance conditions.
What is the main thing to check before ordering?
Free space, orientation, technical zones of the spots, light and shadow, and the exact quantity.
What is the most common mistake?
Purchasing NPU-463.1 before a real space of 330 × 260 mm is found on the finished ceiling.
The spots are already in place — so they set the boundaries for the new molding.
When designing a ceiling from scratch, you can first choose the decor and then arrange the lighting.
Here it's the opposite.
The recessed lights already exist.
Therefore, NPU-463.1 must find its place within the existing lighting layout, not force it to be changed retroactively.
The dimensions of the overlay are known exactly — 330 × 260 × 12 mm. That's enough to make a full-size template and test several positions before purchasing.
If there is a clear area, the ornament is positioned correctly, the lights remain accessible, and their technical requirements are met, you can buy the specific item.
If the overlay barely fits, requires trimming around the spot, or disrupts the lighting grid, it's better to choose another location or another product.
Ceiling stucco molding with recessed spotlights looks convincing when the light and the decor do not compete for the same point on the ceiling.
If, after checking, this particular model fits, buy NPU-463.1 it is already done according to a ready-made scheme: the coordinate is known, the orientation is known, the quantity is known.
And if a wider selection is required, polyurethane molding catalog and the ceiling decor section allow moving to a different scale without trying to force an unsuitable piece into place.
STAVROS's strength here is not that one overlay must be used at any cost, but that a specific article can be checked against its actual size and selected within a large product line. For a finished ceiling, this is the most sensible path: first the existing lighting, then the free field, then NPU-463.1 — and only after that, the purchase.
-