Article Contents:
- Why the usual room perimeter is not enough
- What exactly the overall perimeter hides
- One hundred linear meters in two projects means two different orders
- Project A: long straight walls
- Project B: the same 100 meters, but with complex geometry
- When a preliminary linear footage is enough
- Short sections cannot simply be combined into one total
- Why design columns may differ from finished columns
- Multiple identical columns are calculated by type only after checking the first one
- A wall protrusion or pilaster is calculated as a separate contour
- A multifaceted room requires a list of sequential segments
- The section between two doors is calculated based on finished casings
- Short wall sections are best grouped into a separate cutting pool
- The longest source element does not always yield the best cutting result
- What is especially important
- The orientation of complex decorative profile should be taken into account when cutting
- We take wood grain and finish into account only where it affects the result
- How to avoid double-counting the same area
- Verification check of the schedule after measurement
- A color or graphic scheme helps identify omissions
- Door openings cannot be automatically deducted from the route
- Built-in furniture changes the route if this is confirmed by the design
- Confirmed and changeable zones must be kept separate
- Calculating by room is more convenient than a total count for the property
- You cannot simply multiply one number by one hundred
- Left and right versions are best stored as two cutting layouts
- If the actual size differs from the specification, first determine the scale of the change
- A complex hall requires a different allowance than a long straight corridor
- Practical example: a room with four columns
- Practical example: a wall with three deep niches
- Practical example: an angled corridor
- Practical example: ten standard rooms and two corner rooms
- Practical example: five short wall sections and one long wall
- Practical example: same area with different number of corners
- Supply of building materials: it is useful for the supplier to receive the demand structure, not just the meters
- A building materials supplier cannot compensate for incorrect measurements with extra stock
- Buying building materials in bulk is worth doing after fixing the critical actual dimensions
- Step 6. Create the list of parts
- Step 7. Move on to cutting
- Step 8. Get the number of whole products
- The actual measurement report must be the same for all complex zones
- What to photograph during a complex measurement
- When you can skip waiting for the actual measurement
- If the geometry is too complex, it's cheaper to double-check the calculation before ordering
- When the additional allowance can be reduced due to repeatability
- When it's better to move a complex zone out of the main order
- Cutting verification should end with the number of whole products, not meters
- 1. Counting only the total perimeter
- 2. Automatically adding the full perimeter of each column
- 3. Forgetting the side walls of niches
- 4. Treating every niche the same
- 5. Assuming all angles are right angles
- 6. Not distinguishing between internal and external corners
- 7. Merging short wall sections into a single length
- 8. Subtracting the door opening automatically
- 9. Not accounting for built-in furniture
- 10. Treating a curved wall as a set of short straight segments without coordination
- 11. Using design dimensions as final
- 12. Multiplying a standard room without checking for exceptions
- 13. Mixing different profiles into one total length
- 14. Not creating a cutting plan
- 15. Assigning the same waste percentage to all zones
- 16. Optimizing only material consumption
- 17. Not accounting for the orientation of the decorative profile
- 18. Counting the same section twice
- 19. Mixing confirmed and modifiable rooms
- 20. Treating the price per linear meter as the main indicator of savings
- Can skirting boards be calculated by room perimeter alone?
- Should the full perimeter of each column be added?
- How should a niche be accounted for?
- What should be done with a corner that is not 90 degrees?
- Can a single percentage of extra stock cover complex geometry?
- Why can the same total length require a different number of planks?
- Is it necessary to physically measure every room?
- How should a curved wall be calculated?
- Which matters more: minimal waste or minimum joints?
- What should be passed to the supplier besides the total quantity?
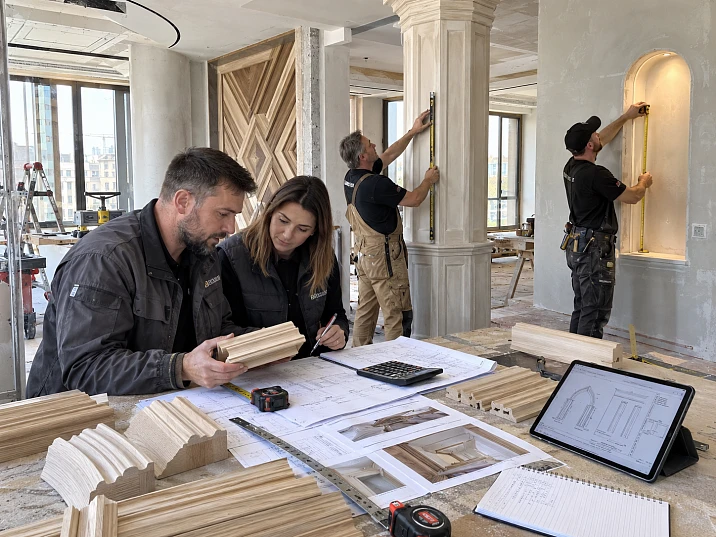
According to the plan, the room has a perimeter of 60 meters. It seems that for the skirting board it is enough to take roughly the same 60 meters, add a margin, and place the order. On the actual site, within this perimeter there are four columns, two deep niches, a door portal, a wall protrusion, several short wall sections, and two corners that are not actually 90 degrees.
In such geometry, the total linear meters no longer answer the main procurement question: how many source products are actually needed and how they will be cut. Two projects of 100 linear meters each may require a different number of planks, a different margin, and a completely different cutting scheme.
Therefore building materials at wholesale prices it is advantageous to purchase not from a conventional perimeter, but from a verified bill of quantities of individual sections. First, the route of each profile is determined, then the lengths, internal and external corners, ends, door gaps, niches, and columns are recorded, after which a cutting plan is drawn up based on the available commercial lengths.
Work sequence:
PLAN → BREAKDOWN INTO SECTIONS → ACTUAL DIMENSIONS → INTERNAL AND EXTERNAL CORNERS → NON-STANDARD GEOMETRY → REQUIRED PARTS → CUTTING PLAN → JUSTIFIED MARGIN → NUMBER OF WHOLE PRODUCTS → FINAL ORDER.
Main principle:
LINEAR METERS SHOW THE SCALE, BUT DO NOT DETERMINE THE CORRECT ORDER.
Why the usual room perimeter is not enough
The perimeter works well as a first reference for a simple rectangular room. But as soon as complex geometry appears, a single final figure begins to hide the structure of the material.
Let's say the design contour of the main room is 60 m. Inside there are four rectangular columns. The skirting board must go around each on three sides, because the fourth side adjoins built-in furniture. In addition, two niches are fully open and also receive skirting board along the side and rear walls.
If the buyer uses only 60 m, these sections will not be included in the calculation at all. If they simply add a conventional 10%, the margin may accidentally cover part of the error, but it will not explain how many specific parts are needed and where the joints will be.
The right task is not to "guess the stock" but to describe the routing of the trim along the actual architecture.
What exactly the total perimeter hides
- short individual sections;
- column surrounds;
- side surfaces of niches;
- external corners;
- non-standard angles;
- doorway gaps;
- areas without baseboard behind built-in furniture;
- different types of profiles in the same room.




For wooden trim, we calculate not only the length but also the structure of the routing
Each item requires several groups of data. Total length is only one of them.
| What we record | Why |
|---|---|
| Length of each section | For selecting source products and cutting |
| Number of internal corners | For understanding joints and cuts |
| Number of external corners | For calculating complex junctions |
| Endings | For checking visible ends and length |
| Door gaps | To avoid counting a non-existent route |
| Columns and pylons | To add actual bypasses |
| Niches | To determine whether the profile goes inside |
| Non-standard angles | To avoid including an automatic 45° cut |
| Profile type | Baseboard, molding, and cornice have different routes |
After that construction materials wholesale can already be considered as a set of actual source products rather than abstract linear meters.
Our factory also produces:
One hundred linear meters across two projects means two different orders
Project A: long straight walls
There are several walls 8–12 meters long, few doors, and almost no niches. The main task is to select product lengths and minimize visible joints.
Project B: the same 100 meters, but with complex geometry
The same total route is divided into dozens of wall sections, columns, niches, and short side segments.
In the second project:
- more cuts;
- more corners;
- higher probability of short unusable remnants;
- harder to use one source element for several parts;
- higher sensitivity to measurement error;
- more important to decide the location of joints in advance.
Therefore, the same purchase of “100 m + the same percentage” may be sufficient in one project and wrong in another.
Get Consultation
First geometry, then purchase volume
For a complex room, the sequence must be strict:
GEOMETRY → SECTIONS → DIMENSIONS → ANGLES → PARTS → CUTTING → RESERVE → ORDER.
Reverse logic — "object area → coefficient → meters" — can only be used for a very early budget estimate, when an exact order is not yet being formed.
This is especially important when building materials wholesale purchasing for several rooms or floors at once: an error in one typical unit is multiplied across the entire volume.
When preliminary footage is sufficient
At an early stage, it helps to understand the scale of the budget and the approximate volume of logistics. But before manufacturing and final ordering, complex zones need to be converted into specific parts.
How to divide a room into separate sections
A simple principle: every change in direction, construction, or termination condition creates a new section.
For example:
WALL 1 → EXTERNAL CORNER → WALL SEGMENT → INTERNAL NICHE CORNER → NICHE SIDE → BACK WALL → SIDE → WALL SEGMENT → DOOR → WALL 2.
Each section is assigned a designation and length. For a complex plan, it is convenient to use a code:
- P-101-W1 — first wall of room 101;
- P-101-N1-L — left side panel of the first niche;
- P-101-C2-S3 — third side of the second column;
- P-101-D1 — wall section at the first door.
The code should not be complex. Its purpose is to link the number in the schedule to a specific location on the plan.
Short sections cannot simply be combined into a single total
Five wall sections of 700 mm each give a total of 3500 mm. But this does not mean that one original element 3500 mm long will automatically cover all five.
Need to check:
- how much allowance is consumed by each cut;
- whether there are corner cuts;
- whether the orientation of the decorative profile matches;
- which ends should be finished;
- whether the remainder from one section can be used for the next;
- whether parts of a different length are required due to the actual trims.
For example, with a stock length of 2400 mm, three 700 mm parts can theoretically be obtained from one strip. But if one of them requires a complex angled cut and an additional allowance, the actual layout may change.
How to calculate the linear footage around a rectangular column
A column cannot automatically be added as a full perimeter. First, you need to determine on which sides the profile actually runs.
Suppose the column has finished dimensions of 600 × 400 mm. One side is covered by built-in furniture, and no baseboard is needed there.
Then the route is:
600 + 400 + 600 = 1600 mm.
But these 1600 mm are not the only thing that matters for ordering. Two or three external corners appear, depending on the junctions, which means separate parts and cuts.
If a project has four identical columns, a single verified detail can be standardized only after the dimensions are confirmed on site.
Why design columns may differ from finished columns
Leveling, plastering, cladding, panels, and local base adjustments change the final dimensions. For finished trim, it is the finished structure that matters.
We treat several identical columns as one type only after checking the first one
If eight columns are marked identically in the design, that does not yet mean that eight finished outlines match down to the millimeter.
Working order:
- measure the first finished column;
- map its route;
- check the corners and junctions;
- compare several of the others;
- if the dimensions match within the accepted design logic, approve the type;
- count exceptions separately.
So wholesale building materials for repeating geometry, you can plan faster without blindly multiplying the design size.
How to calculate linear footage inside a niche
A niche does not always increase the route. First, you need to understand whether the selected profile should even go inside.
Different scenarios are possible:
- open architectural niche — the skirting or molding continues the line;
- furniture niche — part of the linear footage may be excluded;
- radiator niche — the solution depends on the assembly and finish;
- technical niche — the decorative profile may not be used;
- decorative niche — a different profile may be used inside.
Suppose the niche is 1200 mm wide and 300 mm deep. If the skirting runs along both sides and the back wall, the route adds:
300 + 1200 + 300 = 1800 mm.
But along with the length, two internal corners appear at the back wall and two transitions to the main wall. For a complex profile, these junctions are no less important than the linear meters.
We count a wall protrusion or pilaster as a separate contour
A pilaster is the reverse geometry relative to a niche. If it protrudes from the wall, the skirting board may run along one front side and two side sides.
For example, a protrusion has a width of 900 mm and a depth of 250 mm. When going all the way around, the following is added:
250 + 900 + 250 = 1400 mm.
But two external corners and two internal junctions to the main wall also appear.
If furniture is placed next to it and one side panel is completely covered, the actual route is reduced. Therefore, a pilaster is calculated based on the actual junction, not on the geometric perimeter of the protrusion.
Internal and external corners must be counted separately
The total length does not show the complexity of installation. Two rooms with 40 m of skirting board each can differ radically if one has four internal corners and the other has twelve external and eight internal ones.
For the statement it is convenient to have separate fields:
| Room | Route length | Internal corners | External corners | Non-standard angles |
|---|---|---|---|---|
| Hall | 48,600 mm | 12 | 8 | 2 |
| Corridor | 31,200 mm | 6 | 2 | 0 |
Such a table immediately shows that the first object will require more complex cutting, even if the total footage differs only slightly.
A non-standard angle cannot be automatically calculated using two 45-degree cuts
Two 45° cuts work for a right angle of 90°. If the actual wall angle is different, the geometry of the joint changes.
On site, you may encounter:
- obtuse angles;
- acute angles;
- angles that are designed as 90° but actually differ;
- broken sections with several close angles.
In the measurement sheet, it is not enough to write “non-standard angle.” You need to indicate its location and link it to adjacent segments.
For example:
Hall / section C7–C8 / angle between walls 1 and 2 / verify actual geometry on site.
If an exact cutting angle is required, it is determined at the actual joint with a tool or a template, rather than derived from a conventional drawing.
We calculate a bay window by each face, not by the frontal width
A bay window often consists of several straight faces. Its frontal width is less than the actual length of the broken line along the walls.
For example, three faces have lengths:
- 1200 mm;
- 1800 mm;
- 1200 mm.
The total route along the faces is 4200 mm. But between them there are two non-standard angles and two junctions to the main wall.
For cutting, you need to know each face separately. If you simply write “bay window 4.2 m,” it is impossible to understand which source lengths are more advantageous to use.
A multifaceted room requires a schedule of sequential segments
A hotel lobby, restaurant, or meeting room may have eight, ten, or more facets. The more facets there are, the more risky it is to reduce the calculation to a single perimeter.
The working schedule is built in the following sequence:
| Code | Length | Start | End | Feature |
|---|---|---|---|---|
| X-01 | 4200 мм | Internal corner | Door | Straight wall |
| X-02 | 850 мм | Door | External corner | Short wall section |
| X-03 | 3150 мм | External corner | Niche | Straight wall |
After such a breakdown construction material wholesale you can already calculate using specific details and product lengths.
A curved wall requires a separate technical solution
A straight wooden profile cannot automatically be considered suitable for any radiused surface.
Before purchasing, it is necessary to determine:
- actual curvature;
- radius or shape;
- suitability of the selected product;
- possibility of custom manufacturing;
- allowed number of joints;
- appearance requirements.
You cannot achieve a radius simply by increasing the number of short straight elements. Such "approximation" can create a broken line and dozens of visible joints.
If the selected profile is not intended for such a section, the solution must be agreed upon separately before mass ordering.
We calculate the section between two doors based on the finished casings
The short wall section between doors often seems like the simplest area. But its actual length is determined not by the rough openings, but by the final position of the casings.
Before door installation, the project may show 820 mm. After finishing and installing door casings, the working length of the skirting board may become 760 mm or 780 mm.
for wooden baseboard such sections are useful to count as a separate group, because they are well suited for rational cutting of leftovers from long walls.
Short wall sections are useful to allocate to a separate cutting pool
If a floor has twenty short sections from 450 to 1100 mm, it is better not to hide them within the total meterage.
A separate list allows:
- using leftovers from long walls;
- reducing technological waste;
- not cutting a new plank for each short section;
- understanding in advance which lengths are especially useful.
This is already planning before purchase, not accounting for leftovers after installation.
Area schedule — the basis for accurate calculation
| Room | Section | Length | Start | End | Feature |
|---|---|---|---|---|---|
| Hall | Wall 1 | 4200 мм | Internal corner | Door | Straight |
| Hall | Pylon 1 | 850 мм | External corner | External corner | Short |
| Office | Niche 1 | 1200 мм | Internal corner | Internal corner | Niche |
| Corridor | Wall 4 | 3150 мм | Door | External corner | Straight |
Such a schedule is more useful than the note “320 m per floor is needed,” because it can be verified, recalculated, and turned into a cutting plan.
From the wall schedule, you need to move on to the cutting map
After measuring, the areas are grouped by lengths and joint requirements.
For example:
- long feature areas — a single solid piece is preferable;
- medium areas — can be combined with short ones from the same source plank;
- short wall sections — potentially covered by offcuts;
- parts with non-standard cuts — account for separately;
- critical symmetrical sections — best from the same batch and with similar texture.
These parts are then matched against the available commercial length of the specific SKU.
It is at this stage that building materials wholesale they turn from abstract linear meters into the number of whole products.
The longest source element does not always give the best cutting layout
It seems logical: the longer the plank, the fewer joints and waste. But for a group of short and medium sections, a longer element is not always used more efficiently.
Suppose you need to obtain parts:
- 1700 mm;
- 1600 mm;
- 800 mm;
- 700 mm.
If the source length is 2400 mm, the following scheme is possible:
- 1700 + 700;
- 1600 + 800.
Theoretically, two original planks cover four parts almost without any remainder.
However, if only longer products are available, this does not guarantee that the cutting will be better: an inconvenient remainder may appear that cannot be used anywhere, and logistics and storage of long elements will become more complicated.
Therefore construction materials wholesale it should be evaluated as a combination of "product length + segment map", rather than by the principle of "longer is always more profitable".
Cutting should be optimized by group of sections, not for each wall separately
If each wall is calculated independently, useful remainders from one zone do not participate in another. For a large project, it is better to group sections of the same SKU.
For example, from one 2400 mm plank you can get:
- 1450 + 900 mm;
- 1300 + 1050 mm;
- 800 + 800 + 700 mm — if allowances and joints permit.
But the optimal option depends on the actual endings and the quality of the cuts. Therefore, the mathematical sum must be verified by installation logic.
What is especially important
There is no need to join parts solely to minimize waste if this forces an additional visible seam on a long wall.
Quality is more important than minimal material consumption
Savings should not degrade the interior.
Priorities:
- quality and geometry;
- consistent appearance;
- rational cutting;
- minimization of waste.
On the central feature wall, it is better to plan a solid element in advance if the commercial length allows it. Short remnants are more effectively used:
- on wall sections;
- in niches;
- on the side faces of columns;
- in areas near doors;
- in less visible places.
So construction and repair goods wholesale are used efficiently without turning the finish into a mosaic of joints.
The orientation of a complex decorative profile must be taken into account when cutting
For a simple symmetrical skirting board, the direction may be insignificant. For a decorative molding with pronounced geometry, a figured pattern, or a directional finish, it can become critical.
In this case, the cutting map needs to know:
- which end of the part is the left one;
- which is the right one;
- where the inner corner is;
- where the outer corner is;
- which section will be visible;
- whether the remainder can be flipped without disrupting the pattern.
Otherwise, the calculation considers the remainder usable, but the installer on site discovers that its orientation is unsuitable.
We take wood grain and finish into account only where it affects the result
If natural oak or a clear finish is used, adjacent parts may differ noticeably in texture. But this does not mean that the entire project needs to be matched by board pattern.
Visual compatibility is especially important:
- on long feature walls;
- on symmetrical frames;
- on paired portals;
- in central public areas.
In technical and remote rooms, requirements may be less strict.
This is an additional cutting factor, not a separate reason to increase the reserve "just in case."
Design measurement and actual measurement serve different purposes
Design dimensions are needed earlier: for the budget, approximate volume, and preliminary logistics.
Actual dimensions are needed before the final order where finished structures are already in place:
- columns;
- niches;
- door piers;
- pilons;
- non-standard angles;
- areas with built-in furniture;
- areas with changed finishes.
If all the geometry is still rough, millimeter precision creates an illusion of reliability. At this stage, it is wiser to split the schedule into preliminary and confirmed.
How to avoid double-counting the same area
On complex plans, the same part of a wall can end up in several rows at once. For example, the main perimeter of the room is counted in full, and then a niche is added as a separate contour without subtracting the entry section.
To avoid this:
- each area is assigned a unique code;
- the profile route is marked on the plan;
- the schedule is built by consecutive segments;
- the start and end of each area are checked separately;
- do not use both the "overall perimeter" and "detailed areas" as two independent totals.
If the object has already switched to the detailed schedule, the total perimeter remains a control figure rather than a second source for ordering.
Control check of the measurement sheet after measuring
Before cutting, it is useful to run a short audit.
| Check | Yes / no |
|---|---|
| All walls are marked | ___ |
| Doors are excluded only where the profile does not actually fit | ___ |
| Columns added | ___ |
| Niches checked | ___ |
| Pilasters added | ___ |
| Non-standard angles marked | ___ |
| Areas without trim are marked | ___ |
| No double counting | ___ |
| Each section has a clear code | ___ |
After such a check, materials in bulk can be moved to the next stage — optimizing the number of whole products.
A color or graphic scheme helps identify gaps
On the plan, it is useful to highlight with different markings:
- main profile;
- another profile type;
- areas without linear trim;
- disputed spots;
- areas for additional measurement;
- external corners;
- non-standard angles.
This is not a decorative diagram. It allows you to see an area that is present on the plan but missing from the schedule, or vice versa.
We treat different types of trim as separate runs
They cannot be combined into a single total length:
- plinth;
- molding;
- cornice;
- slat;
- door casing.
Even within a single room, their runs differ.
For example, the baseboard is interrupted by a built-in wardrobe, while wooden cornice at the top it runs continuously. A molding may form frames on only two walls.
Therefore wholesale purchase of building materials must have a separate schedule for each SKU or at least for each profile type.
Door openings cannot be automatically deducted from the run
If the baseboard ends at the door casing, the clear opening width is indeed excluded from the lower run. But the specific detail may be different.
Need to check:
- position of the casing;
- whether there is a portal;
- whether the molding runs above the door;
- whether there is a baseboard on the short wall section between two casings;
- whether built-in furniture changes the endpoint.
Therefore, for an accurate door calculation, it is not "minus the opening width," but separate break and junction points.
Built-in furniture changes the route if this is confirmed by the project
If the baseboard does not run behind the built-in wardrobe, the corresponding section is excluded. But this decision must be known before the order is formed.
It is especially important to check:
- full-wall built-in wardrobes;
- kitchen furniture;
- reception counters;
- wall panels to the floor;
- furniture portals;
- equipment zones.
If the furniture has not yet been approved, it is better to leave such an area in the "requires clarification" status rather than pretend that the calculation is final.
Confirmed and changeable zones need to be separated
On a large project, some rooms are already ready for ordering, while others are still changing. If they are combined into one final schedule, each new design revision cycle forces the entire project to be recalculated.
It is more practical to separate:
CONFIRMED — geometry and profiles are ready for purchase.
REQUIRES CLARIFICATION — dimensions, furniture, or assemblies are still changing.
So wholesale purchases of building materials can be launched for ready zones without feigned precision for unready ones.
Calculation by room is more convenient than a total count for the project
If individual volumes are known:
- corridor — ___;
- lobby — ___;
- offices — ___;
- restaurant — ___;
- room inventory — ___;
it is easier to check overruns, changes, and future deliveries.
If the entire project is recorded as a single line “PLT-A — 1800 m”, an error in one cabinet is lost within the total number.
A typical room must first be fully calculated as a reference
For a hotel or apartment complex, it makes sense to first break down one typical room completely:
- perimeter;
- Doors;
- niches;
- Furniture;
- corners;
- short wall sections;
- Cutting;
- technological consumption.
Only after that is the scheme applied to truly identical rooms.
So wholesale purchase of building materials for a standard series becomes manageable rather than based on multiplying a conventional perimeter.
You cannot simply multiply one number by one hundred
Even standard rooms often have variations:
- left and right execution;
- corner rooms;
- different niche depth;
- a different doorway;
- an additional column;
- changes to the end rooms;
- another furniture block.
Therefore, a set of types is created first:
Type A — 84 numbers.
Type A-mirrored — 76 numbers.
Type B-corner — 8 numbers.
Type C-with column — 4 numbers.
For each type — a separate cutting plan.
Left and right versions are best stored as two cutting plans
Mirrored rooms often have the same total area. But for a complex profile, this does not always mean the same parts map.
Differences appear due to:
- decorative pattern directions;
- outer corner positions;
- transitions to doors;
- orientation of parts with finished cuts;
- furniture placement;
- various short wall sections.
Therefore, type A-left and type A-right can be considered identical in total linear meters, but separate cutting plans should be kept. This reduces the risk that the remainder from one orientation is mistakenly considered suitable for the other.
If the actual size differs from the schedule, first determine the scale of the change
Suppose the planned wall section was 900 mm, and the actual one after finish work is 840 mm.
There is no need to automatically adjust the entire order. First check:
- whether the deviation is isolated or systemic;
- how many rooms are affected;
- whether the difference changes the cutting map;
- whether a new usable offcut appears;
- whether the number of source strips changes;
- whether this affects visible joints.
If ten typical rooms were reduced by the same amount, the change may yield real savings. If one section became 60 mm shorter, the overall order may not change at all.
Additional allowance is better derived from the cutting layout rather than from a universal percentage
Conventional 5%, 10%, or 15% look simple but do not reflect the actual complexity of the project.
The amount of technological allowance is influenced by:
- the number of corners;
- number of short elements;
- non-standard cuts;
- product length;
- strict requirements for joint placement;
- repeatability of rooms;
- complexity of the profile;
- ability to use offcuts between sections;
- quality of the actual measurement.
A more accurate method:
FIRST LAY OUT ALL REQUIRED PARTS ALONG THE SOURCE PLANKS, THEN COMPARE THE USABLE LENGTH WITH THE TOTAL LENGTH OF THE REQUIRED RAW MATERIAL.
The difference shows the portion of technological waste specifically for this geometry.
A complex hallway requires a different allowance than a long straight corridor
In a straight corridor 50 m long, you can set the joint rhythm in advance and get a predictable cutting plan.
In a hall with twelve columns, six niches, and many short wall sections, the number of cuts is significantly higher.
Even if the total route is the same, the second object:
- requires more individual parts;
- depends more on measurement accuracy;
- has more corner waste;
- creates more short offcuts;
- requires separate control of visible joints.
Therefore, wholesale building materials for two such zones cannot be calculated using a single coefficient.
The cost of a complete set cannot be assessed solely by the price per linear meter
A low price for a single plank does not guarantee the minimum project cost.
The result also depends on:
- measurement accuracy;
- cutting efficiency;
- amount of waste;
- number of repeat orders;
- cost of express delivery;
- incorrectly manufactured or extra parts;
- rework due to incorrect geometry;
- material loss on unnecessary joints.
Therefore, the main commercial meaning of the request building materials at wholesale prices — not only to get the wholesale price, but also to correctly determine the quantity that the project actually needs.
Practical example: a room with four columns
The main route along the walls is approximately 48,000 mm. The room has four free-standing columns measuring 600 × 400 mm. According to the design, the skirting runs fully around each one.
Route of one column:
600 + 400 + 600 + 400 = 2000 mm.
Four columns:
2000 × 4 = 8000 mm.
Total geometric route:
48,000 + 8,000 = 56,000 mm.
But the purchasing task does not end there. The columns create 16 external corners. If the product length of PLT-A is 2400 mm, you need to determine whether several sides of the columns can be obtained from one strip, what allowances are needed, and where the leftovers can be used.
For example, from one 2400 mm strip you can theoretically get two 600 mm sides and two 400 mm sides based on the sum alone. Actual cuts, allowances, and the quality of the ends must be considered separately.
Therefore, 56 m of the route does not automatically turn into an order for 56 m.
Practical example: a wall with three deep niches
The main straight wall is 7200 mm long. It has three identical niches 1000 mm wide and 300 mm deep. The skirting board must go inside each one.
If you measure the wall only "from corner to corner," you get 7200 mm. But the actual route changes.
Each niche adds two side sections of 300 mm each. The back wall of the niche replaces the corresponding straight section 1000 mm wide, so it cannot simply be added on top without checking the original route.
Additional length per niche relative to a straight wall:
300 + 300 = 600 mm.
Three niches:
600 × 3 = 1800 mm.
Final route along this wall:
7200 + 1800 = 9000 mm.
In addition to the length, 12 additional corner transitions appear: four per niche, counting entrances and internal corners.
Practical example: an angled corridor
The corridor has the following sections:
- 5200 mm;
- 1800 mm;
- 3400 mm;
- 950 mm;
- 4700 mm.
The total length is 16,050 mm. But for cutting, the sequence matters: between the segments there are three internal corners and one external corner.
If the available commercial length is 2400 mm, a 5200 mm section will require at least three original pieces and two joints, unless a longer format is available. A 4700 mm section requires two planks with one joint when chosen optimally.
The short 950 mm section can be obtained from the leftover after cutting the long wall.
This is how wholesale purchasing of building materials turns into a task of distributing specific cut lengths, not just adding up 16,050 mm.
Practical example: ten standard rooms and two corner rooms
There are 12 rooms on the floor. Ten are type A, two corner rooms are type B.
Type A after inspection requires:
- 22.4 m of skirting board;
- 8 internal corners;
- 2 external;
- 4 short wall sections.
Type B:
- 25.8 m of skirting board;
- 10 internal corners;
- 5 external;
- an additional column.
You cannot count the floor as "12 × 22.4 m". Correct:
10 × type A + 2 × type B.
The same applies to the cutting map: corner numbers get a separate template.
Practical example: five short wall sections and one long wall
Need to manufacture:
- 4200 mm;
- 700 mm;
- 700 mm;
- 700 mm;
- 700 mm;
- 700 mm.
Total — 7700 mm.
But if the commercial length is 2400 mm, the long wall cannot be covered with a single strip. It needs at least two, and possibly three, depending on the permitted joint location.
Short wall sections can be distributed among the leftovers from other source elements.
Therefore, the total 7.7 m may require more than 8 m of source linear stock. This is a normal cutting result, not an error.
Practical example: same total length with a different number of corners
| Project | Route | Internal corners | External corners | Short sections |
|---|---|---|---|---|
| А | 60 м | 4 | 0 | 2 |
| Б | 60 м | 14 | 10 | 18 |
The same route does not mean the same complexity and the same allowance. Project B has more offcuts, more corner operations, and a higher chance that a short leftover will not find a use.
supply of construction materials: it is useful to pass the demand structure to the supplier, not just the meters
For a large order, it is more useful to report:
- exact article number;
- total estimated volume;
- number of rooms;
- main required lengths;
- presence of critical long sections;
- share of short parts;
- repeating standard zones;
- requirements for the batch or finish, if any.
This does not mean that the supplier must calculate the architecture of the project themselves. But structured data helps to discuss the delivery format, packaging, and available product lengths more precisely.
building materials supplier cannot compensate for incorrect measurements with additional allowance
If four columns or two niches were forgotten in the calculation, increasing the order by a nominal 5% is not a reliable way to correct it.
The allowance is needed for technological risks and cutting specifics. It should not mask incomplete geometry.
Before the final order, it is better to correct the schedule than to try to cover the unknown with a large amount of material.
buy building materials wholesale should be done after fixing the critical actual dimensions
Not all areas require the same degree of readiness.
It is especially important to verify in practice:
- columns;
- niches;
- wall sections between the architraves;
- non-standard angles;
- sections at built-in furniture;
- bay windows;
- transitions of several profile types.
If these junctions have not yet been formed, the purchase can be split into a confirmed and a to-be-refined volume, rather than ordering everything based on rough dimensions.
End-to-end example: how to calculate a room with complex geometry from plan to order
Let's consider a conventional hall for which a simple design frame yielded a perimeter of 58,400 mm. If we stop at this figure, the purchaser sees approximately 58.4 m of skirting. But ins
Step 6. We form a list of parts
After all the geometry, the purchasing calculation no longer looks like "approximately 60 m." It turns into a set of specific lengths:
- long sections over 4000 mm;
- medium sections 1800–3900 mm;
- short wall sections 500–1700 mm;
- column parts 448–610 mm;
- niche — 350 / 1400 / 350 mm;
- pilaster — 220 / 780 / 220 mm;
- individual parts at the doors.
Step 7. Moving on to cutting
If the selected profile has a stock length of 2400 mm, long walls require several strips and predetermined joints. Short parts of columns and niches can be obtained from offcuts after long and medium segments.
For example, after an 1800 mm part, about 600 mm remains before allowance is taken into account. Such an offcut is potentially suitable for a column side of 448 or 450 mm. After a 1400 mm part, approximately 1000 mm remains, from which two short pilaster elements can be obtained if the cuts allow.
Thus, a group of short parts reduces waste, but only when the layout is planned in advance.
Step 8. Obtaining the number of whole products
Only after laying out all segments does it become clear how many 2400 mm planks are actually needed. The result may turn out higher than the simple formula "total route / 2400", because long segments and design constraints do not allow the material to be used perfectly without waste.
This is exactly where it becomes clear why wholesale purchases of building materials for complex geometry need to be formed through parts, and not through a coefficient to the perimeter.
The actual measurement protocol must be the same for all complex zones
When different employees measure columns, niches, and wall sections differently, the schedule is difficult to consolidate. One writes "niche 1.4 m", another — "1400 × 350", a third records only the frontal width.
For consistency, it is useful to use one short protocol.
| Field | What we record |
|---|---|
| Object / building / floor | Exact zone |
| Room | Number or code |
| Element type | Wall / column / niche / pier / bay window |
| Plot code | Unique identifier |
| Finish length | Actual value |
| Start | Corner / door / open end |
| End | Corner / door / open end |
| Feature | Non-standard corner, furniture, tricky junction |
| Status | Confirmed / to clarify |
This way, measurements from multiple floors are consolidated into a single system without manual interpretation.
What to photograph during a complex measurement
You don't need to photograph every straight wall. Photos are especially useful for:
- non-standard corner;
- complex niche;
- column with furniture adjacency;
- section between two casings;
- curved wall;
- places where the profile changes.
The photo must be linked to the section code, otherwise it will be impossible to tell later which line it refers to.
When you don't have to wait for the actual measurement
Not the entire procurement should stop until the finishing work is fully completed.
You can start confirmed zones if:
- the geometry is finally approved;
- standard rooms have already been checked;
- critical niches and columns are formed;
- door assemblies are clear;
- product length and profile confirmed;
- changeable zones are placed in a separate residual volume.
This way, the delivery of building materials can proceed along the completed part of the project without trying to guess the dimensions of rooms that are still changing.
If the geometry is too complex, it is cheaper to double-check the calculation before ordering
On a project with many columns, niches, and non-standard angles, the cost of re-measuring is often lower than the consequences of a systematic error.
Independent verification is especially useful if:
- one bill of materials forms an order for several floors;
- a standard room is multiplied dozens of times;
- there is expensive solid wood or custom finishing;
- long lead times for re-production;
- many areas with non-standard angles;
- the cutting turned out to be unexpectedly wasteful.
Rechecking does not mean measuring everything again. It is enough to select critical areas and verify the logic of the schedule on them.
When additional reserve can be reduced through repeatability
Complex geometry does not always mean a large reserve. If the project consists of dozens of truly identical rooms, and one standard room has already been fully measured and verified during installation, uncertainty decreases.
For example, after the reference room it became known:
- which short segments repeat;
- which offcuts from long walls are used further;
- where technological waste occurs;
- how many source planks are needed per room;
- which details require separate orientation.
After that, the reserve for the series can be calculated not from an abstract percentage, but from the confirmed cutting plan of a typical room and known exceptions. This is one of those cases where preliminary work yields a direct commercial effect.
When a complex area is better moved out of the main order
If the main volume of the project is already confirmed, and one bay window, curved wall, or unusual portal is still being designed, it is not necessary to delay the entire purchase.
More practical:
- order the confirmed typical areas;
- keep the complex unit as a separate line item;
- after the actual measurement, issue its precise calculation;
- if necessary, arrange a separate delivery or additional order.
This way, the project does not mix reliable data with assumptions. At the same time, it is important not to forget to reserve time in the schedule for the part to be clarified.
If you plan to buy building materials wholesale for the entire project in one delivery, the disputed areas must be resolved before the final order. If the purchase is staged, they can be deliberately moved to a later batch.
Cutting verification should end not with meters, but with the number of whole products
The final result of the calculation is not "327.4 m needed." The supplier ships products of a specific commercial length, so the purchasing list must contain the number of whole units for each SKU.
For example:
| SKU | Useful route | Product length | Cutting calculation | To order |
|---|---|---|---|---|
| PLT-A | 327,400 mm | 2400 мм | By segment map | ___ pcs. |
| MLD-A | 184,600 mm | 2200 мм | By frame map | ___ pcs. |
It is this quantity that then becomes the commercial line item. The total meterage remains a control indicator, but does not replace the calculation of whole products.
20 typical mistakes when calculating complex geometry
1. Counting only the total perimeter
Why it occurs: the perimeter is easy to obtain from the plan. Consequence: columns, niches, and protrusions are not included in the route. How to prevent: divide the contour into separate sections.
2. Automatically add the full perimeter of each column
Cause: the column is perceived as a separate rectangle. Consequence: the profile is calculated on the sides covered by furniture or panels. Prevention: first determine the actual route.
3. Forgetting the side sides of niches
Cause: only the frontal width is visible on the general plan. Consequence: the actual route turns out to be longer. Prevention: count each side separately.
4. Treating any niche the same way
Cause: they are geometrically similar. Consequence: the skirting board ends up in a furniture or technical niche where it is not needed. Prevention: check the purpose of the niche.
5. Assuming all angles are right angles
Cause: the plan conventionally shows 90°. Consequence: the 45° miter cut does not fit on site. Prevention: verify non-standard angles on site.
6. Not separating internal and external corners
Cause: they are not visible in the linear footage. Consequence: the complexity of cutting is underestimated. Prevention: separate fields in the schedule.
7. Combining short wall sections into one length
Cause: the total appears sufficient. Consequence: individual cuts and ends are not taken into account. Prevention: store the length of each segment.
8. Subtracting the door opening automatically
Cause: it is assumed that the profile always ends at the edges of the opening. Consequence: sections near architraves or the portal are lost. Prevention: calculate the finished door assembly.
9. Not accounting for built-in furniture
Cause: the architectural plan and furniture documentation exist separately. Consequence: skirting is purchased for hidden areas. Prevention: link the schedule to the furniture.
10. Treating a curved wall as a set of short straight segments without coordination
Cause: there is a desire to solve the task with a standard profile. Consequence: a broken line and an excess of joints. Prevention: a separate technical solution.
11. Using design dimensions as final
Cause: the drawing looks accurate. Consequence: finished columns and niches differ after finishing. Prevention: measure critical zones on site.
12. Multiplying a typical room without checking exceptions
Cause: rooms are labeled with the same type. Consequence: corner, mirrored, or end rooms produce errors. Prevention: create several typical schemes.
13. Mixing different profiles into one total length
Cause: everything belongs to one room. Consequence: skirting, molding, and cornice lose their own route. Prevention: a separate schedule for each SKU.
14. Not creating a cutting map
Cause: the total linear meters have already been calculated. Consequence: the number of whole products is unknown. Prevention: lay out segments by commercial lengths.
15. Assigning the same reserve percentage to all zones
Cause: a simple internal rule. Consequence: a straight corridor and a hall with columns get the same logic. Prevention: derive the reserve from the cutting plan.
16. Optimizing only material consumption
Cause: the desire to minimize waste. Consequence: extra joints appear on feature walls. Prevention: prioritize quality over savings.
17. Ignoring the orientation of the decorative profile
Cause: the length of the leftover piece is suitable. Consequence: the pattern or cut is oriented incorrectly. Prevention: record the direction.
18. Counting the same section twice
Cause: the total perimeter and the detailed niche are summed at the same time. Consequence: an inflated order. Prevention: unique segment codes.
19. Mixing confirmed and changeable rooms
Cause: the desire to release a single order. Consequence: a future revision changes an already ordered volume. Prevention: a separate “requires clarification” status.
20. Treating the price per linear meter as the main indicator of savings
Cause: the price is easy to compare. Consequence: overspending, repeat orders, and rework are not taken into account. Prevention: calculate the cost of the complete set as a whole.
Checklist before forming a wholesale order
| Question | Checked |
|---|---|
| All rooms are divided into sections | ___ |
| Columns and pylons are accounted for | ___ |
| Niches are verified along the actual route | ___ |
| Door gaps are aligned with finished casings | ___ |
| Internal and external corners are separated | ___ |
| Non-standard angles marked | ___ |
| Bay windows are divided by faces | ___ |
| Curved sections have a separate solution | ___ |
| Built-in furniture is accounted for | ___ |
| Different SKUs have separate routes | ___ |
| Typical rooms are checked for exceptions | ___ |
| Actual critical dimensions confirmed | ___ |
| Cutting map compiled | ___ |
| Location of visible joints agreed | ___ |
| Stock justified by cutting plan | ___ |
| No double counting | ___ |
If at least a few critical lines remain unconfirmed, it is better to buy construction materials wholesale for the entire volume after clarifying these specific areas, rather than increasing stock blindly.
Final algorithm for calculating wooden trim of complex geometry
GET THE CURRENT PLAN → DETERMINE THE ROUTE OF EACH PROFILE → BREAK IT INTO SECTIONS → ASSIGN CODES → RECORD LENGTHS → MARK DOORS → ADD COLUMNS AND PILLARS → CHECK NICHES → SEPARATE INTERNAL AND EXTERNAL CORNERS → MARK NON-STANDARD ANGLES → BREAK BAY WINDOWS DOWN BY FACES → RESOLVE CURVED SECTIONS SEPARATELY → VERIFY FURNITURE → CHECK ACTUAL CRITICAL DIMENSIONS → GROUP SEGMENTS → COMPILE A CUTTING MAP → RECORD VISIBLE JOINTS → DETERMINE THE NUMBER OF WHOLE PIECES → CALCULATE JUSTIFIED STOCK → FORM THE ORDER.
- Do not start with the total linear meters.
- Separate skirting, molding, cornice, and other profiles.
- Create a route for each SKU.
- Split the route into separate straight segments.
- Specify the start and end of each segment.
- Check the columns.
- Check the pylons.
- Check the niches.
- Check the bay windows.
- Mark non-standard angles.
- Check doorways against finished assemblies.
- Check built-in furniture.
- Group short sections into a separate group.
- Split standard rooms by variants.
- Verify critical dimensions on site.
- Check for double counting.
- Group the required lengths.
- Match them with the product lengths.
- Create a cutting plan for the entire group.
- Do not save at the expense of extra visible joints.
- Determine the process consumption based on the cutting plan.
- Add only a justified reserve.
- Count the number of whole items.
- Separate confirmed and pending zones.
- Send the supplier a structured requirement.
Bottom line: wooden trim is sold by the meter, but calculated by sections and cutting layouts
The main mistake on a complex project is trying to turn all the geometry into a single number too early.
For an accurate order, the path must remain transparent:
PLAN → SECTION → LENGTH → ANGLE → JOINT → REQUIRED PART → SOURCE STRIP → CUTTING LAYOUT → REMAINDER → FINAL QUANTITY.
Only after that does the total linear meters become a useful purchasing figure.
This approach is especially important for columns, niches, broken walls, bay windows, short wall sections, and rooms with many corners. That is exactly where a simple perimeter creates a false sense of accuracy.
When a project orders building materials at wholesale prices, savings are determined not only by the unit price but also by the quality of the calculation: an extra strip, a rush reorder, or rework due to an incorrect measurement also factor into the final project cost.
Before placing an order, it is useful to save the final section schedule and cutting map as a single reference version. If a specific niche, column, or door joint changes later, the team can recalculate only the affected segments instead of rebuilding the logic of the entire project from scratch. This is especially important for phased procurement, where the same profile is ordered in several batches.
After approving the calculation, save one reference version of the list and cutting plan with the date. Then any subsequent changes can be recalculated locally and compared with the original order without restoring the entire geometry again.
Frequently asked questions
Can skirting be calculated only by the perimeter of the room?
For a simple rectangular room — as a preliminary guideline. For columns, niches, pilasters, bay windows, and complex door units, a route of individual segments is needed.
Should the full perimeter of each column be added?
No. First determine on which sides the profile actually runs. Part of the column may be covered by furniture or another finish.
How should a niche be taken into account?
It is necessary to determine whether the profile goes inside. If yes — count the sidewalls and the back wall as separate segments and record the corners.
What should be done with a corner that is not 90 degrees?
Mark it as a separate non-standard unit and check the actual geometry. Automatic 45° cutting is not applicable here.
Can a single percentage of allowance cover complex geometry?
It is more reliable to first create a cutting plan. A percentage does not fix missed columns, niches, or incorrect lengths.
Why can the same square footage require a different number of planks?
Because the quantity depends on the length of individual segments, the commercial length, joints, angles, and the possibility of using offcuts.
Is it necessary to physically measure all rooms?
Not always. Truly identical standard rooms can be calculated according to an approved reference, but exceptions, end and corner variants must be checked separately.
How should a curved wall be calculated?
First determine the technical feasibility of using the selected profile. A radius must not be automatically replaced with a series of short straight pieces.
What is more important: minimal waste or minimum joints?
In visible areas, priority is given to quality and a coordinated appearance. A rational cutting plan should not create unnecessary noticeable joints.
What should be passed to the supplier besides the total quantity?
SKU, total volume, number of rooms, critical lengths, recurring types, and geometry specifics. This helps discuss the delivery format more precisely.