Article Contents:
- Start With the Bed, the Wall, and the Sightline
- The headboard is the reference, not the mattress label
- Find the sightline that matters most
- Document constraints before moving furniture
- Layout 1: One large frame above the headboard
- Layout 2: Three tall panels aligned to the bed group
- Layout 3: Two symmetrical tall frames behind nightstands
- Layout 4: A lower-wall treatment with a quiet upper wall
- Layout 5: One framed accent panel with an inset finish
- Layout 6: A headboard wall that connects to a built-in wardrobe
- Give the bed enough visual margin
- Coordinate the frame height with the headboard
- Make nightstands and lighting part of the design
- Natural wood for visible grain and traditional detailing
- MDF for a predictable paint-grade look
- Polyurethane for applied decorative frames
- Material choice at a glance
- MLDPU-001: a quiet line beside upholstered furniture
- MLDPU-004: more definition without a heavy border
- MLDPU-002: a medium-scale architectural outline
- MLDPU-003: strong framing for spacious rooms
- Do not turn a profile chart into an interchangeable product list
- Example A: one 80-by-42-inch headboard frame
- Example B: three panels behind a King bed
- Example C: baseboards for a 12-by-14-foot room
- Verify dimensions before turning a sketch into an order
- Measure the dimensions that control the project
- Stock lengths are a small packing problem
- A reserve should cover actual risks
- A wall-color frame is often the calmest choice
- Choose sheen for the room, not for a photograph
- Prepare the wall and dry-fit the layout
- Make test cuts and plan the joints
- Secure, finish, and inspect
- What is the best molding for an accent wall behind a Queen bed?
- Should a frame be wider than the headboard?
- Is wainscoting the same as picture frame molding?
- Can I attach an upholstered headboard to polyurethane molding?
- How do I keep a frame from clashing with nightstand lamps?
- Can I combine MDF baseboards with polyurethane picture frames?
- Is the same amount of molding required for all King beds?
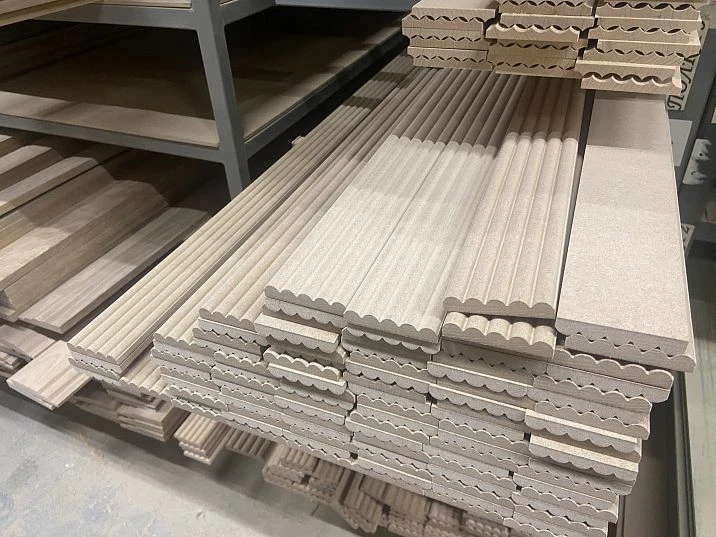
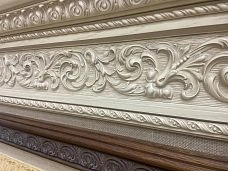
A bedroom accent wall should make the bed feel deliberately placed, not compete with it. For most projects, the most reliable starting point is a measured wall molding layout centered on the actual headboard, coordinated with the nightstands, baseboards, lights, and ceiling height. Choose the design before choosing a profile: a single generous frame, a series of vertical rectangles, or a restrained lower-wall treatment each creates a different visual result. The same idea can be achieved with natural wood, paint-grade MDF, or a suitable polyurethane profile, but those materials require different cutting, fastening, and finishing decisions.
This American-English guide develops the bedroom ideas in the original STAVROS article into a practical plan. It explains how to measure a real room, choose a layout for a Queen or King bed, compare verified STAVROS products, prepare cut lists using inches and feet, and avoid details that interrupt access to outlets or make the wall awkward to repaint. The emphasis is bedroom-specific design, rather than a general guide to all wall moldings. If you need the full installation fundamentals for rectangular frames throughout a home, see the related STAVROS guide to picture frame molding on walls.
Start With the Bed, the Wall, and the Sightline




The headboard is the reference, not the mattress label
Standard U.S. mattresses have useful nominal widths: Full is 54 inches, Queen is 60 inches, King is 76 inches, and California King is 72 inches. A bed frame or upholstered headboard can be several inches wider than the mattress, and a freestanding headboard may project much farther than expected. Measure the visible outside width of the headboard, not just the mattress size printed on a label. Record its top height above the finished floor and how far any padded wings extend to the sides.
Next measure both nightstands, including their widths and the space between each stand and the bed frame. The accent wall usually needs to relate to this entire grouping. A wide frame centered only on the mattress can look narrow once the nightstands and lamps are installed. Conversely, designing a large architectural panel to reach every edge of the furniture can leave no breathing room near the bedroom door or a closet opening.
A useful first sketch shows five horizontal measurements: left wall return, left nightstand, bed or headboard, right nightstand, and right wall return. It also shows the headboard height, ceiling, baseboard, and the lowest hanging light or wall sconce. Keep actual measurements next to the sketch. Do not substitute an idealized symmetrical photograph for a wall that may have an off-center window or uneven corner.
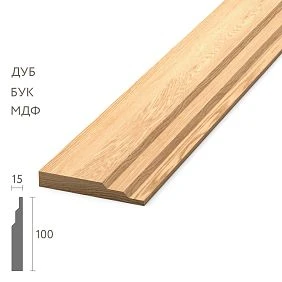
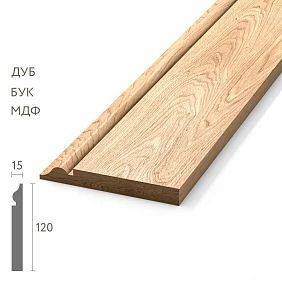
Наша фабрика также производит:
Смотреть весь Каталог продукции
Find the sightline that matters most
Stand in the bedroom doorway and photograph the wall with the furniture in place. Then sit on the bed and look toward the door. These are different views. From the entrance, the accent composition may need to align with the bed. From the bed, the wall molding can be mostly concealed by the upholstered headboard. If a decorative frame disappears completely behind the headboard, raising it or choosing a larger open area above the furniture usually helps more than increasing profile ornament.
Make a second observation from any reading chair or adjoining hallway. A bedroom with a door near one end of the feature wall may read visually off-center even when the bed is mathematically centered. Center the decorative grouping on the furniture when that provides the strongest visual logic, but preserve enough clear wall at the edges that the trim does not look squeezed into a corner.
Получить консультацию
Document constraints before moving furniture
A bedroom accent wall is rarely completely blank. Add outlet and switch plates, low-voltage cable ports, HVAC grilles, return-air paths, picture-hanging points, thermostat controls, ceiling lights, and wall sconces to the drawing. Note doors and closet panels at full opening, not just in the closed position. Record the stud or masonry locations separately from the decorative design. Where mirrors or heavy objects will hang, proper mechanical mounting must work independently of decorative trim.
For apartments, also decide how permanent the project can be. Applied moldings generally leave adhesive residue, paint damage, or fastener holes when removed. A reversible painted feature wall may be more appropriate for a rental than a glued panel system. If the property has special requirements, obtain permission before cutting or fixing anything to the wall.
Choose the Right Bedroom Molding Layout
Layout 1: One large frame above the headboard
A single rectangular frame is often the clearest solution for a smaller bedroom or a bed with a detailed upholstered headboard. The frame can sit above the headboard, with enough gap to remain visible, or create a larger architectural field that extends behind the bed. What matters is the resulting visible composition. Mark the outer frame first; its long-point-to-long-point dimensions control the cut list. Check that the horizontal line does not create an uncomfortable visual collision with a tall headboard, wall art, or pendant lamps.
This arrangement works well when the room has a strong central axis and relatively plain nightstands. A shallow profile creates an understated outline; a wider profile produces stronger shadow lines. Avoid adding a second nested frame until you have lived with the taped outline for at least a day. In many bedrooms, the extra border contributes little except complicated miters and more cleaning surfaces.
Layout 2: Three tall panels aligned to the bed group
Three vertical frames can organize a wider wall: a broad center field behind the headboard and narrower fields above the nightstands. The side panels are not required to match the center panel. Their widths should make sense relative to actual furniture, and their top and bottom baselines should align. A common mistake is making all three rectangles equal when the center bed is two or three times the width of a nightstand.
This layout is useful for a King bed on a long wall, but it can also suit a Queen bed when the side panels are narrow. Place a sconce either clearly inside a panel with adequate space or deliberately outside the molding border. Avoid positioning a vertical molding directly behind a plug, switch plate, or picture-hanging bracket. Use painter's tape to check the negative spaces between frames; a frame system is as much about the gaps as the lines.
Layout 3: Two symmetrical tall frames behind nightstands
A bed with a large upholstered or carved headboard may already provide a dramatic center. In that situation, two tall frames on either side of the bed can support the furniture without competing with it. The panels can frame paired sconces, small artwork, or simply painted wall areas. Their symmetry should come from the real positions of the nightstands, not an imaginary perfect room center.
This approach is particularly helpful when the central area contains a window or when the headboard extends nearly to the ceiling. Frame placements should preserve access to outlets used for lamps and charging. Also leave space for future nightstands: a few inches of design flexibility prevents the wall from looking tailored to furniture that will soon be replaced.
Layout 4: A lower-wall treatment with a quiet upper wall
A low chair rail and a row of lower rectangular frames can create an intimate bedroom without making the headboard wall a large focal point. It can work behind an unadorned platform bed or continue around the room for a cohesive perimeter. The chair-rail position is a design decision, not a required one-third formula; coordinate it with the actual headboard height and with furniture that interrupts the wall. For construction details see STAVROS's separate wainscoting molding guide.
Applied molding rectangles over painted drywall are a visual treatment. They are not the same as installing actual wood wainscot panels, and neither should be described as structural reinforcement. A lower-wall scheme near a bed with an adjustable base may need more clearance than a fixed bed. Confirm the full range of furniture movement before marking the wall.
Layout 5: One framed accent panel with an inset finish
Molding can form the perimeter of an accent panel finished in a different paint color, a wallpaper insert, or a properly specified decorative surface. For a calm bedroom, the simplest combination is often wall-color molding around a subtly contrasted inset. A patterned wallpaper can work when the rest of the room is quiet, but verify that seams and the pattern are centered on the visible panel, not on an arbitrary wall edge.
The inset surface must be prepared and installed according to its own instructions. A textile-look finish, wallpaper, wood veneer, and painted drywall are not interchangeable. Each has different substrate, adhesion, joint, and cleaning requirements. Avoid assuming a thin polyurethane molding can conceal every rough edge or accommodate a raised cladding panel: check the actual molding projection and the inset thickness in a sample.
Layout 6: A headboard wall that connects to a built-in wardrobe
Some bedrooms have a fitted wardrobe or bedside storage on one side of the bed. Instead of mirroring a rectangle into the cabinetry, establish one consistent line that makes the transitions intentional. For example, a narrow molding frame can begin above the headboard and terminate clearly before the wardrobe casing. Another option is to use a common painted trim color while allowing the wall frames and cabinet doors to retain distinct geometries.
Do not run decorative molding across cabinet door swing paths, access panels, or adjustable shelving. Wall trim and cabinet face trim can be coordinated visually without being the same product. If a larger fitted-furniture project is planned, consult the related guide to built-in cabinet trim and decorative molding, then return to the bedroom elevation and determine where each material belongs.
The Key Proportions for Queen and King Bedrooms
Give the bed enough visual margin
Treat a frame as a relationship to furniture, not a fixed percentage. As a first mock-up, try a panel about 4–10 inches beyond each edge of a headboard. That is a design starting range, not a standard. A broad headboard with attached side panels may need a narrower border, while a minimal platform bed may benefit from more space. Choose the final size after viewing the taped outline from the door and from each side of the room.
A nominal Queen mattress is 60 inches wide. Suppose its actual headboard measures 66 inches and a wall frame extends 7 inches to each side. The framed width would be 66 + 7 + 7 = 80 inches. On a 12-foot-wide wall, 144 - 80 = 64 inches remains; if the frame is wall-centered, that is 32 inches on each side before considering the furniture. The numbers can work, but the design should also respect the position of nightstands and the doorway.
Now consider a King mattress, nominally 76 inches, with an 84-inch headboard. A panel extending 6 inches each side would measure 96 inches. Centered on the same 144-inch wall, it leaves 24-inch outer margins. These are plausible sketch dimensions, not a recommendation that every Queen or King bed requires a particular frame width.
Coordinate the frame height with the headboard
Start by measuring the finished height of the headboard, including cushions if they materially change what is visible. For a frame entirely above the headboard, leave a purposeful open strip between the furniture and the bottom molding. If the frame extends behind the furniture, decide how much of its two vertical sides will be visible: a narrow strip of molding disappearing behind the upholstered edge can look accidental.
At an 8-foot ceiling, an oversized top border may make the room feel compressed. A frame reaching almost to the ceiling can also compete with a ceiling fan, a shallow crown molding, or window trim that shares the same horizontal elevation. Keep the top margin coherent with any existing trim. When the ceiling is lower or slopes toward the headboard, simplify the frame rather than forcing a rectangular detail into an irregular shape. For unusually shaped rooms, STAVROS has a separate guide to molding and baseboards under sloped ceilings.
Make nightstands and lighting part of the design
Sketch bedside lamps at their real installed height, not as abstract circles. A tall table lamp may cut across the visible vertical line of a wall frame. A pair of wall sconces can work inside two narrow panels if the fixture centerline and plate location are coordinated in advance. Do not assume that a sconce can be attached to molding or that a decorative profile is an approved electrical raceway.
Keep switches, receptacles, charging ports, and junction boxes accessible. If the frame conflicts with a box, revise the decorative layout instead of covering the box. Electrical work belongs to qualified people under applicable local requirements. STAVROS's wall molding around outlets and switches explains this planning problem in more detail.
Compare Materials Without Treating Them as Substitutes
Natural wood for visible grain and traditional detailing
Wood molding brings grain and variation that paint-grade profiles cannot reproduce. It can make sense in a bedroom with exposed wood floors, natural oak furniture, or a strong traditional interior. Species, moisture content, section shape, and chosen finish matter. Samples should be viewed beside the headboard fabric and flooring under both natural and artificial light. Two wood items marketed with the same generic color may differ greatly when placed next to each other.
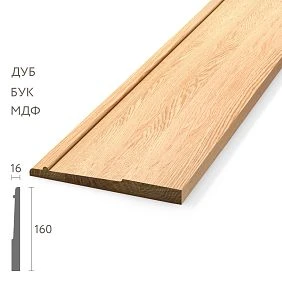
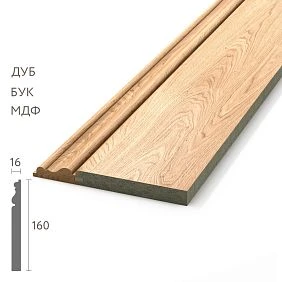
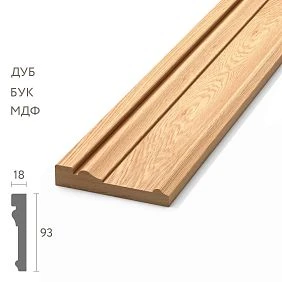
Solid wood moves with changes in indoor humidity. That affects how joints and finishes are planned, particularly across long runs or where the molding meets a different material. Use fastening and joint details recommended for the actual wood product and wall substrate; do not copy a polyurethane adhesive procedure without evaluation. The STAVROS selection of wood and MDF trim profiles provides a separate category for these products, rather than treating every decorative strip as polyurethane.
MDF for a predictable paint-grade look
MDF can be useful when the objective is a smooth, painted architectural line with no visible grain. A paint-grade MDF profile is not automatically waterproof or suitable for a damp substrate. The edge finish, primer, adhesive or nail strategy, and resistance to everyday room conditions depend on the particular product. Check the specified dimensions and intended installation method. MDF pieces can also be substantially heavier or stiffer than a slender polyurethane bead, which changes fastening choices.
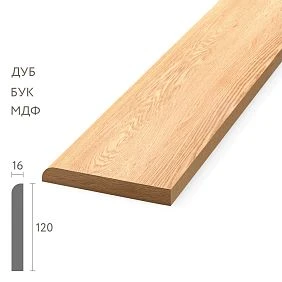
Where the bedroom's floor edge needs finishing, select a genuine baseboard profile rather than using a slim wall molding as a substitute. One concrete STAVROS option is the PLT-005 baseboard and casing profile. Its published section is 120 × 16 mm (approximately 4.72 × 0.63 inches), with a 2,600 mm length for MDF versions and 2,400 mm for oak and beech versions. The length difference matters when calculating purchases; never apply a polyurethane molding's 2,600 mm stock length to a wood baseboard without checking.
Polyurethane for applied decorative frames
A correctly selected polyurethane profile can make a neat applied outline on a dry, properly prepared wall. It works especially well when the desired result is a painted picture-frame border rather than a structural panel. The product's face width and relief determine its visible presence. A 10 mm bead and a 35 mm stepped profile can produce dramatically different results around the same headboard.
Browse the STAVROS polyurethane molding collection before comparing models. The category includes several designs rather than one universal trim shape. Confirm the actual drawing, material, finish condition, and manufacturer's installation guidance for the selected SKU. Never assume that interior decorative polyurethane is suitable for heat, high moisture, load-bearing applications, or continuous direct contact with an incompatible adhesive.
Material choice at a glance
| Material | Why consider it for a bedroom | Planning issue to resolve |
|---|---|---|
| Solid wood molding | Visible grain, traditional joinery language, coordination with furniture | Wood movement, finish samples, suitable fastening and joint detailing |
| Paint-grade MDF | Clean painted lines, repeatable straight sections | Edge sealing, weight, compatible finish, substrate suitability |
| Polyurethane wall molding | Applied picture-frame borders, several relief sizes, paintable compositions where specified | Adhesive and coating compatibility, correct stock lengths, impact limitations |
| Full wall panel system | A distinctly different surface, not merely lines applied to drywall | Panel thickness, outlets, substrate, seams, independent fastening details |
The goal is not to name one universal winner. A bedroom with oak furniture may justify a wood feature and painted MDF baseboards. Another room may use painted polyurethane wall frames above a separate wood baseboard. Material boundaries are acceptable when the designer explains them through shape, color, and scale. Mixing everything indiscriminately creates the opposite effect: every piece seems to come from a different room.
Compare Verified STAVROS Molding Profiles
The four profiles below are all listed by STAVROS as polyurethane products with 2,600 mm stock lengths. The rounded inch conversions are for planning; use the manufacturer's millimeter drawing when a joint or inset requires close tolerances. Profile face width is the dimension seen across the wall surface. Projection describes how far the section stands out. Neither number alone establishes performance, suitability for a specific finish, or an installation method.
| STAVROS product | Published metric size (width × projection × length) | Approximate U.S. dimensions | Bedroom design role |
|---|---|---|---|
| MLDPU-001 | 10 × 6 × 2600 mm | 0.39 × 0.24 × 102.36 in | Fine, restrained rectangular border |
| MLDPU-004 | 15 × 8 × 2600 mm | 0.59 × 0.31 × 102.36 in | Compact outline with more noticeable relief |
| MLDPU-002 | 22 × 11 × 2600 mm | 0.87 × 0.43 × 102.36 in | Medium decorative frame for a feature wall |
| MLDPU-003 | 35 × 12 × 2600 mm | 1.38 × 0.47 × 102.36 in | Broad traditional framing on a large wall |
MLDPU-001: a quiet line beside upholstered furniture
The MLDPU-001 polyurethane molding is 10 mm wide and 6 mm deep, approximately 0.39 by 0.24 inch. Because the profile is slim, it suits an understated contemporary or transitional bedroom, especially where a tall upholstered headboard already supplies texture. On a 12-foot wall, it can visually organize a large frame without becoming another major decorative object. A slim line is still a physical projection: check for interference with picture hangers, upholstered wings, or nearby sliding furniture.
It also requires care at the corners. Even a narrow bead looks untidy if the miter exposes a gap or the profile changes direction. Cut test pieces from a small offcut before cutting the lengths required for the feature wall. A fine line cannot compensate for a wall that is significantly bowed or for rushed surface preparation.
MLDPU-004: more definition without a heavy border
The MLDPU-004 polyurethane profile is 15 × 8 mm, approximately 0.59 × 0.31 inch. That modest increase in face width can be useful where the wall has a stronger paint contrast or the frame will be viewed from a hall. It is a candidate for a single broad rectangle or restrained side panels, but compare its actual contour with the narrow bead in a physical sample or drawing.
A wider face also changes the clear opening. If an outer frame is 80 inches wide, two sides each 0.59 inch wide reduce the unobstructed inner width to approximately 78.82 inches when the profile is mounted entirely inside the outer long-point boundaries. This is a simplified face-width calculation, not a dimension for cutting without reference to the actual section. The choice between narrow and medium trim changes both shadow and apparent proportions.
MLDPU-002: a medium-scale architectural outline
The MLDPU-002 molding measures 22 × 11 mm, roughly 0.87 × 0.43 inch. Its more developed shape can help a larger bedroom feature wall feel intentional. It can make a single frame stand out behind a low bed, or give three equal-height frames a traditional architectural rhythm. Where the bedroom furniture is minimal, this amount of relief may be enough to provide character without a separate rosette or onlay.
Consider the lighting. A shaped profile can cast a more distinct shadow than a rounded bead; in very low-angle light, imperfect joints can become more obvious. Test how the chosen finish looks in daytime and under the room's actual bedside lamps. The product's catalog photograph is useful for seeing its shape, but a full-scale tape mock-up is better for confirming its weight in the room.
MLDPU-003: strong framing for spacious rooms
The MLDPU-003 architectural molding is 35 × 12 mm, approximately 1.38 × 0.47 inch. It creates a broad line that can suit a tall wall with a substantial, low headboard. It may overwhelm a tight bedroom, especially when paired with a tall crown molding, a carved bed, and elaborate bedside lamps. Use it intentionally, not simply because it looks impressive in a close-up product image.
A broad profile is not inherently more suitable for every installation. Check the wall flatness and the adhesive manufacturer's requirements, and plan visible joints carefully. When comparing a broad molding with a more delicate one, place a paper or cardboard strip of the correct face width on the wall. The difference is easier to appreciate at actual scale than in a product specification table.
Do not turn a profile chart into an interchangeable product list
All four SKUs above are polyurethane wall moldings. They are not wood baseboards, acoustic treatments, structural supports, or purpose-made LED channels. Their catalog values describe physical dimensions and material. They do not verify shipping availability to a U.S. address, a guaranteed paint life, or fitness for a room with unusual environmental conditions. Request current product information and finish guidance when making a purchase.
For natural wood or MDF, use the matching STAVROS trim category and check that specific article's dimensions. A wood profile shown as 2,400 mm long is not equivalent to the 2,600 mm polyurethane stock used in the calculations below. That distinction is especially important when buying multiple types of trim for one bedroom.
Three Worked Bedroom Layouts and Cut Lists
Example A: one 80-by-42-inch headboard frame
Assume a 12-foot-wide wall (144 inches), an actual headboard width of 66 inches, and an 8-foot ceiling. A frame 80 inches wide extends 7 inches beyond the headboard on either side if centered. Let its outer height be 42 inches, with its bottom line positioned to remain visible above the real headboard. The exact vertical location depends on furniture height; the 42 inches are a hypothetical design dimension, not a standard for Queen beds.
The required straight long-point cutting lengths are two horizontal pieces of 80 inches and two vertical pieces of 42 inches. Total theoretical trim length is 80 + 80 + 42 + 42 = 244 inches, equal to 20 feet 4 inches or about 20.33 linear feet. Dividing 244 by a 102.36-inch stock length gives a lower bound of three strips.
In this example three full strips can actually work: strip one supplies one 80-inch horizontal, strip two supplies the other 80-inch horizontal, and strip three supplies two 42-inch verticals (84 inches total). The simple plan leaves short offcuts for testing miters. The result still depends on saw kerf, the exact long-point markings, defects, and whether any piece is damaged during finishing. Buy an appropriate reserve if the project schedule cannot absorb a re-order.
Cut-list summary: 2 × 80 inches and 2 × 42 inches, using three 2,600 mm profiles in an efficient arrangement. Do not substitute a 2,400 mm wood profile without recalculating: that shorter stock is approximately 94.49 inches and may change which cuts can share a piece. A straight frame needs four clean corners, and their cut accuracy is just as important as the length calculation.
Example B: three panels behind a King bed
Suppose the wall is again 144 inches wide. Allow 9-inch outside margins and two 6-inch gaps between three frames. Available frame width is 144 - (2 × 9) - (2 × 6) = 114 inches. One balanced, illustrative layout is a 62-inch center frame and two 26-inch side frames: 62 + 26 + 26 = 114 inches. With an outer panel height of 54 inches, all three rectangles can share aligned top and bottom edges.
The theoretical length is:
- Center rectangle: 2 × 62 + 2 × 54 = 232 inches.
- Two side rectangles: 2 × (2 × 26 + 2 × 54) = 320 inches.
- Combined: 552 inches, which is 46 linear feet.
A superficial calculation would divide 552 by 102.36 and round up to six sticks. That understates the practical requirement. Each 54-inch vertical piece is too long to share one 102.36-inch stick with another 54-inch piece. The project needs six such verticals. It also needs two 62-inch center horizontals and four 26-inch side horizontals.
A workable eight-stick allocation is six sticks each providing one 54-inch vertical, with four of those sticks also yielding a 26-inch side horizontal. The remaining two sticks each provide one 62-inch center horizontal. This allocates all twelve pieces across eight sticks, before allowing for cutting error or stock damage. The lesson is more important than the example: a 46-linear-foot perimeter does not necessarily mean that six 8.53-foot pieces are sufficient.
Check the resulting center frame against the real King headboard. If the headboard is wider than 62 inches, the center frame may be partly concealed; that may be intentional, but the side panels must still make sense. For a very large upholstered headboard, it may be better to use two side frames or one outline rather than forcing three identical-height frames into the available wall area.
Example C: baseboards for a 12-by-14-foot room
For a rectangular room measuring 12 by 14 feet, the gross perimeter is 2 × (12 + 14) = 52 linear feet. Suppose a single 3-foot doorway receives no baseboard across the opening. The simple net run is about 49 feet, or 588 inches, before any returns, additional door trims, closet recesses, or difficult corners. Measure the actual wall runs individually; the room's nominal dimensions are merely a starting point.
If considering the MDF version of STAVROS PLT-005 at 2,600 mm (102.36 inches) per length, 588 ÷ 102.36 = 5.74, so six pieces is the absolute theoretical minimum by length. For an oak or beech version at 2,400 mm (94.49 inches), 588 ÷ 94.49 = 6.22, so the theoretical minimum is seven. Neither result accounts for how real corner cuts, long walls, door returns, and offcuts fit into individual pieces. A detailed cut list could require another full length.
The baseboard takeoff should not be combined with the polyurethane wall-frame takeoff. They have different functions, dimensions, finishes, and likely cutting arrangements. Also confirm whether the baseboard will continue behind furniture; many installers run it across the entire wall, but built-ins and fixed platforms can require another approach.
Verify dimensions before turning a sketch into an order
| Worked example | Net or theoretical trim quantity | What a stock-length check changes |
|---|---|---|
| 80 × 42 in single frame | 244 in / 20.33 linear ft | Three 102.36-in sticks can produce the four listed cuts |
| Three frames: 62 × 54 and two 26 × 54 in | 552 in / 46 linear ft | At least eight 102.36-in sticks are needed for the stated cut arrangement |
| 12 × 14 ft room, 3-ft doorway excluded | Approximately 49 linear ft | Six 2,600-mm MDF baseboards or seven 2,400-mm wood baseboards are theoretical lower bounds, not purchase guarantees |
A cut list belongs to a specific profile and a specific measured wall. Do not copy the example numbers into an order if the wall is 11 feet 9 inches wide, the headboard has wider wings, or the molding shape requires a different corner treatment. Even a small change in frame width can change whether two cuts fit on the same stock length. The wider subject of inventory planning is discussed in STAVROS's trim cost per linear foot and material estimating guide.
Make an Accurate Bedroom Molding Calculator
Measure the dimensions that control the project
An effective picture frame molding calculator needs more than room square footage. For each panel record outside width, outside height, profile SKU, stock length, and the number of repeated panels. For a plain four-sided rectangle, theoretical perimeter is 2 × width + 2 × height. Sum all perimeters for a preliminary material estimate, then create a list of the individual cuts. Mark whether the entered sizes refer to outside long points or the clear space inside the frame; mixing the two produces errors.
If the measured dimensions represent clear openings, add twice the chosen profile's face width to each clear dimension when the profile sits around the opening. If the measured dimensions already refer to outer points, do not add the profile again. Decorative corner blocks may change the cut geometry entirely. Verify the actual product drawing before converting a diagram into a saw list.
Stock lengths are a small packing problem
A practical estimator assigns each required straight cut to a purchased stick without allowing any stick's allocated cuts and saw kerfs to exceed its length. Sort the longest cuts first, then test which short cuts fit in the remaining portions. The 54-inch example above illustrates why aggregate footage is misleading: six long cuts cannot be paired with one another when each pair would exceed the stock length.
For hand calculations, write the cut list in descending order and place each piece next to a drawing of a full strip. For a larger installation, a spreadsheet or cut-optimization application can help, but the result still needs a human review for miter orientation, grain direction, defects, joint positions, and waste allowance. A software packing result is not an installation warranty.
A reserve should cover actual risks
There is no universal waste percentage for every wall molding job. A single frame with 80-inch horizontal pieces creates offcuts different from a room filled with short boxes. A profile with a directional ornament can also create more unusable short pieces than a symmetric bead. Define the reserve based on the number of miters, layout changes, fragile edges, finish matching, and the cost of replacement. Keep the reserve separate from the minimum count in the estimate so the buyer can see what is being purchased for the design and what is being held for contingencies.
If the supplier requires whole lengths, check how those lengths are packed and delivered, especially when the product is longer than typical parcel handling allowances. Confirm availability, shipment terms, and any restrictions for the actual destination; nothing in this editorial estimate assumes U.S. warehouse inventory or domestic freight rates.
Color, Paint Sheen, and the Finished Bedroom
A wall-color frame is often the calmest choice
Painting the wall and its molding the same color emphasizes the shadow line rather than the contrast between surfaces. Soft neutrals, muted blue, dusty green, and warm gray can all be effective; select by observing sample areas under the bedroom's real lighting, not by a digital swatch alone. A darker monochromatic wall can feel restful when balanced by adequate task lighting. A pale wall can make the panel system more discreet, though the effect depends on profile projection and where light enters the room.
For a more traditional arrangement, use a modest contrast between wall and trim. If the rest of the house has crisp white baseboards, carrying the same color onto the bedroom frames can create continuity. Do not assume matching paint names ensure a match across different materials: MDF, wood, and polyurethane can require different primers and surface preparation. Test on spare samples before applying the entire scheme. For more finish combinations, consult the STAVROS article on paintable molding colors and finishes.
Choose sheen for the room, not for a photograph
Very glossy molding can expose uneven joints or substrate waves, especially under a bedside lamp. Matte and low-sheen finishes often make the composition quieter, while a modest satin finish may be appropriate when the owner prefers a more defined edge. The exact coating must be compatible with the actual product and its primer or existing finish. Follow the paint manufacturer's instructions concerning temperature, ventilation, curing, and recoating. Do not describe any finish as universally washable or maintenance-free without specific product evidence.
Installation Sequence for a Clean Accent Wall
Prepare the wall and dry-fit the layout
Start with a stable, clean, dry substrate. Repair loose paint, dust, or unsound patches before proceeding. On previously painted walls, test adhesion in an inconspicuous area and confirm compatibility between the surface, the selected molding, and its specified adhesive or fasteners. Measure the wall in multiple places; an old corner may not be square, and a bowed wall can change the apparent straightness of a long molding run.
Transfer the layout with a level, not by measuring every piece up from an uneven floor. Establish one clear baseline and one centerline, then mark the frame corners. Apply painter's tape at the actual proposed profile width. Recheck bed placement, overhead lights, switches, and closet clearances. A full-size mock-up is the cheapest point in the process to discover that the visual center is wrong.
Make test cuts and plan the joints
For rectangular frame molding, miters are often appropriate, but wall corners are not necessarily perfect 90-degree intersections and no single cutting angle solves every condition. Check the actual included angle, saw orientation, and profile direction. Label the face and top of each cut piece. A long horizontal with a reversed decorative contour will be obvious once installed. Keep matching offcuts for saw setup and finishing tests.
Dry-fit all four sides of the first frame on the wall before fixing them permanently. Confirm outer dimensions and the opening's alignment. If the wall is uneven, address that condition rather than forcing trim to bend beyond its intended use. For additional cutting and joint examples, see STAVROS's wall molding installation and wood-baseboard junction guide.
Secure, finish, and inspect
Apply only a manufacturer-approved adhesive or fastening system suited to the specific molding and substrate. Follow instructions on working time, temporary support, joint treatment, and cure. Remove excess adhesive before it hardens where the instructions allow. Do not hide an active crack or unstable substrate with caulk and assume the wall is repaired. Once the assembly is secure, use compatible paintable filler or caulk for minor finish transitions, then prime and paint if required by the product system.
Inspect the wall in daylight and again with bedside lighting on. Side illumination reveals small gaps and patchy sheen that may be invisible under overhead light. Keep an extra short profile sample with the selected paint recorded on it; it is useful for future furniture changes or local touch-ups.
Lighting, Hardware, and Bedroom Safety
A decorative molding rectangle is not a mounting substrate for a heavy headboard, mirror, shelf, or wall sconce. Secure those objects to suitable structural backing or anchors independently of the trim, following their manufacturers' requirements. Tall dressers and bookcases need their own appropriate anti-tip measures. Do not conceal active electrical junction boxes or extend wiring behind trim without an approved method. When work involves changing electrical fixtures, engage the qualified professional required by the location.
If indirect lighting is part of the design, choose a purpose-made, compatible lighting system. A solid polyurethane wall bead is not automatically an LED raceway, diffuser, or heat-management channel. The existing STAVROS overview of molding and dedicated hidden-lighting profiles separates decorative trim from lighting products; the bedroom plan must preserve driver access, proper electrical protection, and practical cleaning. Bedside task lights should remain useful without relying on decorative accents for primary illumination.
Five Bedroom Mistakes Worth Avoiding
First, do not center the frame on the wall while the bed sits visibly off-center without making that asymmetry a conscious feature. Second, do not let vertical molding disappear immediately behind the outer upholstered wing of the headboard. Third, do not choose an ornate 1.38-inch face width from a close-up photograph without testing how it reads from the doorway. Fourth, do not calculate purchases solely from perimeter footage when the longest cuts determine stock usage. Fifth, do not paint first and then discover that the wall needs another outlet, anchoring point, or repaired substrate.
Another frequent confusion is treating applied trim as full wall paneling. A framed painted drywall area is an optical panel, not a thick composite panel. If the intended design uses actual decorative wall panels, build a separate material and mounting specification rather than ordering extra molding and hoping it produces the same surface. The STAVROS guide to wall panel molding and decorative panel layouts addresses the distinction between profile selection and panel construction.
Frequently Asked Questions
What is the best molding for an accent wall behind a Queen bed?
There is no universal best SKU. Start with the real headboard width, the room's proportions, the intended finish, and the visibility of the molding above the furniture. A narrow polyurethane bead can support a quiet modern layout, while a medium or broad profile may suit a larger traditional room. Check the physical dimensions and product drawing before purchasing.
Should a frame be wider than the headboard?
Often a slightly wider frame helps establish a complete visual field, but it is not mandatory. Try the headboard width plus several inches on each side as a tape mock-up, then view it from the entrance. A frame restricted to the upper wall can also work when the headboard itself is large or highly decorative.
Is wainscoting the same as picture frame molding?
No. Wainscoting is a lower-wall design system that may use genuine panels, applied trim, or several layers of construction. Picture frame molding describes a decorative arrangement of strips forming frames, sometimes on painted drywall. A bedroom can combine the two, but plans, materials, and installation costs should remain clearly distinguished.
Can I attach an upholstered headboard to polyurethane molding?
Do not use decorative polyurethane molding as a structural attachment. The headboard requires a mounting arrangement appropriate to its weight and construction. Plan the trim so fasteners and necessary service access remain available; the molding can frame the furniture visually without supporting it.
How do I keep a frame from clashing with nightstand lamps?
Place full-size lamp silhouettes on the elevation, including shades and wall plates. Adjust frame widths and vertical boundaries before installation. If a sconce needs a centered position inside a panel, locate its approved electrical box first and build the decorative framing around that constraint rather than the other way around.
Can I combine MDF baseboards with polyurethane picture frames?
Yes, provided each product is suitable for its intended application and the junctions are planned. The baseboard and applied wall frame serve different purposes. Confirm their finishes separately and choose a coherent color, reveal, or profile relationship rather than assuming identical material is required.
Is the same amount of molding required for all King beds?
No. Even a standard King mattress is only a starting reference. Actual headboards, bed frames, room widths, and preferred frame heights vary. Measure the furniture group and calculate each straight cut, then test an optimized stock-length allocation rather than applying a generic linear-foot rate.
Final Shopping and Installation Checklist
Before ordering, retain one dimensioned elevation showing the actual bed and nightstands, selected STAVROS item codes, outside frame sizes, clearances, outlet locations, and the planned paint finish. Produce a separate cut list for wall molding and baseboards. Check every SKU's material, section, stock length, and current ordering terms. Confirm the substrate, adhesive or fastening method, paint system, and any required electrical work. Finally, install only after the taped layout has been evaluated from the bedroom's ordinary sightlines. The strongest accent wall is the one that still looks balanced when the photographs, accessories, and promotional imagery are gone.