Article Contents:
- The overlay is chosen for a specific door, not for the entire wardrobe
- What is the working field of a facade
- One wide door: it is easiest to build the composition from the central axis
- N-498: an example of a vertical overlay for a tall door
- A narrow door requires a different type of decor
- N-506: when a very narrow vertical element is needed
- Two-door wardrobe: first decide whether it is one composition or two
- One separate overlay for each door
- One shared composition for two doors
- Scheme 1. The same element on each door
- Scheme 2. The central door — the main accent
- Scheme 3. Center + supporting side elements
- Oak
- Oak
- Overall painting together with the facade
- Separate finishing
- Mistake 1. Choosing an overlay before measuring the door
- Mistake 2. Treating the entire wardrobe as one surface
- Mistake 3. Placing two identical directional overlays
- Mistake 4. Not distinguishing between left and right versions
- Mistake 5. Not accounting for handles
- Mistake 6. Not accounting for molding
- Mistake 7. Buying the whole set without a template
- Mistake 8. Making three identical strong accents just for the sake of the number of doors
- Which carved overlays to choose for a wardrobe?
- How to choose an overlay for a wardrobe door?
- Do you need two overlays for a two-door wardrobe?
- Can one overlay be used on two doors?
- How does a symmetrical overlay differ from a paired left and right one?
- How to position the decor relative to the handles?
- How to choose the overlay size for a tall cabinet front?
- What to choose for a three-door wardrobe?
- Which is better under enamel: beech or oak?
- Where to buy decorative overlays for furniture fronts?
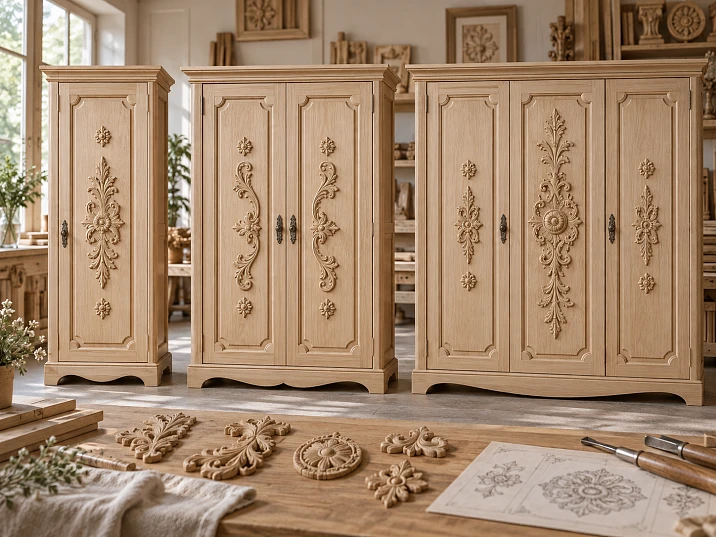
Page description: How to choose and arrange carved overlays on a wardrobe: one, two, or three doors, symmetrical and paired elements, front dimensions, handles, finishing, and STAVROS wooden decor.
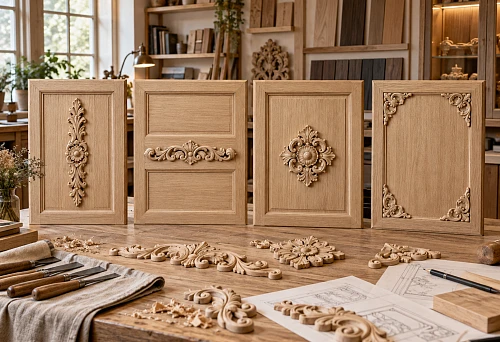
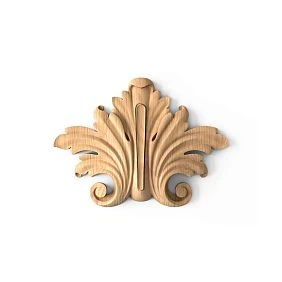
A beautiful carved overlay is easy to choose separately from the wardrobe — and much harder to place correctly on a finished door. In a catalog photo, the element may look compact, but on a narrow front it can take up almost the entire free space. Two identical directional overlays may unexpectedly face the same way. And a large central composition that works well on one wide door falls apart on two doors because of the gap between the fronts.
That is why carved overlays for a wardrobe are not chosen “for the wardrobe in general.” They are chosen for a specific door: with a known width, height, handle position, molding frame, and free space.
The main sequence is simple:
first the door → then the free space → then the size and direction of the decor → then the specific overlay.
If the wardrobe has two or three doors, another level is added: you need to decide whether each door will be its own composition or whether several doors should work as a single whole.

Choose the overlay for a specific door, not for the entire wardrobe
The first thing to do is to stop perceiving the entire wardrobe as one large surface.
A hinged wardrobe has separate doors. Each has its own axis, its own edge, its own handle position, and its own working area.
Before choosing the decor, write down:
- the width of one door leaf;
- height;
- the number of door leaves;
- the width of the gap between them;
- position of handles;
- whether there is a molding frame;
- offsets from the edges;
- other decorative elements.
Only after that can you understand how much space is actually left for the carved overlay.
For example, a door is 500 mm wide. A molding frame 40 mm wide runs along the perimeter. The handle occupies part of the right side. Formally, the facade width is 500 mm, but not all 500 are available for the central carved element.
That is why the size of the overlay cannot be compared with the full size of the door.




What is the working area of a facade
The working area is the part of the door where the decor can actually be placed without conflicting with other elements.
Excluded from the overall size:
- the frame;
- the handle;
- technological offset from the edge;
- adjacent overlays;
- central gap between the doors;
- free space that needs to be left for proper visual perception.
Let's imagine a facade of 500 × 1800 mm.
If there is already a frame on the sides, and the handle is positioned closer to the center of the cabinet, a wide overlay may not fit the composition, even if mathematically its dimensions are less than 500 mm.
For carved decor, the free space around the shape is just as important as the shape itself.
Too tight a surrounding makes even a beautiful ornament feel heavy.
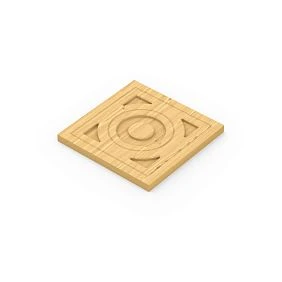
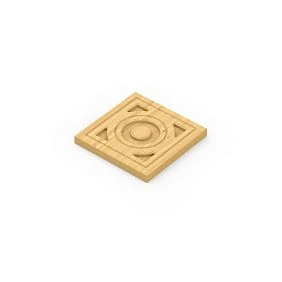
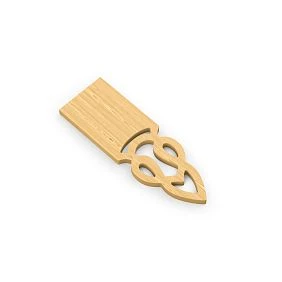
Our factory also produces:
One wide leaf: the easiest way to build a composition is from the central axis
A single door has the clearest scenario — one axis and one main decorative element.
First, draw the vertical axis of the facade.
Then check:
- where the handle is located;
- is there a frame;
- which part of the door is fully visible;
- how high or low the decor should be positioned.
If the handle is not in the very center, the overlay does not have to shift along with it. The handle has a functional role, while the decor has a compositional one.
Elongated vertical elements work especially well on a tall door. They support the proportion of the facade and do not break it into too many parts.
One large central overlay is appropriate if enough free space remains around it and the ornament can be read from a normal distance.
Get Consultation
N-498: an example of a vertical overlay for a tall door
Wooden Decor N-498 measures 41 × 307 × 11 mm.
This is a narrow, elongated element. On a tall door, this format is convenient because it occupies a noticeable height but hardly "eats up" any of the facade's width.
It is easy to check three scenarios for it:
- in the center of the door;
- above the handle;
- below the handle.
If the facade is framed, N-498 can be placed inside the central panel, but first you need to check the actual width of the free area.
For the first project, it is useful to make a paper template of 41 × 307 mm and place it against the facade. On a tall cabinet, 307 mm may be perceived as fairly subtle, while on a small base unit the same element will look much larger.
A narrow door requires a different type of decor
One of the typical mistakes is to choose a wide overlay you like and then try to "squeeze" it into a narrow door.
If the front is narrow, it is better to change not only the size but also the type of composition itself.
Instead of a wide central element, you can use:
- a narrow vertical overlay;
- two thin details along the edges;
- a small central accent;
- decoration only on the upper part.
This way the ornament remains part of the furniture rather than starting to conflict with its proportions.
N-506: when a very narrow vertical element is needed
Wooden Decor N-506 measures 12 × 205 × 5 mm.
Ширина всего 12 мм делает его совсем другой по характеру, чем крупные центральные накладки.
Такой элемент можно рассматривать для:
- узких дверок;
- небольших филёнок;
- вертикальных акцентов рядом с рамкой;
- повторяющегося ритма на нескольких створках.
Если на шкафе пять узких фасадов, иногда лучше повторить тонкую накладку на каждой дверце, чем пытаться использовать один крупный рисунок только по центру всей группы.
Двухстворчатый шкаф: сначала решите, одна композиция или две
Для шкафа с двумя дверями это главный выбор.
There are two fundamentally different approaches.
По одной самостоятельной накладке на каждую створку
Each door has its own vertical axis.
Identical symmetrical elements or details of the same scale are placed on the left and right leaves.
The advantage of this option is its simplicity.
If the doors are equal in size, it is enough to repeat the same installation height and the same offsets.
Even with a slight change in the gap between the leaves, the entire composition is preserved.
One shared composition across two leaves
Here the decor is perceived as a single design divided by the central gap of the cabinet.
This is already a more demanding scheme.
Need to check:
- the left and right parts truly form a pair;
- the gap does not break the design;
- both parts are at the same height;
- the ornament direction is mirrored;
- the handles do not fall within the central composition.
This option may look stronger, but it requires precise marking.
Why two identical directional overlays may look wrong
Not every carved overlay is symmetrical.
Some ornaments have a direction: a branch, a curl, or a line of the composition visually moves to the left or to the right.
If you buy two identical parts and place them on paired doors, both may "face" the same direction.
On a single front, this is almost unnoticeable.
On two identical door leaves, it is immediately read as a mistake.
Therefore, before ordering, you need to check: does the model have a left and right version?
If yes, these are two different product codes.
Left and right overlays must be counted separately
A paired composition is not “one model, two pieces” if the manufacturer produces mirrored versions.
For example:
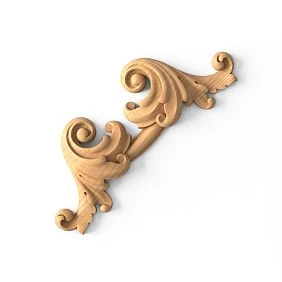
- N-349L — left part;
- N-349R — right;
- N-350L — left;
- N-350R — right.
They must be listed separately in the working list.
You cannot write:
N-349 — 2 pcs.
if the order really should include one left and one right overlay.
For furniture procurement and reordering, this is a fundamental difference.
N-349L/R: compact mirrored pair
Left overlay N-349L и right N-349R have a confirmed linear dimension of 200 mm.
This is a relatively compact paired composition.
It is convenient if:
- the working area of the doors is small;
- there are handles nearby;
- the front already has a moulding frame;
- décor should support the composition, not occupy it entirely.
On a double-door wardrobe, such a pair can be turned to face each other so that the central gap becomes the axis of the entire composition.
But even here, a full-size template is needed first.
200 mm on a small door and 200 mm on a two-metre leaf are perceived completely differently.
N-350L/R: the same principle, but a different scale
Left N-350L и right N-350R have a confirmed size of 411 mm.
This is already a significantly larger decorative gesture.
On a tall door, such a pair can become the main visual element.
On a standard small door, the same scale can take up too much free space.
Therefore, the N-350 should not be perceived as a "slightly enlarged N-349".
411 mm is more than twice 200 mm in linear size.
In a furniture composition, this is already a different level of decorative impact.
Three-door wardrobe: three identical overlays — just one of the options
Three identical doors do not mean that each must necessarily have identical decor.
There are at least three working schemes.
Scheme 1. Identical element on each door
The result is a calm, repeating rhythm.
It is especially appropriate if the overlays are small and the doors themselves are equal.
The main thing is the same height and the same spacing.
Scheme 2. The central door is the main accent
A larger element is placed on the middle door, while the side doors are kept calm.
This way, the central part of the wardrobe is visually reinforced.
This is useful if the middle door is already the main one structurally or compositionally.
Scheme 3. Center + supporting side elements
A large decorative element is placed on the central door, while lighter overlays are used on the side doors.
This creates a hierarchy.
The center is the main one.
The side elements are supporting.
This often looks more convincing than three equally strong ornaments in a row.
On three doors, symmetry is built from the center of the wardrobe
If the doors are identical, the wardrobe has four important axes:
- the overall central axis of the wardrobe;
- the axis of the left door;
- the axis of the center door;
- the axis of the right door.
For a repeating pattern, the decor is centered on each door.
For a central accent, use the overall axis of the wardrobe.
These are different marking methods.
If you mix them randomly, the composition starts to drift even with equal spacing.
Therefore, first choose the principle, and then mark out the overlays.
N-421: compact central accent
Wooden decor N-421 in the base size has dimensions of 250 × 250 × 13 mm.
This is a symmetrical format, convenient for a central composition.
On one wide door, it can be placed along the central axis.
On a three-door wardrobe — use only on the middle door, leaving the side doors calm.
The square character of the shape is especially useful where you do not want to emphasize the height of the door, but need a separate central decorative node.
N-420: horizontal composition requires a wide field
Wooden decor N-420 in the base size has 502 × 250 × 16 mm.
It is significantly wider than N-421.
This format can work well:
- on a wide single door;
- in the upper part of a large front;
- on the central leaf of a large wardrobe;
- in a composition where the handle is positioned lower.
But on a narrow door, the 502 mm width alone may rule the model out of the project.
Therefore, the free space is measured first, and only then is the N-420 selected.
A tall door does not always require vertical decor
The proportion of the front matters, but it is not the only rule.
On a tall door, horizontal ornament can also be used if it works as a top accent or a completion of the composition.
For example:
- horizontal overlay on top;
- handle below;
- a free, calm space between them.
This way, the cabinet does not turn into a surface continuously filled with ornament.
That is, the orientation is chosen not based on a single condition like “the door is tall, so the decor should be vertical,” but based on the entire composition.
The handle and the overlay must be designed simultaneously
The handle is a functional element.
The overlay is decorative.
But on the facade they occupy the same space.
Therefore, you cannot first fully approve the carved decor and then look for where to place the handle.
Several options need to be checked:
- overlay above the handle;
- overlay below the handle;
- handle closer to the center, overlay higher;
- decor in the center, handle offset toward the edge.
For a two-door wardrobe, it is especially important that the handles of both doors do not disrupt the mirrored composition.
If the overlays converge toward the center, the handles are sometimes better placed below or above the main ornament.
Molding and overlay: which is dominant
A facade with a molding frame already has a strong structure.
Appear:
- outer contour of the door;
- frame line;
- inner field.
If a large carved overlay is added inside, it becomes another level.
This is fine as long as the levels have a hierarchy.
Useful diagram:
molding frame — the main architecture of the facade;
carved overlay — an accent inside it.
The problem begins when the frame, handle, and overlay are equally active and each element tries to become the main one.
In that case, it is better to reduce the overlay or choose a calmer molding profile.
Symmetry is calculated along axes, not by eye
For two identical sashes, first mark the axis of each door.
Then set a single installation level.
For example, the top point of the decor is 400 mm below the top edge of the door.
The same value is transferred to the second leaf.
For a mirrored pair, additionally check:
- distance to the central gap;
- the same slope or direction of the ornament;
- matching of the lower and upper levels.
On a tall door, even an error of a few millimeters can become noticeable if two overlays are next to each other.
Therefore, paired elements are best marked with a single template or a common horizontal reference line.
A full-size paper template is a mandatory check for new decor
You don't need to have a physical overlay before purchasing the entire set.
It's enough to start with an accurate paper outline.
Procedure:
- take the actual dimensions of the chosen model;
- build a rectangle or outline at full scale;
- cut it out;
- place it against the door;
- mark the handle and frame;
- look from a distance of 2–3 m;
- repeat on the adjacent leaf;
- only after that confirm the quantity.
For N-498, this is a 41 × 307 mm template.
For N-421 — 250 × 250 mm.
For the base N-420 — 502 × 250 mm.
Already at this stage, the difference in scale becomes obvious.
Why viewing from a distance is essential
Up close, the carved overlay is perceived as a separate object.
A person sees the leaves, scrolls, and relief.
From a distance, it turns into a spot of a certain size and direction.
This is exactly how it is most often seen together with the entire wardrobe.
Therefore, after fitting, step back.
On a tall wardrobe, a small applique can get lost.
Two large ones on adjacent doors, on the contrary, can visually merge and make the central part feel too heavy.
A scale mistake happens more often than a pattern choice mistake.
An applique can have the right style but the wrong size.
Typical cases:
- a small element gets lost on a two-meter door;
- a large ornament almost touches the frame;
- two appliques on adjacent doors create too dense a center;
- the handle ends up inside the pattern;
- the element runs into the molding;
- on three doors, identical decor creates too monotonous a row.
Therefore, scale and composition come first.
Then the pattern and finish.
Beech or oak for cabinet overlays
The choice of species is best tied to the future finish.
Beech
It is often convenient for furniture to be painted with enamel.
If the cabinet will be white, gray, green, or another opaque color, the beech overlay can be painted together with the facade.
Oak
It is interesting if the wood texture needs to be preserved.
For example:
- stain;
- oil;
- clear varnish;
- semi-transparent tinting.
On an oak cabinet or next to oak moldings, such an overlay can work as part of an overall natural system.
But the choice of species should not precede the choice of composition.
First, you need to determine which shape and size suit the facade.
Paint the overlay before installation or together with the facade
Both options are possible.
Overall painting together with the facade
Suitable if the decor should be perceived as part of the door itself.
For example, a beech overlay is installed on the facade, after which the entire assembly is primed and coated with a single enamel.
The boundary between the base and the decor becomes visually calmer.
Separate finishing
Logical if the overlay should differ:
- remain natural;
- receive a stain;
- be darker than the facade;
- have a patina;
- work as a contrasting wooden accent.
But in both cases, a dry fit is needed first.
After the final painting, changing the position of the decor is much more unpleasant.
When one overlay is enough
One overlay works well if:
- single-door wardrobe;
- there is a wide central door;
- the central door of a three-door wardrobe should be the main one;
- the decor is large and self-sufficient;
- the handle does not conflict with its axis.
There is no need to automatically duplicate an element just for the sake of symmetry.
If the composition is already balanced by one central piece, a second one may be superfluous.
When a pair is needed
A pair is especially natural on two identical doors.
This could be:
- two identical symmetrical overlays;
- left and right versions of the same ornament;
- two vertical elements at the same level.
If the pattern is directional, it is better to look specifically for a mirrored pair.
If the shape is completely symmetrical, you can repeat the same item code.
When it is better not to use three identical overlays
On a three-door wardrobe, three identical large ornaments can turn the facade into an overly dense decorative grid.
Especially if there are already moldings and prominent handles.
In such a situation, it is better to compare:
- three identical small elements;
- one large one in the center;
- a central large one + two calmer side ones.
Only a full-size layout will show which option works better.
How to record overlays in the working specification
Avoid writing:
overlays for the wardrobe — 2 pcs.
For a standard symmetrical part, it is better to specify:
N-421, beech, 250 × 250 × 13 mm, 2 pcs., for enamel
For the mirror pair:
N-349L — left, 1 pc.
N-349R — right, 1 pc.
For a three-leaf composition:
center door — N-421, 1 pc.
side doors — without carved decor
Or another approved option.
This way, the installer won't have to guess the composition again from the photo.
Example: a two-door wardrobe with paired decor
Let's imagine two doors, each 500 mm wide and 1900 mm high.
Each has a molding frame.
After subtracting the frame, the working field becomes about 380 mm in width.
The N-349L/R option with a linear size of 200 mm can fit quite comfortably.
But the N-350L/R pair at 411 mm will already require a much larger free field and a different composition.
That is, the question of "which model is more beautiful" is secondary here.
First, it is determined which one physically and visually suits the working field.
Example: a three-door wardrobe with a central accent
Three doors of the same height.
The middle door is located on the main axis of the room and the wardrobe.
Instead of three identical overlays, you can install N-421 only in the center of the middle door.
The side fronts remain with one molding frame and handles.
This way the middle door gets the accent, and the entire wardrobe does not become overloaded.
If the composition seems too empty, the side doors can be complemented with narrower elements, such as vertical overlays, but only after a full-size fitting.
Where to buy carved overlays for a wardrobe
Main category — carved and decorative overlays for furniture.
For symmetrical shapes, you can also look at symmetrical wooden overlays.
When choosing, first determine:
- the number of door leaves;
- the working area of each door;
- whether a regular symmetrical piece is needed or a left/right pair;
- size;
- the material;
- finishing.
After that, it makes sense to buy a specific set.
Quick composition selection table
| Wardrobe | Working scheme | What to Check |
|---|---|---|
| One wide door | one central element | axis, handle, free field |
| Two identical doors | identical overlay on each | same level and indents |
| Two doors, directional pattern | left + right overlay | mirror symmetry and central gap |
| Three identical doors | repetition of small elements | whether the row becomes monotonous |
| Three doors with a main center | large decor on the middle one | the overall axis of the wardrobe |
| Tall narrow door | elongated vertical overlay | width of the working area |
| Wide facade | horizontal or central decor | handle and frame |
Common Mistakes
Mistake 1. Choosing the overlay before measuring the door leaf
A beautiful model turns out to be too large.
Mistake 2. Treating the entire wardrobe as a single surface
Each door has its own axis and its own working area.
Mistake 3. Installing two identical directional overlays
Both "face" the same direction, and the composition breaks down.
Mistake 4. Not distinguishing between left and right versions
The order ends up with two identical parts instead of a mirrored pair.
Mistake 5. Ignoring handles
After installing the decor, the handle has to be placed too close to the ornament.
Mistake 6. Ignoring the molding
The overlay fits well within the full dimensions of the door, but does not fit within the inner field of the frame.
Mistake 7. Buying the whole set without a template
The scale mistake is repeated on several door leaves at once.
Mistake 8. Creating three identical strong focal points just for the sake of the number of doors
A three-leaf composition can benefit from a highlighted center.
The bottom line
Carved overlays for a wardrobe are better chosen not from a catalog, but based on the facade composition.
For a single door leaf, the center and the free field become the main focus.
For two — a choice between two independent elements and a shared mirrored composition.
For three — rhythm and hierarchy: repeat the decor on each door or highlight the central one.
The most reliable order is as follows:
- measure the door leaves;
- determine the working fields;
- mark the axes;
- apply handles and moldings;
- choose the size and orientation of the overlays;
- make a full-scale template;
- check the entire group of doors from a distance;
- only after that order the set.
This way the decorative overlay becomes part of the wardrobe, rather than a separate beautiful element that has to be adapted to an already finished facade.
Frequently Asked Questions
Which carved overlays to choose for a wardrobe?
First focus on the working area of the door, and then on the shape. For a tall narrow door, elongated elements are suitable; for a wide facade — central or horizontal ones; for paired doors, you can use identical or mirrored overlays.
How to choose an overlay for a wardrobe door?
Measure the door, subtract the frame, handle, and necessary margins. Compare the resulting free area with the actual dimensions of the overlay and make a paper template.
Are two overlays needed for a two-door wardrobe?
Not necessarily. You can place one on each door or create a single composition from the left and right parts. The decision depends on the pattern and the free area.
Can one overlay be used on two doors?
Physically, the overlay should not be mounted so that it covers the gap between the hinged doors. But two paired parts can visually form a single pattern through the central gap.
How does a symmetrical overlay differ from a paired left and right?
A symmetrical piece has no distinct direction and can be repeated identically. Paired overlays have a mirrored orientation and are counted as two separate SKUs.
How should decor be positioned relative to handles?
It's best to design them together. The overlay can be positioned above, below, or in the center, while the handle shifts toward the edge. The key is to keep a visually and physically sufficient distance between them.
How to choose the overlay size for a tall facade?
Don't look only at the door height. Consider the width of the working area and the distance to the frame. To check, print the overlay outline at full scale and look at the cabinet from a few meters away.
What to choose for a three-door wardrobe?
You can repeat one small element on each door, highlight only the central door, or use a large center and more subdued side pieces.
Which is better under enamel: beech or oak?
For opaque enamel, beech is often convenient to use. Oak is more interesting when you need to preserve the natural texture under oil, lacquer, or tinting.
Where to buy decorative overlays for furniture facades?
Suitable wooden carved overlays are collected in the STAVROS catalog. Before ordering, choose not only the design, but also the specific size, quantity, orientation, and material for your facade.