Article Contents:
- Short answer: what determines the price of a wooden batten
- Why you can't just look at the price per batten
- Which parameters have the biggest impact on cost
- Batten size
- Material
- Quality of processing
- Profile
- Finish
- How to calculate wooden battens for a wall
- Example calculation of battens for an accent wall
- Batten for a wall: what affects the budget
- Batten for furniture: how to calculate differently
- Wooden batten or block: which is more profitable
- Batten, trim, corner, and molding: how not to confuse them
- How to choose a batten according to interior style
- Modern Interior
- Neoclassicism
- Classic
- Entry Hall
- TV Area
- How not to overpay for wooden battens
- Mistakes when choosing a wooden batten
- What to buy together with a wooden batten
- FAQ: questions asked when choosing a batten
- About the Company STAVROS
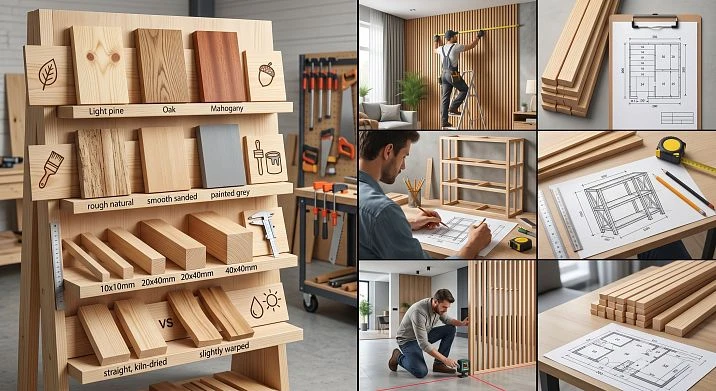
The question "how much does a wooden batten cost" is asked tens of thousands of times a month. And that's understandable: a batten is one of the most versatile elements in interior finishing. It is used for accent walls, furniture facades, TV zones, hallways, partitions, and decorative panels. But when a person finally opens the catalog and sees the price, they often get confused. Why is one wooden batten twice as expensive as another with similar dimensions? Why does a "by eye" calculation almost always lead to an extra charge for a shortage of material?
This article is for those who want to understand. Not just "wooden batten price per meter", but the entire pricing logic, from wood species to installation spacing. And a specific calculation algorithm that works for walls, furniture, and any task with wooden linear elements.
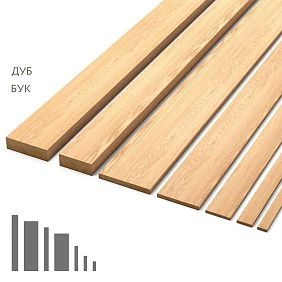
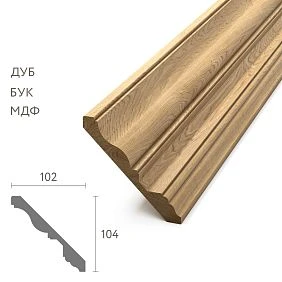
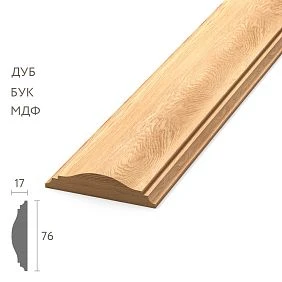
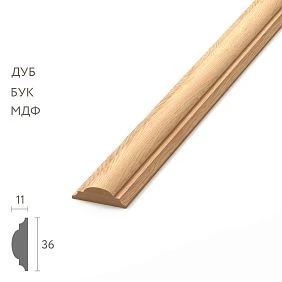
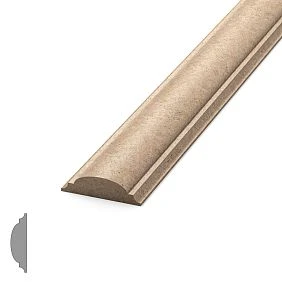

Short answer: what determines the price of a wooden batten
If you need a quick reference, here are eight factors that shape the final cost.
-
Wood species. Pine, birch, oak, ash, beech — each species has its own market value and properties. Pine lath is the most affordable option. Oak lath is a premium segment.
-
Size: length, width, thickness. The larger the cross-section and the longer the element, the higher the price. Not linearly, but noticeably.
-
Sanding quality. Construction-grade lath and Decorative wooden slat with fine finishing sanding are different products in terms of production complexity.
-
Profile complexity. A flat lath is cheaper. A lath with a chamfer, rounding, groove, or rebate is more expensive. Moldings from solid wood with a decorative profile is even more expensive.
-
Purpose. A lath for a hidden structure and a lath for visible decorative finishing have fundamentally different quality requirements.
-
Coating. A lath without coating (for self-painting), with primer, with tinting, or with varnish — different costs.
-
Number of linear meters. With a large order volume, the unit cost often decreases.
-
Allowance for trimming and installation. This does not affect the unit price, but it does affect the total amount — if not calculated correctly, you will have to place an additional order.




Why you can't just look at the price of one slat
This is a trap that most buyers fall into. They see the price of one slat 2 meters long and think: "Well, I'll buy five or six pieces, that'll be enough." It won't be enough. Because even finishing one wall requires a full calculation.
Why is that? Because Wooden boards in interior — this is not a piece decor, but a rhythmic system. A wall 3 meters wide, filled with vertical slats spaced 80 mm apart, will require not five slats, but a significantly larger number. And every extra slat not purchased means a halt in installation and a repeat order.
The width of the slat changes the budget non-linearly. A narrow slat 20 mm wide costs less than a wide slat 50 mm wide — but with the same installation spacing, more narrow slats are needed. As a result, the total footage and overall cost may be comparable or even higher.
The spacing between slats is the main variable. Choosing a spacing of 60 mm instead of 80 mm for the same wall increases the number of elements by about 25–30%. This directly affects the final cost of the order.
Trimmings and cutting. During vertical installation, slats are cut precisely to the height of the room. Trimmings are most often not used. For a standard ceiling height of 2.7 m and a slat length of 3 m — the remainder is 30 cm. Multiply by the number of slats — this is already a significant volume of waste that needs to be factored into the calculation.
Corners and junctions. At each external corner, the slat is cut twice. Joints near doorways, niches, windows — additional cuts, each of which produces a trimming.
The conclusion is simple: don't look at the price of one slat, but at the final budget after an accurate calculation of the footage.
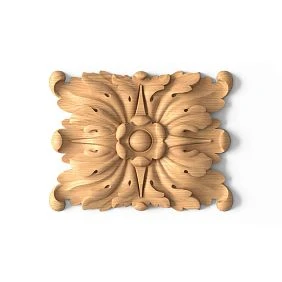
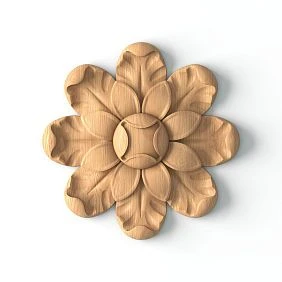
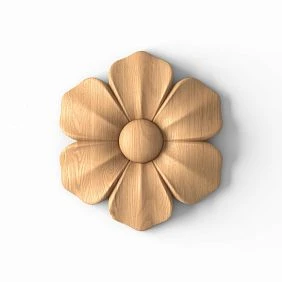
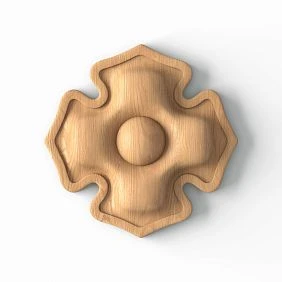
Our factory also produces:
Which parameters have the strongest influence on cost
Get Consultation
Slat size
Three dimensions — length, width, thickness — determine material consumption during production. But they affect it differently.
Length is the length of a standard element: 2 m, 2.5 m, 3 m, 4 m. Longer slats are often proportionally more expensive — both because a longer trunk is needed for their production and because transporting long linear materials is more difficult.
Width is directly proportional to material consumption. Price of wooden strip for a slat 40 mm wide and a slat 80 mm wide from the same wood species will differ approximately twofold — all else being equal.
Thickness is a parameter that is often underestimated. A slat 10 mm thick and a slat 20 mm thick of the same width represent a different volume of wood. For decorative walls, 12–18 mm is usually sufficient. For load-bearing structures and furniture, 20–40 mm.
Material
Here the difference can be multiple — not percentage-based, but truly multiple.
Softwood species (pine, spruce, larch) are the most affordable segment. Pine wooden plank takes paint well, is easy to work with, and is strong enough for interior tasks.
Deciduous hardwoods (oak, ash, beech, birch) — mid-range and above. Oak and ash are valued for their expressive texture, high hardness, and durability. Beech is dense, uniform, and easy to mill. Birch is a compromise between price and quality.
Exotic species (teak, merbau, wenge) — premium segment. Used for expensive interiors and special decorative solutions.
For most decorative tasks with painting or tinting — pine Pogonazh iz massiva fully covers the task. For natural wood without coating — oak, ash, or birch.
Surface finish quality
This is where the most non-obvious part of pricing lies. Two slats of the same size from the same species can differ in price — and the reason is in the processing.
Geometry. Evenness of edges, straightness along the length, accuracy of cross-section. A slat with correct geometry lays without gaps and misalignments. A slat with a "wandering" cross-section creates problems during installation — especially noticeable with a rhythmic pattern.
Sanding. Rough sanding (100–120 grit) — for construction tasks. Finish sanding (180–240 grit) — for visible decorative surfaces. Decorative wooden slat for walls and furniture should have exactly finish processing — otherwise sanding after installation will be required.
Moisture. A damp slat after installation can warp, crack, or change shape. Properly dried millwork is a condition for stability for years.
Profile
A flat slat with a rectangular cross-section is the basic option, the most affordable. Any complication of the profile adds to the price:
-
Edge chamfer — minimal addition, but gives a beautiful shadow when butt-jointed;
-
Edge rounding — neat soft profile;
-
Groove or tongue — for hidden installation or joining elements;
-
Back cutout — for tight fit against uneven walls;
-
Decorative milled profile — for solid wood moldings.
The more complex the profile — the more passes through the milling machine, the higher the price.
Finish
Bare wood slat (uncoated) — base cost. Next:
-
Priming — preparation for painting, reduces paint consumption and improves its adhesion;
-
Toning — changing wood color while preserving texture;
-
Lacquering — protective coating with glossy or matte finish;
-
Enameling is a covering paint that hides texture and creates a smooth surface.
Factory coating is more expensive than DIY painting, but gives a more even result.
How to calculate wooden slats for a wall
Calculation is not a mathematical feat. It's a sequence of simple steps that gives an accurate result.
Step one: measure the width and height of the wall.
Wall width is the number of 'positions' for slats. Height is the length of each slat. For example: width 3.6 m, height 2.7 m.
Step two: determine the direction of the slats.
Vertical placement is a classic for accent walls and TV zones, visually raising the ceiling. Horizontal creates a wider sense of space, typical for Scandinavian and Japanese styles. Diagonal is a dynamic, non-standard solution that requires more complex calculation.
Step three: choose the width of the slat.
For example, a slat 30 mm wide. This means that each element occupies 30 mm of width during rhythmic installation.
Step four: choose the spacing between slats.
Spacing is the distance between adjacent slats (not from center to center, but between the edges). For example, spacing 50 mm. Then one "module" = slat width + spacing = 30 + 50 = 80 mm.
Step five: calculate the number of elements.
Wall width 3,600 mm / module 80 mm = 45 slats. Round up.
Step six: calculate the total linear footage.
45 slats × 2.7 m = 121.5 linear meters. Add 15% waste for cutting: 121.5 × 1.15 = 139.7 m. Round up to 140 m.
Step seven: account for additional elements.
Baseboard, Wooden angle for finishing the edge slats, Wooden molding for covering joints at the ceiling and floor — all this is calculated separately by perimeter or by the number of connection points.
Example of calculating slats for an accent wall
Let's consider a specific situation: decorating an accent wall in a living room with vertical slats. The wall is 3.0 m wide, ceiling height is 2.7 m.
Initial Data:
-
Wall width: 3,000 mm
-
Wall height: 2,700 mm
-
Slat: width 25 mm, element length 3 m
-
Spacing between slats: 60 mm
-
Direction: vertical
Calculation:
Module = 25 + 60 = 85 mm. Number of slats = 3,000 / 85 = 35.3 → 36 pieces. Length of each slat = 2,700 mm (cut from a 3-meter element). Remaining from each slat = 300 mm → offcut, not used. Total needed: 36 elements of 3 m length = 108 linear meters. Plus 15% reserve = 124.2 m → rounded to 125 m.
Additional Items:
-
Baseboard along the bottom horizontal: 3 m + 10% reserve = 3.3 m;
-
Wooden angle for finishing the outer verticals: 2 pieces × 2.7 m = 5.4 m;
-
Wooden molding for ceiling junction: 3 m + 10% = 3.3 m.
Main conclusion: first the layout — then the purchase. Without calculating the pitch, module, and length, you will either buy too much or run short.
Wall slat: what affects the budget
The topic requires a practical perspective: what exactly makes wall finishing with the slat method more expensive or cheaper — beyond the price of the linear material itself.
Wall area. Obvious but important: a large wall = more material. At the same time, designing one accent wall and finishing all walls in a room are fundamentally different budgets. For one wall, it is the optimal solution in terms of the balance between effect and cost.
Installation frequency. The denser the slats, the more material. A sparse rhythm (pitch 100–150 mm) uses fewer slats. A dense rhythm (pitch 30–50 mm) uses significantly more. But a dense rhythm creates a warmer and richer impression.
Slat width. A wide slat of 60–80 mm with the same pitch will require fewer elements in terms of quantity — but each element costs more. A narrow slat of 20–25 mm — more pieces, but each is cheaper. The final budget often turns out to be close with proper selection.
Need for painting. Slats made of natural wood with tinting or varnish — that is one approach. Slats painted with enamel in the wall color or in a contrasting color — another. The second option requires higher quality sanding and sometimes additional surface preparation.
Bypassing sockets, switches, doors. Each obstacle on the wall involves cutting and offcuts. Take this into account when calculating the reserve.
Combination with floor baseboard and moldings. A slatted wall finished with solid wood moldings The top and baseboard at the bottom form a complete finishing system. Its cost is higher than just slats on the wall, but the visual result is incomparably richer.
Slats for furniture: how to calculate differently
Furniture slats are a completely different calculation story. Here the footage is often small, but the precision requirements are maximum.
Size accuracy is more important than footage. A furniture facade is a structure with clear proportions. If slats are 28 mm wide instead of the stated 30 mm, a difference of 2 mm per slat with 10 slats on the facade will result in a 20 mm gap. A geometric mismatch that is immediately noticeable.
Symmetry is mandatory. Unlike a wall, where a slight shift in rhythm is unnoticeable, a furniture facade is perceived as a whole. All slats must be the same size, evenly distributed, and symmetrical relative to the center or edges.
Furniture surfaces: slats are used on cabinet and wardrobe doors, sides of open shelving, dresser drawers, cabinet and TV stand facades, front surfaces of beds and headboards. Each surface requires a separate calculation — not a total one.
Sanding and geometry are critical. Wooden slat for furniture must have a final sanding, straight edges without bevels, and a stable cross-section along the entire length. Any defect on the facade surface is a visible flaw.
What is bought together with slats for furniture: Wooden decoration — overlays, handles, legs. decor for furniture made of solid wood creates a unified style for the product. Strips for closing ends and joints. Wooden corner veneer for decorating facade corners.
Wooden slat or block: which is more profitable
This question comes up regularly — especially when the budget is tight and it seems that a block will save money. Let's break it down honestly.
| Task | What to choose |
|---|---|
| Hidden structure, lathing | Wooden block |
| Visible wall finishing | Decorative wooden slat |
| Decorative interior accent | Solid wood slat or molding |
| Close the joint, finish the connection | Wooden molding |
| Finish the external corner | Wooden corner bracket |
| Create a frame or border | Picture frame molding, Wooden Picture Frame |
| Finish a furniture front | Solid wood strip, trim, overlay |
| Finish the bottom of the wall | Wooden baseboard |
The main difference: a block is a structural element. A strip is decorative. Substituting one for the other is only possible where justified by the task.
A construction block may be cheaper than a strip — but its surface finish is designed for concealed use. The visible surface of the block will require additional sanding, preparation, and possible defects (pitch pockets, unevenness) will show up when painted.
Wooden profile for visible finishing — this guarantees surface quality and stable geometry. The extra cost is justified: saving on the strip results in preparation costs.
Batten, layout, corner and molding: how not to confuse
In the world of wooden moldings, there are many related concepts that are often confused. Let's break them down clearly.
A batten is a straight molding element with a rectangular or slightly profiled cross-section. Its main function is to create lines, rhythm, and structure. Wooden plank for wall — decorative application. A batten on a lathing is structural.
A layout is a thin molding element for covering joints, gaps, and connections. Wooden molding used where a gap between two surfaces needs to be hidden — for example, between a wall and a door frame, or around the perimeter of a panel element. For creating frames — a flat layout with a simple profile.
A wooden corner is a specialized molding profile with an L-shaped or rounded cross-section. Wooden corner bracket used for finishing external corners of walls, furniture edges, panel ends. It simultaneously protects the corner and gives it a neat, finished look.
A molding is a profiled decorative molding with a more complex cross-section: with curves, semicircles, steps. Moldings from solid wood used for creating frames on walls, cornices, door and window trims, and decorative horizontal lines.
Wooden baguette is a molding for framing frames, mirrors, paintings, and panels. Wooden Picture Frame has a specific profile with a rabbet (groove) for holding glass or canvas. It is also used as a decorative framing element on walls.
Wooden baseboard is a horizontal molding for finishing the lower part of the wall at the junction with the floor. with a classic profile creates a sense of solidity, reliability. creates a neat transition and hides the technical gap between the wall and the flooring.
Understanding these differences is key to placing the order correctly. Often a buyer says "batten" but needs a fillet. Or says "corner" but the task requires a molding.
How to choose a batten according to interior style
The interior style dictates not only the choice of finishing material but also the character of the batten: its width, profile, color, and installation density.
Modern interior
Here, conciseness and rhythm reign. Wooden boards in interior of modern style are thin flat battens 20–35 mm wide, even uniform spacing, no complex profile. Color is either natural wood with tinting or painted with enamel to match the walls. No decorative milling or ornaments.
Installation is strictly vertical or horizontal, no diagonals. Even geometry is the main condition of modern style.
Neoclassicism
In a neoclassical interior, the batten works in tandem with moldings, baseboards, and cornices. A single batten on the wall is not enough; a system is needed. The batten creates a background or fills wall panels that are framed. solid wood moldings.
Color — matching the walls or slightly darker. Batten width — 30–50 mm. Spacing — moderate, neither too frequent nor too sparse. Surface — without large texture, suitable for painting in calm tones.
Classic
Classic style is not so much about battens as it is about moldings, cornices, frames, and overlays. But battens are also appropriate here — as a filling element for panels or vertical decorative trim. In a classic interior, battens are chosen with a milled profile, for painting in white or ivory, paired with wooden cornice and cornice.
Entryway
The hallway is a high-traffic area. Here, battens serve not only a decorative but also a protective function: they cover the lower part of the wall from impacts and scratches. Choose battens made of hardwoods — oak or ash — or pine with a durable coating. Width — 40–60 mm. Spacing — moderate. Must be combined with wooden skirting board и a wooden corner piece on the outer corners.
TV area
The TV area is the visual center of the living room. Vertical battens on the wall behind the TV create a "frame" for the screen and add depth to the entire wall. Important: the width of the battens and spacing should be chosen so that the TV is perceived as part of the overall composition, not sticking out of it. Batten color — darker than the wall if an accent is needed; matching the wall color if a calm background is desired.
Joints near the TV, shelves, and cabinet are treated wooden veneer — this creates neat transitions without visible gaps.
How not to overpay for wooden slats
Saving on wooden moldings is not about buying the cheapest material. It's about a smart approach to calculation and selection.
-
First, make a wall diagram. Draw the planned arrangement of slats with dimensions on paper (or in a simple editor). This takes 15 minutes and saves money on reorders.
-
Don't buy slats without calculating the spacing. The spacing determines the quantity. Calculate the module and multiply by the number of positions.
-
Don't buy expensive profiles where a simple slat will do. A milled molding for the lathing is a pointless expense.
-
Don't use construction timber as visible decor. It will require additional sanding and preparation — in the end, it's not a saving.
-
Calculate the reserve correctly. For straight walls without obstacles — 10%. For walls with sockets, doors, niches — 15–20%.
-
Decide on painting in advance. If you will paint yourself — take an uncoated slat. If you need a factory coating — it will add to the price but save time.
-
Choose slats together with the baseboard, corner piece, and layout. Disparate purchases from different places lead to mismatches in tone, texture, and profile.
Mistakes when choosing a wooden slat
This is an honest list — not theoretical, but based on real situations.
Only looking at the price, without considering quality. A cheap batten with crooked geometry will require extra time for adjustment during installation. Some elements will be unusable — and the actual cost will increase.
Not checking the geometry. Straightness along the length is a critical parameter for rhythmic installation. A batten with a bend creates uneven spacing even with precise markings.
Choosing a batten that is too thin for a large wall. A batten 8–10 mm thick on a high wall may sag between attachment points. For vertical battens 2.7 m or higher — thickness should be at least 14–16 mm.
Forgetting about the spacing between battens. Many buy battens without planning the spacing. As a result, either the battens are installed too sparsely and the effect is weak, or too frequently and there isn't enough material.
Not considering the ceiling height. Battens 2 m long with a ceiling of 2.7 m will have to be joined vertically — this complicates installation and requires careful work on the joint. It's better to use battens 3 m long.
Not planning the joint with wooden baseboard. A slatted wall without a baseboard looks unfinished. The baseboard and batten should be from the same wood species and under the same finish.
Not leaving a margin for trimming. Even with a perfectly flat wall — a margin is needed. Errors in marking, wall unevenness near the floor and ceiling, trimming to fit a chandelier or socket — all of this requires extra material.
Buying a batten that is not suitable for future painting. A pine batten with many knots under white enamel is a problem: the knots 'show through' the paint. For painting white, choose a batten without knots or with a quality primer.
What to buy together with a wooden slat
A slat wall is not a separate purchase. It is a system of elements that work together.
wooden panels — for closing joints at the ceiling, floor, and at junctions with other surfaces.
Wooden angles — for finishing external and internal corners of the slat wall.
Moldings from solid wood — for creating horizontal decorative lines, frames, and borders.
Wooden baseboard — the lower horizontal finish of the slat wall.
Wooden Picture Frame — for designing frames, panels, mirrors in the same style as the slat wall.
Wooden decor and overlays — point decorative elements for furniture and walls.
Pogonazh iz massiva of the entire assortment — baseboards, cornices, architraves, thresholds — for a comprehensive design of the space in a single material.
Mounting materials: finishing nails, wood glue, liquid nails for wood, wood putty for filling nail holes, primer and paint.
FAQ: questions asked when choosing a batten
What determines the price of a wooden batten?
Wooden board price determined by the type of wood, cross-section size and length, quality of sanding, complexity of the profile, presence of coating and order volume. An oak batten with fine sanding and tinting costs fundamentally differently than a construction-grade pine batten.
How to calculate the number of wooden battens for a wall?
Measure the width of the wall in millimeters. Choose the batten width and the spacing between battens. Add the width and spacing to get the module. Divide the wall width by the module to get the number of battens. Multiply by the room height to get the total linear footage. Add 15% reserve.
What is cheaper: wooden plank or a block?
A construction block may be cheaper — but only for hidden applications. For visible decorative finishing, a batten with quality processing is needed. Saving on a batten by using a block will result in additional costs for surface preparation.
How is a batten different from a molding?
The batten is the main decorative linear element that creates rhythm and structure. Wooden molding — a thin element for closing joints, framing edges, and connections. Different tasks — different profiles — different prices.
Do I need to buy battens with a reserve?
Absolutely. A 10–15% reserve is the minimum for a flat wall without obstacles. With sockets, switches, niches, doorways — 15–20%. The reserve protects against cutting to zero and needing to reorder.
How to choose the batten width for an accent wall?
Consider the wall area and ceiling height. For a small wall of 2–3 m² — battens 20–30 mm with a spacing of 40–60 mm. For a large wall of 6–10 m² — battens 30–50 mm with a spacing of 60–90 mm. In high rooms, wider battens can be used.
Is a baseboard needed for a slat wall?
Yes. A slat wall without a baseboard looks unfinished — the ends of the battens at the floor are exposed, the gap is not covered. with a classic profile creates a sense of solidity, reliability. from the same species as the battens — a mandatory element of the system.
Can wooden battens be installed without a lathing?
Possible — with even walls. Glue or nail mounting directly onto the wall. But with uneven walls, lathing is mandatory: it levels the mounting plane and prevents the slats from bending over irregularities.
About the company STAVROS
A beautiful slatted wall starts with the right material. STAVROS produces Wooden planks from solid wood with precise geometry, high-quality sanding, and a stable cross-section — for decorative wall cladding, furniture fronts, TV zones, and interior accents. The STAVROS catalog offers a full range of wooden moldings: slats, trims, corners, moldings, baseboards, baguettes, overlays. All elements are made from the same material, within a unified quality system, with the possibility of selection in a consistent style.
STAVROS is not just a store for wooden moldings. It is a manufacturer that understands the difference between a construction timber and a decorative slat, between a cheap and a correct choice. That is why those who want a result — not just to cover a wall with wood — buy here.