Article Contents:
- What exactly needs to be covered at the top boundary of the slat panels
- What MLDPU-004 is and why all three dimensions are needed here
- 15 mm determines the visible width of the line
- 8 mm is responsible for the profile's relief
- 2600 mm determines not the design, but the order
- When 15 mm looks appropriate
- When 15 mm may get lost
- Paper strip does not show an 8 mm protrusion
- Plank No. 1
- Plank No. 2
- Many external and internal corners
- Complex geometry
- Solid sections are critically important
- No way to quickly buy more of the exact same material
- Installation is performed for the first time
- Molding in the color of the upper wall
- Molding in panel color
- Molding in a contrasting color
- The ends must match in profile
- Both parts must be on the same line
- The surface must be prepared for subsequent finishing
- Need to cover a wide defect
- Need a full end cap
- Need a massive architectural molding
- The top line of the panels is very uneven
- The interior looks better without an additional horizontal line
- The molding itself
- Mounting compound
- Panels, if the project is still being completed
- Alternative profile
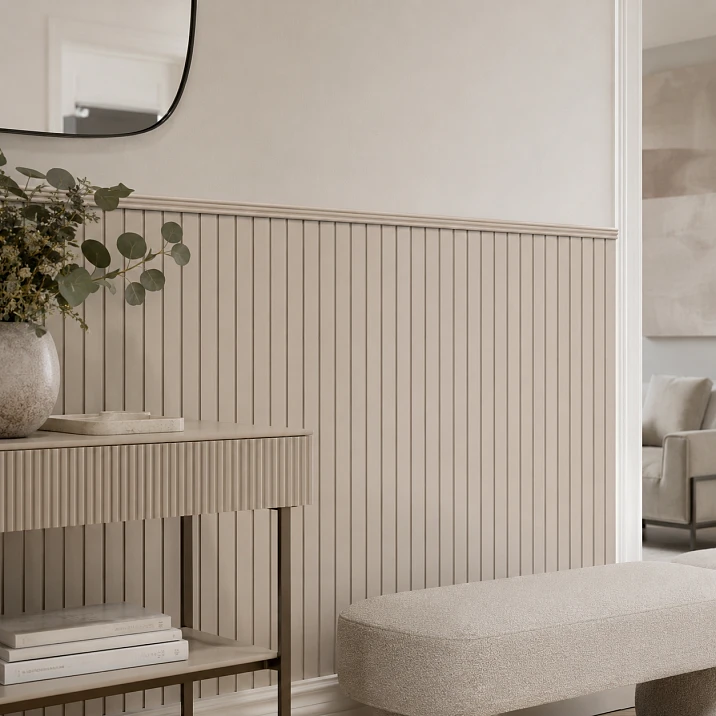
The slat panels covered the lower part of the wall, stopping at about 1100–1300 mm in height. After stepping back a few paces, instead of a neat transition to the painted surface, we saw a technical edge. The slats themselves look good, but their top edge requires a separate solution.
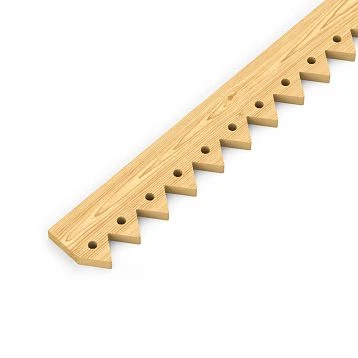
There is no need to redo the entire finish because of this line. One option is to run a thin horizontal molding MLDPU-004 made of polyurethane above the slat zone. It has a profile of 15 × 8 mm and is supplied in strips 2600 mm long.
At the time of verification, MLDPU-004 costs 3,190 RUB per strip. The current product page confirms the dimensions 15 × 8 × 2600 mm and the material — polyurethane.
But it is too early to order the molding based only on the formula “wall length divided by 2.6 m”.
First, you need to answer four questions:
-
does a thin 15 mm line fit the scale of your specific slat wall;
-
is the profile physically capable of forming the existing transition;
-
where will the molding end at doors and corners;
-
into what actual segments do you need to cut slats of 2600 mm length.
It is the last point that often changes the order quantity. The total linear meters may be sufficient, but getting the necessary whole pieces from them may not be. The opposite can also happen: if you correctly use the remainder from one wall on the adjacent one, instead of three slats, two are enough.
Let's go through the entire path from the tape measure to the finished order.

What exactly needs to be covered at the top edge of the slat panels
The phrase "cover the top edge of the panels" combines several different tasks. To choose the molding, they need to be separated.
The first option is that the slat surface is already neatly finished, but visually it ends too abruptly. There is almost no exposed technical end, and no major defect needs to be covered. A thin horizontal line is needed to separate the lower textured part of the wall from the upper painted one.
For this scenario, the narrow MLDPU-004 is especially interesting: 15 mm form a decorative border without turning it into a massive band.
The second option is that a technological seam or an imperfect cut line remains between the panels and the wall. Here, the molding should not only decorate but also cover the problem area.
Before purchasing, measure the maximum height of this section. Not the average, and not the one that turned out at the most beautiful spot, but specifically the maximum.
If the defect is wider than the area the profile can cover, the decorative strip will not fix the problem.
The third option is that the panel noticeably protrudes in front of the main wall, so a voluminous end is visible from above.
Here, it is especially dangerous to look only at the 15 mm size.
MLDPU-004 has a 15 × 8 mm profile, but these numbers cannot automatically be interpreted as a ready-made L-shaped cover capable of closing any end with a thickness up to a certain value. This is a decorative relief molding, not a universal end profile.
If the task is specifically to physically cover the protruding upper plane of the panel, first you need a cross-section drawing or a real fitting.
In other words:
a thin transition between two already prepared surfaces is a good scenario for testing MLDPU-004;
a wide open end or a large plane difference — first check the geometry, then buy.
The STAVROS general guide for slat panels also considers the horizontal joint between the paneled and painted areas as a separate location for finishing with a molding.




What is MLDPU-004 and why are all three sizes needed here
MLDPU-004 is specifically a polyurethane molding, not a carved ornamental trim, not an overlay, and not a standalone rosette.
For the task at hand, three sizes are important.
| Parameter | MLDPU-004 |
|---|---|
| Size A | 15 мм |
| Size C | 8 мм |
| Length L | 2600 мм |
| Material | Polyurethane |
| Price at time of check | 3,190 ₽/pc. |
| Installation | Adhesive |
The current STAVROS product card confirms dimensions A × C × L = 15 × 8 × 2600 mm and a price of 3,190 ₽.
Our factory also produces:
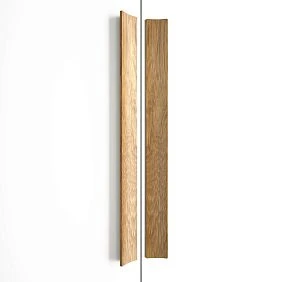
15 mm determines the visible width of the line
This is the main dimension for assessing scale.
A strip 15 mm wide does not create a massive horizontal band. On a large wall, it will be perceived as a relatively thin border.
This is useful if the goal is to neatly finish the slat surface rather than divide the wall with a wide architectural molding.
Get Consultation
8 mm are responsible for the profile relief
The molding does not lie on the wall like a paper tape. It has volume.
Therefore, a 15 mm paper strip shows the scale of the line well, but does not fully convey the future chiaroscuro.
With side lighting, the profile becomes more noticeable.
2600 mm determine not the design, but the order
It is this length that sets the cutting pattern.
If the horizontal boundary has a length of 3800 mm, one plank will not be enough.
If you need to decorate two walls with a total length of 4800 mm, two planks of 2600 mm each are theoretically sufficient — but only if they can be rationally cut for specific sections.
Therefore, the product length must be involved in the project before the purchase button is pressed.
Will a 15 mm wide line suit your specific slat wall
The easiest way to make a mistake is to see MLDPU-004 in a large product photo and decide that it will look just as noticeable in an interior.
The product photo shows the profile up close.
On a wall three to four meters wide, a 15 mm molding turns into a much thinner line.
And this can be both an advantage and a disadvantage.
When 15 mm looks appropriate
A thin molding is worth considering if:
-
the top edge is already neat enough;
-
there is no need to cover a wide gap;
-
The slat finish itself is rich in vertical rhythm;
-
a delicate transition is needed between the lower and upper parts of the wall;
-
There are already larger architectural elements nearby;
-
I don't want to visually reduce the upper smooth part of the wall.
In that case, a wide pull could draw attention to itself, while the 15-mm profile works precisely as a finishing touch.
When 15 mm can get lost
The reverse scenario — a very tall panel area, large wide slats, a spacious room, and a desire to achieve a clearly noticeable architectural band.
Then MLDPU-004 may be physically suitable, but visually too thin.
This is an important distinction.
"Fits" is a technical check.
"Matches the scale" is a design one.
If a more pronounced profile is needed, it's better to look right away Moldings made of polyurethane, rather than trying to make MLDPU-004 perform the task of a wide divider.
How to check 15 mm without buying molding
For the first try-on, no real sample is required.
Cut a strip of paper or masking tape 15 mm wide and run it along the top edge of the panels.
It is important not to make a small fragment 20 cm long.
Cover at least a meter and a half, or better yet, a significant part of the wall. Only then can you assess the horizontal line at the scale of the room.
After that, look at the wall:
-
directly in front of it;
-
from the entrance;
-
from the center of the room;
-
from the point where the wall is most often visible.
If the line almost disappears and the task required a noticeable divider, this is an argument to look at a wider profile.
If 15 mm already sufficiently emphasizes the transition, there is no need to increase the size just to make the molding more visible.
The paper strip does not show the 8 mm protrusion.
This is a limitation of the method.
Therefore, after checking the width, it is advisable to also assess the cross-section.
If the slat zone has a noticeable difference relative to the upper wall, make a small cardboard template of the profile in side projection or verify against the actual MLDPU-004 drawing.
You need to see:
wall → panel → top edge → intended position of the molding.
This makes it clear whether the decorative profile actually covers the required line or is simply located near it.
The slat zone must be finished evenly before installing the molding.
The molding helps to frame the transition, but should not become a way to hide any geometric error.
If the top line of the panels noticeably rises and falls, the thin MLDPU-004 will only emphasize this.
The horizontal trim acts like a long ruler: the eye quickly notices any deviation.
Before ordering, check the top of the panel with a level.
Pay special attention to the long wall.
On a short section, the deviation may seem insignificant, but over four meters it turns into a clearly noticeable slope.
If the line is truly curved, first decide what is being corrected:
-
the edge of the panel;
-
base;
-
the position of the future molding;
-
the junction area.
Gluing MLDPU-004 along a crooked edge just because it follows its shape is not the best option.
But you also cannot run a perfectly horizontal molding over a highly uneven panel without checking: the variable gap between them will reveal the problem even more.
The finishing profile works well when the basic geometry is already prepared.
What to measure for the order: not the length of the room, but the actual molding line
Suppose the wall has a total width of 4200 mm.
This does not yet mean that 4200 mm of MLDPU-004 will be needed.
On the left there may be a doorway, on the right a built-in wardrobe, and the slat panels occupy only the central section of 3500 mm.
Or vice versa: the panels run behind a decorative console from wall to wall, so the molding must continue along the entire length.
Before calculating, mark two real points:
START — where MLDPU-004 begins;
END — where it ends.
The distance between them is the working length.
For multiple walls, record them separately.
Not:
"about 5.5 meters in total."
But:
-
wall A — 3800 mm;
-
wall B — 1700 mm.
This entry will allow you to plan the cutting layout.
What to do near the door casing
If the slat zone approaches the door, it is necessary to decide in advance how the two horizontal lines meet:
the top of the panel with MLDPU-004 and the vertical trim.
There are several possible compositions, and the choice depends on the specific joint.
The molding can:
-
end directly at the trim;
-
approach another vertical decorative element;
-
Finish earlier if there is a free space between the panel and the door.
A bad option is to buy molding for the full length of the wall first, and then decide during installation where to randomly cut it.
The measurement should be taken between the actual end points of the decorative line.
If the molding on the right butts against the trim, the tape measure goes up to it.
If a 50 mm gap is provided nearby, those 50 mm are not included in the length of MLDPU-004.
On one wall, the difference is small.
On several rooms, the sum of such sections can already change the cutting layout.
Internal corner: count two walls separately or as one total length
Suppose the slat finish continues onto the adjacent wall.
First horizontal boundary:
3800 mm.
Second:
1700 mm.
Total length:
5500 mm.
But for cutting, these are still two separate sections, because there is a corner between them.
Inside the corner, the parts are joined according to the selected scheme, and the actual end cuts must be made according to the real geometry of the room.
If the corner is close to right, classic work is often done through the corresponding corner miter. But you cannot automatically assume that any construction corner is exactly 90°.
First, the real geometry is checked.
For calculating the purchase, it is enough to understand something else:
a 3800 mm segment cannot be physically replaced by the sum of two completely random remnants just because the total length adds up.
You need to know in advance where a transverse joint is acceptable.
An external corner requires even more careful layout.
An external corner is more visible than an internal one.
If the molding wraps around a ledge, box, or pylon, it is better to determine in advance which strips fit the corner as whole sections.
Why is this important?
Let's imagine the first wall is 2400 mm long, and after the external corner there is a short edge of 500 mm.
Mathematically, the total line is 2900 mm.
Two strips are enough.
But if the first strip of 2600 mm is thoughtlessly run entirely along the first wall and 200 mm is cut off as waste, the second section will require a separate 500 mm piece.
This is still two planks, but the remainder is used inefficiently.
If the cutting scheme is planned in advance, one of the remaining sections can be saved for the next element of the project.
For long decorative elements, a good layout starts not with the saw, but with a piece of paper.
How many MLDPU-004 are needed for one straight wall
For a first approximation, the formula is simple:
horizontal border length ÷ 2600 mm → round up.
For one continuous straight line, it gives the minimum number of planks if transverse joints are acceptable and no additional allowance is required for complex nodes.
At a price of 3,190 ₽ we get:
| Length of the upper boundary | Minimum planks of 2600 mm | Purchase length | Remainder before accounting for cuts | Cost of the molding |
|---|---|---|---|---|
| 2000 мм | 1 | 2600 мм | 600 мм | 3 190 ₽ |
| 2600 мм | 1 | 2600 мм | 0 мм | 3 190 ₽ |
| 3000 мм | 2 | 5200 мм | 2200 мм | 6 380 ₽ |
| 3800 мм | 2 | 5200 мм | 1400 мм | 6 380 ₽ |
| 4500 мм | 2 | 5200 мм | 700 мм | 6 380 ₽ |
| 5200 мм | 2 | 5200 мм | 0 мм | 6 380 ₽ |
| 6000 мм | 3 | 7800 мм | 1800 мм | 9 570 ₽ |
The table immediately shows an interesting case.
A wall of 3000 mm requires two planks, although only three meters of material is used. After making the second part, a large piece remains.
It is too early to consider it "waste."
If there is an adjacent short edge in the room, this remainder can reduce the total order.
Why the total length of several walls does not give a ready answer
Let's imagine two zones:
the first wall is 3000 mm;
the second is 1800 mm.
Total:
4800 mm.
If we count each wall separately:
-
for 3000 mm — two planks;
-
for 1800 mm — one plank;
that makes three pieces.
But this is an incorrect order.
Two MLDPU-004 strips give:
2600 × 2 = 5200 mm.
Let's make the actual cutting layout.
Strip No. 1
For the first wall, the section goes:
2600 mm.
For a 3000 mm wall, missing:
400 mm.
Plank No. 2
Cut off:
400 mm to complete the first wall.
remains:
2600 − 400 = 2200 mm.
From these 2200 mm we get a solid second piece:
1800 mm.
Remainder:
400 mm.
In the end, two planks are enough.
This is a good example of why you cannot round up each wall independently.
The correct order is as follows:
write down all individual sections → create a cutting map → only then count the planks.
Example 3800 + 1700 mm: why two planks will no longer be enough
Now a different configuration.
First wall:
3800 mm.
Second:
1700 mm.
Total length:
5500 mm.
Two strips give:
5200 mm.
Shortage:
300 mm.
No cutting optimization here will create the missing material.
The minimum order is three MLDPU-004.
Purchase length:
7800 mm.
Cost:
3 × 3 190 = 9 570 ₽.
But even after that, you need to plan the cuts, not just open three packages in a row.
For example:
-
the first wall gets 2600 + 1200 mm;
-
the second — a separate section of 1700 mm.
After such cutting, pieces remain that can be saved for another place.
If there is another short piece of molding in the room, it needs to be included in the map before cutting, not after the large leftovers have already been ruined into small test pieces.
Where is the best place to make a transverse joint on a long wall
A wall of 3800 mm inevitably requires at least two parts.
But this does not mean that the only option is:
2600 + 1200 mm.
You can cut two new strips differently, for example, to get two sections closer in length.
The question is why do this.
The position of the joint is chosen not for mathematical symmetry, but for its minimal visibility.
A good place can be:
-
next to a vertical architectural line;
-
in a less visible part of the wall;
-
behind tall furniture, if it really stays there;
-
where lighting emphasizes the joint less.
The center of the wall is not always good.
On a completely empty symmetrical surface, the central transverse joint can become the most noticeable point of the entire four-meter line.
However, moving the joint close to the corner should not be done automatically either: a too short fragment is sometimes harder to install accurately.
Before cutting, lay two planks along the wall and mark several possible joint locations.
The remaining 1400 mm may be more valuable than it seems
After finishing the straight wall of 3800 mm with two planks, a total of 1400 mm of material remains.
If there is nothing else in the project, this is the remainder.
But if there's another slat insert nearby with a width of 1200 mm, you don't need to buy a new plank for it.
Therefore, it is better to calculate the entire object at once.
For example:
-
main wall — 3800 mm;
-
small slat insert — 1200 mm.
Total decorative length:
5000 mm.
Two strips give 5200 mm.
With rational cutting of the material, it is sufficient.
If you first make the main wall and accidentally cut the remaining 1400 mm into test pieces of 300–400 mm, you will have to buy a third strip for the second zone.
Hence the practical rule:
do not cut the long remainder until a map of all moldings in the project has been made.
When leftovers cannot be added up like regular linear meters
Suppose after several jobs the following remains:
-
700 mm;
-
600 mm;
-
500 mm.
Total:
1800 mm.
And the next wall has a length of 1600 mm.
By pure length, there is more material than needed.
But there is no single piece of 1600 mm among the leftovers.
If you don't want to make two transverse joints on a short visible wall, these 1800 mm do not replace a new plank.
Therefore, for each remainder, record its individual length, not just the total remaining footage.
The cutting work table might look like this:
| Remainder | Can be used for |
|---|---|
| 1400 мм | sections up to 1400 mm |
| 900 мм | a short insert up to 900 mm |
| 500 мм | small fragment, sample, individual node |
This shows the actual purpose of the material.
How much do 1, 2, 3, and 4 MLDPU-004 strips cost
At the current price of 3,190 ₽ per piece, the budget for the molding itself is calculated as follows:
| Quantity of MLDPU-004 | Total purchase length | Cost |
|---|---|---|
| 1 pc. | 2.6 m | 3 190 ₽ |
| 2 pcs. | 5.2 m | 6 380 ₽ |
| 3 pcs. | 7.8 m | 9 570 ₽ |
| 4 pcs. | 10.4 m | 12 760 ₽ |
This is the cost of the molding itself.
The final budget may separately include:
-
mounting compound;
-
materials for preparation and finishing;
-
the coloring;
-
delivery;
-
labor, if installation is done by a professional.
Therefore, the price of a linear decorative line and the total cost of the finished assembly are not the same thing.
Do I need to automatically add a 10% margin
No.
For long-length profiles, the rule of “add 10% to the entire footage” is often worse than actual cutting.
Let's imagine a wall of 3800 mm.
Minimum — two planks, that is already 5200 mm of material. Here the product format itself creates a reserve of 1400 mm, much more than ten percent.
Buying a third plank just for an abstract surplus would mean increasing the order from 5200 to 7800 mm without a clear reason.
But there are situations where an additional plank is truly justified.
Many external and internal corners
A wrong cut on a long section can make it unusable.
Complex geometry
Columns, protrusions, several short edges increase the number of cuts.
Solid sections are critically important
If visible walls cannot be assembled from scraps with joints, cutting becomes less economical.
There is no way to quickly buy the exact same material
For a project with a tight deadline, a reserve is sometimes more important than the cost of an extra plank.
Installation is being done for the first time
The risk of incorrect cutting is higher.
That is, the reserve is added for a specific risk, not out of habit.
What to do if the entire line is almost equal to 2600 mm
A special case is a wall close to the length of one plank.
For example, the tape measure shows 2580–2590 mm.
Nominally, MLDPU-004 with a length of 2600 mm is sufficient.
But ordering "exactly" should only be done after a precise control measurement.
Check:
-
measurement at several points;
-
actual ends of the molding;
-
the need for corner cuts;
-
the curvature of junctions.
The difference between "2600 mm per catalog" and "2600 mm of clear finished section between two complex ends" is fundamental.
If special cuts are required at both ends, the layout must first be drawn.
Do not build a project on the hope that the remaining ten millimeters will compensate for any wall inaccuracy.
Paint MLDPU-004 in the color of the upper wall or slat panels
After resolving the geometry, color appears.
And here, one molding can produce three completely different results.
Molding in the color of the upper wall
If there is a calm painted surface above the slat zone, MLDPU-004 can be visually attached to it.
Then the thin relief line does not create a sharp band, but looks like part of the upper wall architecture.
This option is good when the slat finish itself noticeably differs in texture or color.
Molding in the color of the panels
Here the upper profile is perceived as the end of the slat structure.
The eye first sees a unified lower zone, and then its finishing horizontal line.
This is logical if the panels and molding should look like one system.
Molding in a contrasting color
Narrow 15 mm suddenly become much more noticeable.
Contrast can turn a delicate profile into a clear graphic stripe across the entire wall.
If this is exactly what was intended, the solution works.
If the task was merely to neatly hide the boundary, strong contrast may be excessive.
Therefore, it is useful to do a paper mock-up not only in width.
Paint the strip approximately in the intended color and look at the wall from a distance again.
Why a contrasting line especially changes a wall with vertical slats
Slat paneling has a strong direction — vertical.
Each slat leads the eye upward.
The horizontal MLDPU-004 crosses this entire rhythm at once.
If the molding matches the surrounding finish in color, the intersection becomes soft.
If it's contrasting, a pronounced line emerges that visually "cuts off" the verticals.
This can be a good way to intentionally divide the wall into two levels.
But there is a reverse effect: the room visually begins to divide more strongly by height.
Therefore, with a low ceiling, a contrasting band needs to be evaluated especially carefully.
Not because there is a ban on such a solution, but because a horizontal line four meters long affects perception more strongly than a small molding sample in hand.
What to do if there is wallpaper above the panels instead of paint
The mechanics of the transition change.
A painted wall can be locally touched up after installing the molding if the technology of the materials used allows it.
With ready-made wallpaper, any damage is more noticeable.
Before installation, you need to determine:
-
what surface the profile is actually glued to;
-
whether its adhesive zone is on a weak edge of the wallpaper;
-
whether it is necessary to first form a strong base strip;
-
What will the top edge of the molding look like?
MLDPU-004 should not be used as a way to press down a peeling edge of wallpaper.
First, the base must be in good condition.
If the wallpaper and panels are already neatly joined, a thin molding can serve precisely as a decorative border between the two materials.
Installation after already completed renovation: first a dry fit.
One of the advantages of the scenario in question is that the slat panels may already be installed.
It is not necessary to dismantle all the lower trim.
But a finished surface requires more careful work.
Before applying glue, do a complete dry layout.
For a straight wall:
-
measure the line;
-
prepare the necessary segments;
-
place control marks;
-
attach the details;
-
check the joint;
-
check the horizontal level;
-
step back a few meters;
-
only after that proceed to fixing.
For two walls, an angle check is added.
If after applying the mounting compound it turns out that the second piece does not align with the first by a few millimeters, correcting the mistake is more difficult.
Dry assembly moves most of these issues from the "rework" category to the "one more cut" category.
Base preparation is more important than the amount of glue
Adhesive mounting does not mean the principle "the more compound, the more reliable".
First, you need to understand where MLDPU-004 is being glued.
The substrate can be:
-
painted wall;
-
prepared plaster;
-
the surface of the panel itself;
-
a combination of two materials in the transition area.
The mounting compound must be compatible with polyurethane and the specific substrate.
On the STAVROS website, a separate section is presented KUDO adhesive for installation.
But regardless of the chosen product, the consumption and base preparation should be taken from the instructions of that specific compound.
There is no need to invent a universal consumption of one cartridge per a certain number of meters without considering:
-
adhesive layer thickness;
-
nature of the base;
-
the width of the contact zone;
-
method of application.
Therefore, the amount of MLDPU-004 can be accurately calculated based on the layout, while the amount of adhesive can only be determined after selecting the installation system and checking the manufacturer's instructions.
How to achieve a perfectly straight long horizontal line
MLDPU-004 is only 15 mm wide.
This makes it visually delicate, but at the same time increases the requirements for marking.
A wide profile can sometimes visually hide a small imperfection in the base.
A thin line, on the contrary, clearly shows the deviation.
On a long wall, it is better to set the horizontal level instrumentally rather than guide the profile by random landmarks:
-
the wallpaper seam;
-
the tops of individual slats;
-
the furniture line;
-
visual perception.
First, one control horizontal line is determined.
Then all segments are laid out along it.
If the slat area has a noticeable deviation from the level, the problem must be detected now, before installing the molding.
Transverse joint of two planks: what needs to be checked before sealing
When the wall is longer than 2600 mm, the transverse joint becomes part of the project.
It has several requirements.
The ends must match in profile
If one section is slightly higher than the other, the relief reveals a step.
Both parts must be on the same line
The joint cannot be fixed with filler alone if the planks themselves are at different angles.
The surface must be prepared for the subsequent finish
The goal is to get one continuous horizontal line after painting, not two separate profiles meeting at a random point.
Do not try to compensate for a poor cut with a large amount of joint compound.
First geometry, then finish.
When MLDPU-004 with a width of 15 mm is better not to buy
A specific product does not have to fit every project.
MLDPU-004 should be abandoned or at least the order should be postponed in several cases.
Need to cover a wide defect
If the upper edge requires covering a significantly larger area, a thin profile should not become a patch.
Need a full end cap
If a voluminous end of the panel is exposed, a solution that matches its geometry is required first.
A massive architectural molding is needed.
15 mm may turn out to be too delicate.
In that case, it is more correct buy polyurethane moldings of a different cross-section.
The top line of the panels is very uneven.
Molding does not replace fixing the geometry.
The interior looks better without an additional horizontal line.
Sometimes a clean, neatly finished edge is stronger than extra decor.
Refusing molding after a fitting is a normal decision.
When MLDPU-004 is especially successful
Now the reverse situation.
A thin profile fits the task well if:
-
the panels end with a straight horizontal line;
-
a slight relief transition is needed;
-
most of the wall is already decorative enough;
-
there is a calm painted surface above;
-
a wide molding would look heavy;
-
the existing seam is easily covered by the chosen pattern;
-
The 15 mm profile looks good after a 1:1 scale mock-up.
Then MLDPU-004 does not try to become the main element of the wall.
It performs a more precise function — it completes it.
What to order together with MLDPU-004
After cutting, the shopping list can be combined into one block.
The molding itself
buy the MLDPU-004 molding should be in the quantity that resulted from the cutting map, not from simple rounding of each section.
Mounting compound
Can be purchased separately buy glue for mounting molding, after first verifying its use with your base surface.
Panels, if the project is still being assembled
If the slat finish has not been fully purchased yet, it is wiser to calculate the entire system before starting installation. In the catalog, you can buy wall slat panels and determine their actual upper limit in advance.
Alternative profile
If the paper mock-up shows that 15 mm is not enough, go to the section of polyurethane moldings before placing the order, not after receiving unsuitable slats.
For a wider selection of interior finishes, a general section is available where you can You can buy ready-made stucco matching the Baroque style. Calculate the quantity: linear meters of cornices and moldings, number of rosettes, pilasters, consoles, corner elements. Add a ten to fifteen percent allowance for trimming..
Ready order example: one wall 3800 mm
Let's gather all actions on a specific project.
Initial Data:
-
the slat zone is already installed;
-
The top edge is even;
-
after a paper mock-up, 15 mm fits;
-
The horizontal boundary is 3800 mm;
-
a transverse joint is allowed;
-
There are no additional walls.
Required material:
3800 mm.
One plank:
2600 mm.
Quantity:
2 pcs.
Purchase length:
5200 mm.
Remainder:
1400 mm before accounting for the specific joint position and cuts.
Price:
2 × 3 190 = 6 380 ₽.
The next step is to select the cross-connection point.
Only after this are the planks cut.
A ready example of an order: two walls 3000 and 1800 mm
Initial Data:
-
two separate horizontal boundaries;
-
3000 mm;
-
1800 mm.
Total:
4800 mm.
Do not buy three planks just because the first wall requires two and the second one.
Correct cutting:
Plank 1: 2600 mm for the first wall.
Strip 2: 400 mm for the first wall + 1800 mm for the second.
remains:
400 mm.
Summary:
2 planks.
Cost:
6 380 ₽.
This example shows the real benefit of cutting: one layout saves the cost of an entire additional strip.
Ready-made order example: two walls 3800 and 1700 mm
Now:
3800 + 1700 = 5500 mm.
Two planks:
5200 mm.
this is not enough.
Required:
3 pcs.
Purchase length:
7800 mm.
Cost:
9 570 ₽.
After that, it is decided how to rationally distribute the leftovers.
The main difference from the previous example is not the number of walls, but the specific lengths.
Final algorithm: how many MLDPU-004 to put in the cart
Before ordering, go through the sequence once from start to finish.
- Determine whether you really need molding or if a neat edge treatment is sufficient.
- Check that MLDPU-004 solves exactly your task and is not meant to cover too wide an end.
- Make a paper strip 15 mm wide.
- Evaluate it along the entire wall, not on a small section.
- Check the cross-section and the 8 mm protrusion relative to the actual panel.
- Determine the start and end point of each horizontal line.
- Measure each section separately.
- Record doors, internal and external corners.
- Decide where transverse joints are acceptable.
- Assemble all project sections into one cutting map.
- Lay them out on planks 2600 mm long.
- Check whether long offcuts can be used on adjacent walls.
- Only now determine the number of full planks.
- Multiply the quantity by the current price.
- Add a spare plank only when there is a specific risk, not automatically.
- Do a dry fit.
- Check the level.
- Choose a compatible installation and finishing system.
- After that, place the order.
This order takes a little more time with the tape measure, but greatly reduces the likelihood of the two most annoying mistakes:
buying an extra plank and discovering a shortage already during installation.
Bottom line: MLDPU-004 is good as a thin finish, if you first check the geometry and cutting.
MLDPU-004, sized 15 × 8 × 2600 mm, can be considered for horizontal finishing of slat cladding that ends in the middle of a wall. It is a thin relief molding, so its strength is a neat transition line, not an attempt to cover any wide end or major construction defect.
Before purchasing, first apply a 15 mm paper strip and check the actual cross-section of the joint.
After that, measure not the entire room, but each actual horizontal boundary.
For one straight wall, the preliminary calculation indeed starts with dividing the length by 2600 mm. But for multiple walls, you need to create a cutting plan.
This is where two opposite scenarios appear.
Walls of 3000 + 1800 mm can be finished with just two slats thanks to using the leftover.
And walls of 3800 + 1700 mm already require three, because the total length of 5500 mm exceeds the available 5200 mm of two planks.
That is, the correct question before ordering is not:
"How many meters do I have along my walls?"
But:
"What specific segments do I need and how do they fit into slats of 2600 mm?"
After such a check, you can order MLDPU-004 polyurethane molding already in the calculated quantity.
If the 15-millimeter line on your wall gets lost or does not cover the existing transition, the right solution is not to complicate the installation, but to choose a different profile in the section of polyurethane moldings.
FAQ
Can MLDPU-004 be installed if the slat panels are already mounted?
Yes, the article scenario itself assumes an existing slat zone. First, you need to check the condition of the upper edge, the base for gluing, and the possibility of drawing a straight horizontal line without dismantling the panels.
If the edge has serious geometric defects, it's better to fix them before installing the molding.
Will MLDPU-004 fit if the slat panel protrudes significantly in front of the wall?
A single size of 15 × 8 mm is not enough for a positive answer.
MLDPU-004 is a decorative relief profile, not a universal L-shaped cover. You need to look at the cross-section of the transition from the side and check how exactly the profile contacts the wall and the panel.
What to do if the wall has a length of 2590 mm?
The nominal strip with a length of 2600 mm seems sufficient, but before ordering, you need to perform an accurate control measurement and determine the nature of both end cuts.
With a length that is almost tight, you should not count on a large margin for correcting mistakes.
Should the wall section behind the built-in wardrobe be counted?
Only if the molding will actually pass there.
For ordering, the actual decorative line is measured, not the geometric width of the room.
If the profile ends at the wardrobe, the hidden section is not included in the calculation.
Can the remainder from the first wall be used on the second?
Yes, if the length of the remainder is sufficient and its end cuts allow obtaining the required piece.
That is why it is better to record remainders separately by length.
A remainder of 1400 mm can replace a new plank on a 1200 mm wall, but several short pieces with a total length of 1400 mm — not necessarily.
Can two joints be made instead of purchasing an additional plank?
Sometimes it is geometrically possible, but the decision depends on the visibility of the joints and the sizes of the available remnants.
If saving one plank on a short, well-lit wall results in two noticeable transverse joints, the result may not justify the savings.
Is it worth making a joint exactly in the center of the wall?
Not necessarily.
The center is a visually noticeable place. Sometimes it is better to align the joint with a vertical line of the interior or move it to a less noticeable area.
The position is determined during the dry layout.
Can MLDPU-004 be continued from one wall to the adjacent one?
Yes, if the slat finish itself continues around the corner and such a solution is intended by the composition.
Each wall is still measured separately, and the corner joint is checked against the actual angle of the room.
Is it mandatory to paint MLDPU-004 in the color of the slat panels?
No.
There are three independent options: the color of the panels, the color of the upper wall, or contrast.
They give a different perception of the border, so it's better to choose the color together with the profile width, rather than after installation.
Can the molding be installed over wallpaper?
You need to look not only at the decorative coating, but also at the base and the requirements of the chosen adhesive.
A weak or peeling edge of the wallpaper should not become the load-bearing surface for a long profile.
Will MLDPU-004 hide the wavy top edge of the panels?
A thin profile is more likely to emphasize a long deviation than to correct it.
First, you should bring the main border to an acceptable geometry, and then install the molding.
Do I need to buy an additional strip for one external corner?
Not automatically.
First, create a cutting layout considering corner cuts. If the existing quantity leaves sufficient working sections, an extra plank is not needed.
Reserve is purchased for a specific risk.
Can MLDPU-004 be used as a vertical termination for the slat zone?
The molding itself is a linear decorative profile, so vertical application can be considered separately. But this is a different node: the connections to the floor, ceiling, and horizontal top molding change.
For this article, the calculation refers specifically to the upper horizontal boundary.
What to do if 15 mm looks too thin?
Do not try to compensate for this with contrasting paint just to make the profile more noticeable.
First, compare a different molding size. In the section of polyurethane moldings you can choose a larger model.
Where to buy MLDPU-004?
The product is presented in the card molding MLDPU-004 made of polyurethane.
At the time of inspection, the size is 15 × 8 × 2600 mm and the price is 3,190 ₽ per piece.
Before ordering, first determine the number of slats based on the actual cutting layout, especially if the slat panels continue on two or more walls.