Article Contents:
- A small sample and an installation test are different checks
- Why the 1:1 test begins after choosing the profile, not before
- Why the test must be performed with the material that is planned for purchase
- How to distinguish a geometry test from a finish test
- Skirting board and architrave: one of the most useful junctions to check
- Why the right products can form a bad junction
- Why a single one-metre piece of moulding can be misleading
- How to check the corner of a moulded frame
- Cornice and floor-to-ceiling wardrobe — an unavoidable conflict junction
- Company building materials: checking the working result, not the catalogue
- How to check an external corner
- The end of a profile is often more important than the straight section
- Checking that doors, cabinets, and drawers open
- Check the finish on the same geometry, not on a separate board
- Introducing the "approved reference sample" status
- What cannot be changed after approval without re-testing
- Test area versions must be stored the same way as specification versions
- How to link a test area and a specification
- Why you can't buy everything if one test element hasn't been approved yet
- Building materials suppliers: record only what is actually approved
- How to write comments without saying "something doesn't look right"
- Can you change just one element
- How to check the finish on a test fragment
- Why a photo of an approved area doesn't replace a physical reference sample
- What to do with the physical reference sample after approval
- How to record approval without unnecessary bureaucracy
- When a test can be considered complete
- How to use the test to calculate labor intensity
- How the test helps clarify the actual quantity
- Why you can't transfer the quantity from the test directly to the entire project
- What to do if the first serial batch differs from the test
- When a 1:1 test can be simplified
- When it's worth creating a mock-up area even without a separate contract requirement
- Why the reference sample needs to be linked to the drawing
- How to hand over the reference sample to the installation crew
- Construction shouldn't turn the reference sample into an unattainable museum piece
- How to work with multiple reference samples
- How the buyer knows that the full scope can be paid for
- What to do if the approved item becomes unavailable before the full purchase
- How a mock-up area helps when changing suppliers
- How to define the test objective before work begins
- How to keep a list of issues for the test area
- How to distinguish critical from non-critical issues
- How testing helps avoid premature payment for a large volume
- How to provide for testing in advance in agreements with the supplier
- How to check wooden trim on a real uneven wall
- How to test the joint of a skirting board against the actual floor
- How to test the termination at a staircase, column, or portal
- How to test near an outlet and switch
- How to test near a radiator and utility outlets
- How to account for seasonal and in-service behavior of wood
- How to test the mounting fastener
- How to test the sequence of finishing works
- How to test the maintainability of an assembly
- How the test helps determine the operational reserve
- How to document a failed option so it is not revisited
- Is a small sample of skirting board enough before a large purchase?
- Do I need to do a separate test for each SKU?
- Can the area be assembled off-site?
- Can short offcuts be used instead of full-length planks?
- How much material should be ordered for the test?
- Do I need to do the final finishing on the test?
- What should I do if the customer approved the skirting board but not the cornice?
- Should the test section be kept until the end of construction?
- Who has the right to set the status to "approved"?
- Should the test be repeated if only the supplier changes?
- What should be done if the test looks good but installation takes too much time?
- Can the entire meterage be calculated right away from the test?
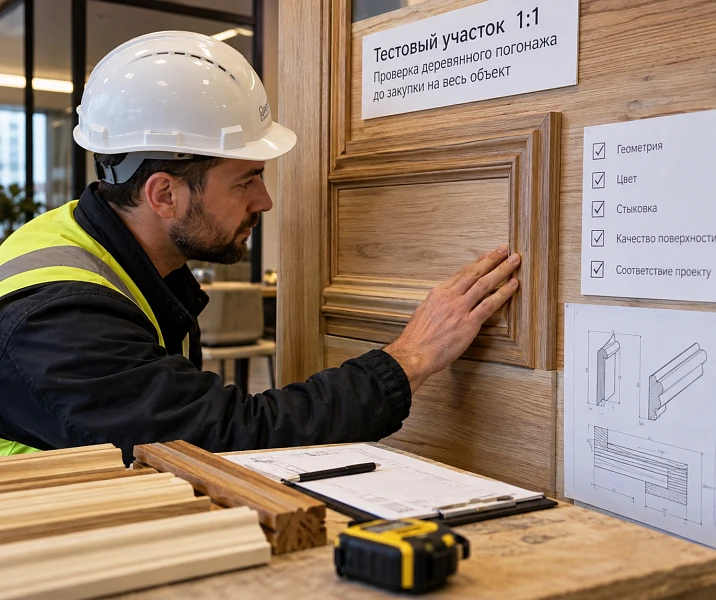
The project includes 480 m of wooden skirting board, 260 m of moulding, and 90 m of cornice. The profiles have already been selected from the catalogue, small physical samples have been viewed in person, the material and finish have been approved, and a commercial proposal has been received. Formally, everything is ready for order. But before paying for the full batch, the client asks to show not a separate piece of profile in hand, but a real full-scale fragment of the future interior.
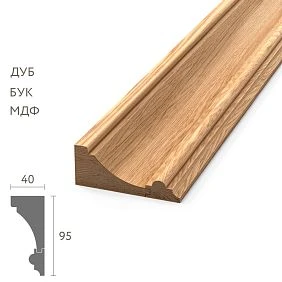
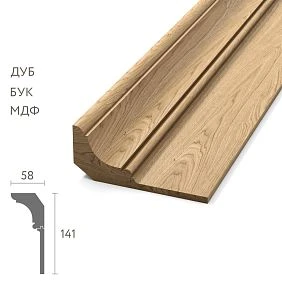
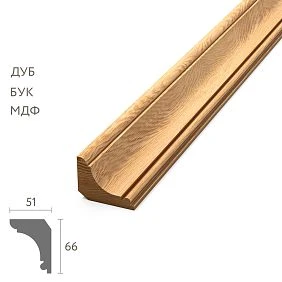
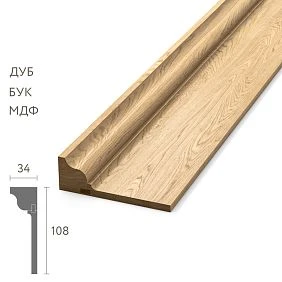
This is exactly where a separate stage of project verification begins. A small sample helps to understand the shape, texture, material, and surface quality. It does not show what will happen when a tall skirting board meets a door casing, the moulding forms a corner, the cornice ends up under a real ceiling, furniture comes right up to the wall, and light creates shadows that were not present in the visualization.
Before purchasing hundreds of meters, it is useful to assemble a 1:1 test section: a small but real fragment of the finish, made from the same types of products and with the same assemblies that will later be repeated on the site. This can be a section of wall with floor, skirting board, door casing, and moulding. Or a corner of a room with wall, ceiling, cornice, and vertical decorative profile. The purpose of the section is not to demonstrate a "beautiful sample," but to check whether the whole system works together.
When materials supplier is already determined, the test area does not replace supplier qualification and does not repeat product selection. It answers the following question: is the selected combination of products ready to be scaled to the entire project without hidden conflicts in geometry, installation, finishing, and adjacent materials?
CATALOG → SHORTLIST → SMALL SAMPLES → PROFILE SELECTION → TEST KIT → 1:1 INSTALLATION → NODE CHECK → COMMENTS → CORRECTION → APPROVED REFERENCE → SPECIFICATION → CALCULATION → WHOLESALE PURCHASE → FIRST BATCH INSPECTION
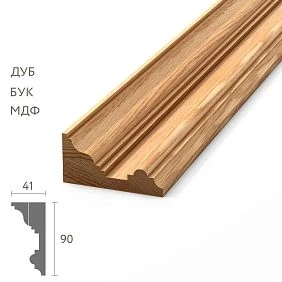
A small sample and an installation test are different checks
The main mistake is to think that a small profile sample has already answered all questions. In reality, it covers only part of the risks.
| Check | Small sample | 1:1 area |
|---|---|---|
| Profile shape | Yes | Yes |
| Wood texture | Yes | Yes |
| Real scale in the room | Partially | Yes |
| Joint with the casing | No | Yes |
| Junction with furniture | No | Yes |
| Internal and external corner | No | Yes |
| Shadow on the wall | Partially | Yes |
| Finish in real light | Partially | Yes |
| Installation | No | Yes |
| Transition between elements | No | Yes |
A small sample answers the question: “Do I like the profile itself, and does its real surface meet my expectations?” The test section answers: “Does this profile work in a specific architecture, with specific adjacent details and the chosen installation technology?”
These stages complement each other. There is no point in assembling a full-scale section from a profile that has not yet passed the basic selection by material, pattern, and shape. But it is also risky to order hundreds of meters just because a short sample felt good in the hand.




Why the 1:1 test begins after choosing the profile, not before it
The test section is not intended for comparing twenty models. Its value appears when the choice has already narrowed down to one specific system or a few final options. At this stage, the item codes, material, approximate finish, door and casing type, main furniture junctions, and architectural wall layout are known.
Then the test becomes not a design search, but a verification of the chosen solution before scaling it up. If, after 1:1 installation, it turns out that the profile is unsuitable, this does not mean the previous work was wasted. The small sample helped narrow the choice. The full-scale section found a problem that a small piece physically could not show.
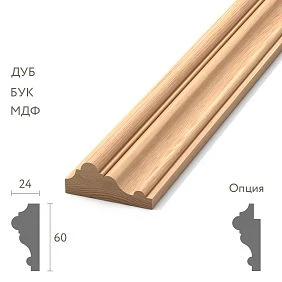
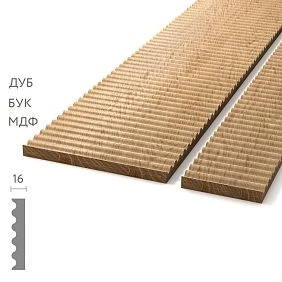
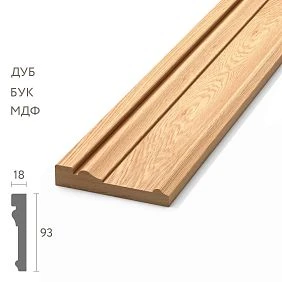
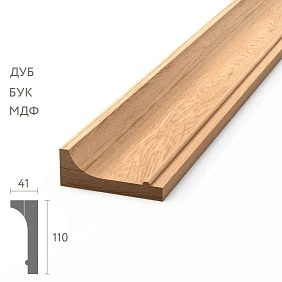
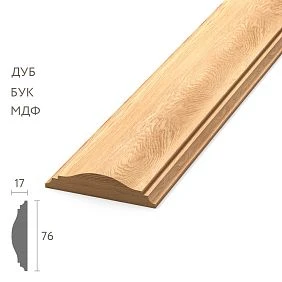
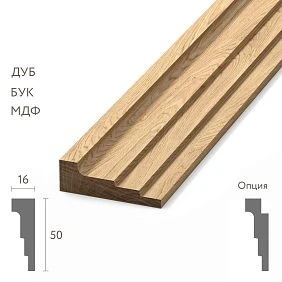
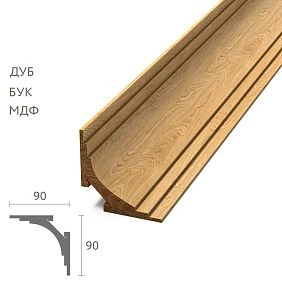
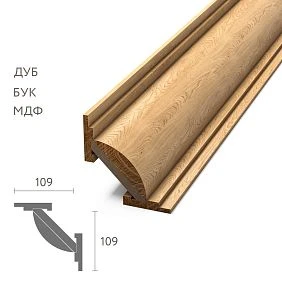
Our factory also produces:
Why spend time on a test if the supplier has already been chosen
Supplier qualification answers questions about the ability to manufacture the required product, consistently maintain quality, meet the specification, package, and deliver batches. A 1:1 test verifies a different object — the design assembly itself.
Even a perfect supplier cannot fix the situation if the skirting board is chosen too high relative to the door casing, the protrusion interferes with the furniture facade, the moulding visually overloads the frame, the cornice seems too massive at the actual height, and the corner looks bad due to the geometry of the combination.
There is no “bad supplier” here. There is an insufficiently verified design solution. The economics of the test are also clear: a few strips, one doorway, one corner, and part of a working day cost less than dismantling and repurchasing hundreds of meters after discovering a systemic error.
Get Consultation
When a test section is truly needed
There is no point in turning a 1:1 test into mandatory bureaucracy for buying two skirting board strips for one room. It is especially useful when the cost of an error scales.
- a hotel with dozens of identical rooms;
- a restaurant with prominent architectural trim;
- a large private house;
- a public interior;
- standard renovation of apartments or flats;
- premium property;
- project with non-standard junctions;
- interior where the profile intersects with built-in furniture;
- property with expensive wood finishes;
- a project in which a single junction will be repeated dozens of times.
The more repetitions, the higher the value of early error detection.
MANY REPETITIONS + EXPENSIVE MATERIAL + COMPLEX ADJOININGS + VISIBLE JOINTS + NON-STANDARD FINISH = HIGH VALUE OF THE 1:1 SECTION
How to choose a location for a test section
Testing the simplest linear meter of wall is a weak solution. Such a section only confirms that the profile can be attached to a flat surface.
It is better to choose the most information-rich junction: a place where several elements meet and where an expensive mistake is likely.
A good option for the lower zone: floor + wooden skirting board + wall + door casing + corner + furniture.
A good option for the upper zone: wall + wooden moulding + cornice + ceiling + light + junction with the wardrobe.
One such fragment can simultaneously test scale, protrusions, corners, terminations, finish and the installer's actual workmanship.
If a project has two fundamentally different junctions, one test may not be enough. For example, a standard hotel room and a lobby may use the same material but completely different architecture. In that case, it is wiser to make two reference samples than to consider one section universal.
Material suppliers: what to order for the test section
When already defined Material suppliers, a separate set is formed for the test, not the entire project volume.
| Position | Article | Material | Quantity for the test | Task |
|---|---|---|---|---|
| Baseboard | PLT-… | Oak | According to the test scheme | Straight line, corner, door joint |
| Molding | MLD-… | Oak | According to the test scheme | Frame and corner |
| Cornice | KZ-… | Oak | According to the test scheme | Ceiling joint |
| Casing | … | Oak | According to the test scheme | Junction with skirting board |
The quantity in the table is not a standard. It is determined by the length of the section and which joints actually need to be assembled. If an external corner is needed for evaluation, the material should be sufficient for a real external corner. If a frame needs to be understood, there should be pieces for the vertical, horizontal, and joint.
Why the test should be performed using the material that is planned to be purchased
Oak and beech profiles of identical geometry may be perceived differently after a clear finish. MDF and solid wood look different on the end faces and require different approaches to further processing. Even with identical geometry, the final impression and technology may differ.
Therefore, one should not approve a test in oak if a serial order is planned in beech, or assemble a section from MDF if solid wood with a clear finish is subsequently purchased. If a material substitution is unavoidable, it is necessary to record which properties the test confirmed and which remained open.
How to distinguish a geometric test from a finish test
| Check type | What confirms | What may remain open |
|---|---|---|
| Geometric test | Size, offset, junctions, angle, installation | Final color and gloss |
| Finish test | Shade, texture, gloss, reaction of the relief to light | Complex junctions if the profile is not installed |
| Full-scale 1:1 test | Geometry, installation, and finish together | Only the zones missing on the site |
On an expensive serial object, a full test is usually more useful because it allows you to see the mutual influence of factors.
Wooden skirting board: we check not only the height
On a separate sample, a high Wooden baseboard one can look expressive. On the wall, it immediately becomes clear how it interacts with the door, furniture, and floor.
- actual visual height;
- protrusion relative to the wall;
- top line of the profile;
- the joint with the door casing;
- inner corner;
- external corner;
- end of the profile;
- relationship to the furniture plinth;
- position relative to outlets;
- reaction to wall unevenness;
- visibility of seams after finishing.
For example, a designed baseboard 120 mm high may be beautiful on its own, but next to a casing with less visual mass it can create a heavy transition. This becomes obvious only at full scale.
Baseboard and casing: one of the most useful junctions to check
At the door opening, the horizontal and vertical elements meet. This is exactly where mismatched thicknesses, projection, the nature of the termination, and the logic of the transition are especially visible.
| Question | What to look for |
|---|---|
| Is the thickness the same? | Is there a step between the baseboard and the casing? |
| What stands out? | Is the change in planes intentional? |
| How does the baseboard end? | Is there a clean finish? |
| Do the profiles match in form? | Do the elements clash with each other? |
| What happens at the floor? | Is an awkward gap or cut being created? |
If the junction is bad, you don't always need to change the baseboard. Sometimes it's easier to change the door casing, the position, the thickness of the shim, or the finishing piece. A 1:1 test lets you compare options before placing a bulk order.
FLOOR → SKIRTING → END PIECE → CASING → DOOR LEAF
Why the right products can form a bad junction
The skirting can fully match the project. So can the casing. Both are made with quality and match in material. But together they create an awkward or visually weak transition.
So the cause is not a defect or the supplier. It lies at the level of the junction.
Such a case cannot be resolved with a claim to the supplier. The design junction needs to be changed: choose a different combination, clarify the thickness, change the placement, or create a special termination.
A full-size test helps distinguish a product defect, a specification error, an unsuccessful combination, an installation error, and a mismatch between expectations and the real scale.
Wooden moulding: testing the frame as a whole
One short wooden molding shows the cross-section and relief. It does not show the frame.
For the test, it is useful to assemble at least one real corner: vertical + horizontal + a 45° joint. Even better — a small completed frame or a significant part of it. Then you can see the real scale of the ornament, the width of the frame, the readability of the relief, the quality of the joint, the trimming requirements, the influence of the wall, the interaction with furniture, and the real shadows.
Why a single one-meter piece of molding can be misleading
A profile held in the hand is perceived as a separate object. A frame measuring roughly 1800 × 900 mm is perceived as an architectural form on the wall.
A thin molding can appear visually active if there are many frames and they are placed close together. A more substantial profile, on the contrary, can look calm on a large, tall wall.
The test should be performed on a real surface or one as close as possible in scale. If the future wall is five meters wide, a small 60 cm wide stand will not show the true perception of the composition.
How to check the corner of a molding frame
On the test fragment, it is worth evaluating not only the precision of the cut, but also how the profile pattern meets at the corner.
- how noticeable the seam is;
- whether the relief is easy to align;
- whether a visual step appears;
- how the finish emphasizes or hides the joint;
- how long does accurate fitting take;
- whether the team consistently reproduces the result.
If one corner requires overly complex manual adjustment, it is tolerable on two corners, but on hundreds of frames it becomes a production risk. The test should show not only the beauty of the first result, but also repeatability.
A wooden cornice needs to be checked at real height
wooden cornice, lying on a table, is perceived completely differently than at a height of three or four meters.
The test requires a real wall, ceiling or its exact imitation, actual height, working lighting, nearby furniture, curtains and niches, if they are part of the assembly.
The cornice creates a shadow under the ceiling. Its width and character depend on the geometry, light and projection of the profile. In a catalog photo, this effect cannot be transferred to a specific room without verification.
Cornice and floor-to-ceiling wardrobe — an obligatory conflict point
If built-in furniture comes close to the ceiling, the cornice may hit the side panel of the wardrobe, interfere with opening the facade, require a break in an unexpected place, or create a too-short visible section.
This conflict is better shown on a test or an exact furniture fragment than resolved on site after manufacturing a large batch.
| Check | What might be discovered |
|---|---|
| Facade opening | The cornice hits the cabinet door |
| Cabinet side panel | The profile requires an unexpected termination |
| A niche under the ceiling | Not enough space for the projection |
| Backlighting | An unwanted shadow appears |
The company's building materials: we check not the catalog, but the working result
Even if company building materials are presented in a good catalog with clear drawings, a specific interior must still confirm a specific combination.
The catalog answers the question "what products exist." The project answers "what products are selected." The 1:1 test answers "what will result after their actual joining."
This is especially important for wooden decor, where the result is influenced not only by dimensions, but also by texture, relief, light, hand fitting, and neighboring materials.
How to check the internal corner
The internal corner shows how confidently the profile joins in the real geometry of the room.
- whether the wall requires excessive fitting;
- whether the seam opens up;
- how the pattern aligns;
- how noticeable the transition is after finishing;
- whether the result can be repeated in series production.
It is important to use a wall with realistic geometry, rather than a perfectly aligned laboratory mock-up, if typical construction deviations are expected on site.
How to check the external corner
The external corner is visually more active than the internal one: the profile wraps around the protrusion and is visible from several directions.
- visual mass;
- joint precision;
- protection of the protruding edge;
- relief at the joint;
- how easily the corner is damaged when people or furniture pass by;
- whether consistent quality can be ensured across a production run.
INTERNAL CORNER → EXTERNAL CORNER → PROFILE END
The profile end is often more important than the straight section
Skirting, moulding, or cornice rarely run endlessly. They end near a door, furniture, staircase, column, window, or other trim.
The test needs to show the exact termination point. Otherwise, installers will decide it on site, and identical rooms may end up with different options.
- termination point;
- end face shape;
- whether a mating piece is needed;
- whether the profile will extend behind the furniture;
- what gap is acceptable;
- how the end face finish will be executed.
How to test wooden trim next to built-in furniture
The furniture junction tests what is not in the catalog or in a small sample.
- the front opens fully;
- the pull-out drawer does not catch on the profile;
- the skirting board does not conflict with the furniture plinth;
- the side panel of the cabinet does not rest against the cornice;
- the moulding does not fall under the furniture carcass;
- a clear transition between the architectural and furniture skirting board is designed;
- installation is possible in the correct sequence.
Sometimes the problem is not the size, but the order of work: furniture needs to be installed before the trim, or vice versa. A full-scale test allows you to find this out before mass installation.
We check the opening of doors, cabinets and drawers
A static photo does not show movement. On a 1:1 mock-up, you need to open the door leaf, cabinet front, pull-out drawer and access to the hidden service area several times, if it is nearby.
If the profile restricts movement by a few millimetres, the problem may not be noticeable during a visual inspection. In use, it will become permanent.
Lighting check is part of the test, not a decorative addition
Relief moulding works with light. A single profile looks calm under diffused daylight, but under side artificial light it creates deep shadows.
It is advisable to check daylight, the main evening scenario, side lighting, illumination next to the profile, and glare on the finish. If the interior will be used mainly in the evening, approving the finish only under daylight is not enough.
We check the finish on the same geometry, not on a separate sample board
A color sample is useful, but a relief profile is perceived differently: recesses are darker, raised areas catch glare, and corners create shadows.
Therefore, on the test area it is advisable to complete at least a representative fragment of the selected coating.
- shade;
- uniformity;
- gloss level;
- readability of the wood structure;
- visibility of joints;
- transitions at the ends;
- combination with the wall, floor, and furniture.
Building materials supplier: what should remain after test approval
After construction materials supplier provided the material for the test and the area was accepted, you cannot limit yourself to the phrase "the client liked it."
You need to save the test area code, photos, exact SKUs, material, dimensions, layout plan, key junctions, finish, approval date, responsible person, closed comments, and status.
This is how the test becomes a managed reference for procurement and installation.
Introducing the "approved reference" status
For example:
TU-01 / APPROVED / 12.09.2026
The code allows linking the specification, drawings, photos, and subsequent procurement to the test.
| Field | Example |
|---|---|
| Test code | TU-01 |
| Zone | Standard hotel room |
| Baseboard | PLT-… / oak |
| Molding | MLD-… / oak |
| Cornice | KZ-… / oak |
| Finish | F-02 |
| Status | Approved |
| Date | 12.09.2026 |
What cannot be changed after approval without re-verification
If the test became the basis for a mass purchase, the key parameters must be protected from unnoticed changes.
- article number;
- the material;
- profile size;
- cross-section geometry;
- main joining scheme;
- position relative to the door or furniture;
- key finish;
- visible corner joint technology.
Not every minor clarification requires a new full-scale test. But a change that could alter the visual or installation result must return the area to verification status.
Test area versions must be stored in the same way as specification versions
If the first option did not pass approval and the second was changed, the photos and notes must differ.
TU-01-R01 — rejected: skirting board too high
TU-01-R02 — under review: new skirting board
TU-01-R03 — approved
Then a month later, no one will take a photo of the old version and send it to the installers as the current reference.
Construction material supplier: how to transfer an approved test to procurement
After approval building materials supplier must receive not a verbal "keep it as on the mock-up," but an exact specification.
The procurement specialist works with the record:
TU-01 → P01 / PLT-… / oak / size … / finish F-02 / APPROVED
This is how the design result turns into a product line.
APPROVED AREA → EXACT SKUs → MATERIAL → SIZE → FINISH → QUANTITY → ORDER TO SUPPLIER
How to link the test area and the specification
| Code | Element | Article | Material | Reference | Status |
|---|---|---|---|---|---|
| P01 | Baseboard | PLT-… | Oak | TU-01 | Approved |
| M01 | Molding | MLD-… | Oak | TU-01 | Approved |
| K01 | Cornice | KZ-… | Oak | TU-02 | Under review |
The table immediately shows: skirting and molding can be included in the calculation of the full batch, cornice cannot yet.
Why you cannot buy everything if one test element is not yet approved
On one hand, it is unreasonable to block the entire project because of one open cornice. On the other, it is dangerous to include the cornice in a mass order just because the other elements have already been approved.
APPROVED → can be calculated and ordered.
UNDER REVIEW → do not launch the full volume.
This allows procurement to proceed with the ready parts and not mix them with open decisions.
Construction material suppliers: we fix only what is actually approved
If the working semantics use the query construction materials suppliers, the meaning of this section remains technical: only the current version is passed to the supplier.
If the test section is still changing, an intermediate scheme cannot be sent as final just for the sake of an early calculation of the full batch. A preliminary calculation is acceptable, but it must be clearly marked as preliminary.
What to do if the test section did not pass approval
A failed test is a useful result, not a loss. It detected a problem before mass ordering.
- record the specific comment;
- understand the cause;
- determine which element needs to be changed;
- select a new version;
- update only the affected part;
- repeat the check;
- after deciding to assign the status "approved".
There is no need to dismantle the entire stand if the problem is only with the cornice. The other approved elements can be kept as the basis for the next version.
How to write comments without the phrase "something doesn't look right"
| Weak comment | Useful comment |
|---|---|
| Baseboard is heavy | The top line of the baseboard is too close to the bottom point of the architrave; check a lower height |
| Molding is too prominent | On the 1800 × 900 mm frame, the profile visually reduces the inner field; check a narrower cross-section |
| Cornice is strange | The cornice projection conflicts with the cabinet side panel and creates an awkward termination |
| The color is wrong | Under evening side light, the finish looks noticeably darker than the furniture sample; check a new color sample |
This is how the designer, buyer, and supplier understand the same task.
Can only one element be changed?
Yes. If the baseboard and molding have passed inspection but the cornice has not, there is no need to reselect the entire trim package.
A new version of the test is created, in which the baseboard and molding remain unchanged, the cornice receives a new article number or geometry, and only the junctions affected by the cornice change are checked.
This keeps the process manageable and prevents it from turning into an endless repetition of all decisions.
How to check the finish on a test fragment
If the products will be painted, stained, or coated with oil or lacquer, a 1:1 area is especially useful.
- shade over a large area;
- difference between flat surface and relief;
- gloss;
- depth of shadows;
- visibility of joints;
- relationship with the wall;
- relationship with the floor;
- relationship with the door and furniture.
If the finish is applied after installation, the test should replicate the actual sequence of work as closely as is critical for the result.
Why a photograph of the approved area does not replace a physical reference sample
A photo is necessary for the project history. But it distorts scale, color, light, and perspective.
Therefore, it is better to preserve the geometry through the product code, size, drawing, specification, dimension diagram, and a physical sample if necessary.
A photograph answers the question “what did it look like.” A specification answers “what was it made of and how was it made.”
What to do with the physical reference after approval
On a large project, it is useful to keep at least the key test elements or signed samples. For example:
TU-01 / P01 / PLT-… / oak / F-02 / approved
This helps when comparing the first production batch and in a dispute over the finish. It is not necessary to keep the entire installed fragment if it interferes with construction. But the project must decide in advance what physical information remains available.
Who should approve the test area
There is no universal list of signatories. Depending on the project, these may be the client, designer, architect, procurement specialist, technical specialist, or project manager.
The main thing is to determine in advance who has the right to assign the final status. Otherwise, one team considers the area approved after the designer’s comment, while the other waits for the client’s decision. Purchasing gets stuck between two understandings.
How to record approval without unnecessary bureaucracy
| Field | Content |
|---|---|
| Code | TU-01 |
| Version | R03 |
| SKUs | PLT-… / MLD-… / KZ-… |
| Material | Oak |
| Finish | F-02 |
| Comments | Closed |
| Status | Approved |
| Date | 12.09.2026 |
| Approved | Responsible person |
The purpose of the card is not a formality, but an unambiguous handover of the result to the purchaser and installers.
When a test can be considered complete
Not when the profile has simply been fixed to the wall. The profile and material, scale, junction to the door, junction to furniture, internal and external corners, termination, installation technology, finish, lighting, comments, and final status must all be checked.
If half of the critical junctions are missing, the section cannot be considered confirmation of the entire system.
How to verify installation repeatability
One craftsman can perfectly assemble one corner in two hours of manual adjustment. But if there are 200 identical corners on the site, reproducibility matters.
- how much time the junction took;
- whether a special template is needed;
- which tool is used;
- what errors appeared on the first attempt;
- whether another installer can reproduce the result;
- what quality control is needed on a series.
A 1:1 test checks not only aesthetics but also the manufacturability of the design solution.
How to use the test to estimate labor intensity
If the test reveals that one frame corner requires additional fitting, this affects the installation budget and schedule. There is no need to turn one section into an exact estimate for the entire project, but it provides real data.
| Operation | What can be assessed |
|---|---|
| Cutting | How consistently the desired angle is achieved |
| Fitting | Whether additional manual work is required |
| Mounting | Whether there are issues with the base |
| Joint finish | How noticeable the joint is |
| Markup | Whether templates are needed |
If the labor intensity turns out to be too high, this is another argument for changing the assembly before mass purchasing.
How the test helps clarify the actual quantity
Before the test, the quantity is often calculated based on the clean lines of the drawing. After real installation, new data emerges:
- how the angles are made;
- which lengths are rational to use;
- what remainder is left after trimming;
- how much material goes into test pieces;
- whether an additional reserve is needed for complex assemblies;
- whether the leftovers can be used in other places.
A test section does not replace a full cutting plan, but it makes the calculation more realistic.
Why you cannot transfer the quantity from the test directly to the entire project
If two planks were needed on a three-meter section, you cannot simply multiply two planks by the number of rooms.
You need to return to the full schedule and calculate all lengths, angles, breaks, standard modules, cutting, allowance, and reserve.
The test confirms the decision, but the quantity for the project is determined by the design.
Why the first production batch should be checked separately
After the reference sample is approved and the full order is placed, it is useful to stay in control. The first production batch is compared with the test:
- whether it is the same item code;
- whether the material is correct;
- does the geometry match;
- whether it is the same finish;
- whether the visible surface characteristics match within acceptable limits;
- whether the approved assembly can be reproduced.
This way, the test becomes a real procurement reference rather than disappearing after approval.
What to do if the first production batch differs from the test
There is no need to install it right away with the argument that it is “almost the same.”
- determine which parameter differs;
- determine whether this is acceptable material variation;
- assess whether the difference changes the approved assembly;
- if necessary, obtain re-approval;
- suspend the batch release if the difference is critical.
Particular attention is paid to geometry and item codes: this is not decorative variation but part of the specification.
When a 1:1 test can be simplified
A full-scale mock-up is not always necessary. Verification can be simplified if the object is small, a standard assembly without complex junctions is used, the profile has already been used many times in an identical configuration, there is no expensive transparent finish, and an error can be easily corrected without large-scale consequences.
But even then, it is useful to check at least the riskiest assembly: for example, the skirting board with the architrave.
When a test area is worth doing even without a separate requirement in the contract
If the object contains expensive material and hundreds of repeating elements, the cost of an error becomes obvious.
The test is especially useful when a profile new to the team, a non-standard junction, a complex finish, a large volume, a tight schedule, expensive dismantling, or several contractors at one node are present at the same time.
This is not a legal obligation, but a risk management tool.
What should go into the final specification after approval
| Field | Example |
|---|---|
| Code | P01 |
| Product | Baseboard |
| Article number | PLT-… |
| Material | Oak |
| Size | according to the product card |
| Finish | F-02 |
| Reference | TU-01-R03 |
| Zone | Standard numbers |
| Status | Approved |
After this, the buyer no longer selects the product. They implement the approved solution.
Why the reference sample needs to be linked to the drawing
The physical section shows the result, but the drawing explains the geometry.
TU-01-R03 → drawing D-21 → specification R07
This link makes it possible to quickly understand which document corresponds to the reference sample seen. Without it, after a few months the test photo may refer to one version, while the working drawing already refers to another.
How to hand over the reference sample to the installation crew
Installers don't need all the negotiations, just a short set:
- current scheme;
- reference code;
- article numbers;
- key dimensions;
- photo of the approved appearance;
- templates;
- rules for corners and endings;
- list of prohibited unauthorized changes.
If a joint cannot be executed exactly as in the reference due to the actual wall, the crew must record the deviation and get a decision, not improvise.
Construction must not turn the reference into an unattainable museum piece
There is the opposite danger: the test is assembled under ideal conditions with endless manual fitting, and then they demand it be repeated on 200 doors within a normal installation timeframe.
A good reference must be visually correct, technically feasible, repeatable, consistent with real substrates, and reasonable in labor costs.
Otherwise, the test confirms not the project, but the unique work of a single craftsman.
How to verify scaling across multiple rooms
After approving one room, it is useful to go through other types of rooms and ask: are the doors, furniture, height, corners, ceiling, and finish the same?
If the conditions differ, a single reference cannot be automatically assigned to all rooms.
How to work with multiple references
| Code | Zone type | What it checks |
|---|---|---|
| TU-01 | standard room | Baseboard + door casing + molding |
| TU-02 | Lobby | Large cornice + molding + furniture |
| TS-03 | Restaurant | Different finish and external corner |
There is no need to multiply tests without reason. Each reference should cover a genuinely different typical detail.
How does the buyer understand that the full volume can be paid for
Approved Wooden trim must be recorded by article numbers and materials, not by the description "the profile that was on the stand."
This is especially important if the catalog contains similar cross-sections.
What to do if the approved article becomes unavailable before the full purchase
It cannot be silently replaced with the closest equivalent. The new profile may have a different width, projection, texture, material, finish, or commercial length.
If the difference affects the approved assembly, the test is returned for review at least in the affected part.
How the test area helps when changing suppliers
If the company changes for commercial or production reasons, the approved reference becomes a useful point of comparison.
The new supplier receives the exact geometry, surface sample, assembly diagram, finish, photographs, and critical junctions.
At the same time, changing the company does not mean that any similar profile is automatically equivalent. If the geometry changes, the solution is rechecked.
How to avoid a test that checks nothing
A weak test often looks nice but contains no risk.
- only a straight wall;
- no doorway;
- no corner;
- no furniture;
- the cornice is positioned too low;
- temporary light was used that does not resemble the future one;
- profiles are attached in a simplified way;
- the finish was done with the wrong material.
Such a mock-up confirms the appearance of individual parts, but does not reduce the main risk.
How to formulate the test goal before starting work
Before assembly, it is useful to write down specific questions.
- Is the baseboard next to the door casing too high?
- Do the baseboard and door casing projections match?
- Can the baseboard be finished neatly at the cabinet?
- Does the molding corner assemble consistently?
- Does the molding interfere with the door handle?
- How does the cornice look at the actual height?
- Does the curtain rod conflict with the wardrobe?
- Does the selected finish look right in evening light?
After installation, the test is considered useful if these questions have clear answers.
How to keep a list of issues for the test area
If issues remain in voice messages and comments on photos, after a few days the team starts arguing about what exactly needed to be changed. It is more convenient to keep a short log.
| № | Node | Remark | Solution | Status |
|---|---|---|---|---|
| 1 | Baseboard/casing | Thickness difference is too large | Check another casing | OPEN |
| 2 | Molding | The angle is difficult to repeat | Make a cutting template | Under review |
| 3 | Cornice/cabinet | Conflict with the facade | Shift the ending | CLOSED |
Such a table turns emotional alignment into a workflow: problem → action → re-check → closure.
How to distinguish critical and non-critical comments
Not every comment should block the purchase.
Critical comments affect the order itself or the possibility of installation: the profile interferes with the door, the assembly cannot be repeated in series, the geometry does not match the project, the finish is fundamentally not accepted, a different SKU or material is needed.
Non-critical comments may concern the organization of work: clarify the marking, add a template, change the installation sequence, clarify local touch-up.
This way the purchaser understands which line should really remain “under review” and which is already technically ready for order.
How a test section affects the purchasing schedule
Testing takes time, so it must be included in the schedule in advance. The worst-case scenario is to start the check at the moment when the full batch already needs to be sent to production.
PROFILE SELECTION → TEST KIT ORDER → INSTALLATION → APPROVAL → ADJUSTMENT → SIGN-OFF → FULL VOLUME CALCULATION → MAIN BATCH ORDER
If the test is planned as a separate stage, it is not perceived as an unexpected delay. On the contrary, it allows problems to be identified earlier that, after production launch, would halt the project at a more expensive stage.
How a test helps avoid premature payment for a large volume
A commercial proposal may be ready before the technical solution. This is normal. But paying for the full batch before critical comments are closed creates a dependency: the project is already financially tied to a profile that may still change.
For a complex project, it is reasonable to separate:
- cost of the test kit;
- commercial proposal for the full volume;
- technical approval;
- permission for mass order.
So commercial work does not stop, but the final launch remains tied to the approved result.
How to provide for a test in the agreement with the supplier in advance
On a large project, it is useful even at the negotiation stage to state that the full volume is launched after a 1:1 site check.
Then both parties understand:
- first a small set is needed;
- its item codes must correspond to the planned series;
- after the test, adjustments are possible;
- the full order will appear only after approval;
- a preliminary estimate is not the same as the final order.
This reduces the risk that the supplier produces excess volume in advance according to a configuration that has not yet been approved.
How to test different wood species when the choice is not yet final
Sometimes the geometry is already defined, but the choice between oak and beech remains.
In this case, the testing can be split:
- test the geometry on one material;
- separately make sufficiently large finish samples on two species;
- compare under the same lighting;
- after choosing the material, if necessary, confirm the final combination.
It is important not to pass off a geometric test of one material as full approval of another, especially with transparent or tinted finishes.
How to test wooden trim on a real uneven wall
A perfect mock-up shows a perfect installation. A real site may have construction deviations.
If the trim is installed on existing walls, it is better to test on a typical substrate or at least simulate a realistic deviation.
- how closely the profile follows the wall;
- where gaps appear;
- how much substrate preparation is required;
- whether gaps are visible after finishing;
- whether the installation technology needs to be changed.
If the profile requires a perfectly flat wall for a beautiful result, this must be identified and included in the substrate preparation requirements before serial installation.
How to test the skirting board junction with the actual floor
It is advisable to evaluate the skirting board with the flooring that will be on site, or with the closest possible sample.
They check the visual transition, the bottom gap, the height relative to the floor pattern, the color contrast, the behavior in the inner corner, and the junction at the threshold.
If the test is performed on bare plywood or a rough substrate, some questions remain open. For example, a skirting board may look great on a light substrate and too contrasting on dark stone or parquet.
How to test termination at a staircase, column, or portal
On a complex object, the profile may end not at a door, but at a column, step, fireplace portal, or another architectural element.
Such a junction should be included in the test if it repeats or is in a prominent place.
- how the profile breaks off;
- whether a return is needed;
- how the end looks;
- whether a strange step occurs;
- whether the junction can be produced serially;
- how to repair it later.
How to test next to a socket and switch
A tall skirting board or wall moulding may come too close to an electrical installation product.
The test checks the free space around the frame, the ability to remove the decorative socket cover, visual symmetry, and the repeatability of the solution in other rooms.
If a conflict occurs on a standard hotel room number, it will be repeated dozens of times. This is a good example of an error that is cheaper to catch in a single area.
How to test next to a radiator and utility outlets
The lower wall zone may include pipes, grilles, floor convectors, and other elements.
The test helps decide where the skirting board ends, whether it can pass under the appliance, whether a different height is needed, how the break looks, and whether the profile interferes with maintenance.
Even if a utility assembly occurs in only one room, it may require a separate part that is better to provide for before the full purchase.
How to account for the seasonal and operational behavior of wood
A 1:1 test cannot predict all seasonal changes in natural wood within a few days. It checks geometry and technology under current conditions.
Even after approval, it is still necessary to follow the manufacturer's recommendations, storage conditions, acclimatization, proper installation, and the operational regime of the room.
A reference sample does not override the properties of the material. Its purpose is to verify the design assembly, not to prove that wood will never change.
How to test the mounting fixture
The appearance may be perfect, but the fastening method is too complex for series production.
- whether the base fits;
- whether the fastening can be repeated without damaging the face surface;
- where the fixing points are located;
- whether the fasteners need to be concealed;
- how minor wall deviations are compensated;
- whether the fastening conflicts with the finish.
The specific technology is determined by the product and the project; the test confirms its performance on a real substrate.
How to test the sequence of finishing operations
The question of "when to install the trim" affects the quality of the result.
During testing, it is useful to check whether the profile is installed before or after the final painting of the wall, when the door is installed, when the furniture arrives, at what point the finish is applied to the wood, how the finished profile is protected, and when local touch-ups are performed.
If the correct sequence is not defined, different rooms may be done differently even with the same specification.
How to test the maintainability of the assembly
For a hotel or public space, it is useful to think not only about the initial installation but also about local repair.
- whether a damaged plank can be replaced without dismantling the furniture;
- whether there is access to the fastening;
- whether the finish can be replicated;
- whether a clear product code will remain;
- whether an operational reserve is needed.
A good joint should not only be beautiful but also serviceable if the object is intended for intensive use.
How a test helps determine the operational reserve
After the actual cutting, it becomes clearer which elements are especially sensitive to damage and which lengths are difficult to replace from random offcuts.
This helps determine which reserve is actually useful: whole strips, short pieces for local areas, a finish sample, a labeled piece of profile.
The reserve percentage should not be automatically copied from someone else's project; it depends on the specific scheme and operation.
How to document a failed option so that no one returns to it
It is also useful to briefly keep rejected solutions.
TU-01-R01 / PLT-A / rejected — conflict with the casing in height
In two months, a new team member will not propose the same profile as a "new idea" without understanding the reason for rejection.
How to check the approved area before closing
| Check | Yes / no |
|---|---|
| Article numbers recorded | … |
| Material matches future purchase | … |
| Door unit checked | … |
| Corner checked | … |
| Ending checked | … |
| Furniture checked | … |
| Lighting checked | … |
| Finish approved | … |
| Installation repeat | … |
| Remarks closed | … |
| Version locked | … |
15 mistakes when checking wooden trim
- Checking only one linear meter of wall. Such a test does not show real joints.
- Not making a corner. The most difficult fitting remains untested.
- Not installing the casing. The skirting board seems successful until it meets the door unit.
- Checking the cornice on the floor. The real scale and the shadow under the ceiling are lost.
- Using a different material. The geometry may be confirmed, but the final surface is not.
- Not recording the product code. The approved section cannot be repeated in the purchase.
- Losing the finish sample. The first batch is compared only by photograph.
- Approving only by photograph. A photo does not convey the exact scale and color.
- Not checking the furniture. The conflict is discovered after the cabinets are installed.
- Do not check the door. The skirting and casing meet in a random way.
- Do not check the light. Texture and color change under real lighting conditions.
- Change the profile after approval without re-checking. The reference no longer matches the purchase.
- Order the entire volume immediately before closing the comments. The error scales up.
- Do not keep the test version. Photos of different variants end up on the site.
- Give the buyer a verbal “all is fine.” The commercial order remains ambiguous.
Final algorithm: from sample to wholesale purchase
- Select a short list of profiles.
- Obtain and compare small physical samples.
- Lock in the final candidate SKUs.
- Determine the material and preliminary finish.
- Choose the most information-rich node.
- Make a list of questions for the test.
- Order a material kit for the 1:1 area.
- Prepare a real or as close as possible base.
- Install the skirting board, casing, molding, cornice, and other required elements.
- Check the inner corner.
- Check the outer corner.
- Check the end of the profile.
- Check the junction to the door.
- Check built-in furniture.
- Check the opening of the fronts.
- Check the light.
- Perform a representative finish.
- Record the remarks.
- Fix only the affected elements.
- Repeat the check.
- Assign the final version a code and the status “approved”.
- Link the reference sample to the specification and drawing.
- Recalculate the full object volume.
- Separate approved and open items.
- Provide the buyer with exact SKUs and materials.
- Place the main order.
- Compare the first production batch with the approved reference sample.
- Provide installers with the current version and templates.
Frequently asked questions about the 1:1 mock-up area
Is a small skirting board sample enough before a large purchase?
For choosing the shape, material, and texture — often yes. For checking how it fits with the door, furniture, corners, and actual height — no. This requires an installed fragment.
Do you need to make a separate test for each SKU?
Not necessarily. One area can test several products at once if they actually meet in the same assembly. A separate test is needed when the area differs fundamentally in architecture or finish.
Can the area be assembled off-site?
It is possible if the mock-up accurately reproduces the dimensions, height, base, and adjacent elements. But the more the actual result depends on the specific wall, furniture, and light, the more valuable an on-site check becomes.
Can short offcuts be used instead of full-length planks?
For assessing the profile, yes. For checking a long run, straightness, joints, and the actual cutting layout, no. The sample set must match the question being tested.
How much material should be ordered for a test?
There is no universal quantity. You need enough to assemble all critical connections without artificial simplification: the straight run, corner, door junction, frame, or ceiling detail that matter specifically for the project.
Should the final finish be applied on the test piece?
If color, sheen, and texture are critical to the decision, it is advisable to apply a representative finish. If the test is purely geometric, the finish can be moved to a separate stage.
What should be done if the client has approved the baseboard but not the cornice?
Separate the statuses. The approved baseboard can proceed to calculation and purchasing if it does not depend on the open cornice. The cornice remains under review.
Should the test section be kept until the end of construction?
It is not necessary to keep the entire stand. But the article numbers, diagram, photographs, version, finish, and, if necessary, physical samples that allow the approved standard to be restored must remain.
Who has the right to set the status to “approved”?
This is determined by the project. The main thing is to appoint a responsible person or group in advance and not treat a random comment in chat as final approval for purchase.
Does the test need to be repeated if only the supplier changes?
If the article number, geometry, material, and finish really remain the same and the new supplier is able to reproduce the approved solution, a full test may not be required. But if the profile or execution changes, the affected assemblies need to be rechecked.
What should be done if the test looks good but installation takes too much time?
This is an important negative result. Either the assembly needs to be simplified, or a template and a new technology need to be provided, or the labor intensity needs to be accepted in the budget. The problem cannot be ignored until mass installation.
Can the entire meterage be calculated immediately from the test?
No. The test provides data on cutting and assemblies, but the full volume is calculated from the project specification of all rooms, lengths, angles, repeating modules, allowance, and reserve.
Conclusion: one real assembly can save hundreds of meters of material
The main value of a 1:1 mock-up is not that the client gets a beautiful demonstration wall. It gives them a cheap point of failure.
If a tall skirting board meets the door casing poorly, it is better to see this on two planks rather than after purchasing 480 meters. If a molding is too bold in a large frame, it is better to change it on one fragment rather than in twenty units. If a cornice conflicts with a cabinet, it is cheaper to change the ending before mass production.
A small physical sample and a full-scale test do not compete. The first helps choose a profile. The second verifies that the chosen profile actually works in the interior system.
Once the reference standard is approved, procurement gets a precise basis: SKU, material, size, finish, assembly, drawing, and status. This reduces ambiguity and separates the technical decision from the subjective memory of project participants.
That is why, before a large purchase of wooden trim, it is useful to go through the chain: catalog → samples → 1:1 test → approval → specification → calculation → order. This process does not complicate procurement; it moves expensive mistakes to the point where correction is still inexpensive.