Article Contents:
- Why a molding between wallpaper and a painted wall
- A dividing line, not a patch
- Horizontal, vertical and frame transitions
- When a molding is not needed at all
- Polystyrene: different products under one name
- Polyurethane: relief and additional elements
- What affects reliability more than the name of the polymer
- Slim profile MLDPU-001
- MLDPU-004 — the intermediate option
- MLDPU-002 and central stucco molding
- Straight horizontal band
- Vertical border of accent wallpaper
- Wallpaper field within a polyurethane composition
- Why gluing over wallpaper is risky
- If the wallpaper has not yet been applied
- If the wallpaper has already been applied
- Where the edge of the wallpaper should end up
- Horizontal border 4800 mm long
- When the total length is sufficient, yet three strips are still not enough
- What decorative end caps change
- How to cover the joint between wallpaper and a painted wall?
- Polystyrene or polyurethane: which is better for a simple border?
- Can molding be glued directly onto wallpaper?
- How to design a vertical wallpaper border?
- Which profile width is suitable for a small room?
- Can decorative stucco overlays be added to the divider?
- Does polyurethane molding need to be painted separately?
- How many strips are needed for a 4.8 m wall?
- What should be done the next time the wallpaper is re-pasted?
- Where to choose polyurethane stucco molding for a renovation like this?
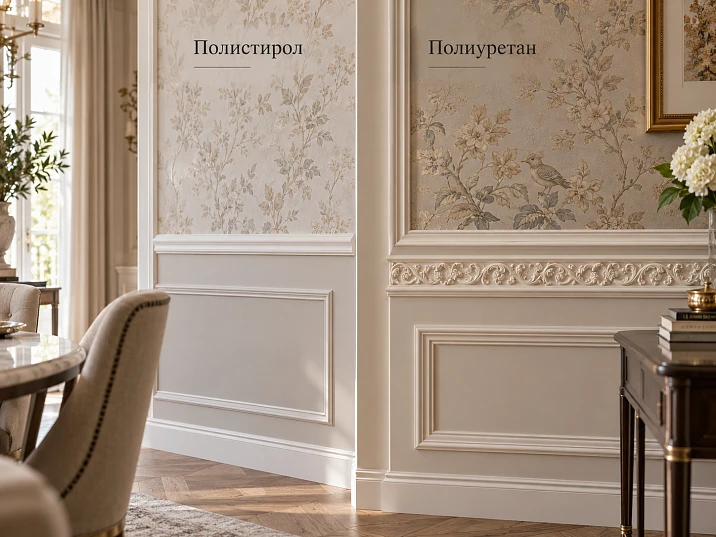
Two finishing fields are already marked out on the wall: matte paint below, patterned wallpaper above. For now, only a thin line separates the materials, and the result may look unfinished. Simply running a straight molding along it is enough, and the boundary becomes part of the room's design. But there is a condition that photos of finished interiors usually do not show: the molding must be held on a reliable base, not on the edge of the wallpaper, which could peel off along with it.
A quality polystyrene profile is suitable for simple separation if its cross-section, coating and mounting method meet the renovation conditions. Polyurethane makes sense to choose when a specific relief, a more prominent architectural line, or a continuation of the composition with decorative ends and overlays is needed. STAVROS offers such solutions, but buying a more expensive profile by itself will not fix crooked marking or a weak wall.
Let's look at what matters more when choosing a material, how to arrange the joint itself, how many strips will be needed, and in which cases it is better to avoid stucco molding. This is specifically about the boundary between wallpaper and a painted surface, not about arbitrary wall frames or masking any renovation defects.


Why a molding between wallpaper and a painted wall




A dividing line, not a patch
Wallpaper and paint reflect light differently. Wallpaper may have embossing, a repeating pattern or a slight sheen; a painted surface is usually perceived as calmer. Even if the colors match, the boundary between the two materials sometimes seems accidental: the eye notices the difference in textures but does not see the reason why it runs exactly here.
The molding primarily solves a visual task. Its protruding cross-section creates a shadow and emphasizes the boundary that the designer planned in advance. The effect is especially noticeable on a long horizontal line: the color fields stop looking like two independently completed renovations.
At the same time, a decorative profile can cover neatly prepared coating edges, but it does not replace repairing peeling wallpaper, crumbly putty, or cracked paint. If a weak layer remains behind the molding, the entire structure will depend on it.
Our factory also produces:




Horizontal, vertical, and frame transitions
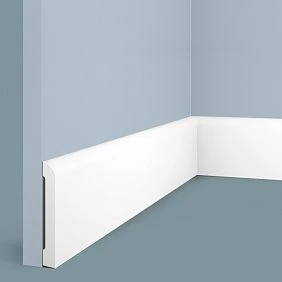
A horizontal divider usually runs across the entire wall or part of the room. For example, a painted field is done below and wallpaper above. Here, the accuracy of the overall height becomes the main thing: a difference of even a few millimeters between adjacent walls can be noticeable near a doorway, baseboard, or furniture line.
A vertical border is more often found on an accent wall: wallpaper occupies the central strip, while paint remains on the sides. If the molding is installed along the edges of the strip, it defines its width. Therefore, the position of the profile is checked not only with a spirit level but also relative to visible objects — the headboard of a bed, a sofa, a door frame.
The third scenario is more complex: wallpaper becomes a decorative field inside a frame, while the rest of the wall is painted. In this case, the divider profile works together with other moldings and, if necessary, with relief details. For such a composition, you can choose Moldings made of polyurethane with a suitable cross-section, but the coating junction scheme still needs to be developed before installation.
Get Consultation
When molding is not needed at all
If the wallpaper meets the paint perfectly, the border runs in an inconspicuous place, and the interior is built on clean planes, an additional strip can only overload the wall. Another case is pronounced wallpaper texture and a profile that is too narrow: it will end up tilted, fit unevenly, or create a gap that will have to be filled with sealant.
You should not try to cover a constantly opening crack between moving substrates with molding. First, determine the cause of the movement and select the appropriate finishing assembly. Decorative stucco is not a expansion joint.
How polystyrene and polyurethane moldings differ
Polystyrene: different products under one name
The phrase "polystyrene molding" brings together products that differ noticeably. There are lightweight foamed profiles intended for simple finishing, and dense decorative products with a more durable surface. You cannot assess the properties of dense high-impact polystyrene based on the impression made by a soft foam skirting board.
For a long, straight divider, the cost of the specific product may be polystyrene's advantage. If you need one simple profile without ornamentation or additional details, there is no need to pay extra just for the name of another polymer. But it is worth inspecting a sample: how the edge looks, how accurately the cross-section is maintained, whether there is any damage, and whether the recommended adhesive is suitable for the material and the wall.
Painting polystyrene requires a compatible formulation. Some solvents can damage certain polystyrene products, so a universal recommendation of "any adhesive and any enamel" cannot be given here.
Polyurethane: relief and additional elements
Polyurethane products also differ in formulation and geometry. For combined finishing, what matters is not the abstract claim that polyurethane is better, but the availability of specific shapes: thin glazing beads, stepped moldings, shaped ends, and central overlays.
At STAVROS Polyurethane moldings is offered in both linear and ornamental products. A straight profile allows you to create a neat boundary between finishes. Coordinated decorative elements help to design the point where the line ends, make the transition to vertical division work, or create a separate wall panel.
This expanded range of options justifies choosing polyurethane primarily in a complex composition. If the task comes down to a single inconspicuous divider, you need to compare the cost and quality of specific samples of both materials.
What affects reliability more than the name of the polymer
What matters is the contact area of the back side with the wall, the strength of the base, the position of the decorative protrusion, and the compatibility of the finishing materials. For example, two profiles of the same length can hold completely differently if one is glued to sturdy primed filler and the other to thin vinyl wallpaper film.
There is also a difference between a molding's resistance to contact and the resistance of its paint. Scuffing may appear on the painted surface without damaging the profile itself. Therefore, promising a specific service life based solely on the word "polyurethane" or "polystyrene" is incorrect.
Polystyrene or polyurethane for the joint between wallpaper and paint: a comparison
| Selection criterion | Polystyrene profile | Polyurethane profile |
|---|---|---|
| Simple straight divider | Suitable with the right cross-section and compatible installation | Suitable; you can choose a thin decorative line |
| Initial cost | Simple products are often cheaper | Molded products and decor may cost more |
| Small and intricate relief | Depends on technology and product range | The STAVROS catalog features profiles and relief details |
| End decorative elements | You need to look for compatible products of a specific brand | There are factory combinations of moldings and end caps |
| Painting | Only with compatible finishes | A compatible painting system is also required |
| Behavior under accidental impact | Depends on type and density | Depends on the formulation and cross-section |
| Fastening at the wallpaper edge | A sturdy base and suitable adhesive are required | The same requirements |
| Subsequent wallpaper change | Determined by the junction scheme, not just the material | Determined by the junction scheme, not just the material |
For a simple horizontal line, the winning factor is not the material but a suitable profile with properly prepared fastening. If the transition must include ornamental endings, straight and vertical elements in a single design, the STAVROS polyurethane system offers more specific selection options.
Which STAVROS moldings and decorative elements are suitable for a transition
For the border between wallpaper and paint, the widest profile in the catalog is not required. Usually the choice is determined by the scale of the field and the role of the line: to softly separate the coverings or to become a noticeable architectural band.
| STAVROS product | Size, mm | Role in finishing |
|---|---|---|
| MLDPU-001 | 10 × 6 × 2600 | Fine geometric line |
| MLDPU-004 | 15 × 8 × 2600 | More legible relief on a long border |
| MLDPU-002 | 22 × 11 × 2600 | Expressive profile for architectural separation |
| NPU-438.1R | 46 × 16 × 9 | Right-hand decorative element for MLDPU-001 |
| NPU-437.1R | 74 × 26 × 12 | Right-hand decorative element for MLDPU-004 |
| MLDPU-2-2.1 | 235 × 237 × 21 | Ornamental detail for the MLDPU-002 system |
Dimensions are given in the order used in manufacturer product cards. For moldings, these are width, projection, and strip length; for overlays, the overall dimensions of the part. The overlays in the table are not interchangeable end pieces for all three profiles.
Slim profile MLDPU-001
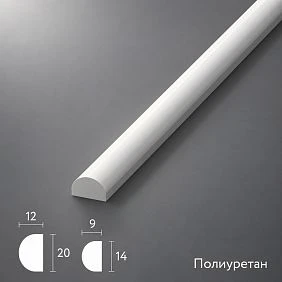
If the wallpaper has a prominent pattern and the painted surface is fairly subdued, a large relief line may compete with the finish. For such a case, the following is suitable thin molding MLDPU-001 10 mm wide with a 6 mm projection.
It traces a boundary without forming a wide band. But the small width requires careful execution of the joint: if the wallpaper edge is uneven and extends far beyond the future profile, it will not be possible to hide it without preparation. It is precisely the slim molding that most clearly shows why good marking is more important than trying to fix everything with finishing paint.
MLDPU-004 — an intermediate option
polyurethane molding MLDPU-004 measures 15 × 8 × 2600 mm. It produces a more distinct shadow but remains relatively compact. On a wall several meters long, such a line reads even without contrasting paint.
For this profile, the manufacturer offers decorative element NPU-437.1R. Right-hand overlay NPU-437.1R measures 74 × 26 × 12 mm and is designed for the 004 system. For the opposite side, a separate left-hand version NPU-437.1L is provided. The letters in the item codes indicate orientation: one mirrored part cannot be replaced with the other without checking.
Not every divider needs an end cap. It is appropriate, for example, when the horizontal line ends in an open part of the wall rather than reaching the corner. If the profile butts against a door casing, first check the neatness and geometry of the joint — a bulky end piece may be unnecessary.
MLDPU-002 and central molding
For a larger decorative composition, the following is suitable Molding MLDPU-002 with a cross-section of 22 × 11 mm. It is sensible to choose it where the dividing line is connected to the frames around the wallpaper field or is repeated on adjacent walls.
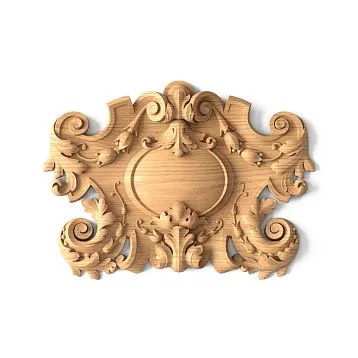
Central Stucco molding MLDPU-2-2.1 measuring 235 × 237 × 21 mm is intended for the composition of the 002 series. This is already a standalone ornamental accent, not a replacement for the connecting seam between two strips. For a narrow paint band only a few tens of centimeters wide, such an overlay would be excessive; it is better to provide for it on a separate free surface.
Finally, for MLDPU-001 there is end piece NPU-438.1R measuring 46 × 16 × 9 mm. For a symmetrical pair, the left-hand version NPU-438.1L is used. Therefore, before ordering, it is important to first draw the lines and mark their open ends, and only then count the decorative parts.
Three ways to design the border between wallpaper and paint
Straight horizontal band
Let's imagine a living room: the lower 1050 mm of the wall is painted in a muted color, with wallpaper above. The boundary runs below the main field of vision and is perceived as an independent division of the wall. With this approach, a single continuous molding is sufficient. The main thing is to set the same height relative to the finished floor, taking into account irregularities in the existing geometry.
For a restrained finish, a polystyrene profile of suitable quality or the polyurethane MLDPU-001 will work. If the decorative line should be noticeable in side light, it makes sense to try MLDPU-004. Overlays are optional here: the whole point of the composition lies in a level horizontal line.
Vertical boundary of the accent wallpaper
Suppose there will be a wallpaper field 2300 mm wide behind the bed, with a painted wall on the left and right. The two vertical moldings should optically frame the wallpaper rather than randomly cutting strips from it. Their position is best aligned with the center of the bed rather than the geometric center of the room, which is often offset by doors and wardrobes.
A single MLDPU-002 profile can be used on both sides if a more pronounced architecture is desired. With vertical lines up to 2600 mm high, each side can potentially be done with one strip; the actual length is adjusted taking into account the floor, skirting board, exposed ends and the chosen finials.
If on one side the wallpaper ends directly at the door casing, while on the other a free painted surface remains, symmetry of the decorative finials is not always necessary. Visually it is neater to end one line at the casing without an additional detail, and to finish the open edge with a special element — but only after checking the proportions.
Wallpaper field within a polyurethane composition
On a wide wall, the wallpaper can be highlighted like a painting: a rectangular frame forms its boundary, and the rest of the space is painted. Here it is useful to do two mock-ups. The first — with moldings only. The second — with additional overlays along pre-selected axes. If the wallpaper pattern is large, the second option often looks cluttered.
When the pattern is calm, a frame made of MLDPU-002 and coordinated molded decoration made of polyurethane can turn the finish boundary into part of a wall panel. However, the overlay should be positioned where it rests fully on a suitable prepared wall and does not cover the weak edges of the wallpaper.
How to create a reliable joint: glue to wallpaper or to the wall
Why gluing over wallpaper is risky
If the adhesive holds the molding to the face layer of the wallpaper, the strength of the finished assembly is also determined by how firmly the wallpaper itself is bonded to the wall. As a result, under load it is sometimes not the polyurethane that separates from the adhesive, but the wallpaper material itself from the substrate.
Therefore, for a new renovation it is preferable to plan the fastening strip in advance: the main adhesive surface of the molding should rest on a solid, prepared wall. You can leave an area without wallpaper beneath it if this matches the width of its back plane and the requirements of the adhesive system. Exactly how much exposed surface is required is determined by the actual cross-section and the installation compound instructions, not by a conventional rule of "leave a centimeter."
If the wallpaper has not yet been applied
A practical sequence begins with marking the position of the molding. The future axis, the width of the contact strip, and the boundaries of the finishing fields are marked on the wall. Then the substrate is prepared for painting and wallpaper, the order of work is coordinated, and the coatings are applied so that after their installation the molding has a reliable adhesive zone.
The main check is simple: before applying the adhesive, the substrate under the profile must not contain loosely adhering wallpaper, peeling paint, dust, or a weak layer of putty.
If the wallpaper has already been applied
Usually there is no need to abruptly remove an entire strip of finish. First, place the profile against the wall, mark its actual contact zone, and check whether the wallpaper pattern allows the edge to be prepared neatly. If the wallpaper needs to be cut, use a guide and a sharp tool, work without excessive pressure so as not to cut through the drywall facing or the wall substrate.
After removing part of the coating, you need to make sure that the remnants of wallpaper adhesive will not impair the adhesion of the new adhesive to the wall. Weak paint or putty is also removed and restored. On a small area, it is useful to check the compatibility of the compound used with the actual coatings.
If, when removing the wallpaper, the edge begins to peel off en masse, it is pointless to continue installation over the damaged area: first restore the surface. In some cases, it is more correct to change the width of the decorative border or completely redo the short section of the finish.
Where the edge of the wallpaper should end up
The junction detail depends on the shape of the molding. For a profile with a wide flat back side, it is usually possible to arrange for its visible part to overlap the neatly trimmed edge of the wallpaper, while the adhesive joint falls on a solid base. But if the profile has a complex hollow geometry or narrow support areas, the position of the edge must be selected according to the cross-section drawing.
Do not apply a thick layer of sealant under the front edge of the molding just to mask unevenly cut wallpaper. It can form a noticeable ridge, and with subsequent painting, a different texture. For a technical junction, precise trimming is needed, not the hope that any gap will disappear after filling.
How to calculate moldings and end pieces before purchase
Horizontal border 4800 mm long
Let's take a wall 4.8 m long and a straight profile MLDPU-004, which is sold in 2600 mm strips. Two strips give 5200 mm. Therefore, based on the original length, 400 mm remains for technological cuts and waste. For one straight section, two strips may indeed be sufficient if the cutting plan, the type of end junctions, and the saw kerf width allow it.
The simplest scheme is one long piece and one shortened piece joined at a pre-selected point. But the position of the seam does not necessarily have to be exactly in the middle of the wall. With open ends, their finishing is determined first, especially if decorative end caps will be used, and then the length of the straight sections is refined.
When the total footage is sufficient, but three strips are still not enough
For a more complex design, you will need three verticals of 1800 mm and two horizontals of 900 mm. The total length is:
3 × 1800 + 2 × 900 = 7200 mm.
Three strips of 2600 mm give 7800 mm, so arithmetically the linear footage is sufficient. But if each vertical needs to be made in one piece, cutting three strips of 1800 mm will leave three offcuts of 800 mm. These cannot produce two one-piece horizontals of 900 mm. For a seamless execution of five parts, a fourth strip is needed: three go to the verticals, and the fourth yields two horizontals. This is a calculation without additional allowances for corner miters; the actual layout must be verified before ordering.
If the project allows additional cross joints, the cutting plan can be recalculated differently. However, on a painted relief profile, extra joints come at a cost in the form of additional fitting, filling, and possible visibility in side light.
What decorative end caps change
The right and left end caps have their own length, relief, and junction area. You cannot automatically subtract the entire longitudinal dimension of the overlay from the molding length: on different products, the joint location may not be at the extreme point of the ornament. First look at the drawing of the pair and do a dry fit on a flat surface.
Count end caps by the visible open ends: right and left separately. If the line abuts a wall, door casing, or another profile, the decorative end may be unnecessary. It is equally important to order paired orientation: otherwise two identical right-hand elements will not create a symmetrical frame.
How much a simple line and a decorative STAVROS composition cost
It makes sense to compare the cost of polystyrene and polyurethane using real sets, not an abstract “price per meter.” For reference, we will use the public prices of selected STAVROS products as of October 21, 2026. They may change; delivery, installation, adhesive, and painting are not included in the calculations.
| Example configuration | Quantity | Unit price | Total |
|---|---|---|---|
| MLDPU-001 for a 4800 mm line | 2 planks | 1740 ₽ | 3480 ₽ |
| MLDPU-004 for a 4800 mm line | 2 planks | 3190 ₽ | 6380 ₽ |
| MLDPU-004 for the five solid segments from the example above | 4 strips | 3190 ₽ | 12 760 ₽ |
| Two NPU-437.1L/R end pieces for this composition | 2 pieces | 490 ₽ | 980 ₽ |
| Four MLDPU-004 in total plus a pair of end pieces | — | — | 13 740 ₽ |
The last three rows refer to a single configuration example, while the first two refer to two alternative solutions for a separate straight line. You cannot add all the rows of the table into one total sum.
Here you can clearly see what the buyer is paying for. The thinner MLDPU-001 solves the task of separating finishes at a lower cost. MLDPU-004 adds a different profile and the option to use suitable decorative end pieces. If you need a full wall composition with relief overlays, its estimate will increase further due to the separate elements and more complex work.
Prices for polystyrene profile are deliberately not included: without choosing a specific product, the comparison would be fabricated. Before ordering, you should write out two real sets with identical delivery terms and comparable quality of the final finish.
How to paint a molding at the boundary between two finishes
The calmest solution is to paint the profile in the color of the painted part of the wall. Then the wallpaper retains its role as the main decorative accent, and the molding stands out mainly through its relief. For this option, it is desirable to choose a coating with the same or a similar degree of gloss: a matte wall and a glossy strip of the same color can sometimes look like different shades.
A white divider, on the other hand, makes the boundary noticeable. This is justified if the white is repeated in the baseboards, casings, and cornices. If it exists in the room only on a single molding, the line may feel out of place. Before painting the whole area, make a test patch on a separate offcut of the profile. Check the dried color in the morning and under evening lighting, as well as the compatibility of the paint and the factory coating of the product. Protect the edge of the wallpaper with painting materials suitable for its surface: some tapes can lift the printed layer or peel off a fragment of the panel. Do not leave the tape on the wallpaper longer than the period recommended by its manufacturer.
Joint durability and future wallpaper replacement
A well-thought-out assembly is also useful after the renovation is complete. If the molding is firmly fixed to the wall and the wallpaper meets its edge, the next time you update the finish you can try to keep the profile and replace the wallpaper field. To do this, you need to know where the actual edge of the panel is and whether it can be safely separated.
If, however, the molding is glued over the wallpaper across a significant width, removing the covering may pull the decorative piece along with it. Dense polystyrene or polyurethane will not change much here: the weak link becomes the layer of wallpaper adhesive. Therefore, for a renovation meant to last for years, the fastening scheme is often more important than the choice between the two materials.
Eight mistakes when designing the border
- Choosing molding based only on a photo. The screen does not show the real depth of the relief or the area of rear contact. Check the cross-section drawing and hold a sample against the wall.
- Leaving the profile hanging on the edge of the wallpaper. If the edge starts to peel away, the decor may come away with it. Provide a strong adhesive strip on the base.
- Marking a long line along the ceiling or furniture. Surface irregularities are transferred to the decorative strip. Check the position with a level and relative to the main architectural axes.
- Choosing too wide a profile for a tight area. The molding covers not only the transition but also part of the pattern. Try several cross-sections full-size.
- Buying decorative end pieces without checking the side. A right-hand element does not always replace a left-hand one. Make a diagram of the open ends and check the item codes.
- Using unsuitable adhesive. The compound may bond poorly with paint or damage the finish. Check the instructions for both materials and the substrate.
- They forget about the cutting plan. The total footage may be sufficient, but you won't get solid pieces of the required length. Lay out the segments across the planks before purchasing.
- They try to fix a large gap with sealant. After painting, it often remains noticeable. First correct the geometry of the junction, and only then treat the seams provided for by the technology.
Frequently Asked Questions
How to cover the joint between wallpaper and a painted wall?
A straight decorative molding will work if the joint is located on a solid and even wall. Choose the width based on the actual edge of the covering. If the wallpaper is peeling or the wall is cracking, fix the defect first: a decorative profile will not replace repairing the base.
Is polystyrene or polyurethane better for a simple border?
High-quality polystyrene may also work for a single neat line. Polyurethane is more interesting when a specific relief and coordinated ornamental details are needed. Compare actual samples, not just the names of the polymers.
Can molding be glued directly onto wallpaper?
Sometimes such installation is permitted for a specific lightweight product, but reliability will depend on the wallpaper itself and the wallpaper adhesive. For a new renovation, it is preferable to designate a solid surface for attaching the profile in advance.
How to design a vertical wallpaper border?
Draw a straight decorative line along the edge of the wallpaper field. Check its position relative to doors, furniture, and the center of the composition. If paired moldings are planned, first mark both lines in full, and then trim the coverings.
What profile width is suitable for a small room?
Start by trying the slim options MLDPU-001 and MLDPU-004. The first is 10 mm wide, the second 15 mm. Choose a larger cross-section based on the scale of the wall and the character of the wallpaper pattern, not on a universal width chart.
Can decorative moulded overlays be added to the divider?
Yes, if the overall composition allows for it and suitable attachment areas are available. For example, compatible decorative end pieces NPU-437.1L and NPU-437.1R exist for MLDPU-004. Do not replace them with a random ornament of similar size without checking the fit.
Does polyurethane moulding need to be painted separately?
The painting method depends on the product's finish and the condition of the wall. The moulding can be finished before or after installation, but the joints between the strips usually require treatment. Use a compatible paint and protect the wallpaper from the composition.
How many strips are needed for a 4.8 m wall?
For a straight line of MLDPU-004 with a length of 2600 mm, two strips are usually sufficient: 5200 mm in total. Before purchasing, check the position of the joint, the method of finishing the ends, and possible decorative end pieces.
What should be done during the next wallpaper replacement?
Check whether the wallpaper goes under the moulding and whether it can be removed without damaging the adhesive joint. If the profile is attached directly to a solid wall, the chances of preserving it are higher. If necessary, first do a test removal on a small area.
Where to choose polyurethane stucco for this kind of renovation?
For a simple transition, first determine the cross-section and length of the molding, and then move on to choosing the decor. If the search goal is «Buy moldings», in the STAVROS catalog you can select ornamental overlays; straight dividing profiles are in a separate molding section.
How to choose and order decor without unnecessary expenses
Before ordering, record the pattern of the two coatings, the actual length of the dividing line, the shape of the open ends, and the mounting scheme. If a thin profile is sufficient, there is no need to buy ornament for the sake of ornament itself. If a full-fledged framed composition is intended, check the compatibility of the molding and the selected overlay in the STAVROS product cards. For tasks that specifically require polyurethane moldings buy, start with a suitable profile, and add additional elements after calculation.
The main difference between polystyrene and polyurethane in this case is not manifested on an abstract “worse — better” scale, but in the capabilities of specific products. A simple polystyrene strip can neatly separate wallpaper and paint. STAVROS polyurethane decor allows this boundary to be developed into a more complex composition — with different cross-sections and coordinated stucco details. In both the first and second cases, a beautiful result begins with accurate marking, a solid base, and a well-thought-out junction of coatings.