Article Contents:
- Why a test paint is needed before ordering MDF panels
- What is a sample of slatted panel OPAN-003
- How to make a test paint on an MDF sample without unnecessary haste
- What to paint MDF panels with
- Why the grooves between slats need to be painted especially carefully
- When to paint panels: before installation or after
- What errors the OPAN-003 sample reveals
- How to use the sample for a designer, furniture maker, and finisher
- How to compare MDF, beech, and oak on a sample
- Slat panels in the interior: why color changes everything
- How to check color in a real room
- How to paint MDF wall panels at home
- Why you can't choose color just from the screen
- What to buy after approving the color sample
- How a sample differs from a general article about panels for painting
- Who especially benefits from the OPAN-003 sample
- Mistakes when buying and painting MDF panels
- How to approach purchasing on the STAVROS website
- Conclusion
How to paint MDF panels so that the color truly matches the interior, the relief looks neat, and the gaps between the slats don't reveal finishing flaws? This question seems technical only at first glance. In reality, it is directly related to the purchase: if you order a large batch of slat panels without a physical color sample, the shade may differ from expectations, the enamel may apply differently than on the catalog sample, and the texture under side lighting will reveal nuances that were not visible on the screen.
That is why before ordering panels, it is wise to check the color not on an abstract piece of material, but on an actual relief. For this task, it is suitable Sample of slatted panel OPAN-003. It helps to see in advance how MDF reacts to primer, how enamel covers the surface, how the recesses between slats are painted, and how the chosen shade behaves under daylight, evening, and artificial lighting.
A test paint-out is especially important for designers, furniture makers, finishers, and buyers who are selecting slatted panels to match the color of walls, doors, furniture, baseboards, or decorative moldings. The screen shows the shade approximately. The RAL or NCS fan also does not always give a complete idea of how the color will look on a relief MDF panel. On a flat surface, the same tone seems calm, but in grooves, on protrusions, and edges, it may appear darker, deeper, or more contrasting.
Purchasing a sample before the main order helps avoid an expensive mistake. A small module allows you to check the material, texture, coverage, layer thickness, paint quality, and combination with the interior before the main batch is ordered. This is not an unnecessary step, but a normal part of an informed choice, especially when it comes to a prominent wall area, a large volume of panels, or a project with a precise color solution.
Why a test paint-out is needed before ordering MDF panels
The user often starts with a simple question: how to paint MDF panels so they look neat. But behind this question lies not only the paint application technology. It is important to understand how a specific color will work on a specific surface. A slatted panel is not a smooth wall panel. It has protrusions, recesses, side edges, shadows, and relief variations. Therefore, paint on such a panel is perceived more complexly than on a flat wall.
If you choose a shade only by screen, there is a risk of getting a different result. The monitor distorts color, brightness, and temperature. A color fan helps more accurately, but even it shows the color on a small flat card, not on a relief MDF panel. In a real room, perception is influenced by windows, lamps, floor color, furniture, adjacent walls, and the gloss or matte finish.
A test paint-out solves this problem. The sample can be painted with the same primer, the same enamel, and the same method planned for the main batch. After drying, it can be placed against the wall, applied to furniture, viewed from different angles, and assessed not only for the color itself but also for the depth of the relief. This makes it clear how to paint MDF panels in this particular project, not in theory.
For large orders, this is especially important. A mistake on one small detail is unpleasant but fixable. A mistake on a wall of several dozen panels costs more: you will have to repaint, change the technology, agree on a new color, or explain to the client why the shade differs from expectations. The OPAN-003 sample allows you to draw a conclusion before purchasing the main volume.


What is the OPAN-003 slat panel sample
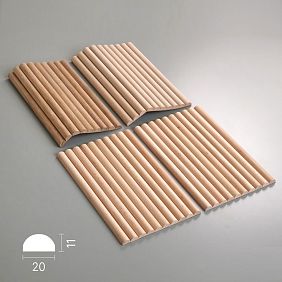
The OPAN-003 sample is a demonstration module of a slatted panel, needed to evaluate the shape, relief, profile depth, material, and future finish. Its purpose is not just to "see a piece of the panel." It helps to understand how the entire wall composition will be perceived if such a profile is chosen.
The confirmed sample size is 200 × 11 × 310 mm. This is a convenient format for testing: it is compact enough to be used as a test module, but still shows the actual relief, grooves, and the character of the front surface. On such a sample, you can already see how paint lays on the protrusions, how the recesses are painted, and how noticeable the shadows are between the slats.
The SEO scheme specifies material options: MDF, beech, oak. For the task of test painting, the MDF option is especially important because it is suitable for painting and evaluating surface preparation for enamel. Beech and oak are needed for other scenarios — when the buyer wants to compare natural wood texture, material density, and the visual behavior of wood. But if the goal is to understand what and how to paint MDF panels, the focus should remain on the MDF sample.
| Parameter | Value for the customer |
|---|---|
| Product | Slat panel sample OPAN-003 |
| Product type | Demonstration module of slat panel |
| Size | 200 × 11 × 310 mm |
| Materials | MDF, beech, oak |
| Main scenario for MDF | Test painting, enamel test, surface preparation check |
| What can be checked | Color, coverage, groove painting, relief, edges, finish behavior |
| Who is it useful for | Buyer, designer, furniture maker, finisher, contractor |
| Before which order is it needed | Before purchasing slatted panels, especially for painting |
| What to clarify | Current material, availability, surface condition and finishing recommendations in the product card or from the STAVROS manager |
This sample is especially valuable because it shows not an abstract material, but the actual geometry of the panel. On a flat board, you can check the color, but you cannot understand how it will behave in the grooves. And in a slatted panel, it is the grooves that often become the most challenging area: paint accumulates there, shadows appear, and unpainted spots and drips are visible. OPAN-003 allows you to see these nuances in advance.
Our factory also produces:


How to make a test paint on an MDF sample without unnecessary haste
A test paint is not just applying paint to the surface. Its purpose is to replicate the future finishing cycle as closely as possible to reality. If the main batch will be primed, sanded, and painted in two coats, the sample should also go through this scheme. Otherwise, the test will be incomplete: the color may appear one way on an untreated surface and completely different after primer and topcoat.
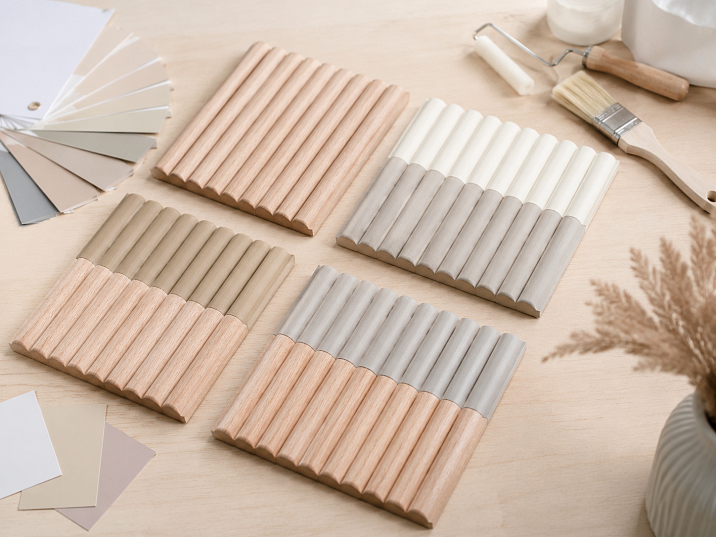
First, the sample should be examined under different lighting. Daylight shows the color more honestly, but evening lamps often have a stronger influence on perception in a living interior. If the panel will be installed in a hallway without a window, it should be evaluated not only by the window but also under the light that will be in the room. If a slatted wall is planned for the living room, it is important to look at the sample next to the sofa, floor, doors, baseboard, and furniture.
Before painting, the surface must be clean. Dust, traces of processing, or accidental contaminants can affect the smoothness of the layer. Special attention should be paid to grooves. On protrusions, paint usually applies more easily, but recesses require care. If the grooves are poorly cleaned, roughness, stains, or uneven color may appear in them.
Primer is needed when testing the full cycle of MDF preparation for enamel. It helps to level absorbency and make the finish more predictable. After the primer dries, the surface is usually evaluated and, if necessary, light interlayer sanding is done. This is not a decorative stage, but preparation for the enamel to lay more evenly.
The first coat of paint shows coverage. At this stage, it becomes clear how well the composition covers the MDF, whether stains appear, and how evenly the protrusions and recesses are painted. Grooves are best done first with a brush, because a roller may not reach the depth of the profile. After that, the face plane can be rolled with a roller or paint can be applied in another way, if such technology is provided by the chosen finishing system.
The second coat gives a more honest representation of the final color. After it, the sample should be evaluated not immediately, but after normal drying. Often, color is perceived differently after a few hours and after a day. Matte paint can become deeper, satin can show a soft sheen, and semi-matte finish can emphasize the relief more than expected.
When a buyer asks how to paint MDF panels at home, it is important to understand: a home test is acceptable, but it must be careful. You need not just to "try the color", but to check the full path: MDF, primer, sanding, first coat, grooves, second coat, drying, lighting, comparison with the interior.
Get Consultation
How to paint MDF panels
The choice of paint depends on what result is needed: a calm matte color, a more durable coating, a satin finish, an interior enamel, or protection without a covering color. There is no universal composition for all tasks. MDF for painting requires a system that is compatible with the material and suitable for the conditions of use.
| Material for finishing | When to use | Possible risk |
|---|---|---|
| Acrylic enamel | Residential interiors, matte or satin finish, calm decorative wall | Weak formulations may have insufficient coverage |
| Polyurethane enamel | Higher durability, commercial interiors, high-traffic areas | More difficult application, higher technology requirements |
| Water-dispersion paint | Smooth matte effect, walls and decorative areas | Not every formulation is suitable for active contact |
| Varnish | When surface protection is needed, not covering color | Does not solve the task of painting in RAL or NCS |
| Oil | For solid wood, if you want to emphasize the wood | Not suitable for covering painting of MDF under enamel |
If the question is how and with what to paint MDF panels, you need to start with the purpose of the room. For a bedroom, living room, or study, the load is usually lighter. For a hallway, commercial area, cafe, or salon, the requirements are higher: surfaces are touched more often, more people pass by, and cleaning may be more intensive. This means the composition must match actual usage.
A matte finish hides excessive shine well and makes the wall calm. But too dull a matte sometimes "eats" the relief, especially if the color is dark. A satin surface softly reflects light and can emphasize the shape of the slats. A semi-matte option makes the relief more noticeable, but with poor preparation, it can show defects.
Acrylic enamel is often considered for residential interiors because it is easier to work with and the result can be quite neat. But coverage depends on the composition. Cheap paint sometimes requires more coats, covers the base worse, and leaves streaks. This is immediately visible on the sample, and that is why testing is needed before the main order.
Polyurethane enamel may be suitable where increased durability is needed. But it is more demanding to apply. If you have no experience, it is better to discuss the system in advance with a finisher or paint and varnish specialist. The OPAN-003 sample in this case becomes a platform for testing not only the color but also the technology.
Why the grooves between the slats need to be painted especially carefully
Grooves are the most problematic area when painting a slatted panel. On the front surface, a roller or spray gives a relatively even layer, but the recesses require more attention. If they are left unpainted or painted weaker, dark stripes will appear in side light. Sometimes they look like a shadow, but more often they reveal a finishing error.
It is better to go over the grooves with a brush before painting the front surface. A brush allows you to reach the depth of the profile and distribute the paint in the corners. But it is important not to fill the recesses with a thick layer. Excess paint collects at the bottom, forms drips, and looks rough after drying. On dark and satin finishes, such defects are especially noticeable.
After painting the grooves, the front part can be finished with a roller or another chosen method. Then the protrusions get an even layer, and the recesses are no longer left empty. It is important to look at the panel not only straight on but also from the side. Side light reveals unpainted areas, streaks, and differences between the protrusions and the depth of the profile.
The sample is good because you can make mistakes on it without risk to a large batch. If paint collects in the grooves, it means you need to change the layer thickness, tool, or application order. If the recesses look darker than the front surface, the problem may be in lighting, color, number of coats, or application method. If brush marks are visible, you need to check the composition, tool, and interlayer treatment.
On a slatted wall, such nuances multiply. One small missed spot on a sample seems like a trifle. On a panel wall, it turns into a recurring defect. Therefore, checking the grooves is not a minor detail, but one of the main purposes of a test paintout.
When to paint panels: before or after installation
The question of painting before or after installation depends on the project. Both options have advantages and limitations. There is no universal answer because conditions vary: some install panels in a living room, others in a commercial space; some require a uniform color with the wall, while for others it is important to perfectly paint the ends and grooves before installation.
| Scenario | Pros | Cons |
|---|---|---|
| Paint before installation | Easier to paint grooves, ends, and tricky spots; easier to control the coat | Coating can be damaged during installation |
| Paint after installation | Can achieve a uniform color for the entire wall and panels | Harder to paint recesses, higher risk of missed spots |
| Make a test paintout on a sample | Safe, fast, helps check color and technology | Does not replace final inspection of the main batch |
Painting before installation is often convenient for relief elements. The panel can be turned, examined, and the ends and recesses can be painted without rushing. But after that, installation must be careful. Any damage to the coating will have to be repaired, and local repair sometimes differs in shade or texture.
Painting after installation is good when you need a single wall surface. For example, if the designer wants the panels and the wall to be painted the same color. But on relief, this approach is more difficult. You need to carefully go through the grooves, watch for drips, and not leave weak spots in the recesses.
A test paint on a sample helps choose the right scenario. If the sample makes it clear that the grooves are difficult to paint after installation, it is better to consider pre-painting. If the color should blend with the wall, you can check in advance how the chosen paint behaves on MDF and on the adjacent wall surface.
What errors does the OPAN-003 sample reveal
A sample is needed not only to confirm a successful color. It often shows errors that seem non-obvious at the selection stage. The first is a difference in shade from the picture on the screen. On the monitor, the color may appear warmer, cooler, lighter, or calmer. On MDF, after primer and two coats of enamel, it may change.
The second error is poor coverage. Some paints look good in the can or on a paper sample, but require more coats on MDF. If this is not checked in advance, the main batch may require additional materials, time, and labor.
The third error is the difference between the front surface and the grooves. The recesses may appear darker, even if the paint is applied evenly. Sometimes this is a normal shadow from the relief, and sometimes it is a sign of poor coverage. The sample helps distinguish one from the other.
The fourth error is brush or roller marks. On a relief surface, the tool can leave streaks. On a matte finish, they are less noticeable; on satin and semi-matte, they are more noticeable. If the defect is visible on a small sample, it will be more noticeable on a large wall.
The fifth mistake is choosing the wrong gloss level. A matte panel can look too flat, especially in dark colors. Gloss or active satin can emphasize small defects. A semi-matte finish sometimes looks more expensive but requires more careful preparation.
The sixth mistake is a mismatch with the interior. The color may be beautiful on its own but not suit the floor, furniture, doors, baseboard, or lighting. You can hold the sample against real materials and see this in advance.
The seventh mistake is an unsuitable tone under evening lighting. During the day, the shade may look calm, but in the evening it can shift to yellow, gray, green, or a cool undertone. This is especially noticeable with warm lamps.
The eighth mistake is paint buildup in corners. The sample shows how the composition behaves in grooves. If paint collects, you need to change the application technique or material.
The ninth mistake is changing your decision after a physical test. This is not a failure but the benefit of the sample. It is better to change the color at the stage of a small module than after ordering the main batch.
How to use the sample for a designer, furniture maker, and finisher
For a designer, the OPAN-003 sample is a working tool for approval. The color in a visualization and the color on a real surface are almost always perceived differently. When the client sees a physical swatch, the discussion becomes concrete. You can hold the sample against the wall, furniture facade, door, baseboard, sofa fabric, or flooring.
If the project works with RAL or NCS palettes, the sample helps verify how the selected code looks specifically on MDF relief. The same shade on a smooth card and on a slatted panel can feel different. Shadows appear in the grooves, light on the protrusions, and the entire surface becomes more dimensional.
For a furniture maker, the sample is useful as a material test. You can check surface preparation, primer adhesion, enamel behavior, sanding between coats, and edge neatness. If you plan to repeat the finish on a large batch, a small module helps you understand in advance how stable the technology is.
For a finisher, the sample shows the complexity of the work. It reveals how quickly grooves clog, whether brush marks remain, if the roller needs changing, if spraying is suitable, and how the second coat behaves. This reduces the risk of errors on site, where fixing defects is more difficult.
For the customer, a sample provides confidence. They see not a promise or a picture, but real material. This is especially important if the panels will occupy a large part of the wall. The larger the area, the more the color affects the mood of the room. A small mistake on a swatch can save the budget, deadlines, and trust in the project.
How to compare MDF, beech, and oak on a sample
The SEO scheme indicates that OPAN-003 can be presented in MDF, beech, and oak variants. This is important because different materials address different needs. MDF is needed when the buyer is thinking about painting, enamel, color matching the wall, or a decorative panel for a specific interior shade. Beech and oak are interesting when one wants to evaluate the natural wood texture.
MDF does not show the wood grain, but it provides a base for color. If the goal is to achieve a smooth painted surface, an MDF sample helps check how the enamel will look on the relief. Here, coverage, smoothness, surface preparation, and paint penetration into the grooves are important.
Beech is perceived as calmer in texture. It can be appropriate where naturalness is needed without too active a pattern. But if the panel is planned to be covered with opaque enamel, the wood texture may lose its meaning. In that case, the buyer must understand what they are paying for and what result they want to achieve.
Oak is more expressive. Its texture itself becomes a decorative part of the interior. If you want to see the wood rather than a painted surface, an oak sample gives a more honest representation of the future appearance. But for the topic "how to paint MDF panels," oak should not become the main focus. It is useful for comparison but does not replace testing MDF under enamel.
Comparing materials helps make a decision before ordering. Sometimes a buyer thinks they want a colored MDF panel, but after seeing oak, they realize the interior needs a natural texture. The opposite also happens: initially, wood is preferred, but in a specific room, a colored panel looks calmer and more precise. A sample allows this choice to be made based on real material, not imagination.
Slat panels in the interior: why color changes everything
Slat panels are often used as an accent wall. They set a rhythm, create a vertical line, make the surface deeper, and help highlight a zone. But color determines whether this wall will be a calm background or the main decorative element. The same profile can look very different in white, gray, graphite, beige, green, warm wood, or a rich dark shade.
In the living room, panels can support the TV area, the wall behind the sofa, a fireplace portal, or a decorative niche. If the color is close to the walls, the relief works softly. If it is contrasting, the panel becomes an accent. In the bedroom, a calmer tone is usually chosen so that the rhythm of the slats does not overload the relaxation area. In the hallway, the color should match the doors, floor, and lighting, because the space is often small and without natural light.
In an office, slatted panels can add a sense of composure to the interior. The vertical rhythm works well behind a desk, in a book area, near a door, or in a meeting room. Here, the color should be checked especially carefully: too dark can make the room feel heavy, too light can lose the relief.
In a cafe, salon, showroom, or hotel, panels often become part of the brand image. The color can support the brand, furniture, signage, reception desk, or decorative lighting. A mistake in shade is more noticeable in a commercial interior because the space is perceived as a single visual system. Therefore, a physical color sample before ordering is especially important.
If a major panel purchase is planned, after color approval you can consider slatted panels made of MDF and solid oak as a base group for selecting a solution for the interior. And if you need a profile related to the chosen sample, it makes sense to look at Slatted panel PAN-003.
How to check color in a real room
Color checking should take place where the panels will be used. In a store, workshop, or by a window in daylight, the shade may seem successful. But in a real room, it interacts with other materials. A warm floor can make gray look greenish. Yellow light can change white. Dark furniture can enhance contrast. A large wall area can make the shade more saturated than it seemed on a small fragment.
It's better to place the sample vertically rather than on a table. A slatted panel on a wall is perceived vertically, and light falls on it differently. If you look at the sample horizontally, you might misjudge the shadows in the grooves and the degree of gloss. A vertical position gives a more honest representation.
It's important to look at the sample in the morning, afternoon, and evening. In the morning, the light may be cooler, in the evening warmer, and with artificial lighting, completely different. If the room is used more often in the evening, like a living room or bedroom, the main test should be done in the evening scenario.
It's useful to place the sample next to a door, baseboard, furniture, fabric, flooring, and wall. The color of the panel does not exist on its own. It should either match or deliberately contrast. It's bad when the shade 'almost matches' but is slightly different. On a large area, this can look like a mistake.
If a designer is leading the project, the sample can be used as an agreed physical reference. This reduces the risk of disputes: the client, finisher, and supplier see the same test result. Of course, the main order still needs to be controlled, but the color decision becomes much more confident.
How to paint MDF wall panels at home
The phrase "how to paint MDF wall panels at home" often sounds simple, but home painting requires care. The main task is not to rush and not to try to get a dense color with one thick layer. A thick layer spreads worse, dries longer, more often forms drips, and behaves particularly poorly in grooves.
For a home test, a sample is convenient precisely because it doesn't require working with a large panel right away. You can prepare a workspace, protect the surface, test the brush and roller, evaluate the primer and paint. If the result is unsatisfactory, the mistake will remain on the sample, not on the entire wall.
At home, it's especially important to watch out for dust. The MDF surface must be clean before painting, and the room should be as calm as possible. Dust, roller lint, and random particles on fresh paint can ruin the finish. On a matte surface, this is sometimes less noticeable; on a satin finish, it's more pronounced.
It's better not to paint the grooves hastily. You can go over them with a small brush, distributing the paint thinly and evenly. After that, it's convenient to finish the front part with a roller. Between layers, you need to let the coating dry properly, because applying the next layer prematurely can pull up the previous one and leave marks.
A home paint-out doesn't always replace professional finishing, especially when it comes to large batches and high finish requirements. But it helps make a key decision: whether the color suits, whether the gloss level is acceptable, whether the grooves are too visible, and whether the paint covers the MDF sufficiently.
Why you can't choose a color just by looking at a screen
The screen shows not the color of the material, but a glowing image. Each monitor has its own brightness, contrast, temperature, and settings. The same shade can look different on a phone, laptop, and designer monitor. Even a photo of a real panel doesn't guarantee accurate perception because the camera also processes color.
With slatted panels, the problem is amplified by the relief. In photos, shadows can be beautiful and soft, but in a real room, they may be sharper or deeper. Sometimes the color on the protrusions seems suitable, but in the grooves it becomes too dark. Sometimes a matte surface looks noble on screen but appears flat in real life. It happens that satin gloss is almost invisible in photos but becomes more pronounced under side lighting.
A physical sample solves this problem better than any pictures. You can hold it in your hands, turn it, place it against the wall, and look at it under real light. It shows not only the shade but also the texture, depth, edges, grooves, coverage, and the material's reaction to primer and paint.
Therefore, choosing a color from a screen can only be used as a first step. The final decision for a serious order should be made after a paint sample. This is especially important if the panels need to match furniture, doors, baseboards, or walls. A "nearly the same color" on a large volume often looks like a miss rather than a match.
What to buy after approving the paint sample
Once the paint sample is approved, the sample ceases to be just a test and becomes a reference point for the main order. The buyer already understands which color suits, how the enamel behaves, how noticeable the grooves are, and how the surface looks in the morning and evening. After this, you can proceed to selecting the main batch of panels and related materials.
If the OPAN-003 profile is chosen as a sample, for the main project you should look at the corresponding PAN-003 panel. The pairing of the sample and the main panel helps maintain the logic of selection: first, the relief and color are tested, then the main product for the wall or decorative area is selected.
To compare profiles, you can use not only OPAN-003. Within a project, it is sometimes useful to look at Sample slat panel OPAN-001, Slat panel sample OPAN-005 or Sample slatted panel OPAN-007. Different profiles provide different rhythm and depth, so comparison helps choose not only the color but also the very character of the wall.
If the project requires checking several materials, textures, and elements, it is convenient to look at STAVROS product samples. This is especially useful for designers and furniture makers who coordinate decisions with the client and want to show physical material, not just a visualization.
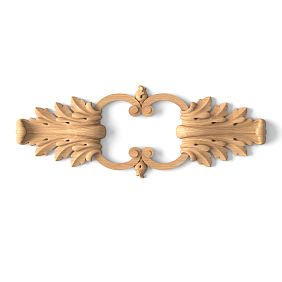
After selecting panels, related solutions may be needed. To tie wall finishing with other interior details, you can consider MDF moldings for paintingAnd for preparing the object, fastening, and finishing work, it may come in handy Mounting and finishing materials, if they match the chosen technology and task.
How the sample differs from a general article about panels for painting
General materials help understand what MDF panels are, where to use them, what scenarios exist, and why painting is important. But the OPAN-003 sample addresses a different question. It is needed not for general introduction, but for testing a specific solution before purchasing the main batch.
If a person reads about Painted MDF plank panels, they gain an understanding of the category. But before ordering, they still need to see the color on a physical material. The article can explain the logic, but it won't show how a specific enamel will look in a specific room.
The sample is needed precisely at the intersection of information and purchase. It translates the question "how to paint MDF panels" into a practical test: here is the material, here is the profile, here are the grooves, here is the primer, here is the enamel, here is real light. After such a test, the decision becomes more precise.
This is especially important if a designer is working on the project. A visualization can be beautiful, but the client accepts the interior not on a screen, but in real life. A physical color sample helps align expectations and reduce the risk of rework. For a furniture maker and finisher, the sample shows the technology. For the buyer, it shows the future appearance.
Who especially benefits from the OPAN-003 sample
The sample is needed for a buyer who wants to order slatted panels for painting and is unsure about the color. This is the most obvious scenario. If it involves a large wall, a decorative panel behind the TV, a headboard, a reception area, or a commercial interior, checking the color before ordering becomes a reasonable measure.
A designer needs a sample to present a solution. It's easier for a client to approve a physical module rather than an abstract shade. It can be placed next to samples of fabric, flooring, facades, paint, and baseboards. This makes the project's palette clearer.
A furniture maker finds a sample useful as test material. You can check primer, enamel, varnish, brush, roller, spray, sanding, and edges. If the technology isn't suitable, it can be adjusted before working with the main panels.
A finisher uses a sample to assess complexity. It shows how paint settles into grooves, whether drips appear, how long a neat coat takes, and how convenient it is to work with the chosen composition.
A sample may be unnecessary only in simple situations where the color has already been tested on the same material and profile, and the batch is small. But if the project is important, the color is complex, the lighting is unusual, or the client has doubts, it's better not to skip a physical sample.
Mistakes when buying and painting MDF panels
The first mistake is choosing panels only by image. A photo helps to understand the overall look but doesn't replace the physical material. Especially when it comes to a color for a specific interior. The shade on the screen doesn't show the real behavior of paint on MDF.
The second mistake is painting a large volume without a test. Even if the paint is good, it may look different on the relief. Coverage, gloss, grooves, and edges are better checked in advance.
The third mistake is ignoring primer. MDF can absorb compounds differently, so surface preparation affects the result. If primer will be used in the actual finish, it should also be part of the test sample.
The fourth mistake is applying too thick a layer. The buyer wants to get a dense color quickly, but a thick layer often causes drips, streaks, and unevenness. This is especially noticeable in grooves.
The fifth mistake is not looking at the sample under different lighting. A color that looks good during the day may be irritating in the evening. For an interior, the lighting in which the room is most often used is important.
The sixth mistake is not comparing the sample with adjacent materials. Panels do not live separately from the room. They should match the floor, doors, furniture, walls, baseboard, and lighting.
The seventh mistake is thinking that a matte finish is always better. A matte surface indeed looks calm, but sometimes it makes the relief too muted. A satin finish can better show depth, but requires careful preparation.
The eighth mistake is forgetting about the ends. On a slatted panel, not only the front side is visible. The ends and side edges contribute to the overall perception, especially if the panel is in a close-contact area.
The ninth mistake is choosing a material without understanding the task. MDF is needed for color, beech and oak for a different visual logic. If a natural texture is needed, you shouldn't expect it from MDF under enamel. If a covering color is needed, there's no point in overpaying for a texture that paint will cover.
The tenth mistake is not recording the approved result. After a successful test coat, you need to know which primer, which paint, which shade, how many layers, and which application method were used. Otherwise, the result may differ during the main painting.
How to approach a purchase on the STAVROS website
It's better to start a purchase by understanding the task. If you need to check the color and relief before ordering, the first step is a sample. If the color is already approved and the profile is chosen, then you can look at the main panel and the required quantity for the project. If the profile is not yet chosen, it's useful to compare several samples.
In the sample card, you should check the material, dimensions, availability, and current parameters. If the buyer is choosing MDF specifically for painting, you need to ensure the appropriate option is selected. If wood texture is important, it's worth comparing beech and oak, but not mixing these tasks with covering paint on MDF.
Before ordering the main batch, you need to understand the wall area, the direction of the slats, the number of panels, the installation method, the future finish, and the operating conditions. Requirements for a residential interior are one thing, for a commercial one — another. If the panels will be frequently touched, if there is a high-traffic area or public space nearby, the finish should be more practical.
If there are doubts about the material, color, compatibility, or finish, it's better to clarify the details with a STAVROS manager in advance. This is especially important when the sample is used not just for personal verification, but as part of a design project or coordination with a client.
Conclusion
The OPAN-003 sample helps solve a problem that cannot be addressed by a photo or description alone: to see how the chosen color and paint system work on a real slatted MDF surface. It shows the relief, depth of grooves, behavior of the enamel, coverage, shadows, and perception of the shade under different lighting.
If a buyer wants to understand how to paint MDF panels before ordering a large batch, a test paint becomes the safest solution. It helps to check the technology, avoid color errors, and coordinate