Article Contents:
- Dining area set: what to buy before starting work
- Table as the center of architectural composition
- Wooden legs for a dining table: selection, parameters, style
- Why choose wooden legs
- Selection parameters
- Legs for a kitchen table in the dining area
- Furniture supports for a sideboard and console
- Ceiling rosette above the dining table: the main ceiling accent
- How to choose the size of a rosette
- Socket style
- Socket and cornice: ceiling decor system
- Polyurethane moldings for dining area walls
- Frame panels: construction principle
- Wall decor behind the dining table
- Buffet or console area
- Cornice and baseboard: horizontal lines of the dining area
- Polyurethane cornice
- Polyurethane baseboard
- Decor for moldings in the dining room
- Ready-made assembly scenarios for the dining area
- Open-plan kitchen-dining room
- Classic dining room in a separate room
- Living room with dining area: table and moldings in a single space
- Small dining room: minimal decor, maximum proportion
- Table: wood or polyurethane in the dining area
- Material calculation for the dining area
- Ceiling Cornice
- Moldings for frame panels
- Wooden table legs
- Mistakes when designing a classic dining area
- Choosing legs without considering load
- Placing a too large rosette above a small table
- Do not align the chandelier, outlet, and table along the axis
- Buy moldings without a wall diagram
- Mix different styles of legs, chairs, and moldings
- Forget the baseboard
- FAQ: answers to popular questions about the dining area in a classic style
- About the Company STAVROS
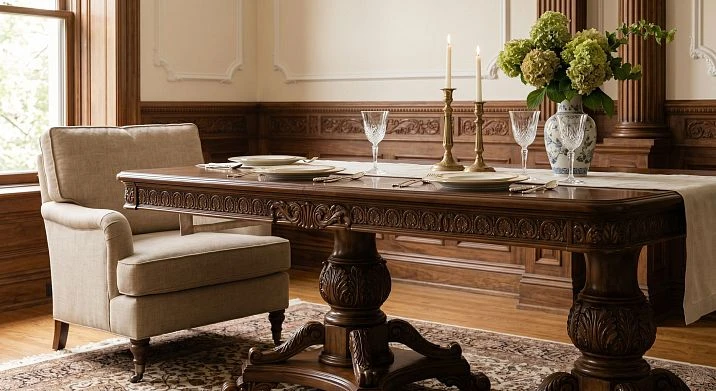
There is a moment when the dining area ceases to be just a place to eat and becomes a space where people live. Where the family gathers, where guests come, where a chandelier hangs over the table and the walls are framed with molding panels. This is not decor for decor's sake — it is the architecture of everyday life.
A classic dining table is the center of such a space. But the table alone does not solve anything. The system solves it: Wooden legs for table with a turned profile, ceiling rose made of polyurethane above the chandelier, Moldings made of polyurethane on the walls, a cornice around the perimeter, a baseboard line, and decorative accents at the right points. All of this together creates what you started the classic interior for in the first place.
This article is a practical guide. It's not about "beautiful ideas," but about what specifically to buy, where to place it, how to calculate, and how to avoid mistakes when assembling a classic-style dining area.
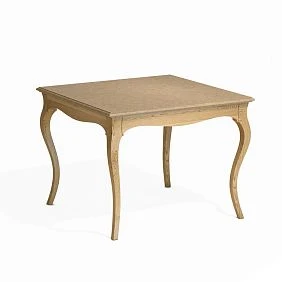
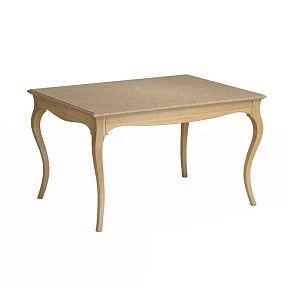
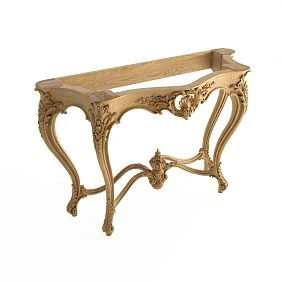
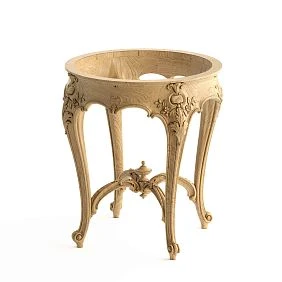
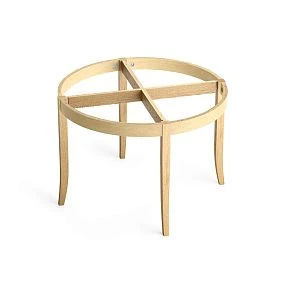
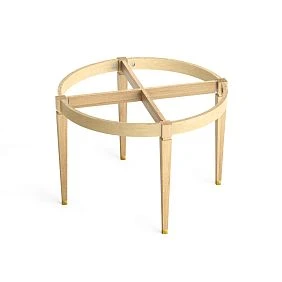
Dining area kit: what you need to buy before starting work
Let's break down the complete list — from the furniture base to installation materials. This is not an abstract list, but a real shopping cart for a classic dining room.
Wooden furniture elements:
-
dining table legs — turned, profiled, solid wood;
-
furniture legs — for a sideboard, console, serving table;
-
decor for furniture — overlay elements for the end panels of a sideboard or console;
-
Classic Furniture — finished products for the dining area.
Polyurethane elements for architectural decoration:
-
Moldings made of polyurethane — cornice, baseboard, wall paneling;
-
ceiling rose made of polyurethane — central accent above the table for a chandelier;
-
Decorative stucco — wall overlays, sideboard area, mirror framing;
-
Decor for Molding — dot inserts along the cornice or in the corners of frames;
-
Polyurethane wall decor — decorative panels and elements for decorating the wall behind the table;
-
Polyurethane moldings — the entire range for architectural finishing of the dining room.
Installation and finishing materials:
-
assembly adhesive — recommendations in the article what to glue polyurethane molding with;
-
acrylic sealant — for seams and joints;
-
adhesion primer — for polyurethane before painting;
-
paint or enamel;
-
fasteners for table legs;
-
reserve of linear elements and decor 10–15%.




The table as the center of the architectural composition
There is a principle that every experienced designer knows: the dining area is assembled from the inside out. From the table — to the walls and ceiling, not the other way around.
This means: first choose the table and legs. Their scale determines what size the ceiling rosette needs, what height the moldings on the walls should be, how elaborate the cornice should be.
A table with a diameter of 120 cm and a ceiling rosette with a diameter of 400 mm are a logical pair. The same table and an 800 mm rosette are a mismatch of scales, an overload. A table 200 cm long and thin 15 mm moldings on the walls are an imbalance. The table and 30–40 mm moldings are the correct proportion.
Everything works as a system. And the wooden table legs are the first element of this system, from which the assembly of a classic dining area begins.
Our factory also produces:
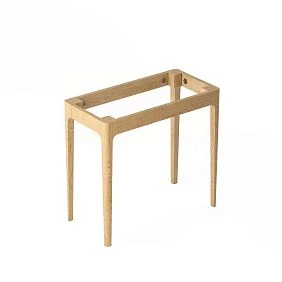
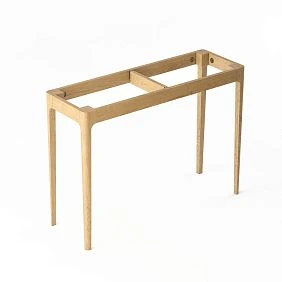

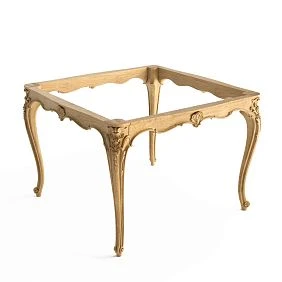
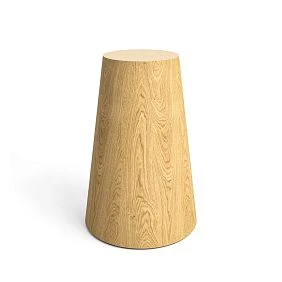
Wooden legs for a dining table: selection, parameters, style
Get Consultation
Why choose wooden legs
Metal and plastic supports for a classic table are a solution that destroys the style. Wood is the only material that is organic in classic and neoclassical interiors. It is warm, visually heavy, convincing. It echoes wooden chairs, parquet, wooden architraves and doors.
Wooden legs for table — this is not just a support. This is a visible architectural element of the table. Especially if the table is without an underframe, with a tabletop on four separate legs — in this case, the legs completely form the silhouette of the furniture.
Selection parameters
Height. The standard height of a dining table is 750–780 mm. The leg height is calculated as the table height minus the tabletop thickness. With a 30 mm tabletop: leg 720–750 mm. With a 40 mm tabletop: leg 710–740 mm. For a bar table or console buffet, the leg height is different: 850–950 mm.
Cross-section. For a light small table (diameter up to 100 cm, for 4 persons) — a leg with a minimum diameter of 50–60 mm. For a large rectangular table (160–200 cm, for 6–8 persons) — a leg of 70–90 mm. For a massive formal table — 80–100 mm or more.
Profile. A turned leg with a reverse taper (wide at the top, tapering downward) is a classic option. A leg with a thickening in the middle part (baluster) is a more decorative, baroque option. A rectangular profiled leg with a chamfer is for strict neoclassicism.
Wood species. For the dining table — oak, ash, beech. Oak — maximum strength and expressive texture. Beech — smooth surface, takes paint well. Ash — lightweight, with a beautiful linear pattern.
Coating. Varnish — to preserve the natural wood texture. Stain + varnish — to change the tone as desired. Enamel — for a table to be painted to match the interior color.
Legs for a kitchen table in the dining area
legs for a kitchen table — often of smaller cross-section than for a dining table. Kitchen table for 4 persons: leg 50–60 mm at the widest part. Important: the kitchen table is located in an area with high humidity, so the leg coating must be moisture-resistant — varnish in 2–3 layers or polyurethane enamel.
Furniture supports for a sideboard and console
Sideboard and console — companions of the dining table in a classic interior. furniture legs for them — short wooden legs 80–150 mm high. They lift the furniture body off the floor, creating "air" under the sideboard. This is a classic furniture technique that makes a heavy body visually lighter.
Ceiling rosette above the dining table: the main ceiling accent
The chandelier above the dining table is not just a light source. It is the central point of the entire dining area composition. And it is here ceiling rose made of polyurethane that it performs its key function: it creates an architectural frame around the chandelier, visually "anchoring" it to the ceiling.
How to choose the size of a rosette
The diameter of the rosette should be proportionate to the table and chandelier. Guideline:
-
Table diameter 90–110 cm: rosette 350–450 mm;
-
Table diameter 120–140 cm: rosette 450–600 mm;
-
Table length 160–200 cm (rectangular): rosette 500–700 mm or an elongated decorative field;
-
Ceiling 2.7 m: rosette up to 600 mm; ceiling 3.0 m and higher: rosette 600–900 mm.
A rosette smaller than the chandelier is illogical. A rosette equal to or slightly larger than the chandelier's diameter is the correct proportion.
Rosette style
For full classic style — a rosette with developed relief: acanthus leaves, rocaille ornament, stucco flowers. For neoclassical — a more restrained profile: geometric ornament, smooth rim with a fillet. For modern classic — a simple round frame with minimal relief.
Rosette and cornice: ceiling decor system
A ceiling rosette does not work in isolation from the cornice. If a Polyurethane molding — the cornice — the rosette in the center creates a symmetrical ceiling composition. The cornice holds the perimeter, the rosette holds the center, the chandelier holds the light axis. Three elements, one system.
Polyurethane moldings for dining area walls
The wall behind the dining table is the most visible surface of the dining room. It is what people look at while sitting at the table. This is where frame molding panels work most effectively.
Frame panels: construction principle
Moldings made of polyurethane on the dining room walls create rectangular frames — decorative panels. They divide the wall into visual sections, creating the feel of expensive architectural finishing.
Rules for constructing frame panels:
-
Distance from the floor to the bottom edge of the lower frame: 100–150 mm (greater than the thickness of the baseboard);
-
Distance from the ceiling to the top edge of the upper frame: 100–200 mm (less if there is a cornice);
-
Distance between frames horizontally: 30–60 mm;
-
Distance from the wall edge to the outermost frame: 80–120 mm.
Molding width for wall frames: 20–35 mm for a room with a ceiling height of 2.7–3.0 m. 35–50 mm for high ceilings of 3.0–3.5 m.
Wall decor behind the dining table
Polyurethane wall decor allows you to create an accent wall behind the dining table. This can be: a mirror in a polyurethane frame, a decorative panel of molding frames of different sizes, vertical pilasters on the sides of the wall, a horizontal belt at the level of the chair backs.
The accent wall of the dining room is one of the classic techniques: it creates a "background" for the dining table, similar to how the altar wall creates a background for the altar. All attention is focused on this surface — and it must be decorated precisely.
Sideboard or console area
A sideboard or console next to the dining table are traditional elements of a classic dining room. The wall above them is an ideal place for a decorative accent: a mirror in a frame, a painting, a group of decorative elements made of moldings from polyurethane.
Decorative stucco above the sideboard: a horizontal overlay in the center, or a symmetrical pair of decorative elements on the sides of the mirror. Scale — according to the width of the sideboard. For a sideboard of 120 cm — a decorative element or mirror frame with a width of 80–100 cm.
Cornice and baseboard: horizontal lines of the dining area
Two horizontal lines — the cornice at the top and the baseboard at the bottom — create an architectural "container" for the dining area. Without them, the molding frames on the walls hang in the air, and the space lacks completeness.
Polyurethane cornice
Ceiling cornice — a horizontal molding in the corner between the ceiling and the wall. For a dining room with a ceiling height of 2.7 m — a cornice height of 70–100 mm. For 3.0 m — 100–130 mm.
The style of the cornice should match the style of the rosette and frame moldings. If the rosette has acanthus ornamentation, the cornice should also have a developed relief. If the rosette is calm and geometric, the cornice should be without ornamentation, with a simple profile.
Moldings made of polyurethane Ceiling cornices are mounted with adhesive. Joints at corners are cut at 45° using corner templates. Details on installation are in the material on adhesive selection.
Polyurethane skirting board
The baseboard line completes the system from below. The height of the baseboard for a classic dining room: 80–120 mm. The profile should have a scotia or ogee, in the same style register as the cornice.
The baseboard and cornice are a "mirror" pair. If the cornice has a developed profile with a height of 100 mm, the baseboard should be at least 80 mm, otherwise the system looks disproportionate. Rule: the baseboard should be at least 70–80% of the cornice height.
Decor for moldings in the dining room
Decor for polyurethane moldings — point decorative inserts along the length of the cornice. In the dining room, they are especially appropriate: corner inserts at the intersections of frame panel moldings create a classic "rosette" accent. The spacing of inserts along the cornice is 60–80 cm for a room with a perimeter of 12–16 linear meters.
Ready-made assembly scenarios for the dining area
Open-plan kitchen-dining room
A kitchen and dining room in one space is a common modern scenario. Here, the dining table stands at a conditional boundary between the kitchen and living room zones.
Set:
-
Wooden legs for table — 4 pcs., turned, oak, height 720–740 mm;
-
Ceiling rosette above the table — diameter 450–500 mm;
-
Moldings made of polyurethane — frame panels on the wall behind the table;
-
Ceiling cornice — along the perimeter of the dining area, 10–12 linear m;
-
Glue, primer, paint, sealant.
Classic dining room in a separate room
Separate room 4 × 3 m with a ceiling height of 2.8 m. Formal dining table for 6–8 persons.
Set:
-
Wooden legs for dining tables — 4 pcs., oak, profile with baluster, height 720 mm;
-
furniture legs for the sideboard — 4 pcs., height 100 mm;
-
Ceiling rosette — diameter 500–600 mm, elaborate ornament;
-
Ceiling cornice — height 100 mm, along the perimeter 14 linear m + 15% allowance;
-
Moldings made of polyurethane for frames on walls — width 30 mm, 4–6 frames;
-
Wall Decor — accent wall behind the table;
-
Decorative stucco above the sideboard;
-
decor for furniture — on the end panels of the sideboard;
-
glue, sealant, primer, paint.
Living room with dining area: table and moldings in a single space
Living room of 25–30 m² with a dining table in the area closer to the kitchen.
Set:
-
Wooden legs — 4 pcs., light profile in neoclassical style;
-
Ceiling rosette — diameter 450 mm, calm ornament;
-
Moldings made of polyurethane — unified system of frames throughout the living room, including the dining area;
-
Cornice — along the perimeter of the entire space;
-
glue, primer, paint.
Small dining room: minimum decor, maximum proportions
Small dining area 3 × 3 m with a low ceiling of 2.5 m. The goal is classic without overload.
Set:
-
Wooden legs — 4 pcs., thin profile, cross-section 50–60 mm;
-
Ceiling rosette — diameter 300–350 mm, simple shape;
-
Moldings made of polyurethane — ceiling cornice height 60 mm, without ornament;
-
Frame panels — 1–2 frames on the main wall, without overload;
-
glue, primer, paint.
Table: wood or polyurethane in the dining area
| Element | Wood | Polyurethane |
|---|---|---|
| Table legs | Main material | No |
| Sideboard / console legs | Main material | No |
| Furniture body decor | Overlays, inserts | Overlays for painting |
| Ceiling rosette | No | Main material |
| Ceiling cornice | No | Main material |
| Frames on walls | No | Main material |
| Baseboard | No | Main material |
| Accent wall | No | Panels, overlays |
| Mirror frame | No | Main material |
| Decor above the buffet | Solid wood overlays | Overlays for painting |
Material calculation for the dining area
Ceiling cornice
Room perimeter + 15% reserve. For a room 4 × 3 m: perimeter 14 linear m, with reserve — 16.1 linear m. Round up to 17 linear m.
Calculate separately: 4 external corners × cutting waste ≈ 0.2 linear m per corner = 0.8 linear m additional. Total: 17–18 linear m.
Moldings for frame panels
For 4 frames on a wall 4 × 2.5 m:
-
Frame width: 700 mm (4 frames of 700 mm with indents from edges and from each other);
-
Frame height: 1800 mm (from baseboard to cornice minus indents 150 + 200 = 350 mm, total 2500 − 350 = 2150 mm, but considering the proportion — 1800 mm);
-
Perimeter of one frame: (700 + 1800) × 2 = 5000 mm = 5 linear m;
-
4 frames × 5 linear m = 20 linear m + 15% = 23 linear m.
Wooden table legs
Standard — 4 legs. For an oval or round table up to 120 cm in diameter — 4 legs are sufficient. For a large rectangular table 160 × 80 cm — 4 corner legs, possibly with a central support or crossbar.
Leg height: table height − tabletop thickness. For a table of 760 mm and a tabletop of 30 mm: leg 730 mm.
Mistakes when designing a classic dining area
Choosing legs without considering load
An elegant turned leg with a cross-section of 40 mm under a tabletop weighing 60 kg — risk of deformation or breakage. Simple calculation: total load on the table (tabletop + food + dishes) = up to 100 kg. Load on one leg with 4 legs = up to 25 kg. For oak with a cross-section of 50 mm — this is acceptable. For lighter wood species with a cross-section of 40 mm — it is already borderline.
Placing a too-large ceiling rosette above a small table
A 700 mm rosette above a round table with a 90 cm diameter creates visual overload. The rosette dominates the table, disrupting the hierarchy of accents. Follow the proportion: the rosette diameter should be no more than 50–60% of the table's diameter or width.
Not aligning the chandelier, rosette, and table along the same axis
The chandelier should hang exactly above the center of the table. The rosette should be above the center of the chandelier. If the table is not centered in the room, that's not a problem: the rosette is installed above the table, not above the center of the ceiling.
Buying moldings without a wall layout
Buying 20 linear meters of molding and then figuring out how to arrange the frames leads to mistakes and overspending. Draw a wall layout with frame dimensions, offsets, and positions of outlets and switches. Only then proceed to purchase.
Mixing different styles of legs, chairs, and moldings
Turned table legs in Baroque style + rectangular chair legs in Empire style + rosette ornament in Rococo style — three different eras in one space. Choose one style code: Classicism, Empire, Neoclassicism — and stick to it in all elements.
Forgetting the baseboard
Wall moldings + cornice + rosette — and a cheap plastic baseboard at the bottom. This ruins everything. The baseboard is a full-fledged part of the system. Moldings made of polyurethane include baseboard profiles — don't forget them when ordering.
FAQ: answers to popular questions about the dining area in a classic style
Which legs to choose for a classic-style dining table?
Wooden legs for table with a turned profile made of oak or beech. Height — 720–750 mm for a standard dining table. Cross-section — at least 55–70 mm for a table for 4–6 persons. Finish — varnish or enamel matching the tabletop or interior.
Can you combine a wooden desk with polyurethane molding?
Not just possible — necessary. Polyurethane moldings — architectural decor of walls and ceiling. Wood is the furniture material. They work in different registers and organically complement each other in a classic interior.
What to buy for a classic dining area?
dining table legs, furniture legs for a sideboard, ceiling outlet, Moldings made of polyurethane for a cornice, baseboard, and frame panels, decorative molding и Wall Decor.
Is a ceiling rosette needed above the dining table?
If there is a chandelier above the table, a ceiling rosette is mandatory. Without it, the chandelier is attached directly to the ceiling, and this is technically readable. Ceiling rosette hides the mounting assembly and creates a decorative accent that visually "anchors" the chandelier on the table's axis.
How not to overload a small dining room with stucco molding?
Choose one main focal point — either an expressive rosette or molding frames on the walls, but not both elements with maximum relief simultaneously. The cornice is low, 60–70 mm. The rosette is small, 300–400 mm. Frames — 1–2 on the main wall.
How to tie the table, chandelier, and moldings into a single system?
Axis of symmetry: chandelier above the center of the table, rosette above the chandelier. Scale: rosette and moldings proportional to the table. Style: the profile of the table legs echoes the profile of the moldings. Color: a unified scheme — wood matching the parquet, polyurethane elements matching the walls.
About the company STAVROS
The entire range for decorating a classic dining area — Wooden legs for table, furniture legs, decor for furniture, Classic Furniture, Polyurethane ceiling rosettes, Moldings made of polyurethane, Decorative stucco, Wall Decor и Polyurethane moldings — is manufactured and supplied by STAVROS.
STAVROS is a Russian manufacturer of architectural and furniture decor from natural wood and polyurethane, founded in St. Petersburg in 2002. Over more than twenty years of work, the company has completed projects in the Hermitage, the Konstantinovsky and Alexander Palaces, and the Trinity-Izmailovsky Cathedral. Understanding of classical proportion, architectural scale, and durability requirements — in every product: from a furniture leg to a ceiling rosette. Orders from one unit, Contact us to confirm shipping to your destination., comprehensive technical specifications in each product card.