Article Contents:
- When it's worth choosing oak legs for furniture
- When an oak leg doesn't deliver the expected advantages
- The main distinguishing feature of an oak support comes from the wood structure
- What 'finished for tinting' means
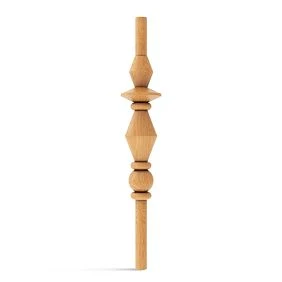
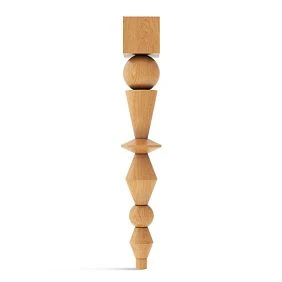
- Turned oak legs
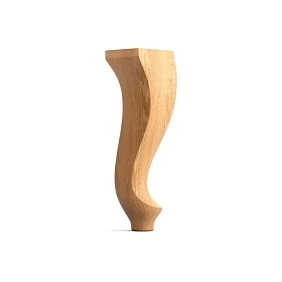
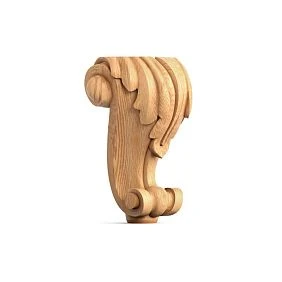
- Carved oak legs
- Geometric oak supports
- Oil and oil-wax
- Stain and Tinting
- Clear varnish
- Close color and shared surface character
- Coordinated contrast
- Chest of drawers and cabinet
- Sofa and armchair
- Table and console
- How to check the result
- What should remain in the order
- Which oak legs are suitable for furniture
- When is the best time to choose oak furniture legs
- How oak legs differ from beech legs
- Is it worth buying oak legs for enamel finishing
- How to tint oak furniture legs
- How to choose between oil and lacquer for oak legs
- Can legs be matched to the color of an oak tabletop
- Should the grain of all four legs be identical
- How to choose oak legs for a dresser
- How to choose oak legs for a table
- Do I need to order a sample
- How to check the size of a furniture leg before buying
- Where to buy oak furniture legs

Four legs of the same article number may match in size yet differ noticeably after a clear finish. One will show a broad pattern of annual rings, another calm longitudinal lines, and on a third the transition between glued wood sections will become more visible. That is why oak legs for furniture are chosen as a set right away: first the construction and fit are checked, then the texture is agreed upon, and only after that is the finish approved.
For an open console, a table, or a chest of drawers on tall supports, this selection affects the appearance of the entire piece of furniture. A single beautiful leg does not yet show how four parts will look together. And the name of the stain does not explain whether the result will match an oak tabletop.
A working order helps separate these questions. Suitable geometry ensures that installation is possible. The choice of oak determines the character of the visible wood. A test stain shows the result of the finish, and a saved sample allows it to be repeated in a batch. Each stage addresses its own task; a successful color does not fix an unsuitable fitting, and the same article number does not make the natural pattern identical.
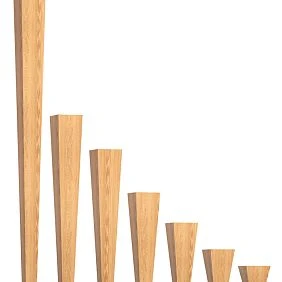
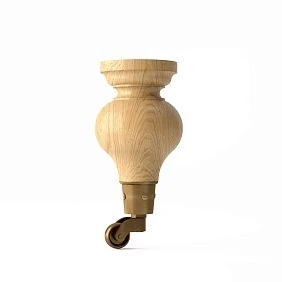

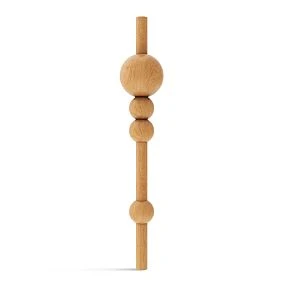
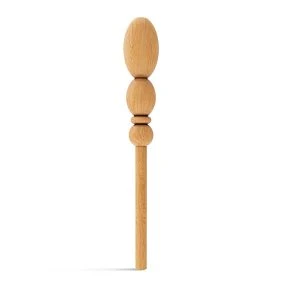
When it is worth choosing oak legs for furniture
Oak supports are especially appropriate when wood remains a visible part of the project. This may be a table with an open underframe, a chest of drawers on tall legs, a light console, or an armchair whose supports are visible next to the upholstery. In such furniture, silhouette and texture work together.
Oak makes sense to consider under clear lacquer, oil, oil-wax, and a tint that preserves the wood pattern. What matters is not the label on the can but the expected result: whether the pores and lines of the wood should read clearly, softly, or almost disappear under a dense color.
If the tabletop or front parts are made of visible oak, oak legs provide a common basis for coordinating the finish. This does not yet guarantee matching shades, but it allows parts of the same species to be compared instead of trying to reproduce its character on a different wood.
You should not choose oak based merely on the general notion of it being "the strongest species." The performance of a support is determined by its shape, minimum cross-sections, height, mounting, and the construction of the cabinet. An oak leg with an unsuitable mounting joint does not solve the furniture's structural problem.
Therefore, when choosing solid wood legs for furniture it is useful to first answer two questions: where the support will be visible and what role its grain pattern should play. If the texture is part of the design intent, oak becomes a meaningful material rather than just a line in the specifications.




When an oak leg does not deliver the expected advantages
Under a dense opaque enamel, the natural color of oak is hidden. If the surface must additionally become perfectly smooth, without pronounced pores, preparation may require separate operations to fill them. In such a project, a significant part of the wood's decorative properties remains unused.
For a uniform white or colored finish, it is worth comparing the available beech options. At the same time, oak under enamel is also acceptable: for example, when a certain pore pattern through the finish is needed, the chosen construction has already been approved in this species, or it is important to preserve a single material throughout the product. The decision depends on the required surface, not on a prohibition against painting oak.
The advantage of visible texture also diminishes when a short support is almost completely covered by the cabinet or upholstery. In this case, height, mounting, availability of a suitable model, and finishing technology come to the fore. Switching to oak by itself will not make a hidden part more noticeable.
The practical differences between species are discussed in the article on choosing oak or beech legs for the future finish. For a project with exposed oak, the next question is already different: what wood grain pattern is needed and how closely the parts of the set should match.
Our factory also produces:
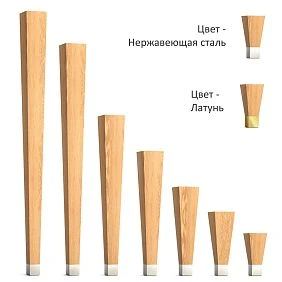
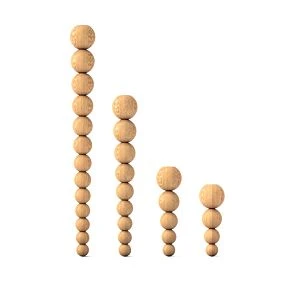
The main distinguishing feature of an oak support is related to the wood structure
Oak has prominent large vessels, growth ring patterns and medullary rays. These features are what form a surface that cannot be described with a single word such as "light" or "dark". Two parts may be close in color yet appear different because of the pattern.
On a surface close to a tangential cut, growth rings often form wide arcs. On a radial surface the pattern usually looks more longitudinal, and medullary rays may appear as characteristic light areas. What matters to the buyer is the result on the visible side of a specific leg, not the need to determine the cut type from a photograph.
On a three-dimensional part, the picture changes as it is rotated. On one side of a geometric support the pattern may be calm, while on the adjacent side it is more active. On a turned surface the fibers intersect with the curved shape, so their appearance changes around the circumference and at diameter transitions.
Natural heterogeneity does not mean that any result suits the order. If the project requires a calm set, this requirement should be agreed before purchase. One sharply contrasting face side can disrupt the composition, even if each part individually matches the chosen model.
Get Consultation
What "finished for tinting" means
In the STAVROS section, about the quality of solid wood products blanks "for enamel" and "for tinting" differ. In the first case, the lamellas are glued without selection by color and texture. In the second, such selection is provided, but minor natural differences remain, including between items from the same order.
Therefore, "for tinting" does not mean a finished coating, an exact shade or photographically identical legs. It is a characteristic of the blank that must be agreed together with the wood species and the quality of surface finishing.
Solid wood also does not necessarily mean a part made from a single solid piece of wood. A blank made from glued wooden lamellas is possible. With a clear finish, it is important to evaluate the placement and appearance of these sections on the finished shape.
Why a set of oak legs should be evaluated together
Four exposed supports need a shared visual balance. Usually a close tone and comparable grain expressiveness are enough; achieving a perfect match of every wood line is not required. But it is useful to define the desired degree of similarity in advance, especially for custom furniture and small batches.
Place the legs in their intended positions under the mock-up or next to the finished cabinet. Compare them under the same lighting and from a single viewpoint. If one part is held by the window and another in the shadow under the table, the difference in lighting is easily confused with a difference in material.
| What to compare | What to look for | How to use the result |
|---|---|---|
| Overall tone | Whether any one part is noticeably lighter or darker | Confirm the set selection before finishing |
| Grain expressiveness | How much the large arcs, stripes and rays differ | Agree on an active or calm texture |
| Visible sides | What each leg looks like in the working position | Assign the placement in the furniture |
| Transitions between the slats | Whether they form a sharp stripe on the front side | Check suitability for the selected coating transparency |
| Appearance after finishing | Whether the difference from tinting and gloss has increased | Evaluate the entire set before installation |
On a wall-mounted chest of drawers, the front legs are often perceived as a pair. On a freestanding table, all sides matter, so simply moving the most active pattern to the back may not work. A console with open sides should also be viewed from the walkway, not just from the front.
If the design allows the support to be rotated, you can choose a favorable visible side. However, the position is not determined by texture alone: a shaped leg, an angled pad, mounting holes, or a carved motif may dictate a single correct orientation. Such a part must not be rotated at the expense of its fit.
After selection, mark the positions: front left, front right, and rear. The marking is placed so that it does not interfere with finishing and installation. For multiple items, it is convenient to store the supports in separate sets rather than returning them to the common box after each operation.
A photo helps record the placement, but it does not replace a physical color sample. Automatic camera settings and lighting change the appearance of the wood. The photo is especially useful for another purpose — to show which side of a specific leg was agreed upon as the face side.
First, the design and shape of the support are chosen
It makes sense to discuss the oak pattern after an initial check of the design. Start with the type of furniture, the required height, and the method of connecting the leg to the body or the underframe. Then determine the top section, the available mounting surface, and the constraints on the overall dimensions.
The working sequence is simple: the purpose of the furniture, the height of the support, the mounting part, the shape, the species, and the future finish. If there is no suitable fastener, a beautiful oak leg cannot be included in the order as a ready-made solution.
At this stage, it is useful to distinguish the outer width from the size of the top platform. The ball-shaped part may be noticeably wider than the mounting area. On a carved leg, the maximum protrusion also does not show how much material remains in the narrowest section.
For a tall support, the connection to the underframe and stability under lateral impact are important. For a low cabinet, it is the transfer of load through the bottom and the placement of the supports relative to the body. Choosing the number of legs based only on appearance or dividing the furniture weight equally among four is not enough: the actual load distribution depends on the design and use.
When the geometry is suitable, you can compare finish options for the same oak product. This order preserves freedom of color choice without forcing you to later redo the body for a texture you like.
How the shape of the leg interacts with the oak texture
The same tint is perceived differently on a flat face, a rounded bead, and deep carving. Therefore, the shape and coating are agreed upon on a three-dimensional part. A flat color sample helps choose the direction of the color, but it does not show the entire future pattern of the support.
Turned oak legs
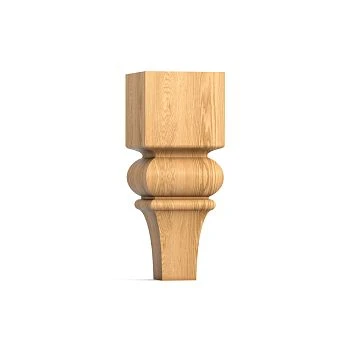
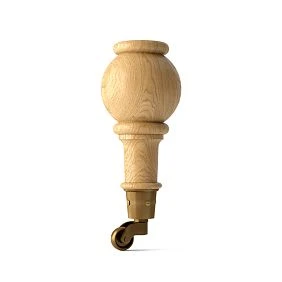
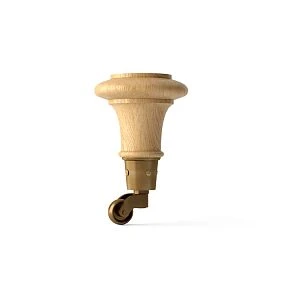
A turned leg alternates cylindrical, conical and rounded sections. The surface shifts position relative to the light, and the wood grain unfolds around the circumference. On a ball or a pronounced bead, even a calm shade can look quite active.
When choosing turned furniture legs don't look only at the silhouette. Assess the transitions between sections, the accessibility of the necks for finishing, and the appearance of the part from the side. If part of the surface ends up deep under the carcass after installation, it is better to plan the coating application before assembly.
For a set with repeating balls or beads, it is important that the finish does not create random dark rings on individual legs. Such an effect may result from a combination of wood grain, surface preparation and uneven application. First this is determined on a test piece, then the agreed process is repeated.
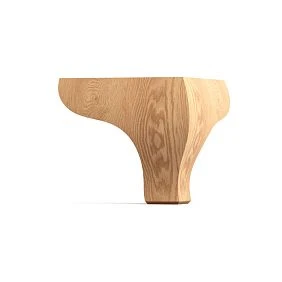
Carved oak legs
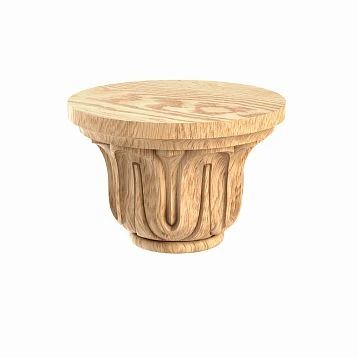
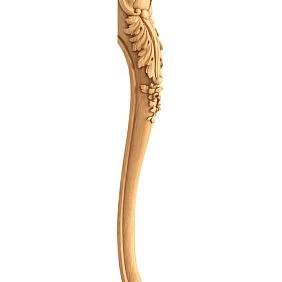
On a carved support, the ornament, the shadows of the relief and the natural texture all act at once. A contrasting stain can make this composition more expressive, but sometimes it fragments it: the fine wood lines begin to compete with the carving.
Choosing Carved legs for furniture, first decide what should read from a normal distance — the large forms or the detailed ornament. For complex relief, it is useful to compare a calm transparent option with a richer stain. Such a choice is more reliable than assuming that a dark finish always looks richer.
Check the recesses and protruding edges after the full coating cycle. The composition remaining in a recess can change the color and sheen; excessive sanding of a peak can soften the pattern. On paired shaped supports, the intended orientation of the carving relative to the carcass is also taken into account.
Geometric oak supports
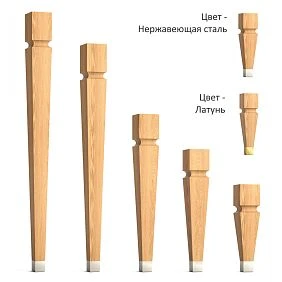
On flat faces, the texture becomes an ornament in its own right. A square section, a simple chamfer or a calm taper leave enough surface to see the wood grain without elaborate ornamentation.
В geometric furniture legs wide colour bands and transitions between the lamellae are especially noticeable. The front face of one leg may differ from the front face of another more than it appears in individual photographs. That is why, here, selecting the working sides can be more important than finding a complex shade.
A light matte finish does not guarantee that the surface will look untreated. Even a transparent composition can change saturation and contrast. If what is needed is specifically the appearance of dry light oak, this should be stated as a requirement for the sample coating.
How to check the dimensions of an oak support
Furniture leg product pages use dimensions A, B, C, D and other designations. For the models under consideration, A sets the height, but the other letters must be read from the drawing of the specific product. The same letter cannot be assumed to be a universal mounting plate dimension for the entire catalogue.
Record the leg height, the upper mounting surface, the maximum cross-sectional dimension and any important narrow sections. Check the holes, fasteners and glide separately. If the support is installed at an angle, its vertical height in the assembly and the position of the bearing point require separate verification.
The final furniture height is measured from the floor to the required upper point, taking into account all non-overlapping parts. A decorative tip already included in the leg's overall dimensions must not be added a second time. The protrusion of the mounting bolt is also not an additional furniture height if it fits into the mating part.
A hypothetical example: the distance from the lower mounting plane of the cabinet to its top is 620 mm. The design overall height is 800 mm. Under the cabinet there is a 6 mm mounting plate, and under the leg a 4 mm glide. With vertical installation and no recessing of the leg, its required height is 800 − 620 − 6 − 4 = 170 mm.
This is a calculation example, not a recommended size for any chest of drawers. If the mounting elements are recessed or overlap each other, the formula is refined using the joint cross-section. The support height cannot be set based only on a similar photograph of finished furniture.
To replace existing legs, measure not just one old part, but the entire lower assembly. Check the condition of the mating thread, the width of the mounting plate, the protrusion of the fastener, and the position of the support relative to the edge of the cabinet. New material does not eliminate wear or weakness in the old mounting.
Which models can be compared in the STAVROS catalog
For a preliminary selection, it is useful to look at several real models. The cards provided include beech and oak; the dimensions from the product tables are listed below. The designations are kept in the order given by the manufacturer.
| Model | Shape or feature | Example dimensions in millimeters | What to check in the project |
|---|---|---|---|
| MN-199 | Turned support with a brass-colored metal tip | A × B × D: 195 × 74 × 39 | Combination of wood, metal, and adjacent hardware |
| MN-217 | Turned furniture leg | A × B × D: 194 × 74 × 39 | Full height and mounting design |
| MN-220 | Spherical support | A × B × D × E: 105 × 109 × 38 × 20 or 125 × 130 × 38 × 32 | Width of the rounded part relative to the edge of the body |
| MN-233 | Rhythm of rounded elements with decreasing diameter | A: 198, 247, 443 or 635; B × C × D: 72 × 72 × 36 | Height version and application restrictions |
MN-199 and MN-217 have similar dimensions, but their overall height and design differ. They must not be mixed in one set just because the numbers in their product cards look alike.
For MN-233, the manufacturer separately specifies use under light loads. This is an essential selection condition: an oak version by itself does not turn any model into a universal support for heavy furniture. The suitable height, permitted application and fastening are agreed for each specific structure.
It is not enough to write only the model designation in the order. You need to choose oak, the required size, the preparation quality and the fastening set. The version for semi-transparent finishing is specified separately; the presence of oak in the materials table does not replace approval of the blank for future tinting.
How to prepare an oak leg for tinting
Tinting should serve a clear purpose: bring the support closer to the tabletop, make it slightly darker than the body, soften the overall tone or emphasize the pores. The wording “paint to look like oak” is too vague for an oak leg. It is better to attach a real sample of the desired result.
Start by inspecting the unfinished surface. Check for machining marks, contamination, glue residue, transitions between areas and places that will be visible after installation. Pronounced natural variation and a preparation defect require different solutions. An additional tinting layer should not be used as a universal fix for any unevenness.
Then the preparation is selected for the specific composition. The sanding sequence, final grit, and the need for primer or other preparatory products are determined by the coating technology and a test on the wood. Overly coarse scratches may become more noticeable after staining, and different preparation of individual areas may alter the appearance of the color.
With complex shapes, it is important to preserve the geometry. Do not sand down sharp edges and thin beads for the sake of uniform smoothness across all areas. For manual finishing, choose a method that allows working in recesses without changing the profile. After processing, remove dust, including from pores and hard-to-reach transitions.
Next, a test application of the selected system is performed. The general sequence for many options looks like this: prepared wood, test color, specified drying, compatible protective layer. But the specific operations, holding time, and number of coats are taken from the material's technical description. For a combined coating, the order may differ.
Do not judge the color by a wet surface. After drying and applying the finish coat, the saturation, contrast, and gloss change. The result is approved on a fully completed sample, and the recipe is saved so that another workshop employee can reproduce it.
If the support has metal decor, its role in the finish should be planned in advance. Clarify whether it can be removed or what surface protection is suitable during work. Evaluate the wood color next to the metal: a warm tip and a cool gray tint may be perceived quite differently than each material separately.
How to choose oil or lacquer and determine the role of stain
Oil, lacquer, and stain are not always three interchangeable options. Stain is usually needed primarily to change the color. Oil or lacquer can serve as the final protective coating. There are also products that combine coloring and protection, so you should focus on the purpose of the specific product.
| Solution | What task it can solve | What to check on the sample |
|---|---|---|
| Clear oil | Preserve visible wood and give the surface the desired character | Changing the shade, pore contrast, and care requirements |
| Pigmented oil or oil-wax | Match the color with the specified protection system | Uniformity on edges and in recesses, the need for additional coats |
| Stain followed by a finish | Adjust the shade before the protective finish | Material compatibility and the final color after the entire cycle |
| Transparent varnish | Form a protective coating with the selected sheen | Color shift, appearance of pores and behavior of highlights on the shape |
Oil and oil-wax
Oak legs under oil are chosen when well-defined wood grain and a tactile feel suited to the project are needed. However, oils and wax-containing compositions differ in the surface they form, the application method and operating requirements. It is not possible to promise the same result based on the name of the material group alone.
Clear oil can make wood visually richer. If the goal is to preserve a light, untreated look, a standard colorless product will not necessarily produce the desired effect. First, test the chosen product on actual oak and compare it with the approved furniture sample.
For a complex leg, it is important to be able to distribute the product over the entire shape without uneven buildup. The conditions for removing excess, the waiting time, and reapplication must be the same for all four legs. These are determined by the material instructions, not by a universal number of minutes.
Stain and tinting
Stain helps change the shade, but by itself it does not confirm the required durability of the finished surface. Check whether the chosen product requires a subsequent protective layer and which one specifically. A suitable appearance after the dye dries does not yet mean that the leg is ready for use.
Transparent tinting preserves the differences in the wood. It can bring the set closer in overall color, but it will not turn the large arcs on one piece into calm stripes on another. Therefore, the acceptable pattern is agreed upon first, and then the shade is worked on.
Color selection should not be done on all four legs at once, gradually darkening the entire set. To find the formula, use separate test pieces, then check the chosen option on a larger component. This preserves the ability to compare and avoids getting four different results during the experiment.
Clear varnish
Oak legs under clear lacquer retain the visible wood pattern. At the same time, transparency does not mean a complete absence of effect on color: different systems can change the perception of light wood in different ways. The degree of gloss also affects the appearance of the texture and shape.
Matte and glossier options should be viewed on the same geometry. On wide faces, an elongated highlight is noticeable; on turned parts, it breaks up into separate light areas. If one leg is glossier than the others, the set may appear uneven even with a similar shade.
The final choice is tied to normal care and the conditions in which the furniture is used. Legs near the floor come into contact with shoes, cleaning equipment, and accidental splashes. Coating requirements are set for this scenario. Compatible Mounting and finishing materials are selected after clarifying the entire system, including preparation and subsequent care.
Why oak color and solid oak mean different things
In furniture descriptions, the word "oak" can refer to the material, the veneer pattern, or the name of a shade. For ordering supports, these are different pieces of information. The label "natural oak" on a color sample does not confirm that the part itself is made of oak wood.
| Designation | What the buyer may be looking at | Significance for choosing legs |
|---|---|---|
| Oak solid wood | Oak wood, including blanks made of glued lamellas | The natural pattern and finish of specific parts are matched |
| Oak veneer | A natural thin layer of oak on a substrate | The veneer pattern is compared with a solid wooden support |
| Tinted beech imitating oak | Beech wood with an altered shade | A similar color does not make its texture oak-like |
| Panel with oak decor | Base with a decorative wood-imitation surface | Selection is made using a real decor sample |
Oak veneer remains natural wood, but its pattern can be specially selected and oriented on a large surface. On a turned leg, the surface reveals the blank around its circumference. Therefore, even a combination of two natural oak materials does not imply an identical pattern.
When ordering, specify the support material and the required finish separately. The wording "oak leg, tinted to match the facade sample" is far more precise than "oak-colored leg." If the facade is made of a different material, attach its sample — a photograph and the decor name provide only a preliminary direction.
How to combine oak legs with an oak tabletop
The tabletop and legs are in different planes and receive different light. Therefore, an identical finishing formula does not guarantee that they will look exactly the same in the assembled table. Comparison should be made in a position close to the working one: the tabletop horizontally, the support vertically or at its design angle.
Usually one of two goals is chosen. The first is the closest possible overall tone, in which the top and supports are perceived as a single material. The second is a pre-agreed contrast, for example darker legs with a light tabletop. Both goals require samples, but the acceptance criteria will differ.
Close color and overall surface character
Compare the warmth of the shade, the degree of darkening, and the sheen. Then look at the texture activity. A leg with strong pore contrast may look noticeably darker than a calm tabletop, even though the base wood color is close.
There is no need to continue the tabletop grain into the leg. These are different parts with different surface directions. For a cohesive impression, it is more important that their tone and expressiveness do not clash, and that the degree of sheen is consistent.
If the top is already finished, first select the finish for the support to match the actual product. Repeating the name of an old stain without checking does not account for surface preparation, the protective layer, and possible color changes in the existing furniture.
Deliberate contrast
Contrast is best made discernible and intentional. A small random discrepancy may look like a failed match, whereas a pre-chosen difference supports the composition. To check, place the finished leg sample under the edge of the tabletop and assess the whole piece from a normal distance.
It is convenient to use one finish system as a starting point if it suits both parts in terms of operating conditions. But the tabletop and legs receive different impacts, so the protective coating requirements for each part remain. What needs to be coordinated is the final appearance and suitability, not necessarily a single can for the entire piece of furniture.
Oak legs under a body made of another material
With painted MDF, an oak support can become a standalone natural accent. Here there is no need to imitate the color of the body. It is more important to check how the wood combines with the enamel in warmth, saturation, and sheen, and how the upper part of the leg aligns with the lower edge line of the furniture.
With a plywood body, consider which surfaces remain visible. The exposed plywood edge, the veneered plane, and the oak leg form three different patterns. To keep the composition from looking accidental, decide in advance which of them will be dominant.
With beech under a clear finish, it is better to accept the difference in texture as part of the design. Trying to make oak and beech look the same with a single stain may produce a close tone, but the natural grain will remain different. If you need a calm transition, compare less contrasting finish options on both species.
With upholstered furniture, the upholstery affects how oak is perceived. Place a sample next to the fabric or leather: warm texture, grey velvet and shiny metal decor can produce different combinations. For an armchair that is visible from all sides, include the side and rear views in the sample.
In every case, decorative coordination is carried out after checking the base for the fastening. MDF, plywood and wooden framing require a suitable mounting solution. Oak furniture legs must not be held in place only by a visually convincing wide top section.
How to choose oak legs for a specific piece of furniture
The applied sections of the catalogue help narrow the search, but they do not replace checking the construction. Within a single category there are different heights, shapes and mounting methods. The availability of an oak version is confirmed in the product page of the selected model.
Chest of drawers and bedside table
For a chest of drawers, what matters is the weight of the carcass with its contents, the position of the internal dividers and the load path to the legs. If the bottom needs reinforcement or the design provides for additional supports, replacing the four outer legs with oak ones does not remove these requirements.
First set the final height and the position of the legs relative to the front and sides. Then check the opening of the lower drawers, doors and elements that pass close to the floor. The maximum width of a ball-shaped or shaped leg may matter more than the width of its top plate.
Tall wooden legs for a chest of drawers visually lighten the carcass while also making the legs themselves more noticeable. In such a design, the front pair deserves especially careful selection. On a low cabinet the visible part is smaller, but a light stripe on one leg can still stand out against a dark lower edge.
Raising a chest of drawers means changing its geometry as a whole. Stability, the operation of extended drawers and the intended furniture fixing are checked after the height change. The strength of the wood does not answer the question of the stability of the entire item.
For a preliminary selection, use the section legs for a chest of drawers, wardrobe, and nightstand. If you want to buy oak legs for a chest of drawers, give the supplier not only the desired height but also information about the mounting area and the visible sides.
Sofa and armchair
For upholstered furniture, changing the supports affects the seat height. With an unchanged frame and cushions, increasing the vertical height of all supports by approximately the same amount raises the furniture by that amount as well; the actual seat height is additionally determined by the compression of the soft elements.
Therefore, replacement begins with assessing the comfort of the finished sofa or armchair. Check whether it is possible to preserve the position of the central supports, the operation of the transformation mechanism, if present, and the previous load-transfer scheme. You must not change only the clearly visible outer legs while leaving the supporting elements at a different height.
for oak sofa supports match the tone with the upholstery and other wooden parts. For armchair legs visibility from the side and rear is also important: an armchair is more often exposed to view from several directions.
The lower part of the upholstery may restrict access to the fastening and cover part of the support. Test fitting is carried out before the final finish so as not to rework already painted oak near the fabric and not to damage the finished surface with tools.
Table and console
For a table, the supports are checked together with the aprons, the tabletop fastening, and the legroom. Expressive oak grain does not compensate for a weak connection between the legs and the underframe. If the wooden tabletop needs to be able to move, its fastening is designed separately from the decorative selection of supports.
In an open console, the silhouette, pairing and direction of the visible grain are especially noticeable. If the project involves wall mounting, this is taken into account when choosing the entire structure. Dining and console models are conveniently found in the sections wooden table legs и supports for a console table, and then proceed to the specific oak finish.
Why a test stain is applied before finishing the entire set
The test should answer the question of how the leg will look next to the furniture after the finish is complete. For this, real wood, identical preparation and the full specified coating cycle are important. A smear of stain on a random offcut solves only part of the task.
For a preliminary choice of shade, a flat sample of suitable oak is acceptable. But for a turned or carved support, the final check is best performed on a full-size part of the chosen shape. It shows the transitions, end-grain areas, recesses and distribution of highlights.
Before ordering a sample, clarify its material and preparation. In the section product samples you can start selecting, and the possibility of obtaining a specific leg for testing should be agreed by its article number. A sample of a different species will not confirm the future color of an oak set.
How to check the result
Prepare a test leg in the same way as planned for the batch. Apply the chosen tint or coating, observing the conditions specified by the manufacturer. Wait for the required drying stage, apply compatible subsequent layers and evaluate the finished result.
Place the leg next to the tabletop, front, or upholstery. Look at it in diffused daylight and under the artificial lighting that is close to the future place of use. Do not mix different light sources when comparing the two parts.
First assess the overall furniture from a normal distance. Then move closer to the surface and check the pores, transitions between areas, depressions, and coating quality. This order helps avoid mistaking a beautiful individual fragment for a successful result of the entire product.
Do not polish or touch up the test leg with additional techniques that were not recorded. If an adjustment was needed to achieve the desired result, it becomes part of the agreed technology. Otherwise, the sample will turn out well, but it will be difficult to repeat it on the next four supports.
| What to record after the test | Why this is needed |
|---|---|
| Article number, size, and species | Link the color to a specific blank |
| Surface condition and preparation | Replicate the initial conditions |
| Names and codes of materials | Rule out substitution with a similar shade |
| Number of coats and application method | Reproduce the richness and appearance of the finish |
| Exposure times for the selected technology | Maintain the sequence of operations |
| Final gloss and a sample of the adjacent material | Evaluate the set against a clear reference |
For noticeable color variation, it is useful to agree not only on one "ideal" sample but also on acceptable lighter and darker variants. This approach is especially convenient for small batches: it sets the boundaries of an acceptable result while preserving the natural characteristics of the wood.
How to order a set from a single batch
Ordering all visible legs for one item at the same time is convenient for joint selection and finishing. However, a single batch does not guarantee identical grain, origin from the same board, or a complete match in shade. Appearance requirements must be discussed separately.
In the request, specify the number of sets and the number of supports in each. State that the parts will be installed on a single item under a clear or semi-transparent finish, and indicate the desired consistency of the pattern. The possibility of such matching, its terms, and the available options are confirmed before the order is placed.
If the front pair or specific visible faces matter, attach a layout diagram. For a freestanding table, note the all-around view. It will be clearer to the supplier and the workshop to receive the task "a set of four visible supports with a calm grain" than a request to send four identical legs without further explanation.
What should remain in the order
The working record includes the item code, size, oak finish, blank preparation, quantity and designation of the approved finish. Fasteners and glides are listed separately if they are not included in the agreed set. For each item it must be clear whether a ready-made component is being purchased or a part that still needs to be prepared in the workshop.
A conditional calculation example for a small batch: six cabinets with four visible legs each require 24 working parts. If, according to the workshop plan, one separate leg remains the finish reference and two are provided as reserve, a total of 27 pieces is needed. This is an example of organizing procurement, not a universal reserve norm.
It is useful to consider the reserve together with the main set and decide whether it is stored unfinished or receives the same finish. A finished spare leg makes replacement easier, but it may change color differently during storage than furniture in the room. An unfinished reserve will require repeating the finish. The choice depends on the timeframe and purpose of the reserve.
After receipt, sort the parts into sets before starting batch processing. Record the layout, compare the execution with the approved sample, and only then send them for finishing. This way the grain matching is preserved until the furniture is assembled.
How to avoid differences when reordering
For a repeat production run, saving a photo and the color name is not enough. A working specification, a physical reference and coating details are needed. Even with the same item code, new wood may differ, and replacing the finishing material will require a new sample.
When the next batch arrives, first process a control part. Compare it with the reference and, if possible, with furniture from the previous run. If the items are intended for the same room, the requirements for similarity will be stricter than for independent orders sharing a common finish name.
| What became noticeable | What to check before fixing |
|---|---|
| One leg is noticeably darker | The original wood tone, preparation, and amount of material applied |
| A different shade appeared in the recesses | Distribution of the composition and adherence to the technique for removing excess |
| Light spots are visible | Surface condition, contamination, and possible glue marks |
| The color is close, but the details look different | Gloss, lighting, and direction of the working sides |
| The new set did not match the old one | Full coating composition, condition of the reference sample, and characteristics of the new wood |
First establish the cause, then choose the adjustment method according to the technology of the materials used. Additional darkening of the entire set may hide part of the color difference, but at the same time change the approved appearance of the furniture. If the original pattern differs too much from the required one, it is more correct to revise the selection of parts before finishing.
Before installation, check the condition of the mounting points and the compatibility of the fasteners. A suitable furniture leg hardware is selected for a specific assembly: stud, mating thread, mounting plate and cabinet body base. The finished coating is protected during assembly, and operation begins after the surface has reached the coating readiness specified by the manufacturer.
Frequently asked questions about oak furniture legs
Which oak legs are suitable for furniture
Those whose purpose, height, cross-section and mounting correspond to the specific construction. For a clear finish, the quality of preparation and the appearance of the set are additionally important. The species itself does not determine the permissible load or the installation method.
When it is better to choose oak furniture legs
When the wood pattern remains visible and participates in the furniture design. Oak is convenient for matching with an oak tabletop, facade parts, or as an independent natural accent under a painted cabinet.
How oak legs differ from beech legs
Oak usually has more pronounced pores and a natural pattern, while beech has a calmer texture. Therefore, different solutions may be required for visible wood and opaque finishes. Suitability in terms of construction and the coating result are checked separately from the general comparison of species.
Should you buy oak legs for enamel finishing
This is acceptable if oak is required by the project or if its grain under the color matters. For a fully smooth opaque surface, it is worth comparing the beech option and the amount of preparation. By covering the grain with enamel, the buyer does not use all the decorative features of oak.
How to tint oak furniture legs
Start with a suitable blank and surface preparation, then make a test of the chosen composition and a compatible protective coating. The formulation, holding times and number of coats are determined by the technical requirements of the materials. The result is evaluated on a finished part.
How to choose between oil and lacquer for oak legs
The choice depends on the required appearance, gloss, care and operating conditions. Compare two fully completed tests on identically prepared oak. Oil does not necessarily preserve the color of dry wood, and clear lacquer does not necessarily look the same in all systems.
Can legs be matched to the color of an oak countertop
Yes, a close overall tone can be coordinated using samples. Color, grain contrast and gloss are compared in the working position of the parts. A matching stain or species name does not replace such a check.
Should the grain of all four legs be identical
A complete match of the natural pattern is usually not required. Consistent expressiveness and the absence of a randomly standout part are important. For furniture viewed from all sides, the entire set is checked from all visible directions.
How to choose oak legs for a chest of drawers
Determine the overall height, the bottom construction, the position of the supports and the mounting method. Check stability and drawer operation. Then coordinate the visible sides of the front pair and the finish next to the facade.
How to choose oak legs for a table
Solid wood table legs are chosen together with the underframe, the joints and the tabletop mounting. Check legroom and structural stability. For a transparent finish, the set is additionally selected by the overall character of the grain.
Should you order a sample
For a new combination of model, wood and finish, a sample helps avoid redoing the set. A flat sample is suitable for an initial shade selection. A complex turned or carved shape should preferably be checked on a full-size part.
How to check the size of a furniture leg before purchase
Compare the dimensional drawing with the mounting assembly and the final furniture height. Check the top plate, the maximum overall dimension, the fastener and the glide. Read letter designations according to the specific product page, without automatically transferring their meaning from another model.
Where to buy oak furniture legs
In the STAVROS catalog you can choose a model and specify the oak version, size and preparation. Unpainted supports are considered for your own finishing. Before ordering a batch, agree on a sample, the set composition and the delivery terms.
Where to buy oak furniture legs
If you need to buy wooden furniture legs with visible grain, start by choosing the shape and geometry in . the STAVROS catalog of oak furniture legs and other supports. In the product card of the selected item, specify oak, the required dimensions and the intended purpose. Do not limit your order to a generic wood species name.
For tinting to your own sample, oils or clear lacquer, the options suited to the project will work Unpainted furniture legs. Clarify the blank's finish for semi-transparent coating, the quality of sanding and the hardware composition. If you need to match several visible supports, mention this before placing the order for the whole set.
In a purchase request, it is useful to combine the technical and visual parts: model, oak, size, number of sets, grain requirements and the approved finish. For a chest of drawers, attach a general view of the front; for a table, a diagram of the underframe and a sample of the tabletop; for an armchair, the upholstery material and the position of the legs.
Workshops and small-scale producers can review the terms of working with manufacturers. The availability of the required finish, lead times, the possibility of matching and delivery terms are agreed for specific items. This allows you to buy oak furniture legs for a real order and to take into account in advance the operations that remain with the workshop.
A successful set begins with a suitable mounting fitting and ends with a coordinated visible surface. When shape, texture and trial finish are checked together, oak furniture legs become a predictable part of the product: they can be installed, assessed next to the cabinet and reproduced with a consistent result during batch production.