Article Contents:
- Which furniture legs can really be made with your own hands
- Simple straight support
- Simple tapered leg
- Turned leg
- Carved leg
- Complex shaped leg
- Mistake 1. Making the first leg without a template
- Mistake 2. Choosing the height without considering the entire piece of furniture
- Mistake 3. Not checking the mounting point
- Mistake 4. Considering only the cost of the wood
- Mistake 5. Assuming all legs are the same in purpose
- Mistake 6. Ordering many ready-made legs without test fitting
- How to make furniture legs with your own hands?
- Which legs are easier to make yourself?
- How to make four legs the same height?
- When is the best time to buy ready-made furniture legs?
- How to choose the leg height for a chest of drawers?
- How do legs affect the height of a sofa or armchair?
- Can I buy unfinished legs and finish them myself?
- Why is a turned leg more difficult than a straight one?
- What to choose — oak or beech?
- How to buy ready-made legs for a specific piece of furniture?
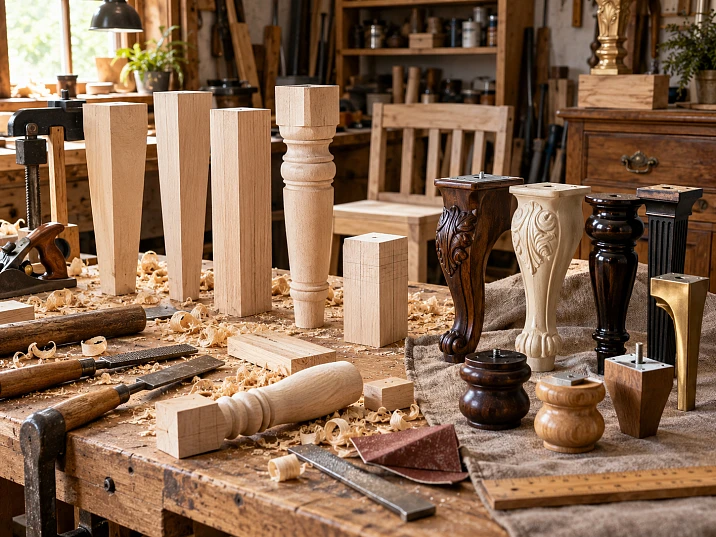
A handmade furniture leg seems like a simple part right up until you need to make not one, but four identical ones. With a straight block, the task is clear: mill the same cross-section, cut the parts to one size, finish the surface, and prepare the mounting point. With a turned leg, you already need to repeat the same profile. With a carved one, the pattern as well. With a shaped support set at an angle, an error of a few millimeters can change the position of the entire cabinet.
That is why the question “how to make furniture legs with your own hands” is better to start not with the machine and not with a drawing of the future part. First you need to understand what furniture they are for, what height the cabinet should have, what clearance is needed from the floor, how many supports are required, and where they will be attached.
For a simple chest of drawers or cabinet, you really can make your own legs in the workshop without unnecessary complications. But if you need a matching set of turned, carved, or shaped supports, it is useful to compare two paths: making them yourself or taking ready-made wooden legs and handling the cabinet, mounting, and finishing yourself.
The main logic is simple: simple shapes make sense to do yourself, complex ones — first calculate, and only then decide whether to make or buy.
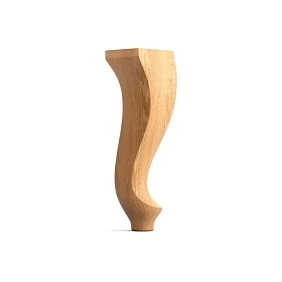
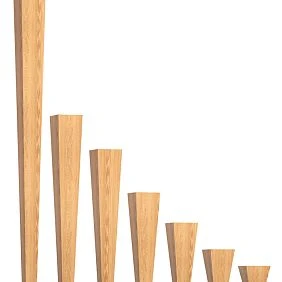
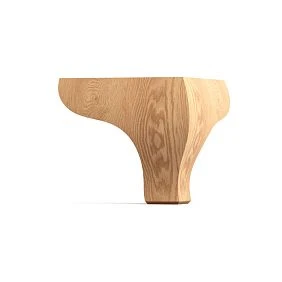

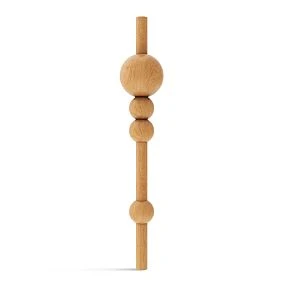
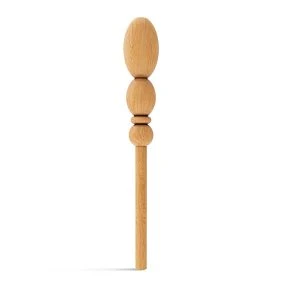
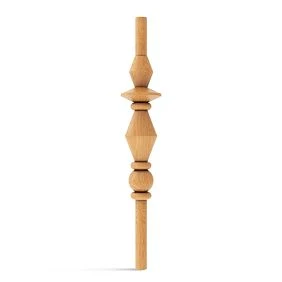
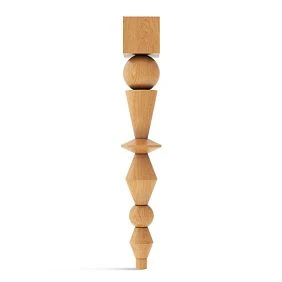
Which furniture legs can really be made with your own hands
Not all legs are the same in terms of manufacturing complexity. A straight support made of timber and a carved shaped leg formally perform the same task — they support furniture. But the amount of work involved is completely different.




Simple straight support
This is the most straightforward option for DIY manufacturing.
If the workshop has dry timber of the required cross-section, you can prepare four identical blanks, bring them to size, trim the ends and sand them. For a nightstand, a simple chest of drawers, a bench or a wardrobe, such a leg often turns out to be the most rational solution.
Especially if it is almost invisible or should look like a calm part of the structure.
Our factory also produces:
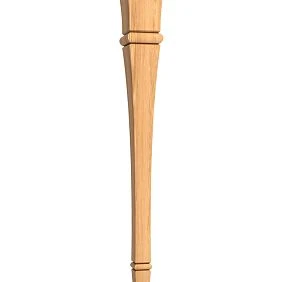
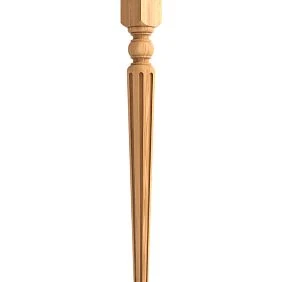
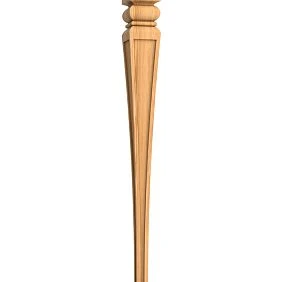
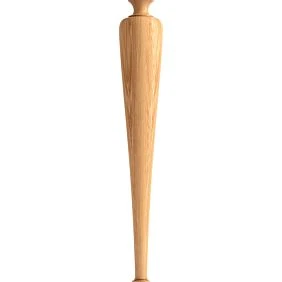
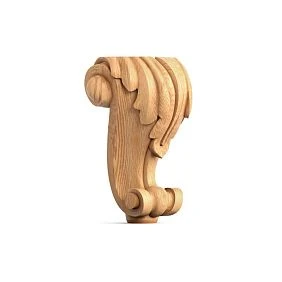
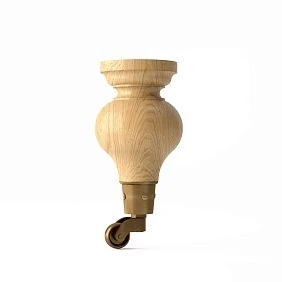
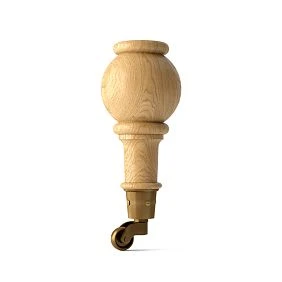
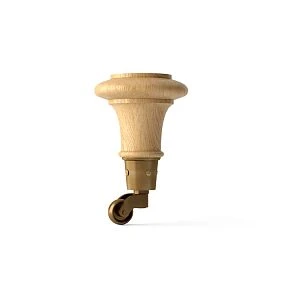
Simple tapered leg
A slight taper makes the part visually lighter, but it does not yet turn it into a complex product.
The main thing is to make an identical template and process all parts according to the same scheme. If the first leg tapers from one point, and the second begins to taper a few centimeters higher, the difference will become noticeable on the finished furniture.
Get Consultation
Turned leg
This already requires a turning process.
A single turned part can come out well even when working almost "by eye." But a set requires repeating diameters, transition heights, grooves, beads, tapers, and overall length.
If there are four or six such parts, the work turns into a separate production task.
Carved leg
A carved pattern is added to forming the overall geometry.
You need not only to make the same height, but also to repeat the relief, depth, edges, and position of the ornament. Then each part still has to be carefully sanded, especially in the recesses and inner corners.
Complex shaped leg
A strong tilt, a complex change of cross-section, transitions between several planes — this is already a full-fledged product.
Straight lines by themselves do not yet mean simple manufacturing. Sometimes a geometric leg with several slanted faces requires more precise marking and tooling than an ordinary round turned one.
The more complex the shape and the fewer parts required, the more useful it is to compare making it yourself with ready-made furniture legs.
The main problem is making not one leg, but an identical set
One good leg does not yet mean the job is done.
A chest of drawers usually needs four supports. A sofa may need more. A bed may use internal or central supports in addition to the visible outer legs. In each case, the parts must work as a single set.
The height, cross-section, installation angle, shape, profile, mounting point, and direction of the decorative pattern, if pronounced, must all match.
With a straight leg, everything is easy to check. Place four parts side by side — you can immediately see whether the length and cross-section match.
With a turned leg, it is more difficult. You need to compare the characteristic points of the profile.
With a carved leg, it is even more difficult. Two parts may be identical in size but look different due to different relief depth or pattern position.
Therefore, before starting work, it is useful to ask yourself a simple question: how will I check that the last leg will be the same as the first?
If there is no answer, you first need a template, drawing, or sample.
First the furniture, then the leg
One of the most common mistakes is starting with a shape you like.
A craftsman sees a beautiful leg and decides: "I'll make one just like it for the dresser." Only later does it turn out that once installed, the body becomes too tall, the doors end up higher than needed, the bottom drawer rises unusually high, or the leg simply doesn't fit at the bottom of the body.
The correct order is different.
First, determine:
- what kind of furniture it is;
- the height of the body itself;
- the desired final height;
- the clearance from the floor;
- number of supports;
- mounting point;
- and only after that — the shape and height of the leg.
For example, a cabinet body 500 mm high with 80 mm legs and a body of the same height with 180 mm legs are perceived as two different things.
Not only the overall size changes. The proportion between the heavy part of the body and the free space below changes as well.
On upholstered furniture the difference is even more noticeable: the height of the support changes the seating position.
DIY legs for a dresser, cabinet, and wardrobe
On case furniture, a leg affects several things at once: the overall height of the piece, the free space under the body, stability, and visual lightness.
For a dresser, it is especially important to check the width and depth of the mounting plate. A beautiful massive leg may simply not fit in the corner of the body because of the side panel, plinth, or the position of the drawers.
If the dresser is wide, the question of middle support is decided separately. Four outer legs look right, but a long base may require additional support in the center. This depends on the construction, width, material, and load. There is no universal rule that "a wide dresser always needs a fifth leg."
Before manufacturing, it is useful to draw the bottom of the body from above and mark the position of the four corner supports, the distance from the edge, the available mounting space, the central part, and possible additional support.
If working out the geometry yourself becomes too difficult, you can look at ready-made wooden legs for dressers, wardrobes, and cabinets.
Why a tall leg dramatically changes a dresser
Let's take a simple example.
The height of the body is 700 mm.
Option one: 100 mm legs. The total height, excluding other structural components, comes to about 800 mm.
Option two: 200 mm legs. The body rises to approximately 900 mm.
The difference is only 100 mm, but visually the furniture changes significantly.
In the first case, the body remains the main mass of the piece. In the second, a large gap appears, and the dresser starts to look lighter and taller.
This can be a successful solution. But it must be planned.
In particular, the position of the top drawers needs to be checked. The dresser may look better in a photo, but be less convenient in everyday use.
DIY sofa legs: start with the seat height
With a sofa and armchair, the leg does not only serve as a decorative part. It affects the position of the entire upholstered unit relative to the floor.
If you replace an 80 mm support with a 150 mm one, the body rises by 70 mm. The seat rises along with it. For a person, this is already a noticeable difference.
A high seat height may be comfortable for one user and uncomfortable for another. The position of the knees, feet, and the seating angle change.
Therefore, before making or replacing the legs of upholstered furniture, measure the current height of the support, the current seat height, the desired change, the overall appearance of the body after raising, the position of the armrests, and stability.
You cannot assume that a new leg is suitable just because it can be screwed into the same place.
For ready-made options, there is a separate section wooden legs for sofas.
The front and rear legs of a sofa or armchair are not always identical
In simple modern furniture, the four supports can indeed be identical.
But in a classic sofa or armchair, the front and rear legs sometimes serve different purposes.
The front support is clearly visible. It can be turned, carved, shaped, more decorative.
The rear one is in a less noticeable area and may have a different shape.
Therefore, you cannot write down “four identical legs” in advance until the design has been checked.
If the front and rear parts differ, they must be separated in the working list: two front pieces, two rear pieces.
Bed legs: consider not only the outer perimeter
With a bed, it's easy to fall into the trap of a pretty picture.
The drawing shows four outer legs. It seems that these alone make up the entire support system.
But a real bed may have outer decorative legs, inner supports, a central longitudinal beam, and central props.
The outer legs are not responsible for the entire base.
Therefore, you cannot simply make four beautiful parts and consider the task complete. The entire structure needs to be checked.
If the height of the outer legs changes, the central supports must also match the new position of the frame.
To select ready-made parts, you can use the section wooden bed legs.
A simple square leg is a good candidate for making yourself
If you need an ordinary wooden support without a complex pattern, making it yourself is often genuinely more sensible than buying one.
Especially when the workshop already has the right wood, the equipment is set up, a non-standard height is required, the shape is simple, and the finishing will be done together with the rest of the furniture.
For example, a cabinet is made from solid wood, and the legs are square, straight, without tapering.
In that case, there is little reason to look for a ready-made part. It is easier to make the legs at the same time as the other body elements.
The main thing is not to forget about equal length and the exact mounting position.
For four straight supports, it is useful to prepare them with a small allowance, process them completely, and then set the final length for the whole set with a single setup.
Why a turned leg sharply increases complexity
A turned support seems simple because it is symmetrical around its axis.
But the profile needs to be repeated several times.
Imagine a leg with a cylinder at the top, then a rounded bead, a narrow neck, another widening, and a smooth taper toward the bottom.
If each transition shifts by just a few millimeters, an individual piece may still look fine.
The problem appears when four legs stand side by side on the same dresser or sofa. The mismatch becomes noticeable.
For reliable repetition, you need a template, reference dimensions, the same blank, the same setup, and careful sanding.
If a lathe is used in the workshop constantly, this is a routine process. If it has to be set up specifically for four small parts, it already makes sense to compare the time spent with ready-made turned furniture legs.
A carved leg is a separate, major job
With a carved support, everything that was difficult in a turned one remains. And relief is added.
You need to create the overall shape, the pattern, uniform depth, small transitions, work on the inner corners, and sand a complex surface.
Hand carving gives more freedom, but makes perfect repetition harder.
For a single piece of furniture, this can be too much work.
That is why, before starting, it is useful to open the section carved furniture legs and compare: is there a ready-made shape that matches in size and appearance.
A geometric leg is not always easy to make
The word “geometric” creates a sense of simplicity.
But a modern leg may have a tilt, a transition between different cross-sections, chamfers, tapering in two directions at once, a complex attachment point, and different widths of the upper and lower parts.
In a drawing, this looks like a few straight lines. In the workshop, precise marking is required.
It is especially difficult to produce several identical parts if each face has to be set separately.
Therefore, a geometric support should be evaluated by the operations involved, not by its outward simplicity.
Ready-made options are collected in the section geometric furniture legs.
You need to count not the cost of a piece of wood, but the entire job
The most incorrect comparison looks like this: a blank costs little, a finished leg costs more, so making it yourself is more profitable.
The calculation is missing labor.
For your own leg, you need to count:
material + waste + cutting + processing + machine time + manual work + sanding + possible defects + finishing.
For a ready-made one:
cost of the finished part + delivery + finishing, if needed + installation.
Sometimes the DIY option is indeed cheaper.
For example, four straight beech legs are made together with other parts. The material has already been purchased, the machines are running, and almost no additional setup is needed.
And sometimes the picture is the opposite.
Four complex turned legs require separate preparation, a template, several hours of work, and hand sanding. Then the finished part may cost more than the wood, but less than the entire operation.
To make the comparison fair, it is useful to record the time.
| Operation | How much time is needed |
|---|---|
| Prepare the drawing | ___ |
| Prepare the blanks | ___ |
| Set up the equipment | ___ |
| Make a test piece | ___ |
| Make the set | ___ |
| Sand | ___ |
| Prepare for finishing | ___ |
After that, the decision becomes much clearer.
Why four ready-made legs are sometimes smarter than making four
A ready-made leg is especially interesting for one-off furniture.
Let's imagine a workshop that makes a single custom dresser. The client wants complex turned supports.
To make them yourself, you need to prepare a drawing, set up the turning work, make a sample, then repeat the profile four times and sand the parts.
If a suitable ready-made model already exists, all that work disappears.
The craftsman still makes the body, fronts, drawers, finishing, and installation himself. He simply does not produce one complex part.
For a small workshop, this can be smarter than turning every order into mastering a new technology.
When making it yourself is more profitable
Buying ready-made legs is not always necessary.
Making them yourself is often better when the shape is simple, the size is non-standard, the wood is already prepared, the equipment regularly performs such work, a large batch is needed, or a unique custom shape is required.
For example, a small cabinet needs four straight legs 90 × 45 × 45 mm.
If the workshop regularly works with beech and can make such a set together with the cabinet, looking for a mass-produced item may simply be unnecessary work.
An unfinished ready-made leg is the middle ground between the two approaches
There is a good intermediate option.
The craftsman buys a ready-made shape, but not a ready-made finish.
For example, a complex turned leg has already been made. All that remains is to coat it with the same enamel as the chest of drawers body.
Or tint it together with the oak furniture parts.
This allows you to eliminate the labor-intensive shaping, but preserve the overall color and finish within the workshop.
That is why from STAVROS open boundless possibilities for designers, furniture makers, and anyone striving to create unique high-quality furniture. convenient to think of it as a pre-prepared wooden part.
Finished leg with coating
Sometimes a workshop doesn't need its own painting cycle either.
For example, furniture is assembled from ready-made elements, and there is no separate finishing area.
Then you can consider furniture legs with a ready-made coating.
The point here is not only the price.
A ready-made coating eliminates several operations: preparation, priming, painting, drying, and intermediate processing.
But the color and appearance need to be checked in advance. If the leg must match an already painted cabinet body exactly, finishing an unpainted part yourself may be more convenient.
MN-186-1: an example of a geometric leg for cabinet furniture
Geometric Furniture Leg MN-186-1 clearly shows why even geometry that looks straight can be more convenient in its finished form.
The model comes in several height options. There are versions of 423, 523, 773, 813, and 923 mm. The cross-section for these options is 62 × 62 mm, but the other shape dimensions vary.
For a chest of drawers, cabinet, or wardrobe, this means a simple thing: you can't choose based on a photo alone.
First you need to know the height required for the specific cabinet, and then look at the full dimensions of the selected option.
If a craftsman decides to replicate a similar shape on their own, the angle and transitions must be transferred precisely to all parts.
MN-083: an example of a finished turned support for upholstered furniture
Turned furniture leg MN-083 on the STAVROS website it is presented as a leg for a sofa and armchair.
The size is listed as 100 × 90 × 73 mm. Options in beech and oak are available.
What matters to us is not the product itself, but the principle.
If a craftsman makes a sofa, he can independently build the entire wooden frame, assemble the upholstered part, choose the fabric, determine the seat height, and use ready-made turned legs.
This way, there is no need to set up lathe work separately for a small set.
But before ordering, you still need to check whether the height suits the specific sofa.
MN-094: example of a leg for a bed
Turned furniture leg MN-094 is listed on the website as an option for a bed.
Size — 100 × 90 mm. Available in beech and oak.
The principle is especially clear here: your own bed frame + a ready-made wooden support.
But four outer legs should not replace the calculation of the entire base.
If the bed needs central support, it is calculated separately.
It is also necessary to check the bed height after installing the supports. Even a small change can noticeably alter the position of the mattress relative to the floor.
One test leg before ordering the full set
If the model is new to the workshop, it is useful to check one part first.
The procedure is simple:
- select a specific leg;
- receive one part;
- attach it to the body;
- check the height;
- check the mounting point;
- do a test finish, if needed;
- only after that, order the full set.
This is especially useful before ordering a large quantity of identical parts.
A mistake in one leg is a minor problem. A mistake in twenty or forty is already expensive.
How to record legs in the working list
Entry legs — 4 pieces too short.
After a few months, it becomes unclear which legs were used.
It is better to record the product number, size, material, quantity, finish, and purpose.
For example:
MN-083, beech, 100 × 90 × 73 mm, 4 pieces, for enamel
If the front and rear legs of the sofa differ, they are recorded separately.
This is especially important for repeat orders.
How to choose beech or oak
For a DIY leg, the choice of wood species depends not only on strength but also on the finish.
Beech is often convenient to use where the part will be painted with opaque enamel.
Oak is interesting when you want to preserve a visible grain under a clear or semi-transparent finish.
But there is no hard-and-fast rule.
If the leg must match an oak body under clear lacquer exactly, oak looks logical.
If the entire dresser will be white, beech often turns out to be the more straightforward solution.
Before a production run, it is useful to do a test on an actual part.
Mistakes when making furniture legs with your own hands
Mistake 1. Making the first leg without a template
It turns out beautiful, but repeating it three more times is difficult.
How to avoid: first determine the reference dimensions and the verification method.
Mistake 2. Choosing the height without considering all the furniture
The dresser becomes too tall, the sofa — uncomfortable, the bed — taller than intended.
How to avoid: first calculate the finished height of the item.
Mistake 3. Not checking the mounting point
The leg looks right, but it doesn't fit under the body.
How to avoid: before manufacturing, draw the lower part of the furniture from above.
Mistake 4. Counting only the cost of the wood
The calculation doesn't include labor hours and equipment setup.
How to avoid: calculate the entire operation.
Mistake 5. Treating all legs as having the same purpose
A sofa may have different front and rear supports. A bed may require hidden central supports.
How to avoid: look at the entire structure.
Mistake 6. Ordering many ready-made legs without a test fit
If the height or mounting does not fit, the mistake is repeated across the entire batch.
How to avoid: check one piece first.
When ready-made legs should not be purchased
A ready-made part is not the right solution in itself.
Purchasing may be unnecessary if the required shape is very simple, the workshop already has the material, making it in-house takes little time, a non-standard size is required, a unique pattern is needed, or the batch is large enough that in-house processing becomes cost-effective.
When a ready-made leg is especially useful
Buying becomes more interesting if the profile is turned, there is threading, the shape is complex, you need a small set, you don't have the necessary equipment, the deadlines are short, or a ready-made model already fits the size.
Then the craftsman is not buying 'wood instead of wood.'
He is buying an already completed complex operation.
Where to buy ready-made wooden furniture legs
If, after calculation, the ready-made option fits better, the main section is Wooden furniture legs STAVROS.
Then you can choose by task.
Unpainted furniture legs are suitable if you plan to do the finishing yourself.
Legs with Finish are convenient when you need a finished appearance.
For a specific piece of furniture, you can go straight to the relevant section:
- legs for a dresser, wardrobe, and nightstand;
- Sofa legs;
- Legs for beds;
- Turned Legs;
- carved legs;
- geometric legs.
First, it's better to shortlist several options by height and dimensions. Only then choose by appearance.
Simple decision table: make or buy
| Situation | Make it yourself | Buy ready-made |
|---|---|---|
| Straight simple leg | often reasonable | Not always worth it |
| Non-standard size | Convenient | A suitable model may not be available |
| Turned profile | Requires turning process | Shape is already ready |
| Carved profile | Many operations | Complex processing can be excluded |
| One dresser or cabinet | Depends on the shape | Convenient for a complex leg |
| Large series | Custom processing can become cost-effective | Batch cost needs to be compared |
| Custom painting | Fully under control | Unpainted legs will work |
| No equipment | Difficult | A finished part is more convenient |
| A unique pattern is needed | The best option | The catalog limits your choice |
This table does not give a single answer for everyone.
It helps you see where the line is between a simple carpentry operation and a separate production process.
Frequently Asked Questions
How do you make furniture legs with your own hands?
For a simple support, prepare identical wooden blanks, bring them to one size, shape them, compare the length, and only then proceed to fastening and finishing. For turned and carved legs, you need a template and stricter control of repeatability.
Which legs are easier to make yourself?
The easiest are straight square or rectangular legs and simple tapered supports. The more transitions, threading, and angled faces, the more operations will be required.
How do you make four legs of equal height?
Treat them as one set. Leave a small allowance, shape the main form, then set the final length for all four parts with one setting and compare them again.
When is it better to buy ready-made furniture legs?
When the shape is complex, only a few parts are needed, the workshop does not do turning or carving regularly, deadlines are tight, or a ready-made option of the required size has already been found.
How do you choose the leg height for a chest of drawers?
First determine the desired overall height of the chest of drawers and the height of the body itself. The difference will give a guideline for the legs, but you also need to take into account the actual bottom construction and the mounting point.
How do the legs affect the height of a sofa or armchair?
The new support raises the entire body together with the seat. Therefore, changing the leg height directly changes the seating height of the furniture.
Can I buy unfinished legs and finish them myself?
Yes. This option allows you to get a ready-made shape and apply paint, stain, or lacquer together with the rest of the furniture.
Why is a turned leg more difficult than a straight one?
With a turned leg, the same profile must be repeated several times: diameters, transitions, grooves, and tapers. With a straight piece, the main task is a consistent cross-section and length.
What to choose — oak or beech?
Beech is often convenient under dense enamel. Oak is more often chosen when you want to preserve a noticeable wood texture under clear or semi-transparent finish. It is best to verify the final decision on a sample.
How do I buy ready-made legs for a specific piece of furniture?
First, write down the type of furniture, the required height, the available mounting space, and the number of supports. Then select models by dimensions, and only after that compare shape, wood species, and finish.