Article Contents:
- Wooden ceiling plinth PLT-001 120×15 mm: what dimensions are confirmed by the product card
- What does A=120 mm mean
- What does C=15 mm mean
- Why the drawing matters more than the name "120 mm plinth"
- Overall profile dimension
- Actual projection onto the wall
- Actual projection onto the ceiling
- Mounting orientation
- 1. Distance from ceiling to top edge of the rod
- 2. Distance to bottom edge of the rod
- 3. Rod projection from the wall
- 4. Bracket position
- 5. Maximum protrusion of all elements
- Why measurements are taken in several places
- Bracket
- Runners and rings
- Top of the curtain
- Decorative tape
- Fabric movement when opening
- What to make the template from
- What should be on the template
- How to use it
- Outcome 1. The profile fits without conflict
- Outcome 2. PLT-001 physically fits, but the visual gap is too small
- Exodus 3. The plinth intersects with the cornice or bracket
- When moving is justified
- When moving is unreasonable
- When moving is almost inevitable
- Why a smaller profile may be better specifically on this wall
- Why you cannot choose only by size 'below 95 mm'
- Almost zero gap
- Narrow readable gap
- Wider gap
- Why the gap should be uniform across the entire wall
- How to check
- Example
- What to do
- End of the curtain rod
- Return of the wooden profile
- Side wall
- Curtain fold
- Main test
- Contrast of materials
- Cornice color
- When the curtain profile needs to be visually hidden
- When it can be left visible
- Why the gap is especially important with oak
- White Enamel
- Wall color
- Color of the metal rail
- Why color does not solve the geometric conflict
- Not automatically above the center of the window
- Not next to the bracket
- Use length map
- The joint and the curtain can mask each other
- Scheme 2400 + 1800
- Scheme 2000 + 2200
- The joint can be moved within a range
- Where to choose the point
- Why
- Scenario A. We buy PLT-001 and move the curtain rod
- Scenario B. We keep the curtains and choose a different ceiling profile
- Scenario C. PLT-001 fits without moving
- Why the cost of moving cannot be assigned in the article
- Why the front view is insufficient
- What to measure on the section
- How to present a single control figure
- Correct measurement recording
- What changes
- What to do
- Why this is cheaper than relocation
- Why this cannot be recommended automatically
- What to Check
- Example
- Why
- Why oak 2400 can cost less than oak 2000
- Beech: 2400+2000
- Oak: 2400+2000
- If we take two 2400s
- Mistake 1. Subtract 120−95 and immediately decide that the profile is not suitable
- Mistake 2. Measure only the rail
- Mistake 3. Not hanging the curtains before checking
- Mistake 4. Checking only the static position
- Mistake 5. Considering the absence of contact sufficient
- Error 6. Measure 95 mm only in the center
- Error 7. Move the cornice without checking the window
- Error 8. Move the cornice on decorative plaster without a renovation estimate
- Error 9. Paint PLT-001 before fitting
- Error 10. Make the joint above the window center automatically
- Error 11. Choose oak before deciding the geometry
- Error 12. Use the discounted price as a permanent one
- Error 13. Forget about the cornice service
- Error 14. Check one edge of the wall
- Error 15. Fit the ceiling profile to a curved cornice
- Map 2400+1800
- Map 2000+2200
- Photo 1. Curtain rod without curtains, PLT-001 template at the nearest bracket
- Photo 2. Curtain fully closed
- Photo 3. Curtain fully gathered at the edge
- Photo 4. View along the wall
- What is the size of PLT-001?
- Can A=120 mm be considered the height along the wall?
- Will PLT-001 fit if the cornice is 95 mm from the ceiling?
- Does 120−95=25 mm mean that the baseboard will overlap the cornice by 25 mm?
- Do I need to move the curtain rod?
- How to make a template for PLT-001?
- Why is a 120×15 rectangle insufficient?
- Do I need to take brackets into account?
- Do I need to take curtains into account?
- Can the curtain touch the ceiling plinth?
- What to choose — beech or oak?
- What lengths of PLT-001 are available?
- Where to place the joint above the window?
- How many PLT-001 should I buy for a 4200 mm wall?
- Can I use two 2000 mm strips for a 4200 mm wall?
- Can I use two 2400 mm ones?
- Can I make a joint at 1750 mm on a 4200 mm wall with two strips?
- When is it better to choose a more compact profile?
- Can I leave PLT-001 only on three walls?
- Should I buy PLT-001 with a discount before fitting?
- How to check the current price?
- How much does PLT-001 cost now?
- Can the cornice be hidden behind PLT-001?
- What to do if the cornice is installed with a slope?
- Do I need to check both edges of the cornice?
- What to do if the conflict is only with one bracket?
- Can the cornice overhang from the wall be increased?
- What to do with a motorized cornice?
- Do I need to leave access to the end caps and runners?
- Can PLT-001 be finally painted before fitting?
- Where to compare wooden cornices and baseboards?
- Where can I buy PLT-001?
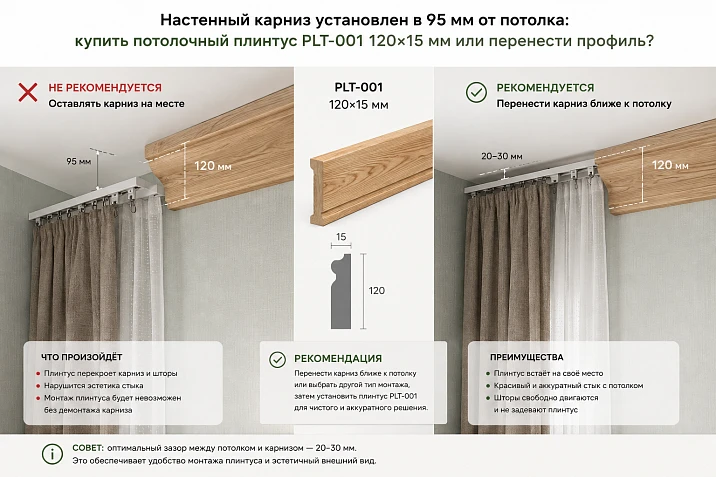
PLT-001 has a size A=120 mm indicated in the card. The top of the wall-mounted curtain rod is 95 mm from the ceiling. At first glance, it seems that the wooden ceiling plinth should "descend" below the cornice by about 25 mm and physically overlap it. From this comparison, it is easy to conclude: PLT-001 cannot be purchased until the curtain system is relocated.
But this arithmetic checks the wrong dimension.
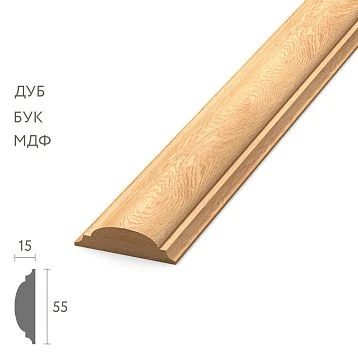
PLT-001 is a profiled product. The value A=120 mm describes the cross-section size according to the drawing, but it cannot automatically be equated to the actual wall projection of the already installed profile in the "wall-ceiling" corner. STAVROS's own material on PLT-001 separately warns: 120 mm is not a ready guarantee of how much the profile will actually descend along the wall after installation.
Therefore, the task is solved not by subtracting 120−95, but by aligning two cross-sections:
-
the actual contour of PLT-001;
-
the already installed curtain assembly together with brackets, runners, rings, the top of the fabric, and the freedom of curtain movement.
If the full-size PLT-001 profile in the real mounting orientation passes above the curtain rod, leaves a normal visual and operational gap, and does not conflict with the brackets, relocating the curtains may not be needed at all. If the intersection appears precisely in the working area of the rod or the fabric touches the wooden profile after installing the plinth, first change the curtain assembly or choose a more compact ceiling profile.
That is why buying PLT-001 based only on the "120 mm" size is premature.
The card confirms PLT-001 120×15 mm in beech and oak, lengths 2000 and 2400 mm, quality "Prestige". For missing items, an average production time of 5–10 days is indicated. At the time of checking, some versions are offered with a warehouse discount, and the manufacturer separately warns that the discount applies only to remaining stock.
Correct checking order:
-
take actual dimensions of the curtain unit;
-
obtain or print the cross-section of PLT-001 at 1:1 scale;
-
apply it in the real 'wall-ceiling' orientation;
-
check not only the fixed profile but also the moving curtain;
-
determine the working clearance;
-
only after this decide whether to buy PLT-001, move the curtain rod, or choose another profile.
When such a mock-up passes without conflict, you can buy the wooden ceiling plinth PLT-001 120×15 mm already as a compatible room element, not as a profile that 'should ideally fit'.
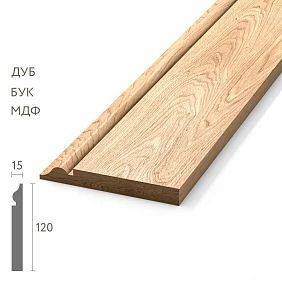
Wooden ceiling plinth PLT-001 120×15 mm: which dimensions are confirmed by the product card
For compatibility with curtains, only the confirmed product parameters are needed.
| Parameter | PLT-001 |
|---|---|
| Cross-section | 120×15 mm |
| Material | Beech / Oak |
| Length | 2000 / 2400 mm |
| Sanding quality | «Prestige» |
| Preparation | under enamel / under tinting depending on the finish |
| Made to order | on average 5–10 working days |




What does A=120 mm mean
This is the cross-section parameter of the product according to the drawing.
It cannot be automatically read as "PLT-001 will drop down the wall exactly 120 mm." For that, the actual projection of the installed profile is needed.
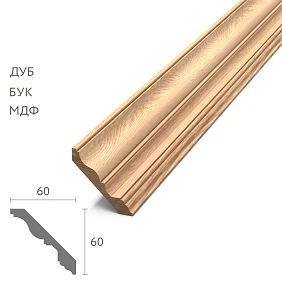
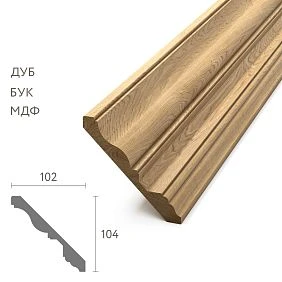
Our factory also produces:
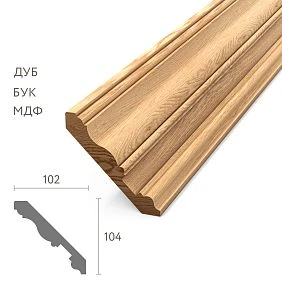
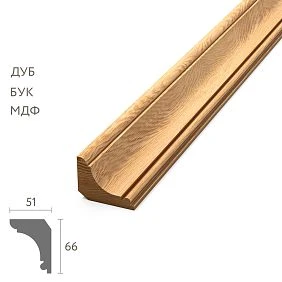
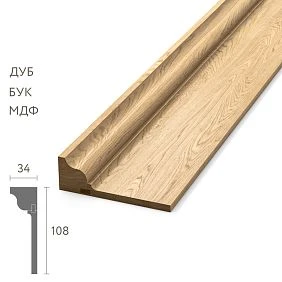
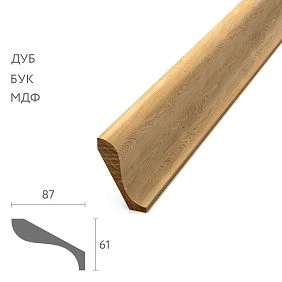
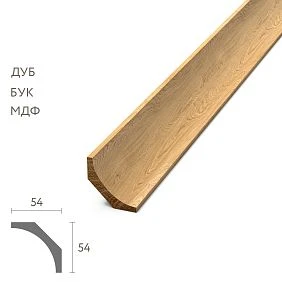
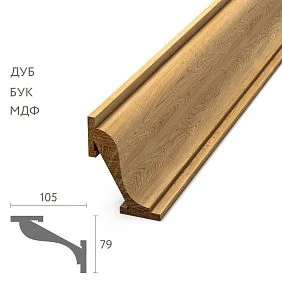
What does C=15 mm mean
This is the second cross-section dimension. It contributes to the profile shape, but by itself does not answer the question about the distance to the curtains.
Get Consultation
Why the drawing matters more than the name "120 mm plinth"
A profiled part occupies space differently than a rectangular board 120×15 mm. It has a front curved section, mounting zones, and a real orientation in the corner.
Buy wooden ceiling molding: why the 95 mm distance cannot be directly compared with A=120 mm
If a person wants buy wooden molding and cornice, they often perceive the size of the ceiling profile as its "height along the wall."
For a complex ceiling cross-section, this is incorrect.
Overall profile dimension
A=120 mm describes the size of the product in the adopted drawing system.
Real projection onto the wall
This is the vertical distance from the ceiling line to the lowest point of the installed PLT-001 on the wall. It is this that needs to be compared with 95 mm.
Real projection onto the ceiling
It determines how much space the profile occupies along the ceiling plane.
Mounting orientation
If the profile is rotated differently, the wall projection changes. Therefore, the mock-up must replicate the actual installation, not just the outline of the part.
Five dimensions to take from an already installed curtain rod
A curtain system is not a single thin line.
1. Distance from the ceiling to the top edge of the curtain rod
In our scenario, the reference is 95 mm. But you need to measure the actual value at several points.
2. Distance to the bottom edge of the curtain rod
It shows the total height of the metal assembly.
3. Cornice projection from the wall
The ceiling profile may pass above it in height, but intersect in depth.
4. Bracket position
The bracket often protrudes higher or closer to the wall than the rail itself.
5. Maximum protrusion of all elements
End caps, rings, runners, and decorative finials are checked.
Why measurements are taken in multiple places
A wall-mounted cornice may not be installed perfectly parallel to the ceiling. For example: 94 mm on the left, 96 mm in the center, 99 mm on the right. Then PLT-001 may pass on one end and conflict on the other.
Wall-mounted curtain rod and PLT-001: we check not only two fixed parts
Even if the wooden profile and metal rail do not physically intersect, this does not yet mean compatibility.
Bracket
May be closer to the ceiling than the main rail.
Gliders and rings
When moving, they take up additional space.
Top of the curtain
The fabric is often positioned above the line of the rail itself.
Decorative tape
May increase the top volume.
Movement of the fabric when opening
The curtain deviates from the ideal vertical.
Therefore, the correct question is: does the curtain PLT-001 interfere across the entire range of motion, not just in a static position?
Buy wooden ceiling baseboards: first make a full-size profile template
For this scenario, the best tool is not a tape measure, but a cross-section template.
Not a 120 mm paper strip.
Not a 120×15 rectangle.
But the actual profile.
What to make the template from
Thick cardboard, thin plywood, plastic, or foam board will work.
What should be on the template
-
contour PLT-001;
-
wall line;
-
ceiling line;
-
bottom point of the profile;
-
ceiling projection.
How to use it
The template is applied directly to the wall-ceiling corner next to the existing curtain rod.
It immediately becomes clear whether the profile fits, what gap remains, and whether it hits the bracket.
Three possible outcomes of fitting PLT-001 near curtains
Outcome 1. The profile fits without conflict
PLT-001 can be kept in the project, and the curtain rod does not need to be moved.
Outcome 2. PLT-001 physically fits, but the visual gap is too small
For example, a narrow strip remains between the wooden profile and the curtain rod. Technically, the parts do not touch each other, but visually the joint may look random.
Exodus 3. The plinth intersects with the cornice or bracket.
One of the elements needs to be changed: move the curtain system, choose a different ceiling profile, or reconsider the entire assembly.
Why a nearly zero gap is sometimes more difficult than an obvious conflict
An obvious intersection immediately forces you to fix the project. A 2–3 mm gap may pass installation but look worse: a dark slit is visible, dust collects, and the fabric may touch the wood.
Is it necessary to move an already installed curtain rod for PLT-001
Moving is not an automatic next step after fitting. It is a separate decision with its own cost and risks.
When moving is justified
If PLT-001 is part of the overall room architecture: the same profile runs along all walls, supports doors, furniture, and the ceiling composition, and abandoning it would break the entire project.
In such a case, the curtain system may be a more mobile element.
When moving is unreasonable
If the cornice is already installed on a finished wall, all holes are covered with decorative elements, the curtain is adjusted, and PLT-001 is needed only on one wall.
Relocation may require:
-
disassembly;
-
new holes;
-
repair of old ones;
-
local repainting;
-
re-adjustment of curtains.
Then it is wiser to compare a more compact ceiling profile.
When relocation is almost inevitable
If the full-size PLT-001 template physically crosses the bracket or the working trajectory of the curtain.
Here, cosmetics will not solve the problem.
Buy a wooden baseboard or choose a more compact ceiling cornice
There is no need to make PLT-001 work at any cost.
If the task is to preserve an already finished curtain assembly, it is useful to compare other products in the category buy wooden molding and cornice.
Compare:
-
the actual wall projection;
-
depth;
-
length;
-
material;
-
visual scale.
Why a smaller profile may be better specifically on this wall
A large PLT-001 can be beautiful in a room in general, but next to a low-mounted cornice it is too massive.
Why you cannot choose only by the size "below 95 mm"
For another complex profile, you again need to look at the actual mounting projection.
That is, the error 120−95 is not fixed by replacing it with the formula 90<95.
Wooden ceiling baseboard PLT-001 and curtains: which visual gap looks intentional
There is no universal "correct" number.
The gap is assessed at the specific scale of the room.
Almost zero gap
The profiles visually merge together.
Can work if the cornice is hidden in shadow and the curtain does not touch PLT-001.
But more often requires very precise installation.
Narrow readable gap
A thin clean strip of wall remains between the wood and the metal.
This option is often easier to perceive as intentional.
Wider gap
The cornice and ceiling profile become independent elements.
For the classic PLT-001, this may be calmer.
Why the gap should be uniform along the entire wall
If it's 15 mm on the left and 5 mm on the right, the strict wooden profile will emphasize the curvature of the curtain system.
That's why the cornice is measured along its entire length.
What to do if the wall-mounted cornice is not installed perfectly parallel to the ceiling
PLT-001 creates a rigid architectural horizontal line.
Before its installation, a small error in the cornice could be almost unnoticeable.
After installing the new wooden profile, a perfect reference line appears.
How to check
Measure the distance from the ceiling to the cornice at least:
-
at the left bracket;
-
in the center;
-
at the right bracket.
Example
95 mm on the left, 98 mm on the right.
The difference is 3 mm.
On the long wall, this may be more noticeable after PLT-001 appears.
What to do
Do not try to fit the wooden profile to a curved cornice.
Either align the curtain system, or consciously accept the visual result.
PLT-001 near the corner of the room: is there enough space for the end return next to the curtains
Compatibility needs to be checked not only above the window, but also at the side walls.
End of the curtain rod
It may have a decorative cap or tip.
Return of wooden profile
The ceiling plinth can transition to the adjacent wall.
Side wall
In the corner, two projections of PLT-001 meet.
Curtain fold
Gathered fabric takes up significantly more space than flat fabric.
If the curtain rod ends close to the corner, the curtain package may hit the wooden profile.
Main test
Open the curtains fully and apply the PLT-001 template in the corner.
A static curtain rod alone is insufficient for testing.
Oak ceiling plinth PLT-001 and metal curtain profile
This joint can not only be "resolved" but also beautifully assembled.
Material contrast
Oak provides a warm natural texture.
The metal cornice adds a more technical line.
Cornice color
Black, brass, white, or steel profiles interact with oak differently.
When the curtain profile needs to be visually hidden
If it is technical and should not be part of the composition.
When it can be left visible
If it repeats other hardware in the room.
Why the gap is especially important with oak
The natural profile is visually more active than white enamel.
If it almost touches the metal, the node may look overloaded.
Beech PLT-001 under enamel: when it's easier to pair with a ready-made curtain rod
Beech is convenient if a covering color is needed.
White enamel
The baseboard merges with the ceiling.
Wall color
You can visually reduce the profile if the paint matches the wall.
Color of the metal rail
Sometimes, on the contrary, PLT-001 is painted to support the curtain rod.
Why color doesn't resolve the geometric conflict
Even perfectly matching white elements still physically intersect.
First the template, then the color.
Length of PLT-001 is 2000 or 2400 mm: where to place the joint on the wall with curtains
After resolving the 95-millimeter conflict, a second purchasing question arises — the length.
Not automatically over the center of the window
The center of the window is often in the most visible area.
If the joint can be moved to a less visible spot, that's better.
Not near the bracket
The curtain bracket already creates a local detail.
Another joint nearby may overload the section.
Use the length map
Need to know:
-
wall length;
-
position of corners;
-
a window;
-
cornice;
-
brackets;
-
available 2000/2400 mm.
The joint and the curtain can mutually mask each other
Sometimes the PLT-001 connection above the area where the gathered curtain is constantly located is visually less noticeable.
But you cannot place the joint there just for masking if the cutting becomes worse.
Example: a wall with a window 4200 mm long
The finished length of the ceiling profile is 4200 mm.
Available 2000 and 2400 mm.
Scheme 2400 + 1800
Need two source parts:
-
one 2400 is used fully or almost fully;
-
from the second 2000/2400, 1800 is obtained.
If you take 2400+2400, the total remainder is 600 mm.
Scheme 2000 + 2200
The second part 2200 requires a source of 2400.
In total, also two strips.
The joint can be moved within the range
The first part can be from 1800 to 2400 mm, if the second does not exceed 2400.
This is much more freedom than in the case of two RK-002 from the previous ceiling case.
Where to choose the point
Considering:
-
center of the window;
-
brackets;
-
assembled curtain;
-
doorway;
-
corner.
Wall 4800 mm: two planks of 2400 give a joint strictly in the center
2400+2400 = 4800 mm.
There is no freedom here if you use two standard lengths without a third piece.
The joint will be at 2400 mm.
If this is the center of the window, you need to decide whether to accept the line or use three segments.
Wall 4500 mm: there is a freedom of 300 mm
Two planks of 2400 give 4800 mm.
Stock:
300 mm.
The joint can be moved within the range of 2100–2400 mm.
This already allows you to move away from a specific bracket.
How to calculate the number of PLT-001 for multiple walls
Do not sum the entire perimeter and divide by 2400.
You need to build a map for each wall.
For example:
-
4200 mm;
-
3100 mm;
-
2800 mm.
Sum:
10100 mm.
Mathematically:
10100/2400 ≈ 4.21 → minimum 5 planks.
But actual cutting may require more or allow convenient use of leftovers.
Why
The 600 mm remainder from one wall can become part of the next only if an additional joint is architecturally acceptable.
Price of PLT-001: when moving the cornice turns out to be more expensive than the wooden baseboard itself
At the time of checking, the card shows, in particular:
-
beech 2000 mm — 2,984 ₽ with warehouse discount;
-
oak 2000 mm — 5,530 ₽;
-
beech 2400 mm — 3,560 ₽ at warehouse discount;
-
oak 2400 mm — 5,192 ₽ at warehouse discount.
The discount applies only to warehouse stock, so price and availability must be rechecked before ordering.
Scenario A. We buy PLT-001 and move the cornice
Estimate:
baseboard + cornice removal + new holes + sealing old ones + local painting + reinstallation + curtain adjustment.
Scenario B. We keep the curtains and choose a different ceiling profile
Estimate:
different profile + possible finish difference + installation.
Scenario C. PLT-001 fits without moving
The simplest:
baseboard + installation + finish.
Why the cost of relocation cannot be assigned in the article
It depends on the wall, fasteners, finishing, and the length of the curtain rod.
But the comparison structure already allows making a commercial decision.
When relocating a curtain rod can be cheap
if:
-
the wall is not yet finally painted;
-
the holes are easily covered by future repairs;
-
the rod is simple;
-
the curtains are not yet installed.
When relocation can be expensive
if:
-
expensive decorative plaster;
-
complex painting;
-
hidden electric drive;
-
long profile;
-
several brackets;
-
ready-made heavy curtains.
How to estimate the cost of a mistake before purchasing PLT-001
A mistake — ordering a profile, finishing it, delivering it, and only then discovering a conflict.
Cost of the mistake:
cost of PLT-001 + finishing + delivery + time + return/storage + possible rework of curtains.
A 1:1 scale template is practically free on this background.
What to do if PLT-001 fits 90% of the wall length but conflicts with only one bracket
This is not a reason to immediately move the entire curtain rod.
You need to understand:
-
can a specific bracket be shifted;
-
does the system allow this;
-
will the load-bearing capacity be compromised;
-
will a new hole appear in a bad spot.
The decision is made by the curtain system installer.
What to do if only the decorative finial conflicts
Sometimes the working profile itself fits, but the cap or finial is too tall.
You can compare other curtain rod fittings if they are compatible.
There is no need to automatically change the ceiling plinth.
What to do if the fabric touches PLT-001 only when fully opened
This is still an operational conflict.
The user will encounter it daily.
You need to either increase the curtain rod projection or change the profile/curtain.
What to do if the curtains are not hung yet
The assembly cannot be considered verified based only on the metal rail.
Need to know:
-
type of fabric attachment;
-
height of the tape;
-
diameter of rings;
-
fold package.
Why a finished curtain matters more than a catalog diagram
Actual sewing may differ from the calculated one.
Therefore, the best test is real fabric on a real curtain rod.
How to build a profile section of the PLT-001 assembly + curtain rod
The most useful drawing for this article is not the wall elevation, but a section perpendicular to the wall.
It shows simultaneously:
-
the ceiling;
-
wall;
-
PLT-001 in real orientation;
-
bracket;
-
rail;
-
runner;
-
top part of the fabric;
-
working trajectory of the curtain.
Why the facade view is insufficient
On the facade, it may seem that the cornice is lower than the baseboard.
But in depth, the bracket can go toward the wall and intersect the volume of PLT-001.
What to measure by section
Not just the minimum gap.
Need to know:
-
the closest point of the wooden profile to the metal;
-
the closest point to the fabric;
-
distance to the bracket;
-
clearance during movement.
How to format one control digit
After alignment, you can write:
minimum actual gap PLT-001 ↔ curtain unit = ___ mm.
This is the exact figure needed for the solution.
Why the distance "95 mm from the ceiling" needs to be clarified with wording
Very often the phrase 95 mm is ambiguous.
It can mean:
-
to the top edge of the rail;
-
to the center of the profile;
-
to the bracket axis;
-
to the bottom edge;
-
to the top point of the decorative tip.
For compatibility, these are different numbers.
Correct measurement notation
For example:
from the finished ceiling to the top point of the rail body — 95 mm.
And separately:
to the top point of the bracket — 88 mm.
Then it is immediately clear which element limits the PLT-001.
If the bracket is higher than the rail: which size should be considered the main one
The element closest to the ceiling becomes the main one.
If the rail is at 95 mm and the bracket rises to 82 mm, you need to check exactly 82 mm.
This is another reason why a single measurement of the curtain rod body does not provide an answer.
If the curtain rod has a decorative box or trim
The box may protrude above the main rail.
It is also included in the overall dimension.
If the decorative trim can be removed or replaced, this becomes a separate optimization scenario.
If the curtain rod is double-row
The second row often protrudes further from the wall.
Vertically it may not interfere, but in depth the curtain gets a large amplitude of movement.
Both rows need to be checked.
If the cornice is three-row
Even more so.
Each row can have:
-
its own fabric;
-
different top;
-
different trajectory.
PLT-001 must not conflict with the entire system.
If the cornice has tulle and dense drapes
A dense curtain in its gathered state forms a large packet of folds.
It is this one that can rise and approach the wall.
Tulle can pass through alone, but a drape cannot.
If curtains are on grommets
The upper part of the fabric and the rings have their own dimensions.
Such a unit cannot be checked against a bare rod.
If curtains are on hooks and runners
You need to see the actual height of the tape and the hook.
If the curtain rod is motorized
The transfer becomes a significantly more serious operation.
Need to consider:
-
power;
-
drive;
-
service;
-
wiring;
-
access.
In that case, choosing a more compact PLT is often economically more attractive than moving the entire system.
If the curtain profile is already connected to the smart home
Even more so.
The decorative solution should not automatically force you to redo the electrical work.
If the wall has decorative plaster
Old holes after relocation can be difficult to restore invisibly.
This needs to be included in the estimate.
If the wall is painted with regular matte paint
Local repair is easier, but matching the shade after several months is still not guaranteed.
If the PLT-001 must run along all four walls
Refusing it only on the curtain wall creates a gap in the overall cornice.
Then moving the curtains may be more justified.
If PLT-001 is needed only above the window
The situation is the opposite.
You can refuse it or replace it with a compact profile without affecting the entire room.
How to understand whether PLT-001 is truly an important part of the architecture
Ask a question:
if you remove PLT-001 from the curtain wall, will the entire ceiling molding system fall apart?
If yes — the profile is strategic.
If no — the curtains are probably more important.
How to check the visual mass of PLT-001 next to curtains
The size 120×15 mm by itself does not show the scale.
You need to see:
-
ceiling height;
-
the window height;
-
the curtain rod width;
-
the fabric density;
-
the distance from the window to the ceiling.
On a low ceiling, PLT-001 may look more massive.
On a high one, it looks calmer.
Why 95 mm is especially sensitive on a low ceiling
There is already little space between the top of the window, the cornice, and the ceiling.
Adding an expressive wooden profile can visually compact the top of the wall.
This is not only a matter of physical clearance, but also of proportion.
How to check the proportion without 3D visualization
Make a full-size strip from cardboard in the shape of PLT-001 on a section of 500–800 mm.
Place it next to the cornice.
This is enough to understand the scale.
What to do if the profile fits physically but 'presses' on the curtains
Do not buy it just because the centimeters add up.
Try:
-
more compact profile;
-
different color;
-
different cornice;
-
larger gap.
What to do if the profile fits and looks good, but the curtain catches when moving
Operation is more important than a static picture.
Need to increase the working gap.
How to properly check the movement of the fabric
Not just open and close once.
Check:
-
slowly;
-
quickly;
-
with full collection;
-
with partial;
-
if there are two layers of fabric — each separately.
What to do if the fabric only touches the edge of PLT-001 at the corner
Perhaps the problem is local:
-
profile rotation;
-
curtain package;
-
curtain rod tip.
Then it is not necessary to change the entire system.
PLT-001 near the corner and return of the curtain rod
Some curtain rods have a return to the wall.
Then the trajectory of the fabric at the side wall is especially important.
The wooden ceiling profile also turns into the corner.
These two returns may intersect.
How to draw the corner in plan and section
Two views are needed:
-
top view;
-
vertical profile.
Only this way can the full conflict be seen.
How to calculate the length of PLT-001 along a wall with corners
If the profile runs along the perimeter, corner cuts need to be taken into account.
You cannot count only the clean length of the wall.
For the material map, the finished lengths of each section are recorded.
How to account for corner cuts
They depend on the geometry of the profile and the angle of the wall.
The article does not specify the cutting technology, but emphasizes: extra allowance is needed.
Why the length of 2000 and 2400 mm is important specifically near curtains
The curtain wall is often the most noticeable.
Therefore, the joint location of PLT-001 needs to be chosen especially carefully.
Example of a 4200 mm wall: where one joint can be placed
If two 2400 mm strips are used, the allowable range for the first piece is:
1800–2400 mm.
Why?
Second part:
4200−X ≤2400
from which X≥1800.
That is, the joint can be moved by 600 mm.
Center of the wall:
2100 mm.
This gives freedom of approximately −300 to +300 mm relative to the center.
This is already enough to move away from one bracket.
If the cornice has a bracket at 2100 mm
It is not necessary to place the PLT-001 joint exactly in the center.
You can choose:
1900+2300
Or:
2300+1900.
Both parts fit within 2400 mm.
If the brackets are placed every 800–1000 mm
You need to find a free zone between them.
If the PLT-001 joint is located directly above the bracket
This can be inconvenient for installation and visually overload the area.
It is better to separate them.
Example of a 3600 mm wall
You can use:
2000+1600;
or 1800+1800;
or 1600+2000.
Even 2000 mm planks give enough freedom.
Example of a 4400 mm wall
Two 2400:
400 mm allowance.
Allowable joint range:
2000–2400 mm.
Center:
Can be shifted by ±200 mm.
How to choose length 2000 or 2400 mm economically
Not always 2400 is better.
If the wall is 3600 mm:
2×2000 = 4000 mm.
Waste 400 mm.
2×2400 = 4800 mm.
Waste 1200 mm.
If the joint location is acceptable, two 2000-mm strips may be more rational.
But why does 2400 sometimes win despite the larger remainder
Because it gives more freedom in joint placement.
For example, you need to avoid a bracket at a specific coordinate.
Then the extra 400 mm of factory length is bought for a better layout.
How to calculate the cost of a layout, not the price of a single strip
Formula:
C wall = sum of selected source planks − value of useful offcuts + installation consequences of joints.
The last element is difficult to convert into an exact amount, but it cannot be ignored.
What counts as a useful offcut PLT-001
A cut piece of sufficient length that can become:
-
a continuation of another wall;
-
a finish test;
-
a repair reserve.
What counts as a useless offcut
A short fragment that cannot be used in the project and makes no sense to store.
Why an oak offcut is more valuable than a beech one under enamel
If the oak is tinted individually, the remainder from the same batch is useful for repairs.
How to label the remainder
PLT-001 / oak / finish ___ / project ___ / date.
Materials and quality of wooden moldings: when to open this section
After confirming the geometry.
For choosing beech/oak, it is useful to look at materials and quality of wooden moldings.
But not before it is determined that PLT-001 fits next to the curtains at all.
Tips for finishing a wooden baseboard
After a dry fit, you can compare tips for finishing wooden baseboards.
This is the correct order:
geometry → material → finish.
Delivery conditions for wooden baseboard
For long lengths of 2000/2400 mm, logistics are important.
Before a large order, they check delivery conditions for wooden baseboards.
Why the profile cannot be finally painted before checking the curtains
If a conflict is discovered after the finish, returns and rework become more complicated.
Better:
-
template;
-
dry fitting;
-
confirmation;
-
finishing.
If PLT-001 is purchased with a warehouse discount
There is no need to rush just because of the price.
The card directly warns that the discount applies to remaining stock.
Compatibility first.
Otherwise, the discount profile turns into an unnecessary purchase.
When PLT-001 does NOT need to be purchased yet
Do not place an order if:
-
95 mm measured at only one point;
-
it is unknown up to which exact element they were measured;
-
brackets are not measured;
-
the curtain is not hung yet;
-
the top of the fabric is unknown;
-
the real projection of PLT-001 is not obtained;
-
the full-size template is not checked;
-
the cornice is installed with a slope;
-
Curtain relocation is still under discussion;
-
Wall lengths have not been measured.
When the wooden ceiling baseboard PLT-001 can already be ordered
-
Card PLT-001 has been verified.
-
The actual profile section has been obtained.
-
The wall projection has been determined.
-
The cornice has been measured at several points.
-
Brackets have been marked.
-
Curtains are hung or their top geometry is known.
-
Fabric movement has been checked.
-
The minimum working clearance has been approved.
-
The decision to move the cornice has been made.
-
Beech or oak has been selected.
-
Finish selected.
-
Lengths 2000/2400 have been laid out along the walls.
-
Joints have been moved away from problem points.
-
The reserve is justified.
-
price and availability rechecked.
How to place order PLT-001 for a room with already installed curtains
Example of a specification:
PLT-001 / 120×15 mm / beech / Prestige / under enamel / L=2400 and 2000 mm / wall length 4200 mm / curtain rod: top point ___ mm from ceiling / bracket: ___ mm / minimum gap after template ___ mm / PLT-001 joint at ___ mm / quantity ___ / reserve ___
For oak:
PLT-001 / oak / 120×15 / 2400 mm / under tinting / wall map ___ / curtain unit checked / finish ___ / quantity ___
After such a check, you can order PLT-001 120×15 mm.
Practical scenario: the cornice is actually at 95 mm, but the top of the bracket is at 82 mm
This is one of the most typical cases where the initial figure turns out to be useless.
If the user measured only the tire body, they might decide that PLT-001 should be compared with 95 mm.
But the highest element of the system is at 82 mm.
Then the check should be based on 82 mm.
What changes
There is no need to recalculate 120−82.
You need to reapply the profile template and look at the actual pass.
But it is already obvious: the space margin is smaller than expected.
Practical scenario: the cornice is at 95 mm, and the curtain rises to 88 mm
The metal passes.
The fabric does not.
This shows why compatibility cannot be calculated only by the bracket.
What to do
Check:
-
height of the tape;
-
hooks;
-
rings;
-
fold;
-
movement.
If the contact appears only on the fabric, sometimes it is easier to change the curtain's fit rather than move the entire rod. But this is decided by a textile/rod specialist.
Practical scenario: PLT-001 passes over the rail but almost touches the metal tip
The conflict is local.
You can check another cap or rod end.
Why this is cheaper than moving
Only the outermost element changes.
Why this cannot be recommended automatically
The tip may be a structural part of the system.
Compatibility needs to be confirmed.
Practical scenario: the cornice fits, but PLT-001 covers part of the decorative trim.
Technically, nothing interferes.
Visually, the curtain system looks cut off.
This is already a design conflict.
Practical scenario: the cornice is black, PLT-001 is white.
Clear contrast.
Even a small gap reads strongly.
What to check
Not only the size, but also the thickness of the light strip between the two elements.
Practical scenario: PLT-001 is oak, the cornice is brass.
Both materials are active.
When moving upward is completely impossible
If the system is already at 95 mm, and the supposed PLT-001 is above.
That is why the choice has to be made between elements.
If the cornice can be extended further from the wall
Sometimes there is no vertical conflict, but the fabric touches PLT-001 in depth.
Increasing the extension can solve this.
But:
-
the bracket's operation changes;
-
the load arm increases;
-
the curtain's position changes.
The solution must be confirmed by the manufacturer/installer of the cornice.
Why you cannot independently install a longer bracket "by eye"
This is a structural element.
Especially with heavy drapes.
How to assess the weight of a curtain system
You need to know the actual fabric and length.
The article does not assign a load.
If the cornice is attached to a weak base
Relocation can be even more complicated.
New points must fall into a suitable base.
If there is hidden wiring behind the wall
Drilling new holes requires checking.
This is another cost of relocation that is often forgotten.
What to do if PLT-001 has already been purchased but not yet finished
It is better to stop and make a template from the profile itself.
This is the most accurate test.
If there is a conflict, the product is even easier to return/redirect to another project than after painting and cutting.
What to do if PLT-001 has already been painted
Do not cut first.
Check it whole.
If it doesn't fit, the chance of preserving the product's appearance is higher.
What to do if PLT-001 is already partially installed on other walls
Then the solution is more complex.
One different profile on the curtain wall can disrupt the overall cornice.
Possible options:
-
curtain relocation;
-
local adaptation of the entire system;
-
continuation of PLT-001 only up to a certain point.
But each requires a new room layout.
When a local break in the ceiling molding is acceptable
If it is tied to:
-
niche;
-
to the portal;
-
to the built-in wardrobe;
-
to the curtain box.
A random break above the window usually looks weaker.
Can PLT-001 be finished before the curtain zone
Yes, if the boundary is architecturally justified.
For example, there is a separate niche for curtains.
But in our scenario, the cornice is wall-mounted and already installed, so such a gap needs to be designed especially carefully.
If the curtain rod is completely hidden by the fabric
In a static view, the metal element is almost invisible.
But with the curtains open, it appears.
PLT-001 should look normal in both states.
How to check open and closed curtains
Take two photos with the template.
This is a simple way to compare.
How to check the evening scenario
Turn on the main light.
The shadow from PLT-001 can visually reduce the gap.
How to check the daytime scenario
Light from the window, on the contrary, often emphasizes horizontal lines.
Why photos on a phone are more useful than memory
You can place two template options side by side and compare them.
How to compare PLT-001 with a more compact profile
Identical conditions are needed:
-
one section;
-
the same color;
-
the same cornice;
-
the same curtain.
Then the choice is fair.
How to build a commercial comparison of two profiles
| Parameter | PLT-001 | Compact alternative |
|---|---|---|
| Wall projection | Check | Check |
| Ceiling projection | Check | Check |
| Working gap | ___ | ___ |
| Material | Beech/oak | ___ |
| Length | 2000/2400 | ___ |
| Wall price | ___ | ___ |
| Need to move the cornice | Yes/No | Yes/No |
| Rework cost | ___ | ___ |
So you can see that a cheaper profile may turn out to be more expensive if it requires different finishing, and vice versa.
Why the question “PLT-001 or moving the cornice” actually consists of three decisions
-
Compatibility. Does it physically fit.
-
Composition. Does it look good.
-
Economy. What is cheaper to redo.
If you skip one layer, the solution is incomplete.
How to calculate the length map along the room perimeter
For each section, record:
-
length;
-
available blank;
-
joint point;
-
remainder.
Example
Wall A — 4200 mm
Wall B — 3600 mm
Wall C — 4200 mm
Wall D — 3600 mm
Total 15,600 mm.
Mathematical minimum at 2400:
15600/2400 = 6.5 → minimum 7 planks.
But corners and cutting may require 8 or more.
Why
You cannot endlessly carry over remnants through corners without additional joints.
How to use the 600 mm remnant
On a short return, sample, or repair.
Why the map is especially needed for oak
Each extra whip is more expensive.
Current PLT-001 prices: how to use them correctly
At the time of checking, the card shows:
| Execution | Price at the time of check |
|---|---|
| Beech 120×15×2000 | 2,984 ₽ with warehouse discount |
| Oak 120×15×2000 | 5 530 ₽ |
| Beech 120×15×2400 | 3,560 ₽ with warehouse discount |
| Oak 120×15×2400 | 5,192 ₽ at warehouse discount |
Discount values depend on stock levels.
Why oak 2400 can cost less than oak 2000
Because the 2400 card currently has a warehouse discount, while the 2000 is made to order without it.
This is another reason not to treat the constant price per linear meter as a permanent characteristic.
Example of a 4200 mm wall cost
Beech: 2400+2000
At the currently shown prices:
3560 + 2984 = 6544 ₽.
Oak: 2400+2000
5192 + 5530 = 10 722 ₽.
This is only the material at the time of checking.
If you take two 2400s
Beech:
2×3560 = 7120 ₽.
Oak:
2×5192 = 10 384 ₽.
Interesting: due to the current discount, two oak 2400s turn out to be cheaper than the 2400+2000 combination.
This is a temporary commercial situation, not a universal rule.
Why the current price can change the cutting plan
Usually, lengths are chosen based on minimal waste.
But if a long discounted plank costs less than a short one, sometimes it is economically more profitable to buy more meters.
That is why the final plan is built in two stages:
-
minimal material;
-
current price of options.
Do I need to buy a reserve PLT-001
Not automatic 10%.
For one room, it's better to set a scenario:
-
risk of corner cut error;
-
damage to one long part;
-
future repairs.
When one spare whip is justified
If oak is tinted to a unique color and reordering from another batch is undesirable.
When the reserve can be closed with leftovers
If after the card there are pieces of sufficient length.
Why a short leftover of 200 mm won't replace a long part
Obviously, but that's exactly why a percentage reserve works poorly for linear materials.
How to keep a repair stock
Label the material and finish.
What to do if the curtain rod is changed after a year
PLT-001 may remain.
If its position was chosen only for the old system, the new rod will have to be checked again.
Why system independence is useful
The best node is one where the wooden ceiling profile and curtain rod can be serviced separately.
When this is not possible
If they almost touch or one blocks access to the other.
Checking service access to the curtain rod
Can you:
-
remove the cap;
-
take out the slider;
-
unscrew the bracket;
-
replace the drive,
without dismantling PLT-001?
If not, this is an important drawback.
If the cornice is motorized, service is especially important.
The drive may require access.
It cannot be locked with a decorative profile.
Mistakes when purchasing PLT-001 next to already installed curtains
Mistake 1. Subtract 120−95 and immediately decide that the profile is not suitable
The reason is that A is taken for a wall projection.
The consequence is an unnecessary relocation of the cornice.
How to prevent — use a profile template.
Mistake 2. Measure only the rail
Bracket higher.
Error 3. Do not hang curtains before checking
The fabric turns out to be closer to PLT-001.
Error 4. Check only the static position
When opening, the curtain touches the profile.
Error 5. Consider the absence of contact sufficient
The gap looks bad visually.
Error 6. Measure 95 mm only in the center
The cornice is installed at an angle.
Error 7. Move the cornice without checking the window
A new height worsens the proportion.
Mistake 8. Move the cornice on decorative plaster without a repair estimate
Rework is more expensive than PLT-001.
Mistake 9. Paint PLT-001 before fitting
Returns become more complicated.
Mistake 10. Make the joint above the window center automatically
It lands in the most visible spot.
Mistake 11. Choose oak before deciding the geometry
Expensive material does not resolve the conflict.
Mistake 12. Use the discount price as a permanent one
Warehouse stock is running out.
Error 13. Forget about the cornice service
After PLT-001, the plug cannot be removed.
Error 14. Check one edge of the wall
In the other corner, the curtain gathers into a large fold.
Error 15. Fit the ceiling profile to the curved cornice
The curtain error becomes part of the entire room.
How to choose between PLT-001 and a more compact profile without redoing the entire renovation
If the PLT-001 template showed a conflict, there is no need to redesign the room from scratch.
It is enough to save five parameters of the already finished curtain system:
-
minimum distance to the ceiling;
-
maximum projection from the wall;
-
bracket coordinates;
-
upper fabric trajectory;
-
required service access.
Any alternative ceiling profile is checked against the same five points.
This makes the comparison objective.
Why a more compact profile does not necessarily look better
A smaller size solves the geometry but may lose on scale.
If the ceiling height is large and other trim elements are massive, a too-small cornice looks random.
Therefore, the alternative should be tried on in the same way as PLT-001.
Where to compare other products
If PLT-001 physically doesn't fit, it's logical to open Wood and MDF moldings and compare other ceiling profiles by actual cross-section.
Not by name.
Not by one dimension.
Specifically by the cross-sectional drawing.
Check after the first installed meter of PLT-001
Even after a paper template, it's useful to stop after a short test section.
Check:
-
distance to curtains;
-
light;
-
parallelism;
-
appearance;
-
cornice service.
If the node differs from the calculated one, it is better to fix one section rather than the entire perimeter.
Why it is better to make the first section in the most complex area
Not on a free wall.
And nearby:
-
with the nearest bracket;
-
with the curtain package;
-
with the corner.
If the profile passes there, the remaining sections are usually simpler.
How to check PLT-001 with fully open curtains
Gathered curtain — maximum fabric volume.
You need to:
-
slide it to the extreme position;
-
attach the profile;
-
check the folds;
-
check the tip;
-
open access to the bracket.
How to check with curtains fully closed
The fabric is distributed along the length.
Sometimes the top tape starts to wave and locally rises higher.
If the curtain rod has several layers of fabric
Each mode is checked separately.
Why the curtain may touch only in a draft
The fabric moves.
If the working gap is zero, periodic touching is inevitable.
This can lead to:
-
noise;
-
marks on the fabric;
-
marks on the painted profile.
How to account for dust cleaning
A very narrow gap between PLT-001 and the curtain rod is inconvenient for cleaning.
For a living room, this is a trifle, but a constant one.
What to do if the client wants PLT-001 at any cost
Then you need to honestly calculate the cost of moving the curtains.
Don't promise that we'll 'adjust it on site.'
What to do if the client wants to keep the cornice at any cost
Then PLT-001 becomes a candidate, not a mandatory element.
How to format the solution for the designer
Short table:
| Question | Solution |
|---|---|
| Real wall projection of PLT-001 | ___ mm |
| Top point of the cornice | ___ mm |
| Top point of the bracket | ___ mm |
| Top of fabric | ___ mm |
| Working gap | ___ mm |
| Visual gap | ___ mm |
| Cornice relocation | Yes/No |
| Alternative profile | Yes/No |
| PLT-001 approved | Yes/No |
This is better than the verbal "seems to fit."
How to document a solution for the installer
Add:
-
bracket coordinates;
-
PLT-001 joints;
-
angles;
-
service areas.
How to prepare a solution for the buyer
Add:
-
material;
-
lengths 2000/2400;
-
quantity;
-
reserve;
-
Current price.
How to check the current price without changing the cutting layout
First, the material map.
Then, prices.
Not the other way around.
Otherwise, the discount might force you to buy an inconvenient length and create an extra joint.
When the discounted 2400 is more advantageous than 2000
If the current price of the long plank is lower than the short one or the difference is small.
But only if the remainder can be used.
When 2000 is more rational
If the wall allows a clean map and 2400 creates a meaningless remainder.
How to compare two maps for a 4200 mm wall
Map 2400+1800
Initial data:
2400 + 2000 or 2400.
Map 2000+2200
Initial data:
2000 + 2400.
Both give two strips.
The difference is the joint location.
Therefore, choose based on the curtain system.
If the ideal joint point is 1750 mm
For a wall of 4200 mm, the second part:
2450 mm.
It is larger than the maximum of 2400.
This means two planks are not enough for such a joint.
A third piece or a different coordinate is needed.
Universal formula for an acceptable joint for two planks of 2400
For a wall of length L:
L−2400 ≤ X ≤ 2400.
For 4200:
1800≤X≤2400.
For 4500:
2100≤X≤2400.
For 4700:
2300≤X≤2400.
The closer the wall is to 4800 mm, the less freedom there is.
Why this is useful near curtains
You can instantly check whether the desired point between the brackets is reachable.
If the wall is 4700 mm and the free zone for the joint is 2100 mm
It is unreachable with two 2400 mm planks.
There is no need to draw such a joint in the project.
If the wall is 4100 mm
Range:
1700–2400 mm.
700 mm of freedom.
How to calculate the joint for two 2000 mm planks
Condition:
L≤4000 mm.
For a wall of 3600:
1600–2000 mm.
For 3900:
1900–2000 mm.
Why combined lengths of 2000+2400 give even more options
One side can be up to 2000, the other up to 2400.
This needs to be calculated separately by direction.
Can a short plank be placed at the corner with curtains
Sometimes yes.
The main thing is that the joint goes into a less noticeable area.
How to check the visibility of the seam with the curtain open and closed
The seam may be hidden by the fabric in one state and exposed in another.
Both need to be evaluated.
What to do if the curtain fabric masks the seam but interferes with the service
Service is more important than masking.
When it is better to place the seam over a blank part of the wall
If the cutting allows.
How to avoid two seams next to each other
Do not combine:
-
seam PLT-001;
-
bracket;
-
cornice edge
at one point without reason.
Summary decision matrix "keep cornice / relocate / change PLT"
| Condition | Keep cornice + PLT-001 | Relocate cornice | Different profile |
|---|---|---|---|
| Physical conflict | No | Possible | Possible |
| Good working clearance | Yes | yes after relocation | Yes |
| Wall repair | Not required | Needed | Not required |
| Single PLT per room | Preserved | Preserved | may be disrupted |
| Cost of work | Below | Higher | depends |
| Risk to finished finish | Low | Higher | Low |
This table does not select automatically. It shows which factors to compare.
Control fitting without guesswork: four photos, after which the decision usually becomes obvious
For an already finished room, a short fixation of the node in four states is more useful than another calculation. It works especially well when the dispute is between two options: moving the cornice or leaving it in place.
Photo 1. Cornice without curtain, PLT-001 template at the nearest bracket
The photo should simultaneously show the ceiling, wall, top point of the bracket, and the profile template. This answers the question about pure geometry.
Photo 2. Curtain fully closed
The top of the fabric is checked along the entire length of the window. If the decorative tape goes in a wave, you can see where it comes closest to PLT-001.
Photo 3. The curtain is fully gathered at the edge
This is the most voluminous mode. The fold packet may be higher and closer to the wall than in a calm state.
Photo 4. View along the wall
It shows parallelism. This is where you can clearly see whether the gap between PLT-001 and the cornice is the same along the entire length, or if the track gradually "drifts away."
Four images provide significantly more information than the phrase "the cornice hangs at 95 mm." They can be shown to the designer, carpenter, and curtain installer so that everyone discusses the same real assembly.
When a decision can be made without moving the cornice even with a very dense top zone
Density itself is not a defect. If the profile template shows a stable gap, the curtain does not touch the wood, the brackets are accessible for maintenance, and the two horizontals look parallel, PLT-001 can work even next to an already high curtain cornice.
In such a case, there is no need to artificially create additional space just because "usually more is left between them." This article does not provide a universal standard for such a gap. What matters is the specific geometry, operation, and visual solution.
When it is better to refuse PLT-001, even if moving the cornice is technically possible
Sometimes the installer confirms: the cornice can be lowered, old holes can be patched, everything can be restored. But that does not yet mean that redoing it is reasonable.
PLT-001 should be abandoned on this wall or a more compact profile chosen if:
-
the relocation will worsen the curtain's position relative to the window;
-
repairing the finished wall is too noticeable or expensive;
-
the motorized drive would have to be completely rerouted;
-
the profile is needed only locally and is not connected to the rest of the interior;
-
after the mockup, the more compact option looks no worse.
Such a solution is not a compromise of "worse product." It is a normal result of checking an already finished interior: first, a working system is preserved, then decor is chosen to match it.
FAQ
What is the size of PLT-001?
Cross-section 120×15 mm, lengths 2000 and 2400 mm.
Can A=120 mm be considered as height along the wall?
No, not automatically. For a complex profile, the actual wall projection in the mounting orientation is needed.
Will PLT-001 fit if the cornice is 95 mm from the ceiling?
It cannot be answered with a single number. The actual PLT-001 profile must be aligned with the cornice and brackets.
Does 120−95=25 mm mean the plinth will overlap the cornice by 25 mm?
No. This is a comparison of different quantities.
Is it necessary to move the curtain rod?
Only if the PLT-001 profile or the moving curtain actually conflicts and there is no more reasonable solution.
How to make a template for PLT-001?
Use a cross-section at 1:1 scale and a rigid base.
Why is a 120×15 rectangle insufficient?
It does not replicate the profiled shape and mounting orientation.
Do brackets need to be considered?
Definitely. They can be taller than the rail itself.
Do curtains need to be considered?
Yes. The top of the fabric and its movement can become the main constraint.
Can the curtain hit the ceiling molding?
Yes, if the working clearance is too small.
What to choose — beech or oak?
After checking the geometry. Beech is convenient under an opaque enamel, oak — when a natural texture and tinting are needed.
What lengths of PLT-001 are available?
2000 and 2400 mm.
Where to place the joint above the window?
Not automatically centered. Choose an acceptable point based on the length map and bracket locations.
How many PLT-001 should I buy for a 4200 mm wall?
At least two strips, but the specific lengths of 2000/2400 are chosen based on the joint location and current price.
Can I use two 2000 mm strips for a 4200 mm wall?
No, their total length is only 4000 mm.
Can I use two 2400 mm strips?
Yes, based on total length. There will be 600 mm of nominal material left.
Can I make a joint at 1750 mm on a 4200 mm wall with two strips?
If the maximum second length is 2400 mm — no: the second part would be 2450 mm.
When is it better to choose a more compact profile?
When PLT-001 requires expensive curtain relocation or visually overloads the top of the wall.
Can PLT-001 be left on only three walls?
Only as a deliberate architectural decision. A random break in the overall ceiling molding can look unfinished.
Is it worth buying PLT-001 at a discount before fitting?
No. First compatibility, then price.
How to check the current price?
In the product card, right before placing the order.
How much does PLT-001 cost now?
At the time of checking, the card shows discounted values for some warehouse items and base prices for others. These values may change along with stock.
Can the curtain rod be hidden behind PLT-001?
Only if the actual geometry allows it and access to the curtain rod system is maintained. PLT-001 is not a standard box for a cornice.
What to do if the cornice is installed with a slope?
First, decide whether it needs to be leveled. PLT-001 can make the slope more noticeable.
Do I need to check both edges of the cornice?
Yes, and preferably all brackets.
What to do if there is a conflict with only one bracket?
Check the possibility of correctly moving it without changing the entire system.
Can the cornice be extended further from the wall?
Only if the design and load allow it. You cannot recommend a longer bracket on your own without calculation.
What to do with a motorized cornice?
Consider the drive, power supply, and service. Relocation can be significantly more complex than usual.
Do we need to leave access to the plugs and sliders?
Yes. The decorative ceiling profile should not block maintenance.
Can PLT-001 be finally painted before the fitting?
Better after geometry confirmation and dry check.
Where to compare wooden cornices and baseboards?
In the profile category of wooden cornices and skirting boards STAVROS.
Where can I buy PLT-001?
In the PLT-001 card after compatibility check.
Final algorithm before ordering PLT-001
-
Clarify what exactly 95 mm means.
-
Measure the rail at several points.
-
Measure each bracket.
-
Check the offset from the wall.
-
Hang the curtains or get their actual top geometry.
-
Get a cross-sectional drawing of PLT-001.
-
Make a rigid 1:1 template.
-
Align it with the corner of the wall and ceiling.
-
Check the nearest bracket.
-
Check the curtain package in the open position.
-
Check the fabric in the closed position.
-
Set the minimum working clearance.
-
Assess the visual gap.
-
Check the curtain rod service.
-
Decide whether relocation is needed.
-
If relocation is expensive, compare the compact profile.
-
Choose birch or oak.
-
Select the finish.
-
Measure each wall.
-
Build a map 2000/2400 mm.
-
Select joint points.
-
Calculate useful leftovers.
-
Determine the reserve.
-
Check current price and availability.
-
Only after this place the order.
Conclusion
The size 120×15 mm of PLT-001 does not give the right to conclude that with a wall cornice 95 mm from the ceiling, the wooden profile will necessarily intersect with the curtains. The formula 120−95=25 mm looks convincing, but it compares the passport parameter A with the actual vertical distance in an already existing assembly. For a profiled ceiling plinth, this is methodologically incorrect.
You need to check the actual wall projection of PLT-001 in the mounting orientation.
After this, brackets, rail offset, runners, top of the fabric, and curtain movement are added to the geometry. Only this entire package answers the compatibility question.
If the full-size template of PLT-001 passes above the cornice, leaves a stable working and visual gap, does not interfere with fabric movement, and does not block service, there is no point in moving the already installed curtain system. It can be left in place and the selected ceiling profile can be purchased.
If PLT-001 physically passes, but a random gap of a few millimeters remains between the wood and metal, the solution is still not ready. In an interior, such an assembly sometimes looks worse than a direct conflict: two lines almost stick together, and the slightest slope of the cornice becomes noticeable against the background of strict wooden molding.
If an intersection occurs with a bracket, moving fabric, or service area, two normal scenarios appear: move the curtain assembly or choose a more compact ceiling profile. PLT-001 cannot be forced to work at any cost.
The economy can also change the decision. Moving a wall-mounted curtain rod on an already finished wall is not just a few new holes. It may involve dismantling, patching old fasteners, repainting, adjusting curtains, and, in the case of motorization, working with the drive and power supply. Sometimes these operations cost more than the ceiling molding itself.
After deciding on the geometry, you need to build a map of lengths 2000/2400 mm. On a 4200 mm wall, two slats are enough, but the joint location can only be moved within limits allowed by the original lengths. It is better to move the joint away from the window center and from the brackets, if the cutting allows.
At the time of verification, PLT-001 is confirmed as a wooden ceiling molding 120×15 mm made of beech and oak, 2000 or 2400 mm long, under the name "Prestige". The card shows warehouse discounts for some versions and directly warns that they apply only to remaining stock.
Therefore, the decision before purchase should not sound like "120 is greater than 95 — so it doesn't fit," but rather:
drawing PLT-001 → profile template → real curtain assembly → fabric movement → working clearance → relocation economics → 2000/2400 map → order.
If this sequence is completed and there are no conflicts, you can buy the wooden ceiling plinth PLT-001 120×15 mm without unnecessary relocation of an already installed curtain rod.