Article Contents:
- What is a door panel: not just an overlay
- Five reasons to buy panels for interior doors instead of replacing the door
- What types of overlay panels for doors exist
- Flat overlay panels
- Frame panels with developed profile
- Carved panels for doors
- Large central panels
- Paired vertical panels
- Upper small + lower large
- MDF panels for doors
- Solid wood panels
- Layout schemes on the door leaf: how to avoid mistakes
- Scheme 1: One large vertical panel
- Scheme 2: Two vertical symmetrical panels
- Scheme 3: Four panels — classic option
- Scheme 4: Upper small horizontal + lower large vertical
- Scheme 5: Panel + decorative rosette
- Scheme 6: Panel + perimeter molding
- Sizes: how to choose without error
- Indent from the edge of the canvas
- Distance to the handle
- Width of the frame molding in a molding scheme
- Scale for canvas width: reference table
- Allowance for painting and trimming
- Material: wood, MDF or polyurethane
- Solid oak: for serious classics
- Solid beech: best option for enamel
- MDF: budget-friendly and fast
- Polyurethane: for decorative accents
- What to buy with panels: a comprehensive approach
- Moldings for the frame around the panel
- Decorative overlays for corner accents
- Wooden rosettes
- Trim in the same style
- Primer, enamel, putty for joints
- Step-by-step instructions for installing overlay panels
- Step 1. Remove the door leaf
- Step 2. Determine the layout pattern and make markings
- Step 3. Degrease the surface in the glue areas
- Step 4. Apply glue
- Step 5. Secure
- Step 6. Seal the joints
- Step 7. Prime
- Step 8. Paint
- Mistakes when buying and installing: ten real blunders
- FAQ: answers to popular questions about overlay door panels
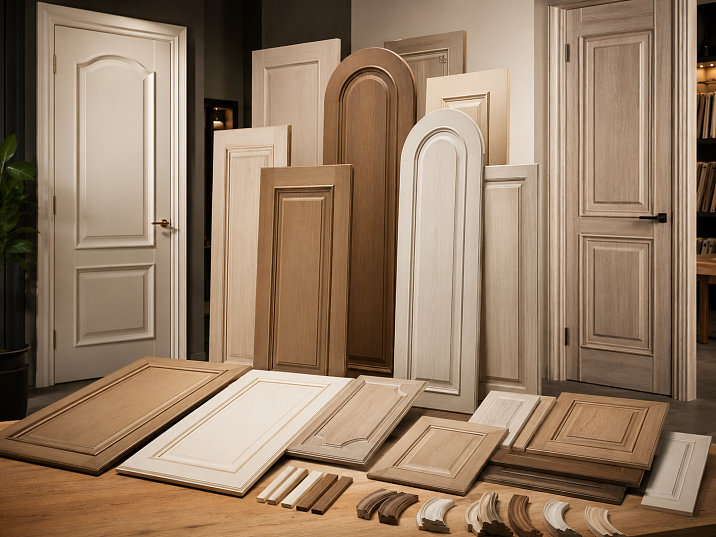
There is a question that everyone who starts a renovation in a classic or neoclassical style asks themselves: why does the door look cheaper than everything else? New moldings on the walls, beautiful Door Thresholds, elegant furniture — and the door leaf still stands as a flat rectangular slab. No relief. No detail. Just a painted panel.
The answer is simple and surprisingly accessible: overlay panels for interior doors. They turn a smooth leaf into a classic frame-and-panel door — without replacing the entire door block, without major renovation, without a designer budget.
Buying panels for interior doors is a solution that is indistinguishable from buying a new classic door in terms of results. The difference is in cost and labor. And in this article — a full breakdown: what a door panel is, how to choose it, what size and layout scheme to use, how to avoid mistakes and assemble the right set.


What is a door panel: not just an overlay
A panel is a central decorative insert in a frame-and-panel door. In a classic design, it was literally inserted into grooves of a wooden frame: vertical and horizontal stiles held a thin wooden panel in the center. Hence, both the structural purpose and the decorative one.
Today, when most interior doors are flush doors with paper or veneer coating, the original structural function of the panel is absent. However, the decorative function is fully preserved.
Door panels in the modern sense are decorative overlays that are mounted on the smooth surface of the door leaf using an adhesive method. They create the illusion of a frame structure: relief, shadow, detailing — everything that distinguishes a classic door from a modern flush door.
How is a panel different from molding? Molding is a linear profile, a frame. It forms the border. A panel is what is inside the frame: a flat or relief panel, the central element of the composition. In a classic door system, they work together: molding defines the boundary, the panel fills the space.
How is a panel different from a decorative overlay? Overlay is a universal term. Overlay ornament, rosette, cartouche, pilaster — all are overlays. A panel is a specific type of overlay element: a rectangular or shaped panel with a relief profile around the perimeter. It is the "body" of the door in a classic system.
Understanding what door panels are means understanding the logic of a classic door: the frame holds, the panel decorates, the molding unifies.


Five reasons to buy panels for interior doors instead of replacing the door
The question "wouldn't it be easier to buy a new door?" is natural. I answer: in some cases, no. Here's why.
1. The existing door is technically sound. The hinges work, the lock holds, there are no gaps. Replacing a working door block for the sake of decoration is excessive. Buying overlay door panels and updating the leaf in one day is much more logical.
2. All doors in the corridor need to be coordinated. Replacing one door when there are several is not a solution: the other panels will remain unchanged. Overlay decorative door panels allow you to bring all panels to a unified style at once.
3. The budget is limited. A set of overlay panels and moldings for one door is several times cheaper than a new door block with installation. At the same time, the visual result is comparable.
4. The interior requires a classic style. You have already bought moldings for the walls, Wooden sockets for the ceiling and Decorative wooden inlays for furniture. A smooth door in this context is a clear dissonance. Overlay panels with molding framing solve this mismatch.
5. The door is good but faceless. Dark veneer, neutral panel, no relief. The owner wants classic style, but the budget was spent on something else. Decorative panels for interior doors are exactly the solution.
And one important point: restoring an old door with adhesive panels is also an environmentally sound choice. Fewer discarded products, less waste disposal and dismantling costs.
Our factory also produces:


What types of overlay door panels are there
The variety of shapes and designs is great. Let's systematize.
Get Consultation
Flat overlay panels
The simplest type: a rectangular or square panel with a flat front surface and a relief profile around the perimeter. The profile can be straight (square groove), rounded (fillet), or complex (oval with a cutout).
A flat applied panel reads well under paint: the relief profile around the perimeter provides shadow and detail, while the front plane is a clean white rectangle. Classic minimalism.
For white enamel doors, this is the most popular choice. It installs quickly, is painted together with the door leaf, and creates exactly the effect of "simple and beautiful classic" that most people want.
Frame panels with a developed profile
Here, the perimeter profile is more complex: multiple transitions, multiple levels of relief. Such a panel itself is a mini-architectural element: an inner groove, fillet, cutout, reverse shelf.
A frame panel with a developed profile is for doors in neoclassical, baroque, and classic styles. It works well in tall rooms, on wide door leaves, in combination with polyurethane moldings.
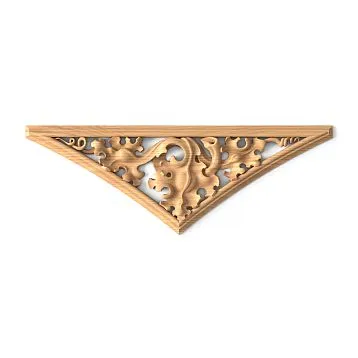
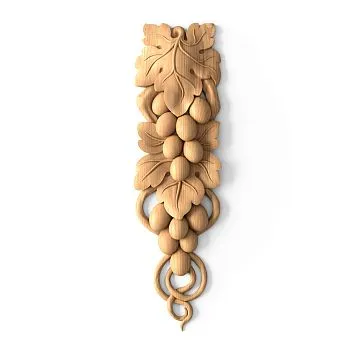
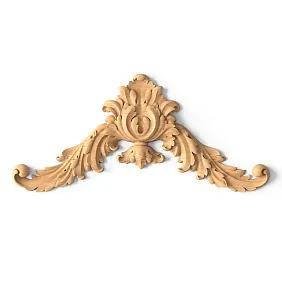
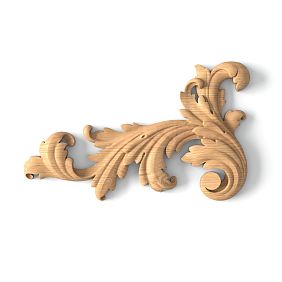
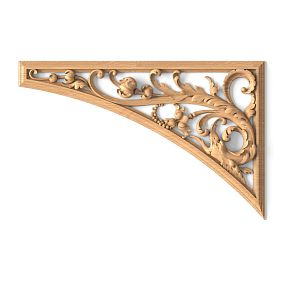
Carved panels for doors
Carved decorative panels are the next level. The panel surface features ornamental carving: a plant motif, meander, acanthus, geometric weave. The carving can be low (relief 5–10 mm) or high (15–25 mm).
Carved panels for doors made of wood or polyurethane are for formal interior doors in classic, baroque, or neoclassical interiors. They work in pair with PU overlays on the corner elements of the frame, with decor for moldings at the corner points.
Central large panels
One large vertical panel occupying most of the door leaf — a minimalist and modern take on the classic. One wide vertical panel in the center of the leaf, with an indent of 80–100 mm from the edges — a strict look for corridor doors.
Popular for doors in the American classic style: one large or two elongated vertical panels, without extra details.
Paired vertical panels
Two elongated vertical rectangles, symmetrically positioned across the width of the leaf. A classic solution for narrow doors (600–700 mm) and standard ones (800 mm). Gives a sense of slenderness.
Top small + bottom large
Classic scheme of a traditional frame-and-panel door: a small horizontal panel in the upper part of the leaf and a large vertical one in the lower part. Or: a small rectangle at the top, a large rectangle at the bottom. This scheme is the most "correct" from the perspective of classical architectural tradition.
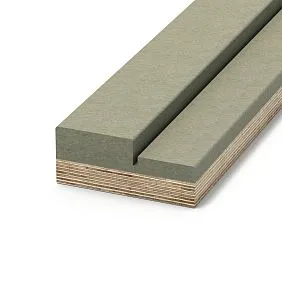
MDF panels for doors
MDF panels are a mass-market and affordable option. A milled MDF panel with a relief profile. The surface is smooth, without pore channels, and accepts primer and enamel well.
For budget-friendly solutions intended for painting, MDF is optimal. Weak point: MDF edges can chip upon accidental impact, and the chip is not as easy to repair as on wood.
Solid wood panels
Wooden decor for doors Made of solid beech or oak — a premium option. Wood is stronger than MDF, more repairable, and more expressive in texture. Under clear lacquer, an oak wood panel reveals a visible, living grain.
Wooden panels for painting with enamel — made of beech: the smooth, uniform surface of beech is ideal for accepting white or colored enamel.
Panel layout patterns on the door leaf: how to avoid mistakes
This is the main question when purchasing. Which pattern is best? For which door? How many panels are needed?
Let's break down six working patterns.
Pattern 1: One large vertical panel
One wide rectangular panel centered on the leaf with equal margins from all edges. For doors 600–700 mm wide — a minimalist and elegant option.
Margins: 60–80 mm from the side edges, 100–120 mm from the top and bottom. Panel size for a 700×2000 mm door: approximately 540×1750 mm.
When to use: modern classic, Scandinavian style, minimalism with one relief accent.
Scheme 2: Two vertical symmetrical panels
Two elongated vertical panels arranged symmetrically across the width. For doors 800–900 mm — one of the most popular schemes.
Indentations from edges: 60–80 mm. Gap between two panels in the center: 40–60 mm. Size of each panel for a door 800×2000 mm: approximately 300×1750 mm.
When to use: standard interior doors, neutral classic, doors in the hallway.
Scheme 3: Four panels — classic option
Two vertical rows, each divided horizontally into an upper smaller and a lower larger panel. Total: 4 panels. Classic door layout, dating back to the traditional joinery pattern.
For a door 800×2000 mm:
-
upper panels: 300×500 mm (2 pcs.)
-
lower panels: 300×1100 mm (2 pcs.)
-
gap between top and bottom in one row: 30–40 mm
-
gap between rows at center: 40–60 mm
-
indentations from edges: 60–80 mm
This is a "correct" classic door. It is this silhouette that is perceived as traditional and expensive.
Scheme 4: Top small horizontal + bottom large vertical
At the top — one wide horizontal panel across the entire width of the working field. At the bottom — one large vertical panel. Between them — a visual gap.
For a door 700×2000 mm:
-
top panel: 540×350 mm
-
bottom: 540×1200 mm
-
gap between them: 50–70 mm
When to use: doors in Provencal or English classic style.
Scheme 5: Panel + decorative rosette
Rectangular panel with a decorative rosette in the center or at the intersection of the frame corners. Rosettes are round or square, mounted as separate elements on top of or flush with the frame molding.
Wooden sockets from the STAVROS catalog — ready-made corner and center accents for this scheme. The rosette in the corner of the molding frame covers the joint of two strips at 45 degrees and gives the corner point a finished look.
Scheme 6: Panel + molding around the perimeter
An applied flat or frame panel is complemented by an external molding around the perimeter: the molding forms an outer frame, with an indent from the door leaf of 15–20 mm. The double frame system creates a voluminous multi-level composition.
Moldings made of polyurethane — a ready-made solution for external framing. More details on how to properly join moldings at an angle are in the article about Molding Installation.
Sizes: how to choose without mistakes
Size is the parameter where mistakes are most often made when ordering. Let's break it down step by step.
Indent from the edge of the door leaf
Standard indentation from the side edges of the panel is 60–80 mm. Less than 50 mm looks visually cramped and gives the impression of a "pinched" panel. More than 100 mm means too much "empty" edge, and the product appears small on a large panel.
Indentation at the top and bottom is 80–120 mm. The bottom indentation can be slightly larger than the top (by 10–15 mm): a classic optical correction that visually "lifts" the composition.
Distance to the handle
The placement of the door handle is a critical constraint. If the handle is installed at a height of 900–1050 mm from the floor, and you have chosen a layout with two vertical panels, the side panel must not intersect the handle area. Indentation from the handle: at least 30–40 mm.
Violating this rule causes the handle to literally "cut into" the relief element — at best it looks awkward, at worst it interferes with a proper grip.
Width of the frame molding in a layout with molding
If you are using a "panel + perimeter molding" layout, the total size of the finished system is larger than the panel itself. A molding 30 mm wide adds 30 mm on each side. When calculating the total system size, take this into account.
Scale relative to panel width: reference table
| Panel width | Layout scheme | Width of one panel |
|---|---|---|
| 600 мм | 1 vertical | 440–480 mm |
| 700 мм | 1 or 2 vertical | 540 mm / 2×260 mm |
| 800 мм | 2 vertical or 4 | 2×300 mm / 4×260 mm |
| 900 мм | 2 or 4 | 2×350 mm / 4×290 mm |
Panel height for a 2000 mm door with the "2 vertical" layout: 1750–1800 mm (with 100 mm gaps at the top and bottom).
Height for the "4 panels" scheme: top panels — 450–550 mm, bottom panels — 1000–1150 mm (with a gap of 30–40 mm between rows).
Allowance for painting and trimming
Wood is a living material: when painted or varnished, it may produce slight fuzz and minor size changes. Allow 1–2 mm on each side when calculating the fit against the molding.
MDF is more stable in this regard, but edges must be sealed and primed before applying the final paint.
Material: wood, MDF or polyurethane
Three materials — three different scenarios. Let's break down each one honestly.
| Material | When to choose | Advantages | Limitations |
|---|---|---|---|
| Oak solid wood | Natural finish, premium interior | Expressive texture, strength, durability | Higher price, requires staining or varnish |
| Beech solid wood | Paint under enamel, smooth surface | Paints perfectly, stable surface | Less expressive texture under varnish |
| MDF | Budget painting, standard doors | Smooth surface, low price | Vulnerable edges upon impact |
| Polyurethane | Decorative accents, carved elements | Lightweight, moisture resistant, does not deform | Does not feel or look like wood |
Solid oak: for serious classics
Oak is dense, hard, with expressive texture. Wooden door panels made of oak — under clear varnish or oil — provide a living texture that cannot be imitated. For doors in a study, library, or grand hall — this is a choice with a compelling argument.
Wooden decor for doors from solid wood in the STAVROS catalog — overlay elements made of oak and beech for natural finishing or painting.
Beech array: the best option for enamel
Beech is fine-grained, uniform, neutrally light. Under white enamel, it provides a smooth surface without "pores" or "nap". That's why most classic white doors are made from beech or with beech decorative elements.
Wooden panels for painting made of beech are the recommended choice for anyone who wants a white classic door with wooden overlays.
MDF: budget-friendly and fast
MDF is lightweight, uniform, easy to cut and mill. MDF door panels are 2-3 times cheaper than wooden ones. The surface for painting is smooth. Edges need to be sealed with acrylic sealant or putty before painting.
Limitation: MDF cannot be repaired if chipped. If the corner of the panel is damaged, it's immediately visible. For doors with intensive use (children's rooms, hallways), it's better to choose wood.
Polyurethane: for decorative accents
PU overlays Polyurethane overlays are moisture-resistant, do not deform with temperature changes, and paint well. Under enamel, they look like wood.
Polyurethane elements are a good choice for corner rosettes in a molding frame, for central accent elements on top of a panel, and for decorative inserts with patterns. But as a main panel, they are inferior to wood in tactile and visual feel.
What to buy with panels: a comprehensive approach
Buying door panels is the first step. To make the result look professional rather than homemade, you need a set of compatible elements.
Moldings for the frame around the panel
Perimeter molding is a mandatory element in most schemes. It forms a frame around the panel, visually separates it from the door leaf, and creates depth.
Moldings made of polyurethane — flexible, lightweight, and cut well at 45 degrees. Ideal for framing overlay panels.
More details on molding installation rules, joints, and painting in the article door decoration with moldings.
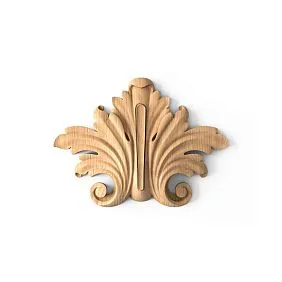
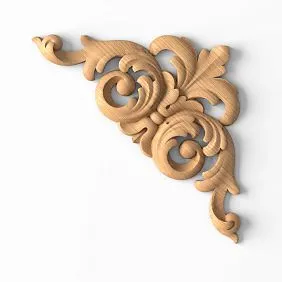
Decorative overlays for corner accents
Decorative wooden inlays or PU overlays — at the corner points of the frame, in the center of the top horizontal crossbar, as an accent above the top panel. They transform the door from "beautiful" to "architecturally complete."
Wooden rosettes
Wooden sockets — square or round corner elements for molding intersection points. Instead of a 45-degree joint, a decorative corner insert with an ornament. Simplifies installation (no perfect angle cutting needed) and enriches the composition.
Trims in the same style
A door with panels and moldings looks cohesive only when Door Thresholds they match the style of the applied decor. A casing with a straight profile on a door with carved panels is a dissonance. A casing with a classic profile, consistent with the frame molding, is a unified system.
Primer, enamel, putty for joints
For painting doors with panels, you need:
-
acrylic sealant for sealing joints between the panel and the door leaf
-
deep penetration primer
-
finish enamel (acrylic, alkyd, polyurethane) — preferably polyurethane-based for coating hardness
All joints between applied elements and the door leaf must be sealed and puttied before priming — otherwise, they will appear as gaps after painting.
Step-by-step instructions for installing applied panels
Remove — mark — glue — putty — prime — paint. These are six stages. Let's break down each one.
Step 1. Remove the door leaf
Horizontal installation is much more convenient than vertical. Remove the leaf from the hinges and place it on trestles or a workbench. The mounting surface must be dry and clean.
Step 2. Determine the layout pattern and make markings
Choose a pattern from those described above. Mark the axes: the central axis along the width of the leaf, the horizontal axis along the height. From the center — lay out symmetrically.
Draw pencil lines for the location of each panel. Check symmetry on both sides.
Step 3. Degrease the surface in the glue areas
White spirit or alcohol-based degreaser — treat each mounting area. A greasy or dusty surface will not ensure glue adhesion.
Step 4. Apply glue
For wooden and MDF panels — woodworking PVA glue (for indoor use) or MS polymer construction adhesive (for any conditions). For polyurethane elements — special PU glue or MS polymer.
Apply glue to the back of the panel in a "snake" pattern or along the perimeter and diagonals. Liquid nails also work — but hold less well on large areas without additional fixation.
Step 5. Secure
Apply the panel to the marked area. Press evenly over the entire surface. Secure with painter's tape until the glue polymerizes (usually 24–48 hours). For large elements — additional staples or clamping strips.
Step 6. Seal the joints
After the glue has completely dried: use acrylic sealant or wood putty to seal all joints around the perimeter of each panel. Allow to dry. Sand with fine sandpaper (grit 180–220).
Step 7. Prime
Apply primer to the entire door leaf along with the applied elements: one coat with drying. After priming — a second light sanding to remove fuzz.
Step 8. Paint
A door with applied elements is painted as a single unit: not the elements separately, but the entire leaf together. 2–3 coats of enamel with intermediate sanding — and you have a classic door indistinguishable from a factory frame-and-panel construction.
Mistakes when buying and installing: ten real blunders
1. Bought a panel that is too large. It fits the door size 'approximately', but the handle area is not considered — and the panel hits the lock socket. Always check the handle location before ordering.
2. Symmetry is broken. The margins from the edges on the left and right are different: 60 mm and 75 mm. From three meters away, it's not noticeable. Up close, it's jarring. Marking along the axis is a mandatory step, don't skip it.
3. Mixed different carving styles. The upper panels have a floral ornament, the lower ones have a geometric one. Each is good on its own, but together it's an ornamental conflict. All elements on one door should be from the same ornamental program.
4. Glued without marking. "Well, roughly in the center" — resulting in an 8 mm offset that cannot be fixed without dismantling. Marking is not overkill, it's a necessity.
5. Painted elements separately from the door. The tone of the elements and the tone of the panel differ slightly. The boundary is visible even without a joint. The system must be painted as a whole.
6. Did not seal the joints before painting. After applying enamel, gaps between the panel and the door leaf appear as dark lines. After painting, this cannot be fixed without removing the coating. Puttying joints is a mandatory step.
7. Did not match the trim to the decor style. A door with classic panels and a molding frame — and a thin flat trim without a profile. The system must be cohesive: Door Thresholds in the same style as the moldings and panels.
8. Used cheap glue on a smooth lacquered surface. Liquid nails do not hold on polished or lacquered surfaces. Degreasing + mechanical matting of the surface (with 80 grit sandpaper) are mandatory.
9. Did not account for the door base type. A panel door with internal stiffening ribs every 150 mm is a good base. A hollow-core door with paper filling — heavy wooden overlays should be installed with caution: fastening points may fail.
10. Did not buy with a surplus. One element got chipped during installation. This item is no longer in the catalog. Buy 10–15% more than calculated.
FAQ: answers to popular questions about door overlays
What are door overlays?
Decorative panels mounted on a smooth door leaf to create the effect of a framed panel structure. They can be flat, embossed, or carved — made of wood, MDF, or polyurethane.
Can I buy overlays for interior doors separately from the door?
Yes. They are sold separately and mounted on the existing door leaf using adhesive — without drilling or special tools.
Which overlays are best for a white door under enamel?
The best choice is beech or MDF. The smooth surface of these materials perfectly accepts primer and enamel. After painting, the door and decor look like a single unit.
How is an overlay different from a molding?
A molding is a linear profile that forms a frame. An overlay is the central panel inside that frame. They work together: the molding defines the border, the overlay fills the space.
How to turn a smooth door into a classic one?
Apply overlay panels according to the selected layout pattern, add molding around the perimeter of each panel, seal the joints, prime and paint the entire door leaf.
What panel sizes should I choose for a door that is 800 mm wide?
For a two-vertical panel layout: 2 panels of 300×1750 mm. For a four-panel layout: 2 upper panels of 280×500 mm and 2 lower panels of 280×1100 mm. Edge offsets — 60–80 mm.
Do I need to remove the door before installation?
It is strongly recommended. Horizontal work is more precise, the adhesive sets evenly, and the risk of element shifting is minimal.
What should I buy together with the panels?
Moldings made of polyurethane for the frame, Decorative Inserts for accents, Wooden sockets for corner points, Casings in the same style, adhesive, primer, and enamel.