Article Contents:
- What's Included in the Current OMLD-005 Set
- What Can and Cannot Be Determined from a 100 mm Sample
- Why a Photo Doesn't Replace a Physical Profile
- Tactile Material Check
- How to Work with 84 Samples Without Overwhelming the Customer
- Step 1: Determine the Product Group
- Step 2: Determine the Acceptable Scale
- Step 3: Select the Profile Shape
- Step 4: check the sample on the object
- Step 5: view under different lighting
- Step 6: check the material
- Step 7: record the approved version
- Step 8: calculate the footage
- How to choose oak
- How to choose beech
- How to choose MDF
- Can you mix oak, beech and MDF
- Choosing a profile for enamel
- Selecting a profile for tinting
- How to evaluate profile depth
- How to evaluate profile width
- How to evaluate radius and convexity
- How to check a square profile
- How to compare similar profiles of the same width
- How to choose a molding for a small door
- How to choose a profile for a large cabinet
- Molding next to a furniture handle
- Molding for kitchen facades
- Molding for a chest of drawers and a nightstand
- Single or double frame
- How to check the gap between adjacent facades
- Molding for door leaf
- How to coordinate molding and casing
- Profile for wall frame
- Molding for a small room
- Molding for a high wall
- Molding around wallpaper
- Molding for a hallway
- How to choose a profile for boiserie
- How to coordinate multiple frames in one room
- How to choose a ceiling cornice by sample
- Cornice for standard ceiling height
- Cornice in a high room
- Concave or convex cornice
- How to choose a baseboard by sample
- Baseboard matching door or floor color
- Baseboard next to a door casing
- Will the baseboard interfere with furniture
- How to coordinate baseboard with outlets
- How to coordinate the profile with the client
- How to sign the selected sample
- How to photograph a sample on site
- Video call approval
- Who should approve the profile
- How to avoid disputes after installation
- How to store the approved sample
- How to reorder the same profile
- What should be included in the molding specification
- How to avoid confusing similar SKUs
- How to calculate the length of a furniture frame
- How to calculate the footage of wall frames
- How to calculate the ceiling cornice
- How to calculate the baseboard
- Why total footage is insufficient
- How to choose a reserve
- Control batch before a large order
- Why a sample does not guarantee the batch shade
- Why a sample does not confirm straightness
- How to use the set in a design studio
- How to use the set in a furniture workshop
- How to use the set in the door salon
- How to use the set in the showroom
- OMLD-005 or SV-006
- How to use the set for the assembler
- How to use the set for a private customer
- How to organize an internal sample catalog
- How to update the set
- How not to confuse OMLD-005 with the on-screen catalog
- How not to confuse a sample with a finished decor
- How not to confuse the sample material with the available configuration
- How not to confuse similar soft profiles
- How not to confuse a square molding with a flat strip
- How not to confuse molding and cornice
- How not to confuse a baseboard and a casing
- Mistake: ordering footage immediately after viewing a photo
- Mistake: showing the client all 84 samples
- Mistake: choosing a profile only by the front side
- Mistake: not looking from a distance
- Mistake: not considering the light
- Mistake: approving the color based on an unpainted sample
- Error: considering a sample as a guarantee for the entire batch
- Error: not checking the card after selection
- Error: not fixing the main URL OMLD-005
- Error: promising an unchanged composition
- Error: considering the set as a full STAVROS assortment
- Error: not accounting for corners and joints
- Error: calculating footage by room area
- Error: buying installation materials in advance
- Who especially needs OMLD-005
- Interior designer
- To the Architect
- To the Furniture Workshop
- To the Door Showroom
- To the Showroom and Dealer
- To the Private Customer of a Large House
- For Whom the Set May Not Be Necessary
- Practical Choice: Custom Kitchen
- Practical Choice: Wall-to-Wall Wardrobe
- Practical Choice: Boiserie in the Living Room
- Practical Choice: Cornice and Built-in Wardrobe
- Practical choice: baseboard for the entire home
- Practical choice: commercial interior
- How to buy OMLD-005 on STAVROS
- What to check before payment
- What to do after receiving the set
- What to buy with OMLD-005 after selecting a sample
- How to coordinate molding, cornice, and baseboard in one style
- How to check the proportions of the entire room
- FAQ: questions about the OMLD-005 sample set
- How many samples are included in OMLD-005?
- What is the length of one sample?
- What materials are featured?
- What is the size of the entire set?
- Can I take OMLD-005 to the site?
- Does the set include full-size strips?
- Can samples be used as ready-made decor?
- Does OMLD-005 contain the entire range?
- How to choose a molding for a small facade?
- How to check the molding next to the handle?
- Can I select a ceiling cornice based on a short sample?
- How to choose the height of skirting boards?
- Is OMLD-005 suitable for a design studio?
- Is a furniture workshop set needed?
- Is the set suitable for a door showroom?
- OMLD-005 or SV-006 — which to choose?
- How to fix the approved article?
- Can the color be matched to the sample?
- Does the sample guarantee the quality of the entire batch?
- How to calculate the footage after selection?
- Is a control batch needed?
- Is the composition of OMLD-005 updated?
- Which card URL should be used?
- Where to buy OMLD-005?
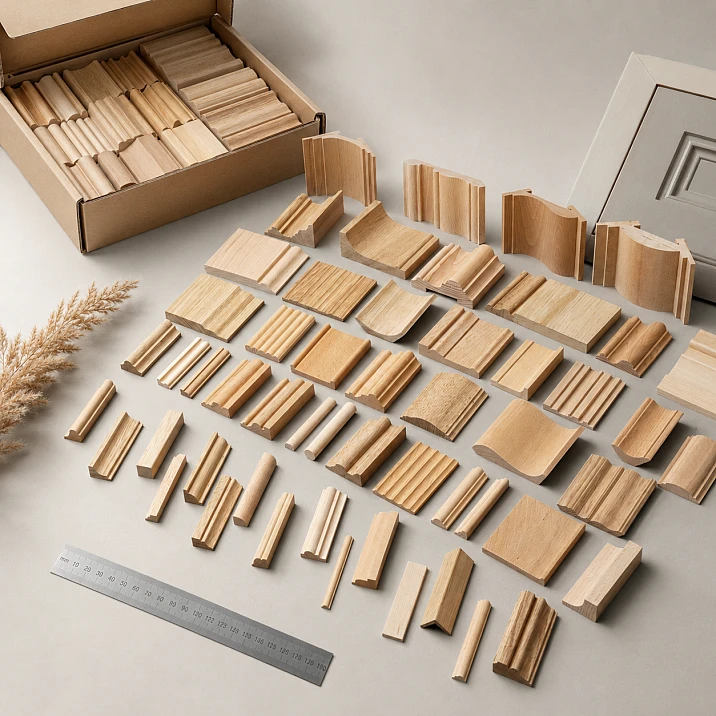
It is worth buying a set of OMLD-005 molding samples before ordering a large footage, when the profile is chosen not for one small frame, but for furniture, doors, wall panels, ceiling cornices or baseboards throughout the room. A photo helps to select the direction, but does not show the actual depth, protrusion, radius, light and shadow, and the ratio of the molding to the handle, facade, trim, wall or flooring.
purchase the OMLD-005 sample set Especially useful for a designer, architect, furniture workshop, door manufacturer, specifier, interior solutions salon, and private client of a large project. The portable show case measuring 375 × 315 × 125 mm contains 84 samples of moldings, cornices, and baseboards. Each sample is 100 mm long, and the materials presented are oak, beech, and MDF.
The short profile can be applied to a real furniture facade, wall, door, wall-ceiling joint, placed next to a handle or casing, and viewed during the day and evening. After approval, the article, cross-section, material, surface preparation, length of the commercial strip, and full URL of the card are recorded. Only then is the footage calculated and an order for full-size linear products placed.
OMLD-005 does not replace the product card, DWG, and control of the long strip. A 100 mm sample does not show the straightness of a 2400–2600 mm product, the shade of the entire batch, the quality of the corner cut, the consumption for the room, and compatibility with the finished corner. Its task is to narrow down the selection and remove the main uncertainty: which profile is truly suitable in terms of shape, scale, and material.
Short answer. OMLD-005 is needed when the cost of a mistake when ordering full footage is higher than the cost of preliminary comparison. The set allows you to check 84 physical samples, select 3–5 suitable profiles, and approve one option on site.
After selecting a sample, open the full-size profile card, check the current cross-section, available length, material, and preparation, create a cutting plan, and only then order a batch of moldings, cornices, or baseboards.
Buy the OMLD-005 set View all product samples Select wooden moldings View cornices and baseboards Order a design project
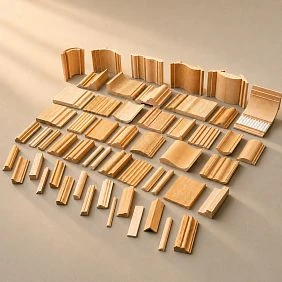
What is included in the current OMLD-005 set
| Parameter | Confirmed data | Practical benefits |
|---|---|---|
| Article number | OMLD-005 | The article is fixed in the specification and the request for a demonstration kit |
| Type | Professional set of trim samples | Suitable for selection and approval before purchasing full-size products |
| Quantity | 84 samples | You can compare a wide range of moldings, cornices, and baseboards |
| Length of one sample | 100 мм | Convenient to apply to a facade, wall, door, or ceiling joint |
| Materials | Oak, beech, and MDF | You can compare the texture, surface character, and intended finishing route |
| Product groups | Moldings, cornices and baseboards | The set helps to furnish furniture and interiors with a single molding system |
| Set size | 375 × 315 × 125 mm | The show case can be stored in the studio and taken to the site |
| Format | Portable demonstration set with handle | Suitable for on-site consultations and meetings with the client |
| Purpose | Profile selection, demonstration to the client, project approval | Reduces the risk of ordering the wrong scale or shape |
| What to check separately | Current composition, marking, selected profile card, length of the product strip, and DWG | The set is not declared as unchangeable and does not replace technical documentation |




What can and cannot be determined from a 100 mm long sample
| Check | Can be assessed using OMLD-005 | Needs additional verification |
|---|---|---|
| Cross-section | Actual width, depth, relief, and radius | Current dimensions in the card and DWG |
| Scale | Relationship with the facade, handle, wall, and casing | Appearance of a full frame or long cornice |
| Chiaroscuro | Shadow behavior under side and top lighting | Behavior of a long line throughout the room |
| Material | Texture of oak, beech, and MDF surface | Exact shade match of the future batch |
| Finishing | Test coating and reaction of a specific sample | Actual preparation of the selected product item |
| Installation | Approximate position relative to the edge | Glue, fasteners, miter cut, and base |
| Footage | Profile to be considered | Total length, allowance, and cutting plan |
| Long plank | Cross-section shape | Straightness, longitudinal joints, and behavior of the 2400–2600 mm plank |
| Ready-made corners | Visual similarity of the pattern | Exact compatibility according to the drawing |
Our factory also produces:

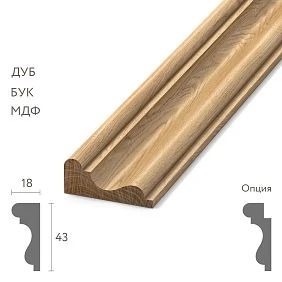
Why a photo does not replace a physical profile
The product card shows the overall pattern, but the screen automatically enlarges or reduces the item. A narrow furniture molding and a large cornice can occupy the same area in a photo, although in a real project they differ in scale by several times.
A physical sample shows the maximum protrusion above the plane, the width of the side platforms, the depth of the groove, and the nature of the radius. These parameters determine whether the molding will look like a neat line or a heavy overlay.
When ordering dozens of doors or long wall frames, even a difference of a few millimeters is repeated many times. OMLD-005 allows you to see it before calculating the entire batch.
Get Consultation
Tactile material check
Oak, beech, and MDF differ not only in name. In hand, the texture, surface density, end grain character, and how the material perceives light are noticeable.
The sample helps explain to the customer why a clear finish and a covering enamel give different results. However, the final finishing route must be checked against the card of the selected full-size profile.
You cannot transfer the shade of one short sample to a future batch without a test stain. Wood has natural variations, and MDF depends on the primer and enamel.
How to work with 84 samples without overwhelming the client
Showing all 84 profiles at once is only useful during the first internal selection. It is easier for the client to make a decision when the designer or furniture maker has pre-selected 3–5 options.
First, exclude unsuitable product groups and overly large cross-sections. Then compare shape, projection, material, and intended finish.
Thus, the set becomes a working tool, not just a collection: a wide selection turns into a clear shortlist.
Step 1: determine the product group
Before opening the show case, you need to decide what is being selected: furniture molding, wall trim, ceiling cornice, baseboard, casing, or universal profile.
The same relief works differently on a drawer 180 mm high and on a wall several meters high. Therefore, comparison starts with function, not with a favorite pattern.
After the preliminary selection, you can open the catalog and select a set of wooden moldings for a specific task.
Step 2: determine the acceptable scale
Measure the facade, the pier, the ceiling height, the distance to the handle, and the width of the trim. These dimensions set the limit within which the profile does not interfere with operation and does not look random.
On a small door, a large relief eats up the free field. On a high wall, a too thin line can get lost, especially in weak side light.
The sample is applied not in the center of the table, but at the actual installation location and viewed from a normal distance.
Step 3: select the profile shape
Semicircular, square, concave, convex, or multi-level geometry creates a different shadow and a different character of the frame.
A soft profile suits a calm line and smooth furniture shapes. A geometric profile emphasizes a modern or strict composition more strongly.
The choice is checked next to the panel, handle, cornice, and other details, not in isolation.
Step 4: check the sample on site
The sample is applied to the actual facade, door, painted wall, flooring, or ceiling joint.
It needs to be viewed from the front, side, and from the main entry point of the room. A profile that looks expressive up close may get lost from the center of the room.
For a complex project, it is useful to photograph each candidate from the same angle and under the same lighting.
Step 5: view under different lighting
Morning daylight, evening warm light, and side lighting reveal the relief differently.
A deep molding creates a strong shadow, which can be an advantage on a large wall and a disadvantage on a small facade.
Final approval is best done in the conditions in which the interior will be used most often.
Step 6: check the material
If the interior involves transparent tinting, first compare oak and beech in their natural state and on test samples.
If all elements will be painted with opaque enamel, compare the surface quality and availability of the selected full-size profile in the required material.
MDF can be a rational option for opaque finishing, but the actual configuration and preparation of a specific SKU should be checked in the product card.
Step 7: finalize the approved option
After selection, record the SKU, full name, cross-section, material, length of the commercial strip, quality of preparation, and future finishing.
Add a photo of the sample at the site and a link to the main product card to the specification.
Without written documentation, similar profiles can easily be confused during transfer between the designer, assembler, production, and installation team.
Step 8: calculate the footage
OMLD-005 helps select the shape but does not calculate the quantity. After approving the profile, measure all straight sections, frames, corners, and repeating segments.
For furniture, compile a list by facades; for walls, by rooms and frames; for baseboards, by perimeters considering door openings.
The cutting map shows what lengths of strips are needed and where joints are acceptable. Only after this is the order placed.
How to choose oak
Oak is valued for its expressive texture and deep grain after clear or semi-transparent finishing.
A physical sample helps to understand whether the large texture conflicts with the fine relief and whether the material matches the door, parquet, or furniture.
Before ordering a full-size profile, you need to check the available wood species, preparation, and make a test finish.
How to choose beech
Beech is visually calmer and often convenient for even painting or tinting when less contrast in the wood grain is required.
On the sample, you can compare how the soft texture interacts with the geometry of the profile.
Beech should not be automatically considered white or ready for a specific enamel: the actual preparation is checked in the card of the selected item.
How to choose MDF
MDF helps to achieve a smooth surface for opaque finishes and is especially useful in projects where natural texture is not part of the design.
A short sample shows the geometry and surface quality, but does not confirm the behavior of a long plank or moisture resistance for a specific area.
The material should be selected based on its purpose, operating conditions, and the available length of the full-size profile.
Can oak, beech, and MDF be mixed?
In one project, materials can only be used deliberately. Under a transparent finish, the differences will be obvious; under enamel, they may be less noticeable, but the preparation technology still differs.
For example, furniture molding and wall profile may solve different tasks, but the color and gloss should be coordinated.
Samples help check the visual combination, but do not replace the workshop's technological solution.
Choosing a profile for enamel
Under opaque paint, the shape, shadow, and quality of the prepared surface are especially noticeable.
On the sample, they check whether the relief looks too heavy after losing the wood grain, and whether the deep groove collects excessive shadow.
It is better to make the final sample on the same material that will be ordered in full footage.
Choosing a profile for tinting
The transparent finish enhances the texture and makes the ends, joints, and grain direction more visible.
An oak or beech sample is applied to existing furniture and flooring, and then a test tinting is done.
The shade of a short sample is not considered a guarantee of matching the entire batch: natural wood has variability.
How to evaluate the depth of the profile
Turn the sample sideways and measure the maximum protrusion. This shows how far the molding will extend above the facade or wall.
A deep profile collects more dust, creates a more noticeable shadow, and requires more free space near the handle or adjacent door.
A small difference in millimeters can be more important than the overall pattern.
How to evaluate the width of the profile
The width determines how much field remains inside the frame and between the molding and the edge of the facade.
On a small drawer, a wide profile can visually reduce the central plane, while on a tall door it can look proportional.
Place two similar options on one spot and take a photo strictly frontally.
How to evaluate the radius and convexity
A semicircular profile creates a soft highlight, while a flatter one creates a calm line.
The radius is especially important near handles of round or faceted shapes: a random combination may look inconsistent.
After comparison, you can buy semicircular molding MLD-027 and check the actual dimensions of the full-size product.
How to check a square profile
Square geometry gives a sharper shadow and a strict outline. It works well in modern facades and wall frames, but may look rigid next to soft carvings.
A physical sample shows how sharply the edges read and how the profile reacts to side light.
After approval, you can buy square molding MLD-038, after checking the actual cross-section and available materials.
How to compare similar profiles of the same width
Two profiles may have the same overall width but differ in depth, number of levels, and side platforms.
In a photo, the difference seems insignificant, but on the facade it changes the entire light and shadow of the frame.
For example, you can Buy molding MLD-006 or Buy molding MLD-011 only after physical comparison and checking the cards.
How to choose molding for a small door
On a small facade, the main thing is to keep enough free space and not bring the profile close to the handle, hinge, or adjacent door.
Apply the sample along all four sides of the future frame, not just one short piece. Paper layout helps to see the full outline.
The compact version can be compared to a card wooden molding MLD-019.
How to choose a profile for a large cabinet
A tall door allows for wider and deeper molding, but the full frame size still needs to be seen on the facade.
A line that is too thin can get lost, especially on matte dark enamel. One that is too large can interfere with the handle and divide the door into heavy zones.
In this section you can choose moldings for cabinets and furniture facades based on real application examples.
Molding next to a furniture handle
The handle and profile must have free working areas. When gripping, fingers should not press against the protruding relief.
The sample is placed next to the installed handle or its full-size template. The horizontal and vertical position is checked.
If the profile interferes, reduce its depth, change the frame, or move the handle before drilling.
Molding for kitchen fronts
In the kitchen, the profile is repeated on many doors and drawers, so a scale error quickly becomes noticeable.
Check the sample near the handle, worktop, plinth, and adjacent fronts. Make sure the relief does not interfere with opening and cleaning.
Choose the material and coating based on the kitchen conditions and the current full-size molding card.
Molding for a chest of drawers and nightstand
Low furniture is viewed from above and from the side, so the maximum profile protrusion is especially noticeable.
On a drawer, the molding must leave room for the handle and not come so close to the edges that the frame looks cramped.
For an expressive furniture front, you can buy furniture molding MLD-002 after sample fitting.
Single or double frame
A single frame requires less footage and looks calmer. A double frame enhances the facade's architecture but increases the number of corners, joints, and the risk of overload.
Two samples can be placed on the facade with the intended distance between contours and viewed from a normal distance.
If the double scheme looks too dense, it's better to keep one profile rather than reducing all margins to a minimum.
How to check the gap between adjacent facades
The molding should not protrude beyond the plane so that the adjacent door hits it when opening.
Check the sample on corner cabinets, paired doors, and pull-out drawers. Open adjacent elements simultaneously.
For serial furniture, this test is performed on a control facade before launching the entire batch.
Molding for door leaf
On a door, the profile must align with the handle, lock, casing, and overall leaf height.
A short sample is applied to the intended frame, and the full contour is marked with painter's tape.
Ready-made solutions can be viewed in the section and select molding and trim for the door.
How to coordinate molding and casing
If the profile on the panel is too close in width to the casing but differs in shape, the composition may look random.
Samples are placed side by side and checked not only for color but also for relief depth.
For a unified system, it is important to decide in advance which element is the main one and which supports it.
Profile for wall frame
On the wall, molding is read from a greater distance than on furniture. Therefore, the same sample may appear too thin.
Make a full-size paper frame and attach the actual profile to one corner. This shows the relationship between the line and the free field.
You can view solutions with wooden moldings and assess the scale of the boiserie.
Molding for a small room
In a small space, a large profile and a frequent grid of frames visually fragment the walls.
Compact relief helps preserve airiness, especially if the molding is painted the same color as the wall.
The sample should be viewed from the door and from the center of the room, not just up close.
Molding for a tall wall
On a wall with a high ceiling, a too narrow line can get lost. A deeper profile creates a shadow that holds the scale.
At the same time, the size is determined not only by the width but also by the projection.
Compare 3–5 candidates on the same vertical axis and photograph them from the opposite side of the room.
Molding around wallpaper
The profile should separate the wallpaper insert from the painted wall without overlapping the pattern or creating too heavy a border.
The sample is applied to an actual piece of wallpaper and the color is checked after the intended finish.
The miter cut and frame width are calculated after the profile is approved.
Molding for the hallway
In a narrow hallway, the profile is viewed up close and at a sharp angle. A deep relief can protrude more and collect shadow.
It is necessary to check whether the molding conflicts with door trims, switches, and furniture.
Additional ideas are provided by the article on how to choose a wooden molding for the wall based on a physical sample.
How to choose a profile for boiserie
Boiserie is built not from a single molding, but from a system of frames, baseboard, cornice, and sometimes vertical dividers.
OMLD-005 helps select the leading profile and check it alongside other lines.
After approval, a layout of each wall and a separate specification by article numbers are compiled.
How to coordinate multiple frames in one room
The profile should work equally well on wide and narrow piers. If frames have different sizes, the same relief may look different.
A short sample is checked at several key points, not just on the most beautiful wall.
If the differences are too great, the project is divided into main and secondary zones.
How to choose a ceiling cornice based on a sample
The sample is applied to the wall-ceiling joint in the correct orientation. Then it is viewed from the center of the room and from the doorway.
A large cornice reduces the visible height of the wall, while a compact one may get lost next to a built-in wardrobe or a tall architrave.
100 mm of length is enough to evaluate the cross-section, but does not show a long continuous line along the perimeter.
Cornice for standard ceiling height
For standard height, balance is key: the cornice should complete the wall but not visually lower the ceiling.
Compare several profiles in one corner and view them in both daylight and evening light.
If there is a floor-to-ceiling cabinet nearby, hold the sample against both the furniture and the wall.
Cornice in a high room
A high wall allows for a more elaborate profile and a stronger shadow.
However, a multi-level cornice may conflict with door casings and other lines.
Coordination should be done across the entire room facade, not just in one corner.
Concave or convex cornice
A concave shape softly blends the wall-to-ceiling transition, while a convex one protrudes more and creates a pronounced highlight.
A physical sample shows the real light and shadow that is difficult to assess in a frontal photo.
The profile is checked in the correct orientation, otherwise the impression will be misleading.
How to choose a baseboard by sample
The baseboard is applied to the actual floor and wall. The height, protrusion, and transition to the door casing are checked.
A high profile emphasizes the room's architecture but may interfere with furniture, outlets, and built-in cabinets.
A short sample helps choose the shape, while the full perimeter is calculated separately.
Baseboard matching the door or floor color
An oak sample can be compared to parquet and the door, but the exact shade of the future batch requires a test finish.
A baseboard matching the wall color looks calmer and is more often chosen for covering finishes.
The decision depends on which line needs to be emphasized: the floor, the door, or the wall.
Baseboard next to the casing
The height and projection of the baseboard should match the width and thickness of the casing.
If one element is noticeably thicker than the other, the joint requires a separate solution.
A universal option can be explored in the card and select a baseboard, casing, or cornice PLT-006.
Will the baseboard interfere with furniture
A deep profile pushes the wardrobe, dresser, or nightstand away from the wall.
Place the sample on the floor at the intended furniture location and measure the actual gap.
For built-in furniture, the baseboard often needs to end before the cabinet or have a cutout as per the design.
How to coordinate the baseboard with outlets
A high baseboard can interfere with lower outlets, cable outlets, or heating elements.
Before choosing a profile, mark all utility points on the layout.
The sample allows for a quick conflict check before finishing work.
How to agree on a profile with the client
It's better to start the meeting not with 84 options, but with the project's objective and a short list. First, show 3–5 samples of a similar scale, then explain the differences in shape, projection, and material.
The client applies the profiles to the actual surface, and the designer records comments: too large, too flat, suitable for shadow, interferes with the handle.
A decision is considered final only after the article number and parameters are documented in writing, not after the phrase 'let's take something like this'.
How to label the selected sample
The temporary label should include the article number, material, room, and date of approval.
Do not write on the front surface or alter the factory marking if it exists.
A photograph of the label and sample on the object becomes part of the project documentation.
How to photograph a sample on the object
Shoot strictly frontally and from the side, adding a tape measure or known size for scale.
Separately photograph the profile next to the handle, trim, floor, or ceiling — that's where the main conflicts arise.
Do not apply filters or color correction if the photo is used for material approval.
Approval via video call
A physical sample can be shown via video call, but the screen again distorts scale and shade.
For remote approval, use dimensions, multiple angles, and photos next to real objects.
It is better to approve the final color based on a material sample, not just a camera image.
Who should approve the profile
In a private project, the decision is usually made by the client with consultation from a designer or furniture maker.
In a commercial project, the list of approvers may include an architect, a specifier, production, and a technical client.
The specification must include the responsible person and the approval date to avoid disputes later about the chosen option.
How to avoid disputes after installation
The sample is kept until the project is completed, and the approval document specifies the article number, material, and finish.
The phrase "profile as in the picture" protects neither the client nor the contractor.
If a full-size batch has natural variations in wood, this must be discussed in advance and confirmed with a test sample.
How to store an approved sample
The selected profile is not returned to the general set without separate labeling if it serves as the project's control standard.
It is stored in a dry place, protected from paint, glue, and mechanical damage.
After completion of the work, the sample can be returned to OMLD-005, keeping the photos and specification.
How to reorder the same profile
For reordering, use the article number and the current card, not just the appearance of the old sample.
Check whether the available lengths, material, and preparation have changed.
If the project continues after a long time, the new material is compared with the old installed batch.
What should be included in the molding specification
Minimum data set: article number, full name, cross-section, material, plank length, preparation quality, finish, quantity, and card URL.
For frames, add side dimensions, number of corners, allowance, and cutting layout.
For baseboards and cornices — room, perimeter, door openings, and joint locations.
How not to confuse similar article numbers
Similar profiles cannot be distinguished only by the words "thin", "semicircular", or "wide".
Check the MLD or PLT code, full cross-section, and end photo.
OMLD-005 helps visually compare the shape, while a written specification eliminates ordering errors.
How to calculate the length of a furniture frame
For each facade, add the lengths of all sides of the frame. Then multiply by the number of identical doors and add the technological allowance according to the cutting map.
If the frame is double, both contours are calculated separately.
You cannot simply multiply the perimeter of the furniture: frame sizes and number of facades may differ.
How to calculate the length of wall frames
First, create a layout of each wall and number the frames.
For each frame, add two heights and two widths, then sum all rooms.
Corner waste, long continuous sections, and strips that cannot be joined in a visible place are calculated separately.
How to calculate a ceiling cornice
Measure the actual perimeter of the room, taking into account protrusions, niches, and built-in furniture.
For internal and external corners, allowance for trimming is needed. Its size depends on the profile and the installer's experience.
OMLD-005 helps select the cross-section, but the final footage is calculated based on the room plan.
How to calculate a baseboard
Add up the lengths of walls and subtract openings where the baseboard is not installed.
Add sections in niches, behind columns, and near built-in furniture if they are provided for by the project.
The cutting layout takes into account the length of the product strip and the location of visible joints.
Why the total footage is insufficient
The same total length in meters may require a different number of planks due to the length of individual sections.
The long side of the wall is not assembled from short leftovers without a visible joint if the project requires a continuous line.
Therefore, after summing the meters, a cutting plan is always made based on the available length of the selected item.
How to choose a reserve
The reserve depends on the number of corners, profile complexity, plank length, and installer skill.
A universal percentage cannot be assigned for all products.
First, a cutting map is built, then specific reserve segments are added for the most risky areas.
Control batch before a large order
For a large furniture or interior project, it is useful to order a small volume of the selected full-size profile.
It is used to check long geometry, finish, corner mitering, and installation on a real base.
A short OMLD sample selects the profile, and the control batch confirms the production scheme.
Why the sample does not guarantee the batch shade
Oak and beech have natural variability, and the color after tinting depends on the specific wood and technology.
MDF under enamel also depends on the primer, paint composition, and gloss level.
The sample is used to guide the selection, and the final color is approved with a separate swatch.
Why the sample does not confirm straightness
A 100 mm segment practically does not show the longitudinal behavior of the plank.
A full-size molding may have storage and geometry features that are assessed upon batch acceptance.
For lengths
How to use the set in the design studio
The designer selects profiles for the concept, takes a short list for the object, and saves the chosen sample until the work is completed.
The set speeds up meetings and makes discussions concrete: the client sees not an abstract "medium-width molding" but an actual cross-section.
For complex configurations, you can order a selection of millwork for the interior or furniture.
How to use the set in a furniture workshop
The master shows the client options for frames, cornices, and decorative planks before manufacturing the facades.
The sample is checked next to the handle, routing, panel, and door edge.
After approval, the technologist translates the selection into a drawing and cutting map.
How to use the set in a door showroom
The profile is applied to the door leaf, casing, and finish sample.
The customer can see how much the molding protrudes and can check it next to the handle.
For paired doors, the sample helps coordinate the scale before manufacturing two panels.
How to use the set in the showroom
The portable OMLD-005 is convenient for table consultations and on-site visits.
For permanent open display, the salon may need a separate stand.
In that case, you can buy display stand SV-006 and organize a stationary presentation of the molding.
OMLD-005 or SV-006
OMLD-005 is a portable show case with 84 short samples, designed for comparison and on-site use.
SV-006 is a separate display stand for demonstration in a salon or showroom.
A professional point of sale can use both formats: a set for negotiations and field visits, and a stand for permanent display.
How to use the set for a specifier
The specifier links the profile selection to the budget, deadlines, and overall specification.
OMLD-005 helps quickly eliminate unsuitable options and provide the customer with a specific shortlist.
After approval, the specifier checks the cards, available lengths, and delivery.
How to use the set for a private customer
The set is justified if a large volume of linear footage is planned in the house or apartment and a decision needs to be made once for many rooms.
For a single short frame, purchasing a full professional kit may be excessive.
In a large project, physical comparison reduces the risk of ordering tens of meters of unsuitable profile.
How to organize an internal sample catalog
Keep the original set structure and return each profile to its place.
An additional spreadsheet may contain the article number, material, purpose, link, and relevance status.
Do not rename samples arbitrarily: the commercial name must match the card.
How to update the set
The assortment composition may change, so it cannot be guaranteed that the 84 items will remain unchanged forever.
Periodically check the labeling and cards, remove outdated internal notes.
Before a major project, check the availability of the selected full-size profile.
How not to confuse OMLD-005 with the catalog on the screen
The electronic catalog is convenient for searching by article numbers and initial selection, but does not show the actual depth and tactile differences of materials.
OMLD-005 provides physical profiles that can be applied to the object. It complements the site, not replaces it.
The best scenario is to find candidates online, compare them in person, then reopen the relevant cards.
How not to confuse a sample with a finished decor
A 100 mm long segment is intended for demonstration and selection.
It cannot be used as a short overlay, corner element, or part of a finished frame without a separate project.
After approval, a full-size molding of the corresponding article is ordered.
How not to confuse the sample material with the available configuration
The presence of oak, beech, and MDF in the set shows materials for comparison, but does not guarantee that each profile is produced in all three variants.
The specific wood species and material type are checked in the card of the selected product.
Only the confirmed configuration is transferred to the specification.
How not to confuse similar soft profiles
Two semi-circular moldings may differ in radius, width, and height, even though they look almost identical in the photo.
Place them side by side on one facade and see which option gives a calmer reflection.
Record the article number immediately after deciding, without relying on memory.
How not to confuse a square molding with a flat strip
A square profile creates volume and side shadow, while a flat strip works more like a graphic line.
The difference may be subtle in a frontal shot, but a side view reveals it immediately.
The choice depends on the free field and the desired frame depth.
How not to confuse a molding and a cornice
A molding forms frames and lines on a plane, while a cornice usually finishes furniture or the transition between wall and ceiling.
Some universal profiles can be used differently, but the purpose of a specific item must be verified.
OMLD-005 helps compare the shape, while the card and project define the function.
How not to confuse a baseboard and a casing
The baseboard works at the floor, the casing frames the opening. A universal profile is only acceptable where its dimensions and geometry truly suit both components.
The sample is applied both to the floor and to the door, checking the joint between the elements.
You cannot designate one product as universal based solely on external similarity.
Mistake: ordering the footage immediately after viewing a photo
The main risk is incorrect scale. The profile may be too deep for the facade or too thin for the wall.
OMLD-005 allows you to check the shape before paying for a large batch.
The larger the footage, the more important physical fitting and a test purchase are.
Mistake: showing the customer all 84 samples
Excessive choice delays decision-making and mixes different product groups.
A professional first selects 3–5 candidates based on task, size, and material.
A wide selection is needed for preparing a shortlist, not for chaotic presentation.
Mistake: choosing a profile only by its front side
Maximum protrusion and the shape of side platforms are often more important than the frontal pattern.
Turn the sample, apply it end-on, and measure the depth.
This prevents conflict with the handle, adjacent facade, or furniture against the wall.
Mistake: not looking from a distance
A profile that looks good in hand may get lost on a tall wall.
After trying, step back to the main entry point and evaluate the line at room scale.
For furniture, look at the facade not only from arm's length but also from the center of the room.
Error: not considering light
Side shadow can make a deep molding visually twice as noticeable.
Check daylight, evening, and directed lighting.
If the interior is still being built, use a temporary light fixture in the intended location.
Error: judging color by an unpainted sample
Natural oak, beech, and MDF change in color and gloss after finishing.
First choose the profile and material, then make a test paintout.
An unpainted sample confirms geometry, but not the final shade.
Error: considering the sample a guarantee for the entire batch
A short segment does not show the natural differences of wood and the longitudinal behavior of the planks.
A full-size batch is accepted separately and compared with the approved direction.
If high requirements are specified, a control plank is ordered.
Error: do not check the card after selection
The set composition and assortment may be updated, and old notes may become outdated.
Before ordering, open the main card of the selected profile and check the dimensions, material, length, and preparation.
OMLD-005 does not replace current product data.
Error: do not fix the main URL of OMLD-005
The product had an old address in the molding section, but for new cross-linking, the card in the product samples section is used.
In project documentation and new materials, one main URL must be preserved.
So specialists do not open different versions of the page and do not distribute internal links between duplicates.
Error: promising an unchanged composition
The quantity of 84 samples is confirmed, but it cannot be stated that the list of SKUs never updates.
Before an important presentation, check the current card and labeling.
The internal electronic registry of the set also requires periodic checking.
Error: considering the set as the full STAVROS assortment
OMLD-005 represents a wide set of moldings, cornices, and baseboards, but should not be described as the entire catalog.
For a complete search, open STAVROS product samples и select a full-size profile after comparing samples.
If the required item is not in the show case, its card and ordering possibility are checked separately.
Error: do not account for corners and joints
A short straight segment does not show how the profile connects in the frame.
After selection, a test cut on a separate workpiece and checking the finished corners against the drawings is needed.
This is especially important for deep multi-level profiles.
Error: calculate the linear footage by the area of the room
Linear footage is calculated by line lengths, perimeters, and frames, not by square meters of floor.
A separate layout is needed for each wall and facade.
The sample determines the article number, but does not replace measurement.
Error: purchase installation materials in advance
Adhesive, primer, and fasteners depend on the selected material, substrate, and finish.
First, the profile and technical scheme are approved, then the installation is assembled.
Useful recommendations for selecting, cutting, and installing profiles, but the specific composition instructions remain mandatory.
Who especially needs OMLD-005
The set is needed by specialists and customers who regularly select linear products or plan a large one-time project.
It is useful where the solution goes through several approvals and must be documented.
The more facades, rooms, and meters, the higher the value of preliminary physical verification.
Interior designer
The designer receives a mobile profile library for meetings in the studio and on site.
The set helps connect the concept with real sizes and materials, not just visualization.
After approval, the sample becomes the basis for the specification.
For the architect
The architect can check the linear elements on door, wall, and ceiling unit layouts.
A physical cross-section helps more accurately assess scale and interaction with architectural lines.
For the technical part, drawings and cards are still used.
For the furniture workshop
The workshop reduces the number of facade reworks and makes consultation clearer.
The client sees the real depth of the molding next to the handle and panel.
The approved sample connects sales, the technologist, the painting area, and installation.
Door salon
The set helps match the profile to the door leaf, casing, and hardware.
The portable format is convenient for on-site measurements or meetings with a designer.
After selection, the profile is fixed in the door order and checked against available configurations.
Showroom and dealer
OMLD-005 allows consulting clients at a table, while SV-006 maintains a permanent display.
This way, the salon combines mobility and clarity.
Samples need to be kept in order and regularly checked against the current assortment.
Private customer of a large house
If trim is chosen for multiple floors, built-in furniture, doors, and boiserie, the set helps create a unified system.
The customer can compare oak, beech, and MDF in their own lighting and save the approved profile.
The cost of a mistake on large footage makes pre-purchase rational.
For whom the set may not be necessary
For one small frame with an already selected article, a full professional kit may be excessive.
If the profile is physically available in the nearest showroom and the project does not require a site visit, it can be approved there.
OMLD-005 is justified when a wide selection, rework, and portable demonstration are needed.
Practical choice: custom kitchen
The master selects several furniture moldings, applies them to a test facade and handle, then makes one control sample with enamel.
After approval, calculates the frames for each door and launches the batch.
Thus, OMLD-005 becomes the first stage, not a replacement for the production sample.
Practical choice: a wall-to-wall wardrobe
The profile is checked on a high door, near the vertical handle, and in the joint area of the doors.
From the center of the room, evaluate whether the frame is sufficiently readable.
After selection, you can go to the wardrobes section and order a full set of moldings.
Practical choice: boiserie in the living room
Three profiles of different depths are selected on the wall and applied to the paper layout of the frames.
Evaluate the shadow during the day and evening, then agree on one option with the baseboard and cornice.
Only after this are all perimeters calculated.
Practical choice: cornice and built-in wardrobe
A sample of the cornice is applied to the ceiling joint and the top line of the wardrobe.
They check that there is no accidental step and that there is enough space for the doors to open.
If the cabinet goes up to the ceiling, the solution must be part of the overall assembly.
Practical choice: baseboard for the entire house
Several samples are placed next to the floor, doors, and furniture in different rooms.
The chosen height must work in both a spacious living room and a narrow hallway.
If necessary, the main and secondary floors receive different profiles but the same finish.
Practical choice: commercial interior
For a hotel, restaurant, or salon, the profile is checked not only visually but also considering cleaning, damage, and reordering.
The approved article number is kept for future repairs.
A control batch helps check the installation before a large order.
How to buy OMLD-005 on STAVROS
Open the main card in the product samples section and check the current price, availability, and ordering conditions.
Before purchasing, determine who will use the kit, where it will be stored, and whether a stationary stand is needed.
Current payment and delivery terms for OMLD-005 are checked immediately before ordering.
What to check before payment
Verify the article number OMLD-005, quantity 84, sample length 100 mm, materials, and show-case size 375 × 315 × 125 mm.
Clarify the current composition and labeling if specific profiles are important for the project.
Do not use the old duplicate URL in the new specification.
What to do after receiving the set
Check the completeness, condition of samples, and ease of removal from the show-case.
Create an internal registry with article numbers and links without changing the factory identification.
Then conduct the first selection based on the real project and save the approved sample.
What to buy together with OMLD-005 after sample selection
The set is needed not for storing short pieces, but for subsequent ordering of specific linear footage. After approval, the profile is transferred to a product card, specification, cutting map, finishing, and installation. For the showroom, the portable set can be supplemented with a stationary stand.
| What to add | Why | Suitable scenario | What to Check | Link |
|---|---|---|---|---|
| OMLD-005 | Compare 84 physical samples | Design studio, workshop, large private project | Current composition and labeling | set of 84 samples of moldings and linear elements |
| All samples | View other demonstration solutions | Showroom and professional configuration | Purpose of each set | Select demonstration sets |
| Wooden moldings | Go from short sample to product | Furniture, walls, doors | Cross-section, material, and length of the strip | buy wooden moldings |
| Molding | Assemble molding, cornice, and baseboard | Room furnishing | Single proportion and finish | Buy moldings, cornices, and baseboards |
| MLD-019 | Consider compact profile | Small furniture door | Position near the handle | Select a compact furniture profile |
| MLD-002 | Choose an expressive furniture molding | Wardrobe, chest of drawers, kitchen | Frame scale and protrusion | Profile for furniture fronts |
| MLD-027 | Compare soft semicircular geometry | Calm frames and furniture | Current cross-section and ready corners | Compare the soft profile in person |
| MLD-038 | Choose a strict square line | Modern facade or wall | Side shadow and free field | Select a volumetric square profile |
| MLD-006 | Check deep relief | Large frame | Chiaroscuro and corner cut | Deep profile 35 mm wide |
| MLD-011 | Compare more compact cross-section | Medium furniture and walls | Difference with a similar profile | compact profile 35 mm wide |
| MLD-020 | Expand short list | Additional project option | Do not confuse the article due to external similarity | compare additional profile from the range |
| PLT-006 | Align the bottom and door line | Baseboard, trim or cornice | Specific application and cross-section | buy universal profile PLT-006 |
| SV-006 | Set up a stationary display | Showroom and salon | Installation location and exhibition composition | Organize a demonstration of the molding in the showroom |
| Materials | Prepare the paint sample and installation | After approval of the article | Compatibility with material and substrate | Purchase materials for installation and finishing of the molding |
| Design project | Connect the profiles into a single system | Multiple rooms or complex furniture | All layouts and specifications | order a selection of millwork for the interior or furniture |
How to coordinate molding, cornice, and baseboard in one style
The set allows you to place three groups of trim pieces side by side and see if they conflict in scale and geometry. A square furniture molding, a soft ceiling cornice, and a complex baseboard can each be beautiful on their own but create a mismatch together.
Choose a leading character: soft, strict, classic, or minimalist. Then keep one candidate each for the wall, ceiling, and floor, and test them on site.
Additional material helps order trim samples before furnishing the interior and tie all lines into one system.
How to check the proportions of the entire room
A profile cannot be evaluated only near the surface. The baseboard, cornice, and molding frames create vertical division of the wall and change the perceived height of the room.
Take photos of all selected samples in one room, mark future lines with painter's tape, and step back to the main viewing points.
It is useful in advance check the proportions of the cornice, baseboard, and molding in personbefore calculating the total footage.
FAQ: questions about the OMLD-005 sample set
How many samples are included in OMLD-005?
The current card confirms 84 samples of moldings, cornices, and baseboards.
What is the length of one sample?
Each sample is 100 mm long. This is enough to evaluate the cross-section and fit to the surface, but not enough to check long geometry.
What materials are represented?
Oak, beech, and MDF.
What is the size of the entire set?
375 × 315 × 125 mm.
Can OMLD-005 be taken to the site?
Yes. The card describes a portable show case with a handle, designed for display and fitting.
Are there full-size strips in the set?
No, these are short demo samples 100 mm long.
Can the samples be used as ready-made decor?
They should not be. Their purpose is selection and display; for installation, order full-size profile.
Does OMLD-005 contain the entire range?
This statement is not confirmed. The set includes 84 samples, and the full current range is checked in the catalog.
How to choose a molding for a small facade?
Place several compact profiles next to the handle and mark the full frame. Check clearances and opening of adjacent doors.
How to check the molding near the handle?
Use a real handle or template, try the grip and open the facade. The profile should not interfere with fingers.
Can I select a ceiling cornice using a short sample?
You can choose the cross-section and scale, but the long line, corners, and total length need to be checked separately.
How to choose the height of the baseboard?
Place the sample near the actual floor and wall, compare with the trim, furniture, and outlets.
Is OMLD-005 suitable for a design studio?
Yes. The set allows you to select profiles, take them to the site, and fix the selection in the specification.
Is a furniture workshop set needed?
It is especially useful for a workshop with regular orders because it helps to agree on the frame before manufacturing the facades.
Is the set suitable for a door showroom?
Yes, profiles can be compared to canvas, trim, and handle before placing an order.
OMLD-005 or SV-006 — which one to choose?
OMLD-005 is mobile and suitable for on-site use; SV-006 is designed for stationary display. The showroom can use both.
How to fix the approved article?
Record the code, full name, cross-section, material, length of the product strip, finish, and card URL; add a photo on the object.
Can the color be matched by sample?
You can choose the direction, but the final shade of the batch is confirmed by a test swatch on the selected material.
Does the sample guarantee the quality of the entire batch?
No. Full-size strips are accepted separately, checking straightness, shade, and condition.
How to calculate the footage after selection?
Create facade or wall layouts, sum up all line lengths, and make a cutting map based on the available plank length.
Is a control batch needed?
For a large order, it is useful: it allows checking long geometry, miter cuts, finishing, and installation.
Is the composition of OMLD-005 updated?
The composition may change, so before an important project, you need to check the current card and labeling.
Which URL of the card should be used?
The main address is in the "Product Samples" section: the OMLD-005 card, which links in this article refer to.
Where to buy OMLD-005?
On the main card of the set on the STAVROS website after checking the current price, availability, and delivery conditions.
Conclusion: why buy OMLD-005 before the full length
OMLD-005 turns the selection of moldings from comparing photos into a verifiable process. One portable show case contains 84 samples 100 mm long made of oak, beech, and MDF. They can be applied to a facade, door, wall, floor, or ceiling joint to see the real scale, depth, and light and shadow.
The set is especially useful where an error will be repeated on dozens of facades or hundreds of meters. The designer selects several candidates, the client approves one profile, the specifier records the article number, and the workshop translates the decision into a drawing, color sample, cutting map, and control batch.
A short sample does not replace a card, DWG, and acceptance of full-size planks. It does not guarantee the shade of the entire batch and does not calculate the footage, but it helps to choose exactly the profile that is worth counting and ordering.
On the STAVROS website you can buy OMLD-005, go to wooden moldings, cornices, and baseboards, select materials, and order a design project. This route reduces the risk of random selection and helps to assemble furniture or an interior from coordinated parts.