Article Contents:
- 1. Read the room before choosing a profile
- Knee walls, sloped ceilings, gable ends, and dormers are different surfaces
- A room can have more than one ceiling height
- Understand the common parts of a finished attic
- Decide which surfaces deserve the viewer's attention
- Crown molding is not the same as a flat wall molding
- Why a rigid profile can follow a diagonal but not a curved wall
- The safer architectural alternative
- MLDPU-001: the understated line
- MLDPU-004: compact molding with more definition
- MLDPU-027: two half-round sizes
- MLDPU-002 and MLDPU-003: when the gable wall has room
- What the material label does not promise
- Keep the strongest line on the most vertical surface
- Make the knee wall quiet and the ceiling light
- Color and sheen control the apparent room shape
- Repeat a rhythm, not every angle
- Start with the actual usable height
- Two legitimate knee-wall layouts
- Protect the building envelope
- Plan around the focal furniture first
- How much blank space should be left?
- Work with the triangular top, not against it
- Interior casing is not exterior flashing
- Make a recess feel deliberate
- Measure the actual visible field
- A straight raked run is measurable, but usually longer than it looks
- The ridge joint is not an ordinary square corner
- The knee-wall-to-slope intersection
- When to use a template instead of a calculator
- Let beams keep their structural identity
- Exposed beams are not permission to drill anywhere
- Keep the decorative language consistent
- Finished attic bedroom: calm and symmetrical
- Attic home office: focus on the end wall
- Cape Cod bonus room: repeat window-related details
- Draw one elevation for every wall receiving trim
- Label each individual cut by its finished length
- Mark obstacles before marking panels
- Measure twice in the finished room
- Order by profile and location
- Shipping and long pieces
- When a sample saves money
- Confirm that the surface is suitable
- Find and mark the reference line
- Dry-fit complete corners before applying adhesive
- Select a compatible adhesive, not a catchy generic name
- Step 1: repair and finish the substrate
- Step 2: build a cut schedule with orientation marks
- Step 3: test the cuts on scrap
- Step 4: mount in a controlled order
- Step 5: treat visible joints as finish work
- Step 6: paint and inspect from the doorway
- Match the coating to both surfaces
- Allow the finish to cure before regular use
- Maintain the relief without damaging its edges
- Decorative does not mean structural
- Can I install picture-frame molding on a sloped attic wall?
- Is polyurethane molding the same thing as PVC trim?
- What is the best trim for a low knee wall?
- Should I run crown molding all the way to the peak?
- Can STAVROS wall molding be used on the ceiling surface itself?
- How do I measure the length of a sloped trim run?
- What should I use around a dormer window?
- Can I glue molding to old wallpaper?
- Can I bend standard polyurethane molding into a curved dormer arch?
- Will polyurethane molding prevent cracks at roof joints?
- Should the trim match the ceiling color or the wall color?
- How much extra molding should I buy?
- Can I install polyurethane molding myself?
- Is decorative molding appropriate next to a recessed light or roof vent?
- Where can I buy the profiles used in these examples?
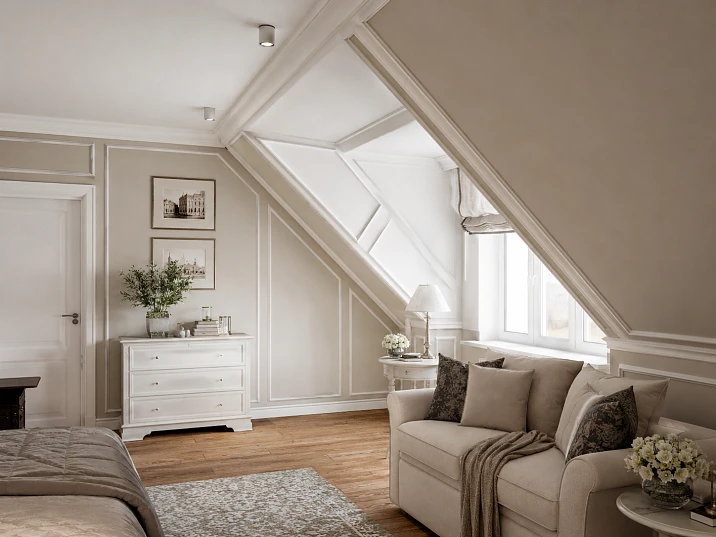
A room beneath a pitched roof has a kind of character that an ordinary rectangular room cannot imitate. The ceiling changes height as you move, a dormer creates a pocket of daylight, and a short wall beneath the roofline turns a simple furniture arrangement into a design problem. Polyurethane molding for sloped ceilings can bring order to that geometry, but only when the trim is designed around the room's actual planes and angles. The right decision is not necessarily to install crown molding along every junction. In many American attic bedrooms, bonus rooms, Cape Cod houses, and finished lofts, one precise decorative line on a gable wall does more than a complicated border around the entire roof.
This guide explains how to choose decorative wall molding for sloped ceilings, knee walls, dormer windows, and attic conversions using US measurements. It also clarifies what is—and is not—established by a STAVROS product description. A straight, rigid molding can follow a straight diagonal line on a flat surface; that does not make the molding bendable, and it does not mean a standard wall profile can bridge two ceiling planes like purpose-designed crown molding. That distinction protects both the appearance of your project and your materials budget.
The starting point is the real STAVROS polyurethane molding catalog. Its individual profiles have published dimensions, materials, and stock lengths that can be compared before buying. We will use verified examples, practical layouts, a cut-list method, and a room-by-room installation sequence rather than treating every attic as an identical DIY project.






1. Read the room before choosing a profile




Knee walls, sloped ceilings, gable ends, and dormers are different surfaces
In American residential language, a knee wall is a short vertical wall beneath a sloping roof, often concealing unfinished space. The sloped ceiling is the finished plane following the roof pitch. A gable end wall is usually a vertical, sometimes pentagonal wall under the roof peak. A dormer projects outward from the roof to create a window and extra headroom. These parts meet, but they are not interchangeable. A molding design that works on the flat gable end may look awkward at the transition from a knee wall into a roof slope.
Begin with a simple room sketch showing the two roof slopes, the ridge line, short vertical walls, windows, doors, beams, vents, and any access hatches. Mark where each surface changes direction. Do not draw a continuous trim line until you know which portions are in one plane and which turn across a corner. The installation difficulty rises dramatically at those transitions, not on the long straight runs.
Наша фабрика также производит:




Смотреть весь Каталог продукции
A room can have more than one ceiling height
A floor plan may say that a room is 12 by 14 feet, but the useful wall area may be only 3 feet high at its edges and nearly 10 feet at the center. That changes the scale of decorative panel molding. A border that looks delicate on an 8-foot wall may consume much of the knee wall; a large ornamental profile may feel unbalanced when it follows the sloped roof. Record the minimum vertical height, the approximate ridge height, and the wall surface where the decor will actually sit.
The essential design question is not "How tall is the room?" but "How much uninterrupted, visible surface remains after the bed, desk, trim, outlets, and the roof geometry are accounted for?" In a compact attic bedroom, the visible wall behind the headboard may be the most reliable place for one complete panel frame.
Получить консультацию
Understand the common parts of a finished attic
| US construction term | What it means in a trim plan | Typical decorative approach |
|---|---|---|
| Knee wall | Short vertical wall below roof slope | Slim horizontal trim, or leave the wall plain |
| Raked/sloped ceiling | Angled finished ceiling surface | Straight accent lines on the plane; deliberate joints |
| Gable end wall | Full-height end wall under the roof peak | Picture-frame panels or a centered decorative composition |
| Dormer window | Window in a roof projection | Interior casing and measured window-wall accents |
| Ridge | Where two roof slopes meet at the top | Often leave clean; do not force conventional crown molding |
| Valley/compound corner | Three-dimensional change of planes | Template and dry-fit; custom carpentry if needed |
Decide which surfaces deserve the viewer's attention
Most rooms need only one dominant decorative system. If the gable wall has a centered bed, a set of clean rectangular frames can become the focal point. If there is a writing desk in a dormer, a restrained casing around the dormer window can make its recess look intentional. If the roof structure includes attractive exposed beams, use the polyurethane molding as a quiet supporting detail rather than wrapping every timber edge. The goal is to simplify a complicated room, not to reproduce every roofline in ornament.
2. Why the usual crown-molding rule breaks down in an attic
Crown molding is not the same as a flat wall molding
In ordinary rooms, crown molding often sits across the wall-to-ceiling junction with two contact surfaces. Its spring angle and cutting method depend on how that particular profile is shaped. On a sloped ceiling, the included angle is different from a standard flat-ceiling corner. A pre-cut 45-degree miter from a rectangular room should not be assumed to fit. You may need special compound calculations, a custom transition block, a different profile, or no crown at all.
A wall molding, by contrast, usually lies against a single flat surface. Straight polyurethane wall trim may be mounted diagonally on a sloped drywall plane just as it may be mounted horizontally or vertically, provided the back of the profile is appropriate for that substrate and installation. It can create a raked picture-frame line without bridging the slope-to-wall corner. This is why the STAVROS molding profiles are useful for deliberately drawn lines on one plane, whereas the geometry of crown at a compound ceiling junction needs separate evaluation.
Why a rigid profile can follow a diagonal but not a curved wall
A diagonal line is still straight. A 102.36-inch length of molding can be rotated to align with it without bending. However, the same molding cannot be presumed to conform to a curved dormer arch, a warped wall, or an irregular radius. For a curved installation, use a product specifically identified as flexible and verify its minimum radius, installation conditions, and finish compatibility. Do not try to create flexibility by heating an unspecified rigid profile with a heat gun.
There is a second, subtler issue: a rigid trim strip may bridge small wall irregularities rather than sit flush along its entire length. Better surface preparation, controlled adhesive application, and a test fit are more reliable than forcing the decorative profile against a poorly finished substrate.
The safer architectural alternative
When the sloped joint is too complicated, an intentional shadow line, a clean painted intersection, or a flat accent profile set back from the junction often looks better than poorly fitting crown molding. Treat a clean seam as a legitimate design choice, not evidence that the room is unfinished. If there are three planes meeting at an awkward angle, ask a finish carpenter to template the corner before ordering a large quantity of specialized trim.
3. Five verified STAVROS polyurethane profiles to compare
The following examples are actual polyurethane products in the English STAVROS catalog. Measurements are the published profile width × projection/depth × stock length, not room clearances. They provide a starting point for visual scale. They are not advertised here as pre-flexed attic trim or guaranteed ceiling-junction crown.
| STAVROS SKU | Profile size, inches | Stock length | Best role in a sloped-ceiling room |
|---|---|---|---|
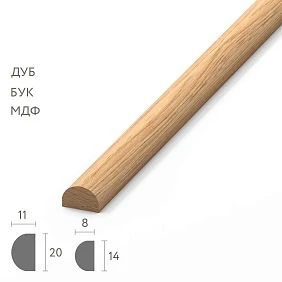
| MLDPU-001 | 0.39 × 0.24 | 102.36 in | Fine lines, small panels, dormer details |
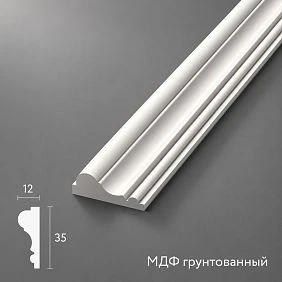
| MLDPU-004 | 0.59 × 0.31 | 102.36 in | Slim but visible panel frames |
| MLDPU-027 | 0.55 × 0.35 or 0.79 × 0.47 | 102.36 in | Quiet half-round contours on one plane |
| MLDPU-002 | 0.87 × 0.43 | 102.36 in | More substantial gable-wall framing |
| MLDPU-003 | 1.38 × 0.47 | 102.36 in | Pronounced trim on broad wall areas |
MLDPU-001: the understated line
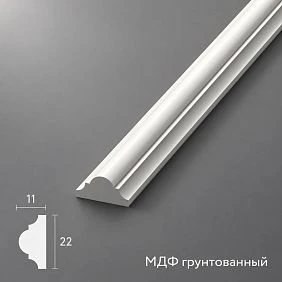
At only 0.39 inch across and 0.24 inch deep, MLDPU-001 polyurethane molding is a candidate when the decor must be visible without visually lowering the room. Consider it for a single narrow frame on a dormer return or a quiet line beneath a slope. Its compact size makes it easier to keep the ornament proportional to small surfaces. It still requires careful marking, smooth substrate preparation, and end joints that are intentionally located rather than left wherever a strip runs out.
MLDPU-004: compact molding with more definition
For a small attic office or a bedroom with plain painted walls, MLDPU-004 offers a 0.59-inch visual width and a 0.31-inch projection. The stepped relief gives a stronger edge than an extremely fine bead. Use a full-size sample or a paper-width strip before ordering: viewed from across a room, the actual relief and lighting matter more than a difference of a few millimeters on a product page.
MLDPU-027: two half-round sizes
The MLDPU-027 profile has two published variants, 0.55 × 0.35 inch and 0.79 × 0.47 inch, each 102.36 inches long. The half-round silhouette produces a comparatively soft, restrained line. It works as a candidate for a deliberate horizontal detail on a knee wall or a small decorative frame in a dormer nook. Decide the exact size before doing a cut list; the two widths cannot be treated as the same decorative layout at joints and corners.
MLDPU-002 and MLDPU-003: when the gable wall has room
An accent composition on a broad gable end can support more visible moldings. MLDPU-002 measures 0.87 × 0.43 inch and has a dimensional, stepped design. MLDPU-003 is 1.38 × 0.47 inch, a substantial profile relative to the STAVROS group compared here. The wider option can make a confident wall panel, but it is generally too emphatic to place automatically at every narrow knee-wall segment. The visible face, depth, and surrounding blank space should guide selection.
What the material label does not promise
All five catalog pages identify these listed SKU variants as polyurethane. That confirms the catalog material—not any universal claim about a specific U.S. fire rating, load capacity, bend radius, outdoor exposure, or installation adhesive. The product page and any current technical documentation should be reviewed for the actual project. Likewise, STAVROS sells wood, MDF, and other polymers in nearby departments: the label "decorative molding" does not guarantee that every product on the website is polyurethane.
4. Layout principles that make an attic feel taller
Keep the strongest line on the most vertical surface
Vertical lines can emphasize the full height of the gable wall without announcing how low the knee walls are. In a bedroom, one well-proportioned rectangular frame behind the headboard often provides enough structure. In a sitting room, a pair of frames on either side of a central low cabinet can create rhythm. The frame should not disappear behind tall furniture, lamps, drapery, or a sloped-window recess.
This approach is related to conventional picture-frame wainscoting and lower-wall molding, but an attic requires greater attention to unequal heights and changing wall shape. Do not automatically continue a row of equal-height frames from a tall gable wall onto a 30-inch knee wall.
Make the knee wall quiet and the ceiling light
A low roofline does not necessarily need elaborate trim. A single narrow horizontal line, located well below the point where the wall tilts, may tie the room together. Another option is no raised molding on the knee wall and a consistent wall-to-ceiling paint color that lets the slope recede. Strong contrasts around every angled edge can make a compact room feel chopped into pieces.
If knee-wall access doors are present, leave their edges and hardware serviceable. Do not bridge an access panel with a decorative profile just to maintain a continuous band. A maintenance seam is more important than forcing symmetry across a removable door.
Color and sheen control the apparent room shape
Painting the trim the same color as the wall produces relief through shadow rather than contrast. It suits low rooms with multiple planes. A subtle satin trim against matte wall paint can increase definition while remaining subdued, but coating compatibility and the exact sheen system matter. When a gable end is the focal point, contrasting trim may work there alone. A bright white outline against a dark sloped ceiling on all sides often makes the roof geometry more dominant, which can be the opposite of the desired effect.
Repeat a rhythm, not every angle
Three equally sized panel frames on one broad wall can establish an ordered rhythm. The same three panels forced around window cutouts, eaves, and a ridge can become visually restless. Preserve matching gaps where people see panels together; allow different decorative treatments on a dormer and a gable end. This is consistency of design rather than mechanical repetition.
5. Knee wall trim: a useful detail with strict limits
Start with the actual usable height
Suppose an attic has a 36-inch knee wall, an outlet 12 inches above the floor, and a hidden access hatch. Placing a 28-inch-tall ornamental panel on that wall leaves too little breathing room and can interfere with required access. A narrow line at a measured height might be more practical. If furniture sits against the wall, verify that the added relief will not be crushed by a headboard, drawer, storage unit, or the movement of a bed frame.
A slim STAVROS polyurethane wall molding is better chosen after taping its exact width on the wall. In a short room, material scale must be judged from the normal doorway and from the bed or desk, not only from arm's length.
Two legitimate knee-wall layouts
The first layout is a single horizontal trim line, interrupted cleanly at service doors. It gives the wall a continuous visual datum. The second is a restrained series of narrow vertical frames, but only where there is enough height to make them genuinely rectangular rather than squat. Avoid a decorative band that wraps around access panels, air returns, or mechanical closets. The designer can still achieve symmetry by centering the visible composition within the unobstructed portion.
Protect the building envelope
Knee walls can sit adjacent to insulated, ventilated, or unfinished attic cavities. Do not drill, cut, or glue over hidden service points without knowing the construction. Decorative polyurethane is not an air barrier, a vapor retarder, or a substitute for proper insulation, fire protection, or ventilation. If a renovation includes moving a knee wall or opening the roof assembly, building-envelope work and local permitting should be addressed separately before decorative trim is installed.
6. The gable end: often the best place for picture-frame molding
Plan around the focal furniture first
A gable end often offers the most uninterrupted wall area in a finished attic. Its shape may be rectangular at the bottom and triangular above. Decide whether the trim design belongs in the rectangular portion or should reflect the triangular roof geometry. For most DIY projects, rectangular picture-frame molding is more forgiving because its four pieces can be dry-fitted with familiar right-angle geometry. A triangular peak composition can be elegant, but it introduces additional angles and must be drawn and templated at full scale.
For a queen bed, a symmetrical central wall composition is usually more convincing than several narrow frames that disappear behind nightstands. For a desk, two panels flanking shelving can work better than a large centered rectangle. Use painter's tape to simulate the outside edge of the molding and stand back before ordering.
How much blank space should be left?
There is no universal code-mandated decorative gap around a panel. The right margin depends on the room, profile width, furniture, lighting, and the wall's shape. As an initial visual test, draw multiple options with several inches of clear wall between the molding and the nearest door casing, sloping corner, or piece of furniture. Then assess the design from the doorway. A complex cornice at the roof peak may not be needed when the framed area already reads as architectural.
Work with the triangular top, not against it
Do not add a horizontal panel top that visually collides with the descending ceiling. Options include a shorter, fully rectangular composition below the roof peak or a custom peaked design built from precisely measured straight segments. The latter remains feasible with rigid molding because each segment is straight; the difficulty lies in accurate corner cuts and preserving profile alignment. Professional help is reasonable when the wall angles are uneven or multiple planes meet.
7. Dormer windows: decorative trim versus window construction
Interior casing is not exterior flashing
A dormer window is surrounded by a roof and wall assembly that must manage water and air. Decorative molding on the interior finish should not be confused with the window's flashing, waterproofing, drainage, exterior casing, or structural installation. The project begins only after the window is sound, accessible, and properly finished. Never cover weep paths, operable hardware, screens, required egress mechanisms, or serviceable joints.
Inside the room, a dormer can be emphasized with one thin molding frame that stays on the surrounding drywall plane. Alternatively, a modest border may be applied to a suitable interior reveal after verifying the angle and surface. Flat wall molding is not automatically an appropriate substitute for functional window casing, particularly where casing must protect an exposed edge.
Make a recess feel deliberate
A typical dormer niche has a window at the back, a small ceiling above, and side returns. Choose one treatment: a perimeter line around the window, a frame on the flat back wall, or a simple border where the recess opens into the room. Combining all three often makes the dormer feel crowded. A white-on-white profile around a painted dormer nook provides depth without distracting from the light source.
Measure the actual visible field
Do not size the molding from the nominal window dimensions printed on the order. Measure the drywall opening and its clearances after paint and casing are complete. Look for window handles, swing arcs, shades, curtain tracks, and any shelf or desk beneath the sill. A narrow profile such as MLDPU-004 can be considered for a flat decorative field, but its 0.31-inch depth still projects and must not interfere with operation.
8. Sloped lines, ridge joints, and compound corners
A straight raked run is measurable, but usually longer than it looks
A trim line that follows a roof slope crosses more distance than the horizontal floor measurement beneath it. If the horizontal run is 8 feet and the rise is 4 feet, the straight diagonal length is the square root of 8² + 4², or about 8.94 feet (107.33 inches). That is longer than a single 102.36-inch STAVROS strip. The installer needs a planned joint, not an emergency splice discovered halfway up the slope. This simple geometry is useful for budgeting; final cutting dimensions must be taken from the actual finished surface and the intended end details.
The slope may also be crooked in the real building. Measure it at the exact location of the decorative line, not only from a construction plan. If a painted roof plane bows or an older attic is out of square, snap a layout line that creates a deliberate visual result rather than relying on a bent ceiling edge as the guide.
The ridge joint is not an ordinary square corner
At the ridge, two angled ceiling planes meet. A profile with a single flat mounting back can end on each plane, but a continuous decorative object spanning the ridge is a different construction problem. Its contact geometry, apparent profile height, and joint angle all change. A 45-degree miter may be incorrect even when the two slopes look symmetrical from the floor. Template both pieces in place and check them from the room's normal sightlines.
A clean stop a few inches short of the ridge can be preferable to a forced ornamental connection. If you want an uninterrupted architectural cornice crossing multiple planes, a trim carpenter or an engineered system designed for that joint is the sensible route.
The knee-wall-to-slope intersection
Where the knee wall meets the sloped ceiling, there may be a sharp angle, a rounded drywall corner, a sloped transition, or a structural irregularity. Treat this junction as a building detail first and a decorative opportunity second. A thin wall profile can stop neatly below it, preserving a simple boundary. Alternatively, trim can sit entirely on the slope and remain visibly separate from the knee wall. Trying to bridge the two with a flat-backed profile often leaves unsupported edges and a conspicuous gap.
This is also where an unexamined gap in the building envelope may be mistaken for a cosmetic issue. If airflow, condensation, or staining is present, resolve it before using molding or caulk to disguise the line. Decorative sealant cannot repair a moisture problem inside a roof assembly.
When to use a template instead of a calculator
A square, a digital angle finder, a bevel gauge, and cardboard or scrap-wood templates can reveal the real geometry of three-plane corners. Record the actual meeting angle and mark the face and orientation of each test piece. Test cuts on scrap before touching finished decorative stock. For highly visible peaks, old houses with uneven planes, or compound crown work, the labor saved by a correct template frequently exceeds the cost of a little offcut material.
9. Exposed wood beams and polyurethane molding
Let beams keep their structural identity
A wood beam, whether structural or decorative, provides a strong material rhythm. Polyurethane trim can complement it without trying to disguise it as the same material. For example, simple painted panel frames on the nearby gable wall may balance natural timber overhead. Another design is a subtle line on the drywall between beams, leaving a deliberate reveal around the wood. These approaches create a hierarchy: timber remains the dominant feature; wall molding organizes the surrounding surfaces.
Avoid fastening decorative strips directly across joints where wood movement is likely to occur. A small intentional separation may survive seasonal movement better than an inflexible caulk bridge, depending on the construction. When the wood is stained and the polyurethane is painted, their material difference is not a defect: it can be part of the design.
Exposed beams are not permission to drill anywhere
Find out whether the visible timber is structural and where wiring or concealed attachments run. A decorative line on adjacent drywall should not introduce holes into the beam, interrupt structural connectors, or obstruct inspection. If a project involves electrical wiring for lights attached to a beam, route and secure it according to applicable local requirements; a piece of molding is not approved electrical raceway merely because it hides a cable from view.
Keep the decorative language consistent
Choose one restrained polyurethane profile and repeat it on related wall features rather than changing patterns next to every beam. For an attic that combines oak timber, white drywall, and a compact dormer, the half-round MLDPU-027 molding may create a soft visual link between openings. A dramatically ornate profile beside rustic beams could work in a deliberate eclectic interior, but it should be a conscious styling choice supported by the room's furnishings.
10. Three American room scenarios
Finished attic bedroom: calm and symmetrical
Imagine a bedroom with a broad gable end, a queen bed centered against it, and low roof slopes on both sides. Rather than framing the roofline, put two or three balanced panels on the flat gable end. Keep the molding same-color as the painted wall and preserve enough visible wall above the headboard for the upper rail to read clearly. If a storage hatch sits in a knee wall, leave it accessible and undecorated. A compact MLDPU-004 profile can create an understated effect; a wider profile should be considered only with actual mockups.
If the bedroom has an unusually low area behind the bed, it may be better to use no raised molding there. A well-chosen wall color and simple bedside lighting can be more successful than forcing a frame into a space that is mostly covered by furniture. The purpose of molding is to improve proportion, not to satisfy a requirement that every room must contain it.
Attic home office: focus on the end wall
A converted attic office often has a desk under a dormer, built-in shelves under one slope, and a taller wall behind the chair. Use a decorative frame where it can be seen during video calls or on entering the room. Keep the desk nook functional: monitor arms, shelving, shades, and outlets need clearance. A narrow strip may also frame a painted notice wall, but do not bridge electrical boxes or conceal the route to any mechanical access.
A calm office palette pairs naturally with the low-relief MLDPU-001. For a larger, more formal study, consider MLDPU-002 on a wide flat wall. Either way, apply the same visual margin to the panels you can see together; do not force the design to continue over every sloped corner.
Cape Cod bonus room: repeat window-related details
A Cape Cod-style upper floor may have dormers facing the street, sloped ceilings at the sides, and a central room used for guests or play. If two dormers have similar proportions, a small matching trim layout on each interior back wall can unify the room. Keep the visible casing simple and ensure blinds, window cranks, and egress operation remain unaffected. The lower storage walls can remain plain or receive one thin line where they are unobstructed.
For a children's space, design against real use: climbing, furniture movement, toys, and cleaning are more important than a highly projecting decorative strip. Select positions that are less likely to be struck and choose a maintainable coating. No decorative polyurethane molding should be described as impact-proof or as a substitute for child-safe furniture placement and secure anchoring.
11. Measure first: the attic trim survey
Draw one elevation for every wall receiving trim
A single overhead floor plan is not enough. Use wall elevations: a straight-on drawing of each surface, including the diagonal roof boundary and the positions of doors, windows, vents, and furniture. For the gable end, mark the width at the floor, the width at any chosen panel height, and the ridge height. For each knee wall, record usable length, height, access doors, and interruptions. For each dormer, record opening dimensions and the depth of the returns.
A small sketch often exposes a problem before installation: a proposed decorative rectangle may cross the sloped wall line on one side even if it fits on the other. A measured drawing also allows another person to verify the purchase list without relying on a vague photograph.
Label each individual cut by its finished length
For a picture-frame molding layout, record the outside or inside cut-point dimension consistently—whichever your template uses—and include the profile width in the drawing. The cut length of a mitered piece is commonly measured between its longer points, but the appropriate convention depends on the profile and corner construction. Write the convention on the schedule. A list that mixes inside dimensions with outside miter lengths can create several inches of error across a large room.
Record separate pieces for the left, right, top, and bottom of every panel. Do not merely write "four rectangles" and add their total perimeters. The practical quantity of stock depends on how individual cuts fit into the available strip length, saw kerf, joint allowances, and the appearance requirements for visible splices.
Mark obstacles before marking panels
Electrical receptacles, switches, smoke alarms, HVAC grilles, sprinkler components, access hatches, and window hardware should appear on the drawing. Verify any required clearances or access requirements for the actual equipment; do not hide or restrict them behind decorative molding. If the room has a smoke or carbon monoxide alarm, avoid interference with its listed placement and service requirements. When in doubt, consult the relevant manufacturer instructions or a qualified professional.
Measure twice in the finished room
A roof conversion can be measurably out of square. Check width at multiple heights, diagonals across a proposed rectangular panel field, and the distance from the planned molding to the actual ceiling line. A laser level helps establish consistent horizontal references, while a plumb line helps keep vertical elements truly vertical. A decorative frame should not be forced to imitate a crooked building edge unless that is the intentional design.
12. Cut-list example A: three gable-wall frames
Assume a broad, flat gable-end field allows three picture-frame panels, each measuring 32 inches wide by 48 inches tall between the selected outside miter points. For this exercise, the finished dimensions already reflect the cutting convention; the frame positions have been checked against the bed and slope. Each frame requires two 32-inch horizontals and two 48-inch verticals. Three frames therefore require six pieces of 32 inches and six pieces of 48 inches.
| Cut group | Pieces | Length each | Total cut length | Example packing into 102.36-in stock |
|---|---|---|---|---|
| Frame verticals | 6 | 48 in | 288 in | Two 48-in cuts per strip: 3 strips |
| Frame horizontals | 6 | 32 in | 192 in | Three 32-in cuts per strip: 2 strips |
| Total | 12 | — | 480 in | 5 strips before contingency |
The total is 480 inches, or 40 linear feet. Dividing by the published STAVROS strip length of 102.36 inches gives a theoretical minimum of five strips, and here that minimum is physically achievable: three strips each provide two 48-inch parts, while two more each provide three 32-inch parts. Each arrangement leaves room for ordinary saw kerf and a small amount of unused stock. It assumes accurate finished dimensions and no defective or damaged pieces. For a real room, consider six strips to allow a correction or damage reserve, and review the actual cuts before purchasing.
This is a clearer result than automatically ordering "10% extra" with no cut plan. The spare is justified by the number of precise miters and the possibility of re-cutting visible pieces. The final count may change if the actual profile, miter convention, or shipping stock length differs from these published examples.
13. Cut-list example B: two matching roof-slope runs
Suppose you want a straight decorative line on each of two identical slopes. The plan's horizontal run is 8 feet (96 inches) and the rise is 4 feet (48 inches). The diagonal is approximately 107.33 inches per slope, using the Pythagorean theorem. Both slopes together require roughly 214.66 inches of actual installed length. Since one STAVROS strip measures 102.36 inches, every slope will need a joint unless the layout is shortened. A single unspliced piece cannot span either run.
An illustrative cut schedule is two main sections of 90 inches and two short sections of approximately 17.33 inches. The two 90-inch parts each use one stock strip. Both shorter parts fit in a third strip, with ample room for saw kerf. Therefore three strips can supply these four pieces before contingency, assuming the real end treatments permit that splice layout. The important point is that three strips do not remove the need for joints: they simply provide material for them.
Place joints symmetrically when both slopes are visible together. Dry-fit the splice and check whether the pattern or raised detail disguises a small mismatch or exaggerates it. A scarf-like splice may be appropriate for some profiles, while another joint arrangement may be more suitable for the particular molded section and adhesive system. Do not prescribe a universal joint angle without testing the product. A fourth stock strip can be a reasonable contingency for two highly visible slopes with several angled end cuts.
14. Cut-list example C: three dormer-window frames
Imagine three matching dormers, each receiving a decorative rectangle on a suitable flat interior wall. Each rectangle needs two 41-inch vertical pieces and two 36-inch horizontal pieces (dimensions measured by the same chosen miter convention). Across three dormers that makes six 41-inch pieces and six 36-inch pieces, for 462 linear inches in all.
Simple arithmetic suggests 462 ÷ 102.36 = 4.51, or five stock strips. But that ignores the lengths of the individual cuts. Three 36-inch pieces total 108 inches and cannot fit in one 102.36-inch strip, even before kerf. Every strip can provide at most two of the required pieces. There are 12 pieces, so the minimum is six stock strips. One easy packing method is one 41-inch and one 36-inch piece from each strip; 77 inches plus cutting loss fits easily. This leaves six strips as the real minimum for the stated pattern, not five.
This example shows why ordering by linear feet alone can fail. For a finished-room project with repeated window frames, add a seventh strip if you need a practical mistake reserve. Verify the actual space for shades and handles before accepting any of the design dimensions.
15. A concise purchase schedule, not a vague material estimate
| Purchase item | What to verify | Why it matters |
|---|---|---|
| Main molding | Exact SKU, material, profile width, depth, 102.36-in length | Ensures cut schedule matches the real item |
| Optional secondary profile | Color and shape alongside main profile | Prevents mixed design languages |
| Approved construction adhesive | Compatibility with both polyurethane and the finished substrate | Avoids bond failure or surface damage |
| Joint filler and paintable caulk | Use and movement suitability; compatibility with finish | Controls visible joints without promising to fix roof movement |
| Primer and finish paint | Compatibility with trim surface and existing coating | Reduces peeling, flashing, and color mismatch |
| Temporary supports and cutting supplies | Manufacturer-approved methods, miter tools, eye protection | Allows clean positioning and accurate cutting |
Order by profile and location
Group the shopping list by SKU rather than by room alone. A 0.59-inch molding on one dormer and a 0.87-inch molding on another cannot necessarily be combined at a shared joint. Make separate stock counts for each profile and note whether stock can be cut from the same order. The STAVROS MLDPU-002 product page and other individual SKU pages identify current published sizes; verify them again at checkout because options, stock, packaging, and prices may change.
Shipping and long pieces
A 102.36-inch molding is more than 8.5 feet long. Plan how the pieces will be delivered, moved through stairs, brought into a finished attic, and stored flat and protected until use. A narrow staircase or tight dormer opening may influence the practical cut sequence, but do not pre-cut everything solely for transport without confirming the final dimensions and keeping enough allowance for miters. The STAVROS English storefront displays prices and product information, but do not assume U.S. shipping availability, duties, delivery time, or total landed cost without confirming the order terms directly.
When a sample saves money
For prominent trim, a small representative piece or a full-size paper profile mockup can reveal whether the relief is too busy, too thick, or too shallow in the room's light. This is especially helpful for low knee walls, sloped ceiling planes seen at a shallow angle, and dormer returns. The cost of discovering a scale problem before installing 40 linear feet is usually less than the cost of removing decorative molding after it has been glued and painted.
16. Installation on sloped drywall: preparation comes first
Confirm that the surface is suitable
Inspect the actual wall or ceiling plane for peeling paint, dust, loose compound, movement, cracks, stains, and signs of condensation. A clean, structurally sound painted drywall surface is different from friable old plaster, wallpaper, plastic wall covering, or a fresh patch that has not cured. Follow the product and adhesive manufacturer's preparation instructions for the real substrate. Decorative molding must not be used as a way to hold loose drywall together or disguise recurring roof leaks.
Sloped surfaces are more difficult to work on because gravity can move the piece before the adhesive reaches sufficient holding strength. Prepare temporary support and an installation method approved for that profile and substrate. A worker should not rely on a single hand to hold a long strip while trying to make an accurate cut or apply pressure. Arrange a stable work platform appropriate to the room; never stand on furniture or on unstable steps to reach a roof slope.
Find and mark the reference line
Use a laser level, ruler, tape measure, straightedge, and adjustable bevel gauge. Start with measured reference points and snap or lightly draw the intended decorative line on the finished plane. Check that the design is visually centered when viewed from the doorway. For a diagonal, verify both end points and sight the line from the floor before mounting the first piece. If the installation is a group of picture-frame panels, build a consistent set of spacers or templates for repeated distances.
A line parallel to the sloped ceiling edge may look slightly crooked if the framing is out of square. Decide whether true level, true plumb, or visual parallelism is the design priority and apply that decision consistently. There is no reason every decorative line must follow the imperfections of the roof assembly.
Dry-fit complete corners before applying adhesive
Lay out the exact left, right, top, and bottom pieces of a frame; label their backs. Check the profile orientation and relief direction at every miter. For a gable composition with angled top corners, assemble a temporary taped template and verify the visible apex. For a dormer, test that the pieces do not cross a window jamb or shade track. If the profile is stepped or ornamental, the face pattern must visually continue through the joint—not merely touch at its outside edge.
A practical installation detail deserves emphasis: the cutting method that works for a flat wall picture frame may not be appropriate for a three-dimensional crown profile at a sloped ceiling junction. Consult the manufacturer's details or a qualified installer for crown and compound joins instead of copying an ordinary 45-degree picture-frame cut.
Select a compatible adhesive, not a catchy generic name
Do not assume that every construction adhesive, "liquid nails" formula, solvent adhesive, or caulk bonds safely to every polyurethane profile. Compatibility depends on the specific decorative product, substrate, surface coating, expected temperature, and application conditions. Check written guidance for adhesion to polyurethane and the actual wall surface. Make a small bond test if the recommendations allow it. Where a special primer is required, use the specified system; where a factory surface is already prepared, verify whether additional priming is necessary.
A sealant intended to fill a painted hairline is not automatically a structural adhesive for a long sloping trim piece. Keep those functions separate. The STAVROS installation guidance provides general background, but the adhesive instructions and actual condition of the attic remain decisive.
17. A practical installation sequence
Step 1: repair and finish the substrate
Complete roofing, insulation, drywall, joint compound, and moisture repairs before decorative installation. Allow surfaces to dry and cure under the relevant coating manufacturer's directions. In a finished attic, avoid changes to the venting and insulation configuration while working on decor. Record and preserve access to services hidden behind knee walls.
Step 2: build a cut schedule with orientation marks
Transfer the confirmed room dimensions into a cut list. For picture frames, label outside miter-point lengths and each piece's position. For slope runs, label the direction of rise and planned splice location. Keep a small reference drawing near the saw so that left and right pieces do not get accidentally reversed. Check every quantity against the 102.36-inch published stock length and the actual saw-kerf allowance.
Step 3: test the cuts on scrap
Before cutting expensive profile lengths, make a short trial joint. Confirm the saw angle, the decorative face orientation, and how the profile sits against the mounting plane. If the wall turns across a compound corner, make a cardboard or scrap template and dry-fit the actual profile. Angles in old attics can vary over just a few feet; avoid assuming that two corners on the same wall have identical geometry.
Step 4: mount in a controlled order
For a gable panel layout, install from carefully checked reference lines rather than from an uneven baseboard. For a diagonal line, stage all sections and any temporary support before adhesive is applied. Use the adhesive manufacturer's recommended bead pattern, pressure, working time, curing requirements, and temporary retention method. Wipe excess product only as its instructions permit so that solvents or aggressive wiping do not damage the polyurethane finish.
Step 5: treat visible joints as finish work
Inspect miters and splices after the adhesive has reached its specified state. Repair minor cosmetic gaps with suitable compatible filler or paintable sealant as appropriate to the product and joint. Do not pack large structural gaps with caulk or expect filler to restrain movement between roof components. Sand only as recommended for the profile surface and wear protection appropriate to the materials. Remove dust before painting.
Step 6: paint and inspect from the doorway
After all specified cure periods, prime where necessary and finish the molding with a compatible paint system. Inspect under daylight and artificial light from the positions where the trim will actually be seen. Sloping daylight from a dormer exaggerates bumps and seams that look invisible under a work light. Correct obvious defects before putting furniture and window treatments back in place.
18. Paint, maintenance, and honest expectations
Match the coating to both surfaces
If the wall is matte and the trim is semigloss, every edge will be strongly defined. That may be useful on a large gable accent wall, but it may overemphasize the roofline in a low room. A same-color satin or low-sheen finish often creates a quieter effect. For polyurethane, verify the surface preparation and suitable primer and paint with product-specific instructions. Do not rely on a generic statement that all water-based or all solvent-based coatings are compatible with every molded product.
Allow the finish to cure before regular use
Dry-to-touch and full cure are not the same. Window shades, stored items, and furniture may come into contact with fresh trim soon after installation, especially in a tight attic. Follow the coating manufacturer's cure time before installing hardware nearby, cleaning, or placing objects against finished pieces. Keep the room ventilated according to product directions, considering that attic temperatures can fluctuate more than temperatures in a main-floor room.
Maintain the relief without damaging its edges
Painted polyurethane decorative molding can usually be dusted with a soft cloth or brush when the coating system permits. Use mild cleaning methods compatible with the installed finish rather than abrasive pads or strong solvents. Check any caulked joints periodically where roof movement or seasonal temperature changes are noticeable. An expanding crack, stain, or persistent damp patch is a reason to inspect the building, not simply to repaint it.
Decorative does not mean structural
Polyurethane molding is used here as a visual architectural detail, not as a support for shelves, a handhold, a window-frame fastener, an approved fire barrier, or a way to secure electrical cables. A decorative layer cannot solve a failed window, leaking roof, or inadequately insulated knee wall. Those building systems must be addressed independently.
19. Common attic-molding mistakes to avoid
- Ordering by the room perimeter alone. The perimeter cannot tell you how many cut pieces will fit into a 102.36-inch stock strip, particularly when dormers and multiple panel frames are involved. Make a piece-by-piece plan.
- Treating all ceiling trim as crown molding. A wall-applied decorative strip and a profile designed to span a wall-to-ceiling angle are different. Verify the geometry and intended contact surfaces.
- Assuming polyurethane is flexible. A rigid straight piece can run diagonally on a flat plane but should not be forced around a curve or heated to create an unspecified bending radius.
- Following every roof edge with contrast trim. This can lower the apparent ceiling and fragment a small room. Choose one focal surface and a controlled visual rhythm.
- Cutting all miters at 45 degrees. Irregular roof pitches and three-dimensional joints require measurement and templates. Test the actual corner.
- Using adhesive as a repair for failing drywall. Surface preparation, moisture remediation, and structural repairs must come first. The decorative bond is only as sound as the substrate.
- Covering attic access or equipment. Knee-wall hatches, air returns, window operation, and service clearances need to remain available after installation.
- Ignoring the profile projection. A molding less than an inch wide can still project far enough to interfere with window shades, tall furniture, or door swing.
- Mixing product materials without checking. STAVROS categories include products made from different materials. Confirm each SKU rather than assuming that nearby baseboards, wood accents, and other trims are polyurethane.
- Assuming a U.S. delivery promise. Product visibility on an English website does not establish delivery availability, import charges, lead time, or a final checkout total in the United States.
20. Questions American homeowners ask about sloped-ceiling trim
Can I install picture-frame molding on a sloped attic wall?
Yes, provided the wall has a suitable, sound flat mounting surface and the layout is measured for its actual boundaries. A picture-frame composition may sit entirely on a sloped plane or on a flat gable end. The straight pieces of a rigid profile do not need to bend to follow straight diagonal segments. Measure the intended cut-point dimensions, dry-fit every corner, and choose an adhesive compatible with the profile and surface.
Is polyurethane molding the same thing as PVC trim?
No. Polyurethane and PVC are different polymers, and manufacturers use different formulations and installation systems. Some decorative profiles are polyurethane, while other products sold as trim may be PVC, polystyrene, MDF, plaster, or wood. Confirm the material on the exact item before choosing adhesives, paint, and installation methods.
What is the best trim for a low knee wall?
A narrow decorative line or no raised molding can be the best aesthetic answer. Check the actual height, nearby furniture, access hatches, and the visual scale. A slim, confirmed polyurethane profile such as MLDPU-001 may be a sensible candidate for a flat wall surface, but it is not an all-purpose construction solution.
Should I run crown molding all the way to the peak?
Not automatically. A sloped ceiling changes the corner geometry, and the ridge may require specialized compound joints. In many rooms, leaving the peak clean and concentrating decorative wall molding on the gable end creates a more controlled design. If continuous crown is desired, verify a suitable crown system and have the corner measured by a capable installer.
Can STAVROS wall molding be used on the ceiling surface itself?
A straight wall molding may be used as a decorative line on a suitable flat ceiling plane if the manufacturer's installation guidance and the adhesive system permit that orientation and substrate. Do not confuse this with using it as structural support or as a substitute for purpose-built crown across two different planes. The product's weight, adhesion, orientation, and temporary retention method must be reviewed.
How do I measure the length of a sloped trim run?
Measure directly along the intended installed path where possible. For a preliminary right-triangle calculation, use the square root of horizontal run squared plus rise squared. Record the slope length in inches and then check the actual finished wall. The example in this guide is 96 inches horizontally and 48 inches vertically, yielding about 107.33 inches of straight diagonal distance.
What should I use around a dormer window?
Use interior trim appropriate to the finished substrate, opening, and clearance requirements. A slim decorative molding can create a visual frame on a flat surrounding wall, but it must not cover operative window components or replace proper casing, waterproofing, exterior flashing, or functional window installation elements.
Can I glue molding to old wallpaper?
Do not assume the bond will be reliable. Wallpaper can separate from the wall, and its surface or adhesive may be incompatible with construction adhesive. Follow the chosen trim and adhesive manufacturer's substrate requirements; sound, properly prepared paint-grade drywall is a different situation from decorative wallpaper.
Can I bend standard polyurethane molding into a curved dormer arch?
Not unless that exact product is specified for bending within the required radius. Rigid molding should not be treated as flexible because the material name contains polyurethane. For an arched opening, see the separate STAVROS guide to polyurethane arch molding and verify the suitable bendable profile before ordering.
Will polyurethane molding prevent cracks at roof joints?
No. Decorative trim can conceal a minor cosmetic seam, but it cannot prevent underlying building movement or correct damaged drywall, insulation problems, or moisture penetration. If the joint is moving repeatedly, diagnose the cause and choose an appropriate building-detail solution before finishing.
Should the trim match the ceiling color or the wall color?
Both are possible. For a visually spacious attic, matching a sloped ceiling or surrounding wall often makes the geometry quieter. Contrasting molding on a large gable wall can establish a focal point. The best decision should be tested with real samples in both daylight and evening lighting.
How much extra molding should I buy?
There is no universally correct percentage. Calculate every individual piece and pack the cuts into the published stock length. Then consider extra material for miters, likely mistakes, damage, stock matching, and the number of visible joints. The five-strip and six-strip examples in this guide show why a physically possible cut schedule is more useful than applying one percentage to a raw perimeter.
Can I install polyurethane molding myself?
Simple panels on a flat wall are achievable for a careful DIY homeowner with appropriate tools, surface preparation, a suitable adhesive, and proper work-platform safety. Complicated crown at a ridge or three-plane joint, questionable building-envelope conditions, and any electrical or structural changes should be handled by appropriately qualified professionals.
Is decorative molding appropriate next to a recessed light or roof vent?
Only after verifying the fixture's listed clearances, access, heat exposure, and installation instructions. A decorative strip must not obstruct vents or violate fixture clearances. For a light, locate the trim around the approved fixture rather than modifying the fixture or using trim to conceal unsafe wiring.
Where can I buy the profiles used in these examples?
Start with the STAVROS polyurethane molding collection and compare the exact profile on its individual product page. Check the material, size option, published length, current availability, delivery destination, packaging requirements, and total cost before ordering. This article is an editorial selection guide, not a guarantee of U.S. inventory or shipping.
21. A better way to finish the attic
A successful attic interior does not hide its pitched roof. It makes the changing geometry look considered. The first step is to choose a focal surface, often the gable end or a dormer recess. The second is to select a profile at a scale the room can carry, using verified dimensions rather than a generalized promise that a certain molding is "ideal for any ceiling." The third is a cut list built from real pieces, not only a perimeter in linear feet.
For quiet lines, the fine MLDPU-001 or compact MLDPU-004 may work on suitable flat surfaces. For a substantial gable feature, MLDPU-002 or MLDPU-003 deserves a full-size mockup. The half-round MLDPU-027 offers a different, softer contour. In every case, confirm the specific product's material and mounting guidance before deciding where it belongs.
For a broader discussion of cuts, surface preparation, adhesive selection, and finishing, read the STAVROS polyurethane molding installation guide. Then return to the actual attic with a sketch, a tape measure, and a complete cut list. The strongest result is not the most decorative roofline—it is a room where polyurethane molding complements the slope without fighting the construction.