Article Contents:
- Molding as an interior architecture tool, not just decor
- How a designer should choose molding to match the scale of a room
- Ceiling Height
- Wall size
- Profile width
- Depth of Relief
- Distance between frames
- Offsets from the floor, ceiling, and doors
- Symmetrical composition
- Asymmetrical composition
- Moldings around furniture
- Moldings around door portals
- Radius wall
- Column
- Arch
- Rounded portal
- Corner Elements
- Central elements
- Left and right elements
- Rosettes and separate wall decor
- Depth of Relief
- Small bedroom
- Spacious living room with a high ceiling
- Hallway or long gallery
- Wall with a fireplace
- Curved wall or column
- Which moldings are best to use in a design project?
- How to tell if a molding is too wide for a room?
- Should the same molding be used throughout the entire apartment?
- How to calculate molding for a rectangular frame?
- When is flexible molding needed?
- Can molding be combined with overlays and rosettes?
- What should a working drawing of moldings contain?
- Should molding be listed in the room-by-room specification?
- Can polyurethane wall moldings be purchased only after the visualization is approved?
- How to check molding before a large purchase?
- Which is more important: a beautiful profile or the correct layout?
- Can you paint molding the same color as the wall?
- How to include molding in the project if the furniture has not yet been chosen?
- How to place an order so that the contractor and the order assembler do not mix up the items?

A beautiful profile by itself does not yet create a good wall. In a professional project, molding must work on several levels at once: support the interior architecture, match the scale of the room, form a clear rhythm of frames, coordinate with doors and furniture, join correctly at corners, be translated from the visualization into a working elevation drawing, and then into a specification with product codes and quantities.
That is why moldings for designers are not a separate "designer collection" as an abstract marketing term. It is a working scenario: choose a specific profile, test it on a sample, place it in a visualization, obtain technical materials, calculate the linear footage, add decorative elements, and prepare the set for purchase.
They are especially convenient in project practice Moldings made of polyurethane: they can be used in framed compositions, wall panels, accent zones, and combined with separate decor. But the choice begins not with the catalog as such, but with the architectural task of the wall.
The working chain for a designer looks like this:
concept → room axes → wall scale → profile → layout → sample → 3D/DWG → working elevation drawing → calculation → specification → order.
If one of the stages is skipped, a beautiful solution from the visualization may turn out to be inconvenient for installation, too small on a large wall, conflicting with the door casing, or simply poorly calculated in terms of quantity.
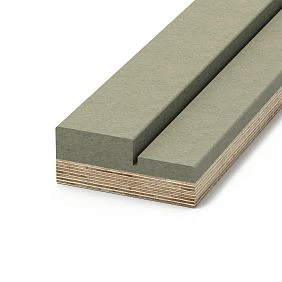
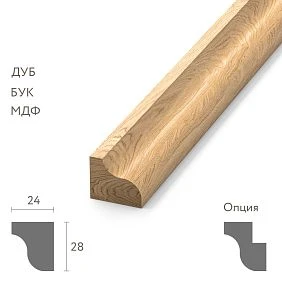
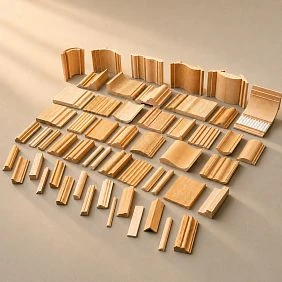
Molding as a tool of interior architecture, not just decor
A professional approach begins with function. Molding should not exist on the wall as a random line. It works as a tool for dividing space.
Creating axes
A vertical line can support the axis of a door, console, headboard, or the central part of the wall. A horizontal one can connect different walls of the room and create a common level.
If a moulding composition is built without reference to architectural axes, it often looks "pasted on top of the interior." When the axes coincide with real objects, the decor is perceived as part of the architecture.
Wall division
A large surface rarely requires uniform filling across its entire width. It can be divided into:
-
central field;
-
side panels;
-
vertical frames;
-
lower band;
-
upper zone.
Moulding helps achieve this without a heavy joinery panel and without changing the wall thickness across the entire area.
Adjusting perceived height
Vertically elongated frames visually reinforce the vertical. A horizontally developed composition, on the contrary, widens the wall.
Here it is important not to turn the advice into a mechanical rule. If the ceiling is high but the walls are saturated with doors and furniture, additional verticality can make the composition too fragmented. The designer evaluates the entire wall, not just the proportion of the room.
Connection with the joinery
The molding can continue the logic:
-
door portals;
-
built-in furniture;
-
facade frames;
-
wall panels;
-
decorative columns;
-
cornice zone.
But it must have its own role. If the profile completely repeats the joinery casing and at the same time runs next to it, a competition of identical lines arises. Sometimes it is better to choose a profile with a different depth or to abandon the additional frame altogether.
Zoning without a partition
On a long wall, a molding system can designate a separate zone:
-
work;
-
living room;
-
dining room;
-
fireplace room;
-
console area;
-
headboard.
This is especially useful in interiors where functional zones need to read clearly, but physical separation is not required.
Correcting the proportions of a room
If a wall seems too long, it can be broken into several fields. If it is narrow, avoid excessively frequent vertical frames and assemble a larger composition.
In this sense, molding works as a graphic grid. Its task is not to fill emptiness, but to organize the surface.




How a designer should choose molding to suit the scale of a space
The same profile on a 2.7 m wall and in a 5 m high hall is perceived differently. Therefore, the choice cannot be based only on a close-up photo of the product.
Our factory also produces:

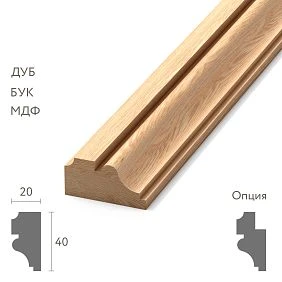





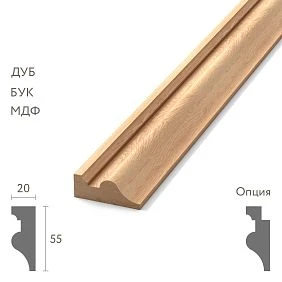
Ceiling height
The higher the room, the greater the distance from the viewer to the upper elements of the composition. A profile that is too thin can get lost.
But a high ceiling does not automatically require a very wide molding. If the interior is minimalist, a large relief may turn out to be excessive. The style and contrast need to be taken into account.
Get Consultation
Wall size
On a small wall, the profile reads from a close distance. On a large one, it reads as part of the overall geometry.
Before choosing, it is useful to lay out the profile to scale on an elevation drawing and evaluate not a separate fragment, but the entire wall as a whole.
Profile width
The width determines the visual mass of the line.
Narrow profile:
-
lighter;
-
more graphic;
-
suitable for a fine frame grid;
-
competes less with the furniture.
Wide:
-
organizes the wall more strongly;
-
more noticeable from a distance;
-
suitable for large frames;
-
requires more free surface area.
The query "wide polyurethane wall molding" really makes sense as a question of scale, not as a separate "better/worse" category.
Relief depth
A profile with greater depth creates a more active shadow. With side lighting, the relief reads more strongly. With soft frontal light, the same detail may look calmer.
Therefore, the sample should be viewed under lighting close to the project lighting.
Distance between frames
The intervals matter no less than the profile itself.
If the distances between adjacent frames differ without a deliberate reason, the composition falls apart. If they are too small, the wall begins to look "fragmented."
It is better to first establish a base interval module, and then consciously deviate from it where the furniture or architecture requires it.
Offsets from the floor, ceiling, and doors
The frame should not accidentally almost touch the door casing or end a few centimeters from the baseboard without a clear logic.
Before approval, check:
-
offset from the baseboard;
-
offset from the cornice;
-
distance to the doorway;
-
relationship with switches and outlets;
-
position relative to furniture;
-
distance to the edge of the wall.
Narrow or wide molding: how the scale of the profile changes the interior
The choice of width cannot be reduced to a universal table, but it can be used as a first filter.
| Situation | What to consider |
|---|---|
| Small room | Narrow or medium profile |
| High ceiling | medium or wide profile |
| Large frame system | More pronounced profile |
| Minimalist interior | Smooth, minimalist profile |
| Classic interior | more developed geometry |
| Accent wall | profile with greater visual mass |
This table does not replace fitting. It helps to filter out extreme options.
Why width cannot be assigned based only on ceiling height
A 3.2 m ceiling in a narrow bedroom and a 3.2 m ceiling in a spacious living room are different situations. In the second case, the viewer steps back farther, and the furniture is larger. In the first, a too-wide profile can eat up the free plane.
Scale check at 1:1
If you are unsure between two profiles, it helps to print or cut out strips of their actual width and hold them against the wall.
For a designer, this is a simple way to understand how noticeable the line will be without a full installation.
Even better — get a physical sample and look at it on site.
How to build a molding layout on the wall
Layout is one of the main stages of design. This is where the designer turns the idea of "making frames" into specific geometry.
A working algorithm is best followed from the wall architecture to the profile, not the other way around.
1. Take clean wall dimensions
Required:
-
width;
-
height;
-
door positions;
-
window positions;
-
trim;
-
baseboard;
-
cornice;
-
switches;
-
sockets;
-
light outlets;
-
radiators;
-
built-in furniture.
If measurements are taken before finishing, it's important to understand which thicknesses will still change after plastering, cladding, or installation of joinery.
2. Mark openings and permanent elements
A door and a window are not just obstacles. They create strong vertical lines.
If the frame almost coincides with the edge of the opening, it looks accidental. It's better either to align them on a single axis or to create a deliberate offset.
3. Determine compositional axes
For each wall, it's useful to mark:
-
central axis;
-
sofa axis;
-
bed axis;
-
console axis;
-
fireplace axis;
-
doorway axes;
-
the axes of the fixtures, if they are part of the composition.
After this, it becomes clear which frames should be symmetrical and where asymmetry is justified.
4. Place the furniture
This is a mandatory step.
A frame that looks beautiful on an empty wall can be completely lost behind a sofa, cabinet, or console.
If the furniture has already been chosen, its actual dimensions must be shown on the elevation.
5. Determine the number of frames
You should not start with the number “three” or “five” just because compositions with that many are often found in references.
The number of frames is determined by:
-
wall width;
-
the position of the furniture;
-
rhythm of the doors;
-
style;
-
scale of the profile.
Sometimes one large panel is better than five small ones.
6. Calculate the intervals
If the composition is symmetrical, the intervals should follow a system.
A conventional scheme:
left margin = gap between frames = right margin
not always mandatory, but it helps create order.
If the margins are different, this should be related to the architecture, and not to the fact that “it just turned out that way as a leftover.”
7. Choose the molding width
The profile is selected within the already built geometry.
If the frames turned out small and frequent, a wide profile can overload the wall.
If the frames are large, a narrow profile can get lost.
8. Check in the visualization
At this stage it is useful to see:
-
scale;
-
relief;
-
shadow;
-
color;
-
interaction with furniture;
-
light reflection.
Visualization is needed not only for presenting to the client. It is also a checking tool.
9. Make a working elevation
After approval, the composition should become a drawing with dimensions.
For each frame, specify:
-
width;
-
height;
-
coordinates;
-
distance to adjacent elements;
-
profile;
-
article number;
-
corner and decorative elements, if any.
This is how an idea turns into working documentation.
Symmetrical composition
Symmetry works well:
-
behind the bed;
-
around the fireplace;
-
on the central wall of the living room;
-
on the main axis.
But even here, it is not necessary to make all frames identical. The center can be wider than the side margins.
The main thing is that the composition reads as a single system.
Asymmetrical composition
Asymmetry is needed when the architecture itself is asymmetrical.
For example:
-
the door is offset;
-
the furniture stands on only one side;
-
the wall continues into the hallway;
-
one part of the wall is occupied by a built-in wardrobe.
Trying to force symmetry sometimes creates more problems than deliberate asymmetry.
Moldings around furniture
If the frame interacts with a sofa, console, or chest of drawers, the actual height of the furniture must be taken into account.
Bad scenario: the lower horizontal line runs directly behind the countertop and visually disappears.
It is better either to raise it higher or to use furniture as the lower boundary of the composition.
Moldings around door portals
The door sets a strong vertical. The molding can:
-
continue it;
-
frame the portal;
-
create an adjacent panel;
-
assemble the entire wall into a symmetrical composition.
But the profile should not accidentally almost touch the casing. A minimal "accidental" gap usually looks worse than a clear junction or a full-fledged setback.
Polyurethane moldings for a design project
For a designed interior, polyurethane is convenient primarily due to its repeatability and precision of geometry. The same profile can be used in several rooms, repeated on different walls, and specified in the specification as a specific article number.
If you need buy polyurethane moldings For a large project, the professional choice is based not on the wording “like / don't like,” but on the compatibility of the profile with the architecture.
Geometry
The profile must be legible in the project at the required distance.
For a large wall, a more pronounced profile is often needed. For a complex grid, a calmer and thinner one.
Weight
Polyurethane profile is lighter than massive mineral solutions, but for a designer what matters more is not the number of kilograms itself, but how it affects installation planning.
A lightweight element is easier to use on large walls, but the adhesive joint and substrate preparation must still be provided for.
Repeatability
In a large frame system, dozens of segments must look identical.
If the profile has elaborate relief, repeatability is especially important: a small difference becomes noticeable in a series.
Painting
The designer must decide:
-
the molding is painted to match the wall;
-
remains contrasting;
-
receives a separate accent color;
-
is part of the overall decorative panel.
The finish must be included in the project before installation, because it affects the perception of the relief.
Working with a complex composition
The molding must join with:
-
adjacent frames;
-
corners;
-
with overlays;
-
doors;
-
with sockets;
-
cornices;
-
other profiles.
The more complex the system, the more important it is not to select elements separately.
One profile throughout the entire space
Using one profile family across multiple rooms creates a visual connection.
But the exact same molding isn't necessarily suitable everywhere. A large living room and a small bathroom may require different scales.
It's better to think in terms of a family: the same style, different sizes.
When a designer needs flexible molding
Flexible molding is not an "improved version of regular." It solves a separate geometric problem.
Main scenarios:
-
radius wall;
-
column;
-
arch;
-
rounded portal;
-
curved niche;
-
a non-standard furniture or wall shape.
If the surface is straight, a flexible version is usually not needed.
Radius wall
On a curved surface, a standard rigid profile cannot be neatly bent without distorting the geometry.
The flexible option allows you to maintain the line along the radius.
But before ordering, you need to know the actual radius and make sure the chosen model allows such a bend.
Column
On a round column, a flexible profile can create horizontal bands or vertical decorative lines.
It is important to consider the column diameter: a profile that is too large will visually overwhelm the surface.
Arch
In an arched opening, a flexible molding allows you to continue the profile of the straight sections into the curved area.
Here it is especially important to check whether the face geometry of the standard and flexible versions match. You cannot automatically assume they are a pair just because the names are similar.
Rounded portal
If straight sections transition into a radius, the designer must decide in advance where the flexible part begins and how the joint will look.
This point must be marked on the working drawing.
What to check before buying a flexible profile
-
exact radius;
-
length of the curved section;
-
face profile;
-
compatibility with the straight option;
-
joining method;
-
painting;
-
installation order.
The query "buy flexible polyurethane molding" becomes practical only after answering these questions.
How to combine moldings with decorative elements
A framed composition does not have to consist only of straight profiles. In classic and neoclassical interiors, the designer can complement it with corner, center, and end elements.
The main rule: the decorative element must continue the geometry of the molding, not look like a separate overlay randomly placed next to it.
For this, STAVROS has a separate Decor for Molding.
Corner elements
The corner can be:
-
formed by mitering the profile itself;
-
complemented with a decorative insert;
-
fully assembled with a ready-made corner element.
The latter scenario is especially useful if the frame needs to have a pronounced ornamental character.
But a decorative corner cannot be chosen based on the pattern alone. You need to check:
-
width;
-
height;
-
depth;
-
the mounting profile;
-
orientation;
-
compatibility with the specific molding.
Central elements
The central overlay can work:
-
at the top of the frame;
-
in the center of the panel;
-
on the wall axis;
-
in the composition above the console;
-
in the doorway portal.
It becomes the visual center, so its position should be aligned with the overall axis of the room.
If the central decor is offset by a few centimeters relative to the furniture or chandelier, the entire composition appears imprecise.
Left and right elements
Some decorative details have mirrored versions.
For the specification, these are two separate items.
Do not write:
decor — 2 pcs.
Better:
DECOR-L — 1 pc.
DECOR-R — 1 pc.
This way, the contractor won't mix up the orientation.
Sockets and separate wall decor
If the composition extends beyond the molding frame, you can use polyurethane wall decor.
But you should only expand the wall with additional elements when they support the architecture.
A bad scenario is when the frame, the socket, the overlay, and the molding compete with each other.
A good one is when one element is the main one and the others support it.
Not all walls require decorative inserts
A minimalist frame system can be stronger without additional ornament.
If the profile already has a complex relief, an additional overlay sometimes overloads the composition.
Therefore, it is useful for the designer to compare two options:
-
profile only;
-
profile + decorative element.
The decision is made based on the entire wall, not on the beauty of an individual detail.
Molding samples: what the designer should check before approval
A catalog and visualization provide a lot of information, but a physical sample solves different problems.
It shows the real scale of the profile, which is especially difficult to assess on a screen.
Actual width
A profile with a nominal width of 40 and 70 mm may look almost identical on a monitor if the cards are shown at the same scale.
On a real wall, the difference is fundamental.
Relief depth
Depth determines the shadow.
With side natural light, the relief appears stronger. With diffused artificial light, it is softer.
If the project is based on a light-and-shadow effect, the sample should be viewed under similar lighting.
Surface quality
Before specification, the designer must understand how the surface looks before and after painting.
If the project involves a complex color, it is useful to make a test paint sample.
Ornament scale
The ornamental profile in a product card is usually shown large. In a room, the pattern may appear too small or, conversely, overly active.
The sample restores the correct scale.
Joining
If the composition is long, it is important to understand how the joint between two elements reads.
For an elaborate ornament, this question is especially important.
Color after painting
A white profile and the same profile in the wall color are perceived differently.
Painting to match the wall reduces contrast and enhances the architectural effect. A contrasting color, on the other hand, turns the molding into standalone graphics.
Combination with materials
The sample should be placed next to:
-
wall paint;
-
the wood;
-
stone;
-
fabric;
-
the door finish;
-
the furniture front.
This way, the designer checks not an abstract product, but a specific interior ensemble.
When a sample is especially needed
-
a large project;
-
a non-standard color;
-
premium finish;
-
ornamental profile;
-
combination of several moldings;
-
transition between straight and flexible elements;
-
approval with the client;
-
future serial specification.
DWG moldings and drawings for the working project
The visualization shows the idea. The working project explains to the contractor exactly what to install and where.
To do this, the designer needs precise technical data.
On the STAVROS website, the section DWG molding used as an access point to catalogs, drawings, and digital materials.
Why an accurate profile is needed
The cross-section shows:
-
width;
-
height;
-
depth;
-
relief;
-
the mounting surface.
It makes it easier to understand how the molding will join with the door casing, panel, or another profile.
DWG in a wall elevation
If the designer works in AutoCAD, the profile can be used in the working documentation as a real object rather than a schematic line.
This is useful for details:
-
inner corner;
-
external corner;
-
junction with the architrave;
-
transition to the skirting board;
-
connection with other decor.
Article reference
It is not enough to write "40 mm moulding" on the drawing.
You need to reference:
MLDPU-... or another specific article.
Then the visualization, specification and working documentation refer to the same product.
Coordination with the contractor
The contractor doesn't need a mood board, but:
-
size;
-
profile;
-
article number;
-
markings;
-
angles;
-
installation diagram.
DWG helps avoid the situation where a "similar" profile from another source is chosen on the construction site.
Don't overload the drawing
There's no need to insert a detailed cross-section on every frame.
It is enough:
-
indicate the profile type;
-
provide a legend;
-
attach a typical detail;
-
specify the SKU;
-
show non-standard joints.
This keeps the working documentation readable.
3D models of moldings for visualization
A 3D model is not needed just for a nice-looking file. It links a specific product to the design scene.
Work sequence:
catalog → SKU → 3D model → visualization → approval → specification.
What a real model provides
The designer sees:
-
width;
-
a protrusion;
-
relief;
-
shadow;
-
scale;
-
pattern repeat.
This is more accurate than a conventional rectangular profile.
Light check
An expressive profile behaves differently under:
-
side daylight;
-
overhead ambient light;
-
wall sconces;
-
linear lighting.
A 3D scene lets you see in advance whether the texture will read well.
Checking furniture and decor
In the visualization, you can check whether the frame overlaps:
-
the sofa;
-
the headboard;
-
for the artwork;
-
into the curtain area;
-
to the edge of the doorway portal.
This is how the designer adjusts the layout before releasing the working documentation.
Do not substitute a real sample with a 3D model
3D perfectly shows the geometry, but does not convey 100%:
-
the real surface;
-
material;
-
shade;
-
quality of painting;
-
tactility.
Therefore, for a responsible project, digital and physical verification complement each other.
How to translate the visualization of moldings into a specification
One of the most common mistakes in project documentation is that the visualization is approved, but the specification is written in general terms.
For example:
polyurethane molding — as per project.
This is not enough for procurement.
The specification must contain specific fields.
| Field | What to specify |
|---|---|
| Article number | specific SKU |
| Name | exact product name |
| Profile size | width / height |
| Element length | according to the product card |
| Room | living room, bedroom, etc. |
| Wall / zone | Wall A, TV zone, etc. |
| Estimated linear meters | By layout |
| Reserve | Separately |
| Decorative elements | SKU + quantity |
| Glue | type/position in the project |
| Finish | color/coating system |
| Note | corners, flexible section, joint |
The item code must match across all documents
If one profile is used in the visualization and another is listed in the schedule, the contractor faces a contradiction.
It is useful to keep a single code:
PROFILE-P01
and nearby:
Supplier SKU: MLDPU-___.
Room and zone
Even if one profile is used throughout the entire project, it is still useful to break down the quantity by room.
This simplifies:
-
acceptance;
-
distribution across the project;
-
remaining stock control;
-
reorder.
Finish
In the specification, you need to specify not just "for painting" but the system:
-
in the color of the wall;
-
separate color;
-
before installation;
-
after installation;
-
A test coat is mandatory.
Related elements
If the frame has decorative corners, they must be listed on a separate line.
If a flexible section is needed, it cannot be hidden inside the general "molding" line.
The specification must reflect the actual structure of the system.
How to calculate the amount of molding for a project
The calculation does not start with the wall area or its perimeter. You need to calculate the lengths of all the lines in the approved layout.
Basic formula:
the sum of the lengths of all frames + individual horizontal/vertical lines + technological allowance.
Frame system
For a rectangular frame:
2 × width + 2 × height.
If there are multiple frames, each type is calculated separately.
Example:
There are three frames on the wall.
Two side panels — 700 × 1400 mm.
Central panel — 1200 × 1400 mm.
Side panels:
2 × (0.7 + 1.4) = 4.2 m for one.
Two frames:
4.2 × 2 = 8.4 m.
Central panel:
2 × (1.2 + 1.4) = 5.2 m.
Total:
8.4 + 5.2 = 13.6 m without allowance.
But buying exactly 13.6 m is almost never reasonable. You need to take into account the product length, the number of corners, cuts, and possible leftovers.
Why pure arithmetic can be misleading
If elements are sold in fixed lengths, a mathematically suitable total meterage may not divide well into real segments.
For example, a project needs a row of parts:
-
1.95 m;
-
1.95 m;
-
1.35 m;
-
1.35 m.
The total is 6.6 m.
But if the product length of an element is, say, 2 m, you cannot simply buy “6.6 m.” You need to check how many whole items are required and which leftovers can actually be used.
Cutting plan
For a complex project, it is useful to create a table:
| Detail | Length | Quantity | From which product length |
|---|---|---|---|
| Vertical-A | 1.95 m | 2 | ___ |
| Horizontal-A | 1.35 m | 2 | ___ |
| Vertical-B | 1.20 m | 4 | ___ |
| Horizontal-B | 0.70 m | 4 | ___ |
This makes it clear which remnants can be reused.
Corners increase the risk of waste
The more frames, the more cuts.
An incorrect cut on a long part can make the remnant unusable.
Therefore, the technological allowance depends not only on the total linear meters, but also on the complexity of the geometry.
Ornamental profile
If the pattern must match at the joints, cutting becomes more complex.
You cannot automatically use a short leftover just because its length is sufficient. You need to check whether the ornament matches.
Straight lines
For a single long horizontal line, the calculation is simpler, but another question arises: where the joint will be.
If the wall is longer than one commercial piece, it is better to place the joint in advance:
-
in a less noticeable area;
-
symmetrically;
-
in a logical place in the composition.
Technological allowance
You cannot assign a universal “10% for all projects.”
The margin is higher if:
-
many corners;
-
complex profile;
-
there is an ornament;
-
many short frames;
-
a complex pattern is needed;
-
installation is being performed for the first time.
Below — if:
-
lines are straight;
-
cutting is simple;
-
profile is smooth;
-
offcuts are reused well.
The right allowance is a result of the cutting map, not a magic percentage.
What to buy together with moldings
A professional specification does not end with the line “molding.”
An installation system has accompanying elements.
Decorative corners and overlays
If the frame uses ornamental inserts, they must be counted individually.
For a project with four frames of four corners each:
4 × 4 = 16 corner elements.
If left and right pieces are used, they must be counted separately.
Mounting adhesive
The adhesive must be compatible with the profile material and the substrate.
Instead of an abstract “adhesive for stucco molding,” it is useful to define the specific installation system in advance and move on to the material about which adhesive for polyurethane moldings to use for the chosen scheme.
A designer does not have to become an installation technologist, but the specification must make the adhesive category clear and indicate who is responsible for selecting the specific compound.
Jointing compound
Long lines and complex frames have joints.
If the technology requires a separate compound for joining the ends, it must be added to the specification in advance.
Otherwise, the contractor will make the decision on site.
Materials for preparation
Depending on the substrate, the following may be needed:
-
primer;
-
filler;
-
abrasive materials;
-
marking tools.
They do not necessarily need to be included in the decorative specification as separate STAVROS SKUs, but the designer must understand the technological route.
Paint
The color and type of finish affect the perception of the texture.
If the project involves painting the profile together with the wall, the order of work must be determined in advance.
For separate detailing, it is useful to provide the contractor with material about painting polyurethane moldings.
Samples
For a large project, samples are also part of the procurement scenario.
They help approve the profile before the main order.
Installation must be considered already at the design stage
The designer is not required to perform installation, but the project must be installable.
This means that before releasing the working documentation, it is necessary to check:
-
wall base;
-
position of corners;
-
joints;
-
intersections;
-
distance to the architraves;
-
sockets and switches;
-
space for the miter cut;
-
the ability to neatly paint the profile.
If the layout requires an impossible installation movement or creates dozens of microscopic segments, the problem originated back in the design.
It is useful for the contractor to provide a link to a separate article about Installation of polyurethane moldings, and leave the geometry and key nodes in the working documentation.
A 45° angle is not a universal answer
For a rectangular frame, a typical cut is often built at 45°, but the actual wall angle may differ from an ideal 90°.
Therefore, the contractor must adjust the joint on site.
It is useful for the designer to consider that a very complex relief in a small frame increases accuracy requirements.
Joints of long lines
If an element is shorter than the wall, the connection point must be chosen in advance.
It is better not to place the joint:
-
in the center is the most noticeable
Designer's checklist before including molding in the project
Before releasing the specification, it is useful to go through one short checklist.
Profile
-
item code selected;
-
width checked;
-
relief depth is suitable;
-
scale matches the room.
Layout
-
axes set;
-
frames are aligned with the furniture;
-
intervals are intentional;
-
doors and windows are accounted for;
-
switches do not fall into conflict zones.
Corners
-
internal corners checked;
-
external corners checked;
-
decorative elements coordinated;
-
transitions between straight and flexible profile shown.
Sample
-
physical scale checked;
-
relief viewed under the required lighting;
-
color or test paint sample coordinated.
3D and DWG
-
the visualization uses the required profile;
-
working drawing matches the visualization;
-
item code is the same in all documents.
Quantity
-
all frames are accounted for;
-
straight lines added;
-
commercial length taken into account;
-
cutting map checked;
-
the stock is justified.
Installation
-
base is clear;
-
adhesive system determined;
-
joints and corners are manufacturable;
-
painting is included.
Specification
-
article number;
-
size;
-
room;
-
zone;
-
quantity;
-
decorative elements;
-
associated materials;
-
finish.
If at least one of these blocks remains undefined, the molding is not yet ready to be released for procurement.
Common mistakes in projects with moldings
Mistake 1. Choosing a profile before layout
Why it happens: it's easier to open a catalog than to build a wall.
Consequence: after selection, it turns out the profile is too large or too small for the frames.
How to prevent: first create the rough wall geometry, then select the profile scale.
Mistake 2. Designing on an empty wall
Why it happens: the furniture has not yet been approved.
Consequence: the frame ends up covered by a sofa, headboard, or console.
How to prevent: use at least overall placeholder blocks for furniture.
Mistake 3. Ignoring the door casing
Why it happens: moldings and doors are designed in separate blocks.
Consequence: a random narrow gap appears between the profiles.
How to prevent it: build the elevation after the door portals are fixed.
Mistake 4. Choosing an ornament based only on a close-up photo
Why it happens: the product page shows the texture up close.
Consequence: in a real room, the ornament looks too small or too busy.
How to prevent it: use a sample or a visualization at real scale.
Mistake 5. Not calculating the cutting layout
Why it happens: the designer limits themselves to the total square footage.
Consequence: there is formally enough material, but the required long sections cannot be obtained.
How to prevent: for complex frames, create a parts map.
Mistake 6. Forgetting decorative pairs
Why it happens: the left and right overlays are visually perceived as one type.
Consequence: the wrong number of orientations arrives at the site.
How to prevent: separate L/R in the specification.
Mistake 7. Failing to coordinate the transition between straight and flexible profile
Why it happens: it is assumed that they are automatically identical.
Consequence: a difference in the front geometry is visible at the joint.
How to prevent: check the specific pair in advance.
Mistake 8. Leaving adhesive selection to the last day
Why it happens: adhesive is treated as a contractor's consumable.
Consequence: installation begins without an approved system.
How to prevent it: lock in the technology in the specification or notes.
Mistake 9. Changing the SKU after visualization without updating the drawings
Why it happens: the new profile looks like the old one.
Consequence: the 3D model, DWG, and bill of materials describe different products.
How to prevent it: route any SKU change through a project revision.
When moldings are not needed at all
A professional article should answer not only "how to apply" but also "when to avoid."
The wall is already overloaded with materials
If there is an active stone, large carpentry, decorative plaster, and complex lighting, an additional frame system can create visual noise.
The furniture completely closes off the composition
If the main part of the wall is occupied by a bookcase or a built-in wardrobe, there is no point in designing frames behind them.
The geometry of the room is too fragmented
Many doors, niches, switches, and short wall sections sometimes leave too little clean flat surface.
Instead of many micro-frames, it is better to use one accent element or a completely different technique.
The client wants minimalism without architectural graphics
There is no need to convince them of moldings just because they are trendy.
In a minimalist interior, an empty wall can be stronger than a decorative grid.
The budget does not include quality installation and preparation
Poor geometry, crooked joints, and random coloring devalue an expensive profile.
If quality execution cannot be ensured, it is better to simplify the composition.
Five design scenarios: how the solution changes
The same profile selection methodology works differently in different rooms. Scenarios help to see which parameters become the most important.
Small bedroom
Initial conditions:
-
low or medium ceiling height;
-
one main wall behind the bed;
-
large headboard;
-
two bedside tables;
-
light fixtures on the sides.
The main mistake is to build a fine frame grid that will be hidden by furniture.
It is more rational to start from the axis of the bed and decide whether the frame should:
-
frame the headboard;
-
be located above it;
-
form one large central panel;
-
support two side lighting zones.
The profile here is usually viewed from a close distance, so overly active relief may look heavier than in the visualization.
Spacious living room with a high ceiling
Here there is another problem: the profile may get lost.
A large wall requires:
-
large-scale rhythm;
-
longer lines;
-
clear connection with doors and windows;
-
checking from a far point in the room.
If the frames are too small, they turn into a “grid.”
It is useful to first build large fields, and only then decide whether internal divisions are needed.
With a high ceiling, the shadow from the relief is especially important. The sample should be viewed under the design lighting.
Corridor or long gallery
A narrow, long space is easy to overload.
Instead of large frames on every wall, you can use:
-
a repeating vertical module;
-
a calm horizontal line;
-
an accent on only one side.
The rhythm of the doorways is especially important here. If the frames are not aligned with the doors, the corridor looks chaotic.
Wall with a fireplace
The fireplace already creates a strong axis.
Moldings should support it, not compete with it.
Possible schemes:
-
one large central frame above the fireplace;
-
symmetrical side margins;
-
framing of the entire fireplace area;
-
a combination of frames and a central decorative insert.
If the TV is located above the fireplace, you need to check whether the profile intersects with the screen or the mount.
Curved wall or column
Here, design begins with the geometry of the surface.
Need to know:
-
radius;
-
arc length;
-
transition to straight sections;
-
compatibility of flexible and standard profile.
A visually beautiful profile may not have a suitable flexible counterpart. Therefore, this is checked before the composition is finally approved.
How to coordinate moldings with the client
The client usually perceives the wall as a whole, while the designer also sees it as a system of details. Therefore, the presentation should show both levels.
Do not show only the profile card
A large product photo does not answer the question of how it will look in the room.
It is better to show:
-
a visualization of the wall;
-
a close-up fragment of the profile;
-
a physical sample;
-
the color after the intended painting.
Explain the scale
If the client is choosing between a narrow and a wide profile, it is useful to show two versions of the same wall.
This is how the decision becomes deliberate.
Lock in the approved article number
After approval, it is important to record the specific SKU.
The phrase "that molding from the second image" is not suitable for purchasing.
Approve the finish separately
Even the same layout in white and in the wall color is perceived differently.
Therefore, approving the profile and approving the color are best treated as two separate decisions.
How to hand over the project to the contractor
The designer and the installer have different areas of responsibility, but the document must connect them.
The contractor needs:
-
wall elevation;
-
frame dimensions;
-
floor and ceiling reference marks;
-
article number;
-
corner details;
-
decorative elements;
-
flexible section diagram;
-
mounting system;
-
finish;
-
work sequence.
Wall numbering
convenient to use:
ROOM-01 / WALL-AROOM-01 / WALL-Band so on.
In the specification, the linear footage can be broken down by these codes.
Profile numbering
For example:
PROFILE-P01PROFILE-P02FLEX-P01DECOR-D01This keeps the drawing readable, while full SKUs are shown in the legend.
Project version
If the profile changes after approval, the following must be updated:
-
the unfolded view;
-
specification;
-
3D;
-
procurement list.
A single outdated sheet on site can cause more problems than an error in the calculation itself.
How to control installation according to the project
It is useful to base author's supervision not on the impression of "straight / crooked," but on several checkpoints.
Axes
Do the frames align with the established axes?
Spacing
Are the design intervals between frames, doors, and furniture preserved?
Corners
Are the joints neat and does the pattern match?
Position of decorative elements
Are the central and corner details at their specified coordinates?
Color
Does the finished surface match the approved sample?
Overall rhythm
After installation, you need to step back to a normal distance and evaluate the wall as a whole.
Sometimes a small mistake, unnoticeable right at the profile, is clearly visible from the other end of the room.
How to build a repeatable system for a large project
If moldings are used in several rooms, you shouldn't design each wall from scratch.
It's better to create standard modules.
For example:
FRAME-A — narrow vertical frameFRAME-B — wide centralFRAME-C — bottom panelPORTAL-P01 — door unitThis offers several advantages:
-
faster development of layouts;
-
lower risk of profile mismatches;
-
easier material calculation;
-
easier installation;
-
easier to reorder;
-
the project looks more cohesive.
But a standard module should not be applied mechanically. If one wall has a different size, the module needs to be adapted, not stretched to absurdity.
How to estimate the molding budget in a project
The price of one linear meter does not show the cost of the finished wall. For a designer, the budget consists of several layers: the profile itself, decorative elements, technological reserve, adhesive system, surface preparation, painting, and installation.
If two profiles are positioned differently, you need to compare not only the catalog price but also the final construction.
For example, a more complex profile may require more attention to corners and joints. An ornamental system may include separate left and right overlays. A flexible section adds a standalone line item. A large number of small frames increases the number of cuts even with a small total meterage.
Therefore, it is useful to separate in the estimate:
-
the main straight profile;
-
flexible profile;
-
decorative elements;
-
allowance;
-
mounting materials;
-
painting;
-
installation work.
This way the client can see why two visually similar walls have different costs.
At the early stage of a project, it is not necessary to know the final price down to the ruble. But the designer must understand the budget structure and not create a visualization that implies dozens of complex elements when the budget only covers a basic profile.
If you need to reduce the cost without destroying the concept, the options are usually as follows:
-
reduce the number of frames;
-
use a simpler profile;
-
keep decorative elements only on the accent wall;
-
unify the profile between rooms;
-
reduce the number of complex corners;
-
remove ornament where it is hidden by furniture anyway.
This way, optimization happens through the project architecture, not through a random substitution of an approved article on the construction site.
FAQ
Which moldings are best to use in a design project?
It is better not to look for the “best molding in general.” For a project, choose a profile that matches the scale of the wall, the interior style, the rhythm of the composition, and the installation task. One room needs a thin, laconic profile, while another needs a wide and relief one. It is better to verify the solution on an elevation drawing and a sample.
How can you tell if a molding is too wide for a room?
Look not at the width of the profile separately, but at its relationship to the size of the wall and the frames. A wide molding inside a small frame can take up too much of the field. It is useful to place the profile in a visualization at real scale or attach a strip of the corresponding width to the wall.
Should the same molding be used throughout the entire apartment?
Not necessarily. A unified profile helps tie rooms together, but rooms of different scales may require different sizes. It is better to work with a family of closely related profiles, maintaining the overall style while varying the scale.
How to calculate molding for a rectangular frame?
Add twice the width and twice the height:
2 × width + 2 × height.After that, sum up all the frames and separately check the commercial lengths, cutting layout, and technological allowance. A bare sum of linear meters does not always equal the number of items you actually need to buy.
What allowance should be set aside for trimming?
There is no universal percentage. The allowance depends on the number of corners, the complexity of the relief, the repeatability of the ornament, the experience of the installers, and the cutting map. The more complex the system, the higher the risk of unusable offcuts. It is better to calculate the allowance after laying out the parts according to commercial lengths.
When is flexible molding needed?
When the profile must follow a radiused surface: a round column, an arch, a curved wall, or a portal. On a straight wall, the flexible option usually offers no advantages. Before ordering, you need to check the radius and whether the face profile matches the straight version.
Can molding be combined with overlays and rosettes?
Yes, if the elements are designed as a single composition. The overlay should be aligned with the axis of the frame, and the ornament should not conflict with the profile. For complex systems, it is especially important to check size compatibility and the orientation of left/right parts.
Is a physical sample needed if there is a 3D model?
For a responsible project, it is advisable. 3D shows the geometry and scale well, but it does not fully convey the texture, the actual relief, the surface after painting, and the perception of the material under specific lighting.
What should a working drawing of moldings contain?
Minimum:
-
wall elevation;
-
frame dimensions;
-
axes;
-
indents;
-
profile type;
-
article number;
-
markings;
-
angles;
-
decorative elements;
-
non-standard junctions.
If there is a flexible section, it should be highlighted separately.
Should moldings be listed in the specification by room?
For a large project, this is convenient. Even if the profile is the same, breaking it down by room simplifies acceptance, material distribution, remaining stock control, and reordering. For a small apartment, a single schedule can be used, but the zones should still be identified.
Can polyurethane wall moldings be purchased only after the visualization is approved?
It is better after full project confirmation: the visualization shows the appearance, but before ordering you still need to check the item code, profile length, layout, calculation, angles, decorative elements, and installation materials.
How to check moulding before a large purchase?
Order or obtain a sample, compare it with the project wall and adjacent materials, check the scale of the relief and the test colour. After that, lock the article number in 3D, DWG and the specification. Then the large order proceeds according to the approved configuration.
What matters more: a beautiful profile or the correct layout?
The layout. Even an expressive profile will not save a composition with random intervals and a conflict with furniture. And conversely, a well-built architectural grid can look convincing with a fairly simple moulding.
Can you paint the molding the same color as the wall?
Yes, this is one of the common project scenarios. In such a solution, the profile reads through light and shadow rather than through colour contrast. For a rich relief, the effect can be especially expressive. But a test paint is still useful.
How to include moulding in the project if the furniture has not yet been chosen?
Use overall blocks of the future furniture with realistic dimensions and mark the zones that will definitely remain free. When the furniture is approved, the elevation needs to be rechecked. Do not release the final layout if the position of large furniture may still change significantly.
How to place an order so that the contractor and the order assembler do not mix up the items?
Use a single profile code in all documents. In the specification, indicate the article number, room, zone, quantity and finish. For decorative pairs, separate the left and right elements. For flexible sections, create a separate line.
Summary: a strong project starts not with the profile, but with the system
Moldings have value for designers not because it is a separate professional category by name. Value appears when the same profile goes through the entire path without losing information:
architectural idea → layout → sample → 3D → DWG → product code → calculation → specification → order → installation.
If a designer starts only with a beautiful product, they then have to adjust the wall to fit the profile. If they start with architecture, the profile becomes a precise tool.
For a professional project, it is useful to work in this order:
-
define axes and scale;
-
build a frame composition;
-
choose a profile;
-
check the sample;
-
place a real product code into the visualization;
-
produce a working elevation drawing;
-
calculate linear footage and cutting;
-
add decor and installation materials;
-
build a specification;
-
only then place the main order.
This way, the designer gets not a decorative idea, but a reproducible solution that can be handed off to the specifier and contractor without verbal explanations.
If you need the full range, technical materials, and design solutions, the starting point remains STAVROS. But professional work begins not with browsing all items one by one, but with a precise understanding of the task for a specific wall.
As a result, molding ceases to be a “decorative strip.” It becomes part of the interior architecture, documentation, and procurement specification — with a clear scale, product code, quantity, and place in the project.
-