Article Contents:
- Why Paintable Polyurethane Molding Is More Than Decorative Trim
- How to Choose Polyurethane Molding for Painting
- Choose a Profile With Clear Architectural Geometry
- Match Molding Width to Wall Size
- Compare Actual STAVROS Polyurethane Profiles
- Smooth Profiles vs. Ornamental Molding
- What About Flexible Polyurethane Molding?
- Check Surface Stability
- Correct Significant Wall Irregularities
- Clean and Dry the Installation Area
- Prime the Wall When Required
- Factory-Primed Polyurethane Molding
- Unprimed Polyurethane Molding
- Surface Inspection
- Step 1. Establish the Wall Layout
- Step 2. Prepare the Cutting Schedule
- Step 3. Cut the Molding Accurately
- Step 4. Dry-Fit the Complete Composition
- Step 5. Apply the Correct Installation Adhesive
- Step 6. Position and Secure the Molding
- Step 7. Allow the Adhesive to Cure
- Step 8. Inspect Every Joint
- Mitered Corners and End Joints
- Gaps Between the Molding and Wall
- Avoid Excessive Filler
- Check the Joint After Curing
- When Prepainting Makes Sense
- When Primer Is Recommended
- How to Prime Correctly
- Water-Based Acrylic Latex Paint
- Waterborne Trim Enamel
- Waterborne Alkyd and Hybrid Coatings
- Solvent-Based Paints
- Paint Quality Matters
- Matte Finish
- Eggshell Finish
- Satin Finish
- Semi-Gloss Finish
- High-Gloss Finish
- Use the Right Brush
- Use a Smooth-Finish Mini Roller
- Work in Manageable Sections
- Apply Thin, Even Coats
- Can You Spray Paint Polyurethane Trim?
- Monochromatic Wall Molding: Paint the Trim and Wall the Same Color
- White Molding Against a Colored Wall
- Colored Molding Against a Neutral Wall
- Subtle Tonal Contrast
- Living Room Accent Walls
- Bedroom Headboard Walls
- Dining Rooms and Wainscoting
- Entryways and Hallways
- Home Offices and Libraries
- Staircases and Landings
- Decorative Molding Corners
- Central Decorative Onlays
- Match the Ornament to the Architectural Style
- Check Compatibility by Product Series
- Example: Three Decorative Wall Frames
- Why a Cutting Schedule Matters
- Choosing a Profile That Is Too Small
- Using an Oversized Profile
- Ignoring Lighting
- Using Caulk to Correct Poor Cuts
- Priming Without Checking the Existing Surface
- Applying Paint Too Thickly
- Using an Unsuitable Roller
- Rushing Drying and Curing
- Creating Unnecessary Color Variation
- Forgetting About Material Reserve
- Visible Hairline Seams
- Raised Paint Along Profile Edges
- Uneven Paint Sheen
- Brush Marks
- Peeling or Poor Adhesion
- Can You Paint Polyurethane Molding?
- What Kind of Paint Is Best for Polyurethane Molding?
- Do You Need to Prime Polyurethane Molding?
- Should You Paint Polyurethane Molding Before Installation?
- How Do You Make Polyurethane Molding Joints Invisible?
- How Many Coats of Paint Does Polyurethane Molding Need?
- Can You Paint Polyurethane Molding the Same Color as the Wall?
- What Is Better for Decorative Wall Molding: Matte or Satin Paint?
- Can You Use Polyurethane Molding for Picture Frame Wall Panels?
- Can Polyurethane Molding Be Used in Bathrooms?
- Is Polyurethane Molding Better Than MDF?
- Does Polyurethane Molding Crack After Painting?
- Can You Repaint Existing Polyurethane Molding?
- How Much Extra Polyurethane Molding Should I Order?
- Where Can You Buy Polyurethane Molding for Decorative Walls?
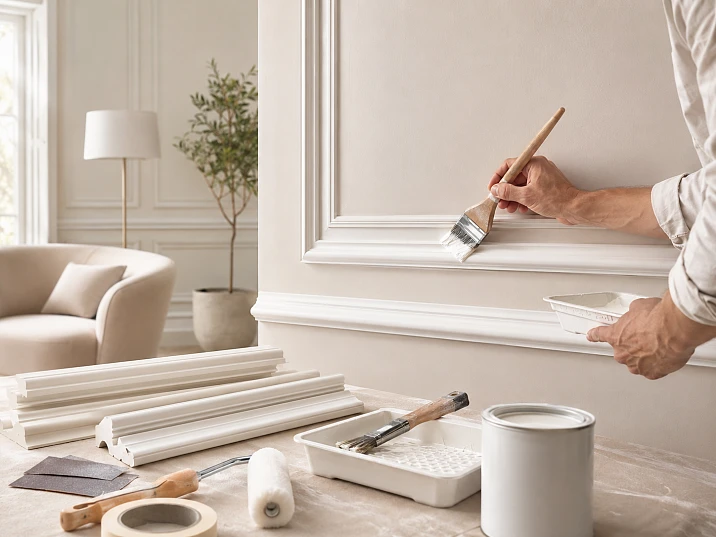
Beautiful architectural wall detailing is rarely the result of choosing the most elaborate molding or the most expensive paint. What makes a finished interior look sophisticated is the relationship between the molding profile, the proportions of the wall, the precision of the joints, and the way the final coat of paint unifies every element.
Paintable polyurethane molding is particularly effective because it allows designers and homeowners to create architectural detail without relying on heavy plasterwork or extensive custom millwork. A plain drywall surface can become a refined composition of framed panels, decorative borders, and sculptural accents. When the molding and wall share the same color, the decoration can appear to be part of the architecture itself.
Yet achieving that seamless result involves more than attaching a few strips of trim and applying paint.
The profile must have the right scale. The wall must provide a suitable installation surface. Corners must meet accurately. Joints must be treated with compatible materials. The primer and finish paint must work together, and the application technique must preserve the definition of the molding.
Understanding these details makes it possible to create anything from understated contemporary wall paneling to richly ornamented classical interiors.
This guide explains how to select, install, prepare, and paint polyurethane molding for American residential interiors. It also shows how to coordinate STAVROS polyurethane moldings with decorative onlays, molding corners, and other architectural elements to create a complete, thoughtfully designed wall treatment.


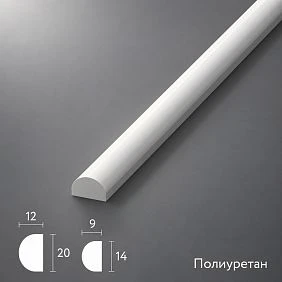




Why Paintable Polyurethane Molding Is More Than Decorative Trim
There is an important architectural difference between installing a contrasting strip of decorative trim and creating a wall treatment in which the molding is visually integrated with the surface.
Contrasting trim is immediately recognizable because its color separates it from the wall. White molding against a navy blue wall, for example, creates strong geometric outlines even when the profile is relatively shallow.
Monochromatic molding behaves differently.
When the molding and wall are painted the same color, visual separation comes primarily from the geometry of the profile. Raised sections catch light, recessed sections create shadows, and the transitions between them establish the decorative pattern.
The molding becomes an architectural relief rather than an applied graphic line.
This is one reason decorative molding can transform a relatively simple room without introducing visually competing colors or materials.
A carefully designed panel arrangement may add depth while preserving the calm atmosphere of a modern living room. In a traditional dining room, the same principle can create a sense of historical architectural detailing.
But monochromatic finishes also change how installation imperfections are perceived.
Poorly aligned corners, uneven edges, and inconsistent joint treatment can become noticeable when light moves across a continuous painted surface.
The goal is therefore not merely to make the molding and wall the same color. It is to create a consistent architectural finish in which the individual components work together as one composition.




How to Choose Polyurethane Molding for Painting
Not every decorative molding profile produces the same result after painting.
Two polyurethane profiles may look similar in catalog photographs yet behave quite differently once installed on a wall.
Their width, projection, cross-section, and ornamental complexity determine how light interacts with the finished surface.
Наша фабрика также производит:
Смотреть весь Каталог продукции
Choose a Profile With Clear Architectural Geometry
For most paint-grade wall treatments, the strongest results come from profiles with well-defined but controlled relief.
Common profile shapes include:
Bead molding: A rounded raised section that creates a soft highlight and a simple shadow line.
Ogee molding: An S-shaped curve combining convex and concave surfaces.
Cove molding: A concave profile that creates a smooth transition between surfaces.
Stepped molding: A profile with multiple levels that produces several distinct shadow lines.
Beveled molding: A relatively restrained profile with angled surfaces and clean transitions.
Ornamental molding: Decorative trim incorporating repeated floral, rope, bead, acanthus, or other sculptural motifs.
Each shape communicates a different architectural character.
A narrow bead profile works well in restrained contemporary compositions, where the frame should be present but not dominant.
An ogee or stepped profile creates a more traditional appearance, particularly when combined with picture frame molding or applied wall panels.
Deeply ornamented profiles introduce a stronger historical reference and may be more suitable for formal rooms, decorative furniture, or distinctive accent walls.
One consideration is the effect of paint on fine detail.
Every additional coat introduces a small amount of film thickness. Repeated heavy applications can soften small grooves, closely spaced ridges, and delicate ornamental features.
For detailed polyurethane trim, select a coating with good leveling characteristics and apply controlled, even coats.
A well-chosen profile should remain architecturally legible without depending on excessive contrast or heavy paint buildup.
Получить консультацию
Match Molding Width to Wall Size
The size of the molding should be proportional to the wall and the intended decorative composition.
A profile that appears elegant on a sample board may look insignificant on a large wall.
Conversely, a substantial architectural molding may overwhelm a narrow hallway or compact bedroom.
The following dimensions are useful starting points, not fixed design rules.
| Room proportions | Suggested molding face width | Typical design approach |
|---|---|---|
| Approximately 8-foot ceiling, compact wall | 3/4–1 3/8 inches | Refined frames and restrained wall detailing |
| Approximately 9–10-foot ceiling, medium-to-large wall | 1 3/8–2 inches | Stronger panel framing and transitional compositions |
| 10-foot-plus ceiling, expansive wall | 2–3 inches or more | Large architectural frames and formal detailing |
Smaller profiles can also work successfully in these rooms when they form part of a layered composition.
The important relationship is between profile width, projection, panel dimensions, viewing distance, and lighting.
For example, a 3/8-inch molding may be effective as a secondary detail inside a larger frame but visually delicate as the main outline of a 10-foot-wide accent wall.
Likewise, a 2-inch profile may work well in a formal dining room yet seem disproportionately heavy around a small wall mirror.
Compare Actual STAVROS Polyurethane Profiles
The STAVROS catalog includes paintable polyurethane molding in several profile sizes.
These examples illustrate how even relatively small dimensional differences affect architectural scale.
| STAVROS profile | Approximate face width | Projection | Suitable design applications |
|---|---|---|---|
| MLDPU-001 | 0.39 in | 0.24 in | Delicate inner frames, furniture fronts, small decorative borders |
| MLDPU-004 | 0.59 in | 0.31 in | Narrow architectural accents and secondary frames |
| MLDPU-002 | 0.87 in | 0.43 in | Classic wall frames and balanced panel compositions |
| MLDPU-003 | 1.38 in | 0.47 in | Prominent picture frame molding and more substantial architectural detailing |
These profiles are offered in nominal lengths of approximately 102.36 inches, equivalent to about 8.53 feet.
The face width determines the visual scale, but projection is equally important.
A shallow profile produces a more discreet shadow. A deeper profile becomes more visually pronounced, especially when illuminated from the side.
When comparing products, it is helpful to view an actual cross-section or sample rather than relying exclusively on a styled interior image.
Explore the STAVROS polyurethane molding collection to compare dimensions, profile shapes, and available decorative systems.
Smooth Profiles vs. Ornamental Molding
The choice between plain and ornamental molding should reflect the intended visual hierarchy of the room.
Smooth profiles are particularly effective when the wall treatment depends on geometry.
For example, three evenly spaced rectangular frames behind a sofa can create a refined architectural composition without floral ornament or sculptural detail.
Ornamental molding is more appropriate when the decoration itself plays an important expressive role.
A traditional library may benefit from decorative borders featuring repeated classical motifs. A French-inspired bedroom may use intricate molding with floral accents and curved details.
The STAVROS decorative trim collection provides additional options for projects requiring sculptural relief rather than a simple linear outline.
A useful design principle is to distinguish the main architectural structure from its ornamentation.
Let the primary molding organize the wall. Use detailed decorative trim or individual appliques to emphasize selected areas.
This prevents the surface from becoming visually overloaded.
What About Flexible Polyurethane Molding?
Curved walls, arched openings, rounded niches, and other radius conditions introduce a different installation requirement.
A rigid profile designed for straight surfaces should not be forced around a tight curve.
Where a project needs flexible molding, the selected product must be specifically manufactured for that application.
The important considerations are the minimum permitted bending radius, the direction of flexibility, and the profile's compatibility with adjacent straight sections.
Ideally, straight and flexible moldings should have matching cross-sections.
Otherwise, their transition may remain visible even after joint treatment and painting.
Before ordering, verify that the required flexible version exists for the selected profile and can accommodate the actual radius.
Preparing the Wall for Decorative Polyurethane Trim
A successful installation begins with the condition of the receiving surface.
The wall does not need to be perfectly new, but it must be suitable for the selected adhesive and finishing system.
Check Surface Stability
Paintable polyurethane trim is commonly installed over drywall or plaster, but the attachment is only as reliable as the layers beneath it.
A molding attached to peeling paint may remain bonded to the paint film while the paint separates from the wall.
Likewise, loose plaster, chalky surfaces, grease, and other contaminants can undermine adhesion.
Inspect the installation area carefully.
Remove unstable coatings, repair damaged areas, and prepare the substrate according to the installation adhesive manufacturer's instructions.
Correct Significant Wall Irregularities
Wall molding can visually disguise minor imperfections, but it should not be expected to straighten a badly uneven surface.
A long profile placed against a bowed wall may touch at several locations while leaving visible gaps elsewhere.
Trying to close those gaps entirely with adhesive or caulk can produce an uneven, unfinished appearance.
Use a straightedge to identify significant irregularities before installation.
Repair the surface where necessary.
For an elaborate decorative composition, spending additional time on wall preparation is generally more effective than attempting to correct dimensional problems after the molding has been attached.
Clean and Dry the Installation Area
Dust, grease, moisture, and cleaning residue can interfere with adhesion.
Clean the surface using a method appropriate to the existing wall finish, then allow it to dry completely.
Fresh plaster, newly repaired drywall, and recently painted surfaces may require additional curing time.
Follow the relevant product instructions rather than relying on a universal waiting period.
Prime the Wall When Required
Porous or unstable substrates may require a suitable primer or sealer before adhesive installation.
However, primer selection must be coordinated with the adhesive system.
A conventional paint primer is not automatically suitable as a bonding surface for every construction adhesive.
The correct preparation depends on the substrate, its condition, and the manufacturer's recommendations.
Preparing Polyurethane Molding Before Installation
Paintable polyurethane products may be supplied with different surface finishes.
Some are factory-primed. Others require additional preparation before painting.
The distinction matters because it affects the finishing sequence.
Factory-Primed Polyurethane Molding
Many STAVROS polyurethane profiles are described as having a white, primed, paint-ready surface.
A factory primer may eliminate the need for a separate full coat of primer on the undamaged molding.
However, cut ends, repaired joints, exposed filler, or abraded areas may still require spot priming.
Check the specific product information and the compatibility of the selected finish paint.
Unprimed Polyurethane Molding
Unprimed polyurethane may require a coating specifically approved for adhesion to the surface.
A generic drywall primer should not automatically be assumed suitable.
Test the primer and finish system on a sample when compatibility is uncertain.
Surface Inspection
Before installation, inspect the molding for shipping damage, surface contamination, irregular cut ends, or manufacturing residue.
Remove loose particles and clean the profile using an approved method.
Avoid aggressive solvents that could affect the polyurethane or its factory-applied coating.
The goal is to preserve the manufactured relief while providing a clean surface for installation and finishing.
Tools and Materials for Installing Paintable Wall Molding
A basic installation typically requires a measuring tape, level or laser level, square, suitable miter saw, compatible adhesive, painter's tape, and tools for applying and finishing joints.
For painting, prepare an appropriate primer if required, paintable filler, flexible paintable caulk where suitable, fine abrasive paper, a high-quality angled brush, and a small smooth-finish roller.
A particularly useful tool is a bright portable work light.
When directed across the wall at a shallow angle, it makes small surface defects and joint irregularities easier to identify before painting.
For more complex projects, prepare a cutting schedule and a labeled layout drawing.
These are especially valuable when several molding frames have similar but not identical dimensions.
How to Install Polyurethane Wall Molding Step by Step
Precise installation is the foundation of a professional paint finish.
The most reliable process follows a deliberate sequence: measure, mark, cut, dry-fit, attach, cure, finish the joints, prime where necessary, and paint.
Step 1. Establish the Wall Layout
Begin with the overall architectural composition.
Identify the width and height of the wall, the location of doors and windows, existing baseboards, crown molding, furniture, switches, and lighting fixtures.
Determine the finished outside dimensions of each decorative frame.
Use a laser level or other accurate layout method to transfer the design onto the wall.
For rectangular frames, verify that the corners are square.
Do not assume that the floor, ceiling, or adjacent wall provides a perfectly level reference.
In existing homes, small irregularities can affect the appearance of repeated molding frames.
When necessary, adjust the layout so that the decorative composition appears visually balanced.
Step 2. Prepare the Cutting Schedule
Before cutting, determine the required lengths for each frame.
Specify whether the dimensions refer to the outside long points of mitered pieces, the inside opening, or the molding centerline.
Mixing these conventions can result in incorrect frame dimensions.
For a conventional rectangular frame, the four molding pieces generally meet at mitered corners.
However, decorative corner blocks or other specialized components may require a different cutting arrangement.
Account for saw kerf and the direction of the profile when preparing the cut list.
Step 3. Cut the Molding Accurately
Use a suitable fine-tooth blade and secure the molding to prevent movement.
For square rectangular frames, 45-degree miters are the standard starting point.
If the receiving geometry is not square, the final cut angles may require adjustment.
Examine each joint before installation.
A poorly fitting miter should be corrected by cutting or refitting rather than concealed under a large amount of filler.
A clean joint is easier to finish and less likely to remain visible after painting.
Step 4. Dry-Fit the Complete Composition
Position the cut pieces against the marked wall before applying adhesive.
Check all corners, frame dimensions, clearances, and alignments.
This is also the moment to confirm that the design looks correct at normal viewing distance.
A frame can be mathematically accurate but visually awkward when placed near furniture or an existing architectural feature.
Temporary positioning allows these problems to be resolved without damaging the wall or molding.
Step 5. Apply the Correct Installation Adhesive
Select an adhesive specifically compatible with the polyurethane product and the receiving substrate.
Depending on the installation system, this may be a suitable water-based construction adhesive, acrylic mounting adhesive, or hybrid polymer product.
Compatibility is more important than the general label on the adhesive package.
Follow the manufacturer's instructions for bead placement, coverage, working time, and required support.
Some decorative molding systems also specify a separate adhesive for end joints and mitered connections.
Where required, use the designated joint adhesive rather than relying on painter's caulk as a structural connection.
Step 6. Position and Secure the Molding
Place the molding against the layout marks and press it into the specified adhesive.
Check alignment along the entire length.
Use an appropriate temporary support method if the profile requires it.
Painter's tape can help hold lightweight decorative pieces in position, but it should not be assumed sufficient for every product.
Avoid excessive pressure that could distort the molding or force too much adhesive out of the bond line.
Remove excess adhesive using the manufacturer's recommended method.
Step 7. Allow the Adhesive to Cure
The adhesive must develop sufficient strength before the temporary supports are removed or additional finishing operations begin.
Curing time varies with adhesive chemistry, temperature, humidity, substrate, and installation conditions.
Do not assume that an adhesive is fully cured simply because the surface feels dry.
Follow the specified waiting period before filling joints, applying coatings, or placing stress on the installed profile.
Step 8. Inspect Every Joint
Once the installation is secure, examine the molding under different lighting conditions.
Inspect the mitered corners, straight joints, molding-to-wall transitions, and any connections between ornamental and linear elements.
Use a raking work light to reveal defects.
Small irregularities are much easier to correct at this stage than after the final paint has been applied.
How to Hide Polyurethane Molding Seams Before Painting
Joint preparation is one of the most important aspects of decorative wall molding.
A visible seam interrupts the illusion that the profile forms part of the architectural surface.
However, different types of gaps require different finishing materials.
Mitered Corners and End Joints
Connections between two molding pieces should be fitted as accurately as possible.
Where the system specifies a joint adhesive, use it as instructed.
After the joint has cured, small cosmetic irregularities may be corrected with an appropriate paintable filler.
A compatible hard-setting filler can often be sanded to produce a continuous surface.
The filler must adhere properly to the decorative product and remain suitable for the intended coating.
Gaps Between the Molding and Wall
Small transitions between the molding edge and the wall may require a flexible, paintable acrylic or elastomeric caulk compatible with the finish system.
Apply a controlled bead rather than a large quantity of material.
Smooth the joint carefully and remove unnecessary excess.
The objective is a clean transition, not a wide fillet of caulk that changes the apparent shape of the molding.
Unlike sandable fillers, many flexible caulks do not sand cleanly after curing.
They should be applied and tooled correctly while workable.
Avoid Excessive Filler
Large quantities of filler can conceal the original profile geometry.
They may also create differences in texture or movement that become visible under paint.
For poorly fitted pieces, recutting or replacing the component is often a better solution.
Check the Joint After Curing
Inspect the completed joint under side lighting.
Look for raised edges, depressions, shrinkage, uneven surface texture, and visible transitions.
Sand only materials that are intended to be sanded, using an appropriate fine abrasive.
Preserve the surrounding factory-finished molding surface.
Clean away all dust before priming or painting.
Should You Paint Polyurethane Molding Before or After Installation?
For most decorative wall molding projects, the final paint coat should be applied after installation and joint preparation.
There are several reasons.
First, the installer must cut and connect the molding pieces. Even carefully prepared components may require small cosmetic repairs.
Second, a continuous finish helps unify the molding, repaired joints, and surrounding wall.
Third, painting in place allows the final appearance to be evaluated under the actual room lighting.
This is particularly important when the molding and wall will be painted the same color.
When Prepainting Makes Sense
Prepainting can be useful when the molding will contrast sharply with the wall.
For example, applying an initial coat of white enamel to trim before installation may simplify the finishing of difficult-to-reach surfaces.
However, the finished joints and attachment areas will still require touch-up work.
Prepainting may also be useful in projects using carefully controlled shop-applied finishes.
The practical compromise is often to apply an initial coat before installation when appropriate, then complete the finishing system after the trim has been attached and the joints have been prepared.
The final sequence should always remain compatible with the adhesive and coating manufacturers' instructions.
Do You Need to Prime Polyurethane Molding Before Painting?
The answer depends on the product's existing surface and the selected paint.
A factory-primed profile may already provide a suitable foundation for a compatible topcoat.
Unprimed polyurethane, exposed cut ends, repaired areas, and certain specialty finishes may require additional preparation.
This distinction is important because unnecessary primer applications add labor and coating thickness without necessarily improving the result.
When Primer Is Recommended
A compatible primer may be appropriate when:
The decorative element is unprimed.
Repairs expose a different surface or filler.
The existing coating has uncertain compatibility.
The finish paint requires a specified primer.
A specialty finish needs a consistent substrate.
For a professional installation, evaluate the complete coating system rather than selecting primer and paint independently.
How to Prime Correctly
Clean the surface and confirm that all repairs are cured and ready for coating.
Apply a thin, even primer layer with an appropriate brush, roller, or spray method.
Avoid allowing primer to collect in decorative grooves.
Allow the primer to dry and cure according to its technical instructions.
Inspect the surface again before applying the final paint.
Primer can make small imperfections easier to see because it creates a more uniform surface appearance.
Correct remaining defects before proceeding.
What Paint Should You Use on Polyurethane Molding?
For many interior projects, a high-quality water-based acrylic latex trim paint or compatible waterborne enamel is a practical choice.
The correct paint must adhere to the prepared polyurethane surface, provide the desired finish, and remain suitable for the conditions in which the molding will be used.
Water-Based Acrylic Latex Paint
Acrylic latex coatings are widely used in American residential interiors.
Appropriate products offer good color selection, convenient application, and relatively straightforward cleanup.
For wall-mounted decorative molding, select a product suitable for architectural trim or the intended wall finish.
When the entire wall is painted one color, the same compatible coating may be used across the molding and wall to create a uniform appearance.
However, the paint should be evaluated for its leveling properties, finish durability, and ability to preserve fine relief.
Waterborne Trim Enamel
Waterborne trim enamels are designed to produce smoother, more durable finishes on architectural trim, doors, and similar surfaces.
They can be particularly useful when the molding will be touched frequently or needs a more refined satin or semi-gloss appearance.
A suitable enamel should level without excessive brush marks and provide sufficient opacity without requiring heavy coating buildup.
Waterborne Alkyd and Hybrid Coatings
Some waterborne alkyd or hybrid enamel systems provide a smooth, traditional trim appearance.
Their suitability depends on compatibility with the polyurethane product, factory primer, and underlying preparation.
Use them only when the coating manufacturer permits the application.
Solvent-Based Paints
Solvent-based paints and coatings should not be applied indiscriminately to decorative polyurethane.
Certain solvents may affect particular polymer formulations, factory coatings, or adhesives.
If a specialty solvent-based finish is required, verify compatibility with the manufacturer and test the complete system before proceeding.
Paint Quality Matters
The lowest-priced paint does not necessarily offer the lowest completed project cost.
A coating with poor coverage may require additional applications.
A paint with inadequate leveling may leave visible brush marks.
An unsuitable coating can undermine a precisely installed decorative system.
For complex wall detailing, prioritize compatible coatings with reliable coverage, predictable application, and the finish characteristics required by the design.
Matte, Eggshell, Satin, or Semi-Gloss: Which Finish Looks Best?
Paint sheen determines how strongly the surface reflects light.
That reflection changes the perceived depth of the molding.
Matte Finish
Matte paint produces a soft, relatively nonreflective surface.
The molding remains visible primarily through its physical relief and the shadows it creates.
This is an effective choice for contemporary monochromatic wall designs.
Matte finishes can also make minor surface irregularities less conspicuous than higher-gloss coatings.
However, cleaning performance varies among products, so select an appropriate durable finish for frequently touched areas.
Eggshell Finish
Eggshell provides a subtle sheen while maintaining a relatively restrained appearance.
It often works well in living rooms, bedrooms, and transitional interiors.
The molded profile catches slightly more light than it would with a flat finish, without becoming visually dominant.
Satin Finish
Satin introduces a more noticeable reflection.
It can emphasize the curved and stepped portions of decorative molding while remaining appropriate for many traditional and contemporary interiors.
Satin is often a useful compromise when the design requires both architectural definition and practical cleaning performance.
Semi-Gloss Finish
Semi-gloss highlights profile geometry more strongly.
It is particularly effective for contrasting architectural trim and certain traditional interiors.
However, reflective coatings make poor joint preparation, roller texture, and uneven surfaces easier to notice.
For intricate trim work, semi-gloss generally requires more careful preparation and application.
High-Gloss Finish
High-gloss molding can be visually striking in deliberately formal or highly polished interior schemes.
It is not inherently unsuitable for polyurethane, but it requires exceptional attention to surface preparation and coating quality.
Every interruption in the finish can become apparent under direct lighting.
For most residential decorative wall molding, matte, eggshell, satin, or carefully applied semi-gloss finishes provide a more practical range of options.
How to Paint Polyurethane Molding Without Brush Marks
The application technique should preserve the clarity of the profile while producing an even, continuous finish.
A high-quality paint cannot compensate for overloaded brushes, poorly prepared surfaces, or excessive coating thickness.
Use the Right Brush
A small angled sash brush is useful for narrow profiles, decorative corners, and recessed details.
For many wall molding applications, a brush approximately 1–1.5 inches wide provides good control.
The correct size depends on the profile.
The brush should be suitable for the selected paint chemistry and able to hold enough paint for smooth application without excessive dripping.
Use a Smooth-Finish Mini Roller
For relatively broad or flat molding surfaces, a small high-density foam roller or fine-nap mini roller may help produce a consistent finish.
Choose a roller appropriate for the coating and desired texture.
Large, coarse rollers can leave unwanted stippling and may fail to reach narrow decorative recesses.
Work in Manageable Sections
Paint a limited length of molding at a time.
Begin by coating recessed areas carefully.
Then distribute the paint across the exposed face of the profile.
Where the coating permits, use a final controlled brush stroke along the length of the molding to reduce visible transitions.
Avoid repeatedly brushing paint that has already started to set.
Overworking the coating can create dragging marks and an uneven finish.
Apply Thin, Even Coats
Two thin coats are often more effective than one heavy application, although the required system depends on coverage, primer, color, and product instructions.
Excess paint may accumulate around decorative grooves and rounded edges.
As it dries, this buildup can soften the original profile.
Allow each coat to dry and reach the required recoat condition before applying the next.
Do not substitute a guessed drying period for the coating manufacturer's instructions.
Can You Spray Paint Polyurethane Trim?
Spraying can produce a smooth finish on suitable decorative components, particularly when they are painted before installation or in a controlled workshop environment.
However, spray application introduces overspray, masking, ventilation, and equipment requirements.
It also demands careful control of film thickness around detailed relief.
For many residential wall molding projects, a combination of brush and smooth-finish mini roller is more practical.
Spraying becomes more attractive when there are numerous repeated components or when a professional refinisher is producing a controlled specialty finish.
Choosing a Color Scheme for Decorative Wall Molding
Paint color changes the character of a molding composition as much as profile selection.
The same decorative frame can appear contemporary, traditional, dramatic, or understated depending on its finish.
Monochromatic Wall Molding: Paint the Trim and Wall the Same Color
Monochromatic molding is one of the most effective ways to make applied decorative trim feel architectural.
The wall and molding are painted in the same shade.
Instead of emphasizing the frame through color contrast, the design emphasizes dimensional relief.
The result is often calm, sophisticated, and visually cohesive.
Dark colors can be particularly effective.
Deep forest green, charcoal, navy, burgundy, and saturated brown create strong shadows that reinforce the profile's geometry.
Warm neutral colors produce a softer effect.
Taupe, warm gray, mushroom, ivory, and muted beige work well in transitional interiors.
White-on-white molding can also be effective, particularly where the room receives enough directional light to reveal the profile.
The key is maintaining a consistent color and an intentional relationship between paint sheens.
Using the same color formula with different sheens can produce an interesting effect, but the different reflections may make the surfaces appear slightly different in color.
If a completely unified finish is desired, using the same compatible paint and sheen is generally the most predictable approach.
White Molding Against a Colored Wall
This is a traditional approach that creates strong architectural definition.
White or off-white molding stands out against gray, blue, green, or other colored walls.
It works particularly well with symmetrical wall panels, chair rail molding, and formal dining room treatments.
Because the contrast is pronounced, frame alignment and joint quality become especially important.
Colored Molding Against a Neutral Wall
Decorative molding does not have to be white.
A muted olive, terracotta, dusty rose, deep blue, or other selected color can create an intentional graphic composition against a neutral background.
This approach works best when the trim color relates to another element of the room, such as furniture upholstery, cabinetry, or artwork.
Subtle Tonal Contrast
A particularly refined strategy is to paint the molding slightly lighter or darker than the wall.
This establishes definition without the strong visual separation produced by high-contrast trim.
It is effective in transitional and contemporary interiors where the designer wants architectural interest without excessive ornamentation.
Where Paintable Polyurethane Molding Works Best
Paintable decorative molding can be used in many parts of a home, provided the selected products and installation system suit the environment.
Living Room Accent Walls
A large living room wall often needs architectural structure without additional furniture or artwork.
Picture frame molding can establish that structure.
A pair of large rectangular panels behind a sofa, or a central panel flanked by narrower frames, can create visual balance.
For a contemporary effect, paint the molding and wall in a consistent shade.
For a more traditional composition, use contrasting trim and consider incorporating restrained ornamental details.
Bedroom Headboard Walls
The wall behind a bed is a natural location for decorative molding.
A broad rectangular frame may visually anchor the headboard, while taller adjacent frames can emphasize the room's height.
In smaller bedrooms, restrained profiles usually preserve a more comfortable sense of scale.
Soft neutral colors and matte or eggshell finishes can create an architectural background that supports rather than competes with the bed.
Dining Rooms and Wainscoting
Dining rooms are particularly suitable for formal wall panel treatments.
A horizontal chair rail molding can divide the wall, with applied panel molding below.
Additional upper frames may create a more elaborate classical composition.
The height of the chair rail should respond to the room's proportions and furniture rather than follow an arbitrary measurement.
Where the treatment resembles wainscoting, distinguish between applied decorative molding and a complete protective panel system.
Entryways and Hallways
Long walls can become visually repetitive without architectural divisions.
Decorative wall molding introduces rhythm and helps establish a consistent interior design language throughout the home.
In narrow circulation areas, select profiles with modest projection.
Avoid placing delicate, highly projecting ornaments where they are likely to be struck by people, furniture, or luggage.
Home Offices and Libraries
Dark monochromatic wall molding can produce a particularly strong result in a home office.
Deep green, charcoal, navy, or warm brown finishes emphasize the architectural relief while creating a cohesive background for bookcases and furniture.
A satin or carefully applied semi-gloss coating can introduce additional depth.
The molding should align thoughtfully with built-in cabinets, doors, and other permanent architectural features.
Staircases and Landings
Staircase walls often contain large uninterrupted areas that benefit from decorative organization.
However, the geometry is more demanding.
Frames may follow the incline of the staircase or remain aligned with the building's vertical and horizontal axes, depending on the design.
These arrangements require careful elevation drawings and accurate angle calculations.
A layout that works on a level hallway wall should not simply be copied onto a staircase.
Coordinating Decorative Molding With Polyurethane Onlays and Corners
Straight molding provides architectural structure, but a complete decorative system may also include ornamental accents.
These components can turn a simple rectangular frame into a more expressive classical composition.
Decorative Molding Corners
Ornamental corner elements can introduce sculptural detail at the intersections of molding profiles.
They may also provide a visual transition between adjoining straight sections.
However, decorative corners are not automatically compatible with every profile.
Their dimensions, relief, and connection geometry must correspond to the selected molding system.
Browse STAVROS polyurethane molding corners and accents when planning more elaborate framed compositions.
Central Decorative Onlays
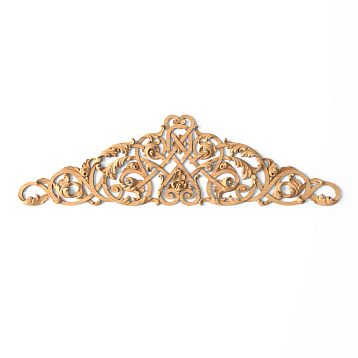
A central applique can establish the focal point of a decorative wall panel.
A floral ornament may be positioned above a framed section, over an architectural opening, or inside a traditional panel composition.
The placement should reinforce the geometry of the surrounding moldings.
The STAVROS polyurethane onlays and appliques collection includes ornamental details in a range of configurations.
When the entire composition is painted in one color, these applied elements can become visually integrated with the surrounding trim.
Match the Ornament to the Architectural Style
A highly ornate applique placed inside an extremely minimal frame may look disconnected unless the contrast is intentional.
Likewise, multiple large decorative elements can compete with the main architectural structure.
Use a hierarchy:
The principal molding establishes the frame. Secondary details complete the geometry. Selected onlays provide emphasis.
The more elaborate the central ornament, the more important it becomes to control the surrounding decorative elements.
Check Compatibility by Product Series
STAVROS offers decorative components associated with particular molding series.
For example, the MLDPU-1-2.1 central applique is documented for use with the MLDPU-001 and MLD-001-MG molding systems.
This relationship illustrates why product codes matter.
A compatible decorative element should not be chosen solely because its photograph resembles the molding.
Confirm the intended system, dimensions, and material before ordering.
How Much Polyurethane Molding Should You Buy?
The material quantity should be determined from the actual design and a cutting schedule.
Simply measuring the total perimeter of every decorative frame does not always produce an efficient purchase quantity.
Example: Three Decorative Wall Frames
Suppose a living room design requires three identical rectangular frames.
Each frame measures:
Width: 30 inches.
Height: 60 inches.
Using outside long-point dimensions, the total nominal molding length per frame is:
2 × 30 + 2 × 60 = 180 inches.
For three frames:
3 × 180 = 540 inches.
That equals 45 linear feet.
Now consider a polyurethane molding supplied in 102.36-inch lengths.
The project requires six vertical pieces measuring 60 inches and six horizontal pieces measuring 30 inches.
Each stock length can potentially yield one 60-inch piece and one 30-inch piece, allowing room for ordinary cutting kerf, provided the cutting arrangement and joint geometry are planned correctly.
This simplified layout therefore requires six stock lengths for the specified finished pieces.
An additional length may be useful as a reserve for cutting mistakes or damaged material.
Why a Cutting Schedule Matters
Two projects can require the same linear footage but a different number of stock lengths.
The difference comes from the dimensions of individual pieces and how they can be arranged within the available stock.
For ornate molding, pattern alignment may introduce further constraints.
When estimating material, consider:
Finished frame dimensions.
Stock length.
Saw kerf.
Required miter orientation.
Ornamental pattern repeats.
Corner blocks and other separate components.
Reasonable material reserve.
For projects involving several rooms, maintain a room-by-room material schedule.
This reduces the likelihood of confusing similar profiles or installing the wrong ornament in a particular location.
Common Mistakes When Painting Polyurethane Molding
Several recurring mistakes can undermine an otherwise well-designed wall treatment.
Choosing a Profile That Is Too Small
Thin molding may look attractive in a close-up photograph but disappear visually across a large wall.
Evaluate the profile from the normal viewing distance.
If the treatment depends entirely on subtle shadow, the projection must be sufficient for the room's lighting conditions.
Using an Oversized Profile
Very wide decorative molding can overwhelm a compact wall.
This is particularly noticeable when several frames are placed close together.
The solution is not automatically to reduce ornament. Sometimes choosing a narrower primary profile creates a more balanced composition.
Ignoring Lighting
Side lighting can make good molding look exceptionally refined.
It can also reveal every poorly prepared joint.
Inspect the installation under daylight and the room's intended artificial lighting before final painting.
Using Caulk to Correct Poor Cuts
Flexible painter's caulk is useful for suitable transitions, but it should not replace accurate joinery.
Large, poorly fitted miters may require recutting or rebuilding.
Use the appropriate filler or joint adhesive for the particular defect.
Priming Without Checking the Existing Surface
Factory-primed products and unprimed products may require different finishing procedures.
Applying an unnecessary or incompatible primer can create its own adhesion problems.
Confirm the existing surface treatment and follow the selected coating system.
Applying Paint Too Thickly
Heavy paint buildup can reduce the definition of small decorative details.
Use controlled coats and avoid leaving excessive material in grooves and corners.
Using an Unsuitable Roller
A coarse roller can create unwanted texture and fail to coat recessed areas evenly.
Choose a smooth-finish application tool appropriate for the profile and paint.
Rushing Drying and Curing
Adhesives, fillers, primers, and paints have different curing requirements.
Applying the next product too early may lead to poor adhesion, shrinkage, visible joints, or finish defects.
Follow the documented recoat and curing conditions.
Creating Unnecessary Color Variation
When the design requires one continuous color, using different paint batches, sheens, or coating systems may produce visible differences.
Plan the finishing materials before painting.
Forgetting About Material Reserve
A cutting error may require a replacement length, particularly when the design uses repeated mitered pieces.
A sensible reserve is inexpensive insurance against an interrupted installation.
Troubleshooting Problems After Painting
Even careful installations occasionally reveal defects after the first finish coat.
The appropriate repair depends on the actual cause.
Visible Hairline Seams
A fine seam may indicate joint movement, shrinkage of the finishing material, or an inadequately prepared connection.
Determine whether the joint is stable.
A stable cosmetic defect may be repaired with a compatible filler or caulk, depending on its location.
An unstable joint may require a more substantial correction.
Raised Paint Along Profile Edges
This can result from excessive coating buildup, poor tooling of caulk, or paint accumulation.
If the coating has fully cured, carefully remove or level the defect using an appropriate method.
Reprime exposed areas if necessary before repainting.
Uneven Paint Sheen
Different substrates or patches may absorb or reflect the finish differently.
Inconsistent surface preparation, inadequate primer, or variations in application technique can contribute to the problem.
A suitable uniform primer or additional finish coat may resolve the difference, provided the underlying surface is correctly prepared.
Brush Marks
Brush marks can result from an unsuitable tool, excessive reworking, or coating that does not level well under the application conditions.
Corrective work may require controlled smoothing after curing and a new thin finish coat.
Peeling or Poor Adhesion
Do not simply paint over peeling material.
Identify whether the failure occurred between the coating and molding, between primer and paint, or within the underlying wall finish.
Remove unstable material and rebuild the coating system using compatible products.
What to Buy With Paintable Polyurethane Molding
A complete decorative molding project requires more than the principal profile.
The purchasing specification should include all materials necessary to construct and finish the intended system.
| Product or material | Purpose |
|---|---|
| Polyurethane molding | Main architectural frames and decorative borders |
| Compatible installation adhesive | Attachment to the prepared substrate |
| Specified joint adhesive, if required | Structural connection of molding joints |
| Paintable filler | Cosmetic repair of small surface and joint defects |
| Compatible flexible caulk | Suitable molding-to-wall transitions |
| Primer, where required | Preparation of unprimed or repaired surfaces |
| Interior acrylic paint or compatible trim enamel | Final decorative coating |
| Fine abrasive and appropriate tools | Controlled surface preparation |
| Angled brush and smooth-finish mini roller | Paint application |
| Decorative molding accents | Compatible corner and center elements |
| Polyurethane onlays | Decorative focal points and relief accents |
| Additional molding stock | Cutting errors, waste, and future repairs |
Select installation and finishing materials according to the actual polyurethane product, substrate, and environment.
For a project using several different molding series, document the selected product codes and their intended locations.
Final Project Checklist
Before beginning installation, verify that the wall dimensions have been measured, the decorative layout has been approved, and the selected molding is proportional to the room.
Confirm that the wall is sound, the adhesive is compatible, the cut list is complete, and all necessary installation materials are available.
Check whether the polyurethane profiles are factory-primed or require additional preparation.
Ensure that the selected paint system is appropriate for the molding and intended finish.
Plan how miter joints, wall transitions, and decorative accents will be finished.
Finally, inspect the completed installation under the actual lighting conditions before applying the final paint.
A carefully executed preparation process is the best way to achieve an architectural finish that looks intentional rather than improvised.
Frequently Asked Questions About Paintable Polyurethane Molding
Can You Paint Polyurethane Molding?
Yes. Many architectural polyurethane molding products are specifically designed to be painted.
The correct preparation depends on whether the molding is factory-primed or unprimed and which coating system is being used.
Choose compatible products and follow the relevant preparation instructions.
What Kind of Paint Is Best for Polyurethane Molding?
A compatible water-based acrylic latex trim paint or waterborne enamel is often an effective option for interior applications.
Select the finish according to the desired appearance, durability, and cleaning requirements.
The coating must be suitable for the polyurethane surface and any existing primer.
Do You Need to Prime Polyurethane Molding?
Not always.
Factory-primed molding may be ready for a compatible finish coat after cleaning and inspection.
Unprimed products, repaired joints, and exposed cut surfaces may require primer.
Follow the product and coating manufacturers' recommendations.
Should You Paint Polyurethane Molding Before Installation?
For most decorative wall treatments, the final coat is best applied after installation.
This allows the joints, corners, and transitions to be prepared and finished consistently.
An initial coat may be applied before installation in certain situations, but final touch-up work is normally still required.
How Do You Make Polyurethane Molding Joints Invisible?
Begin with accurately fitted pieces and the appropriate joint adhesive where specified.
Use compatible filler for suitable cosmetic repairs and paintable caulk for appropriate wall transitions.
After curing and surface preparation, apply the necessary primer and finish coats.
Good joint geometry is the foundation of an unobtrusive seam.
How Many Coats of Paint Does Polyurethane Molding Need?
Many projects achieve the intended result with two properly applied finish coats, but the number depends on the coating, color, primer, existing surface, and desired coverage.
Follow the paint manufacturer's recommendations.
Avoid substituting one excessively thick coat for the appropriate coating system.
Can You Paint Polyurethane Molding the Same Color as the Wall?
Yes. This is a popular approach for creating monochromatic architectural detailing.
Using the same compatible paint and sheen can produce a cohesive appearance in which the molding is primarily defined by its physical relief.
A slight sheen difference can also be used intentionally, but it will change the way the two surfaces reflect light.
What Is Better for Decorative Wall Molding: Matte or Satin Paint?
Matte paint creates a restrained appearance and emphasizes shadows.
Satin paint reflects more light and provides stronger surface definition.
Neither is universally better.
The appropriate choice depends on the architectural style, lighting, cleaning requirements, and desired visual effect.
Can You Use Polyurethane Molding for Picture Frame Wall Panels?
Yes. Applied polyurethane trim is suitable for many decorative picture frame molding compositions.
It can be arranged into rectangular or other geometric frames over a prepared wall surface.
Accurate layout and compatible installation materials are essential.
Can Polyurethane Molding Be Used in Bathrooms?
Certain polyurethane architectural products can be suitable for bathroom applications.
However, suitability depends on the specific product and complete installation system.
The adhesive, coating, substrate, and expected moisture exposure must all be considered.
Do not assume that every interior decorative molding is approved for direct wet exposure.
Is Polyurethane Molding Better Than MDF?
The answer depends on the project.
Polyurethane is attractive for molded relief, decorative ornaments, and applications where its material properties are advantageous.
Primed MDF can be effective for straight paint-grade interior trim in suitable dry conditions.
Compare dimensions, material specifications, installation methods, and intended use rather than choosing solely by appearance.
Does Polyurethane Molding Crack After Painting?
Properly selected and installed molding can provide a durable decorative finish.
However, joints may develop visible lines if the installation system is unsuitable, the substrate moves, the adhesive fails, or the finishing materials are applied incorrectly.
Appropriate joint design and compatible materials help reduce these risks.
Can You Repaint Existing Polyurethane Molding?
In many cases, yes.
Inspect the existing coating for adhesion, contamination, damage, and compatibility with the new finish.
Clean and prepare the surface as required before repainting.
How Much Extra Polyurethane Molding Should I Order?
Prepare a cutting schedule first.
Then allow for saw kerf, cutting mistakes, pattern matching, damaged pieces, and reasonable reserve material.
For complicated decorative compositions, the necessary reserve may differ from that of a simple rectangular frame.
Where Can You Buy Polyurethane Molding for Decorative Walls?
STAVROS offers polyurethane molding profiles and coordinated decorative elements suitable for a variety of interior architectural projects.
Explore the STAVROS polyurethane molding catalog to compare product sizes and profiles.
Before purchasing, confirm product materials, stock lengths, availability, and shipping arrangements for the project location.
Buy Polyurethane Molding and Decorative Trim From STAVROS
A professional-looking decorative wall begins with selecting components that work together.
The most efficient approach is to treat the molding, ornamental details, installation materials, and final finish as one coordinated specification.
STAVROS provides architectural decorative products that can support both restrained modern interiors and more elaborate classical compositions.
For projects based on clean architectural lines, browse polyurethane wall molding profiles.
For decorative corners, central accents, and other components that complete a framed composition, explore STAVROS molding decor.
For floral ornaments, classical scrollwork, and sculptural decorative accents, consider polyurethane onlays and appliques.
If the project requires more expressive linear relief, examine the decorative trim collection.
Homeowners and professional designers planning a complete wall composition can also explore STAVROS wall décor and molding kits.
Because some decorative collections contain different materials, verify each component before ordering. Where an all-polyurethane installation is required, confirm that the selected profiles, corners, and ornamental elements satisfy that specification.
For projects involving several rooms, prepare a detailed product schedule listing the molding series, dimensions, quantities, ornamental components, and finish requirements.
This improves purchasing accuracy and makes installation more predictable.
Final Thoughts: The Best Paintable Molding Looks Like Architecture
The appeal of paintable polyurethane molding lies in its ability to transform a flat surface into an architectural composition.
The material provides the decorative profile, but the final quality comes from design and execution.
A well-proportioned frame can make a simple living room feel more refined. A thoughtfully arranged set of wall panels can introduce a sense of classical order. Carefully selected ornamental details can create richness without overwhelming the space.
Painting completes this transformation.
When the joints are accurate, the surface is properly prepared, and the finish is applied consistently, the molding no longer appears to be an unrelated object attached to the wall.
It becomes part of the room's architectural identity.
Whether the desired result is a monochromatic contemporary accent wall, a traditional dining room with picture frame molding, or a classical interior featuring decorative polyurethane trim, the underlying principles remain the same: choose the right profile, respect the proportions of the space, use compatible installation materials, and give the finishing process the attention it deserves.
The difference between ordinary wall decoration and convincing architectural detail is rarely the amount of ornament. It is the precision with which every element is selected, installed, and finished.
Explore the STAVROS architectural polyurethane décor collection to find molding profiles, decorative trim, appliques, and coordinated elements for your next interior design project.