Article Contents:
- Why an expensive light fixture on a bare ceiling looks accidental
- Three things that happen when a chandelier gets decorative surroundings
- Ceiling rosette: not an accessory, but an architectural foundation
- Polyurethane rosette: why this material specifically
- How to choose the size of a rosette for a chandelier: a practical guide
- Approximate matching table
- Ceiling height adjusts the choice
- Rosette style: from classic to neutral minimalism
- Moldings around a chandelier: when one rosette is not enough
- Four forms of ceiling molding contour
- How the molding contour connects the chandelier with the furniture
- Ceiling as the 'fifth wall': why this is especially important now
- Ready-made ceiling decor kits: a system solution without independent design
- Four scenarios: how to assemble a ceiling center for different tasks
- Scenario one: chandelier in the living room
- Scenario two: pendant over the dining table
- Scenario three: bedroom
- Scenario four: hall and entrance area
- How to choose molding for a ceiling contour: details matter
- Principles for Choosing a Profile for Ceiling Molding
- Corner Elements: The Detail That Completes Everything
- Mistakes When Choosing Ceiling Moldings for a Chandelier
- Mistake One: Choosing a Rosette Only for Its Looks
- Mistake Two: A Small Rosette in a Large Living Room Without a Molding Outline
- Mistake Three: An Overly Ornate Ceiling with an Expressive Chandelier
- Mistake Four: Ceiling Decor Without Connection to Wall Decor
- Mistake Five: Contrasting Painting of Moldings Without a Thought-Out Concept
- Selection Table: Task — Solution — Where to Buy
- How to Paint Ceiling Moldings: Technical Minimum
- FAQ: answers to popular questions about ceiling stucco molding under a chandelier
- About the company
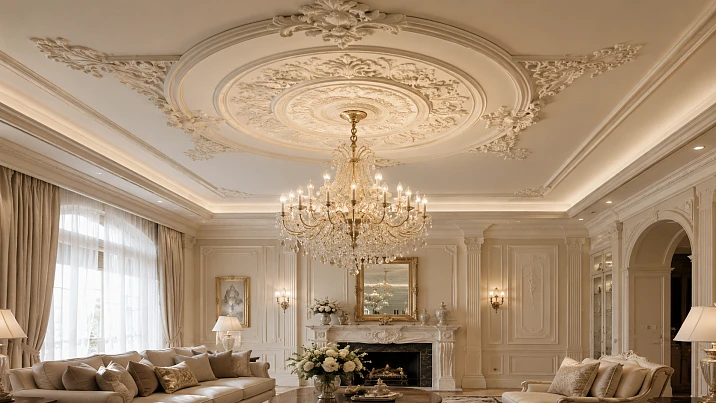
You spent time, money, and energy choosing a chandelier. You scrolled through hundreds of options, compared designs, estimated sizes, and mentally pictured how it would look in your living room. And now it's hanging — beautiful, expensive, exactly the one. But something is off. The light fixture hangs, but it doesn't "anchor" the room. It looks like a foreign object that flew in from another interior and landed on your ceiling.
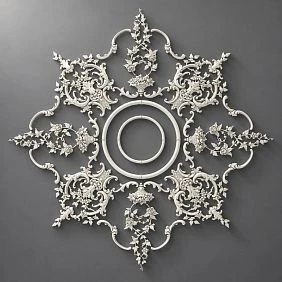
Sound familiar? The issue isn't the chandelier. The issue is that it has no architectural setting. No base. No pedestal. A ceiling rosette, a molding contour Ceiling molding around the light fixture — that's exactly what turns a "hung chandelier" into an "architectural center of the room." And that's what this article is about.

Why an expensive light fixture on a bare ceiling looks accidental
Imagine a painting without a frame. Even if it's a masterpiece, it loses half its impact when leaned against a wall without framing. The frame doesn't just "decorate" — it isolates the work from its surroundings, creates a visual territory for it, and tells the viewer: "Here begins art."
A chandelier works on the same logic. The light fixture is the central element of the space, its light and visual focus. But without architectural framing, it "floats" on the ceiling without an anchor. No boundary, no context, no hierarchy. The eye doesn't know how to relate to it — as a lighting device or as a design statement.
Buy ceiling molding — it's not about "decorating the ceiling for decoration's sake." It's about creating for your light fixture what it lacks: an architectural context, a visual "frame," a space within which it is the main element.




Three things that happen when a chandelier gets decorative surroundings
First: the light fixture gains status. A ceiling rosette under the chandelier and a molding contour around it — this is a signal to anyone entering: this light fixture is not here by accident. It's part of a well-thought-out architecture. It's in its place.
Second: the ceiling ceases to be a "fifth wall." In most apartments, the ceiling is a neutral white plane that is only noticed when something needs to be repaired. With a rosette and a molding contour, it becomes an architectural surface — part of the design, not its limitation.
Third: the entire room looks more expensive. This is an almost paradoxical but truly effective effect: a decorative ceiling center elevates the perception of the entire space. The same furniture, the same walls — but the feeling of the interior's "expensiveness" noticeably increases.
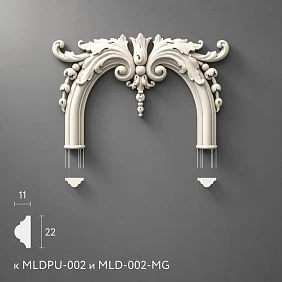
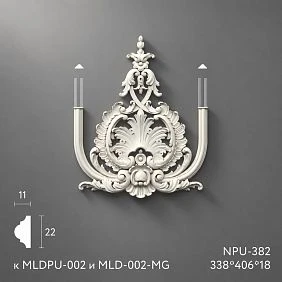
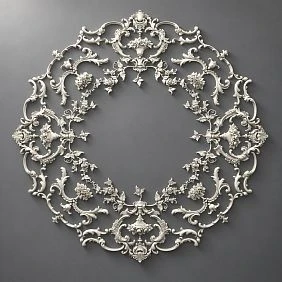
Our factory also produces:
Ceiling rosette: not an accessory, but an architectural foundation
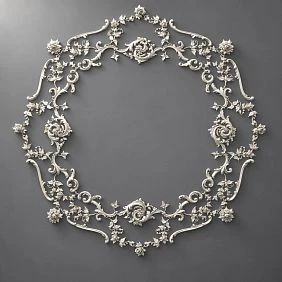
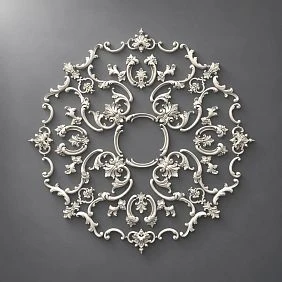
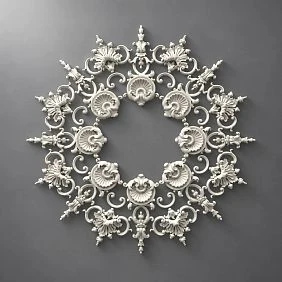
Let's start with the basic element — the ceiling rosette. In decorative tradition, the rosette under the chandelier has existed since ancient times: it marked the central axis of the dome, fixed the symmetry point of the ceiling decor, and concealed the attachment point of the chain or cable. The functions have been preserved to this day, although the technical component has become simpler.
What does the rosette do today?
-
Conceals the mounting plate and wiring around the attachment point — the technical area becomes invisible
-
Visually fixes the center of the ceiling — creates a "focal point" that the eye turns to first
-
Connects the light fixture to the room's style — a correctly chosen rosette profile "negotiates" with the furniture, moldings, and interior details
-
Creates a concentric ornamental motif that is perceived as part of the architecture, not as an added object
The last point is the most important. That's why Ceiling molding under the chandelier is not a 'ceiling decor', but a structural element of the space.
Get Consultation
Polyurethane ceiling rosette: why this material
Historically, rosettes under chandeliers were made of plaster. And a plaster rosette is good—detailed, solid, beautiful. But it is heavy: a large plaster rosette weighs 3–5 kg and requires reliable fastening to the ceiling slab. In apartments with plasterboard ceilings, this becomes a real problem.
A polyurethane rosette weighs 6–8 times less than its plaster counterpart. It is glued with acrylic mounting adhesive without drilling, without dowels, without damaging the surface. At the same time, the relief is reproduced with such precision that it is almost impossible to distinguish a polyurethane rosette from a plaster one after painting.
Another argument is moisture resistance. Polyurethane does not react to humidity, does not crack with temperature changes, and does not crumble over time. For kitchens, bathrooms with decorative ceilings, as well as for rooms without constant heating, this is a fundamental advantage.
And finally, painting. The surface of polyurethane is poreless: the paint lays evenly, without uneven absorption. One coat of primer and two coats of matte paint—and the rosette looks like a single whole with the ceiling. That's exactly how it should be.
How to choose the size of a rosette for a chandelier: a practical guide
This is where most people make their first mistake. They take a 'larger' rosette—'so it's visible'—and get a ceiling where the rosette competes with the chandelier for the main role. Or they take a small one—'so as not to overload'—and get a tiny circle that gets lost under a massive light fixture.
The rule of proportionality is simple: the socket supports the chandelier but does not overshadow it. It should be noticeable — yet remain in the role of a "frame," not a "picture."
Approximate matching table
| Chandelier diameter | Recommended rosette diameter | For which room |
|---|---|---|
| Up to 30 cm | 20–25 cm | Bedroom, study, small hallway |
| 30–50 cm | 25–35 cm | Living room up to 20 sq m, bedroom with high ceiling |
| 50–70 cm | 35–50 cm | Living room 20–35 sq m, dining room |
| 70–100 cm | 50–65 cm | Living room from 35 sq m, hall, formal area |
| From 100 cm | 65–80 cm | Grand hall, high foyer, restaurant |
These figures are approximate, not strict norms. The general principle is more important: the diameter of the rosette should be smaller than the diameter of the chandelier, but not less than 70% of it. A 1:1.5 ratio between the rosette and the chandelier is a classically proven proportion.
Ceiling height adjusts the choice
For ceilings 2.5–2.7 m, it is better to choose rosettes with a more delicate, shallow relief. A deep ornamental relief under a low ceiling creates visual "pressure" — it seems the ceiling is even closer. The lower the ceiling, the more "flat" and calm the decor should be.
For ceilings from 2.9 m — complete freedom. Here, a deep classical relief truly unfolds: the height provides space for chiaroscuro, and the ornament becomes voluminous. It is at great heights that buy ceiling stucco with developed relief — this is the right and cost-effective solution.
Rosette style: from classic to neutral minimalism
It is a mistake to think that a ceiling rosette is only for classic interiors with stucco walls and antique furniture. Modern designer interiors with a striking chandelier quite organically accept a rosette — provided its profile is calm, without an overloaded ornament.
For a modern interior, choose rosettes with a clear geometric profile and a minimum of decorative elements. Paint strictly in the color of the ceiling. The rosette will be almost invisible in daylight — and very expressive in the evening when the chandelier is on and side lighting reveals the relief.
For classic and neoclassical interiors — rosettes with ornamental motifs: acanthus, leaf frieze, concentric volutes. Here, the rosette becomes a full participant in the decorative ensemble, on par with moldings and wall panels.
Moldings around the chandelier: when one rosette is not enough
A ceiling rosette is a point. And a point sometimes needs context. In large rooms — living rooms from 25 sq. m, spacious dining rooms, grand halls — one rosette, even large and beautiful, gets "lost" on the ceiling. There is too much empty white space around it that says nothing. The rosette is there — but there is no system.
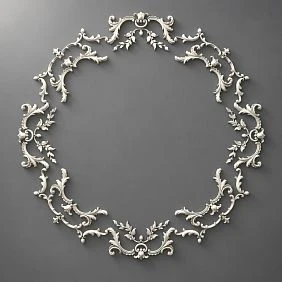
This is where they come into play Moldings made of polyurethane as a ceiling contour. A molding frame around the central chandelier zone is a way to create an "architectural hall" within the ceiling space: a designated area with clear boundaries, a decorative center, and visual weight proportionate to the room's scale.
Four shapes of ceiling molding contour
Square. A classic shape for square rooms or a square zone (e.g., a dining group under a chandelier). The square size is usually 60–75% of the zone's width. The rosette is installed strictly at the geometric center of the square.
Rectangle. For elongated living rooms and dining rooms where the lighting zone is stretched along a long wall. The rectangular contour mirrors the proportions of the furniture group — a sofa or dining table beneath it.
Double frame. Two concentric rectangles or squares with an equal interval between them. This is a more solemn, "ceremonial" option — suitable in high rooms with rich finishes. The inner frame is a thin molding, the outer one slightly wider. The rosette is in the center of the inner frame.
Octagon (octagonal). Geometrically complex but architecturally expressive option. Suitable for rooms with domed ceilings, country houses, and formal areas. Assembled from straight molding segments, beveled at 45° at corner points.
How a molding contour connects a chandelier with furniture
This is one of the smartest techniques in modern interior design: a ceiling frame made of moldings that "responds" to the furniture group below. A living room with a 2.4 m wide sofa and a central coffee table — a ceiling frame 2.8–3.0 m wide visually "covers" this area, creating the feeling of a separate architectural space within a large room.
In a bedroom with a 1.8 m wide bed, a molding contour on the ceiling 2.2–2.4 m wide above the bed area is an architectural "canopy" that makes the sleeping area distinct and complete without a canopy or upholstered headboard.
In a kitchen-living room, a molding contour can separate two functional zones on one ceiling: the dining area under one contour, the sofa area under another. Visual zoning without walls or partitions.
For corner joints of ceiling contour moldings, use Decor for Molding — corner overlays and decorative rosettes that "close" the contour at turning points. This is an important detail: an uncovered corner looks like unfinished work. A decorative corner turns the joint into an architectural accent.
The ceiling as the "fifth wall": why this is especially important now
For many years, the ceiling in interior design was "obligatory" — it was whitewashed, leveled, sometimes stretched — and then forgotten. This was considered the norm. But the norm is changing.
Today, the ceiling is increasingly viewed by designers as a full-fledged surface deserving the same decorative treatment as walls. Recessed lighting, coffered ceilings, tray ceilings, geometric coffers, contour lighting — all these are manifestations of one trend: the ceiling becomes the "fifth wall," visible from any point in the room and influencing the perception of space more than any other surface.
And crucially: to create expressive ceiling decor, you don't need to change the structure. Polyurethane rosettes, moldings, and Polyurethane ceiling decoration deliver results comparable to expensive construction solutions — for incomparably less money and without major renovations. The rosette is glued in a few hours. The molding contour is installed in a day. This is accessible architecture.
Ready-made ceiling decor sets: a system solution without independent design
Special attention deserves the ready-made ceiling decor sets of the CPU-P series from the STAVROS catalog — CPU-P1, CPU-P2, CPU-P3, CPU-P4, CPU-P5, CPU-P6. These are designed ceiling systems for a 3200×3200 mm area, where the scale of the cornice, molding profile, ornamental overlays, and central element for the chandelier are coordinated.
The principle of the series is from laconic to monumental. CPU-P1 is a basic three-contour system, ideal for small rooms. CPU-P6 is a monumental multi-level architecture with 15 types of products and the central system MLDPU-027 for formal spaces. Each set includes cornice A130V1 (100×83 mm) with a slot for LED strip, molding contours, ornamental overlays, and a central decorative element for the chandelier mounting point.
The advantage of a ready-made set is a unified ornamental language: scales are coordinated, stylistics are verified, the layout scheme is tested in completed projects. You don't need to independently select what goes with what — the system is already designed.
Four scenarios: how to assemble a ceiling center for different tasks
Scenario one: chandelier in the living room
The living room is a space where ceiling decor is visible from any point and under any lighting. Here it's important not to make a mistake with the scale: a too small rosette under a large chandelier looks helpless, a too heavy contour in a small living room feels oppressive.
Optimal solution for a living room of 20–35 sq. m:
-
Ceiling rosette with a diameter of 35–50 cm
-
Molding contour (square or rectangle) proportionate to the sofa group
-
Decorative corner elements at the joints of moldings — Decor for Molding
-
Perimeter cornice throughout the living room
-
Uniform painting in the color of the ceiling
Link for this scenario: Buy ceiling molding — ready-made sets of the CPU-P series for living rooms of various sizes.
Scenario two: pendant over the dining table
A pendant light over the dining table is the most "focused" scenario. One point of light, one functional zone, clear geometry of the table beneath it. Here, the molding contour works especially expressively: a rectangular frame on the ceiling above the table literally "outlines" the dining area, giving it architectural independence.
Optimal solution:
-
A calm, neutral-shaped rosette — without complex ornamentation, if the style is modern
-
A rectangular molding contour that repeats the proportions of the table (±20 cm on each side)
-
Decorative corner rosettes at turning points
-
Painting in the ceiling color — a unified system
For this scenario: Buy polyurethane moldings — a wide selection of profiles from thin (for modern interiors) to wide classic ones.
Scenario three: bedroom
The bedroom is a special space. Here a person spends a third of their life looking at the ceiling. And that is why ceiling decor in the bedroom has special value: it creates a feeling of an architectural refuge, a personal space with thoughtful details.
Delicacy is important for the bedroom. A heavy ornamental ceiling with deep relief in a small bedroom is not the best choice. But a small rosette with an elegant profile and a thin molding contour above the bed — that is exactly what is needed.
Optimal solution:
-
Ceiling rosette with a diameter of 20–30 cm — delicate, with a thin ornament
-
Soft square or rectangular outline made of thin molding (profile 30–40 mm)
-
Painting in the color of the ceiling — mandatory
-
Light source — preferably with a dimmer so that the relief 'reveals' in the evening with dimmed light
For this scenario: ceiling rosettes — a category with a wide selection of diameters and profiles for a bedroom of any size.
Scenario four: hallway and entrance area
A high hallway in a country house, a double-height hall, a grand foyer — here the ceiling decor must be proportionate to the scale of the space. A small rosette under a monumental crystal chandelier in a double-height hall with a 5 m ceiling is almost a mockery of architecture. A system is needed here: a large rosette, a wide molding outline, ornamental overlays in the field between the outline and the rosette.
Optimal solution:
-
Large rosette with a diameter of 60–80 cm — with an expressive ornamental relief
-
Wide molding outline (profile 80–120 mm) with a double frame
-
Ornamental overlays along the axes of symmetry between the outline and the rosette
-
Decorative corner elements with developed ornamentation
-
Perimeter cornice around the entire room with ceiling plinth
For this scenario: Buy moldings — a complete catalog of polyurethane stucco decor for formal spaces of any scale.
How to choose molding for a ceiling contour: details matter
Ceiling molding is not the same as wall molding. On the ceiling, the profile works differently: it is viewed from below, at an acute angle, under diffused or directional light. This changes the requirements for profile selection.
Principles for selecting a profile for ceiling molding
Laconic geometry is better than complex ornament. On ceiling molding, detailed ornament is almost invisible under normal lighting — too far away and too acute a viewing angle. A clear profile with simple geometry works: a straight chamfer, stepped ledge, smooth rounding. Such a profile creates an expressive shadow under side lighting and reads clearly even from a distance of 4–5 meters.
Width is proportional to the scale of the contour. Thin molding (20–30 mm) for a small inner contour. Medium (40–60 mm) for the main framing contour. Wide (70–100 mm) for the outer perimeter of a zone or for a formal double frame. Mixing widths in one contour is an interesting technique: the outer frame is wider, the inner one is thinner.
Vertical and horizontal elements. On the ceiling, 'vertical' and 'horizontal' in the usual sense are absent — there is only the geometry of the frame. But if the molding contour is oriented along the long axis of the room, it visually 'stretches' the ceiling. If across, it makes it more square and stable.
buy polyurethane moldings for a ceiling contour, it is recommended with a margin of 15–20% — part will go to cutting corners and inevitable first installation errors. Moldings are cut with a knife or miter box at 45° for internal corners of a rectangular frame.
Corner elements: the detail that completes everything
An unclosed corner of a molding contour is a visual "splinter." The joint of moldings is always noticeable upon close inspection if it is not hidden by a decorative corner element. Decor for Molding — special corner covers and rosettes that are installed at the turning points of the contour. They not only hide the joint — they turn the corner into a decorative accent. A small rosette in the corner of a square contour is a "punctuation mark" that makes the system complete.
Mistakes when choosing ceiling stucco for a chandelier
Mistake one: choosing a rosette only "for beauty"
The most common one. The rosette looks beautiful in the catalog — and it is bought without correlating with the size of the chandelier, ceiling height, and room scale. The result is either a tiny rosette under a huge chandelier or a monumental rosette under a modest pendant. The beauty of the detail does not compensate for the disproportion.
Solution: first the chandelier size → then the rosette diameter according to the matching table → then the choice of profile and ornament.
Mistake two: a small rosette in a large living room without a molding contour
A rosette with a diameter of 25 cm on the ceiling of a 35 sq. m living room with a ceiling of 2.9 m is a dot on a white plane. It exists but organizes nothing. For a large living room, a rosette without a molding contour is an incomplete solution. Add Moldings made of polyurethane around the central zone — and the rosette immediately acquires the necessary scale and significance.
Mistake three: too ornate ceiling with an expressive chandelier
If your chandelier is a large designer piece with a rich form and complex structure, it doesn't need equally elaborate ceiling decor. In this case, an ornamental rosette will compete with the light fixture — and both elements will lose. For an expressive designer chandelier, it's better to choose a calm molding outline with a small, delicate rosette. The decor supports the light fixture — it doesn't compete with it.
Mistake four: ceiling decor without connection to wall decor
A ceiling rosette and molding outline existing on their own with completely bare walls — that's a "ceiling with decor" and "walls without decor." Dissonance. The ceiling Polyurethane moldings works best when the walls also have at least a minimal decorative element: a ceiling molding or cornice around the perimeter, floor moldings. This creates an architectural "frame" for the room on all surfaces.
Mistake five: contrasting paint on molding without a well-thought-out concept
A white rosette on a colored ceiling is a decorative statement. It can work, but requires confidence. If not — paint it Buy ceiling stucco molding the same color as the ceiling itself. Monochrome painting is always correct: the relief is revealed by light, not color, and it looks professional in any interior style.
Selection table: task — solution — where to buy
| Task | What to buy | Category |
|---|---|---|
| Need a center for the chandelier | Ceiling rosette of the required diameter | ceiling rosettes |
| Need to design a large ceiling | Socket + molding contour + ready-made kit | ceiling decor |
| Need a contour around the chandelier | Polyurethane moldings of the required profile | Moldings and cornices |
| Need decorative corners for the contour | Corner overlays, corner sockets | Decor for Molding |
| Need all stucco in one section | Full catalog of polyurethane products | Polyurethane Items |
| Need to connect the ceiling with the walls | Decorative overlays, stucco decor | Overlays and stucco decor |
How to paint ceiling stucco: technical minimum
Proper painting is half the success. Even the most beautiful rosette will look bad if the paint is applied unevenly or if the joint between the rosette and the wall remains rough.
Step 1: Surface preparation. The ceiling is primed before installing the stucco. The rosette and moldings are primed separately — with a thin layer of acrylic primer. This ensures even paint absorption.
Step 2: Installation. The rosette is glued with mounting acrylic glue without nails or drilling. Moldings — with the same glue. Joints at corners — 45° for a rectangular contour.
Step 3: Puttying joints. All joints between the stucco and the ceiling are puttied with a thin layer of finishing putty and sanded. This makes the transition "invisible."
Step 4: Painting. Matte water-based paint, two coats with intermediate drying. Color — the same as the ceiling. Brush — for relief details, roller — for flat surfaces.
Step 5: Final detailing. Optionally — light patina on relief details: a thin layer of darker or lighter paint applied with an almost dry brush. This reveals the depth of the relief and adds "age" to the decor.
FAQ: answers to popular questions about ceiling stucco under a chandelier
Which ceiling stucco should I buy for under a chandelier first?
Start with a ceiling rosette. This is the minimal and most obvious step that immediately yields results. If you want more, add a molding contour. If you need a complete system, look at ready-made kits from the CPU-P series.
Can a ceiling rosette be used in a modern interior without classic stucco on the walls?
Yes. For a modern interior, choose a rosette with a minimalist profile, paint it the color of the ceiling, and it will look like an architectural detail, not like "classic decor in a non-classic interior."
What is better: a single rosette or a rosette with a molding contour?
For small rooms (up to 20 sq m), a rosette is often enough. For living rooms, dining rooms, and halls of 25 sq m and above, a rosette plus a molding contour. The contour provides scale and completeness that a rosette alone cannot achieve.
Do I need to paint ceiling stucco?
Yes, definitely. Polyurethane decor comes from production with a basic white color, but without painting it looks unfinished. One coat of primer plus two coats of matte paint in the ceiling color, and the decor becomes part of the architecture.
What should I buy together with a ceiling rosette and moldings?
Standard kit: acrylic mounting adhesive, finishing putty for joints, acrylic primer, matte paint in the ceiling color, decorative corner elements for molding joints. For a more complex system, a ceiling cornice around the entire perimeter of the room.
How long does a polyurethane rosette last on the ceiling?
With proper surface preparation and installation on high-quality adhesive, it lasts for many years without signs of delamination. Polyurethane does not react to humidity and temperature changes, does not crack, and does not crumble. It can be repainted at any time without removal.
Is polyurethane ceiling decor suitable for an apartment with a drywall ceiling?
Yes, this is exactly the case where polyurethane is preferable to plaster. Light weight (a 40 cm diameter rosette weighs 200–400 g), installation with adhesive without anchor fastening — ideal for drywall structures.
About the Company
The entire range of ceiling rosettes, moldings, ready-made ceiling kits, and decorative elements for creating an architectural ceiling center is presented in the STAVROS catalog. STAVROS produces items from polyurethane and HIWOOD polystyrene with precise relief, balanced proportions, and readiness for painting without additional processing.
STAVROS is a system: a rosette for the chandelier, a molding contour around it, decorative corner elements, and a ceiling cornice around the perimeter of the room. All elements are designed as parts of a unified decorative language — from the basic rosette to the monumental ceiling kit CPU-P6. This means: whatever you choose from the STAVROS catalog, it will work together with other items.
An expensive chandelier should not hang on an empty ceiling. The STAVROS catalog has everything you need to give your light fixture the architectural pedestal it deserves.