Article Contents:
- Why a wall with a built-in wardrobe looks unfinished
- Where stucco decor near the wardrobe is especially needed
- Bedroom: wardrobe by the bed, opposite, next to the mirror
- Hallway: sliding wardrobe at the entrance, mirror and ottoman area
- Dressing room: wardrobes, open sections, fitting area
- Living room: wardrobe near the TV area or built-in storage system
- Children's room: floor-to-ceiling wardrobe and calm decor without overload
- Six working schemes for designing a wall with a built-in wardrobe
- Scheme 1. Moldings as architectural framing of the cabinet
- Scheme 2. Moldings and frames on free wall sections next to the cabinet
- Scheme 3. Cabinet in wall color plus molding rhythm
- Scheme 4. Molding frames on wall sections visually supporting the facades
- Scheme 5. Vertical moldings next to the cabinet for visual space elongation
- Scheme 6. Ready-made set of stucco decor on a free wall next to the cabinet
- Which polyurethane decor elements to use
- Moldings: linear elements for frames, borders, and lines
- Decor for moldings: corner inserts and transitions
- PU overlays: accent points in the system
- Baseboards and cornices: lower and upper connection
- How to choose moldings for a built-in wardrobe correctly
- Rule 1. Profile scale matches wardrobe scale
- Rule 2. Paneled doors — simpler moldings
- Rule 3. Door opening determines molding placement
- Rule 4. Molding color — from wall or from wardrobe
- Rule 5. Do not make frames smaller than wardrobe sections
- Rule 6. Consider sockets, switches, lighting
- Table: molding profiles for different situations near the wardrobe
- Style scenarios: how to design a wardrobe in different interiors
- Neoclassicism: symmetry, frames, classical rhythm
- Neoclassic Light: light frames, floor-to-ceiling cabinet, clean lines
- Modern Classic: single color, large frames, moldings without ornament
- Japandi: smooth facades, natural shades, minimal decor
- Versailles Light: expressive frames, overlays, classic formal interior
- Color Solutions: how to choose the color of moldings for the cabinet and wall
- Moldings in wall color
- Moldings in the color of the cabinet
- White moldings on a colored wall
- Monochrome System: cabinet, wall and moldings in one color
- Installation of moldings next to a built-in cabinet: procedure
- Full sequence
- Features of installation near cabinet doors
- Common mistakes when decorating a wall with a built-in wardrobe
- What to buy for decorating a wall with a built-in wardrobe
- Frequently Asked Questions

A built-in wardrobe is practicality in its purest form. It solves the storage problem radically: it occupies the wall from corner to corner, from floor to ceiling, absorbs square footage and gives volume in return. But this compromise has a downside that is rarely considered when ordering furniture: a large wardrobe turns the wall into a closed facade screen. And if it is not connected to the rest of the space, it will remain just a box placed against the wall. Expensive, convenient, but alien.
This is where the work ofstucco decor for a wall with a built-in wardrobebegins. Polyurethane moldings, frames, cornice belts, baseboards, overlays and decorative elements turn the furniture volume into an architectural part of the wall. The wardrobe ceases to be "placed" — it becomes truly "built-in": integrated into the interior, connected to it by horizontal and vertical lines, unified in color and rhythm.
This article is a detailed breakdown of exactly how this is done. With diagrams, rules for selecting profiles, style scenarios, error analysis, and answers to questions that arise for everyone who faces this task.
A built-in wardrobe occupies most of the wall, so it is important to connect it with the interior.Polyurethane moldings and stucco decor STAVROShelp to design the wardrobe, the piers, and adjacent areas as a single architectural composition.





Why a wall with a built-in wardrobe looks unfinished
Let's honestly name the problem. A built-in wardrobe is a rectangular volume that occupies 30 to 100% of the wall's width. Its facades — smooth, flat, or with laconic inserts — create a monotonous field that, despite all its neatness, lacks architectural depth. Next to such a wardrobe, the wall — if left unfinished — looks like an incomplete renovation.
Three visual conflicts occur most often.
First. The wardrobe up to the ceiling blocks the cornice belt or simply "breaks off" at the ceiling without logic. The horizontal line above the wardrobe is not emphasized — and the top of the furniture looks like a random cut.
Second. The piers next to the wardrobe remain empty. If the wardrobe occupies 60% of the wall's width, the remaining 40% is a bare plane that does not rhyme with either the facades or the rest of the interior.
Third. The baseboard that runs along the entire wall "breaks" at the wardrobe or changes height — and the wall falls apart into fragments.
Moldings around the built-in wardrobeeliminate all three conflicts. They create vertical and horizontal lines that unite the furniture volume and the wall into a single system. The wardrobe ceases to be a foreign body — it becomes part of the architectural rhythm of the room.stucco decor behind furniture— about the principles of linking furniture volumes with decorative wall systems.




Where stucco decor near the wardrobe is especially needed
Our factory also produces:
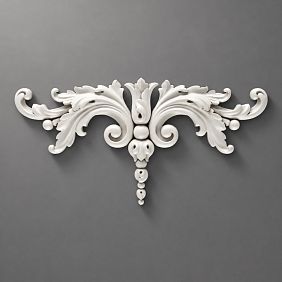


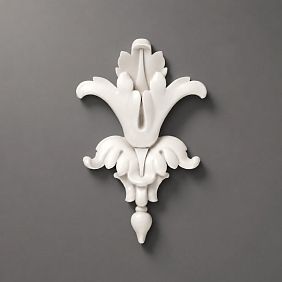
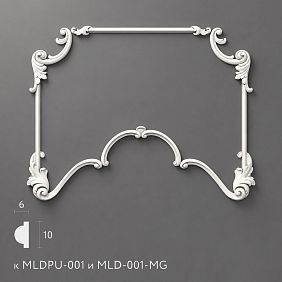
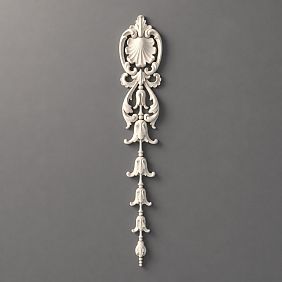
Bedroom: wardrobe by the bed, opposite, next to the mirror
In the bedroom, a built-in wardrobe is most often located on one of the side walls — by the bed or opposite it. Both positions create different tasks.
Wardrobe by the bed: you need to visually connect it with the headboard. A molding belt running at the same height across the wall with the wardrobe and across the wall behind the bed creates a horizontal connection. The decor does not extend over the wardrobe — it continues on the free wall sections nearby.
Wardrobe opposite the bed: its facades are the first thing a person sees when waking up. Smooth white planes without decor are boring.Moldings near the wardrobe in the bedroomon the side wall sections, vertical rhythm of frames, cornice connected to the top line of the wardrobe — and the wall gains character.
Dressing table or chest of drawers area near the wardrobe: here work wellPU overlaysand frames from moldings above the mirror. The wall section between the wardrobe and the mirror is the most precise place for a decorative molding accent.
Get Consultation
Hallway: sliding wardrobe at the entrance, mirror and bench area
In the hallway, a built-in wardrobe is typically a sliding-door wardrobe spanning the entire width of the wall. It creates a powerful facade screen at the entrance.Decor of the wall with a sliding-door wardrobe in the hallway— about specific design schemes for corridor and hallway areas with built-in wardrobes.
The task here is twofold: to decorate the wall sections next to the wardrobe and to connect it with the baseboard, cornice, and door trims. If the trims and moldings are made in the same profile, the space is perceived as complete and well-proportioned.
The mirror and bench area next to the sliding-door wardrobe is a separate decorative focal point. A molding frame around the mirror, a vertical molding along the side of the bench, a horizontal band at a height of 90–100 cm — a small but convincing decorative ensemble.
Dressing room: wardrobes, open sections, fitting area
A dressing room is a space where built-in furniture occupies almost all the walls. Here, Stucco decor for walls in a dressing roomworks on a different principle: moldings do not frame the wardrobe from the outside (there are too many wardrobes), but instead decorate the free zones between sections — the mirror area, the wall opposite the exit, the fitting area.
symmetric polyurethane wall decorin the dressing room are vertical frames between open sections, a horizontal band at shoulder height, and a cornice that unifies the top line of all wardrobes.
Living room: wardrobe near the TV zone or built-in storage system
In the living room, a built-in wardrobe often coexists with a TV zone or is part of a built-in furniture system: wardrobe — open shelves — TV — wardrobe again. The task of moldings here is to unite this horizontal system into a single wall panel.
A horizontal molding belt at a height of 180–200 cm runs across the entire wall, including wardrobe facades (if they allow) and free wall sections. This is a simple technique that immediately elevates the perception of the interior — and does not require complex decor.
Children's room: wardrobe up to the ceiling and calm decor without overload
In a children's room, a built-in wardrobe up to the ceiling is the norm, not an exception. Here, the decor should be delicate:Thin polyurethane moldings for walls15–22 mm wide in the color of the wall, simple rectangular frames on free wall sections, without ornaments and classic overlays. The child grows — and the interior should be a neutral background, not an overloaded decorative system.
stucco decor for a small apartment— about the principles of working with decor in small spaces, including children's rooms with built-in wardrobes.
Six working schemes for decorating a wall with a built-in wardrobe
Scheme 1. Moldings as an architectural frame for the wardrobe
The most radical and most convincing technique.Moldings around the built-in wardrobeare mounted around the perimeter of the furniture block: vertical profiles on the sides of the wardrobe, a horizontal belt above the wardrobe (if there is a gap to the ceiling) or a cornice running along the entire wall at the level of the wardrobe's top line. The baseboard at the bottom is of the same style as the moldings.
Visual result: the cabinet looks like a built-in architectural element — like an alcove, a niche, a built-in section with doors. Not furniture against the wall, but furniture in the wall.
Technical nuance: the molding is mounted on the wall, not on the cabinet facade. The vertical profile runs from ceiling to baseboard — along the wall next to the cabinet side panel. Distance between the profile and the facade: 10–20 mm — for the gap when opening doors.
Scheme 2. Moldings and frames on free wall sections next to the cabinet
When the cabinet occupies part of the wall, wall sections remain on its sides. Bare wall sections next to a large furniture block is a typical mistake of an unfinished renovation.
Frames from moldings next to the cabinet — one or several rectangles, proportional to the width of the wall section and the room height. Important: the frame size should be proportionate to the wall section width. If the wall section is 60 cm — the frame should not be wider than 45 cm, otherwise it will hit the edges. If there are two wall sections (on both sides of the cabinet) — the frames are made symmetrical.
Inside the frames, you can leave just a painted wall — and that is enough. Or add aPU overlay in the center of the frame as an accent element.
Scheme 3. Cabinet in wall color plus molding rhythm
One of the most complex and most striking options is when the cabinet fronts are painted the same color as the wall. The boundary between the cabinet and the wall disappears. The room is perceived as a single whole: a wall with niches, behind which is storage.
On such a monochrome surface,moldings next to the cabinetwork especially expressively: the relief of the profile is visible due to shadows, not due to color contrast. This requires precise geometry and flawless installation — any curvature will be noticeable on a monochrome surface.
stucco decor in the color of the wall or contrasting — about two approaches to the color of moldings in systems with cabinets and built-in furniture.
Scheme 4. Frames made of moldings on the piers, visually supporting the facades
If the cabinet fronts are smooth — wall frames on the sides create a decorative rhythm that "rhymes" with the vertical lines of the cabinet. The frames do not copy the facades — they continue their logic. The width of the frames is in scale with the pier. Vertical orientation of the frames is mandatory if the cabinet is tall.
If the cabinet fronts are already decorated — with panels, frames, or texture — the wall decor should be calmer to avoid competition. In this case, one horizontal molding belt is better than several frames.
Scheme 5. Vertical moldings next to the cabinet for visually stretching the space
Vertical profiles — from the baseboard to the cornice — mounted on the piers next to the cabinet, work as visual "columns." They stretch the space upward, make the ceiling-height cabinet lighter, and the room taller.
For hallways and entryways, this is especially relevant: a narrow space with vertical moldings on the walls is perceived as an enfilade rather than a tunnel.Wall decor in the entryway and hallway made of polyurethane— with a detailed breakdown of vertical schemes for corridor spaces.
Spacing of vertical moldings: 50–80 cm for standard ceiling height (2.7–3.0 m), 60–100 cm for high ceilings (3.0–3.5 m and above). Profile width: 18–35 mm depending on ceiling height and space scale.
Scheme 6. Ready-made set of stucco decor on a free wall next to a wardrobe
If one wall is occupied by a wardrobe, the adjacent wall is free — and it is often left unattended.Ready-made molded decor kitsallow you to design the free wall systematically: selected moldings, decorative elements, and overlays in a unified style, without independent calculation.
Such a set on the wall opposite or next to the wardrobe creates decorative balance: a furniture block on one side, a decorative wall on the other. The space gains rhythm.
For framing the wardrobe and designing adjacent piers, the following are suitableMoldings made of polyurethane. If a more expressive composition is needed, you can addDecor for MoldingandPU overlays.
Which polyurethane decor elements to use
Moldings: linear elements for frames, borders, and lines
Moldings made of polyurethane — the foundation of any decorative system next to the cabinet. These are linear profiles that form frames, vertical and horizontal lines, and the framing of the furniture block.
Key parameters when choosing:
-
Profile width: from 12 mm (thinnest, for modern and Japandi interiors) to 55–70 mm (classic, for neoclassical and Versailles Light);
-
The profile is flat or convex — for walls next to the cabinet, a flat or slightly convex profile without deep relief usually works best;
-
Plank length: standard 2 m, convenient for calculation and transportation.
Decor for moldings: corner inserts and transitions
molding decorative elements — these are corner inserts that are mounted in the corners of frames instead of a 45° miter cut. They allow you to assemble the frame faster and achieve an expressive classic or neoclassical corner.
Corner inserts are important when frames are large (from 80 cm per side) and when the interior style involves decorative detailing. For minimalist interiors and Japandi, corner inserts are not needed; a 45° miter cut provides a clean geometric corner.
PU overlays: accent points in the system
Polyurethane appliqués — these are medallions, cartouches, decorative overlays that are mounted in the center of the frame, above the frame, or as separate accent elements on the wall.
In a system with a cabinet, overlays are appropriate on free wall sections — where a molding frame already exists and a central decorative point is needed. Above the cabinet, if there is a gap to the ceiling, a PU overlay can become the central element of a horizontal strip.
Baseboards and cornices: lower and upper connection
These are the most underestimated elements of the system — and the most important.Polyurethane molding for interiorincludes baseboards and cornices of all formats. They create the horizontal lines that unify the cabinet and the wall from below and above.
The principle is simple: the baseboard should run continuously along the entire wall — both under the cabinet (if the cabinet is on legs or there is a base gap), along the wall sections, and across the entire space. The cornice is similar: a single line along the entire length of the wall, including the area above the cabinet.
how to combine stucco decor with baseboards and cornices— a systematic guide to connecting horizontal interior elements.
How to properly choose moldings for a built-in cabinet
Choosing a profile is both a technical and stylistic task. There is no universal answer to the question "which molding to choose for a wall with a cabinet" — there are several precise rules that work in different situations.
Rule 1. Profile scale — to the scale of the cabinet
If the cabinet is tall (2.4–2.7 m and above) and wide (from 2 m), the frames next to it should be large, and the profile should be no thinner than 28–35 mm. A thin molding next to a large furniture volume will be lost and look random.
For a wardrobe up to the ceiling in a narrow hallway, the proportion is different: vertical moldings 18–25 mm look neat and do not overload the narrow space.
Rule 2. Facades with panels — simpler moldings
If the wardrobe facades already have relief — their own frames, panels, routing — the wall moldings should be calmer. Two different decorative rhythms next to each other create visual overload. One horizontal band instead of a system of frames is the right solution.
If the facades are smooth — wall frames made of moldings can be expressive: they create the necessary decorative rhythm against the background of neutral planes.
Rule 3. Door opening determines the placement of moldings
This is a practical, not an aesthetic, question.moldings next to the cabinetThey should not interfere with the opening of the facades. For a hinged wardrobe: the molding on the side wall is mounted behind the line of the open door — with an indent of at least 50–60 mm from the edge of the door in the open position.
For a sliding wardrobe with sliding doors: the molding can be placed flush against the side wall of the wardrobe, as the doors move parallel to the wall.
Rule 4. Color of the molding — from the wall or from the wardrobe
Two polar approaches. Moldings in the color of the wall: the decor blends with the background, the relief is visible due to shadows, the effect is restrained and expensive. Moldings in the color of the wardrobe: the furniture block and wall decor are read as a single system. White moldings on a colored wall — a graphic, contrasting accent.
Rule 5. Do not make frames narrower than cabinet sections
If the cabinet section width is 60 cm, the frames on the wall should be no narrower than 45–50 cm. Small frames next to a large cabinet look cluttered.
Rule 6. Account for sockets, switches, and lighting
Before marking moldings, it is necessary to record the position of all sockets, switches, and lighting outlets. Molding lines must not intersect with these elements: a profile cut by a socket is an irreparable mistake.
Table: molding profiles for different situations next to a cabinet
| Situation | Recommended profile | Approximate width |
|---|---|---|
| Vertical lines next to a tall cabinet | Flat or slightly convex | 22–35 mm |
| Horizontal band above the cabinet | Flat with cornice profile | 35–55 mm |
| Frames on walls (neoclassical) | Convex with corner inserts | 30–45 mm |
| Frames on piers (modern classic) | Minimalist rectangular | 25–38 mm |
| Cabinet perimeter framing | Rectangular, sharp edges | 28–42 mm |
| Thin lines (Japandi, minimalism) | Flat minimalist | 12–20 mm |
| Dividing horizontal belt | Shelf or flat | 25–40 mm |
| Cornice connecting cabinet to wall | Cornice profile | 45–90 mm |
Style scenarios: how to design a wardrobe in different interiors
Neoclassicism: symmetry, frames, classical rhythm
Wardrobe and moldings in neoclassicism — this is strict symmetry, expressive frames with corner decorative inserts on the piers, a baseboard 80–120 mm, a cornice with a profiled section. The wardrobe is either built-in between two molding pilasters or framed around the perimeter.
Color: moldings white or matching the wall (cream, pearl, warm gray). The wardrobe — matching the moldings or slightly darker.Neoclassical Stucco Decor — a collection of system elements for such solutions.
Neoclassic Light: light frames, wardrobe to the ceiling, clean lines
Light wall decor with a wardrobe— for modern apartments that want a classic structure without heaviness. Thin profiles 22–30 mm, simple rectangular frames without corner inserts. Moldings in the color of the wall. Cabinet up to the ceiling without visible gap. Thin cornice, 45–55 mm. CollectionNeoclassic Light— delicate solutions for this approach.
Modern classic: single color, large frames, moldings without ornament
Cabinet in the color of the wall. Moldings in the same color or a close shade. No ornament — only clean rectangular profiles. Large frames on the walls, cornice 60–80 mm. The entire effect is due to light, shadows, and proportions.polyurethane wall moldings— complete catalog of laconic profiles for this style.
Japandi: smooth facades, natural shades, minimal decor
Smooth cabinet facades in dry clay, sage, whitewashed wood, or dark graphite. Thinnest molding 12–18 mm in the color of the wall on the wall — one or two frames. No corner inserts, no overlays. Meditative emptiness.Cabinet and moldings in Japandi style— Japandi collection with suitable profiles.
Versailles Light: expressive frames, overlays, classic formal interior
Classic wall decor with a wardrobe — for formal spaces with high ceilings. The wardrobe is white or ivory. Moldings with corner inserts,Polyurethane decorative appliques above the frames, a powerful cornice 80–120 mm. Solemn, elegant, convincing. CollectionVersailles Light — system elements for such interiors.
Color solutions: how to choose the color of moldings for the wardrobe and wall
Color is the first question that arises when you see a wall with a wardrobe. And the most common source of mistakes.
Moldings in the color of the wall
The calmest, most modern option. The relief of the molding is read due to shadows — especially with side or directional light. The wardrobe stands out with its color or texture against the background of a neutral wall with relief. Works well in modern classic, neoclassical, minimalism.
Moldings in the color of the wardrobe
Helps to visually integrate the wardrobe into the wall. When the moldings on the piers are the same shade as the facades — the eye does not separate the wardrobe and the wall, but perceives them as a single volume with niches. This technique requires precise matching of tones — it is better to paint the moldings with the same paint as the wardrobe.
White moldings on a colored wall
Graphic contrast. A white profile on a blue, green, gray, or terracotta wall reads clearly and creates a classic "framed" feel. Suitable for neoclassical, hallway, bedroom. Not suitable for minimalism — too active contrast.
Monochrome system: cabinet, wall and moldings in one color
Premium option. Everything in one tone. Relief is created solely by light and shadow. Requires flawless installation and high-quality painting. Visual result: the space is perceived as a single architectural volume.polyurethane wall decor— elements for monochrome systems.
Installing moldings next to a built-in cabinet: step-by-step procedure
The question of what to install first — the cabinet or the moldings — has a clear answer: first the cabinet, then the moldings. Moldings are installed on the already installed cabinet, taking into account its exact dimensions and position.
Complete sequence
Step 1. Install the cabinet. Fix its exact position relative to the walls, ceiling and floor.
Step 2. Fix the position of all sockets, switches, lighting cables. Draw a diagram on paper or in your phone.
Step 3. Mark the moldings on the wall using a laser level. Mark with a pencil — not a marker.
Step 4. Cut the moldings. For frames — miter cut at 45°. For vertical lines — straight cuts. For cornice and baseboard — straight cuts, with adjustment at the joints near the cabinet.
Step 5. Apply mounting adhesive to the back surface of the molding. Press against the wall according to the markings. For long profiles, additionally secure with painter's tape until the adhesive sets.
Step 6. Install corner inserts and trims. Allow the adhesive to fully dry (12–24 hours).
Step 7. Fill the joints between the molding and the wall with putty, then sand. Paint the moldings with acrylic paint in the desired shade.
installing polyurethane molding — a complete professional guide on cutting corners, choosing adhesive, hidden joints, and final painting.installation of polyurethane molding — a guide for craftsmen working with polyurethane decor.
Installation features near cabinet doors
For a hinged cabinet: always open the door to its maximum position and ensure the molding markings are beyond the door's movement path. The minimum gap between the molding and the open door is 30–40 mm.
For a sliding wardrobe: doors move parallel to the wall, so moldings can be placed flush against the side panel of the cabinet. The only limitation is a finger gap when opening: at least 10–15 mm from the door edge.
Common mistakes when decorating a wall with a built-in wardrobe
Analyzing mistakes is part of a professional conversation. Knowing what not to do is as important as knowing what to do.
Moldings interfere with door opening. The most painful mistake is one that cannot be fixed without dismantling. Always check the opening trajectory before installation.
Frames do not match the scale of the cabinet width. A small frame next to a large cabinet looks random. The frame scale should be proportionate to the furniture volume.
Baseboard and cornice are not connected to the cabinet. The cabinet "hangs" in space without lower and upper lines. Continuous baseboard and cornice are mandatory.
Molding style does not match the facade style. Classic moldings with ornamentation next to a minimalist loft-style cabinet is a conflict with no winners.
Too many small elements. Three different types of moldings, overlays, corner inserts, and a horizontal band on a small wall section is overload. Fewer elements, more space between them.
Moldings are not leveled. A crooked molding next to precise geometric cabinet facades is a disaster. A laser level is mandatory.
Sockets fall into molding lines. Before installation — a diagram, on the diagram — all electrical points.
Decor breaks off at the cabinet edge without logic. If a horizontal band runs along the wall and reaches the cabinet, it should either "enter" the cabinet (i.e., continue on its facade) or stop symmetrically on both sides.
Moldings are not connected to door casings. In a hallway where a doorway is next to the cabinet, the molding and casing should be of the same profile or at least the same style. Otherwise, the space breaks into separate decorative fragments.
What to buy for decorating a wall with a built-in cabinet
Full list of elementsSTAVROSfor implementing a wall with a wardrobe:
-
Moldings made of polyurethane— profiles for frames, vertical lines, edging, cornices, and baseboards.
-
Polyurethane wall decor— decorative elements and systems for accent walls next to the wardrobe.
-
Decor for Molding— corner inserts for classic and neoclassical frame designs.
-
PU overlays— medallions and cartouches for accent areas next to the wardrobe.
-
Ready-made molded decor kits— for systematic design without independent calculation.
-
polyurethane interior items— full catalog: moldings, baseboards, cornices, decorative elements.
If you need to design a wall with a wardrobe in a unified style, use ready-made STAVROS collections:Neoclassical, Neoclassic Light, JapandiorVersailles Light— they help create a neat composition without random selection of elements.
Frequently asked questions
What to install first — the wardrobe or the moldings?
Always install the wardrobe first. Moldings are installed after the wardrobe is in place — taking into account its exact dimensions, door positions, and opening trajectories.
Can moldings be glued directly onto cabinet facades?
Technically — yes, if the facades are laminated or painted and have a sufficiently flat surface. PU mounting adhesive holds on most coatings. But it is more logical to mount the moldings on the wall around the cabinet — this gives a cleaner result and does not create a risk of damaging the facade during removal.
How to calculate frames from moldings next to a cabinet?
Frame width = wall width minus 8–12 cm indents on each side. Frame height = room height minus cornice and baseboard minus indents. For walls 40–60 cm wide — one frame. For walls 80–120 cm — one or two frames depending on height.Ready-made molding frames for the wall — with calculation diagrams.
How to design a cabinet in the color of the wall — practically?
Paint the wall and cabinet (facades) in the same shade with the same paint — this is the only way to get an exact match. Paint the moldings with the same paint after installation. The final coat — on the moldings, facades, and wall simultaneously, so there is no variation in shade.
Is a cornice needed if the cabinet goes up to the ceiling?
If the cabinet is flush with the ceiling — the cornice is mounted on the walls next to the cabinet, on the free wall sections. It creates a horizontal line that visually 'continues' the top plane of the cabinet across the entire space. Without a cornice — the decorative system seems incomplete.
What style of moldings to choose for a sliding wardrobe with mirrored doors?
Mirror facades are neutral and reflective. Both classic frames and minimalist vertical profiles work well next to them. The key rule: don't compete with the mirror — moldings should match the wall color, not contrast.Thin polyurethane moldings for walls — for delicate design next to mirrored sliding wardrobes.
How to make a wardrobe visually less bulky?
Three techniques: paint the wardrobe the same color as the wall (it will 'dissolve'); add vertical moldings nearby to stretch the space upward; install a cornice at the level of the wardrobe's top line so the wardrobe becomes 'part' of the horizontal line rather than a separate volume. All three techniques can be combined.symmetric polyurethane wall decor — about working with large furniture volumes and wall rhythm.