Article Contents:
- Types of wall molding: designer's toolkit
- Moldings: universal lines
- Decorative overlays: ornamental accents
- Wall rosettes: medallions on vertical surfaces
- Pilasters and Half Columns: Vertical Architecture
- Corner elements and brackets
- Creating decorative panels: the mathematics of beauty
- Layout principles: golden ratio and rule of thirds
- Calculating material quantities
- Wall marking: precision is the foundation of quality
- Molding installation: step-by-step technology
- Boiserie: classic luxury in an accessible way
- Classic boiserie scheme: three-tier structure
- Modern interpretation: simplified boiserie
- Color solutions for boiserie
- Materials for filling panels
- Vertical zoning of long walls: rhythm and proportion
- Rhythmic division: repeating verticals
- Pilasters as architectural accents
- Asymmetric zoning: dynamics instead of statics
- Accent wall: focal point in bedroom and living room
- Accent wall in bedroom: behind the headboard
- Accent wall in living room: behind sofa or television
- Framing paintings and mirrors: instead of traditional frames
- Framing mirrors with moldings
- Framing paintings and posters
- Gallery wall with unified framing
- Wall protection from damage: practical function of molding
- Molding at chair back height
- Protection in children's rooms
- Protection in corridors and hallways
- Frequently asked questions about wall moldings
- Can molding be mounted on wallpaper?
- How to calculate panel height for a standard apartment?
- What width of molding should I choose for decorative panels?
- Can moldings be painted a color other than white?
- How much does it cost to create decorative panels with moldings?
- How to care for wall moldings?
- Can moldings be removed without damaging the wall?
- How long does it take to create decorative panels?
- Conclusion: The wall as an architectural work

A wall is not just a vertical surface dividing space. It is a canvas on which the architect and designer create composition, rhythm, volume, and the character of the interior.polyurethane wall moldingIt transforms a smooth plane into an architectural work, where every line, every relief, every shadow carries meaning. Decorative panels made of moldings divide the wall into proportional sections, creating a rhythmic structure. Overlays add ornamental accents. Rosettes become sculptural medallions. All of this is accessible, practical, and beautiful.
Why has polyurethane conquered the wall decor market? Because it combines opposites: the beauty of classical moldings and the simplicity of modern technology. Lightweight – adheres without reinforcing walls, does not create load. Durable – does not crumble, does not crack from vibrations and minor impacts. Moisture-resistant – suitable for any room, including bathrooms and kitchens. Affordable – price several times lower than plaster or carved wood. Diverse – hundreds of profiles, sizes, designs to realize any ideas.
This article is a practical guide to working with polyurethane wall moldings. We will analyze types of elements, learn how to calculate and mark decorative panels, create classic boiserie, zone long corridors, decorate accent walls in bedrooms and living rooms, frame mirrors and paintings. All with specific dimensions, diagrams, technologies – so you can implement it yourself or competently assign the task to contractors.


Types of wall moldings: The designer's toolkit
Before designing, you need to know the tools. What elementsof polyurethane wall moldingsexist, how do they differ, what are they intended for?


Moldings: Universal Lines
Molding – a profiled strip that creates a relief line on the wall. This is the basic element from which most compositions are built. The length of a standard section is 200-240 cm, which allows mounting long runs with minimal joints.
Molding profiles. Simple – rectangular cross-section with a slight bevel or rounding, width 20-40 mm. Used in minimalist modern interiors where a thin line without decorativeness is needed. Medium – one or two beads, light ornamental elements (beads, ribbons), width 40-70 mm. Universal, suitable for most classical and neoclassical interiors. Wide – complex multi-stage profile with deep relief, ornaments, width 70-120 mm. For luxurious palace interiors where scale and richness of decor are needed.
Applications of moldings. Creating frames on walls (decorative panels). Horizontal division of the wall (separation into color or texture zones). Framing doors and windows (instead of or in addition to architraves). Masking joints of different materials (e.g., where plaster transitions to wooden panels). Protecting walls from damage (molding at chair back height protects the wall from impacts).
Our factory also produces:


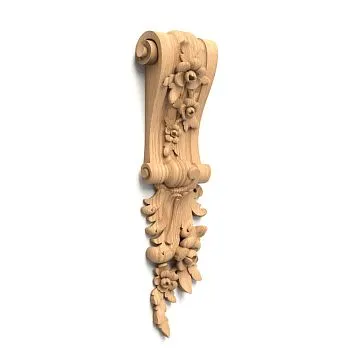
Decorative overlays: Ornamental accents
Overlays – flat or relief elements of various shapes that are glued to the wall as independent decorative objects or in combination with moldings. Sizes from miniature 5×5 cm to large 50×80 cm.
Shapes of overlays. Square and rectangular – imitate panels, used in corners of panels, create symmetrical compositions. Round and oval – rosettes, medallions, inserts in panel centers. Vertical – long narrow elements creating vertical accents, visually increasing room height. Ornamental – plant swirls, geometric patterns, stylized architectural elements, glued chaotically or according to a certain pattern.
Applications of overlays. Corner elements in molding frames (emphasize corners, enhance decorativeness). Central medallions in panels (focal point of the composition). Repeating ornaments along a line (create rhythm, richness). Framing mirrors, paintings, televisions (instead of traditional frames).
Get Consultation
Wall rosettes: Medallions on a vertical
Rosettes are traditionally associated with ceilings, but wall versions also exist. These are large round or oval elements 30-80 cm in diameter with relief ornamentation, glued to the wall as independent art objects.
Wall rosettes are used above fireplaces, at bed headboards, as central elements of accent walls, in halls and formal rooms to create solemnity. They perform the same function as paintings or panels – attract the eye, create a focal point, demonstrate status.
Pilasters and half-columns: vertical architecture
Pilasters – flat vertical elements imitating columns, consisting of a base (lower part), shaft (main part, smooth or fluted), and capital (upper decorative part). Height from 150 to 300 cm, width 10-20 cm.
Pilasters are glued to the wall in room corners, on the sides of door or window openings, on wide wall sections to create vertical rhythm. They visually raise the ceiling, create architectural solemnity, divide a long wall into sections.
Corner elements and brackets
Corner elements – special overlays placed at the junctions of moldings (especially when moldings meet at a right angle). They mask the joint, create a smooth transition, add decorativeness.
Corbels – elements glued to the wall that visually support a horizontal shelf, cornice, architectural element. Purely decorative function (do not bear structural load), but create an illusion of support, logical composition.
Creating decorative panels: The mathematics of beauty
Decorative panels made from moldings are a classic wall finishing technique that never goes out of style. Rectangular or square frames created by moldings structure the wall, create rhythm, proportionality, and architectural expressiveness.
Layout principles: the golden ratio and the rule of thirds
Random panel placement creates chaos. Professional placement creates harmony, which is perceived subconsciously. How to lay it out?
Golden Ratio. A classical proportion found in nature and art — a ratio of 1:1.618. If a wall is 270 cm high, divide it horizontally into two zones using the golden ratio: the lower zone 167 cm, the upper zone 103 cm. Or vice versa (depending on the task). Build the panels within the zones also according to the golden ratio — width to height 1:1.618 or close to it.
Rule of Thirds. Divide the wall into three equal parts horizontally and vertically. Place key elements (panel centers, accent overlays) at the intersections of the lines — these are points of natural visual attention.
Symmetry. In classical interiors, panels are placed symmetrically relative to the central axis of the wall. If a wall is 400 cm wide, create three panels — the two outer ones identical (120 cm each), the central one 140 cm (slightly wider for emphasis). The distances between the panels and from the wall edges are equal (10 cm each).
Asymmetry. In modern interiors, asymmetry is acceptable — panels of different sizes, offset from the center. But even asymmetry should be deliberate, not random. Use the rule of dynamic balance — a small panel on the left is balanced by two medium-sized ones on the right.
Material calculation
Before buying moldings, calculate the exact quantity. Measure the wall (length, height). Draw a diagram of the future panels with dimensions. Calculate the perimeter of each panel (sum of all sides). Add up the perimeters of all panels — you get the total length of molding needed. Add 10-15% as a reserve (for miter cuts, possible installation errors). Divide by the length of one molding section (usually 240 cm) — you get the number of sections.
Example. Wall 400×270 cm. Planning three vertical panels sized 110×200 cm each. Perimeter of one panel (110+110+200+200) = 620 cm. Three panels 620×3 = 1860 cm. Plus 15% reserve = 2140 cm. Divide by 240 cm (section length) = 8.9 sections. Round up to 9 molding sections.
Wall layout: precision is the foundation of quality
Preparation. The wall must be level, clean, and dry. If there are uneven spots, bumps, or depressions — fill, level, and sand them. The molding follows the wall's relief — on an uneven wall, it will be uneven, joints will separate, and corners won't meet.
Tools. Laser level (ideal) or a 120-150 cm long spirit level. Tape measure, pencil, ruler, square. Painter's tape (for temporary fixation during layout).
Horizontal layout. Mark the height of the bottom edge of the panels (usually 20-30 cm from the floor — to leave space above the baseboard). Draw a horizontal line along the level across the entire wall length. Mark the height of the top edge of the panels (e.g., 220 cm from the floor). Draw a second horizontal line. The distance between the lines is the panel height.
Vertical layout. Mark the width of the panels and the distances between them. Draw vertical lines using a level (use a plumb line or laser level in vertical mode). The intersections of horizontal and vertical lines are the corners of the future panels.
Check. Measure the diagonals of each marked panel. If the panel is rectangular, the diagonals must be equal. If not equal — there's an error in the layout somewhere, the corners are not right angles. Correct it before installation.
Installing moldings: step-by-step technology
Miter cutting. Moldings are joined at corners at a 45-degree angle (like a picture frame). Use a miter box and a fine-toothed saw or a miter saw. Measure the length of the panel side, cut the molding with a 2-3 mm allowance (adjust during installation). Both ends at 45 degrees, the cut direction is mirrored (one end to the left, the other to the right).
Applying adhesive. Use polyurethane adhesive or liquid nails for heavy materials. Apply adhesive to the back of the molding in a zigzag pattern or dots spaced 10-15 cm apart. Don't apply too much — excess will squeeze out when pressed, staining the wall.
Installation. Place the molding against the marked line, align it precisely with the layout, press evenly along its entire length. Hold for 1-2 minutes until the adhesive sets. For reliability, secure with painter's tape for 4-6 hours until the adhesive fully dries.
Corner joining. Corners must meet perfectly, without gaps or steps. If there is a small gap (up to 2 mm) — fill it with acrylic sealant after the adhesive dries. If the gap is larger or there is a step — redo it, precision is critical.
Sealing joints and painting. After the adhesive dries (24 hours), inspect the joints. Fill gaps with acrylic filler, smooth with a wet spatula, let dry (2-4 hours). Sand with fine sandpaper. Prime the filled areas. Paint the entire molding with acrylic paint in 2-3 coats. Painting after installation ensures uniform coverage — joints won't stand out.
Boiserie: classic luxury in an accessible way
Boiserie is a French term for wooden decorative panels used to clad walls in palaces and mansions of the 17th-19th centuries. Genuine boiserie made of carved wood is exorbitantly expensive, accessible to only a few.Polyurethane wall moldingallows you to create an imitation of boiserie for a reasonable price.
Classic boiserie scheme: three-tier structure
Traditional boiserie is divided into three horizontal tiers: the dado (lower part), the main zone (middle part with panels), and the cornice (upper part).
Dado. Height 20-40 cm from the floor. It is a horizontal strip, often finished in a dark color or with wooden panels. Framed top and bottom with moldings. Function — protects the lower part of the wall from damage, serves as the visual foundation of the composition.
Main zone. Height 120-180 cm (from the top of the dado to the start of the cornice). Here, decorative panels made from moldings are created — vertical rectangular frames, inside which the wall is painted a different color from the background, wallpapered, finished with fabric, or decorated with decorative plaster. The number of panels depends on the wall width — usually 3-5 panels on a wall 4-5 meters long.
Cornice. The upper part, transition from wall to ceiling. It is a wide horizontal molding (width 80-150 mm), often supplemented with decorative elements (brackets, consoles). Function — architectural completion of the composition, visual support for the ceiling.
Modern interpretation: simplified wainscoting
Full three-tier wainscoting is suitable for high rooms with ceilings from 3 meters. In standard apartments (ceiling height 2.5-2.7 m), a simplified version is used — a two-tier structure without a plinth.
The lower part of the wall (from the floor to a height of 100-120 cm) is highlighted with color, wallpaper, or wooden panels. It is framed at the top with a horizontal molding (width 40-60 mm). The upper part (from the molding to the ceiling) is painted in the main color or left white. A thin cornice (40-60 mm) runs under the ceiling.
Vertical panels are created on the lower part using moldings — 2-3 panels per wall. Inside the panels, the wall is finished the same as the rest of the lower zone, but the moldings create architectural structure, division, and rhythm.
Color solutions for wainscoting
Contrast scheme. The lower part is dark (graphite, dark blue, burgundy, emerald), the upper part is light (white, cream, light gray). Moldings are white, contrasting with both zones. Creates drama, expressiveness, characteristic of English and American classic interiors.
Monochromatic scheme. The entire wall in shades of one color — the lower part is 2-3 tones darker than the upper part, moldings are 1 tone lighter or darker. Creates subtlety, sophistication, depth without sharp contrasts.
Wallpaper scheme. The lower part is covered with patterned wallpaper (damask, stripe, geometry), the upper part is smooth painted. Moldings match the color of the upper part. Creates richness of texture, coziness, characteristic of classic and vintage interiors.
Materials for filling panels
What is placed inside the molding frames? There are many options. Paint — the simplest. Panels are painted in a color different from the background. Wallpaper — textile, vinyl, paper with a pattern. Creates texture, richness. Wooden panels — veneered or solid wood. Provides natural warmth, solidity. Decorative plaster — Venetian, textured, with marble, concrete, or fabric effect. Creates texture, tactility. Fabric — wall upholstery with textile (velvet, velour, linen). Provides intimacy, sound absorption, luxury.
The choice of material depends on the interior style, budget, and room function. For a bedroom, fabric is suitable (coziness, quietness). For a study — wood (solidity, status). For a living room — decorative plaster or wallpaper (beauty, representativeness).
Vertical zoning of long walls: rhythm and proportion
A long wall (more than 5 meters) without divisions looks monotonous, heavy, and oppressive. Vertical zoning with moldings and pilasters breaks it into sections, creates rhythm, and eases perception.
Rhythmic division: repeating verticals
Divide a long wall into equal sections with vertical moldings. Sections 80-120 cm wide (depending on the total wall length). Moldings run from floor to ceiling (or from baseboard to cornice), creating clear vertical lines.
Inside the sections, the wall can be uniform (all one color) or vary (alternating colors, wallpapers, textures). The first option creates a calm rhythm purely through architectural means. The second — more dynamic, with color accents.
Vertical moldings visually raise the ceiling, create slenderness, and structure the space. Especially effective in narrow long rooms (corridors, galleries).
Pilasters as architectural accents
Instead of simple moldings, use pilasters — flat columns with a base and capital. They create a more solemn, architectural division. Pilasters are placed at intervals of 150-200 cm, dividing the wall into wide sections.
Pilasters are glued to the wall either entirely (base at the floor, capital under the ceiling) or partially (only the upper or lower part). Panels are created between the pilasters using horizontal and vertical moldings, or the wall remains smooth.
Pilasters are suitable for high rooms (from 2.8 m), in low rooms they look bulky. Color — usually matching the walls or 1-2 tones lighter/darker.
Asymmetric zoning: dynamics instead of statics
It is not necessary to divide the wall into equal sections. Asymmetric zoning — when sections are of different widths — creates dynamics, modernity, interest. For example, a 600 cm wall is divided into three sections — 200 cm (left), 250 cm (central, accent), 150 cm (right).
The central section is highlighted with color, wallpaper, decorative plaster — this is the focal point of the composition. The side sections are neutral. Or vice versa — the central is neutral, the side ones are accent.
Asymmetry requires a subtle sense of balance. Incorrect size ratios create disharmony. Use the rule of dynamic balance — a smaller section is balanced by a larger one not by size, but by color/textural activity.
Accent wall: focus of attention in the bedroom and living room
Accent wall — one wall in a room, highlighted by color, wallpaper, texture, decor.Polyurethane stucco on wallsenhances the accent, creates an architectural frame for the accent.
Accent wall in the bedroom: behind the headboard of the bed
The wall behind the headboard is a natural place for an accent in the bedroom. It's where the gaze lingers, the compositional center of the room. How to use molding?
A large frame made of moldings. Create a rectangular frame slightly wider than the bed (if the bed is 160 cm, the frame is 180-200 cm), with a height from the top of the headboard to the ceiling or 50-70 cm above the headboard. Inside the frame, the wall is painted in a contrasting color (e.g., the room walls are light gray, the accent is dark blue) or covered with patterned wallpaper. Molding width 50-80 mm, profile classic or modern — depending on the bedroom style.
Several panels. Instead of one large frame, create 2-4 small panels, positioned symmetrically relative to the center of the bed. Panel size 60×80 cm or 70×100 cm. Inside the panels, the wall differs from the background (color, wallpaper, fabric). Moldings are thin (30-50 mm), delicate.
Volumetric overlays. Place decorative overlays on the accent wall — rosettes, medallions, ornamental elements. They are glued chaotically or according to a specific pattern (symmetry, grid), creating relief, play of light, richness of decor.
Accent wall in the living room: behind the sofa or TV
In the living room, there are two typical places for an accent wall — behind the sofa (if the sofa is not centered but against a wall) or behind the TV (TV zone).
Behind the sofa. Create a composition of moldings — three vertical panels of the same size or one horizontal wide panel spanning the entire length of the sofa. Inside the panels, the wall is an accent color or has decorative finishing. Moldings should be wide enough (60-100 mm) to be readable from a distance (the living room is a spacious room).
Behind the TV. Frame the TV zone with moldings, creating a frame inside which the TV is placed. The frame is slightly larger than the TV (if the screen is 55 inches diagonally, the frame width is 150-170 cm, height 100-120 cm). The wall inside the frame is a contrasting color (usually dark — black, graphite, dark blue, so the TV doesn't stand out but blends with the background). Moldings are light (white, cream), creating contrast.
Some designers do not recommend framing the TV with molding, considering it excessive. But with the right approach (restrained profile, conciseness, matching the style) it works, especially in neoclassical interiors.
Framing paintings and mirrors: instead of traditional frames
Traditional frames for paintings and mirrors are bought ready-made.Polyurethane wall moldingallows creating a custom frame of any size directly on the wall.
Framing mirrors with moldings
A frameless mirror hangs on the wall, serves its function, but lacks decorative expressiveness. Frame it with moldings — the mirror turns into an architectural element.
Measurement and marking. Measure the mirror (width, height). Add 5-10 cm on each side (gap between the mirror edge and the molding). Mark a rectangle on the wall around the mirror.
Choosing molding. For small mirrors (up to 80 cm on the longer side) use narrow moldings (30-50 mm). For large mirrors (over 100 cm) — medium or wide (50-80 mm). The profile depends on the interior style — classic ornamented or modern minimalist.
Installation. Cut the moldings at 45-degree angles (frame), glue them along the marked lines. The joints at the corners must be perfect. After the glue dries, fill the joints, paint the molding in the desired color.
Color solution. The molding can be the same color as the wall (blending, the mirror reads as a window into space), contrasting (white molding on a colored wall — a clear frame), gilded (luxury, palatial), patinated (vintage, aged look).
Framing paintings and posters
Similarly to mirrors, paintings, posters, photographs are framed. Especially effective for large works (over 100×80 cm), for which it's hard to find a ready-made frame.
The painting is hung on the wall, a frame of moldings is created around it with a 5-8 cm gap from the edge of the painting. The molding is painted in a color that harmonizes with the painting or contrasts with the wall.
This technique creates a gallery effect — the painting is perceived not as a decorative object, but as a work of art worthy of architectural framing.
Gallery wall with unified framing
If there are several paintings, posters, photographs of different sizes on a wall, create a unified framing for the entire composition. A large frame made of moldings frames the entire group of images, uniting them into a cohesive gallery.
Inside the frame, the wall can be a contrasting color (e.g., walls are white, the gallery area is dark gray). Images are placed freely or on a grid. The common frame creates order, structure, turning disparate paintings into a curated exhibition.
Protecting walls from damage: the practical function of molding
Polyurethane molding on the wallperforms not only a decorative but also a protective function. A horizontal molding at a height of 90-120 cm from the floor protects the wall from damage by furniture, accidental impacts, wear.
Molding at chair back height
In dining rooms, offices, and corridors with seating, molding is installed at a height of 85-95 cm — this is the level of a standard chair back. When a chair is pushed against the wall or pulled away, the back hits the molding, not the wall. The molding absorbs the impact, protecting the wall from dents, scratches, and scuffs.
Molding for this purpose is chosen to be sturdy, with sufficient width (40-60 mm), to create a noticeable barrier. It is painted a dark color or the color of the wall (if the wall is dark) — scuffs are less noticeable on a dark surface.
Protection in children's rooms
A child's room is a high-risk zone for walls. Children play, drop toys, draw, and accidentally bump into walls. A horizontal molding at a height of 100 cm creates a boundary. The lower part of the wall (from the floor to the molding) is finished with practical materials (washable paint, vinyl wallpaper, plastic panels) and painted a color on which dirt is less noticeable. The upper part (from the molding to the ceiling) is decorative, protected from children's impacts by its height.
The molding serves as a visual boundary — children subconsciously perceive it as a division of zones: the lower one is for play (allowed), the upper one is beautiful (not to be touched).
Protection in corridors and hallways
Corridors are high-traffic areas where walls are subjected to constant impact (bags, umbrellas, clothing, shoes). Molding at a height of 90-110 cm creates a protective line. The lower part of the wall is painted with washable enamel, which is easy to wipe clean. The upper part stays clean longer, as the main impact is on the lower zone.
Additionally, high skirting boards (120-150 mm) are installed, protecting the bottom of the wall from impacts with shoes, vacuum cleaners, and mops.
Frequently asked questions about wall molding
Can molding be mounted on wallpaper?
Yes, but unreliably. Glue holds the molding on the wallpaper, but the wallpaper may peel off the wall under the weight of the molding. It is recommended to remove the wallpaper in the areas where moldings are to be mounted (cut a strip), glue the molding to the wall, then re-glue the edges of the wallpaper flush against the molding. Or glue the molding before wallpapering — the wallpaper is trimmed flush against the molding.
How to calculate panel height for a standard apartment?
For ceilings 2.5-2.7 m, the optimal panel height is 180-200 cm (from the floor to the top edge of the molding). This leaves 50-70 cm to the ceiling, visually raises the ceiling, and does not overload the space. Panel width is 80-120 cm depending on the wall length.
What width of molding to choose for decorative panels?
For standard apartments (ceilings up to 2.7 m) — moldings 40-60 mm. For high rooms (ceilings from 3 m) — 60-100 mm. Too narrow (less than 30 mm) gets lost on a large wall, too wide (more than 100 mm) overloads a small room.
Can moldings be painted a color other than white?
Yes, polyurethane can be painted any color with acrylic paints. You can paint it the color of the walls (monochrome), a contrasting color (accent), or use decorative techniques (patina, gilding). Choose high-quality paint with good coverage.
How much does it cost to create decorative panels with moldings?
Moldings cost 150-800 rubles/meter depending on width and profile complexity. For a standard 4×2.7 m wall with three panels, 20-25 linear meters of molding are needed. Material: 3000-20000 rubles. DIY installation is free, hiring a master: 3000-8000 rubles. Total: 3000-28000 rubles.
How to care for wall molding?
Wipe with a dry cloth once a month (dust removal). For relief moldings, use a soft brush. Every 3-6 months, wipe with a damp cloth and mild detergent. Avoid abrasives. If the paint is damaged — touch it up.
Can moldings be removed without damaging the wall?
Yes, but carefully. Pry the edge of the molding with a putty knife, gradually pushing it off. The glue will stretch or tear. Traces of glue will remain on the wall — cut them off with a knife, sand them down. Local puttying and wall painting may be required.
How long does it take to create decorative panels?
Marking — 1-2 hours. Cutting moldings — 1-2 hours. Installation — 2-4 hours (depending on complexity). Glue drying — 24 hours. Joint puttying, sanding, priming — 2-3 hours. Painting (2 coats) — 1 day. Total: 3-4 days including drying time.
Conclusion: the wall as an architectural work
A wall ceases to be just a plane when architecture appears on it.Polyurethane wall moldingsIt transforms a vertical surface into a composition — rhythmic, proportional, expressive. Decorative panels create divisions, structure, order. Moldings frame mirrors and paintings, protect walls from damage, zone long corridors. Overlays add ornamental accents, richness of detail.
The company STAVROS offers everything needed to create wall compositions of any complexity. Moldings in dozens of profiles — from minimalist smooth to luxurious carved, width from 20 to 120 mm.Decorative InsertsHundreds of designs — square, round, vertical, ornamental. Pilasters, capitals, brackets, corner elements — for creating complex architectural compositions. Wall rosettes, medallions, panels — for accents and focal points.
STAVROS quality is guaranteed by 23 years of impeccable work. Polyurethane density of 280-350 kg/m³ ensures strength, clarity of relief, and durability. Factory white primer is ready for installation and painting. Precise geometry of elements guarantees perfect joining — corners meet without gaps, long runs are installed without visible seams, compositions turn out mathematically precise.
The STAVROS website features detailed catalogs with photos, dimensions, and article numbers. Convenient filters help you find the right molding by width, style, and purpose. A calculator estimates the amount of materials needed for your project. Educational articles and videos explain the step-by-step technology for creating decorative panels — from layout to painting.
STAVROS works with both private clients and professionals. For designers, architects, and construction companies — special terms, personal managers, and technical support at all stages. For private customers — free consultations, assistance in selection, and material quantity calculations.
Delivery is organized through reliable partners. Packaging protects elements from damage. Delivery times are 1-10 days across Russia. Cost is calculated automatically.
Start transforming your walls with STAVROS. Open the catalog, choose moldings and overlays. Draw a layout of future panels. Calculate materials. Order, receive, create. In just a few days, your walls will gain architectural expressiveness, rhythm, proportion, and beauty. Every time you enter the room, you'll see not just walls, but a work of art — thoughtful, harmonious, created by your own hands or by craftsmen according to your vision. It's a feeling of pride, satisfaction, and joy from the space you live in. With STAVROS, this is reality.