Article Contents:
- Cornice is there, but curtains are not hung on it
- Why four different products are called by one word
- What is KZ-008 90 × 44 mm
- What 90 and 44 mm actually mean
- Where KZ-008 performs best
- Living room with ceiling from 2.8 m
- Home office and library
- Dining Room
- Hall and representative area
- Bedroom
- Restaurant, hotel room, salon, office
- When the scale of the room works against a large profile
- MDF for a smooth, opaque color
- Beech for a calm texture and different finishing scenarios
- Oak when the texture is really meant to be left visible
- Example: rectangular room 3 × 4 m
- Example: room 4 × 5 m
- Room with a niche
- Room with external corners
- Why the margin percentage does not replace the cutting map
- Inside corner
- Outside corner
- Straight joint along the length
- Angled joint along the length
- First dry assembly, then final fixation
- Need to finish the top of the wall without overloading the room
- Need to hide the curtain niche
- Need to connect the cornice with tall cabinets
- Need a white cornice for enamel
- Visible wood is required
- Need to design a commercial space
- Need to replace a random construction batten
- Choosing Only by Photo
- Consider KZ-008 a curtain rod
- Order by total perimeter
- Not checking the delivery route
- Buy oak for dense white enamel without reason
- Not accounting for stretch ceiling and built-in furniture
- Place short inserts on the main wall
- Leave finishing for later
- Can curtains be hung on KZ-008?
- How is KZ-008 different from a ceiling rail?
- What does the size 90 × 44 mm mean?
- Which length is better: 2400 or 2600 mm?
- Is KZ-008 suitable for a ceiling height of 2.7 m?
- Can it be installed next to a stretch ceiling?
- What to choose for white enamel?
- Can MDF be tinted?
- What margin should be set?
- Where is the best place to position the joint along the length?
- How to attach the cornice to the wall?
- Can I order a non-standard length?

The word "cornice" seems unambiguous only until the buyer opens the catalog. One cornice holds curtains, another covers the joint between the wall and ceiling, a third finishes the top of a cabinet, and a fourth is a wall-mounted rod with brackets. Externally, these products may be similar in color or placement, but structurally and functionally they belong to different groups. That is why the query "buy a wooden ceiling cornice" often leads to an error: a person expects to see a guide for fabric, but instead finds an architectural profile.
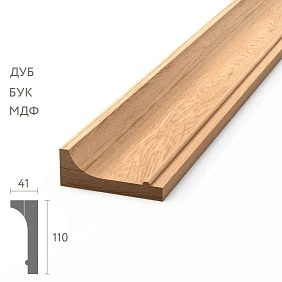
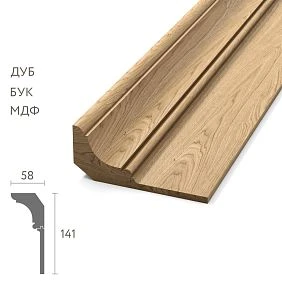
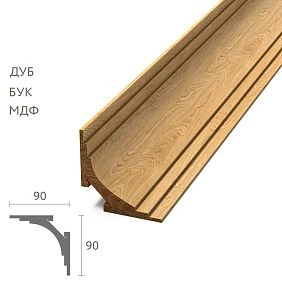
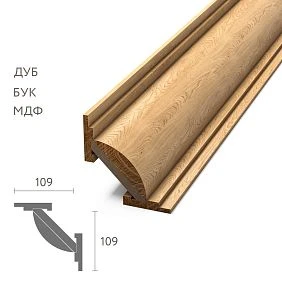
KZ-008 90 × 44 mm is specifically a decorative ceiling cornice. It forms the top line of the wall, helps to design the transition to the ceiling, and gives the interior a finished architecture. Curtains are not hung on it: the profile has no rail, runners, rings, hooks, or other system designed for the movement and weight of fabric. If curtains are needed in the room, a separate ceiling rail, hidden niche, or wall-mounted rod is required. KZ-008 can be located next to this system and visually cover the technical part, but does not replace it.
Such clarification is important to make before calculation, material selection, and order placement. A buyer looking for wooden ceiling curtain rods may mistake a decorative profile for a load-bearing element and order a product for the wrong purpose. The reverse error also occurs: an architectural cornice is attempted to be replaced with a simple plastic rail, and then it is discovered that the top of the wall remains visually unfinished. These products do not compete with each other because they solve different tasks.
If you need exactly an expressive wooden profile for the top joint, you can go to the product card and buy a wooden ceiling cornice KZ-008after checking the material, length, actual cross-section of the selected design, and the number of slats according to the cutting map. If the main task is to hang curtains, first choose the support system, and only then decide whether a decorative wooden cornice is needed in front of it.
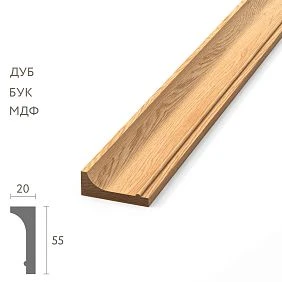
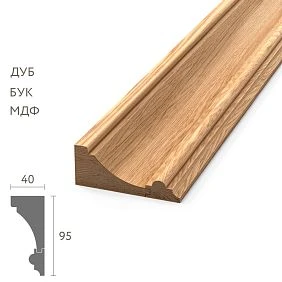
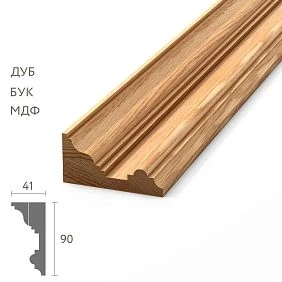
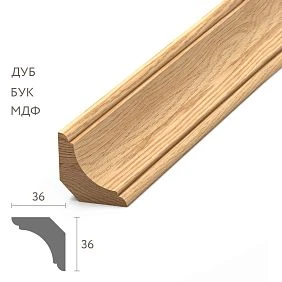
There is a cornice, but curtains are not hung on it
KZ-008 has an architectural, not a mechanical function. It works as the top finish of a wall: it creates a continuous horizontal line around the perimeter of the room, softens or emphasizes the transition between planes, and supports the proportions of door portals, wall panels, tall cabinets, and other stationary decor. It is evaluated by its profile, height, projection, material, joint quality, and how convincingly it fits the scale of the room.
A track cornice is evaluated differently. For it, the number of rows, type of gliders, fabric weight, mounting method, and free movement of curtains are important. Even if the ceiling track is painted to look like wood or covered with a decorative strip, its working part remains a guide. KZ-008 does not have such a guide and should not be perceived as a base for hooks.
This does not mean that a decorative cornice and curtains cannot be used together. On the contrary, in a well-thought-out interior, they often work as a pair. The track is hidden in a niche or placed closer to the window, while the wooden profile forms the visible boundary of the ceiling. A distance is left between the products necessary for fabric movement, access to fasteners, and system maintenance. If the drapes reach the floor and are gathered in tight folds, it is especially important to check in advance whether the cornice projection will interfere with the fabric and whether the decorative profile will be too close to the curtain's trajectory.
Before ordering, it is useful to answer three simple questions. First: what should hold the fabric? If the answer is KZ-008, the purpose is misunderstood. Second: is a visible architectural line under the ceiling needed? If yes, the model may be suitable. Third: is there space on the wall and ceiling for a profile 90 mm high and about 44 mm projection? If there is no free space, you will have to change the assembly, choose a different profile, or abandon the large cornice.
In an interior, a mistake in purpose is not immediately noticeable. While looking at the product in a photo, it seems that any 'ceiling cornice' can be installed above a window. The problem becomes apparent on site: there is no place to insert gliders, it is impossible to hang hooks, the profile is not designed for the intended scenario, and the ordered long slats have already been delivered. Therefore, the correct sequence does not start with choosing the wood species or asking about price. First, determine the function, then check the dimensions, and only then calculate the quantity.




Why four different products are called by one word
In catalogs and search queries, the word 'cornice' combines several product groups. To avoid buying the wrong element, it is useful to distinguish them by function, installation location, and features visible in the product card.
| Type of cornice | Main function | Where is it installed | Is there a fabric guide | Does it carry curtains | How it is perceived in the interior |
|---|---|---|---|---|---|
| Decorative ceiling cornice | Joins the wall and ceiling, sets the top line | Around the perimeter of the room or in selected areas | No | No | Visible architectural profile |
| Ceiling rail | Ensures curtain movement | On the ceiling or in a window niche | Yes | Yes, within the parameters of the selected system | Can be open or hidden |
| Wall-mounted rod | Holds rings, grommets, or curtain loops | On brackets above the window | Not a track, but has a working rod | Yes | Visible functional window component |
| Furniture cornice | Completes the top of a cabinet, kitchen, display case, or portal | On furniture or a furniture structure | No | No | Part of a furniture composition |
KZ-008 belongs to the first line of the table. Its place is in the architecture of the room. Even if the profile passes over a window, that does not turn it into a system for hanging fabric. Similarly, a furniture cornice may visually resemble a ceiling cornice, but is designed for a different scale, a different base, and a different composition.
When searching, it is convenient to pay attention not only to the name, but also to the description of the design. For a track system, the card usually contains information about rows, runners, end caps, turns, hooks, and the permissible method of suspension. For a wall-mounted rod, it includes the pipe diameter, brackets, rings, and finials. For a decorative profile, it includes the cross-section, height, projection, length, material, and purpose for finishing. If the card mentions MDF, beech, oak, profile, and plank length, but does not contain suspension elements, then the buyer is likely looking at an architectural product.
It is equally important to distinguish a ceiling decorative cornice from a furniture one. A ceiling profile is perceived from a distance and connects large planes, so its height must match the scale of the room. A furniture part works within the facade or body. Attempting to transfer a furniture profile to the ceiling can result in too fine a relief, while a large ceiling cornice on a low cabinet can make the top of the furniture look heavy.
For a wider selection of profiles, you can look at Wooden cornices, moldings, and baseboards. Such a review is useful not for random comparison of ornaments, but for assessing scale: one profile sets a noticeable architectural boundary, another works as a thin line, a third is better suited for furniture or local framing. The more precisely the task is formulated, the lower the chance of ordering a beautiful but unsuitable product.
Our factory also produces:
What is KZ-008 90 × 44 mm
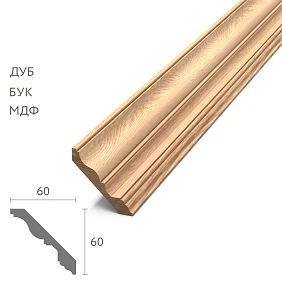
KZ-008 is a decorative wooden cornice for the upper joint of wall and ceiling. The provided product data confirms a cross-section of 90 × 44 mm, length options of 2400 and 2600 mm, and executions in MDF, beech, and oak. For the selected option, before ordering, you need to re-check the actual parameters in the card, because the length is tied to the material and specific execution.
| Parameter | Confirmed data | What this means for the buyer |
|---|---|---|
| Article number | KZ-008 | Allows you not to confuse the profile with neighboring models |
| Product type | Decorative ceiling cornice | Decorates the interior, but does not hold curtains |
| Nominal cross-section | 90 × 44 mm | 90 mm creates a noticeable height on the wall, about 44 mm provides a projection from the plane |
| Length | 2400 or 2600 mm | The quantity needs to be calculated for each wall and cutting map, not just by the total perimeter |
| Materials | MDF, beech, oak | The choice depends on the future finish, desired texture, and overall interior design |
| Main purpose | Decorative completion of the wall at the ceiling | The profile creates a pronounced horizontal line |
| Curtain system | Not included and not provided by the design | The rail or rod is selected separately |
| Finishing | Selected based on the material and project | Current options and preparation level must be checked before ordering |
| Installation | Depends on the base and the node design | You need to assess the wall, ceiling, embedded parts, joints, and access to finishing in advance |
| Product card | buy a wooden ceiling cornice KZ-008 | Here, the selected version, length, and current parameters are checked |
A size of 90 mm cannot be considered neutral. It is not a thin glazing bead or a barely noticeable molding. A nine-centimeter height forms a full belt under the ceiling. In a room with sufficient height, it helps to gather the top of the wall and balance tall doorways, large cabinets, panels, or an expressive baseboard. In a small room, the same profile can visually lower the ceiling, especially with contrasting paint.
A projection of about 44 mm also affects more than just appearance. It determines how far the cornice extends from the wall, how the shadow forms under the relief, whether the profile interferes with high cabinet doors, curtains, slopes, architraves, lights, and the ceiling niche. On a drawing, 44 mm looks insignificant, but in a corner, near furniture, or with a short wall section, this size can decide the fate of the entire node.
The length of the planks is important for two reasons. First is the number of joints. The better the length fits the walls, the fewer visible connections remain in open areas. Second is transportation and lifting. A long product must pass through the entrance, stairs, elevator, corridor, and doorways. A mistake here is discovered too late: the material is already paid for and delivered, but it cannot be brought in without risk of damage.
It is better to perceive the profile not as a separate decorative strip, but as part of a system. It is connected to the room height, ceiling color, architraves, baseboard, wall panels, furniture, and lighting. If these elements are chosen independently of each other, even a high-quality cornice can look random. If the dimensions and finish are coordinated, KZ-008 helps to carry a single architectural line throughout the entire room.
Get Consultation
What 90 and 44 mm actually mean
The buyer often perceives the product size as a formal characteristic: larger or smaller than the neighboring model. For a ceiling profile, this is not enough. You need to imagine how the cross-section works after installation.
90 mm is the height of the visible part on the wall. It occupies almost ten centimeters of the upper zone and creates a noticeable transition to the ceiling. If the ceiling is painted white and the cornice continues its color, the profile can visually expand the ceiling plane and lower its starting line. If the cornice is painted the color of the wall, the top of the wall appears higher and denser. With a contrasting solution, the horizontal line becomes stronger and requires support from other details.
44 mm is the depth or projection. The profile does not lie flat on the wall like a slat, but occupies space. This creates shadow, relief, and visual mass. The more directional the side light, the more noticeable the protrusions, joints, and base irregularities become. Therefore, a sample that looks good under diffused lighting in the showroom may reveal every installation inaccuracy on site with lighting along the wall.
The most reliable way to assess the scale is to make a 1:1 cross-section template. Not a reduced image or a printout on a single sheet with an unknown scale, but a full-size outline with a height of 90 mm and a projection of 44 mm. It is applied to the wall near the ceiling at several points: above the door, near the window, next to the cabinet, at the external corner, near the niche, and in the main lighting area. Such a mockup does not show the full relief, but immediately answers questions about height, free space, and proportion.
If the project is being prepared in drawings, it is useful to download the drawings of STAVROS products and check how the profile connects with adjacent elements. This is especially important for built-in furniture up to the ceiling. The cabinet door may open above the body, the facade may protrude beyond the side panel, and the decorative strip may fit tightly against the ceiling. The projection of the cornice in such a node can block opening or require a gap that was not included in the project.
A full-size fitting is also needed in a room with a stretch ceiling. Here it is not enough to see the distance from the wall to the fabric. You need to understand where the ceiling mounting profile is located, whether there is a embedded element, how the cornice will be fixed, whether access for painting will remain, and whether the decorative element will be too close to the fabric. KZ-008 should not be used as a random means to hide an ill-conceived node. First, design the base, then choose the installation method, and only then order the lengths.
In a low room, it is useful to check not only the physical fit but also the perception at eye level. Attach the paper template to several walls and step back to the entrance. If the top strip begins to dominate over doors, windows, and furniture, the profile may be too large. If it connects the elements and does not appear overhanging, the size is chosen convincingly.
Where KZ-008 reveals itself best
A cornice with a height of 90 mm is especially appropriate where the interior needs a noticeable upper boundary. This is not a strict rule based on area or style, but a matter of proportions. The same model can look composed in a room with a high ceiling and heavy in a small space with low doors and large furniture.
Living room with ceiling from 2.8 m
In the living room, a large cornice helps connect several long walls and maintain the scale of the space. It reads well next to tall doors, wall panels, a library, or a large portal. If the windows are designed with a hidden curtain niche, KZ-008 can be used as a visible architectural finish for the rest of the perimeter, without replacing the track system.
Special attention should be paid to the wall with the TV and built-in furniture. If the cabinets reach almost to the ceiling, the cornice either runs in front of them as a single line or is interrupted at a pre-calculated point. A random break above the cabinet often looks like a mistake. It is easier to resolve this issue on the plan than to cut finished strips on site.
Study and home library
In the study, the upper horizontal line supports a calm, collected architecture. The profile can connect bookcases, a door portal, and wall finishes. Solid wood versions are especially appropriate here if the project involves visible natural texture. However, the material is chosen not by the status of the room, but by the finish: under opaque enamel, oak is not always rational because its grain will be hidden.
Dining room
In the dining room, the cornice helps define the finish of walls where panels, mirrors, sconces, or decorative frames are placed. The projection creates a shadow, so the profile must be carefully joined in areas where light is directed upward. If overhead lighting is used, first check that it does not conflict with the relief or highlight imperfections in the base.
Hall and reception area
In the hall, a large profile works for long-distance perception. It is seen from the entrance, so the continuity of lines and the placement of joints are especially important. Short inserts above the door or in the center of the longest wall are more noticeable than in a bedroom. For such spaces, the cutting plan should consider not only material savings but also priority views.
Bedroom
In the bedroom, KZ-008 is suitable when a clear but calm upper line is required. If the room is low, it is better to avoid a sharp contrast between the cornice and the wall. When painted in similar shades, the profile is read through shadow and relief, not as a heavy strip. Above the window, its coordination with the niche or curtain rod should be agreed upon in advance.
Restaurant, hotel room, salon, office
In a commercial interior, repeatability and maintainability are important. One profile can run through several rooms or be repeated in standard rooms. Here it is especially important to specify the material, length, finish, joint positions, and corner templates. An order 'by total footage' without a specification leads to different solutions in each area, and the visual system falls apart.
When the scale of the room works against a large profile
A low ceiling itself does not prohibit using a 90 mm cornice, but it raises the requirements for fitting. If a room with a height of 2.7 m has tall doors, calm furniture, and light monochrome finishes, KZ-008 may look appropriate. However, if the ceiling is crossed by beams, the walls are occupied by hanging cabinets, and there is little space above the windows, the profile risks overloading the upper zone.
You cannot choose a cornice only by the style name. 'Classic', 'neoclassical', or 'modern classic' do not indicate ceiling height, door sizes, or the amount of furniture. First, check the geometry and scale, then decide whether the profile supports the character of the interior.
MDF, beech, or oak: the material is chosen based on the result, not on a habitual hierarchy
For KZ-008, three material options are confirmed: MDF, beech, and oak. You cannot automatically assume that oak is always better, beech is intermediate, and MDF is only for saving money. For a decorative profile, the material is evaluated together with the future finish, texture requirements, room geometry, and the overall system of wooden details.
MDF for a smooth, opaque color
MDF is reasonably considered when the cornice is planned to be covered with opaque enamel to achieve a calm, uniform surface without showing wood grain. In such a solution, the main role is played by the profile, shadow, and precision of the line, not the wood species. If the ceiling, doors, and cornice are to be painted in one color, MDF may be a more logical choice than solid wood, whose texture would be completely hidden anyway.
However, the phrase 'MDF cornice for enamel' does not mean you can order any option and install it immediately without preparation. Before purchasing, you need to check the surface readiness, requirements for priming, sanding, joint filling, and compatibility of the chosen finishing system. This information depends on the specific execution and project. Do not assume in advance that the product is supplied painted or fully ready for installation unless confirmed in the product card.
Beech for a calm texture and different finishing scenarios
Beech is suitable for projects where solid wood with a calmer grain is needed. It can be considered for enamel, varnish, or tinting, but the final decision depends on the desired color and surface preparation. For transparent or semi-transparent finishes, you need to evaluate in advance how the joints along the length and corners will look: on painted MDF, the seam can be made less noticeable due to the opaque coating, while on solid wood, the natural grain remains part of the result.
Beech is often chosen to pair with other details made from the same wood species. This helps avoid a situation where the cornice, trim, and furniture decor differ not only in shade but also in the character of the texture. At the same time, the word "beech" in the product card does not yet guarantee an automatic match with already installed items: the wood changes its appearance after tinting, and the color depends on the finishing sample and lighting.
Oak, when the texture is truly intended to remain visible
Oak is justified where the natural pattern should be part of the architecture. It is chosen for transparent or tinted finishes when the expressive texture supports doors, panels, furniture, or flooring. In such a project, it is especially important to decide in advance how the fibers will be oriented, where the joints will run, and how much natural variation between planks is acceptable.
Buying oak only because it is perceived as the most prestigious wood species, and then covering it with dense white enamel, is a common mistake. If the wood pattern completely disappears, the buyer pays for a property they are not using. In a number of projects, it is more rational to allocate the budget to an accurate cutting map, high-quality surface preparation, and careful installation.
| Option | When it is especially appropriate | What the buyer receives | What to check before ordering | Typical mistake |
|---|---|---|---|---|
| MDF | Opaque painting, a single color with the ceiling or doors | Uniform color scheme, emphasis on the profile shape | Degree of preparation, requirements for primer and finish | Considering the product fully ready for painting without checking the card |
| Beech | Enamel, varnish, or subtle tinting | Array with restrained pattern | Match with adjacent parts and finish sample | Select by species name without evaluating color after finishing |
| Oak | Transparent or tinted finish with visible texture | Expressive natural pattern | Shade variation, joints, grain direction | Buy oak under dense opaque enamel just for the word 'solid wood' |
Before making a final choice, it is useful to study differences in quality and preparation of STAVROS products. This helps separate the material from the degree of readiness and not transfer expectations to the product that are not in the confirmed characteristics.
After selecting the material, open the card again and check which specific version is available in the required length. Then you can buy a wooden ceiling cornice KZ-008 already not from the general photo, but as part of a specific project: with the selected wood species or MDF, a clear finish, and a calculated quantity.
How to calculate the quantity of KZ-008 without the 'perimeter divided by length' trap
For a simple linear product, the calculation seems obvious: add up the lengths of the walls, add a margin, and divide the result by the length of one strip. This method gives a rough estimate, but not the final quantity. It does not show where the joints will be, what offcuts will remain after corners, whether the remainder can be transferred to the next wall, and whether the length will be sufficient after cutting.
The correct calculation begins with measuring each wall separately. Not just 'room 3 × 4 m', but four actual dimensions taking into account niches, protrusions, columns, and areas where the profile is interrupted. Then mark internal and external corners, places adjacent to cabinets, portals, and curtains. After that, lay out strips of 2400 or 2600 mm length on each wall.
Example: rectangular room 3 × 4 m
The nominal perimeter is 14 m. Simple arithmetic shows:
-
six strips of 2400 mm give 14.4 m;
-
six strips of 2600 mm give 15.6 m.
By total length, both options seem sufficient. But walls 4 m long cannot be covered with one strip. Each will require a joint. Walls of 3 m are also longer than one strip. This means there will be joints on all four walls, and you need to figure out how to use the leftovers.
With a length of 2400 mm, on a four-meter wall you can place a whole plank and a section of about 1600 mm, leaving an allowance for cutting. From the second plank, a fragment of about 800 mm will remain, which by itself will not cover a three-meter wall, but can be used in another layout. With a length of 2600 mm, the additional section on the four-meter wall is about 1400 mm, and the remainder is about 1200 mm. Such a remainder is more flexible, but the final result depends on where joints are allowed and how corners are executed.
Therefore, the decision 'six planks will definitely be enough' cannot be made based only on the sum of 15.6 m. After miter cuts and distribution of connections, the useful yield decreases. If one end is damaged during installation, the mathematical margin quickly disappears. For a room of 3 × 4 m, first build a diagram of each wall, and then add a reserve that actually replaces a critical section, rather than existing only in percentages.
Example: room 4 × 5 m
The perimeter is 18 m. Seven planks of 2600 mm give 18.2 m. Formally, 200 mm remains — less than one percent. In practice, this is not a reserve. Each of the four walls is longer than a plank, so there will be several connections. Corner cuts will consume part of the length, the saw has a kerf width, and short remnants may be unsuitable for noticeable sections.
In such a room, eight planks of 2600 mm give 20.8 m and seem excessive only until a cutting map is drawn up. An additional plank may allow moving joints away from the center of the main wall, selecting the array pattern, and leaving a reserve for errors. On the other hand, with proper cutting and permissible connections, the quantity can be optimized. The decision is made based on the diagram, not a single formula.
For the 2400 mm option, eight planks give 19.2 m. The total reserve is higher than with seven planks of 2600 mm, but the remnants are distributed differently. Sometimes a shorter plank is more convenient for lifting and cutting, and sometimes it increases the number of connections. Therefore, the question 'which length is better — 2400 or 2600 mm' has no universal answer. The better length is the one that suits the material of the chosen finish, logistics, and specific walls.
Room with a niche
A niche adds not only meters but also corners. Even a shallow recess creates additional sections and two internal or external turns depending on the geometry. If only the total perimeter is calculated, you might not notice that a short section requires a separate piece with two cuts, while a remnant of suitable length has already been used on another wall.
It is useful to break down the niche into independent segments. For each, specify the net size, direction of cuts, and priority of appearance. A narrow section above a built-in cabinet can be made from a remnant if the joint does not fall into a visible area. And a short front face of a column, illuminated by side light, requires a neat, whole fragment.
Room with external corners
External corners require higher precision and are more often in plain sight. You cannot calculate the length "flush" for them. An allowance is needed for a trial cut, adjustment, and preserving the full relief at the apex. If the plank ends almost at an external corner, the length joint and the corner connection may end up too close to each other. Such a node is more difficult to align and finish.
Why the percentage of reserve does not replace a cutting map
The phrase "add ten percent" is convenient but not universal. Ten percent of 14 m is 1.4 m. This could be a useful long fragment, or it could turn into several short offcuts. For a wall 3 m long, a 1.4 m remainder does not replace a damaged whole plank. The reserve should be assessed based on which parts it allows to restore.
The cutting map answers five questions:
-
How many whole planks go to each wall?
-
Where will each straight or angled joint be located?
-
Which remnants can be transferred to adjacent areas?
-
Which fragments are critical in terms of pattern, light, and visibility?
-
Is there a reserve for an error in corner cutting or damage during lifting?
Such calculation is especially important for oak and beech, where the joint remains part of the pattern. With opaque enamel, the connection can be made less noticeable after preparation and painting, but geometric accuracy is still needed.
The base is checked before purchase, not after delivery.
Even a correctly chosen profile does not automatically fix a crooked joint between the wall and ceiling. The cornice can visually hide a small transition area, but it repeats or emphasizes serious irregularities. The longer the horizontal line and the more directional the light, the more noticeable the wave.
Start by checking the wall. A long straightedge or laser helps to see bumps and dips. If the strip is pressed only at a few points, gaps appear between it and the base. These cannot be endlessly filled with finishing material: a thick layer may crack, and the profile will remain stressed.
Then evaluate the ceiling. In older buildings, the angle between the wall and ceiling rarely forms a perfect 90 degrees around the entire perimeter. One section may be sharper, another more obtuse. Preparing each corner using a single template without a test fit is risky. With a stretch ceiling, additionally check the position of the fabric and the mounting profile. The decorative cornice cannot be attached to the fabric, and the available base must be planned in advance.
A drywall structure requires understanding where the studs, tracks, or blocking are located. There is no universal fastening method for all bases. The solution depends on the wall material, the weight and cross-section of the profile, the condition of the base, and the design node. Therefore, the article should not replace the installer's calculation with advice like 'just glue it.' Before ordering, determine what the cornice will rest on and whether reliable fixation can be ensured along its entire length.
Lighting also relates to the base. If there is linear lighting along the wall or windows are nearby, the shadow will slide across the profile. It will emphasize irregularities, open joints, and varying depths of installation. In such areas, preparation requirements are higher, and it is better to move joints to where they are less visible.
Finally, check access for finishing. After installation, there should be enough space under the ceiling to treat the joints, sand the surface, apply primer, and finish without damaging adjacent planes. If the stretch ceiling fabric is already installed flush, finishing becomes more difficult. Sometimes the sequence of work needs to be changed: prepare the profile in advance, perform the main operations before installing the ceiling, or protect finished surfaces.
After designing the node, it is useful to look at tips for installing and finishing wooden decor. They do not replace the assessment of a specific base, but help to compile a list of questions for the installer in advance and avoid ordering a long-length profile without a clear installation method.
How to join planks so the cornice looks continuous
A long horizontal line is perceived more strictly than a separate furniture piece. On the cornice, shifts in relief, height differences, varying seating depths, and sharp seams are noticeable. Therefore, joining planks is not a secondary operation but part of the appearance.
Inner corner
An internal corner seems simple: two walls meet, and the profile edges are hidden inside. But if the angle is not 90 degrees, a standard 45-degree cut will leave a gap. Before cutting, measure the actual geometry and do a test fit on a scrap piece. It is especially important to align the visible profile lines: even a small vertical shift creates a step that is more noticeable than the gap itself.
On an opaque painted version, minor mismatches can be corrected within the finishing technology, but this does not justify a rough cut. A thick layer of filler does not replace precise geometry. On beech or oak with a transparent finish, the ability to hide errors is even less, so the quality of the cut and matching adjacent sections become critical.
External corner
An external corner is visible from two sides at once. Here, not only the length but also the profile along the entire depth meets. The apex is easily damaged during handling and fitting. For such a section, it is better to leave sufficient allowance and not make the final cut based on the nominal wall angle without checking.
If a lengthwise joint is located near an external corner, the node has two risk zones: one seam may shift in height, the other may open in the plane. If possible, move the lengthwise joint away from the corner. This requires more material but gives a cleaner result.
Straight joint along the length
Joining planks end-to-end is easiest on paper and hardest to make invisible on a long, illuminated wall. The slightest base unevenness turns a straight seam into a vertical line. If the finish is opaque, the joint can be prepared and painted together with the profile. If the texture remains visible, the ends and wood grain will be more noticeable.
It is better to place a straight joint not in the center of the main wall or opposite the entrance. Calmer locations are above a tall cabinet, closer to a corner, in an area with diffused light, or where the line is partially covered by another architectural element. But hiding the joint at the cost of a short insert is also not worth it: several small fragments look worse than one well-thought-out joint.
Miter joint along the length
A miter joint increases the contact area and makes the transition line less sharp. It may be more convenient for opaque finishes, but requires precise profile matching and reliable fixation. The direction of the miter cut is chosen considering light and the main viewing direction. If the seam faces a window or entrance, it may be emphasized by shadow.
For the array, natural wood changes due to humidity fluctuations should be considered. The article cannot assign a universal compensation gap: it depends on the material, preparation, room conditions, and installation technology. What matters is not to fill the joints with random compounds or assume that a thick finish will permanently hold moving parts.
First dry assembly, then final fixation
On a complex perimeter, it is useful to first lay out or temporarily test-fit the main sections. This allows you to see where the joints will actually be, whether the relief matches, if the length is sufficient, and whether a short leftover piece appears on a visible wall. If you start fixing planks from the first corner you encounter, the last wall often becomes the place where all accumulated errors must be 'collected.'
The installation sequence is chosen based on the room. It is usually reasonable to start with the most visible and geometrically critical area, but the final decision should be made by a specialist who sees the base and the cutting layout. The main goal is not just to close the perimeter but to maintain the continuity of the profile.
What to plan together with KZ-008
A decorative cornice rarely exists in isolation. For a complete result, a separate curtain system, prepared base, coordinated finishing, corner scheme, and logistics for long planks are needed. This does not mean that all items are included in the KZ-008 kit or sold on one page. On the contrary, before ordering, it is important to separate the profile itself from the accompanying solutions.
| What to plan | Why is this needed | For which scenario | What to check | Useful internal page |
| The KZ-008 cornice itself | Forms a decorative line under the ceiling | Decorating the perimeter or selected walls | Material, length, cross-section, quantity | buy a wooden ceiling cornice KZ-008 |
| A separate system for curtains | Holds and moves the fabric | Window with drapes, tulle, or multiple layers | System type, distance to profile, access for maintenance | Selected separately; KZ-008 does not replace it |
| Adjacent linear elements | Help coordinate the cornice with moldings and baseboard | Interior with a unified line system | Scale, relief, material and finish | Wooden cornices, moldings, and baseboards |
| Drawing or 1:1 template | Checks fit before ordering | Niche, ceiling-height cabinet, complex corner | Height 90 mm, projection 44 mm, gaps | to download the drawings of STAVROS products |
| Finish system | Unifies planks and joints into a single result | Enamel, varnish or tint depending on material | Compatibility with base and degree of preparation | differences in quality and preparation of STAVROS products |
| Mounting solution | Ensures fixation on a specific base | Wall, drywall, node with stretch ceiling | Embedded parts, evenness, access to finishing | tips for installing and finishing wooden decor |
| Delivery and lifting | Preserves long planks before installation | Lengths 2400/2600 mm | Elevator, stairs, openings, packaging and route | Delivery of long wooden cornice |
The most common mistake in this block is to consider the decorative cornice as a ready-made window kit. In the KZ-008 card, the buyer selects a profile, not a curtain system. Hooks, runners, rings, rail and fabric do not automatically appear from the word "cornice". They need to be designed separately.
The second mistake is buying only the exact total length. The kit actually includes the reserve length if it is necessary to guarantee a clean external corner or replace a damaged section. The reserve is not extra material, but insurance for a specific cutting plan.
The third mistake is choosing the finish after installation. If it is not decided in advance whether the profile will be painted opaque or retain the wood texture, it is impossible to correctly assess the joints, material, and surface requirements. Dense enamel requires one approach, transparent varnish or tinting requires another.
Practical selection for different tasks
Need to finish the top of the wall without overloading the room
First, make a template 90 × 44 mm and evaluate it on all walls. If the profile seems too heavy, the problem is not solved by choosing a more expensive wood species. The scale, color scheme, or model should be changed. The material affects the texture and finish, but does not reduce the physical height of the cornice.
If KZ-008 looks convincing, choose a calm finish. Painting in the color of the ceiling or a shade close to the wall usually makes the line softer than a sharp contrast. This is a design recommendation, not a confirmed option of factory coating: the specific finish must be agreed upon separately.
Need to hide the curtain niche
First, design the niche and track: distance from the window, number of rows, free movement of fabric, access to the runners, and the ability to remove the curtains. Then check whether KZ-008 can become a visible facade or an adjacent architectural element. The profile should not block the movement of the fabric or restrict access to the mechanism.
You cannot first install a decorative cornice and then try to place the track in the remaining space. In this order, it often turns out that the 44 mm projection has eaten up the useful depth or the fabric touches the relief.
Need to connect the cornice with tall cabinets
Mark the trajectory of the facade opening. Some doors lift up, extend above the body, or require a gap in front of the ceiling. The paper template should be applied not only to the closed cabinet, but also to check the movement of the door. If the cornice passes in front of the furniture, decide in advance whether it will be continuous or neatly end at the side panel.
Joints above cabinets may be less noticeable, but this area should not be used as a dump for short offcuts. After furniture installation, some connections may remain exposed on the side or be reflected in the glass.
Need a white cornice for enamel
Consider MDF and beech based on the degree of preparation and surface requirements. Oak is only justified if there is a separate structural or design reason. If the texture is completely covered, paying extra for an expressive wood grain provides no visible benefit.
Before ordering, clarify exactly what needs to be done on site: priming, sanding, joint filling, and final painting. Do not plan installation on the last day of renovation if wet and dusty operations are needed afterward.
Need visible wood
The choice between beech and oak is made based on the grain pattern and compatibility with adjacent elements. Take a finish sample and view it in the room's lighting. The color on the screen does not show the actual shade, and a small sample may look different on a long plank.
The cutting map for transparent finishes must account for the grain. Do not place a random short fragment in the center of a wall just because it fits the length. Saving a few tens of centimeters can create a seam that will be visible for the entire service life.
Need to design a commercial space
Create a specification by zones. For each room, indicate the article number, material, length, quantity, finish, and joint positions. If KZ-008 is repeated in several rooms, one approved corner joint and one finish sample help maintain consistency.
Consider maintenance. In a restaurant, salon, or hotel, the finish may require local repairs. An overly complex combination of transparent tinting and many joints is harder to restore than a well-thought-out opaque solution. But the choice depends on the concept, not just ease of repair.
Need to replace a random construction batten
An ordinary batten can close a gap, but it will not create a profile with a calculated relief and architectural height. If the task is limited to simply covering a narrow slit, KZ-008 may be excessive. If a finished top line is needed, a random batten usually looks like a temporary insert.
A professional profile is valuable not just because it is made of wood or MDF, but because of its predictable cross-section and the ability to repeat the solution around the entire perimeter. This is especially noticeable in long rooms and serial commercial interiors.
How not to confuse KZ-008 with similar products
The first sign is the purpose. If the product is supposed to hold curtains, look for information about guides, rows, runners, or a rod. KZ-008 does not have this function.
The second sign is the cross-section size. The designation 90 × 44 mm describes an architectural profile. For a track, the buyer would be more interested in the guide length, number of rows, and movement mechanism. For a furniture cornice, compatibility with the cabinet or facade would need to be checked.
The third sign is the material. MDF, beech, and oak indicate a decorative product intended for interior finishing. But the presence of wood itself does not make the profile a "wooden curtain rod." Even a solid element cannot be used as a load-bearing rod if it is not designed for hanging fabric.
The fourth sign is the package contents. In the description of a decorative cornice, you should not expect rings, hooks, runners, or curtain brackets. If these elements are needed, they are selected as part of a separate system.
The fifth sign is the line placement. KZ-008 can be run around the entire perimeter of a room, while a curtain rod is usually associated with a specific window or group of windows. If the profile continues above doors, blank walls, and cabinets, it serves an architectural role.
For a general understanding of different profiles, the material on how to choose a wooden ceiling corniceBut when choosing KZ-008, its specific cross-section, length, material, and compatibility with the project remain decisive.
Mistakes that turn the right cornice into the wrong purchase
Choosing only by photo
The photo shows the profile from one angle and under one lighting. It doesn't convey how much space 90 mm will take on your wall or how far 44 mm will protrude. The fix is simple: a full-size template, several fitting points, and checking from the doorway.
Considering KZ-008 as a curtain rod
This is the main mistake of purpose. The profile does not include a working rail. If curtains are needed, the suspension system is designed separately. KZ-008 can frame a niche or an adjacent area, but it does not carry fabric.
Ordering by total perimeter
The total meters do not show the cutting. Seven strips of 2600 mm formally give 18.2 m, but for a perimeter of 18 m, this may not be enough after corners, cuts, and joint distribution. A diagram of each wall is needed.
Not checking the delivery route
Strips of 2400 or 2600 mm must fit into the elevator, up the stairs, through the vestibule, and doorways. If the route is complex, it is measured before ordering. Cutting the product at the entrance for lifting means adding an unplanned joint.
Buying oak for dense white enamel without reason
If the wood grain is completely covered, the advantage of the oak texture is not used. The material is chosen based on the visible result. For opaque finishes, consider MDF or beech, after checking preparation and painting requirements.
Do not account for stretch ceiling and built-in furniture
The cornice is not attached to the stretch ceiling fabric. It requires a base and a well-thought-out assembly. Near the cabinet, check the opening of facades and the gap. Otherwise, the profile physically fits but blocks the furniture or interferes with the ceiling system.
Place short inserts on the main wall
Saving leftover material is not always saving the result. One long fragment with a well-thought-out joint usually looks better than several short pieces. On solid wood, the joints additionally emphasize the wood grain.
Leaving the finishing 'for later'
The material, joints, and installation sequence depend on whether the surface will be opaque, transparent, or tinted. The decision on finishing is made before cutting and installation.
Who KZ-008 is suitable for, and when it's better to choose another solution
KZ-008 should be considered for rooms where a noticeable nine-centimeter line under the ceiling is needed, there is space for an offset of about 44 mm, and a reliable base is prepared. It is especially useful in high living rooms, studies, dining rooms, halls, and commercial interiors, where the profile connects several walls and supports the scale of doors, furniture, or panels.
Another option is better to look for when a real curtain rod is needed, the ceiling is visually overloaded, there is no gap above the cabinets, the base cannot be prepared, or an almost invisible line is required. KZ-008 should not be ordered in a situation where the buyer expects a fully finished painted product but has not checked the configuration and the degree of preparation of the specific execution.
An honest refusal of an unsuitable profile is better than an attempt to adapt it after delivery. The cornice must solve the task without conflicts with the ceiling, furniture, curtains, and finishing technology.
How to order KZ-008 on STAVROS
Before placing an order, prepare a short list. In it, specify the article KZ-008, the selected material, the length of the planks, the quantity, the dimensions of each wall, the number of internal and external corners, the intended finish, and the presence of a stretch ceiling. For a complex room, attach a diagram with joint locations.
In the product card, you must re-check the actual cross-section and length of the selected configuration. Do not automatically transfer parameters from one material to another. The current price, availability, lead times, and preparation options are checked immediately before purchase, because these data are not confirmed in the original article diagram.
Separately, consider the delivery. Information on how the Delivery of long wooden corniceis organized is needed not after payment, but before it. Measure the narrowest turn along the route and make sure the planks can be brought in without bending or damage.
When the purpose, material, and cutting are confirmed, you can go back to the product card and buy a wooden ceiling cornice KZ-008 in the quantity calculated by the walls, not by approximate footage.
Frequently asked questions about the KZ-008 cornice
Can I hang curtains on KZ-008?
No. KZ-008 is a decorative architectural profile without a rail, runners, or hooks. Fabric requires a separate ceiling or wall system. The profile can be used next to a hidden niche if it does not interfere with the movement of curtains.
How is KZ-008 different from a ceiling rail?
The rail carries the fabric and ensures its movement. KZ-008 finishes the joint between the wall and ceiling. The products have different functions, designs, and selection criteria, so one does not replace the other.
What does the size 90 × 44 mm mean?
About 90 mm is the visible height of the profile on the wall, 44 mm is its projection. Before ordering, make a 1:1 template and check the fit near the window, cabinet, niche, and lights.
Which length is better: 2400 or 2600 mm?
The one that matches the chosen configuration and provides a more reasonable cut. Compare not only the total length but also the number of joints, leftovers, ease of lifting, and placement of connections on visible walls.
Is KZ-008 suitable for a ceiling height of 2.7 m?
Sometimes yes, but the decision is made after a full-size fitting. In a small, busy room, the profile may look heavy. In a calm interior with high doors and a similar tone of paint, it can look appropriate.
Can it be installed next to a stretch ceiling?
Only with a pre-designed base. The cornice is not attached to the fabric. You need to check the embedded elements, the position of the ceiling profile, gaps, and access to the final finish.
What to choose for white enamel?
First of all, it's worth comparing MDF and beech. Oak is justified when its properties are needed for the project, but under a dense opaque enamel, the expressive texture is not visible. The degree of preparation of the selected finish is clarified before ordering.
Can MDF be tinted?
MDF is usually considered for opaque painting. The possibility of specific decorative finishing and surface preparation must be checked on the product card and coordinated with a specialist. Do not automatically transfer solid wood technologies to MDF.
What margin should be allowed?
There is no universal percentage. The margin should allow replacing a critical fragment or repeating a corner miter cut. First, a cutting map is drawn up, then an additional plank or useful offcuts are determined.
Where is it better to place the joint along the length?
Not in the center of the main illuminated wall and not near an external corner. A calm area with diffused light is preferable, but the exact location is chosen based on lengths, wood grain, and layout.
How to attach the cornice to the wall?
The method depends on the wall material, evenness, weight of the selected finish, and the presence of embedded elements. The universal advice "just glue it" is unsafe. The installation solution is determined after inspecting the base.
Can a non-standard length be ordered?
The source data confirms planks of 2400 and 2600 mm. The possibility of another size cannot be assumed: it must be separately clarified in the product card or with a STAVROS manager before calculating the project.
Informed choice instead of buying by a single word
KZ-008 90 × 44 mm is not needed for hanging fabric, but for interior architecture. It completes the wall at the ceiling, creates a noticeable horizontal line, and helps connect the room into a unified system. Its advantages are revealed only when the function is correctly defined, the size is checked at a 1:1 scale, the material is chosen for the actual finish, and the quantity is calculated for each wall.
Before ordering, separate the decorative cornice from the curtain system, check the projection near furniture and niches, create a cutting map, and plan the delivery of long planks. This approach protects not only the budget but also the appearance: what arrives at the site is not a random "wood-like cornice," but a specific profile prepared for a clear assembly.
STAVROS allows you to move from a general idea to a verifiable product with a precise article number and confirmed material options. The final decision should be based not on a photo or the word "cornice," but on the purpose, dimensions, base, finish, and room layout. Only then does KZ-008 become a convincing wall finish, rather than an expensive part being misapplied.