Article Contents:
- What are ready-made slatted panels and how they differ from individual slats
- Advantages of a ready-made panel over individual slats
- Why panel size and thickness are critical
- Why skirting boards and additional elements should be chosen before installation
- Where to use ready-made slatted panels: by room
- Hallway: first impression and durability
- Living room: an accent with character
- TV area: from background to architecture
- Bedroom: warmth without extra words
- Kitchen-living room: border without walls
- Study: material solidity
- Hallway
- Walk-in closet
- Commercial interior
- What should be included in the slat panel kit
- The slat panels themselves
- Wooden skirting board or MDF skirting board
- End caps
- Molding along the top edge
- Door trims
- Corner Elements
- Extension profile for adjoining a painted wall
- Which skirting board to choose for ready-made slat panels
- Solid Wood Skirting Board
- Paint-Ready MDF Skirting Board
- High skirting board
- White baseboard
- Skirting board matching the panel color
- Baseboard matching door color
- Skirting for painting
- How to finish ends and edges: all junction points
- Side end at open wall
- Junction with door casing
- Outside corner
- Inside corner
- Edge at floor: bottom joint
- Edge at ceiling: top joint
- Transition to a painted wall
- Navigating around outlets and switches
- Which material to choose: MDF, wood, or panels for painting
- Wooden slatted panels made of solid oak
- Slatted MDF panels for painting
- Slatted MDF panels with wood finish
- Primed panels: ready to paint straight out of the box
- How to correctly calculate the number of panels and trim pieces
- Step 1: Measure the wall
- Step 2: Find the dimensions of one panel
- Step 3: Add 10–15% extra
- Step 4: Calculate the baseboard
- Step 5: Calculate the molding
- Step 6: Calculate end strips and corner profiles
- Step 7: Calculate the platbands
- Why it's better to calculate as a set, not just wall area
- Mistakes when buying ready-made slatted panels
- FAQ: answers to the most frequently asked questions
- Where to buy ready-made slatted panels as a set

There is one moment in renovation that looks innocent but can ruin the entire result. You bought ready-made slatted wall panels, installed them — and only then realized that the ends are open, the baseboard doesn't match in thickness, and there's a rough cut gaping at the doorway. The beautiful slatted wall turned into an unfinished fragment.
That's why ready-made slatted panels are not bought by the piece or by the square meter. They are bought as a kit: the panels themselves, baseboard, end strips, moldings, architraves, corner profiles. Only then does the wall look like an architectural solution, not like a separately glued decorative piece.
This article is a detailed practical breakdown of how to choose the right kit. No lyricism or general phrases. Only specifics that will save your budget, time, and nerves.
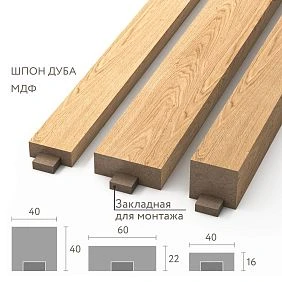
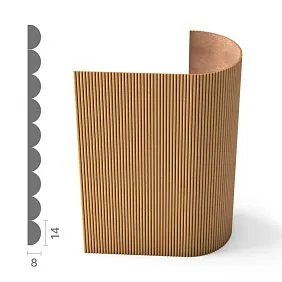
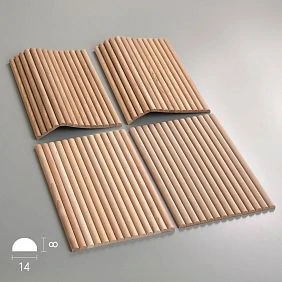
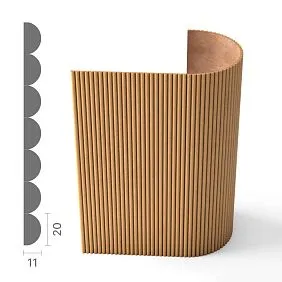
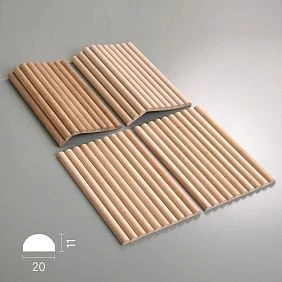
What are ready-made slatted panels and how they differ from individual slats
Before talking about the kit, you need to understand the difference between two approaches. The first is to assemble a slatted wall from individual slats: buy the slats, calculate the spacing yourself, make a base, attach each slat. This is maximum freedom and maximum work.
The second approach is ready-made slatted panels, where the slats are already assembled into a single panel on a backing. One panel is a ready-made wall section. The geometry is calculated, the slat spacing is fixed, the surface is finished. All that remains is to install the section on the wall — and the decorative surface is ready.




Advantages of a ready-made panel over individual slats
-
Significantly less installation time: instead of attaching each slat individually — installation of ready-made sections
-
The geometry of the slats and gaps has already been calculated by the manufacturer: no need to worry about spacing and alignment.
-
Uniform surface treatment: all slats are the same shade and texture.
-
Easier to calculate quantity: the wall area is divided by the area of one panel, accounting for trimming.
-
Easier to select trim elements: the manufacturer typically offers compatible linear components.
But the main advantage of a finished panel is precisely what turns it from a separate element into a system. When you buy a finished panel from the manufacturer, they also have baseboards, moldings, and linear components made from the same material, in the same tone. And this is a fundamental condition for a neat result.
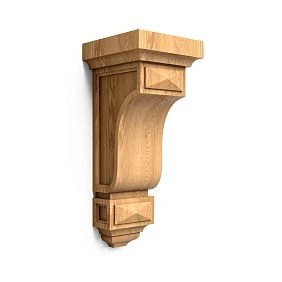
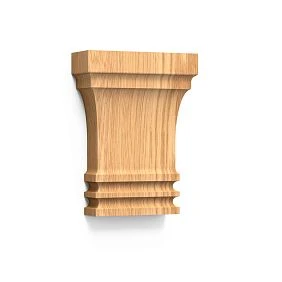
Our factory also produces:


Why panel size and thickness are critical
Ready Wall slatted panels have a specific thickness — typically from 12 to 25 mm depending on the material and construction. This figure affects the choice of baseboard (its profile must account for the panel's offset from the wall), the choice of casing (it must cover the end or join with the face plane), the depth of electrical boxes, and the gaps near door frames.
Without knowing the panel thickness before purchasing the set, you risk ordering incompatible elements. Therefore: first fix the panel thickness, then choose everything else.
Get Consultation
Why baseboards and trims should be chosen before installation
After the panels are installed, the choice of baseboard and end caps narrows sharply. You can no longer change either the height of the lower part of the wall or the thickness of the protrusion. The baseboard must precisely cover the bottom joint of the panel with the wall, and if it does not match geometrically, the joint will be exposed or messy.
Professional rule: baseboards, end strips, and moldings are purchased together with panels, before installation begins.
Where ready-made slatted panels are used: by each room
slatted panels for wall finishing — not a universal product 'for any wall'. Each room has its own task, and the right choice starts with understanding that task.
Hallway: first impression and durability
The hallway is the most heavily trafficked room. Here, walls are brushed by hangers, bags, strollers, and bicycles. wooden lath panels Solid oak here is the optimal choice: oak as a species has high density and resistance to mechanical impact. solid wood baseboard A height of 80 mm or more protects the lower part of the wall where impacts occur most often.
In the hallway, it is especially important to properly finish the ends at the doorway: the entrance is the first thing people see. Wooden casings In the tone of the panels or doors, they create a unified wooden entrance contour.
Living room: an accent with character
In the living room ready-made decorative slatted panels — a tool for creating an accent wall. The wall behind the sofa, the wall by the fireplace, the wall as a backdrop for artwork. The slatted surface acts like a frame that highlights the area and gives it its own scale. For a living room, panels with wide slats and pronounced gaps are suitable: a large rhythm is proportionate to a large space.
TV zone: from background to architecture
TV zone with ready-made slatted wall panels transforms from a simple screen location into an architectural object. Panels from floor to ceiling, built-in lighting in the gaps, a wooden baseboard matching the tone of the slats — and the TV ceases to dominate the interior: it becomes part of the wall composition.
Bedroom: warmth without unnecessary words
Behind the headboard Oak Slat Panels create the effect of a wooden niche — enveloping, natural, cozy. In the bedroom, moderation of relief is important: too active a rhythm of wide slats creates visual restlessness. A thin wooden molding along the top edge of the panel and an elegant baseboard at the bottom — enough for a finished result.
Kitchen-living room: border without walls
In open layouts, a slatted panel on a separate wall zones the space without physical partitions. A wooden wall behind the dining table or kitchen island is an accent that says: "here is a special zone." The baseboard and moldings are selected to match the kitchen furniture or wooden floor.
Study: material solidity
A study with wooden slatted panels is a space for people who value natural materials and quality details. Slatted panel made of solid wood in a dark tint, high wooden baseboard, Wooden moldings around the perimeter — and the study acquires a completely different class.
Corridor
In the hallway, ready-made Slatted wall panels with moderate relief create expressive texture without pressure. The direction of the slats is chosen wisely: vertical ones visually raise the ceiling, horizontal ones widen the corridor. For a narrow space — light tones and a small step of the lamellas.
Walk-in closet
In the dressing room Ready-made MDF slatted panels for painting — a practical solution: painted in the desired shade, create a textured background, easy to clean. MDF baseboard in the same shade creates a monochrome system that does not distract from the contents of the dressing room.
Commercial interior
In restaurants, hotels, and showrooms, slatted panels made of natural wood are a tool for creating atmosphere. Wooden Trim, moldings and baseboards from the same species set a unified material culture of the space.
What should be included in the kit for slatted panels
Here is the most important part of the article. Many people buy only the panels. They arrive for installation and discover that half of the materials are missing. Result: additional orders, delays, mismatched colors and materials. Let's break down what a proper kit consists of.
The slatted panels themselves
Basic element: ready-made slatted wall panels made of the selected material and in the desired shade. Calculate with a 10–15% margin for trimming, defects, and unforeseen situations. In practice, no installation ever happens without a margin: at every doorway, every outlet, and every corner, trimmings are inevitable.
Wooden baseboard or MDF baseboard
Wooden baseboard — a mandatory element of the bottom joint. Its function: to close the gap between the bottom edge of the panel and the floor, hide unevenness, and create a clear horizontal line at the floor. The length of the baseboard is calculated based on the perimeter of the wall with panels plus a 10% allowance for cuts and joints. The height is chosen considering the room's intensity and the desired architectural scale.
End strips
The side ends of finished slatted panels need to be closed. An open end is a cut of MDF or a cross-cut of wood. Neither is a final finish: an MDF cut absorbs moisture and dust, a wood cut may crack. A wooden end strip made of trim covers the cut and makes it part of the decorative surface.
The length of end strips is calculated based on the height of the wall panels. The quantity is based on the number of ends: each wall usually has two open ends (left and right edges).
Molding along the top edge
wooden molding along the top edge of the panel creates an architectural horizontal line that completes the slatted surface from above. Without a molding, the top edge of the panel looks cut off — regardless of how neatly it is trimmed. The molding creates a frame for the slatted wall: the lower boundary is the baseboard, the upper boundary is the molding.
In minimalist interiors, the molding is sometimes intentionally omitted. But this is an architectural decision, not a cost-saving measure: in this case, the top edge of the panel must be perfectly straight and run strictly parallel to the ceiling.
Door casings
At each door opening, the slatted panel adjoins the casing. If the casing is already installed and its thickness is less than the total thickness of the wall and panel, a step is formed. Wooden casings made of solid wood in the tone of the panels or in the tone of the doors are selected considering this geometry and cover all unevenness of the junction.
Corner elements
At an internal corner, panels from two adjacent walls meet. A corner molding or a wooden corner strip from the trim closes both ends and forms a clear vertical line of the corner. At an external corner, the situation is more complex: both ends are open and visible from different sides. A wooden corner profile made of trim solves the problem.
Additional profile for adjoining a painted wall
When the slatted panel ends not at a door or corner, but simply in the middle of the wall — the boundary between the slatted surface and the painted wall requires finishing. The wooden additional profile from the molding creates a clear vertical transition and prevents the eye from "stumbling" on an untidy edge.
| Kit component | Function | Material |
|---|---|---|
| Slatted panels | Main decorative surface | Solid oak / MDF |
| Baseboard | Bottom joint of the panel with the floor | Solid oak / MDF |
| End strip | Closing side cuts | Solid wood molding |
| Molding | Panel top edge | Array / MDF |
| Casing | Door frame junction | Oak solid wood |
| Corner profile | Interior/exterior corner finishing | Solid wood molding |
| Extension profile | Transition to the painted wall | Solid wood molding |
Which baseboard to choose for ready-made slatted panels
Choosing a baseboard is not a decorative task, but a geometric one. The baseboard must cover the bottom joint of the panel with the floor, considering that the panel protrudes from the wall. Let's review all the main options.
Solid wood skirting board
Wooden baseboard Made of solid oak — the best choice for a set with wooden slatted panels. Natural wood to natural wood: material coherence that cannot be replicated by other means. The wooden baseboard is tinted to the same shade as the panels — and the bottom line of the wall acquires a unified natural texture.
A wooden baseboard also works well with MDF panels imitating wood: the natural material at the base "pulls" the synthetic panel covering toward naturalness.
The profile of a solid wood baseboard must account for the panel thickness: if the panel protrudes from the wall by 18 mm, the baseboard must have a corresponding projection or a straight profile that covers the bottom joint without gaps.
MDF skirting board for painting
MDF baseboard paired with slatted MDF panels for painting — a monochrome system in its ideal form. Both elements are painted with the same enamel — the boundary between the panel and the baseboard dissolves. The wall becomes a solid vertical surface with a rhythm of slats from floor to ceiling.
MDF baseboard requires high-quality painting: 2–3 coats of enamel with intermediate sanding. An insufficiently painted MDF baseboard at the joint with the floor — especially in a hallway or kitchen — quickly loses its appearance.
High baseboard
High Wooden baseboard from 100 mm gives a wall with slatted panels monumentality. It creates an architectural "base" — a massive horizontal strip near the floor that visually grounds the slatted surface. This technique is especially effective in studies, living rooms with high ceilings, and country houses, where the scale of the space requires large-scale details.
A tall baseboard aligns with tall architraves and moldings: horizontal accents should be proportional to each other around the entire perimeter of the room.
White baseboard
White baseboard under ready-made slatted panels — the most versatile solution. It works with any panel color, any floor, any white ceiling. It creates a clear visual break and does not compete with the wooden accent of the panels for attention.
The only limitation: a white baseboard with very dark panels and simultaneously dark doors creates a conflict. In this case, a wooden baseboard in the tone of the doors is better.
Baseboard matching the panel color
A baseboard in the tone of wooden panels creates a continuous vertical line from floor to ceiling. The eye does not notice the transition between the baseboard and the panel — only the rhythm of the slats extending all the way to the floor. This is a powerful technique for TV zones and accent walls where maximum vertical integrity is needed.
Baseboard matching the door color
Wooden baseboard In the tone of the doors, it connects the two main wooden accents of the room — the slatted wall and the doors — through the horizontal floor perimeter. The baseboard, trim, and doors form a single wooden frame for the room. This is a classic design technique that works in any style.
Skirting board for painting
An MDF baseboard painted to match the wall color makes the lower boundary of the wall almost invisible. The wall seems to smoothly transition into the floor. This is a refined modern technique that requires flawless installation: any gap or deviation from the horizontal will be clearly visible on the monochrome surface.
How to cover ends and edges: all key points
Here is a practical breakdown of every place where a decorative slatted wall meets other interior elements. It is at these points that most installations look unfinished.
Side edge at an open wall
When the slatted panel ends not at a door or corner, the edge is visible from the side. A wooden edge slat made of trim — a rectangular profile, whose width matches the panel thickness, covers the cut. A trim in the panel tone makes the end a continuation of the decorative surface; in a neutral tone, it creates a clear boundary.
Junction with door casing
The most common joint and the most common mistake. If the casing is thinner than the panel, a step forms between it and the panel. Solutions: choose a casing with sufficient width to overlap the panel end; use an additional transition strip; or intentionally set the panel back from the casing by a few millimeters, creating a neat shadow gap.
Wooden casings with a profile that accounts for the panel thickness — this is a professional solution where the end is not visible at all.
External corner
At the external corner, the ends of two panels from perpendicular walls are visible from both sides. Three options:
-
A corner wooden batten from the molding range that covers both ends from both sides of the corner
-
Diagonal cut of the ends at 45°: both cuts meet in a perfect corner joint — requires precision
-
Metal corner profile with subsequent painting — for interiors where metal is appropriate
Internal corner
At the internal corner, the ends of two panels from two adjacent walls meet. Here, a corner molding from trim covers both ends and creates a clear vertical line of the corner. If the panels on the two walls are different colors, the corner molding becomes a neutral divider: the eye perceives it as an architectural detail, not a patch.
Edge at the floor: bottom joint
The bottom joint is the space between the lower edge of the panel and the floor surface. A wooden baseboard pressed against the face of the slats covers this joint. The baseboard must overlap the bottom end of the panel by at least 10–15 mm: this is enough to hide both the end and the expansion gap between the panel and the floor.
If the floor is uneven, a compensating wedge shim is installed under the baseboard to level the bottom line.
Edge at the ceiling: top joint
The top edge of a slat panel, if it does not run from floor to ceiling, is finished with a molding. If it runs from floor to ceiling, three options are possible: tight abutment to the ceiling with sealing, a shadow gap of 5–8 mm, or a ceiling baseboard covering the joint.
Transition to a painted wall
When slat panels cover only part of the wall and the remaining surface is painted, the boundary between them is a critical node. A vertical trim profile from the linear molding in the tone of the panels creates a clear transition. A shadow gap of 5–8 mm between the panel and the painted wall is a modern technique where the boundary looks intentional and elegant.
Bypassing outlets and switches
Slat panels with a thickness of 18 mm or more require relocation of junction boxes. Standard junction boxes are designed for installation in the wall, and the panel adds 18+ mm to it. Extended junction boxes or additional spacer rings are used. Decorative frames of outlets must cover the installation gap between the junction box and the face plane of the panel.
Which material to choose: MDF, wood, or panels for painting
slatted panels for interior wall finishing are divided into three fundamental types by material. The choice is determined not by price or fashion, but by the specific interior task.
Solid oak wooden slat panels
oak slat panel is naturalness without compromise. Each panel is unique: a natural pattern that changes from plank to plank. Oak is tinted in a wide range of shades: bleached, honey, tobacco, dark walnut, stained. The surface is tactilely rich — the hand feels the living wood.
Wooden panels are a choice for interiors where naturalness is the main value: country houses, classic, neoclassical, Scandinavian minimalism with a wooden accent, eco-friendly apartments with wooden floors and wooden doors.
An important condition: wooden panels require acclimatization in the room before installation — 48–72 hours at working temperature and humidity. This is a mandatory step that prevents deformation after installation.
MDF slatted panels for painting
Primed MDF slatted panel PAN-002 — freedom of color and precise color consistency. Paint in white, anthracite, gray, olive, terracotta — to the exact shade from the designer's catalog. The MDF surface is uniform: no natural defects, knots, cracks.
MDF is lighter than solid wood, which simplifies wall installation. The surface has no texture direction — ideal for monochrome solutions. Disadvantage: end cuts require protection; MDF is afraid of moisture on the open cut.
MDF skirting board for painting paired with such panels — a monochrome system with a single color from the floor to the upper edge of the slatted surface.
Slatted MDF panels imitating wood
MDF panels with a wood-like coating provide the visual warmth of natural material at a more affordable price. On the wall, they are convincing. Wooden Skirting made of solid wood paired with them — a natural base at the floor that "pulls" the clad panel towards naturalness.
Primed panels: ready to paint straight out of the box
The primed surface of the MDF panel is already prepared for final painting. No preliminary priming on site is needed — just apply 2–3 coats of enamel. This saves the installer's time and reduces the risk of uneven coloring.
| Material | Tactility | Color freedom | Style | Skirting board |
|---|---|---|---|---|
| Oak solid wood | High, natural | Toning with oil/varnish | Classic, country house, eco-style | Same wood species |
| Primed MDF | Homogeneous, for painting | Any enamel color | Minimalism, modern, monochrome | MDF in one tone |
| Wood-look MDF | Medium | Limited by coating | Transitional, modern | Wood or MDF |
How to correctly calculate the number of panels and additional elements
Calculation is mathematics adjusted for reality. The reality is that trimming, obstacle avoidance, and technological margin always add 10–15% to the calculated quantity.
Step 1: Measure the wall
Record the exact width and height of the wall for the panels. If the wall has a doorway or window, subtract their area. If you plan to cover only part of the wall height with panels, use only that height.
Step 2: Find out the dimensions of one panel
For a specific finished slatted panel there are exact dimensions: width and height. Divide the wall area by the area of one panel — you get the minimum number of pieces.
Step 3: Add 10–15% margin
The margin covers: trimming the last panel at a corner or door, installation defects, and future replacement of a damaged panel. For rooms with complex geometry — multiple doors, niches, protrusions — the margin increases to 20%.
Step 4: Calculate the baseboard
Length wooden baseboard = perimeter of walls with panels plus 10% for cuts. The baseboard is joined at internal corners (45° cut) and ends at external corners. At each door, the baseboard ends flush against the casing.
Step 5: Calculate the molding
Length molding along the top edge = the same length as the baseboard if the top molding runs along all walls with panels.
Step 6: Calculate end caps and corner profiles
End caps: count the number of open side ends. Each end = one cap with a height equal to the panel height. Corner profiles: count the number of corners (internal and external) where panels meet on both sides.
Step 7: Calculate casings
Wooden casings calculated for each door opening: perimeter of the door opening × number of openings plus a 10% margin.
Why it's better to calculate as a set, not just wall area
The mistake most buyers make: they only calculate the wall area and order only panels. As a result, there is a shortage of baseboard, molding, and end caps. They have to place an additional order — and the risk of color and batch mismatch increases many times over. One batch of oak panels may have a slightly different shade than the next. Buy the entire set in one batch.
Mistakes when buying ready-made slat panels
Many people have made these mistakes. After reading them, you won't make a single one.
Buying panels without baseboards. It seems logical: first buy the panels, then deal with the baseboard. In practice: the panels are already installed, the bottom joint is exposed, and it turns out that the baseboard of the required height in the desired tone is not produced or is out of stock. Everything is ordered simultaneously.
Not accounting for the panel thickness when choosing the baseboard. decorative slatted panels 18 mm thick protrude from the wall. A standard profile baseboard pressed against the wall will leave an 18 mm gap between the baseboard and the front surface of the slats. Always check the compatibility of the baseboard profile with the panel thickness.
Not ordering end strips. Open ends of slatted panels at every door and every wall end is a mistake that is immediately noticeable. Pogonazh iz massiva for ends — a mandatory item in the order.
Forgetting about door trims. If the trims are not coordinated with the panel thickness, an unsightly step forms at each door opening. Casings are ordered taking into account the panel thickness — before installation begins.
Not calculating the wall height considering the baseboard. If the baseboard is 100 mm high and the wall is 2600 mm high, the working height of the panels is 2500 mm. Cutting panels to 2600 mm and then installing the baseboard: the bottom 100 mm of the panels will go behind the baseboard, material resources are used inefficiently.
Not leaving a margin for trimming. Without a 10–15% margin, the first non-standard size at a corner or outlet becomes a problem. Margin is not wastefulness, but a professional standard.
Mixing different wood shades without a concept. Warm golden oak in panels and cool gray oak in baseboards is not contrast, but a temperature conflict. Coordinate the tone: warm with warm, cold with cold.
Choosing panels without considering the floor and furniture. A slatted wall does not exist in a vacuum. Oak panels with wenge parquet without a well-thought-out color connection create an interior that looks like a random set of materials.
Thinking only about the price of the panel, not the total cost of finishing. Budget panels without baseboards, without moldings, without architraves, and without end caps are just the beginning of expenses. Consider the total cost of the set, not just the cost of the panel.
FAQ: answers to the most frequently asked questions
What is included in the set of ready-made slatted panels?
Minimum required set: the panels themselves, baseboard, end strips, and molding along the top edge. For rooms with doors — architraves. For corner walls — corner profiles. All of this is selected from one catalog, from one material, and in one tone.
Which baseboard to choose for ready-made slatted panels?
Depends on the panel material: for wooden panels — a wooden baseboard of the same species; for MDF for painting — an MDF baseboard in one tone; for MDF with a wood finish — a wooden baseboard as a natural accent. Baseboard height — from 60 mm in the bedroom to 120 mm in the study and living room.
How to cover the end of a slatted panel?
The end is covered with a wooden end strip from the molding, with a width equal to the panel thickness. In the panel tone — the strip becomes part of the decorative surface. In the architrave tone — it connects the end to the door frame.
What is better: ready-made panels or individual slats?
Ready-made panels are faster to install, easier to calculate, and geometrically more precise. Individual slats offer more freedom in spacing and placement but require more time and accurate marking. For residential interiors with a clear design brief, ready-made panels are preferable.
How to calculate the number of ready-made slatted panels?
The wall area (excluding openings) is divided by the area of one panel. Add 10–15% margin for trimming. Additionally, calculate baseboard, molding, end strips, architraves, and corner profiles. The entire set is ordered in one batch.
Can ready-made MDF slatted panels be used in a hallway?
Yes, MDF panels work well in a hallway provided: a solid wood baseboard protects the lower wall area from mechanical damage better than an MDF baseboard; ends are covered with wooden strips from millwork; all exposed MDF cuts are protected.
Where to buy ready-made slatted wall panels in Saint Petersburg and Moscow?
In the STAVROS catalog — ready-made slatted panels from solid oak and MDF for painting with delivery across Saint Petersburg and Russia. Nearby in the catalog — wooden baseboards, moldings, architraves, and millwork for a complete set.
Where to buy ready-made slatted panels as a set
The task is only completed when the entire set is purchased — no exceptions. buy wall slat panels in one place, Wooden baseboard in another, Moldings in the third — this leads to incompatible shades, different thicknesses, and rough joints. The correct approach: one source, one material, one batch.
The STAVROS catalog includes ready-made slatted wall panels made of natural solid oak — Decorative panel PAN-001, oak slat panel PAN-003, MDF panel for painting PAN-002 — and all necessary additional elements: solid wood baseboard, Wooden moldings, Wooden casings и Wooden trim for ends, corners, and transitions.
STAVROS manufactures Solid wood products with precise geometry and a finished surface, ready for tinting. All catalog elements are coordinated by material and can be selected in a unified system. buy wall slatted panels with delivery to St. Petersburg and Moscow — in the STAVROS catalog.