Article Contents:
- “Ready-made leg” can mean two different things
- Ready-made in geometry
- Fully ready for installation
- Ready-made geometry saves production even without a finish
- Beech under enamel: when an unpainted leg makes sense
- Oak under tinting: when its own finish gives more control
- When a ready-made coating is better than your own painting
- Tone-on-tone
- Natural wood + painted body
- Contrasting leg
- Why a photo of the color does not replace a physical sample
- SAMPLE → APPROVED → BATCH: why one leg is cheaper than an error in a series
- Turned
- Carved
- Geometric
- MN-145M: turned support with ready-made finishes
- MN-146M: geometric shape and ready-made palette
- MN-204M: ready-made leg for cabinet furniture
- Dresser, wardrobe, and cabinet
- Console and high table
- Dining or writing desk
- Sofa and armchair
- Restoration and replacement of existing supports
- Why one SKU and one approved specification matter for a small batch
- When in-house finishing is especially useful in a small batch
- When a ready-made finish is especially useful in a small batch
- Finish State: first establish who is responsible for the surface
- Finish Code: the color should become the project identifier
- For a finished coating, keep the exact catalog name
- Reference Sample: a physical reference is stronger than a text description
- Do not mix the visual specification and the process sheet
- How to work with a custom finish on a batch
- How to work with a ready-made finish on a batch
- Why Finish Code is useful for repairs and reordering
- Incoming inspection of legs with a ready-made coating
- Incoming inspection of unfinished legs
- Do not mix the statuses "received" and "ready for assembly"
- Reordering a coated leg
- Reordering an unfinished leg
- Repairing a single damaged support
- A project archive should store more than a photo
- What to do if the finished color is not available
- What to do if an unfinished leg doesn't fit the workshop's process
- Choose the color first, then the geometry
- Buying an unfinished leg without factoring in the finishing cycle
- Buying a finished coating without a sample
- Mixing two finishes in one series
- Not saving the data after the first order
- When you shouldn't buy a coated leg at all
- When you shouldn't choose an unfinished leg
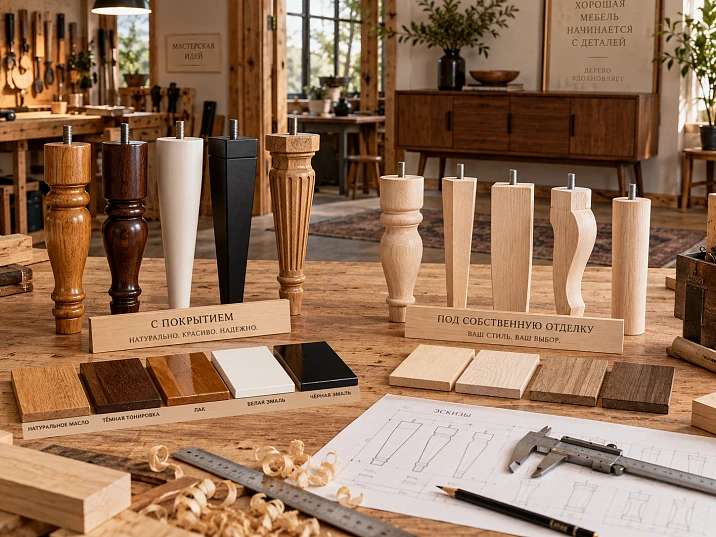
The master has already resolved the main question: we won't turn or mill the legs ourselves, we'll take a ready-made serial SKU. But that's not where the choice ends. Next comes a more practical fork: order a fully finished leg with a factory coating and install it on the furniture right away — or buy the same ready-made support in terms of geometry without a finish, so it can be painted, tinted, or oiled together with the rest of the project parts.
These options look similar only at the catalog stage. In production, they create two different routes.
READY + FINISHED: choose SKU → check dimensions and mounting → approve color → receive the set → install.
READY + UNFINISHED + OWN FINISH: choose SKU → check dimensions and material → make a test finish sample → include the legs in your own finishing cycle → inspect the set → install.
Therefore, the question of "with or without coating" should not be decided on the principle of "what is cheaper" or by a color photo. First, the geometry of the specific support is checked, then your workshop's technology, the requirements for color matching, the batch size, the material, and only after that — the degree of readiness of the purchased component.
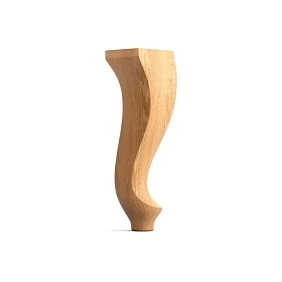
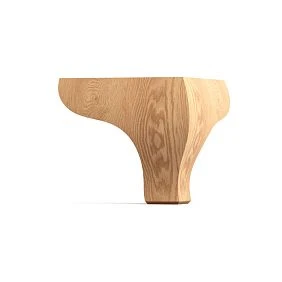

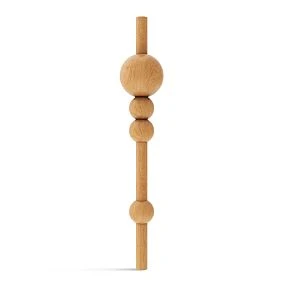

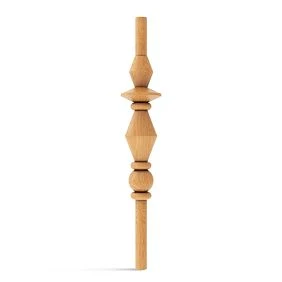
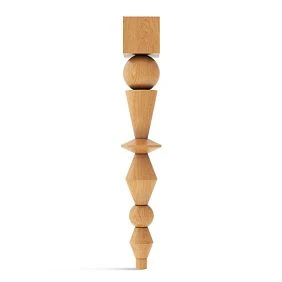
"Ready-made leg" can mean two different things
In furniture practice, the word "ready-made" is often used for two different products.




Ready-made in terms of geometry
The leg has already been produced as a serial part. It has:
- article number;
- the specified shape;
- actual dimensions;
- the material;
- surface finish quality;
- repeatable geometry.
But there is no final decorative coating yet. This is not a "blank for further manufacturing," but a finished furniture support that the workshop itself includes in its finishing system.
This option is convenient to look for in the section unpainted furniture legs.
Our factory also produces:

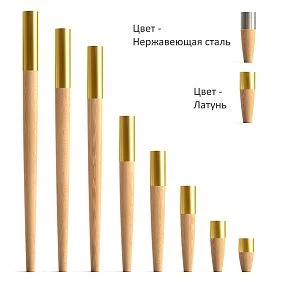
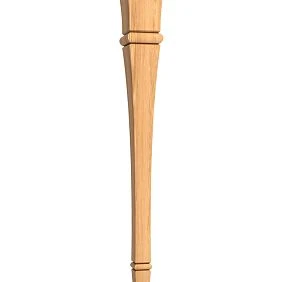
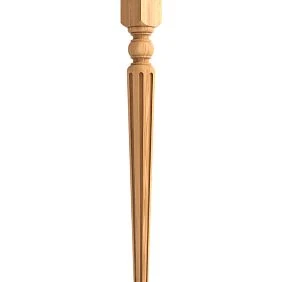
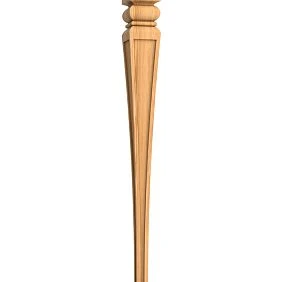
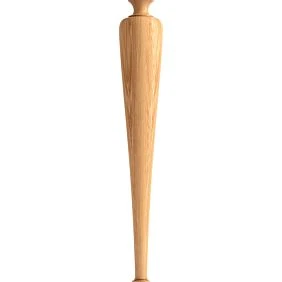
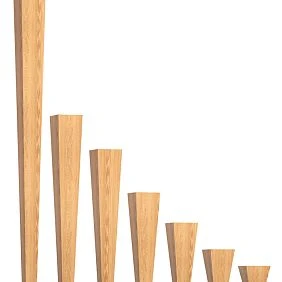
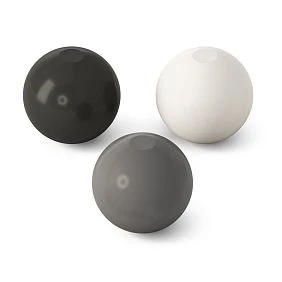
Fully ready for installation
Here, a ready decorative finish has been added to the finished geometry. In the current STAVROS range, coated legs include enamels and wood tints; for example, certain models are offered in white, grey, and black enamel, as well as in tinted versions.
For the workshop, this is already a component that, after incoming inspection, can proceed directly to installation.
This group is assembled by the section finished wooden legs with coating.
The main difference can be summed up in one line:
finished geometry ≠ necessarily a finished finish.
This difference determines the entire subsequent production route.
Get Consultation
First geometry and purpose, then coating
The most common mistake in this topic is starting the selection with color.
A white leg looks good with a white dresser, a black one with a cabinet with dark hardware, and a tinted one with an oak countertop. But if the height, installation area, or top size don't fit, a beautiful finish no longer matters.
Correct checking order:
- choose the furniture type;
- determine the required support height;
- check the specific SKU;
- transfer its dimensions to the drawing;
- check the upper mounting plate and fasteners;
- check the material;
- only then choose a ready-made finish or a custom finish.
This is especially important because a single model may exist in several heights or materials, and different visually similar legs may have different mounting geometry.
For general navigation, it is best to start with the category wooden legs for furniture and within it, separate items by their level of readiness.
When it makes sense to buy a leg with a finish right away
A ready-made leg with a finish saves not so much material as operations.
If a suitable color already exists, the production chain is reduced to:
receiving → inspection → installation.
This is a good scenario when:
- the coating shade suits the project without custom color matching;
- the legs do not have to match the fronts tone-on-tone;
- the workshop does not have its own painting area;
- the batch is small and starting a separate painting cycle is not cost-effective;
- a single item needs to be assembled quickly;
- the finish of the legs may intentionally differ from the carcass;
- the project uses a standard RAL or a ready-made wood tint.
Let's imagine a small series of bedside tables. The carcass is veneered, and the supports must be black. If the selected ready-made leg is available in the required black enamel and the geometry has already been verified in the project, a separate painting cycle just for 16 or 24 supports may not provide a production benefit.
Another example is the restoration or modification of ready-made furniture. The carcass already exists and there are no plans to repaint it. Here, a ready-made leg with an agreed color allows the task to be solved as a component replacement rather than as a full-fledged finishing project.
But a ready-made finish is only advantageous when it truly matches the task. Buying a painted leg and then sanding off the finish for the sake of a custom color is poor economics.
When is it better to buy an unfinished ready-made leg
An unfinished serial support is especially useful for a workshop that wants to control the finish itself.
Scenarios:
- all furniture is painted in an individual RAL or NCS;
- the customer has approved a complex color matching that is not among the ready-made options;
- the legs must match the fronts as closely as possible;
- a proprietary patina is used;
- oak elements are tinted with a single composition;
- an oil or lacquer of a specific system is used;
- the workshop wants to maintain a single technological cycle for the carcass and decor;
- the color is confirmed only after a physical color sample.
In this case, a mass-produced unfinished leg works as a high-quality semi-finished product: the complex geometry has already been produced by the supplier, while the workshop retains control over the visible surface.
This is especially convenient for custom furniture, where "white" rarely means just any white. Even if the project is called white, the following may differ:
- shade;
- gloss level;
- coverage;
- surface texture;
- primer system;
- patination;
- aging effect.
Then a custom finish allows the leg to be matched not to a catalog palette, but to a specific project.
Ready-made geometry saves production effort even without a coating
An unfinished leg is sometimes mistakenly perceived as "almost a blank." For a furniture maker, this is fundamentally incorrect.
If the support has already been mass-produced, the workshop does not spend time on:
- developing the profile;
- preparation of the turning program;
- milling of a complex shape;
- production of a trial geometric part;
- repetition of four identical elements;
- initial sanding to a marketable level, if it is already included in the finish;
- checking that the profiles match between the individual legs.
Another group of operations remains:
preparation for its own finish → finishing → coating inspection → installation.
This is the main B2B point of an unpainted production leg. A workshop is not buying a “half-finished product.” It is buying a finished complex shape and keeping for itself the operation it can control better within a specific furniture project.
For a small joinery workshop, this is often more sensible than starting a turning operation for four, eight, or twenty identical supports.
Two production routes: comparison of operations
The difference is easier to see not by product specifications, but by the production chain.
| Stage | Coated leg | Unpainted leg |
|---|---|---|
| SKU selection | Needed | Needed |
| Dimension check | Need | Need |
| Fastening check | Need | Need |
| Material check | Need | Need |
| Color coordination | using a ready-made option | via a custom color sample |
| Surface preparation | usually not a workshop production task | depends on the adopted technology |
| Primer / stain / oil | no, if the finish is ready | performed by the workshop |
| Applying the finish | No | performed by the workshop |
| Drying / intercoat operations | not in its own cycle | Present |
| Color control | incoming | after its own finish |
| Installation | Yes | after finishing is complete |
The table shows: the coated option reduces operations. But fewer operations is not always the main criterion.
If all furniture already goes through the paint shop, adding four or eight legs to the same process flow can be simpler than approving a separate ready-made shade.
But if there is no painting cycle, an unfinished leg, on the contrary, creates a new production challenge that the workshop could have avoided.
Material and finish system: beech, oak, enamel, and tinting
Material cannot be chosen separately from the finishing method. In a finished leg, the material is already part of a specific SKU, while in an unfinished one, it is also the basis of the future finishing system. Therefore, the question of “beech or oak” is considered here not as a competition between species, but as a production link: material → finish → furniture.
Beech under enamel: when an unfinished leg makes sense
For opaque painting, the value of the natural wood grain often becomes secondary. The focus is on geometry, surface quality, and compatibility with the adopted finishing system.
If the fronts, frame, and legs must have a single enamel color, the logic can be as follows:
carcass + fronts + ready-made unfinished legs → coordinated preparation → test spray-out → single enamel.
The advantage is that the workshop controls the entire visible set within one system.
But here one cannot promise an automatic match just because everything is painted with “one paint.” Different substrates, primers, relief, and number of coats can affect the final perception of the surface in different ways.
Therefore, a responsible approach includes a test coat specifically on the material or surface as close as possible to the actual part.
Some current unfinished STAVROS beech legs are explicitly labeled as enamel-ready, which fits this production scenario well. But the specific finish must always be verified in the product card of the selected SKU.
Oak for tinting: when your own finish gives more control
If the goal is to preserve the natural texture, the choice between a ready-made and your own finish becomes more difficult.
With an oak leg, the visible wood itself is part of the design. The result is influenced by:
- grain pattern;
- natural tone;
- stain;
- oil;
- varnish;
- degree of matte;
- depth of relief;
- adjacent wooden parts.
If the countertop, handles, decorative inserts, and legs need to form a single wood group, your own tinting can give the workshop more freedom.
For example, the craftsman approves a sample on a specific oak countertop, then tints the legs and other elements to match that sample. In such a project, a ready-made catalog tint, even if beautiful on its own, can become an unnecessary variable.
But there is a reverse scenario: the legs deliberately stand out as an independent wood accent. In that case, a ready-made tint may be quite sufficient if the physical sample satisfies the customer.
When a ready-made finish is better than custom painting
An unpainted option cannot automatically be considered "more professional." A professional choice is determined by the project's technology.
A ready-made finish is more rational if:
- the workshop does not do finishing;
- a separate painting job makes a small batch disproportionately expensive;
- the ready-made RAL already matches the project palette;
- the legs should be contrasting rather than tone-on-tone;
- fast production of a single piece of furniture is required;
- the customer approves the ready-made sample without additional color matching;
- the supplier's finish is satisfactory in terms of gloss, tone, and texture.
Imagine a console with a natural wood body and black legs. If the black base is a deliberate contrast, there is no point for the workshop to strive for a microscopic match between the legs and another wooden surface. A ready-made black finish may be technologically simpler.
Another case is a small restoration. Two or four supports need to be replaced on finished furniture, and setting up a separate painting cycle just for them is impractical.
Leg and body color: three sound strategies
Not all furniture needs legs that match the facade color. There are at least three well-established approaches.
Tone-on-tone
The legs visually continue the body.
This scenario places the highest demands on matching the shade, degree of gloss, and surface character. If the ready-made finish does not match closely enough, a custom finish is often more convenient.
Natural wood + painted body
The leg becomes a material accent.
For example, a painted cabinet body can stand on tinted oak supports. Here there is no need to imitate the facade color; on the contrary, the difference in materials is valued.
Contrasting leg
A black, gray, white, or other contrasting support is deliberately separated from the cabinet body.
In this case, the finished coating often works especially well: the goal is not an imperceptible match, but controlled contrast.
It is better to choose the strategy before ordering, because it affects not only the color of the leg, but also the handles, plinth, cornice, countertop, and other visible furniture elements.
Sample and finish confirmation before purchasing the batch
The choice of readiness level cannot be finalized based only on the product card. For a small single order, the risk is limited to a few parts; for a series, an error is replicated across dozens of supports. Therefore, between selecting the SKU and purchasing the batch, it is useful to introduce a separate confirmation stage.
Why a color photograph does not replace a physical sample
A catalog photograph is needed for selection. It is not sufficient for responsible color approval.
A screen does not allow reliable assessment of:
- shade temperature;
- actual gloss;
- tint transparency;
- patina depth;
- relief behavior under side light;
- compatibility with a specific facade or countertop.
Even a standard RAL solves only part of the task. The same color on different surfaces can be perceived differently due to gloss, relief, lighting, and surroundings.
For an important project, it is better to use the following chain:
SKU → physical sample → comparison next to the furniture material → APPROVED.
If the workshop works with its own finish, instead of a ready-made sample, a test coating is applied to the selected leg or to a comparable material.
SAMPLE → APPROVED → BATCH: why one leg is cheaper than an error in a series
Before ordering 24, 32, or 40 supports, it is useful to check one actual part, especially if the SKU is being used for the first time.
The sample shows:
- actual scale;
- size of the top part;
- position of the decorative profile;
- surface quality;
- color;
- gloss;
- texture;
- mounting method;
- compatibility with the cabinet.
Production scheme:
1 sample → fitting → geometry and finish check → APPROVED → batch order.
This protects against the scenario where the batch has already been purchased and then it turns out that:
- the shade is too cool;
- the leg looks heavier than in the render;
- the mounting part interferes with the runner;
- the height changes the proportion of the cabinet;
- the texture is too active for the selected front.
One test leg is not unnecessary overcaution, but an inexpensive checkpoint before the series.
Turned, carved, and geometric legs: the type matters, but it should not lead the article away from the main fork
This article should not replace separate materials on leg types. But the shape still influences the choice of finish.
Turned
У turned furniture legs the color is read by the smooth transitions of the profile. With custom painting, you need to especially carefully control the evenness of the coating in the fillets and transitions.
Carved
У carved furniture legs the finish interacts more strongly with the relief. Patina, tinting, or a clear coat can emphasize the depth of the pattern, while an opaque enamel makes the light-and-shadow pattern of the carving itself the focal point.
Geometric
У geometric furniture legs planes and edges are especially noticeable. On them, it is easier to see the difference in gloss and evenness of the finish.
The leg type does not answer the question "ready-made finish or your own" for you, but it shows which finishing features will be more noticeable on the finished furniture.
Examples of ready-made legs with STAVROS coating: how to use them in your selection
Specific product models are useful not as universal recommendations, but as examples of how different geometries, heights, materials, and finish options can be combined within a ready-made category.
MN-145M: a turned support with ready-made finishes
Turned furniture leg MN-145M is available in several size options and ready-made finishes. The current product page includes, in particular, white, gray, and black enamels, as well as wood tints.
A practical takeaway for the workshop: if the MN-145M geometry already suits the furniture, you can compare two production paths — a ready-painted version or the corresponding unpainted geometry, if it is available in the required configuration and the workshop wants its own finish.
MN-146M: geometric shape and ready-made palette
Geometric Furniture Leg MN-146M also shows that a ready-made finish does not mean a single color: the model offers several heights and several coating options.
For the designer, the order of steps matters: first choose the right size, then check the material, and only then compare colors.
MN-204M: ready-made leg for cabinet furniture
Geometric furniture leg MN-204M is part of the current range of coated legs for chests of drawers, wardrobes, and cabinets. For a project, this is a good example of a complete component: geometry, size, and finish should be checked as a single product, not as three independent decisions.
In all cases, the same logic applies: the product page provides the source data, but does not make the design decision instead of the furniture maker.
How the degree of readiness changes depending on the type of furniture
The same approach is not equally useful for a cabinet, console, table, and upholstered furniture. The difference is not in the name of the item, but in how much the leg should visually and technologically match the rest of the structure.
Chest of drawers, wardrobe, and cabinet
In cabinet furniture, the leg is often located next to the front, the side panel, and the plinth. That is why it is especially noticeable whether it matches the cabinet in color and surface character.
If a project is built on a monochrome painted cabinet, an unpainted leg with its own enamel gives the workshop a direct path to a unified finish. This is convenient when the fronts, side panels, and supports should look like one painted mass.
If, however, the leg should be contrasting — for example, black against a natural oak cabinet — a ready-made finish may prove simpler. Here there is no task of matching the cabinet shade; on the contrary, the difference in materials is part of the composition.
For a bedside table there is another nuance: the leg is close to the floor and often falls into shadow. A small difference in shade may be less noticeable than on a tall console under side light. Therefore, the requirement of a “perfect tone-on-tone” should be assessed not abstractly, but in the real position of the furniture.
Console and tall table
Tall legs have a larger visible area. Here the finish becomes a noticeable part of the furniture.
If the leg is long, a solid-color enamel should look even along its entire height. If a transparent tint is used, the natural wood grain shows through more strongly. Therefore, on a tall support the difference between a factory finish and an in-house one becomes more noticeable than on a part 80–120 mm high.
For a custom console with a non-standard cabinet color, an in-house finish often gives more control. For a series of simple consoles with contrasting standard legs, a ready-made finish reduces operations.
Dining or writing table
On a table, the leg is perceived not only from the front, but also from the side, and often from all sides. Here it is especially important that the finish be even all around or on all faces.
If the tabletop is made of natural oak and the legs are also oak, the decision depends on the design intent. You can keep a unified tint and finish everything together. Or, conversely, you can choose a ready-made dark leg as a standalone graphic element.
For a workshop, it is more important to define this strategy in advance, because after assembly it is significantly harder to change the finish of a long support.
Sofa and armchair
On upholstered furniture, the leg may be partially hidden by the upholstery and located in the lower shadow zone. But its finish should still be coordinated with other visible wooden elements, if there are any.
A finished coating is especially convenient if the upholstered furniture manufacturer does not have its own wood finishing cycle. In that case, the support arrives as a completed component.
However, if the workshop makes wooden armrests, frames, or decorative inserts and already has an approved tinting system, an unfinished leg allows it to be included in a single process.
Restoration and replacement of existing supports
Here the logic differs from new furniture. The body already exists, and its color or geometry is usually not planned to be changed.
First, you need to determine what is more important: replicating the old finish or achieving a deliberately new contrast. If the old shade is complex and the catalog does not offer a close ready-made option, an unfinished leg may be a more flexible base for matching.
If the task is to quickly replace the set with black, white, or tinted supports and the project allows for a new accent, a ready-made finish shortens the path.
In all scenarios, one rule remains: the degree of readiness is chosen after geometry and purpose, not instead of them.
How to calculate the number of ready-made legs
For simple four-support furniture, the basic calculation is obvious:
4 × number of items.
For example:
8 nightstands × 4 legs = 32 legs.
But this formula cannot be universalized.
A long dresser may have an additional center support. A sofa has more than four points. A bed may use a different scheme. Some products stand on a base or frame.
Therefore, the BOM must contain two fields:
- Qty per unit — how many legs per product;
- Total Qty — how many are needed for the entire batch.
Example:
| Project Code | SKU | Qty per unit | Production Qty | Total Qty |
|---|---|---|---|---|
| LEG-01 | selected SKU | 4 | 8 | 32 |
If part of the furniture uses a different model or a different finish, that is already a different line.
Why one SKU and one approved specification are important for a small series
A series of eight identical nightstands should truly be a series, not a set of similar items.
After the prototype is approved, the following are fixed:
SKU + material + finish + dimensions + mounting + quantity.
Do not mix visually similar but different legs in the same batch just because one model is temporarily out of stock.
Even if two supports differ by a few millimeters or have a slightly different shape, this is more noticeable on repeated furniture than on a single item.
For a finished coating, there is one more risk — a difference in finish between different SKUs or batches. Therefore, when there are high visual requirements for uniformity, the sample and the batch must be part of production control.
Small series: how to lock down SKU, finish, and batch
A series turns the choice of coating from an aesthetic decision into a production standard. After the first item is approved, each subsequent set must not be assembled on the principle of “let’s take something similar.” A series must have one frozen specification: SKU + material + dimensions + finish state + finish + mounting.
When an in-house finish is especially useful in a small series
An in-house finish gives the workshop a unified technological standard.
Let’s imagine a series of ten consoles. The project uses:
- oak countertop;
- ready-made oak legs;
- wooden handles;
- decorative profile.
If all parts must have the same custom tint, purchasing unfinished components allows the finisher to work from a single approved sample.
The advantage is not that "finishing it yourself is always better." The advantage lies in the controlled repetition of a single project finish across different components.
But this requires discipline:
- one approved sample;
- a fixed coating system;
- consistent preparation;
- batch control;
- process records.
Without this, in-house finishing itself becomes a source of variability.
When a ready-made finish is especially useful in small batches
The reverse scenario — a series where the leg must be a standard contrasting component.
For example, eight cabinets with identical black supports. The bodies may differ in wood or shade, but the legs must remain identical.
Here, the ready-made black enamel simplifies production:
- there is no need to introduce the legs into a separate painting process;
- there is no need to organize separate drying;
- the number of operations within the workshop is reduced;
- labor costs are easier to calculate;
- the kit arrives as a finished item.
Therefore, the choice of the degree of readiness depends not on the size of the business, but on where the workshop wants to keep control: with the finish supplier or within its own production.
How to calculate real savings: not the price of the leg, but the cost of the entire route
Comparing only the price of a finished painted leg versus an unfinished one is not enough.
For the unfinished option, the cost may include:
- preparation;
- soil;
- stain or enamel;
- lacquer or oil;
- consumables;
- finisher's time;
- drying;
- intercoat sanding;
- inspection;
- risk of defects;
- re-finishing a defective part.
A ready-made leg still carries its own costs:
- higher price of the finished component;
- sample check;
- risk of color mismatch;
- possible palette limitation;
- the need to order a replacement in exactly the same finish.
Therefore, the make-or-finish decision looks like this:
the cost of the supplier's ready-made finish versus the full cost of an in-house finishing cycle.
On four legs, the difference may be small. On forty, it is already significant.
But if the workshop is going to finish the entire furniture set anyway, the additional cost of including the legs in the existing cycle may turn out to be lower than it seems when calculated separately.
How to describe a finish so it can be reproduced a month and a year later
The weakest entry in the specification — white leg, dark oak or walnut finish. It is clear at the moment of discussion, when a sample is at hand and all project participants remember what was meant. A few months later, such wording is almost useless.
If a workshop wants reproducibility, the finish must be described as a separate project entity.
Minimal logic:
Finish State → Finish Code → Reference Sample → Approval → Batch.
Finish State: first establish who is responsible for the surface
Field Finish State it answers not the question “what color is the leg” but the question “at what stage does the supplier’s work end.”
Options:
FINISHED— the leg comes with a ready decorative finish;UNFINISHED— the leg comes without a final coating, and the finishing is done by the workshop;- if necessary, an internal status such as
FINISH BY WORKSHOP, if it is accepted in the documentation.
This field is especially important when the same furniture model exists in several versions. For example, the base series gets ready-made black legs, while the custom one gets unpainted legs to match the custom facade color.
Without a separate Finish State, the buyer can easily select the correct SKU in the wrong finish.
Finish Code: color should become a project identifier
For a custom finish, it is convenient to create a code:
F-01
F-02
WOOD-03
The code links the leg to the overall furniture system.
For example:
LEG-01 | UNFINISHED | Finish F-01
HND-02 | UNFINISHED | Finish F-01
MLD-03 | UNFINISHED | Finish F-01
This makes it immediately clear: three different wooden components must go through one approved finishing system.
The coating recipe itself can be stored in the workshop's process card, while the BOM only needs a reference to the code. This is better than copying a long description into every line and ending up with several slightly different versions of the same finish.
For a finished coating, keep the exact catalog name
If the FINISHED variant is selected, the internal description white Not enough.
It is better to keep the exact coating name from the product page. For example, if the manufacturer specifies a particular RAL or tint name, that is exactly what should go into the specification.
This reduces the risk that six months later someone orders a "white" leg in a different shade, considering it equivalent.
For a finished finish, the line might look like this:
LEG-01 | FINISHED | [exact manufacturer's coating name] | APPROVED SAMPLE S-01
Reference Sample: a physical standard is stronger than a text description
Even a good specification does not replace a physical sample where color and surface are critical.
The standard should be labeled:
- Project Code;
- SKU;
- Material;
- Finish State;
- Finish Code or catalog finish;
- Revision;
- approval date;
- project or furniture series.
This way, the sample does not turn into a nameless piece of wood that no one can identify six months later.
If a custom tint is used, the master sample helps the finisher check not only the color, but also the overall character of the surface: depth, contrast of the grain, matte level, and the visual behavior of the texture.
Do not mix the visual specification and the process sheet
There are two levels of description.
The project level answers: what visual result has been approved?
The technological level answers: how does the workshop achieve it?
In the project specification, it is enough to indicate:
- Finish Code;
- reference sample;
- APPROVED status.
The process sheet may contain the workshop's working sequence, materials, and settings, but this is already an internal production document.
Separation is useful because the technology sometimes changes, while the approved external result must remain the same. Conversely, a project can change color without changing the base processing technology.
How to work with a custom finish on a batch
After the first leg is approved, you should not automatically assume that the entire series will look identical without control.
Practical route:
- the SKU geometry is approved;
- a test finish is performed;
- the sample receives APPROVED status;
- a small control group or the entire batch is finished according to the approved system;
- the batch is compared with the reference;
- only after this do the legs move to assembly.
This is especially important for transparent and semi-transparent finishes, where the wood itself remains visible and affects the result.
How to work with a ready-made finish on a batch
A factory coating removes the application technology from the workshop, but it does not cancel acceptance.
Upon receiving a batch, compare:
- compliance with the ordered finish;
- uniformity of the set;
- absence of damage;
- consistency of visible surfaces;
- compliance with the approved sample, if one was used.
The workshop is not obliged to produce the coating itself, but it remains responsible for ensuring that the agreed parts go into the finished furniture.
Why Finish Code is useful for repairs and repeat orders
A year later, the client asks for a second console. The archive contains only the SKU of the leg, but no information about the finish. Formally, the required item has been found, but visually it is already harder to replicate the furniture.
If the archive contains:
LEG-01 | SKU | UNFINISHED | F-01 | SAMPLE S-01
Or:
LEG-01 | SKU | FINISHED | exact manufacturer finish | SAMPLE S-02,
reordering becomes reproducible.
That is why the finish is not a comment at the end of a line. For custom furniture, it is just as much a project parameter as size and material.
Lead times, batch, and incoming inspection: what to check besides color
The degree of readiness affects not only painting operations, but also the production schedule.
For a leg with a finish, the workshop depends on when the supplier can provide exactly the required combination:
SKU + size + material + finish + quantity.
For an unpainted item, the dependency is different: receiving the part is not enough — after delivery, a separate finishing cycle is still required. Therefore, the arrival date of unpainted legs must account for time for preparation, application of materials, drying, and inspection.
If the carcass is already assembled and the legs have only just arrived at the paint shop, the product may physically occupy space in the workshop and wait for one small component to be completed.
A practical schedule is best worked backwards from the assembly date:
- final assembly date;
- date when the legs are ready for installation;
- time for in-house finishing or receiving the finished coating;
- incoming inspection;
- delivery;
- placing the order.
This way, the coating stops being the "final decorative touch" and becomes part of production planning.
Incoming inspection of legs with a finished coating
Check the set before installation, not just one random part.
You need to compare:
- SKU;
- quantity;
- size;
- material, if visible or specified in the delivery;
- color;
- gloss level;
- Integrity of coating;
- uniformity of the set;
- condition of the installation areas.
If one leg differs in finish, it is easier to detect this before the other three are already installed on the body.
Incoming inspection of unpainted legs
Here the focus shifts to geometry and surface before finishing.
Check:
- completeness;
- dimensions;
- absence of damage;
- quality of sanding in the available finish;
- surface in areas of future painting;
- uniformity of the profile;
- installation part.
After applying your own finish, some original defects are harder to correct, so incoming inspection must occur before the painting cycle.
Do not mix up the statuses "received" and "ready for assembly"
For FINISHED, they may almost coincide after inspection.
For UNFINISHED, there is a separate production stage between them.
In the working table, it is useful to distinguish:
RECEIVED
IN FINISHING
FINISH APPROVED
READY FOR ASSEMBLY
This is especially useful when several furniture orders are in progress at the same time and different sets of legs are at different stages.
How to record a finished leg in the BOM
The degree of completion must be recorded directly in the specification.
For a coated leg:
LEG-01 | SKU | FINISHED | material | finish | qty
For an unpainted one:
LEG-01 | SKU | UNFINISHED | material | finish system F-01 | qty
Useful table:
| Field | Example |
|---|---|
| Project Code | LEG-01 |
| Manufacturer | STAVROS |
| SKU | specific |
| Type | turned / carved / geometric |
| Material | beech / oak |
| Dimensions | By card |
| Finish State | FINISHED / UNFINISHED |
| Finish | RAL / stain / F-01 |
| Qty per unit | 4 |
| Total Qty | 32 |
| Sample Status | APPROVED |
| Revision | REV02 |
| URL | Product |
This is not bureaucracy. Such a line protects against the situation where a buyer orders a leg that is correct in form but wrong in level of readiness.
Reordering, repairing, and replacing a single leg: which option is easier to maintain
The furniture lifecycle does not end on the day of shipment. A leg can be damaged during a move, the customer may want a second item from the same series, and the workshop may need to reproduce the model a year later.
Here the difference between FINISHED and UNFINISHED shows up again.
Reordering a finished leg
For an exact repeat, you need to preserve not only the SKU but also the finish.
A record such as:
MN-... / black
too weak.
It is better to record the full name of the finish variant used in the original order, plus the date or project revision.
Even with the same catalog name, it is reasonable to physically compare the new part with the old furniture if appearance is critical. The wood substrate, use, and aging of the existing finish can affect perception.
Reordering an unfinished leg
Here the workshop retains more control over the finish, but must preserve its own technology.
Required:
- SKU;
- the material;
- size;
- finishing system;
- color recipe;
- layer sequence;
- sample or reference.
If this data is lost, buying the same unfinished leg solves only half the problem: the geometry will match, but the color will have to be recreated from scratch.
Repairing a single damaged support
If the damage is only on the surface, a custom finish can sometimes be easier to restore locally within the workshop, especially if the materials and recipe have been preserved.
For a factory finish, it makes more sense to first check whether a replacement can be ordered in the same variant. Independently touching up a finished surface locally can produce a noticeable difference in sheen or tone.
The project archive should store more than a photograph
Minimum archive:
| Field | What to save |
|---|---|
| Project Code | LEG-01 |
| SKU | Exact SKU |
| Size | Selected size |
| Material | Beech / Oak |
| Finish State | FINISHED / UNFINISHED |
| Finish | exact finish or F-01 |
| Mounting | fasteners / assembly joint |
| Qty per unit | Quantity per product |
| Supplier URL | Product card |
| Revision | project version |
This way, a repeat order becomes a reproducible operation rather than a search for a "similar leg."
Edge cases: when the chosen route stops working
A good selection framework should explain more than just the ideal cases. Sometimes the required geometry exists in only one finish, the ready-made palette doesn't fit, your own painting cycle is overloaded, or a reorder is needed many months later. In that case, it's important not to continue down the chosen path automatically, but to return to the project's original constraints.
What to do if there is no ready-made color
There's no need to choose the closest shade just because the geometry fits perfectly.
There are several options:
- check an unfinished version or a similar SKU without a finish;
- use the ready-made finish as a contrasting one, if the design supports it;
- change the color strategy of the project;
- choose another model with a suitable ready-made finish;
- approve a custom finish.
The right decision depends on what matters more for a specific piece of furniture: precise geometry or a ready-made color.
If a leg is structurally perfect and available without a finish, it is often more rational to keep the geometry and resolve the color within the workshop than to change the entire SKU just for a catalog shade.
What to do if an unfinished leg does not fit the workshop's technology
There is also the opposite limitation.
The workshop may not have:
- a paint booth;
- a stable tinting system;
- toning experience;
- drying time;
- conditions for a repeatable batch finish.
Then your own finish turns from freedom into risk.
In such a situation, a ready-made leg with a finish may be a more professional choice, even if the palette is slightly less flexible.
Expertise here is not in the maximum number of in-house operations, but in choosing a controlled process.
Typical mistakes when choosing the degree of readiness
First they choose the color, then the geometry
Reason: the catalog is perceived as a palette.
Consequence: a beautiful finish ends up on a leg of the wrong size.
What to do: first SKU and dimensions, then finishing.
They buy an unfinished leg, not counting the painting cycle
Reason: the price of the blank seems attractive.
Consequence: after primer, paint, drying, and labor, the total cost turns out higher than expected.
What to do: calculate the entire production route.
They buy a ready-made finish without a sample
Reason: the color on the screen seems suitable.
Consequence: in real light, the shade or sheen conflicts with the furniture.
What to do: SAMPLE → APPROVED.
They mix two finishes in one series
Reason: part of the required quantity is missing.
Consequence: the set stops looking uniform.
What to do: record the SKU + finish as a single specification item.
They do not save data after the first order
Reason: the project is considered complete.
Consequence: when reordering, the search for "the same leg" begins.
What to do: archive the BOM, SKU, and finish.
When to choose FINISHED, and when UNFINISHED is not advisable
Both strategies have situations in which they create extra work. Checking "when it is not needed" is more useful than universal advice, because it immediately shows the boundary of the solution's applicability.
When you should not buy a leg with a finish at all
A pre-finished surface is impractical if the workshop will remove or cover it anyway.
For example:
- the project requires a unique NCS;
- the leg must receive the same patina as the fronts;
- the oak needs to be tinted to match the worktop sample;
- the surface will be artificially aged together with the furniture;
- a pre-finished surface conflicts with the adopted finishing system.
In these cases, a pre-finished surface adds an extra step: first it must be accounted for as an existing layer, then you must decide whether it can be worked on further or needs to be removed.
It is more sensible to choose an unfinished version right away if it is available in the required geometry.
When you should not choose an unfinished leg
An unfinished part is not universal either.
It offers no advantage if:
- there is no in-house painting cycle;
- the project has already been approved based on a ready catalog color;
- the leg is used as a standalone contrasting accent;
- the batch is too small for a cost-effective finishing run;
- the timeline does not allow for introducing an additional operation;
- the workshop cannot guarantee color repeatability.
In that case, a ready finish removes unnecessary uncertainty from production.
Short decision tree: which option to choose
If we set aside styling and leave only production conditions, the fork becomes fairly clear.
| Project conditions | More often it makes sense |
|---|---|
| The standard catalogue color is perfectly satisfactory | FINISHED |
| Custom RAL/NCS needed | UNFINISHED + OWN FINISH |
| Legs must match the fronts tone-on-tone | more often UNFINISHED, after painting |
| Legs serve as a contrasting accent | often FINISHED |
| No in-house painting facility | FINISHED |
| All furniture still goes through the in-house paint shop | often UNFINISHED |
| The oak needs to be matched with another wooden component | often UNFINISHED + shared sample |
| Single quick replacement on finished furniture | FINISHED, if the color matches |
| A small batch with a standard color is needed | FINISHED after sample approval |
| A batch with a custom patina or tint is needed | UNFINISHED + fixed technology |
The table does not replace checking a specific SKU. It only shows where each route usually has its production advantage.
There is a simple control question:
Which operation does the workshop want to control itself — only assembly, or also the visible finish?
If only assembly, a ready-made coating naturally shortens the process.
If the finish is part of the workshop's proprietary technology, an unpainted serial leg preserves this technology without forcing the geometry to be produced from scratch.
Final checklist before ordering
Before buying ready-made wooden furniture legs, check:
- the specific SKU is selected;
- the height is suitable;
- the top size and mounting area are suitable;
- the mounting method is clear;
- the purpose matches the furniture;
- the material is selected;
- decided: FINISHED or UNFINISHED;
- for FINISHED, a physical sample is approved;
- for UNFINISHED, a custom finishing system is approved;
- beech/oak chosen deliberately;
- color strategy is clear: tone-on-tone, natural accent, or contrast;
- Qty per unit calculated;
- Total Qty calculated;
- batch approved;
- Sample Status = APPROVED;
- BOM contains finish state;
- URL and revision preserved.
If after this a line remains in the specification wooden leg — 4 pcs., the selection is not yet complete.
Where to buy ready-made wooden furniture legs
STAVROS conveniently separates two product routes.
For fully finished components, use the section finished wooden legs with coating.
If the workshop wants to retain control over color, tinting, or protective finish, the following are suitable unpainted wooden legs.
The full range is gathered in the section furniture legs and wooden supports.
The final decision point should be simple:
geometry is suitable + ready finish is suitable → READY + FINISHED.
geometry is suitable + finish needs to be subordinated to your own project → READY + UNFINISHED + OWN FINISH.
In both cases, the workshop gains the main advantage of a ready-made serial component: it does not need to reproduce the complex geometry of the leg from scratch. The only difference is where the supplier's work ends and the workshop's own technological responsibility begins.