Article Contents:
- What is KPU-124 and why all three dimensions are important for the beam
- What exactly does "two lower edges" mean when installing the molding
- Option 1. Two strips on the lower plane
- Option 2. One strip on each side face
- What should not be assumed without checking
- Two lines are logical if the beam is read as a whole
- One line may be sufficient if one side is barely visible
- One line can be a deliberate asymmetric accent
- Beam 3.6 m
- Beam 4.2 m
- Beam 5 m
- Joints opposite each other
- Joints offset
- Joint at the center of the beam
- In the color of the beam
- Contrastingly
- Can KPU-124 be used if the bottom edge of the beam already has a chamfer?
- Is it mandatory to place KPU-124 strictly on the bottom surface?
- Can KPU-124 be used on a beam that rests with one end against a wall?
- Can short remnants of KPU-124 be used on another beam?
- What to do if two edges have slightly different actual lengths?
- Is an additional strip needed "just in case"?
- Can KPU-124 be installed on only one of several beams?
- What to do if the beam is longer than 6 m?
- Can remnants of 800 and 1200 mm be joined to get a full 2 m?
- If KPU-124 is painted to match the beam color, will the ornament remain visible?
- Can KPU-124 be combined with ceiling moldings?
- If the bottom edge of the beam is 100 mm, are two strips of 20 mm each too wide?
- Should I install molding on a beam with a pronounced wood texture?
- Where can I see other sizes of molding?
- Where can I buy specifically KPU-124?
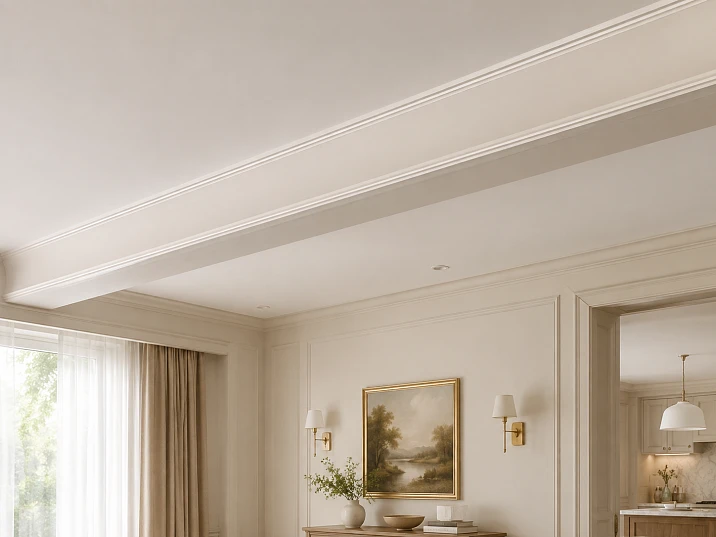
The false beam is already installed, its size and position do not need to be changed. The problem is much more local: the smooth lower part looks too plain, and adding large ceiling molding around the entire structure is not desirable. In this situation, you can consider two thin longitudinal decorative lines — one along each lower edge.
For this task, the decorative molding KPU-124 made of polyurethane is suitable in format. Its size is 20 × 7 × 2000 mm, meaning the cross-sectional dimension is 20 mm, depth is 7 mm, and the length of one strip is 2 m. The price at the time of checking is 6,190 ₽ per piece.
But first, you need to check not the length of the beam, but the edge itself.
KPU-124 is a linear decorative molding, not a corner profile. Therefore, it cannot automatically be considered a part that "wraps" around the right angle of the beam. For installation, a suitable flat area about 20 mm wide on the selected face is needed: for example, on the lower plane of the beam along both edges, or on two side surfaces near the lower edges.
After that, the length is calculated.
If the beam has a length of 3.6 m and two parallel edges are being decorated:
3.6 × 2 = 7.2 m of decorative line.
With a KPU-124 length of 2 m, four strips are mathematically sufficient:
4 × 2 = 8 m.
But for long beams, simple linear footage is only the beginning of the calculation. You also need to decide where the joints will be, how short the edge inserts will be, whether leftovers can be used on the second edge, and whether the pattern of two parallel lines will look the same.
Therefore, the correct sequence is as follows:
determine the mounting plane → try the 20 mm width → choose one or two lines → measure the actual length → plan the cutting of two-meter strips → determine the position of joints → calculate the cost → only then order KPU-124.
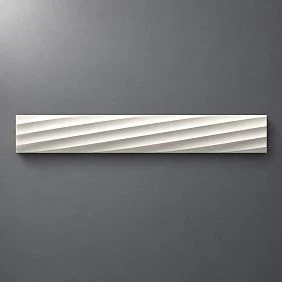
What is KPU-124 and why all three dimensions matter for a beam
KPU-124 belongs to the STAVROS polyurethane molding. The current product card specifies parameters A × C × L = 20 × 7 × 2000 mm. The manufacturer describes the product as decorative molding that can be used on furniture, openings, transitions between surfaces, and in ceiling compositions.
| Parameter | KPU-124 |
|---|---|
| Product type | decorative linear molding |
| Material | Polyurethane |
| Size | 20 × 7 × 2000 mm |
| A | 20 мм |
| C | 7 мм |
| L | 2000 мм |
| Price at time of check | 6,190 ₽ per strip |
| Average production time for made-to-order items | 3–7 days |
The product card and the current molding section confirm the price of 6,190 ₽.
For the beam in question, each dimension answers a separate question.
20 mm determine how much space the decorative strip occupies on the surface.
7 mm show how much the relief protrudes relative to the plane of the beam.
2000 mm determine the cutting layout and the number of joints.
You cannot consider only the last two meters of length and ignore the first 20 mm. If the mounting area near the edge is narrow, rounded, or already occupied by a chamfer, KPU-124 may not fit even with a perfectly calculated number of planks.




What exactly does "two lower edges" mean when installing trim
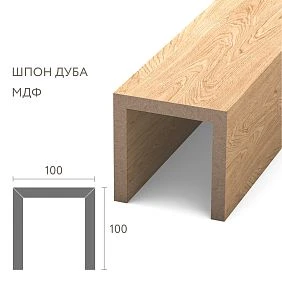
A U-shaped or rectangular decorative beam has a lower plane and side faces. Between them run two longitudinal lower edges.
KPU-124 can be considered as a decorative line accompanying these edges. But before ordering, you need to determine on which plane the trim will actually be glued.
Our factory also produces:
Option 1. Two strips on the lower plane
KPU-124 is placed on the bottom, with one strip along the left and right edges of the lower face.
Then both lines are clearly visible to a person standing under the beam.
This is the most illustrative option for calculating the width of the lower plane.
Get Consultation
Option 2. One strip on each side face
The molding runs along the side of the beam near its lower edge.
From below, the composition looks calmer, but an ornamental border appears when viewed from the side.
What should not be assumed without checking
KPU-124 cannot be considered a ready-made L-shaped profile that simultaneously covers the lower and side surfaces.
The card shows a regular decorative molding with a cross-section of 20 × 7 mm, not a corner piece.
Therefore, the first fitting should answer the question:
where exactly do these 20 mm lie?
After this, all subsequent calculations become much more accurate.
First, stick two paper strips 20 mm wide.
For KPU-124, a full-size check takes several minutes.
Cut two strips of paper or masking tape 20 mm wide and secure them along the intended lines.
It is not necessary to immediately make a mock-up three to five meters long. To assess the transverse scale, a section about 0.5–1 m long is sufficient.
Look at the beam:
from below;
from the side;
from the usual point of entry into the room;
with the main lighting turned on.
This will make it clear whether two lines are really needed.
Sometimes 20 mm seem very narrow on the screen, but on a small false beam, two strips together already give 40 mm of ornamental decor along the bottom plane.
This effect is especially noticeable on narrow beams.
If KPU-124 passes from below, two strips occupy 40 mm of the beam width
Suppose two strips are placed on the bottom face directly near its edges.
Each occupies 20 mm.
Their total width:
20 + 20 = 40 mm.
The remaining smooth field between them can be calculated:
bottom face width − 40 mm.
It turns out:
| Beam bottom face width | Two KPU-124 strips | A clean field between them |
|---|---|---|
| 60 мм | 40 мм | 20 мм |
| 80 мм | 40 мм | 40 мм |
| 100 мм | 40 мм | 60 мм |
| 120 мм | 40 мм | 80 мм |
| 150 мм | 40 мм | 110 мм |
| 180 мм | 40 мм | 140 мм |
| 200 мм | 40 мм | 160 мм |
This is not a standards table. It shows the share of decor in the actual cross-section of the beam.
On the lower plane with a width of 60 mm, two 20-millimeter strips occupy two-thirds of the entire surface.
On a beam with a width of 150–200 mm, they turn into a much thinner framing of a large central field.
Therefore, the expression "narrow KPU-124" is only correct relative to the product itself. Relative to a specific beam, the scale is different each time.
What happens if the molding is set back from the very edge
Sometimes a decorative line looks better not directly on the edge, but with a slight offset.
Suppose:
width of the lower face — 120 mm;
width of each KPU-124 — 20 mm;
the offset from each outer edge will be denoted as X.
The width of the clean central field then is:
120 − 40 − 2X.
If X = 0, 80 mm remains between the strips.
If a different offset is selected, the central field decreases accordingly.
But a universal offset cannot be set. It depends on the shape of the beam itself, the edge profile, and how much the KPU-124 should emphasize the edge specifically.
A paper mockup allows comparing the position "flush to the edge" with the position with an offset before installation.
The depth of 7 mm also affects the result.
The KPU-124 protrudes relative to the mounting plane by the amount specified as C = 7 mm.
This depth is not visible on the paper strip.
On the ceiling beam, it creates an additional shadow.
If two strips are on the bottom, two parallel lines of light and shadow appear.
With side lighting, they can be more noticeable than the ornament itself.
This is especially useful when painting KPU-124 to match the beam's color: the decorative effect is created not by a new color, but by the relief.
But on a very thin or small false beam, the 7-millimeter protrusion also needs to be checked. You can temporarily attach a strip of material of similar thickness along the paper mockup and look at the beam from the side.
One line or two: the amount of trim should follow the composition
The article's topic implies two bottom edges, and for a symmetrical freestanding beam, two lines are usually easier to tie to its geometry.
But you don't automatically need to buy material for both sides.
Two lines are logical if the beam is read as a whole
It is located inside the room, both sides are visible, and the bottom edge is symmetrical.
Decorating both edges supports the beam's shape itself.
One line may be enough if one side is barely visible
For example, a beam runs close to a wall, or the room's architecture makes one side secondary.
Then the second decorative line may have almost no impact on perception, but it doubles the material consumption.
One line can be a deliberate asymmetric accent
This is already a separate design decision.
In such a case, the quantity is calculated only for one edge:
beam length / 2 m, taking into account cutting waste.
The key is not to buy two lines just because the beam physically has two edges.
How to calculate KPU-124 for two identical edges
For one beam of length L, the total installed length with two lines is:
L × 2.
One product strip has a length of 2 m.
For two identical edges, the mathematical minimum can be quickly estimated:
total length / 2 m.
But the result must be verified by cutting.
For one beam, we get:
| Beam length | Two edges | Mathematical minimum of strips | Purchase length | Cost |
|---|---|---|---|---|
| 2.0 m | 4.0 m | 2 | 4 м | 12 380 ₽ |
| 3.0 m | 6.0 m | 3 | 6 м | 18 570 ₽ |
| 3.6 m | 7.2 m | 4 | 8 м | 24 760 ₽ |
| 4.2 m | 8.4 m | 5 | 10 м | 30 950 ₽ |
| 5.0 m | 10.0 m | 5 | 10 м | 30 950 ₽ |
| 6.0 m | 12.0 m | 6 | 12 м | 37 140 ₽ |
Calculation performed at the current price of 6,190 ₽ per two-meter plank.
The most interesting part of the table is the 4.2 m and 5 m beams.
Both require a minimum of five planks, although one is 80 cm shorter.
The reason is the discrete product length: KPU-124 is sold not by meters from a coil, but in two-meter segments.
Beam 3.6 m: why four planks are indeed sufficient
Need to get two decorative lines of 3.6 m each.
Total length:
7.2 m.
Four slats give:
8 m.
The simplest layout for one edge:
2.0 + 1.6 = 3.6 m.
For the second:
another 2.0 + 1.6 = 3.6 m.
After cutting, two pieces of 0.4 m will remain.
But this is not the only option.
If you want the same position of the central joint, you can do on each side:
1.8 + 1.8 = 3.6 m.
For two lines, four planks of 2 m length are still required.
Remainders:
4 × 0.2 = 0.8 m in total.
The quantity of goods is the same, but the nature of the joint changes.
This is a good example of why cutting is not just about saving material. It affects the pattern of the finished beam.
What is better for 3.6 m: a joint in the center or an offset one
If the connection is 1.8 + 1.8, it is located exactly in the center of the beam.
The advantage is strict symmetry.
The disadvantage is that the joint ends up at the most obvious point.
Scheme 2.0 + 1.6 shifts the joint from the center.
It may be less noticeable as a "center seam," but the two sides of the beam need to be laid out identically if symmetry is required.
There is no universally correct option.
For decorative molding, you also need to check where exactly the pattern is interrupted.
The exact pattern repeat cannot be invented here. Before cutting, you need to look at the actual KPU-124 and select the connection point based on the pattern itself.
Beam 4.2 m: five planks is the mathematical minimum, but cutting already requires attention.
Total installed length:
4.2 × 2 = 8.4 m.
Five planks:
5 × 2 = 10 m.
In terms of material quantity, everything fits.
But the scheme:
2.0 + 2.0 + 0.2 = 4.2 m
creates a very short fragment of 200 mm length on each edge.
Technically, it solves the problem.
Visually, a short piece at the end may not be the best option.
Therefore, it is worth not just buying five planks, but redistributing their cutting pattern.
For example, one line can be assembled from several more balanced segments, if the pattern and the chosen joint placement allow it.
The point of the calculation here is not to provide a single mandatory cutting scheme, but to let the buyer see the problem in advance:
five planks are enough in terms of length, but five planks do not yet guarantee a beautiful arrangement of joints.
Beam 5 m: five planks can be used almost perfectly
Two edges of 5 m each:
10 m of installed linear footage.
Five product strips:
10 m of purchased length.
That is, there is no waste in net length.
Convenient scheme for each side:
2 + 2 + 1 = 5 m.
Four strips are used entirely.
The fifth is divided:
1 + 1 m.
One meter piece goes to the first edge, the second to the second.
This results in a symmetrical set:
2 + 2 + 1
и
2 + 2 + 1.
Price of five KPU-124:
30 950 ₽.
In this particular case, the arithmetic minimum aligns well with practical cutting.
Why the cost of an installed linear meter turns out different
Nominally, one two-meter KPU-124 costs 6,190 ₽.
If the full length is used:
6,190 / 2 = 3,095 ₽ per linear meter of material.
But with unused remnants, the actual cost of one installed meter increases.
For example:
Beam 3.6 m
Installed:
7.2 m.
Purchased:
8 m.
Cost:
24 760 ₽.
24,760 / 7.2 ≈ 3,439 ₽ per installed meter.
Beam 4.2 m
Installed:
8.4 m.
Purchased:
10 m.
Cost:
30 950 ₽.
30,950 / 8.4 ≈ 3,685 ₽ per installed meter.
Beam 5 m
Installed:
10 m.
Purchased:
10 m.
Cost:
30 950 ₽.
It works out exactly:
3,095 ₽ per installed meter.
Therefore, two beams can have almost the same decor cost with noticeably different lengths.
This is a normal feature of fixed-length linear products.
The remainder cannot be considered waste until the entire ceiling is calculated.
If after a 3.6 m beam there are two KPU-124 fragments of 400 mm each, they do not necessarily go to waste.
The room may contain:
short end sections;
another small beam;
a decorative transition;
another zone where the same linear product is needed.
But using the remainder makes sense only if:
its length is indeed sufficient;
the pattern fits;
the new joint turns out to be acceptable;
the part will not have to be assembled from many short pieces.
Therefore, for a room with several beams, the entire list of parts is calculated first, and only then the final quantity of KPU-124 is determined.
Several parallel beams cannot be considered as one very long one
Let's imagine three identical false beams, each 4.2 m long.
Two edges on each:
3 × 2 = 6 decorative lines.
Total length:
4.2 × 6 = 25.2 m.
Purely mathematically:
25,2 / 2 = 12,6;
so, the absolute minimum is 13 planks.
Cost:
13 × 6 190 = 80 470 ₽.
But here a new problem arises.
To stay within the mathematical minimum, you'll have to use the remnants very efficiently. With the direct scheme of 2 + 2 + 0.2, six short 200-millimeter fragments are formed on each line.
From the standpoint of total footage, this is acceptable.
From the standpoint of appearance, it requires separate verification.
Therefore, for several long beams, the correct algorithm is as follows:
first, calculate the minimum by footage;
then, create a real map of joints;
and only then decide whether this minimum is sufficient for the chosen visual result.
There is no need to automatically add a "10% margin" or any other universal figure. For two-meter ornamental molding, the nature of the leftovers matters more than an abstract percentage.
Six beams already mean twelve decorative lines
The amount of material is not the only constraint.
If the ceiling system has six parallel faux beams, decorating both lower edges will create:
6 × 2 = 12 parallel ornamental lines.
On a single beam, KPU-124 may look delicate.
On six identical beams, a strong repeating pattern appears.
Therefore, before a bulk purchase, it is useful to decorate at least two or three adjacent beams with paper strips or create a visual mockup of the entire ceiling.
Perhaps it is better to decorate:
only the main beam;
only the outermost beams;
only one edge of each;
or even abandon the additional trim on part of the structure.
This can reduce the order not for the sake of savings, but because the ceiling will become visually calmer.
The width of the beam determines whether KPU-124 is needed at all
KPU-124 with a width of 20 mm is especially interesting for a relatively thin decorative line.
On a massive beam with a width of 250–300 mm, a single twenty-millimeter strip occupies a small fraction of the surface.
It will work as a thin framing.
On a beam with a width of 60–80 mm, the same detail becomes a significant part of the lower face.
Therefore, one cannot say that KPU-124 is "small" or "large" without the size of the beam itself.
If two paper strips 20 mm wide look too heavy, there are three normal solutions:
use only one line;
choose another narrower decor if it fits the project;
leave smooth edges.
Purchasing the product is not a mandatory final step of the fitting.
And if the beam is very massive — is a wider molding needed?
On a large ceiling beam, a thin twenty-millimeter line may seem too delicate from a normal viewing distance.
In this case, the problem cannot be solved by simply doubling KPU-124.
Two adjacent strips on each side is already a different pattern.
It is more reasonable to compare KPU-124 with other models in the section buy decorative polyurethane molding.
The current catalog does include KPU-124 among other polyurethane trim models.
If 20 mm are lost on the beam scale, it is not a product defect. The specific design simply needs a different visual weight.
Where to place joints of two-meter planks
For beams longer than two meters, joints are inevitable.
For two parallel decorative lines, there is a choice.
Joints opposite each other
On both edges, the connection is at the same transverse coordinate.
Plus — strict symmetry.
Minus — if the joint location is noticeable, two points can visually merge into one transverse line.
Staggered joints
The joints of the two edges are located in different places.
This reduces the effect of the transverse "seam."
But the symmetry of the two decorative lines becomes less obvious.
Joint at the center of the beam
This solution is convenient for equal segments, as in the case of 1.8 + 1.8 for a 3.6 m beam.
It is easy to mark out.
But the central point of the room is often the most noticeable.
The choice depends on the nature of the KPU-124 pattern and the viewing point.
Before final cutting, it is useful to temporarily mark the intended joints with pieces of masking tape and look at the beam from below.
The rhythm of the pattern is more important than trying to use every centimeter
Decorative molding, so optimal cutting does not always coincide with cutting with minimal waste.
Let's imagine that a 430 mm fragment remains and a 400 mm section is needed.
The length fits perfectly.
But if the beginning of the pattern on the remnant does not visually align with the previous piece, saving 400 mm of material may result in a noticeable pattern defect.
The exact repeat step of the KPU-124 pattern does not need to be invented in this article.
You should work with the actual plank.
Before mass cutting, it is worth joining two fragments on the floor or table to see how the pattern continues.
This is especially important if there are several beams and all joints are visible.
How to finish a decorative line at the end of a beam
Not every false beam rests with both ends against a wall.
If the end face is visible, the end of KPU-124 also becomes part of the composition.
Before cutting, you need to decide:
the linear trim simply ends together with the longitudinal edge;
continues onto the end face;
or the longitudinal decor is deliberately stopped earlier.
You cannot first cut all the strips exactly to the length of the beam, and then find out that an additional return to the end face is needed.
If the end faces are hidden by the abutment to the wall, the task is simpler.
If they are open, this is a separate expense item and a separate length.
In the main formula beam length × 2 End sections are not accounted for.
What to do if the beam is already painted
The article scenario assumes an already finished structure.
This means that before installation, you need to check not only the polyurethane but also the existing finish coating.
The adhesive actually interacts not with the "beam material in general" but with its top layer:
paint;
with enamel;
with varnish;
with veneer;
other finishes.
Therefore, one cannot give a universal promise that KPU-124 can simply be glued over any ready-made coating.
You need to check the requirements of the chosen mounting system and the condition of the surface.
If the paint is peeling, the additional decor will hold together with the unstable layer.
The foundation must be reliable first.
How to paint KPU-124 on an already finished beam
There are two main visual solutions.
In the color of the beam
The calmest option.
The 20-millimeter line does not create a new color contour, but is read through the 7-millimeter relief and shadows.
This method works well if you want to make a smooth false beam more complex, but not turn it into a contrastingly decorated element.
Contrastingly
Light KPU-124 on a dark beam or dark on a light one creates a much stronger graphic line.
Then the two edges become noticeable almost immediately.
On a single beam, this can work as an accent.
On a system of five to six beams, the contrast already creates ten to twelve bright parallel stripes.
Therefore, the color should be chosen after evaluating the entire ceiling, not a single twenty-centimeter sample.
When KPU-124 is better to paint before installation
On an already finished beam, it is especially important not to ruin the existing finish.
Pre-painting part of the decorative surface can simplify the work, but the final technique depends on the chosen coating and installation scheme.
If joints need to be treated after installation, connection points may still require final touch-up.
Therefore, the sequence "fully paint → glue → do nothing else" cannot be considered universal.
The decision is made taking into account finishing materials.
When two decorative strips make the beam visually narrower
If KPU-124 is placed on the lower surface closer to the edges, a central smooth field appears inside.
Visually, it can be perceived as an independent inner strip.
For example, the bottom edge is 100 mm:
20 mm of decor;
60 mm of clean center;
20 mm of decor.
The eye begins to read not a "beam 100 mm wide," but a composition:
20 + 60 + 20 mm.
This can make a large smooth surface more structured.
On a beam 60 mm wide, the central field is only 20 mm, and the effect is already the opposite: the ornament almost fills the bottom.
Therefore, two identical KPU-124 on different beams can give a completely different sense of mass.
When it is better to place the molding on the side faces
If the lower plane itself is beautiful — for example, it has a pronounced wood texture or is already divided by other lines, two strips at the bottom may be unnecessary.
Then you can check the placement of KPU-124 on the side surfaces along the lower edges.
In this scenario, the width of the lower plane almost no longer affects the fit.
Instead, you need to measure the free height of the side mounting zone.
For KPU-124, a transverse dimension of 20 mm must be placed on this surface.
Again, a paper strip resolves the issue faster than an abstract description.
When a wide, smooth beam is better left without decoration altogether
An empty surface is not always a drawback.
If the ceiling already contains:
a complex rosette;
expressive cornice;
coffers;
pendant lights;
several parallel beams;
contrasting wood texture,
additional trim may be an unnecessary layer.
Be especially careful with two decorative lines on each of the many beams.
If after a paper mock-up the ceiling becomes visually fragmented, the correct order of KPU-124 for this zone may be zero pieces.
This is a normal commercial conclusion.
KPU-124 or a regular smooth profile
If the task is only to create a new straight line without ornament, decorative molding may be excessive.
A smooth profile will provide geometry.
KPU-124 adds precisely the decorative pattern.
Therefore, the choice depends on the reason for the rework.
If the beam seems too simple due to the lack of an additional border, a smooth solution may be sufficient.
If you want a pronounced ornamental edge, then KPU-124 is more logical.
There is no need to buy a more complex product if the problem is solved by a calmer element.
How to calculate a project with multiple beams without errors
Suppose there are four beams of different lengths in the room:
3.2 m;
3.2 m;
4.4 m;
4.4 m.
If both edges are finished on each, first compile a list of eight separate decorative lines, not just one total length.
Then lay out the lines across KPU-124 planks of 2000 mm length.
Why not just sum them up right away?
Because each long section requires its own joints, and the remainder from one beam may be too short for rational use on the next.
optimal order:
- write out the length of each edge;
- determine the allowable number of connections on it;
- choose the position of the joints;
- lay out the segments across 2000 mm planks;
- only then sum up the number of product units.
This is exactly how the real basket is calculated.
The project price should be calculated by the number of whole KPU-124
You cannot consider:
7.2 m × 3,095 ₽ = final cost,
if the product is actually purchased in whole two-meter planks.
For a 3.6 m beam, this arithmetic would give:
7,2 × 3 095 = 22 284 ₽.
But the four necessary planks cost:
4 × 6 190 = 24 760 ₽.
The difference arises from the 0.8 m of purchased but not installed material.
Therefore, the commercial calculation always ends with the formula:
number of whole planks × current price of one plank.
Calculation by linear meter price is only suitable for analyzing cutting efficiency.
Cost of several typical options
At the current price of KPU-124 6,190 ₽ per plank, we get:
| Planks | Purchase length | Cost |
|---|---|---|
| 1 | 2 м | 6 190 ₽ |
| 2 | 4 м | 12 380 ₽ |
| 3 | 6 м | 18 570 ₽ |
| 4 | 8 м | 24 760 ₽ |
| 5 | 10 м | 30 950 ₽ |
| 6 | 12 м | 37 140 ₽ |
| 8 | 16 м | 49 520 ₽ |
| 10 | 20 м | 61 900 ₽ |
| 12 | 24 м | 74 280 ₽ |
| 13 | 26 м | 80 470 ₽ |
This does not include the cost of glue, base preparation, and finishing.
The figures show only the price of the KPU-124 itself.
Error: measuring only the length of the beam
A person sees a 3.6 m beam and buys two 2 m planks.
Their total length is 4 m, so one edge is enough.
But the article considers two edges.
You need to:
3.6 × 2 = 7.2 m;
at least 4 slats.
The cause of the error is treating the product as one decorative route instead of two parallel ones.
The solution is simple: draw both lines on the diagram before calculating the quantity.
Error: counting KPU-124 as a corner profile
The buyer sees the word "edge" and assumes that the linear trim covers the corner itself.
But the product card shows a regular linear decorative trim of 20 × 7 mm.
If the selected face has no flat area, the installation requires a separate solution.
This must be checked before calculating 10–20 meters of material.
Error: ordering the mathematical minimum without a joint diagram
On a 4.2 m beam, five slats by length are sufficient.
But if you simply use:
2 + 2 + 0,2
on each side, short inserts appear.
The reason is an attempt to first buy the minimum quantity, and then think about the layout.
It's better to do the opposite:
first design visually acceptable segments;
then check how many two-meter planks are required for them.
Mistake: making joints of two edges randomly
If on the left the connection is at 1.7 m from the start of the beam, and on the right at 2.3 m without any compositional reason, when viewed from below the two lines may look sloppy.
This is especially noticeable on a solid-color painted beam.
You need to decide in advance:
joints coincide;
arranged mirror-symmetrically;
or deliberately offset.
Random placement is the worst option.
Error: treating all remnants as a full supply
After several beams, 2–3 m of short fragments may accumulate.
But five pieces of 400 mm do not equal one whole 2 m plank if the next section requires a continuous 1.8 m.
Therefore, remnants are accounted for individually:
length;
condition of the ends;
drawing;
place of future application.
Only after this can they be deducted from the new order.
Error: forget about the 7 mm thickness
The paper template shows the width, but not the relief.
After installation, the two strips protrude from the surface and create a shadow.
If the beam itself is small, the result may be more active than expected.
Before a large order, it is useful to test at least a short volumetric mock-up.
Error: finish all beams just because they are identical
On one site, five identical beams do not necessarily have to have two KPU-124 each.
If the ceiling is already busy, a serial ornament may become excessive.
First one beam is checked, then the whole group.
This is especially important when ordering dozens of slats, when a change in decision significantly affects the budget.
Where to buy KPU-124
If after trying the 20 mm width and calculating the layout this option is chosen, you can buy KPU-124 linear molding.
At the time of checking, the card shows:
20 × 7 × 2000 mm;
polyurethane;
6,190 ₽ per piece;
average production time to order is 3–7 days.
Other linear models can be compared in the section buy decorative polyurethane molding.
For a wider selection, the section is available You can buy ready-made stucco matching the Baroque style. Calculate the quantity: linear meters of cornices and moldings, number of rosettes, pilasters, consoles, corner elements. Add a ten to fifteen percent allowance for trimming..
If a different type of ceiling decor is required, you can check the section buy polyurethane ceiling decor.
Moldings are collected separately: buy polyurethane moldings.
A wider catalog of stucco is available via the link Buy Molded Decoration.
Practical algorithm before ordering KPU-124
1. Determine two specific mounting lines.
At the bottom of the beams or on the side faces near the lower edges.
2. Check the flat mounting area.
For trim with a width of 20 mm, a suitable surface must exist.
3. Make a paper template 20 mm wide.
It's better to have two parallel strips at once.
4. Look at the beam from the side.
Take into account the future 7 mm protrusion.
5. Decide whether you need two lines or one.
6. Measure the actual length of each decorative edge.
7. Write them down as separate segments.
Do not limit yourself to the total length.
8. Distribute the segments across 2000 mm planks.
9. Determine the connection points.
10. Check the actual KPU-124 pattern at the future joint locations.
11. Consider useful remnants from other beams.
12. Count the number of whole product slats.
13. Multiply the quantity by the current price.
14. For multiple beams, evaluate the entire ceiling.
15. Only after this, place the order.
When KPU-124 is truly suitable for a ready-made false beam
This option is especially rational if you no longer want to redo the structure, but neat additional detailing is required.
KPU-124 is suitable for the scenario in question when:
there is a suitable area on the selected face for a 20-millimeter strip;
two decorative lines match the scale of the beam;
a relief of 7 mm does not seem excessive;
the joints can be distributed neatly;
the buyer is ready to calculate the material using exactly two-meter planks;
the decor enhances the beam rather than overloading the entire ceiling.
If these conditions are met, redoing the false beam itself for the sake of an ornamental edge is indeed not necessary.
When it is better not to buy KPU-124
Refusal is reasonable if the mounting surface is already 20 mm or has a complex rounded profile.
It is also worth reconsidering the decision if two strips visually take up too much of the narrow bottom face.
With a large number of beams, repeating KPU-124 can make the ceiling excessively fragmented.
On the contrary, on a very massive beam, a twenty-millimeter line may be almost unnoticeable from a normal distance.
And finally, if a smooth false beam already blends well with the rest of the ceiling, the absence of additional decor is not a drawback in itself.
For a 4.2 m beam:
8.4 m;
mathematically 5 planks;
cost — 30,950 ₽;
but the layout of joints needs to be designed especially carefully.
For a 5 m beam
Result: how many KPU-124 to put in the cart
For one beam, its actual decorative length is first measured.
If two identical longitudinal edges are being finished:
beam length × 2 = installed length.
Then this length is converted not just into "linear meters", but into whole KPU-124 strips 2000 mm long with cutting check.
For a 3.6 m beam:
two lines = 7.2 m;
4 strips;
cost — 24,760 ₽.
For a 4.2 m beam:
8.4 m;
mathematically 5 planks;
cost — 30,950 ₽;
but the layout of joints needs to be designed especially carefully.
For a 5 m beam:
10 m;
5 strips;
cost — 30,950 ₽;
convenient layout — 2 + 2 + 1 m on each side.
For several beams, the simple total length is used only as a first reference. The final order is determined by the map of segments and joints.
After this check, you can Order KPU-124 20 × 7 × 2000 mm in the required quantity.
FAQ
Can KPU-124 be used if the bottom edge of the beam already has a chamfer?
You need to measure the flat mounting part specifically. The overall width of the beam is not enough: if the twenty-millimeter zone falls on the chamfer, the standard flat seating requires additional assessment.
Is it mandatory to place KPU-124 strictly on the bottom surface?
No. In the scenario under consideration, it can be fitted to a suitable flat surface near the bottom edge. The decision depends on the specific beam's construction and from where it is most often viewed.
Can KPU-124 be used on a beam that butts against a wall at one end?
Yes, but the length is measured up to the actual end point of the decorative line. If one end is hidden by the wall, separate finishing of that end may not be needed at all.
Can short remnants of KPU-124 be used on another beam?
Yes, if the length is sufficient and the location of the new joint is acceptable in terms of the pattern. You cannot rely only on the total length of all offcuts.
What to do if two edges have slightly different actual lengths?
Measure them separately. Do not automatically transfer the size of the first side to the second, especially if the beam adjoins walls at different angles or has non-standard ends.
Is an extra plank needed "just in case"?
There is no universal rule. First, a real cutting layout is made. If it uses planks almost without waste and the project contains complex joints, the reserve issue is resolved separately. A fixed percentage is less useful here than a parts map.
Can KPU-124 be installed on only one of several beams?
Yes. If one beam is compositionally the main one, it can be highlighted separately. It is not necessary to repeat the decor on all ceiling elements.
What to do if the beam is longer than 6 m?
The calculation remains the same, but the number of connections increases. For such a length, it is especially important to distribute the joints in advance and check the pattern repeat, not just buy enough total footage.
Can remnants of 800 and 1200 mm be joined to get a full 2 m?
In length — yes, 800 + 1200 = 2000 mm. But this creates an additional joint. For a visible longitudinal edge, you first need to decide whether it is visually acceptable.
If KPU-124 is painted the same color as the beam, will the ornament remain noticeable?
Even with the same color, the volume is preserved: size C is 7 mm, so the relief will be readable through lighting and shadow.
Can KPU-124 be combined with ceiling moldings?
They can be considered in the same composition, but these are different types of products and different installation lines. The ratio of ornaments and joint locations should be checked on a specific project.
If the bottom edge of the beam is 100 mm, are two strips of 20 mm not too wide?
Physically, after two strips, 60 mm of the central field remains if they are placed directly at the edges. How much or how little this is visually is only shown by a full-size fitting.
Is it worth installing trim on a beam with a pronounced wood texture?
Not necessarily. The ornament may compete with the texture. First, attach two 20 mm strips and assess whether the new line improves the composition or makes the surface overloaded.
Where can I see other sizes of trim?
Other models are available in the section decorative polyurethane molding.
Where exactly can I buy KPU-124?
After calculating two edges, you can buy KPU-124 linear molding. At the time of checking, the size is 20 × 7 × 2000 mm, the price is 6,190 ₽ per plank.