Article Contents:
- Why the wooden cornice KZ-011 should be chosen before installing slat panels
- What task to give to the installers before starting the work
- Wooden cornice KZ-011 108 × 34 mm: what we check in the product card
- Ceiling cornice made of wood or MDF cornice: which version to order
- KZ-011 from MDF for enamel coating
- Wooden cornice made of beech
- Oak ceiling cornice
- Summary solution on material
- Plank 2600 mm for MDF
- Plank 2400 mm for beech and oak
- Why you cannot count only linear meters
- Step 1. Determine the clean length of the wall
- Step 2. Fix the types of endings
- Step 3. Account for end returns
- Step 4. Place the joints
- Step 5. Distribute the segments across the original planks
- Step 6. Add a justified margin
- Option 1. KZ-011 made of MDF, 2600 mm long
- Option 2. KZ-011 made of beech or oak, 2400 mm long
- Which material is more cost-effective for 4.8 m
- Example: main wall 4 m and side return 1.2 m
- Example: two walls of 2.3 m each and a short section of 0.4 m
- Example: two open walls of 3.1 m each
- Control point before closing the base with panels
- Verify the configuration
- Inspect the geometry and surface
- Do not start cutting until dry layout is done
- Organize storage
- Why store marked offcuts
- Where the mounting strip should be located
- Why you cannot support the profile only on protruding slats
- Checking the wall plane
- Reinforcing joints and corners
- Utilities and ceiling systems
- What to record in the base readiness report
- Choose material after calculating the quantity
- Order exactly 4.8 m of solid wood for a 4.8 m wall
- Add universal 10% without card
- Assign the joint to the installer on installation day
- Prepare a mortgage plate sized 108 × 34 mm without a drawing
- Bring the slats to the ceiling with extra margin
- Use individual slats as the only support
- Order oak for a clear finish without the tinting category
- Choose MDF only because of the 2600 mm length
- Do not approve the ceiling system
- Do not check the delivery of long profiles
- Fix prices and stock in the long-term specification
- Is KZ-011 intended for curtains?
- When should you choose KZ-011 — before or after ordering slat panels?
- Is a mounting strip exactly 108 mm high required?
- Can KZ-011 be glued only to the tops of the slats?
- What to choose for white enamel — MDF or beech?
- Can the oak KZ-011 be tinted to match the panels?
- How many MDF slats are needed for a 4.8 m wall?
- How many beech or oak planks are needed for 4.8 m?
- Where is the best place to position a straight joint?
- Do I need to calculate each section separately if the total length is already known?
- Can KZ-011 be installed next to a stretch ceiling?
- What margin should I buy?
- Do I need to buy an extra plank for repairs?
- Can the material be changed after the base has already been made?
- What is more important first: order the cornice or make the mounting base?
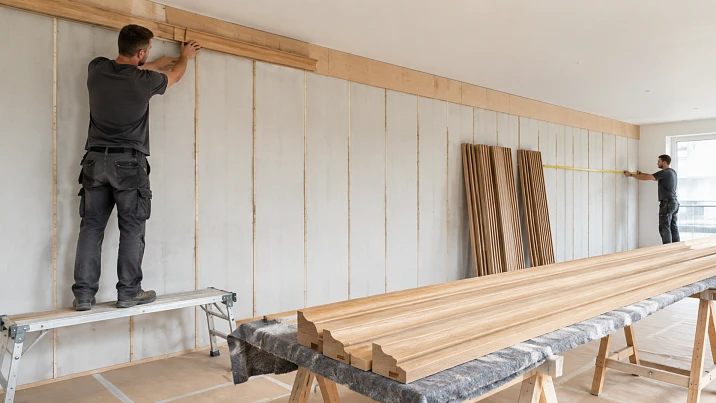
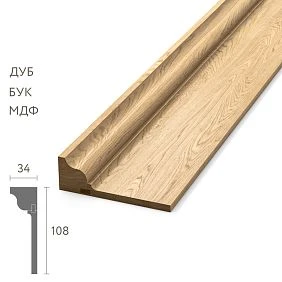
The wooden cornice KZ-011 should be chosen not after the wall is clad with slats, but before it begins. The reason is structural: the profile, 108 mm high with a 34 mm projection, must rest on a flat, continuous mounting zone. If installers first run individual slats up to the ceiling, a relief of protrusions and voids will remain behind the cornice. You will have to trim the finished cladding, add an overlay strip, change the overhang of the top line, or abandon the selected profile.
Before purchasing, it is enough to make five decisions: choose MDF, beech, or oak; determine the plank length — 2600 or 2400 mm; create a cutting plan for each wall; mark the positions of straight and corner joints; provide installers with a cross-section of the solid base. After that, the order can be placed without assumptions. If the base has not yet been designed, it is too early to buy KZ-011, even when the number of linear meters seems obvious.
For a 4.8 m wall, the difference in materials is especially clear. Two strips of beech or oak, 2400 mm each, give exactly 4800 mm — mathematically sufficient, but there is no practical allowance for trimming, checking corners, or damage. Two MDF strips, 2600 mm each, give 5200 mm and nominally leave 400 mm. This does not mean MDF is automatically better: the material is chosen based on the finish and room conditions, and the quantity is determined by the actual cutting plan.
The main design result must be recorded before work begins: where the lower edge of the cornice runs; on which plane its back side rests; what the continuous base is attached to; where the slat panels end; which KZ‑011 segments form each straight section. If these five points are agreed upon, the slat wall and ceiling profile are assembled as a single unit, rather than being adjusted to each other on site.
Why the wooden cornice KZ‑011 should be chosen before installing slat panels
Slat panels define the finished plane of the wall, and KZ‑011 defines its upper architectural boundary. The order of selection immediately affects geometry, material consumption, and the work of several contractors. The designer determines the profile position; the builder prepares the base; the electrician routes cables outside the mounting zones; the panel installer stops the slats at the specified mark; the carpenter cuts and installs the cornice. If the profile is chosen last, each participant has already completed their part without the necessary component.
The height of KZ‑011 is 108 mm. Consequently, the lower edge of the cornice descends from the upper design mark and intersects the area that would otherwise be occupied by slats. You cannot order panels "up to the ceiling" and then assume that the wooden profile will simply lie on top of them without changes. You need to decide in advance whether the slats end under the cornice, fit into a prepared niche, or remain visible behind its lower part according to a special cut.
The 34 mm projection also only works relative to a specific base plane. The slat system has its own thickness: adhesive, backing, lathing, background, and face slat. If the mounting strip is recessed to the base wall, KZ‑011 will protrude forward by one amount. If the strip is built up to the face zone of the panels — by another. Selecting the base thickness after installing the slats means changing the already formed silhouette of the wall.
Before installation, operations are available that later become expensive:
-
you can leave a continuous upper section without slats;
-
install an embedded element in the frame;
-
bring the strip to a single plane;
-
move the backlight cable;
-
change the height of the panels without visible cutting;
-
place the cornice joints above reinforced zones;
-
coordinate the stretch ceiling and the top of the wooden profile;
-
check external and internal corners with templates.
After cladding, these same actions turn into dismantling and local repair. Therefore, the article does not answer the general question of how to beautifully finish panels at the ceiling, but a specific commercial question: which KZ-011 configuration to order and what should be ready on the wall before its delivery.




What task to give to the installers before starting work
The phrase "there will be a wooden cornice on top" is insufficient. Installers need a measurable document. The minimum task consists of a plan, a elevation, and a side section.
The plan shows the length of each wall, internal and external corners, open ends, cornice stop points, and plank numbers. The elevation marks the height of the lower edge of KZ-011, door and furniture lines, lights, ventilation grilles, and joints. The section shows the base wall, the full projection of the slat system, the mounting strip, the rear part of the profile, its 34 mm overhang, and the ceiling covering.
| Task parameter | What is recorded | Why this is needed |
|---|---|---|
| Profile | KZ-011, section 108 × 34 mm | Exclude replacement with a similar but geometrically different cornice |
| Material | MDF, beech or oak | Determine the length of strips, finish, and cutting map |
| Bottom mark | Distance from ceiling or other design line | Set the end height of panels |
| Mounting plane | Distance from base wall to rear zone of cornice | Calculate base thickness |
| Continuous support | Material, height, and method of connection to the load-bearing wall or frame | Do not attach the profile only to individual battens |
| Joints | Coordinate of each joint | Reinforce the base and bring the parts into one plane |
| Angles | Actual values after wall preparation | Cut the profile correctly |
| Utilities | Cables, ventilation, ceiling guides | Do not cross them with fasteners and do not block access |
| Finish | Enamel, dense or semi-transparent tinting | Choose the workpiece category and finishing sequence |
You should not pre-assign a universal thickness for the mounting strip. It depends on the full projection of the panels and the shape of the back side of KZ‑011. The working formula is as follows:
Thickness of the leveling layer = required plane for installing the cornice − actual plane of the solid base.
Then the front point check is performed:
Protrusion of KZ‑011 relative to the battens = position of the mounting plane + profile projection of 34 mm − full projection of the batten system.
All three distances are measured from one base wall. If the panel thickness is taken from the catalog, the backing is assessed visually, and 34 mm is measured from the front batten, the calculation loses its common zero and becomes useless.
Our factory also produces:
Wooden cornice KZ‑011 108 × 34 mm: what we check in the product card
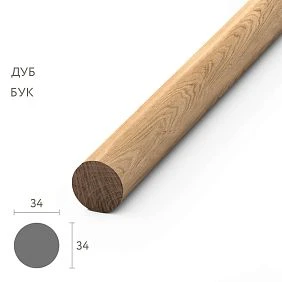
Wooden Cornice KZ-011 — a decorative ceiling profile, not a rod or track for curtains. It is used for architectural finishing of the upper edge of the wall. The card presents three versions with the same cross-section but different lengths.
| Version KZ‑011 | Cross-section | Length of one plank | Main selection logic |
| MDF, sanding "Prestige", for enamel | 108 × 34 mm | 2600 мм | Camouflage coating and longer cutting module |
| Beech | 108 × 34 mm | 2400 мм | Solid wood for enamel or agreed tinting |
| Oak | 108 × 34 mm | 2400 мм | Solid wood with pronounced texture; transparent finish requires appropriate blank category |
Prices and stock levels change. They should not be transferred to the article as a permanent characteristic. Before ordering, open the product card, select a specific material, and check the current price, availability, and lead time. The manufacturer indicates shipment of available items within three working days and an average production time of 5–10 days for out-of-stock items made to order; actual conditions are confirmed at the time of ordering.
The size 108 × 34 mm does not answer all installation questions. A drawing of the cross-section profile is needed, because the external dimension does not show the location of the rear contact areas. If the mounting strip supports only a part that, according to the drawing, is not intended for fixation, the formal width of the base does not ensure a correct joint.
In the product card, the selected configuration is displayed as "for enamel." This is logical for opaque painting. For a semi-transparent finish on solid wood, the possibility of "for tinting" execution should be clarified: such blanks are selected differently by color and texture of the lamellas. You cannot order oak "for enamel," coat it with clear varnish, and expect uniformity as a mandatory property.
Get Consultation
Wooden ceiling cornice or MDF cornice: which version to order
The material is chosen simultaneously with the finish, plank length, and room conditions. Comparing only by price leads to incorrect ordering: a cheaper plank may provide convenient cutting but not be suitable for the desired transparent finish; expensive oak may completely lose its visual value under dense enamel.
KZ‑011 made of MDF for enamel
MDF is suitable when the top line should be evenly painted in the color of the ceiling, wall, or other trim. The length of 2600 mm reduces the number of joints on some walls. For example, two planks give 5200 mm, so a 4.8 m wall can be assembled with a nominal remainder of 400 mm.
MDF is not chosen to imitate natural oak texture under a transparent stain. Its advantage is a smooth base for an opaque finishing system. It is necessary to fully treat the face surfaces, fresh edges, and cut zones with compatible materials.
Not every MDF can be considered moisture-resistant by default. In a kitchen, bathroom, near a cold exterior wall, or under a potential leak, the suitability of a specific product, operating conditions, and edge protection must be checked. The decision is made based on manufacturer data and the room design.
Beech wooden cornice
Beech has a calm, fine-pored surface and is often practical under an opaque enamel. It retains the solid wood look but does not require showing a pronounced oak texture. For a wall where the slats remain natural and the cornice must match the ceiling color, beech can be a reasonable compromise.
Tinting beech requires a sample. The same composition looks different on beech and oak, so the shade name does not guarantee a match with the panels. The full finishing cycle is compared under actual lighting.
Oak ceiling cornice
Oak is chosen when the natural texture should support oak slats, doors, cabinets, or furniture. Its pronounced grain reveals itself under a semi-transparent finish. But the word "oak" does not automatically mean a match: batches, cuts, lamellas, stain, and varnish affect the final tone.
Before purchasing oak KZ-011 for a transparent finish, ask whether the "for tinting" category is available, whether all slats can be selected from one batch, and whether a sample can be obtained. If only a "for enamel" blank is available, professional options are to choose an opaque finish or change the material. Hoping that the contrast of lamellas will disappear on its own is not possible.
Summary decision on material
| Project objective | Preferred starting option | What to confirm before ordering |
| Cornice in the color of the white ceiling | MDF or beech under enamel | Primer and paint system, room conditions |
| Cornice in the color of the painted wall | MDF or beech | Gloss match, preparation of joints and ends |
| Natural oak together with panels | Oak | Category "for tinting", batch, and color sample |
| Dense dark tinting | Beech or oak after sample | How much the finish hides lamella differences |
| Minimum joints on a straight wall | First check MDF 2600 mm | Do the material and finish contradict the project conditions |
| All linear elements from solid wood | Beech or oak | The overall finishing of the cornice, molding, and baseboard |
How plank length affects ordering a wooden cornice
Standard length is not a minor reference detail. It determines the number of joints, waste, symmetry possibilities, and logistics. MDF is supplied in 2600 mm, beech and oak in 2400 mm. After changing the material, the calculation must be redone.
Plank 2600 mm for MDF
One piece covers a straight section up to 2.6 m without an intermediate joint, if end cuts and allowance fit within this length. Two pieces give 5.2 m. On walls of 2.5, 5.0, or 7.5 m, the module may be convenient, but corners and technological trimming change the usable length.
Plank 2400 mm for beech and oak
One plank covers up to 2.4 m, two give 4.8 m, three — 7.2 m. The even match of 4.8 m looks economical only on a calculator. When the wall has internal corners, an external return, or a requirement to trim both factory ends, the margin is zero.
Why you cannot count only linear meters
The total length does not show whether the required segments can be obtained from the original planks. Suppose segments of 2300, 2300, and 400 mm are needed. Their sum is 5000 mm. Two MDF planks give 5200 mm, but from one 2600 mm plank you cannot cut both 2300 and 400 mm simultaneously: 2700 mm is required. The second plank covers only the second 2300 mm segment. Thus, the mathematical length is sufficient, but cutting requires a third piece or a different breakdown.
Another example: segments of 2000, 1600, and 1200 mm sum to the same 4800 mm. From two solid wood planks of 2400 mm each, they can be distributed as 2000 + 400 remainder and 1200 + 1200; the 1600 mm segment is no longer possible. If the first plank gives 1200 + 1200, the second only 2000 with a 400 mm remainder, the 1600 mm segment is again missing. A different layout or an additional plank is needed. Therefore, you should calculate not the sum, but the packing of segments into each original length.
How to calculate KZ‑011 for one slat wall
The calculation is performed in millimeters along the finished mounting line. It consists of six steps.
Step 1. Determine the clean wall length
Measure exactly the installation line of the rear part of KZ‑011 after leveling the base. The dimension along the floor, ceiling, and middle of the wall may differ. For cutting, take the actual design length at the cornice height.
Step 2. Record the types of endings
Open end, abutment to side wall, inner corner, outer corner, entry into cabinet or portal require different cuts. You cannot add the same conditional 10% to all layouts and consider the issue resolved.
Step 3. Account for end returns
If the cornice turns from the front wall onto a short side, the return length becomes a separate segment. It cannot be automatically obtained from any leftover: the profile must have the correct orientation and allowance for corner cuts.
Step 4. Place joints
The joint is chosen based on composition and substrate. It must lie on a continuous reinforced zone, not fall into the most visible light, and not create a short filler piece in the center. The joint coordinate is fixed before cutting and communicated to the substrate installer.
Step 5. Distribute segments across original planks
For each element, record the plank number, usable segment, and leftover. If one required segment exceeds 2400 or 2600 mm, a connection is inevitable. If two segments sum to more than the original length, they cannot be cut from a single piece, even if the total ordered footage is sufficient.
Step 6. Add justified allowance
Allowance is needed for test cuts, corners, removal of damaged ends, possible errors, and repairs. Its size is determined by the layout, not a universal percentage. On a simple straight wall with one joint, the risk is one thing; on a wall with two outer corners and transparent finish, it is another.
| Internal cutting table | Value |
| Wall | For example, the accent wall of the living room |
| Net length | 4800 мм |
| Material | MDF / beech / oak |
| Initial plank length | 2600 / 2400 mm |
| Left end | Open end / corner / junction |
| Right end | Open end / corner / junction |
| Joint coordinate | Specified from the fixed axis |
| Plank number for each segment | 1, 2, 3 and so on |
| Remainder | Length and intended use |
| Reserve | Separate strip or confirmed useful remainder |
After this table, the buyer understands not only how many meters are required, but also which actual parts should arrive at the site.
Example of calculating a wooden cornice for a wall 4.8 meters long
Consider a straight slatted wall 4800 mm long. On the left and right, it adjoins smooth side walls, so internal corner joints are needed at the ends. One straight joint should preferably be placed not randomly, but in the central or less noticeable zone. The calculation is done separately for MDF and solid wood.
Option 1. KZ‑011 made of MDF, 2600 mm long
Two strips give:
2600 + 2600 = 5200 mm.
Nominal remainder:
5200 − 4800 = 400 mm.
Percentage relative to the net length:
400 ÷ 4800 × 100% ≈ 8,3%.
Mathematically, two parts are enough. In practice, the corner cuts need to be checked. If 4800 mm is measured along the mounting line of the back part of the profile, and miter joints require additional length on the protruding side, the 400 mm is distributed between the two ends, the central joint, and test cuts. The allowance may be sufficient, but this is confirmed by the installer after the corner template.
For a symmetrical wall, a 2400 + 2400 mm layout is possible. 200 mm is removed from each original strip, and the joint ends up in the center. The total remainder stays 400 mm, but is divided into two short fragments. This layout is visually convenient, but not always the best in terms of using the remainders.
Alternative — 2600 + 2200 mm. The joint shifts 200 mm from the center. One remainder of 400 mm length stays whole and can be used as a finish sample or test material. The layout is appropriate if the shift does not conflict with the wall axis and lighting.
| MDF layout | Joint position | Remainder | When to choose |
| 2400 + 2400 mm | Centered | 200 + 200 mm | Strict symmetry is more important than a whole remainder |
| 2600 + 2200 mm | 200 mm from the center | 400 мм | The joint can be shifted, a useful whole offcut is needed |
| Another layout | Along the design axis | Depends on cuts | There is light, furniture, or a reinforced base zone |
Option 2. KZ‑011 from beech or oak, 2400 mm long
Two strips give:
2400 + 2400 = 4800 mm.
The remainder is zero. This is the mathematical minimum, but not a safe set for a wall between two corners. Any loss of length during test trimming, removal of a damaged end, or corner correction makes the order insufficient. If one factory end cannot be used as a finished end, there is nothing to replace it with.
For a responsible project, the practical order is three solid wood planks, unless there is a confirmed remainder of KZ‑011 from the same batch from another area. The third piece provides:
3 × 2400 = 7200 mm.
After a clean line of 4800 mm, up to 2400 mm remains. This is a large reserve, so it needs to be justified: use it on a side return, adjacent wall, test cuts, or save it for repairs. If the cornice is installed only on one straight wall with two open ends and factory ends can be used, the craftsman may confirm a minimum order of two planks. But this exception must be documented, not assumed.
Which material is more cost-effective for 4.8 m
Two MDF planks provide a small margin; two solid wood planks do not. But buying MDF just for the 400 mm remainder is wrong if the project requires natural oak. First choose the finish and material, then accept the cost of the practical reserve. The right decision may be more expensive than the arithmetic minimum, but it does not stop installation after the first failed cut.
After confirming the material and quantity, you can buy a wooden cornice in the profile section and compare KZ‑011 with more compact or larger options. At this stage, the link works naturally: the reader already knows the required cross-section, length, and quantity.
How to calculate KZ‑011 for multiple walls and returns at once
Calculating a single straight wall does not show how to use the remnants throughout the entire room. If the cornice runs along two or three planes, the strips are distributed among them simultaneously. This reduces waste but increases the number of corners and orientation requirements for the segments.
Example: main wall 4 m and side return 1.2 m
The total length is:
4000 + 1200 = 5200 mm.
For MDF, two strips of 2600 mm each give exactly 5200 mm. At first glance, the cutting is ideal. The practical layout might look like this:
-
strip No. 1 — 2600 mm of the main wall;
-
strip No. 2 — 1400 mm of the main wall + 1200 mm of the return.
There is no remainder. The card only works if sections 1400 and 1200 mm can be obtained, considering angular cuts, from one 2600 mm piece. An angle appears between the main wall and the return, so actual cut lines may require additional allowance. The minimum order of two strips is confirmed by the carpenter; otherwise, a third is needed.
For solid wood, three strips of 2400 mm give 7200 mm. Two provide only 4800 mm and do not even arithmetically cover both sections. In the third, there remains significant reserve, which needs to be allocated for the angular cut, test template, and possible repair.
Example: two walls of 2.3 m and a short section of 0.4 m
In total, 5000 mm is required. Two MDF strips give 5200 mm, but three whole pieces of 2300, 2300, and 400 mm cannot be unconditionally obtained from two original pieces:
-
2300 + 400 = 2700 mm — more than one 2600 mm strip;
-
the second strip is needed for the second 2300 mm piece.
Solution options:
-
Order a third strip and keep all three sections whole.
-
Divide the short 400 mm section into two parts, for example 300 and 100 mm, using remnants from the two long strips. This adds an extra joint on the shortest element and usually looks worse.
-
Move one joint from the long wall so as to change the combination of pieces. This solution is only possible with additional support and acceptable composition.
This example shows why the formula "5000 mm is less than 5200 mm" does not complete the calculation. A commercially correct order sometimes includes a third plank not due to a shortage of total length, but to obtain solid visible pieces.
Example: two open walls of 3.1 m each
Total length is 6200 mm. For MDF, mathematically three planks with a total length of 7800 mm are needed. For solid wood, also three planks with a total length of 7200 mm. The number of pieces matches, but the layout differs.
MDF allows splitting each wall into 2600 + 500 mm. Then two very short add-ons remain, which can become noticeable. It is better to consider a more symmetrical split, for example 1550 + 1550 mm on each wall, but it creates four segments and two joints. From three planks of 2600 mm, you need to check how these four parts are packed without an extra fourth plank.
For solid wood, a scheme of 2400 + 700 mm on each wall is possible, but short extensions again become visible. Another split — 1550 + 1550 mm — requires four segments; two pairs of 1550 mm do not fit into one 2400 mm plank. Three planks give a maximum of three whole 1550 mm segments with remainders of 850 mm, and there is no fourth 1550 mm element. Therefore, for a symmetrical scheme, a fourth plank or a different piece size will be required.
Before purchasing for multiple walls, a packing table is compiled:
| Plank | Initial length | Segment 1 | Segment 2 | Remainder | Remnant assignment |
| № 1 | 2400/2600 mm | Wall section | Return or second section | Calculation | Sample / repair / next section |
| № 2 | 2400/2600 mm | Wall section | If present | Calculation | Specified in advance |
| № 3 | 2400/2600 mm | Wall section | If present | Calculation | Specified in advance |
If a negative balance or a segment "appears out of thin air" appears in the line, the map is incorrect. Such a simple check is more useful than the overall margin percentage.
Who is responsible for the base, calculation, and installation of the cornice
Before starting work, responsibilities need to be distributed. Otherwise, the designer thinks the builder will provide the embedded part, the builder waits for a drawing from the carpenter, and the carpenter arrives after the wall is closed.
| Participant | What should be provided or checked | What should not be left to him without source data |
| Designer / architect | H1 profile, bottom mark, layout, visual position relative to the slats | Thickness of the embedded part without a structural section |
| Measurer | Clean lengths at height KZ-011, actual angles, obstacles | Material and finish selection by the client |
| Builder / frame carpenter | Continuous solid base along the specified plane | Joint coordinates "approximately centered" |
| Electrician | Cable routes, light outlets, safe fastening zones | Decision that a wooden cornice will replace the cable duct |
| Slat panel installer | Full system layout, even top edge, preservation of installation zone | Unauthorized change of the lower cornice mark |
| Carpenter / installer KZ‑011 | Cutting map, joint type, corner templates, fastening | Fixing a crooked base with thick glue |
| Painter | Preparation, primer, and finish system, finishing of ends and joints | Choosing the category "under enamel" or "under tinting" after purchase |
| Customer / supplier | Approved configuration, quantity, deadline, and acceptance of goods | Change of material without recalculation |
At the coordination meeting, it is sufficient to approve one section and one cutting map. The protocol records document versions and the person responsible for base control. If the joint is moved, both the builder and the carpenter receive the change: otherwise, the reinforcement will remain in the old place.
Control point before closing the base with panels
Before the slats hide the wall, the mounting strip is checked visually and with instruments. Photos are taken with a tape measure and reference to permanent axes, utilities are marked, and the layout of studs or fasteners is saved. These materials will be useful when installing the cornice and during subsequent repairs.
A photo without dimensions is of little help. It must show the bottom mark, distances to corners, joint axes, and cable locations. The document is stored together with specification KZ‑011.
How to accept delivery of KZ‑011 before installing the slat wall
It is advisable to receive and check the slats before the base is finally closed. The actual profile allows confirming the rear geometry and fitting it to the template. At the same time, delivery should not stop preparation: the project is built according to the official drawing, and the physical part serves as the final check.
Verify the configuration
During acceptance, check:
-
article KZ‑011;
-
material — MDF, beech, or oak;
-
cross-section 108 × 34 mm;
-
length 2600 or 2400 mm;
-
number of slats;
-
sanding quality;
-
workpiece category for the selected finish;
-
belonging to the approved batch, if the wood remains visible.
A material error changes not only the color, but also the cutting layout. If solid wood arrives instead of MDF, the planks are 200 mm shorter. The delivery cannot be accepted, and the layout map cannot be corrected after panel installation.
Inspect geometry and surface
Packaging is checked before signing documents; visible damage is recorded. Planks are inspected under good side lighting, comparing profile and straightness on a flat support. Tolerances and quality criteria are taken from the manufacturer's documentation; the article does not introduce its own universal standard.
For transparent finishing of oak or beech, parts are laid out side by side in the intended sequence. A sharp difference in tone may require rearranging planks or coordinating with the supplier before cutting. After sawing, exchange and claim options are usually limited by the seller's terms.
Do not start cutting before dry layout
All planks are numbered on the back side, matched with the layout map, and placed against the project line. It is checked which factory end remains, where the straight joint will be, and which part produces the return. Only after this does the craftsman mark the cuts.
Organize storage
The long-length profile is stored on a flat support under conditions that match the manufacturer's recommendations. It must not be placed as an arch between two widely spaced supports, leaned against a damp wall, or positioned near a heat source. The packaging is opened and the material is prepared for the site according to the official instructions, not based on an arbitrary timeframe.
Why store marked offcuts
Offcuts are kept until final handover. They are needed for trial finishing, checking adhesive, tool adjustment, and possible repairs. The offcut is marked with the material, batch, wall, and the finish used. Without marking, after a few months it becomes difficult to determine which line it belongs to.
How to prepare a solid base for a ceiling wooden cornice
The base performs two functions: it holds the profile and defines its geometry. It must be continuous within each straight section, level, connected to the load-bearing wall or a calculated frame, and accessible for the chosen fastening. The decorative panel background, individual slat tops, or a soft acoustic underlay are not considered a full support on their own.
Where the mounting strip should be located
The position is determined by the cross-section. First, the desired face plane of KZ-011 relative to the slats is selected, then the back plane of the profile is found using the 34 mm offset. The mounting strip is aligned to this back plane. If done the other way—attaching a random board and then applying the cornice—the final projection becomes a result of the available thickness, not the design solution.
In height, the strip must support the contact and fastening zones specified by the manufacturer. The external height of the cornice of 108 mm does not prove that the embedded strip should have exactly the same width. A profile drawing or an actual sample is needed.
Why the profile cannot be supported only on protruding slats
The slats form a discontinuous line. Between them, the adhesive does not contact the base, mechanical fastening may fall into a void, and adjacent protrusions may differ in depth. The straight joint is especially vulnerable: if the connection falls between slats, one or both edges remain without support.
A decorative overlay strip on top of the slats does not become a load-bearing embedded element if it is only attached to those slats. It can level the visible plane, but it does not necessarily create reliable force transfer to the wall. The method of connecting the base to the structure is determined by the installer.
Checking the wall plane
A long profile reveals waves. The mounting strip is checked with a straightedge along its entire length, controlling the level of the bottom edge and the depth at several points. Local dips cannot be compensated with an excessively thick adhesive layer: this changes the position of the cornice and worsens the joint.
Corners are checked separately. Two strips on adjacent walls must meet at the same depth. If one embedded element is set further out, perfectly cut KZ‑011 pieces will not align on the face plane.
Reinforcement of joints and corners
Connection coordinates are passed to builders before cladding. In these places, the base must remain continuous and suitable for fixing both parts. Reinforcement should not be placed "approximately in the center" if the cutting map specifies the joint at a specific mark.
At an external corner, the support extends to the edge because the protruding miter is most vulnerable. In an internal corner, access is maintained for precise fitting, and no step between planes is allowed.
Utilities and ceiling systems
Before installing the strip, electrical cables, LED profiles, ventilation, sensors, and tension ceiling guides are marked. Fasteners must not cross utilities. KZ‑011 does not transfer load to the tension ceiling fabric and does not replace the wall profile of the ceiling system.
If lighting is planned, a separate lighting assembly is needed: an aluminum profile or another calculated base, heat sink, power supply, and access for maintenance. The 34 mm offset by itself does not make the wooden cornice a ready shelf for an LED strip.
What to record in the foundation readiness certificate
Before starting panel installation, it is useful to record:
-
the mounting strip is completed along the entire length;
-
the lower and rear design elevations are verified;
-
joint locations have support;
-
internal and external corners are aligned in depth;
-
utilities are marked;
-
actual wall dimensions are transmitted for final cutting;
-
the 108 × 34 mm template is applied without conflicts;
-
the responsible person has accepted the foundation.
Such a short act prevents a dispute over who should have provided for the mortgage after the slats already covered the wall.
In what order to install slat panels and a wooden cornice
There is no single order for all structures, but design decisions must be made in one sequence.
-
Choose KZ-011 and the material. The length of the plank and the finish depend on this.
-
Obtain a drawing or sample of the profile. Check the back zones, height, and overhang.
-
Create a side section. Coordinate the base wall, slats, base, cornice, and ceiling.
-
Calculate the planks. Place joints and corners, determine the reserve.
-
Run the utilities. Remove cables from fastening zones, provide for light maintenance.
-
Install a solid base. Level it and reinforce the joints.
-
Perform a control measurement. After the base, dimensions may differ from the preliminary project.
-
Mark the bottom line of KZ-011. It determines the end of the panels.
-
Install the slat system. Do not cover the working installation area and do not break the cut.
-
Dry-fit the cornice. Check straight sections, joints, corners, and open ends.
-
Perform final cutting and finishing. Coordinate the painting sequence with the carpenter and painter.
-
Install KZ-011. Use approved adhesive and mechanical fastening on a solid base.
-
Finish the joints and coating. Check the line under working lighting.
Sometimes it is convenient to install the cornice before the face slats, sometimes after them — this depends on access to the fastening and the type of bottom connection. But the base and the cornice mark must always be ready before panel installation. The sequence of decision and execution cannot be changed: first the joint is selected, then materials cover its parts.
Official STAVROS advice distinguishes adhesive in
For transparent finishes, solid wood parts should ideally be ordered in one batch and compared against actual samples. For enamel, a unified technical map of priming, matting, and finishing is more important: the same color code does not exclude differences in gloss and texture.
What to check before buying a wooden cornice KZ-011
The purchase is ready when every question has a verifiable answer.
| Security question | Ready for order | The order needs to be postponed |
| What material? | MDF, beech, or oak is specified in the specification | The choice is left to the installer "on site" |
| What finish? | There is a sample or an approved system | There is only the color name |
| What is the length of the plank? | 2600 or 2400 mm are accounted for in the map | Only linear meters are calculated |
| How many parts? | Each segment is placed in the original plank | The quantity is obtained by dividing the total perimeter |
| Where are the joints? | There are coordinates and support | The joint will appear where the plank ends |
| How are the corners designed? | The corners are measured, templates are provided | All are taken as equal to 90° |
| Where is the base? | The cut and strip material are agreed upon | Fastening to the tops of the battens is intended |
| Where do the utilities run? | The routes are marked on the diagram | The fasteners will be installed blind |
| How is KZ-011 connected to the ceiling? | The joint is agreed with the ceiling workers | The profile should "somehow cover" the guide |
| How to deliver the slats? | The elevator, stairs, and storage area have been checked | The route of introduction is unknown |
If only the first two items are filled in, the product is chosen aesthetically but not prepared for ordering. A commercial solution is considered complete when the material, quantity, and base are linked by a single document.
Who suits a profile with a height of 108 mm, and who needs a more compact cornice
KZ‑011 is suitable for a wall where the top horizontal line should be noticeable, and the height of 108 mm does not conflict with doors, cabinets, lighting, and ventilation. It is appropriate on a full accent surface, in an office, living room, or other space where wooden trim is supported by architectural details.
A full-size mockup is mandatory. A strip of cardboard 108 mm high is placed at the design mark, and a side template 34 mm deep is applied to the calculated mounting plane. The wall is viewed from the entrance, from the main seating area, and with the lights on. The mockup shows how many slats will appear visually shortened and whether a heavy shelf will form.
A more compact profile should be considered if:
-
there is no clear 108 mm zone left above a door or cabinet;
-
the 34 mm projection blocks light or interferes with the ceiling assembly;
-
a low ceiling and small room make the top strip disproportionately massive;
-
the slat panel itself has a strong relief that does not need a second dominant line;
-
it is impossible to create support under the entire back part;
-
external corners are located in a narrow passage and the protruding profile will be vulnerable.
KZ‑011 should not be reduced by unauthorized cutting in height or depth. Changing the cross-section alters the geometry, strength, and external pattern. If the profile does not fit, choose a different article or change the composition.
Errors when ordering a cornice made of wood and MDF
Choose the material after calculating the quantity
MDF has a length of 2600 mm, solid wood — 2400 mm. After changing the material, the number of joints and planks changes. First, fix the execution, then build the map.
Order exactly 4.8 m of solid wood for a 4.8 m wall
Two planks mathematically match the length, but leave no allowance. Corners, trimming, or damage make the set insufficient. A separate check of the minimum scheme or a third piece is needed.
Add a universal 10% without a map
The percentage does not show whether the required segments fit into the original planks. Three short sections may require more pieces, even though the total footage is sufficient. Each segment is placed separately.
Assign the joint location to the installer on the installation day
The joint may fall over a void or under sliding light. The coordinate is fixed before the base is installed, and this area is reinforced.
Prepare an embedded part sized 108 × 34 mm without a drawing
This is the external cross-section, not the finished base dimensions. The rear geometry may have different contact areas. The strip is designed according to the drawing and the fixing method.
Extend the slats to the ceiling with a margin
After installing KZ‑011, the top of the panels has to be cut on the finished wall. A straight line is difficult to achieve without damage. The lower cornice mark is set in advance.
Use individual slats as the only support
The cornice gets voids, unstable joints, and varying depth. A continuous mounting zone is needed with force transfer to a solid base.
Order oak for a clear finish without the "for tinting" category
A blank "for enamel" may have contrasting lamellas. A clear coating will reveal them. Confirmation of the finish and a sample are required.
Choosing MDF only because of the 2600 mm length
Convenient cutting does not cancel the operating conditions and the chosen finish. The material must suit the room, not just the calculator.
Do not approve the ceiling system
KZ-011 may overlap the guide of a stretch ceiling, access to the fabric, or the light niche. The assembly is approved before the ceiling and cornice installation.
Do not check the delivery of long profiles
A 2600 mm strip may not fit through an elevator or a turn. The delivery route is checked before ordering, and the profile is stored on a flat support.
Fix prices and stock in the long-term specification
The warehouse changes faster than the project. The specification includes a link, article number, and configuration, while the current price and availability are checked before payment.
How to order a wooden cornice and slatted panels in one project
A joint purchase starts not with a cart, but with a unified specification. In it, the cornice and panels are linked by four parameters: material, color, depth, and length. For each item, the article number, size, quantity, finish, and role in the assembly are specified.
If the panels are not yet selected, Buy slatted panels for the wall it is necessary after checking their full removal and the method of the top termination. It is not enough to know the visible width of the rail. The project requires the distance from the base wall to the front point of the entire system.
For covering trim, you can separately consider an MDF cornice under enamel. The link leads to the corresponding material, but the final decision remains with the project: a length of 2600 mm is not convenient on every map, and MDF is not suitable for all conditions.
A request to the manager might look like this:
Need a decorative ceiling cornice KZ‑011 108 × 34 mm for a slatted wall before the start of panel installation. Material — [MDF/beech/oak], finish — [specify], length of the main wall — [mm], ends — [specify], internal corners — [number], external — [number]. Please confirm the length of the strip, the blank category, current price and availability, the possibility of a single batch, and provide a drawing of the rear profile for preparing a solid base. The cutting map and side section are attached.
In a separate message, installers are given not prices but geometry: the lower mark, the plane, the base material, the coordinates of joints, and the prohibition on covering the mounting strip with slats. This way, the commercial order and the construction task are not mixed.
Summary: when KZ‑011 can be ordered
KZ‑011 is ready to order if four conditions are met.
-
Material and finish approved together.
-
Planks 2400 or 2600 mm are laid out according to actual segments, angles, and joints.
-
Solid base shown in section and accepted by installer.
-
Current price, availability, and lead time verified immediately before payment.
If the slat wall is not yet installed, this is the best time to solve the problem. You can embed a continuous support, bring out the desired plane, stop the slats at the design mark of the cornice's lower edge, and maintain access to utilities. After cladding, the same actions will require rework.
For a 4.8 m wall, the minimum MDF order is two 2600 mm planks with a nominal remainder of 400 mm. For beech or oak, two 2400 mm planks give zero margin; practical configuration is confirmed by ends and corners, adding a third piece if necessary. This is the difference between calculating linear meters and preparing an order.
Frequently asked questions about ordering the wooden cornice KZ‑011
Is KZ‑011 intended for curtains?
No. It is a decorative ceiling profile for architectural wall finishing. It is not a rod, a two-row track, or a system with rings for textiles.
When should you choose KZ‑011 — before or after ordering slat panels?
Up to the final specification and installation of panels. The cornice section determines the lower mark of the cladding and the position of the solid base. Panels and KZ-011 are better coordinated in one project.
Is a mounting strip exactly 108 mm high required?
Not necessarily. 108 mm is the external dimension of the profile. The height of the base is determined by the rear geometry and attachment points, so a drawing or sample is needed.
Can KZ-011 be glued only to the tops of the battens?
This scheme cannot be accepted without calculation. The support will be intermittent, and the joints may end up over voids. A continuous zone connected to a solid wall or frame is required.
What to choose for white enamel - MDF or beech?
Both options are possible. MDF provides a length of 2600 mm and is designed for opaque finishing; beech preserves the solid wood version and has a length of 2400 mm. The choice depends on the room conditions, cutting, and overall specification.
Can oak KZ-011 be tinted to match the color of the panels?
Yes, if a suitable blank category is available and a test stain has been done. The card by default shows "for enamel," so the "for tinting" finish is confirmed before ordering.
How many MDF slats are needed for a 4.8 m wall?
Mathematically, two pieces of 2600 mm each. They give 5200 mm and 400 mm of nominal remainder. The final answer depends on angles, end cuts, and the chosen joint scheme.
How many beech or oak planks are needed for 4.8 m?
Two pieces of 2400 mm each give exactly 4800 mm without any allowance. For a wall with corners or mandatory end trimming, a third plank is often needed, or a confirmed remainder from the same batch from another section.
Where is the best place to position a straight joint?
On a continuous support, away from the most noticeable sliding light, and at a coordinated compositional point. On a symmetrical wall, a central joint is possible; near a less visible edge, an offset one.
Do I need to calculate each section separately if the total length is already known?
Yes. The segments must physically fit into planks of 2400 or 2600 mm. The total length may be sufficient, but a suitable cutting layout may not be.
Can KZ-011 be provided near a stretch ceiling?
Yes, if the cornice is attached to the wall or a separate embedded element, does not load the canvas, and does not block the installation and maintenance of the ceiling profile. The assembly is coordinated with the ceiling installers in advance.
What allowance should be purchased?
The universal percentage does not replace the card. The stock is determined by the number of corners, types of ends, joints, finish, and the acceptability of reordering. For zero balance, the risk is assessed especially strictly.
Do I need to buy an additional plank for repairs?
With a transparent finish and complex corners, a spare part from the same batch is useful. Under enamel, a local replacement is easier to match by color, but the profile and its geometry must still match. The decision depends on the cost of downtime and the ability to store a long-length remainder.
Can the material be changed after the base has already been made?
The cross-section remains the same, but the length of the plank and the finish change. You need to recalculate the cutting layout, check the workpiece categories, and ensure that the selected base and fastening are compatible with the new material.
What is more important first: order the cornice or make the embedded base?
First, choose the exact configuration of KZ‑011 and obtain its drawing, then design the embedded base. You can pay for the entire product after a control calculation, but the base cannot be made for an abstract "similar cornice."