Article Contents:
- First, determine what to preserve in the original furniture
- Choose one main change
- The base matters more than the visual similarity of materials
- Legs: the new silhouette must suit the existing base
- Handles: check the holes, marks, and ease of grip
- Appliques: scale is determined by the free field of the facade
- The rosette sets the accent and requires its own space
- Molding changes the division of the surface
- Assemble the composition on a full-size mockup
- Check the full travel of the door and drawer
- How to combine new wood with an old cabinet body
- Paint the body and decor together or separately
- Wardrobe: align the verticals and the two doors
- Dresser: look at all rows of drawers at once
- Sideboard: limit the number of decorative focal points
- What to change first on a limited budget
- One real element helps you check the whole concept
- Where to buy decor for upcycling furniture to match a ready-made project

The chest of drawers has working drawers, a convenient depth and suitable width, but the heavy plinth, darkened handles and blank fronts prevent it from fitting into the new setting. Buying a few overlays does not yet solve this task. First you need to understand what exactly defines the old appearance and what changes the construction allows.
Decor for furniture makeovers is selected to match the existing piece: its dimensions, finish, holes, gaps and fasteners. A successful result can come from just replacing the handles or adding a new frame on the door. In another case, coordinated legs, trim and a small carved accent will be needed. The composition of the set becomes clear after a trial fitting, when both the future composition and its compatibility with the furniture are visible.
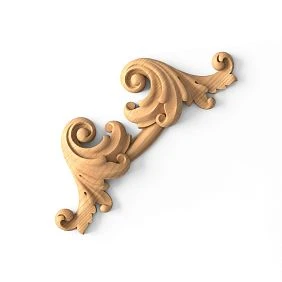
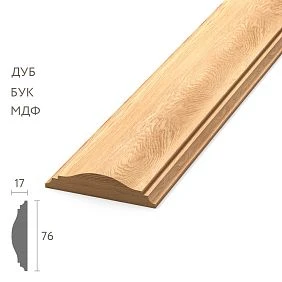
First determine what is being preserved in the original furniture
Take photos of the piece from the front and side, then record its overall dimensions, the height of the supports, the dimensions of the fronts and the location of the hardware. Separately note the elements that remain: the tabletop, side panels, hinges, runners, base. These are what set the boundaries of the project.
Before choosing decor, check the condition of the carcass. Loose joints, damaged hinge mounts or a swollen base require repair. A new overlay can cover a surface, but it does not restore its strength. If the construction is sound, you can move on to changing the appearance without making a new carcass.
Describe the desired result specifically: “keep the wooden tabletop, make the fronts light and calm,” “add frames to the doors,” “replace the heavy handles with minimalist ones.” Such a formulation is more useful than a single style name: it makes it easier to filter out unsuitable details.
For a piece with valuable authorial or historical design, first assess what changes are permissible. For ordinary cabinet furniture the task may be freer, but it is useful to decide in advance which original features you want to preserve. Then decor for old furniture will support successful proportions instead of hiding them with random ornaments.




Choose one main change
Different elements affect the perception of furniture in different ways. Legs change the silhouette and the clearance below, handles set the rhythm, moulding divides the plane, and an overlay draws attention to a specific place. Before buying, it is useful to determine which of these effects is needed first and foremost.
| Element | What changes visually | What limits the choice |
|---|---|---|
| Legs | Height, silhouette, sense of massiveness | Base and mounting scheme |
| Handles | Character of the front and rhythm of repeats | Holes, traces of previous hardware, grip |
| Overlays | Composition and prominence of the ornament | Free field and relief protrusion |
| Rosettes | Position of individual accents | Scale and adjacent details |
| Moldings | Frames, bands, vertical divisions | Profile size, corners and gaps |
| Finishing | Color, sheen, perception of material | Condition and compatibility of coatings |
For a first sketch, one main change and one or two supporting ones are enough. For example, a moulded frame can define the cabinet's new look, while simple handles and a single color support it. If a large carved applique is chosen as the main accent, it is better to leave calm shapes for the neighboring details.
This makes it easier to evaluate wooden decorative elements by their role in the project. A detail that is attractive on its own is not always what this particular piece needs.
Our factory also produces:
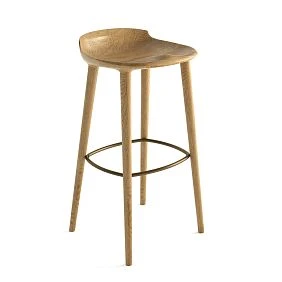
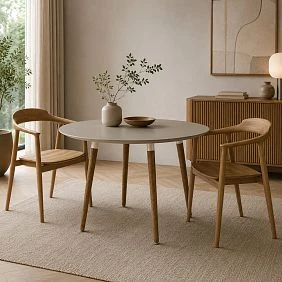

The substrate matters more than the visual similarity of materials
Painted solid wood, veneer, laminated board and a film-faced facade require different approaches to fastening and finishing. Beneath a wood grain pattern there may be a surface that does not absorb glue the same way as untreated wood. Therefore, first determine the facade material and the condition of its top layer.
Check for delamination, blistering, flaking paint and traces of previous care products. If a decorative element is attached to a weak coating, the reliability of the bond is limited by that coating. Surface preparation and adhesive selection must suit both materials, not just the wooden applique.
For mechanical fastening, first determine the thickness of the substrate, access from the reverse side and the permissible fastener depth. A thin panel or hollow door is not equivalent to solid wood. Veneer also cannot be treated like a thick wooden blank: its face layer is easily damaged.
If repainting is planned, test the chosen system on an inconspicuous area. Check adhesion after the drying and curing time specified by the manufacturer. A colored surface that no longer feels tacky to the touch does not yet confirm that the coating is ready for use.
Get Consultation
Legs: the new silhouette must fit the existing base
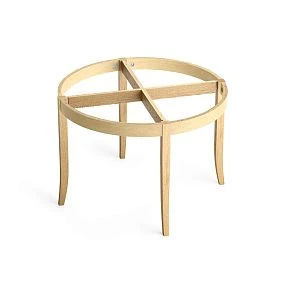
Wooden furniture legs can noticeably change the proportions of a chest of drawers or a cabinet. But whether they can be installed depends on how the body transfers the load to the supports. If the item stands on a plinth, replacing it with four legs cannot be considered a simple swap of parts: a different base or reinforcement may be required.
For furniture with replaceable supports, check the mounting plates, the condition of the holes, the position of the supports relative to the side panels, and the presence of intermediate support. A decorative shape does not confirm load capacity. The entire structure must be compared, including the connection to the body.
Let's consider a conventional chest of drawers 800 mm high with supports that add 80 mm to the body height. If the new mounting preserves the same geometry and the installation height of the supports is 140 mm, the total height will become 860 mm. The top drawers and the tabletop will rise by 60 mm. This change should be checked on site before choosing the shape of the legs.
After replacement, assess stability and the provided wall mounting of the furniture. Increasing the clearance underneath does not guarantee stability: the actual position of the support points matters. If the goal of the project is to keep the body without structural work, choose supports compatible with the existing assembly.
Handles: check the holes, marks, and ease of grip
Replacing handles may be the most compact change in terms of scope of work. Remove one old handle and measure the distance between the centers of the mounting holes. The overall length of a new handle of this size does not replace it: two parts that look identical on the outside may have different mountings.
Inspect the surface under the old hardware. Dents, scuffs, or an area of a different shade are sometimes left there. The new model must either cover these marks with its mounting part, or the project must include repair and finishing of the front. A decorative element located nearby will not solve the problem of an exposed old hole.
Choosing Wooden furniture handles, check the projection, finger space, and access to the fasteners. Trying it on a heavy drawer is especially important: a beautiful but inconvenient handle will have to be used every day. The overlay and frame must not block the grip area.
If a custom color is required, consider uncoated furniture handles. The possibility of painting does not cancel the requirements for the wear resistance of the finish. The sample should be evaluated both by appearance and by feel in the hand after the coating is completed.
Overlays: the scale is determined by the free field of the facade
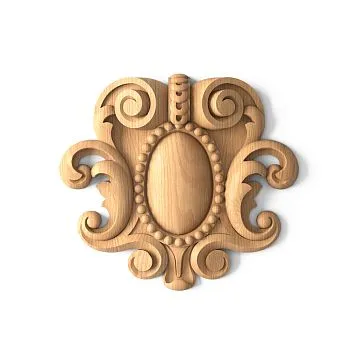
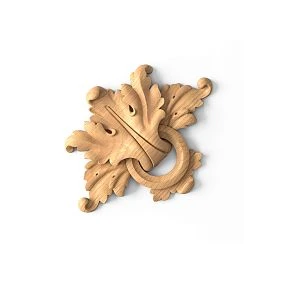
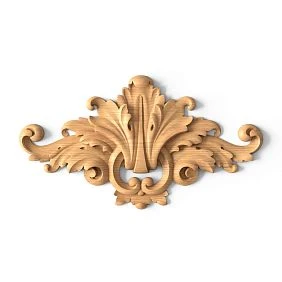
For a smooth door decorative inlays for furniture allow you to create a new center of composition without making another facade. However, the size is chosen based on the available field remaining after placing the handle, frame, and necessary indents.
Suppose the width of a conventional facade is 500 mm. The frame is set back 40 mm from each side edge, and its profile takes up another 20 mm inward. Between the inner edges of the frame, 380 mm remains. For an overlay 240 mm wide with central placement, there will be 70 mm of free space on each side. These numbers illustrate the calculation and do not set a universal norm for indents.
On the product drawing, check the width, height, and maximum protrusion from the mounting plane. Letter designations for dimensions must be read according to the specific product card: their meaning may differ across product groups. The overall thickness of the part is also not equal to the depth of the carved ornament.
Carved wooden overlays for furniture are tried on together with the handle. It is important to see both the contour and the space between them. On a tall facade, a narrow vertical element may turn out to be more expressive than a wide horizontal composition, even if both options physically fit.
The rosette sets the accent and requires its own place
Carved outlets from wood are convenient for small compositional centers. They can be repeated on several facades, complete a decorative division, or highlight the axis of the door. At the same time, an empty space in itself does not mean that it needs to be filled.
Compare the position of the rosette with the handle. If two expressive elements are located close together and have a similar size, they may compete. Sometimes it is better to leave one rosette in the center of a large plane than to add small details to every free area.
To connect a rosette with a molding, check the shape of the joint, the height of the relief and the overall thickness of the assembly. The catalog has a separate Decor for Molding, associated with specific profiles. When selecting, it is important to verify the stated compatibility: not every round element becomes a universal corner or connector.
If rosettes are repeated on several drawers, the marking is done according to a common system of axes. A slight displacement of one part is especially noticeable in a row. Therefore, first assess the entire facade of the chest of drawers, and only then refine the individual attachment points.
Molding changes the division of the plane
With wooden moldings for furniture you can form an inner frame, divide a large door into several fields, or support the horizontal line of the drawers. Surface-mounted framing creates volume while preserving the existing base of the facade.
Start with the outer boundaries of the frame. Check how they relate to the edges of the door and adjacent facades, then choose the width and projection of the profile. A wide strip reduces the inner field: after adding it, the previous handle or overlay may end up too close to the frame.
The length of the product strip, the corners and the placement of the joints also affect the selection. For a profile with a repeating ornament, the pattern will need to be matched at the joints. If you need a calm facade and simple cutting, it is more convenient to consider a profiled section that is constant along its length.
The framing of each door must allow it to open independently. A common molding must not cross the moving gap between two leaves. Similarly, a decorative band on a chest of drawers is divided across the drawer facades, preserving their movement and the coordinated pattern in the closed position.
Assemble the composition on a full-scale mockup
Once the main technique is chosen, make paper templates of the specific parts. Transfer the dimensions from the product card or drawing; a product photo without a scale is not suitable for this. For molding, a strip of the required width is sufficient; for a carved overlay, its actual contour is useful.
Place the templates on the furniture in a way that does not damage the finish. Mark the center axes, the position of the handles, and the edges of the frames. Then look at the item from a normal distance and from the points in the room where it is most often seen. A large pattern looks different in a close-up photo than on the whole wardrobe.
At this stage, check the hierarchy: what draws the eye first, what supports the composition, and which surfaces remain calm. If the legs, handles, frames, and overlays are all equally active, try removing one type of decor and compare the photos again.
Save two or three options from the same angle. Choosing between them helps you evaluate the result before buying a set. A paper mockup confirms the dimensions and placement, but it does not show the mass, texture, or protrusion of the part. After that, you need a three-dimensional fitting, especially near adjacent doors and walls.
Check the full travel of the door and drawer
An overlay may fit entirely on a closed front, but when opened it may catch on an adjacent handle or the side wall. That is why one photo from the front is not enough. The check must take into account the protrusion of the decor and the actual path of movement.
For a preliminary fitting, use a lightweight three-dimensional mockup that reproduces the outline and maximum protrusion of the selected part. The mockup's fastening must hold it in place during movement and not damage the finish. Slowly check the door from the closed position to the required angle, without trying to overcome any contact by force.
Then evaluate the neighboring elements: the second open door, the pulled-out drawer, the handle on a perpendicular front. For furniture near a wall, there is an additional constraint from the room side. A freestanding nightstand may open freely on its own and behave differently once placed next to the bed.
There is no universal gap that suits any relief and any hinges. The specific assembly needs to be checked. If the new finish and parts add mass to the front, evaluate the hinges, their mounting, and their adjustment separately. A mockup confirms the geometry, but it does not test how the hardware performs under the additional weight.
How to combine new wood with an old cabinet
Using one wood species for new handles, legs, and overlays makes selection easier, but it does not guarantee the same shade. The blanks themselves, the surface preparation, and the absorption of the finishing product all differ. The old cabinet adds another variable: its previous finish and the color change over time.
If all furniture is painted with an opaque finish, form and surface quality come to the fore. Texture becomes less significant in terms of color, although the relief of wood grain can remain noticeable. Therefore, enamel should not be considered an automatic way to achieve an equally smooth appearance across different materials.
Oak decor with visible texture can be made a standalone accent on a calm painted facade. In that case, it is important to match the exposed wooden elements with one another. An attempt to precisely replicate the shade of an old countertop requires a separate test finish next to it.
In the section quality of wooden products the execution parameters for enamel and for tinting are described. They are taken into account when choosing an available configuration. For a transparent finish, it is especially important to see in advance the wood that will remain exposed on the finished furniture.
Paint the carcass and decor together or separately
The choice of sequence depends on the desired appearance and the method of attachment. A single color does not always require applying the coating to an already assembled item: different substrates may need different preparation. The decision on assembly is made at the same time as choosing the finishing system.
| Desired result | Possible scheme | What to check on the sample |
|---|---|---|
| Uniform painted facade | Prepare the substrates, install compatible decor, apply the agreed finish | Junctions, access to recesses, adhesion of coatings |
| Visible wooden accent | Finish the body and wood separately, then install the part | Cleanliness of the boundary and suitability of the mounting area |
| Preserving the old finish | Prepare only the new element and the designated mounting points | Fastener compatibility and absence of damage around |
| Contrasting handles or removable parts | Paint separately and install after the coatings are ready | Fastener marks, ease of assembly, surface durability |
For a glued joint, do not arbitrarily paint the mating side if the chosen adhesive requires untreated wood. Other compositions are also applied only to the substrates intended for them. The issue is resolved according to the instructions for the specific material.
Select Mounting and finishing materials it is worth waiting until the final purchase of the decor. Then the full scope of work will be clear: preparation, test fitting, fastening and finishing, not just the color of the front surface.
Wardrobe: align the verticals and the two doors
A wardrobe has a large facade area, so even a small change in the layout is noticeable from a distance. For a subtle refresh, you can start with the handles and one frame on each door. For a more pronounced decorative look, add an elongated overlay tied to the vertical of the door.
Two doors are designed at the same time. Compare the top and bottom margins, the height of the handles and the position of the central motifs. If a mirrored composition is intended, check that the corresponding right and left pieces are available. Rotating a single directional overlay does not always produce the desired reflection.
The top decor is tried on taking into account the overall height and the distance to the ceiling. Its fastening must rest on a suitable surface, and its scale must be consistent with the side panels and doors. Adding an expressive finishing element just because there is space left above is not necessary.
On a wide wardrobe, it is useful to leave some of the surfaces calm. If the ornament is already noticeable on both doors, large corner rosettes and elaborate handles may be superfluous. The chosen set is checked with the doors closed and open, including access to the shelves and drawers inside.
Dresser: look at all rows of drawers at once
On a dresser, the rhythm is formed by the repetition of handles, horizontal gaps and facade edges. That is why it is more convenient to assess a makeover on an overall sketch rather than on a single removed drawer. Different facade heights may require different scales of decor.
On a narrow top drawer, a new handle is sometimes enough. A taller lower facade can accommodate a frame or a small carved element. At the same time, the overall principle should read clearly: equal side margins, aligned axes and a similar character of lines.
In a conventional dresser with three wide drawers and two handles on each, six handles will be needed. Before ordering a set, it is enough to check one chosen model on the actual facade, and the placement of all six on templates. If the test handle remains suitable for the piece after checking, it is included in the final quantity.
Changing the legs also affects this scenario: the cabinet will be raised, but the previous horizontal lines of the fronts will be preserved. First assess the new silhouette, then decide whether additional overlays are needed. Perhaps a combination of different supports, handles, and color will already be enough for a noticeable makeover.
Nightstand: limit the number of decorative focal points
On a compact nightstand, the distance between the handle, the edges, and the lower base is small. A large overlay that looked good on a wardrobe may take up almost the entire field here. That is why furniture makeover elements are chosen with the scale of the specific piece in mind.
Start with one noticeable decision: an expressive handle, a thin frame, or a small overlay. The remaining details should support it. If the nightstand stands by the bed, additionally check that the handle is easy to reach and that there are no protrusions in the walkway.
The height of the new legs is coordinated with the purpose of the furniture. For a bedside table, the height of the tabletop relative to the bed matters; for a media console, the position of the equipment and cables matters. The decorative effect must not interfere with normal use.
For a pair of nightstands, make a shared layout and color test. A difference in shade or ornament position that is almost imperceptible on a single piece becomes apparent when they are placed side by side in the same room. Matching parts are best selected and marked out at the same time.
What to change first on a limited budget
The order of work is determined by the task and compatibility. A low price for the part itself does not mean a cheap makeover: filling holes, preparing the old finish, or a new mounting assembly may be required. You should compare the full scope of changes.
| Purpose | What to consider first | When to choose another path |
|---|---|---|
| Change the character of the front | New handles | Mounting holes and marks from old handles require extensive repair |
| Make the bottom visually lighter | Compatible legs | The cabinet is designed for a plinth and requires reworking the base |
| Add a framed composition | Molding | Insufficient clearance or interference with opening |
| Create one striking accent | An overlay or rosette | The front is already rich in ornamentation |
| Combine dissimilar parts | A unified color scheme | The old finish requires complex preparation |
First approve the complete sketch, even if the work is planned to be done in stages. Otherwise, new handles may take the place of a future frame, and the first overlay may interfere with molding chosen later.
Buy parts for the agreed stage. This allows you to evaluate the result after the main change and avoid purchasing supporting decor that has already turned out to be unnecessary. A space without ornament also participates in the composition.
One real element helps verify the entire concept
Before buying a set, choose the part on which the most important decision depends: a handle for grip, an overlay to check the relief, or a section of molding to evaluate the frame. In the catalog product samples you can view the available options. The availability of a sample does not mean that it exists for every SKU or fully reproduces the future assembly.
A small section of profile will show the cross-section, but will not replace an assembled corner. One leg will help check the fastening, but will not confirm the stability of the entire item. Therefore, for each sample, determine in advance which question it should answer.
After fitting, draw up a schedule: SKU, material, size, finish-ready version, quantity, and installation location. For paired elements, indicate the side. Separately account for fasteners and materials required by the chosen technology; their inclusion in the set must be checked against the product.
Save the photo of the approved layout and the finished color sample. Before installation, check the received parts against them. The section will be useful for preparing the work installation and finishing tips, and the specific application methods for the materials are taken from their manufacturers' instructions.
Where to buy decor for furniture makeovers for a ready-made project
At STAVROS you can select decor for furniture makeovers and complement it with suitable handles, legs and moldings from the relevant catalog sections. It is more convenient to start the selection with a photo of the original item, the dimensions of the fronts and a sketch of the future look.
If you need to buy wooden decor for furniture, in your request specify not only the desired ornament, but also the available space, the base material, the finishing method and the number of parts. For overlays, the contour and protrusion are important; for handles, the mounting and grip; for supports, compatibility with the base. These parameters help narrow the choice down to applicable options.
Before buying carved wooden decor for the whole set, test the key element on the furniture and agree on the finish. The current set contents and lead times are confirmed by the selected item codes. Then the ready-made decorative elements are ordered for a clear result: a new look for a wardrobe, chest of drawers or cabinet while keeping the body in good condition and maintaining ease of use.