Article Contents:
- A wall with moldings is a system, not a single product
- What is included in the basic kit for a wall with moldings
- How to choose a molding profile: width, relief, style
- Molding width: the main parameter
- Profile: smooth, embossed, or ornamental
- Molding for painting or molding with a ready color
- How to calculate the number of moldings: count correctly
- Step one: draw a wall diagram
- Step two: calculate the perimeter of each frame
- Step three: add horizontal and vertical lines outside the frames
- Step four: account for trimming
- Step five: add a margin — 15–20% of the total length
- Why it's better to buy with extra right away
- Glue for moldings: what to choose and how much is needed
- Which glue is suitable for polyurethane moldings
- How much glue is needed per order
- Installation features: what to know before applying glue
- Decor for moldings: why it's needed and when to add it
- What is molding decor
- When to add molding decor and when it is not needed
- Decorative stucco inside a frame: when the frame needs an accent
- What to place inside a frame
- Which frames need an internal decorative element
- Stucco decor for a wall: when a frame is not enough
- Where stucco decor works in addition to moldings
- How to properly place stucco decor relative to molding frames
- Ceiling stucco: when to add to wall moldings
- When a ceiling cornice is mandatory
- Wall with moldings in different rooms: what to buy for each task
- Living room: accent wall behind the sofa
- Bedroom: area behind the headboard
- Hallway: quick effect on a small budget
- Study: strictness and status
- Commercial space: restaurant, hotel, office
- Table: what to buy for a specific task
- Paint and finishing: what you need to know
- What paint to use
- How to paint: brush or roller
- Painting to match the wall: features
- Painter's tape, miter box, level: essential tools
- Painters' tape
- Miter box
- Level and tape measure
- FAQ: most common questions before ordering
- About the Company STAVROS

Decision made: I want a wall with moldings. I already have a picture in my head — frames, symmetry, beautiful. One thing remains: to understand exactly what to put in the cart. It seems like a simple question. But this is where most people stumble.
Because a wall with moldings is not one product. It's a set. The molding profile is just the beginning. You need glue, paint, extra for trimming. Possibly — decorative corners, stucco decor inside the frame, a ceiling cornice. And if you buy only the profile without thinking about the kit in advance, the installation will stop halfway.
This article is a practical guide to assembling the right cart. No fluff, no extra philosophy. Only specifics: what to take, how much, why, and in what order.



A wall with moldings is a system, not one product
Let's start with the main thing. A wall with frames made of moldings is an architectural solution. Small, but systemic. And like any system, it consists of several interconnected elements, each performing its function.
When a person first looks at such a wall in an interior and thinks 'I want the same', they see the result. They see frames, beautiful corners, possibly a central decorative element, coordinated painting. But behind this result is a precisely assembled set: the right profile in the right quantity, the correct glue, paint, extra, and, if necessary, additional decorative elements.
If you buy only the molding and come home with one roll of profile — it turns out there is no glue, no extra for corners, it's unclear how to cut the joints, and the frame ends up empty where you wanted an accent. This is not a disaster, but it's a waste of time and extra trips for missing items.
The right approach: one order, a complete set, installation without interruptions.




What's included in the basic kit for a wall with moldings
The basic kit is the minimum you need to start and complete the installation:
-
Moldings made of polyurethane — linear profile in the required quantity with a reserve
-
Mounting acrylic glue — for attaching the profile to the wall
-
Acrylic sealant — for sealing joints and edges
-
Acrylic paint — for the finishing coat
-
Painter's tape — for fixing during installation
-
Miter box or corner template — for cutting at 45°
-
Tape measure and level — for precise marking
The extended set adds to the basic set:
-
Decor for Molding — corner elements and ornamental inserts
-
decorative molding — overlays, medallions, cartouches for accent areas
-
ceiling molding — cornice along the ceiling perimeter
-
Ceiling rosette — if a chandelier is present
Let's examine each element in detail.
Our factory also produces:


How to choose a molding profile: width, relief, style
The first and main question is which molding profile suits your task. This is not a question of "what is more beautiful" — it is a question of scale, interior style, and ceiling height.
Get Consultation
Molding width: the main parameter
Molding width is the visible surface of the profile when looking at the wall. This parameter determines how noticeable the frame will be, how "heavy" it looks visually, and how appropriate it is in a particular room.
Narrow molding (15–25 mm). Delicate, almost invisible from a distance. Works well in small rooms with ceilings 2.4–2.5 m, in minimalist interiors. Creates an embossed effect — frames are present but not overwhelming.
Medium molding (25–45 mm). A universal range for most apartments with ceilings 2.5–2.8 m. Clearly visible, creates a distinct frame, works in both modern and neoclassical interiors.
Wide molding (45–70 mm and more). For rooms with high ceilings from 2.8–3 m. In a standard apartment, it can create a visual heaviness effect. In a high space, it adds monumentality and architectural character.
A simple rule: the lower the ceiling, the narrower the molding should be.
Profile: smooth, textured, or ornamental
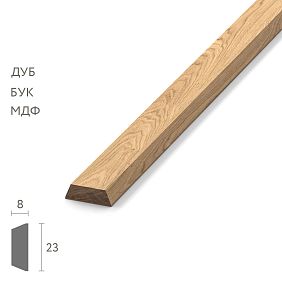
In addition to width, the cross-sectional shape — how the profile looks in section — is important.
Smooth (rectangular or semicircular) profile — strict, modern, universal. Works in any interior. Especially good in modern neoclassicism and transitional style. When painted in the wall color, it creates an exquisite embossed effect. When painted white on a colored wall, it creates a clear graphic accent.
Stepped profile — several horizontal levels with a drop. Creates a play of light and shadow, visually weighs down the frame. Works well in Art Deco and modern classicism.
Textured ornamental profile — with an Ionic band, meander, bead molding, acanthus ornament. For classicism, neoclassicism, Baroque. Requires a corresponding interior style — if the style is different, the ornament will look alien.
Ogee profile (S-shaped) — smooth curve. A transitional option between smooth and textured. Universal, works in most residential interiors.
Molding for painting or molding with a ready color
Moldings made of polyurethane They are supplied white — ready for painting. Polyurethane perfectly accepts acrylic paint. This gives complete freedom of choice: the molding can be painted white, to match the wall, in a contrasting color, in gold, in gray — for any solution.
Painting to match the wall is the most delicate option. The frames are there, but they do not stand out from the wall, creating a subtle tactile effect.
White molding on a white wall is a classic. Minimal contrast, maximum neatness.
White molding on a colored wall is an expressive, modern option. Used in interiors with accent walls.
How to calculate the number of moldings: counting correctly
This is a practical block that saves time and money. Correct calculation of the footage is a guarantee that installation will go without a stop "need to order more".
Step one: draw a wall diagram
Take a sheet of paper and draw the wall to scale. Mark where the frames will be: how many, what width, what height. Indicate the indents from the ceiling, floor, and side walls.
This is not difficult and does not require an architectural education. A simple diagram on paper — a pencil and a ruler. But when the diagram is ready, calculating the footage becomes elementary.
Step two: calculate the perimeter of each frame
Frame perimeter = (width + height) × 2.
For example: a frame 90 × 140 cm. Perimeter = (90 + 140) × 2 = 460 cm = 4.6 m.
If there are three such frames — total length for three frames = 4.6 × 3 = 13.8 m.
Step three: add horizontal and vertical lines outside the frames
Sometimes moldings are not only in the form of closed frames, but also as single horizontal lines (a belt on the wall) or vertical dividers. Calculate their length separately and add to the main length.
Step four: account for trimming
Each corner of the frame is two pieces of molding cut at 45°. Trimming produces waste — small triangular offcuts. These offcuts need to be accounted for in the calculation.
In practice: for each frame with four corners, add 20–25 cm to the perimeter. For three frames, this is 60–75 cm of additional length.
Step five: add a margin — 15–20% of the total length
A reserve is needed for several reasons:
-
Cutting errors (especially for beginners)
-
Uneven walls where cutting differs from theory
-
Joints in the middle of a long run
-
Force majeure during installation
15–20% is the standard construction reserve for any linear material. Less is a risk. More is extra expense.
Final formula:
Total perimeter of all frames + horizontal/vertical lines outside frames + waste for corners + 15–20% reserve = final order length.
buy polyurethane moldings with correct calculation means placing one order and starting installation without delays.
Why it's better to buy with a reserve right away
Proven fact: moldings from the same batch have identical color and parameters. If the next order contains moldings from a different batch, there may be a slight difference in the white shade, thickness, or relief angle shape. This is not always critical, but after final painting, the difference sometimes becomes noticeable.
A reserve of 15–20%, ordered together with the main batch, insures against this risk.
Glue for moldings: what to choose and how much is needed
Glue is not a minor detail. It is the foundation of installation. Wrong glue or insufficient amount is a direct path to moldings falling off after a few months.
Which glue is suitable for polyurethane moldings
For polyurethane moldings, acrylic mounting glue is used. It holds polyurethane well on any surfaces — plastered walls, drywall, wood. It does not deform polyurethane, does not leave yellow stains, and is compatible with acrylic paint.
Do not use solvent-based and nitro glues — they destroy polyurethane. Do not use epoxy glue — it is too rigid and does not allow micro-movements during temperature changes.
How much glue is needed for an order
Practical guideline: one tube of acrylic mounting glue weighing 300–400 g is designed for approximately 8–12 linear meters of molding up to 40 mm wide. Wider molding requires more glue.
Add acrylic sealant to this — for filling joints between sections, for finishing the edges of the molding near the wall and ceiling. Sealant prevents visible gaps after painting and during wall shrinkage.
Installation features: what to know before applying glue
The wall surface must be clean and dry. Dust, grease, and wallpaper residue all reduce adhesion. Newly plastered walls need to be primed. Drywall — definitely.
Apply glue in a zigzag pattern to the back of the molding, then press the molding against the wall and secure it with painter's tape for 20–30 minutes until it sets. After the glue has fully dried (usually 24 hours), remove the tape, fill the joints with sealant, and after the sealant dries — apply the final paint.
Decor for moldings: why it's needed and when to add it
Decor for Molding — this is a category of products often overlooked when placing the first order. But that's a mistake. It's these small elements that turn a simple geometric frame into a complete decorative system.
What is decor for moldings
These are ornamental elements that are attached directly to the molding or at specific points in the frame system. This category includes:
Corner elements. Small square or rectangular overlays installed at the corners of the frame instead of a cut joint. This is both a decorative and functional solution: the corner element hides the joint and adds an ornamental detail to the corner.
Corner elements are especially convenient when the corners of the frame don't align perfectly — which happens with uneven walls or when working as a beginner. The corner overlay forgives small inaccuracies and makes the result look professional.
Center inserts. Elements installed in the center of the horizontal or vertical side of the frame. They add rhythm and detail to the system.
Rhythmic ornamental elements. Small decorative overlays repeating at equal intervals along the molding. Particularly effective on long horizontal runs — cornices, belt moldings, wide frames.
When to add decor for moldings and when it is not needed
Not needed if the interior style is minimalism or modern geometry. A smooth frame without additional elements is the intended result.
Needed if you want a more classic, more "expensive" look for the frame. Corner elements transform the frame from modern geometry into a classic decorative panel.
Mandatory in classic and neoclassical interiors, where the corners of frames must be ornamentally finished.
The key condition when choosing decor for moldings: stylistic compatibility. The decorative corner must be from the same series or the same style direction as the molding. A classic corner ornament on a geometric molding is a stylistic dissonance.
Decorative stucco inside the frame: when the frame needs an accent
A frame made of moldings is beautiful in itself — as an architectural system. But sometimes the frame looks empty. This is especially noticeable on a large wall, where the frames are wide and tall — the field inside the frame occupies a significant part of the wall and remains unfilled.
In such cases, a decorative element is added inside the frame — and the wall immediately gets a different character.
What to place inside the frame
Medallion. A horizontally elongated ornamental element. Installed along the central axis of the frame — horizontal or vertical. Works well at the top of a large frame or in the center of a medium one.
Cartouche. A figured overlay with a frame border. Often vertically elongated. Installed in the center of the frame or in its upper third.
Ornamental panel overlay. A complex multi-element piece with an elaborate ornament. An independent accent inside the frame.
buy decorative moldings for an internal accent of the frame — means deciding the size in advance: the element should occupy 40–60% of the frame's width and not extend beyond its boundaries.
In which frames is an internal decorative element needed
Not every frame needs decor. Rule: in one room, one or two frames with a decorative accent are enough. The rest are clean. This creates a hierarchy: the main frame — with an accent, auxiliary ones — without.
В гостиной: главная рамка по центру акцентной стены — с медальоном или картушем. Боковые рамки — без декора.
In the bedroom: the frame behind the headboard — with a central element. Side frames — clean.
In the hallway: one frame above the console or mirror — with an overlay. The rest — moldings without decor.
Stucco decor for the wall: when a frame is not enough
There are tasks for which frames are not enough. When a person wants not just to organize a wall, but to make it distinctive — add personality, historicity, richness of ornament — the stage is entered by Relief Decoration.
Stucco decor is more complex and large-scale ornamental overlays: large cartouches with detailed ornamentation, stucco panels, figurative elements with leaves and scrolls, heraldic motifs.
Where stucco decor works in addition to moldings
The wall behind the sofa in a classic interior. Frames made of moldings plus a large stucco element in the central frame — this is a complete formal wall that works without additional furniture.
The area above the fireplace. Moldings around the perimeter of the fireplace portal plus stucco decor above it — this is a classic solution, proven by centuries of interior architecture.
An office with a workspace. Frames on the wall behind the workspace plus one large stucco element along the central axis — this is a declaration of status without redundancy.
Restaurant, hotel, showroom. In commercial spaces Buy Molded Decoration — means investing in image. Stucco decor combined with moldings creates an atmosphere that the visitor reads instantly.
How to properly place stucco decor relative to molding frames
Stucco decor should be tied to the structure of the frames — not placed randomly outside the system. Options:
-
In the center of the main frame — along the horizontal and vertical axis
-
In the upper third of the main frame — at the frame's golden ratio point
-
Above the main frame — on the wall field between the frame and the ceiling
-
Paired on the sides of the central frame — symmetrically relative to it
Main rule: stucco decor must always be on the axis of symmetry or in a symmetrical arrangement. A random location disrupts the system.
Ceiling stucco: when to add to wall moldings
Wall moldings and ceiling cornice are a connected system. A wall with frames and a bare ceiling create a visual gap: decor exists but is incomplete. A ceiling cornice closes this gap, organizes the transition, and makes the decor systematic.
Ceiling molding Attached as a cornice at the junction of wall and ceiling. With a 2.5 m ceiling — cornice height up to 50 mm. With a 2.7 m ceiling — 50–70 mm. With a 3 m ceiling — 70–100 mm.
The cornice is chosen in the same style direction as the wall moldings. Smooth molding — smooth or minimally relief cornice. Ornamented molding — matching ornamental cornice.
When a ceiling cornice is mandatory
In the following cases, a cornice made of ceiling molding is not an option, but a necessity:
-
Classic and neoclassical interior with rich molding decor
-
High ceilings from 2.8 m, where the empty wall-ceiling transition looks unfinished
-
Formal rooms — living room, dining room, hall
-
Commercial spaces — restaurant, hotel, executive office
In an apartment with a 2.5 m ceiling, a cornice is desirable but not always mandatory — with narrow moldings and a minimalist solution, its absence is not as noticeable.
Wall with moldings in different rooms: what to buy for each task
Let's break down specific scenarios by room — this is the most practical section for those who already know where they will be working.
Living room: accent wall behind the sofa
The main wall of the living room is the face of the apartment. A full set is appropriate here.
What to buy:
-
Moldings made of polyurethane 30–45 mm for 3–4 frames
-
Corner decorative elements (Decor for Molding)
-
Central stucco decor for the main frame
-
Cornice around the ceiling perimeter
-
Ceiling rosette for chandelier (if central lighting is present)
-
Glue, sealant, paint, 15–20% extra
Result: a finished accent wall with architectural decor and a coordinated ceiling.
Bedroom: area behind the headboard
In the bedroom, the main task is to design a relaxation area without overloading the small space.
What to buy:
-
Moldings 25–35 mm for one or two frames behind the bed
-
Decorative stucco — one central element inside the main frame
-
Cornice — optional, for ceilings 2.7 m and higher
-
Glue, sealant, paint, spare
If sconces are planned on the sides of the headboard, add paired L/R overlays next to each sconce.
Hallway: quick effect on a small budget
The hallway is a small space where one right element changes the entire perception of the entry area.
What to buy:
-
Moldings 20–30 mm for one frame or several small frames
-
Decorative element above the mirror — Buy Molded Decoration small size
-
Glue, sealant, paint, spare
Minimum budget — maximum effect. A hallway with a frame and a decorative accent above the mirror looks several times more expensive than a bare plastered wall.
Study: strictness and status
A study requires restraint: not lavish, not overloaded, but high-quality and convincing.
What to buy:
-
Moldings 30–40 mm, smooth or minimally embossed profile
-
Decorative corner or corner overlays for frames
-
One stucco element above the workspace — a restrained cartouche or medallion
-
Cornice around the perimeter — neat profile
Commercial space: restaurant, hotel, office
Here the scale is different. More surfaces, higher ceilings, systemicity is more important.
What to buy:
-
Moldings 40–60 mm for wide frames
-
Ceiling cornice — mandatory
-
Stucco decor — on accent walls
-
Ceiling rosettes — if central lighting is present
-
Large stock, calculation considering all rooms
to buy molding For a commercial project, it's better to consult a specialist — this saves time and eliminates calculation errors.
Table: what to buy for a specific task
| Task | Mandatory | Additionally |
|---|---|---|
| Simple frames | Moldings, glue, paint, stock | — |
| Frames with expensive corners | Moldings, Decor for Molding, glue | Paint, stock |
| Accent wall with decor | Moldings, Decorative stucco, glue | Decor for moldings |
| Wall with sconces in bedroom | Moldings, paired overlays, glue | Cornice |
| Classic interior | Moldings, Relief Decoration, cornice, glue | Rosette, overlays |
| Full room | Moldings, cornice, rosette, stucco decor, glue | Decor for moldings |
| Commercial project | Everything, calculation based on room plan | Specialist consultation |
Paint and Finish: What You Need to Know
Finish painting is the final step that determines the final look. Even perfectly installed moldings without proper finish painting look incomplete.
Which paint to use
For polyurethane moldings, water-based acrylic paint is suitable. It adheres well to polyurethane, does not crack, does not yellow, and is easily washed off with water before drying.
Do not use oil-based paints — they can cause yellowing and create adhesion problems on polyurethane.
How to Paint: Brush or Roller
A brush is the optimal tool for molding. Especially for relief profiles where every detail of the ornament needs to be painted. A brush with long bristles or a flat brush — for large flat surfaces of the molding. A thin brush — for recesses in the relief.
A small foam roller — for smooth, wide-profile moldings. Provides an even layer without brush marks.
Number of coats. Two thin coats are better than one thick coat. The first coat is a base coat that opens up the surface. The second is a finish coat that evens out the color. Between coats — complete drying (2–4 hours for acrylic paint).
Painting to Match the Wall: Features
If the moldings are painted to match the wall — first paint the wall, then install the moldings, then repaint everything together with a finish coat. This guarantees a perfect color match.
If the moldings are painted in a contrasting color (white on a colored wall), first finish the wall, then install the moldings, then paint them with a neat cutoff along the edge.
Painter's tape, miter box, level: essential tools
Painter's tape
Without tape, installing moldings becomes a nerve-wracking ordeal. It is needed for:
-
Securing the molding while the glue dries
-
Masking during separate painting (wall + molding in different colors)
-
Protecting the wall when applying sealant
It's better to buy more than you think you need. Tape is a consumable that always runs out at the worst possible moment.
Miter box
A miter box is a tool for cutting moldings at precise angles. For frame corners, a 45° angle is needed. A plastic miter box with fixed angles is a budget option. A metal rotating miter box is more accurate, more convenient, and suitable for large volumes.
A fine-tooth hand saw for wood or an electric jigsaw with a fine wood blade — for cutting polyurethane molding. An angle grinder is not suitable for this purpose — the cut will be uneven.
Level and tape measure
The horizontality of the frames is the main thing to check before installation. Molding installed "by eye" almost always results in a misalignment that is immediately noticeable. A water or laser level is an essential tool.
A tape measure is needed for marking: distance from the ceiling, from the floor, from the side walls, width and height of the frames.
FAQ: most common questions before ordering
What should you buy first for a wall with moldings?
First of all — Moldings made of polyurethane of the required profile and width, calculated with a 15–20% margin, and mounting acrylic glue. Without these two items, installation cannot begin.
Is a reserve of moldings needed when ordering?
Absolutely. A 15–20% reserve of the calculated footage is standard. It covers waste from cutting, errors, joints, and unforeseen situations during installation.
Are decorative corners needed for moldings?
Not always. For simple modern frames, the corners are cut at 45° and joined without decorative elements. Decor for Molding It is needed when you want a classic look or when the joint is not perfect and needs to be covered with a decorative element.
What to add to a frame if it looks empty?
decorative molding — a medallion, cartouche, or ornamental overlay. The size of the element is 40–60% of the frame width. Placement is along the central axis of the frame.
When is ceiling stucco needed along with wall moldings?
Always when the interior is classic or neoclassical. In modern interiors, it is optional. Ceiling molding In the form of a cornice, it connects the walls and ceiling into a single system.
What glue is suitable for installing polyurethane moldings?
Acrylic mounting adhesive. Additionally, acrylic sealant for joints. Do not use solvent-based adhesives — they destroy polyurethane.
Can moldings be painted the color of the wall?
Yes. This is a delicate and exquisite solution, especially for small rooms and low ceilings. A molding in the color of the wall creates an embossed effect.
Is ceiling molding necessary if wall moldings are only on the walls?
A cornice is desirable — it completes the decorative system. However, if the interior style is modern and minimalist, the cornice can be omitted.
What to buy for stucco decoration above the mirror?
One decorative element — a medallion or horizontal cartouche with a width of 60–80% of the mirror width. Installation height — 5–10 cm above the top edge of the mirror.
About the company STAVROS
The right shopping cart starts with the right supplier. STAVROS is a Russian company specializing in the production of decorative polyurethane products. The STAVROS catalog offers a full range for wall and ceiling decoration: Moldings made of polyurethane in a wide range of profiles and widths, Decor for Molding — corner and ornamental elements, Decorative stucco и Relief Decoration for accent zones, Ceiling molding for cornices and ceiling decorative solutions.
All products are made of high-quality polyurethane with precise relief and stable geometric parameters, compatible with each other in style and size, ready for installation and final painting. If you are unsure about the calculation of the set or the choice of profile, STAVROS specialists will help you select the necessary items, calculate the footage, and assemble a complete order without errors. Because a wall with moldings starts with the right shopping cart — and STAVROS knows what to put in it.