
























































Article Contents:
- Why decorative elements should not be bought at the last moment
- Renovation logic: everything is connected
- What happens if you buy late
- Top of wall and ceiling: ceiling cornice, wooden cornice, stucco molding
- Why you need a ceiling cornice and when to choose it
- Wooden cornice or polyurethane: which to choose
- How not to make a mistake with the width of the cornice
- Bottom of wall: wooden baseboard and floor baseboard
- Why the baseboard is the second priority choice
- Baseboard height: how to make a decision
- Baseboard and color strategy
- Walls: slats, layout, moldings, and stucco decor
- When to make a decision on walls
- Wooden slats on the wall: where and how
- Wooden layout: fine work with details
- Moldings and stucco: when classic demands more
- Ceiling and zoning: wooden beams
- Why a beam cannot be chosen at the last moment
- Decorative wooden beam: difference from construction timber
- Beam as a zoning tool
- Scale rule for beams
- Furniture parts: handles, legs, supports and underframes
- Why furniture parts should be chosen before final ordering of facades
- Legs and supports: impact on height and style
- Underframe: when to choose it and for what
- Checklist: what to buy before starting finishing work
- Common mistakes when purchasing decorative elements
- How to estimate the cost of decorative elements
- Linear elements
- Individual Elements
- Coating and installation
- Where to buy everything for finishing in one style
- FAQ: Answers to Key Questions
- About the company

Renovation is not a sequence of random decisions, but a scenario where each action affects the next. Someone who buys a curtain rod after the ceiling is already painted risks redoing the joints. Someone who chooses a wooden baseboard after installing doors often finds that the colors don't match. Someone who orders furniture handles on the last day gets what's in stock, not what's needed.
This article is a practical checklist: what to buy for interior finishing in advance, at what stage of renovation, why exactly then, and what happens if you're late. There's no theory for theory's sake here — only a specific sequence of purchases that will save money, time, and nerves.





Why decorative elements cannot be bought at the last moment




The logic of renovation: everything is connected to everything
Renovation is not a set of independent tasks. It's a system of interdependent decisions, where each choice leads to the next. The floor affects the color of the baseboard. The baseboard affects the architraves. The architraves affect the doors. The doors affect the furniture handles. The furniture handles affect the furniture legs and supports. The curtain rod affects the painting of the upper perimeter of the walls. The slats affect the layout and final wall finishing.
Most problems that arise during renovation are related to one thing: a person made decisions one by one, without thinking about the system. Bought good doors, separately good flooring, separately good furniture — and in the end, everything is good, but nothing is connected into a single whole.
Decorative elements — curtain rods, baseboards, slats, beams, moldings, handles, legs, supports — are precisely the details that create the connection. They work like "threads" through which the finishing, furniture, and architecture of the space begin to speak the same language.
Our factory also produces:



What happens if you buy late
The curtain rod was bought after painting the ceiling. When installing the curtain rod to the ceiling, traces of fastening, putty, and profile adhesion appear. If the ceiling is already finished painted — you'll have to repaint the strip near the curtain rod. A small inconvenience turns into an extra day of work and additional paint costs.
The baseboard was purchased after the doors were installed. Door trims and baseboards must match in shape and color. If the trims are already in place and the baseboard is chosen "by eye," there will inevitably be a gap or profile mismatch at the joint. This is resolved either by selecting a new baseboard or using an unattractive adapter.
The wall slats were purchased after the furniture was arranged. The sofa is already against the wall where the slats are needed. Now you either have to move the sofa during installation or install the slats only on the visible part of the wall — resulting in an ugly pattern break behind the furniture.
Furniture legs were purchased without considering height. A 40 mm tabletop + 720 mm legs = a 760 mm table. Standard. But if you forget about the tabletop thickness and buy 750 mm legs, the table will be 30 mm above the norm, making it uncomfortable to work at.
All these situations are typical, and they are all solved by one thing: making a decision on decorative elements before finishing work begins.
Get Consultation
Top of the wall and ceiling: ceiling cornice, wooden cornice, stucco molding
Why a ceiling cornice is needed and when to choose it
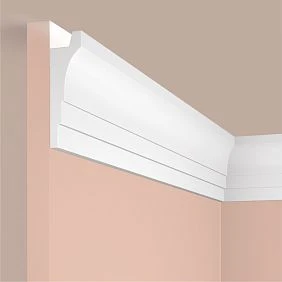
Ceiling cornice — the first element in the hierarchy of decorative purchasing. It must be chosen before the final painting of walls and ceiling — this is a fundamental requirement, violating which leads to rework.
Why is that? Because the cornice is installed at the junction of the wall and ceiling. Its installation area is a zone that must be puttied, primed, and painted for a specific profile. If the cornice is wide (80–120 mm), the upper part of the wall is covered by it — it doesn't need careful painting. If the cornice is narrow (40–60 mm), the paint must be perfect right up to the ceiling. These are different technological conditions, and the painter must know about them in advance.
The second point is hidden lighting. Increasingly, the cornice is used as an element for mounting an LED strip: warm light directed at the ceiling. If such lighting is planned, the electrician must run the cable before the ceiling finishing begins. This means the decision about a cornice with hidden lighting is made at the rough work stage.
Wooden cornice or polyurethane: which to choose
Two materials, two different solutions — they don't compete, but solve different tasks.
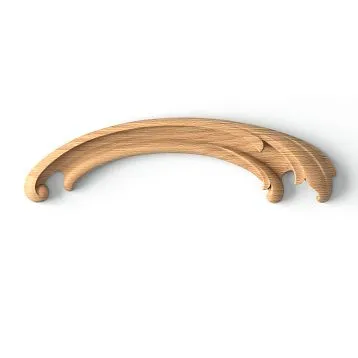
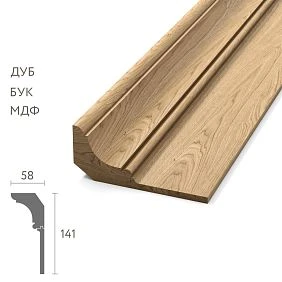
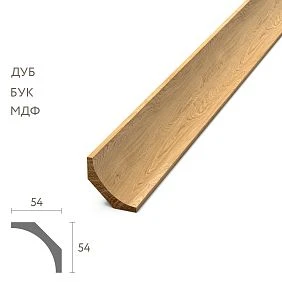
wooden cornice from array — for interiors where wood is the main decorative material. It is tinted in any shade, coordinated with the baseboard, doors, and furniture into a single wooden system. The natural texture creates a character that no artificial material can reproduce with the same conviction.
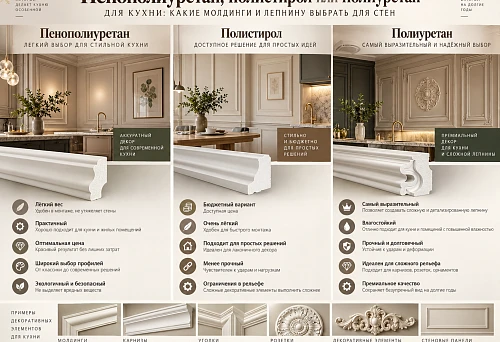
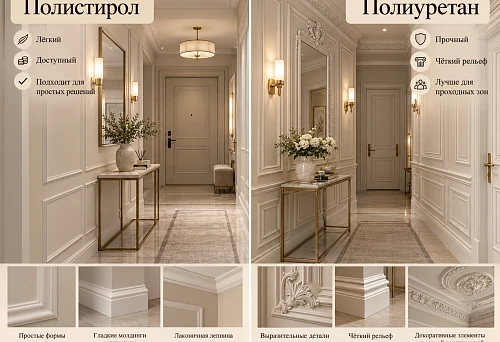
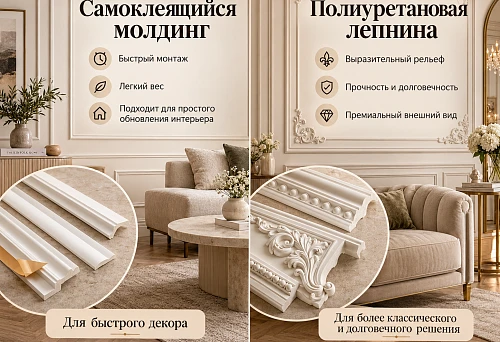
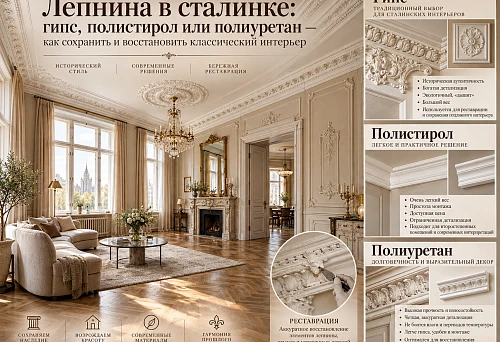
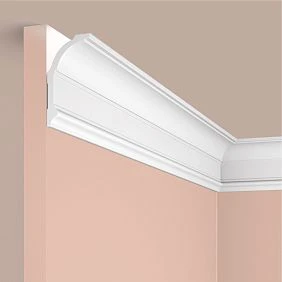
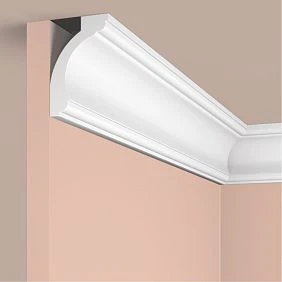
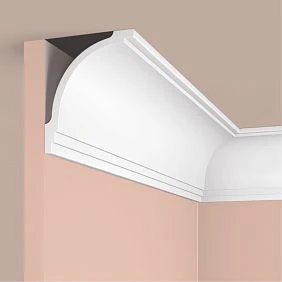
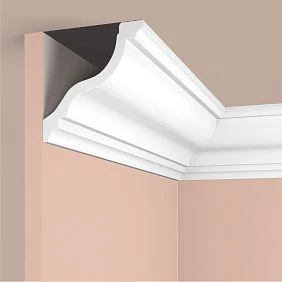
Moldings made of polyurethane — a lighter, moisture-resistant, and more technologically advanced option. A polyurethane cornice accepts paint perfectly: when finished in white or in the wall color, it becomes part of the surface, loses visible joints, and creates a sense of monolithic design. This is especially valuable in classical and neoclassical interiors with rich profiles.
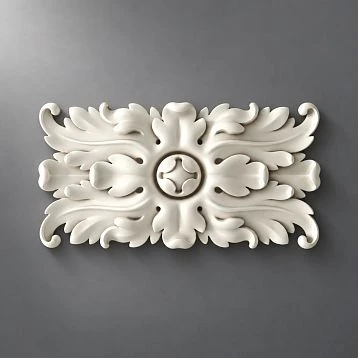
Buy moldings — a separate task for those creating a rich classical or baroque interior. Stucco is installed before final painting and requires advance planning: where exactly the rosettes, cornice, and consoles are — everything must be fixed on the drawing before work begins.
How not to make a mistake with the width of the cornice
The main rule of scale: the width of the cornice should correspond to the ceiling height. For ceilings 2.5–2.7 m — cornice no wider than 60–70 mm, otherwise it visually "presses down." For ceilings 3 m and higher — up to 100–120 mm, a good scale for an expressive profile. For unusually high ceilings (from 3.5 m) — up to 150 mm or more, depending on the style.
buy wooden cornice it's better to have a margin of 10–15% in length: for cutting corner joints and possible marking errors.
Bottom of the wall: wooden baseboard and floor baseboard
Why the baseboard is the second priority choice
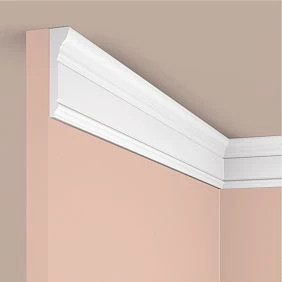
If the cornice is the upper contour, then Wooden baseboard — the lower one. Together they form the frame of the space: the floor and ceiling receive clear architectural boundaries, the wall between them becomes a full-fledged surface, rather than just a vertical plane without beginning or end.
The baseboard is chosen before the doors are installed — this is a key point. The door casing and baseboard meet at the point of contact with the doorway. If the casing is already in place, you need to select a baseboard to match it. If the baseboard is determined in advance, the carpenter or installer immediately makes the casing taking the joint into account. The second scenario is significantly neater.
Baseboard height: how to make a decision
Height is the first and most important parameter when choosing a baseboard. And here the answer depends on the interior style and the height of the room.
Standard apartment with a ceiling of 2.5–2.7 m. Baseboard 50–70 mm. This is a neutral height that does not pull the eye downward or overload the wall from below.
Neoclassical, classic. Baseboard 80–120 mm. A high lower belt creates a sense of solidity and the "correct" classical proportion of the wall.
Modern interior, minimalism. Baseboard 40–60 mm, possibly without a profile — just a straight strip at the floor.
Country house, chalet. Baseboard 100–150 mm, massive, possibly with a simple reverse profile.
wooden skirting board purchase you need a margin of at least 10% of the room's perimeter. Plus an additional 5–10% for cutting at corners — especially if the corners are non-standard. Total from the calculated perimeter — at least 15% margin.
Baseboard and color strategy
Three strategies, each working in its own context:
Baseboard in the color of the floor. The bottom line of the wall visually disappears, making the room seem wider. Works in small spaces and modern interiors with a horizontal orientation.
Baseboard in the color of the doors. Wooden baseboard + wooden doors in the same tone = a unified wooden theme around the entire perimeter. This is the most "designer" option, which is immediately noticeable.
Baseboard in the color of the wall. A delicate choice: the baseboard becomes part of the wall, not a separate element. Suitable for minimalism and Scandinavian style.
with a classic profile creates a sense of solidity, reliability. Uncoated solid wood — the optimal option for those who want to control the final color themselves. You cover the baseboard with the same tint or oil you use for the doors. Result: a perfect match without guessing.
Walls: slats, layout, moldings, and stucco decor
When you need to make a decision about the walls
Decorative wall elements — slats, moldings, layout — need to be determined before the final painting. The reason is simple: their installation leaves marks on the wall that need to be puttied and painted over. If the painting is already final, you'll have to carefully touch up or repaint individual sections.
Additionally, if frame panels are planned on the wall wooden molding — their layout is done before painting, and the painting is done considering the panel placement. When using two colors (wall one color, panels another), the work order is even stricter.
Wooden slats on the wall: where and how
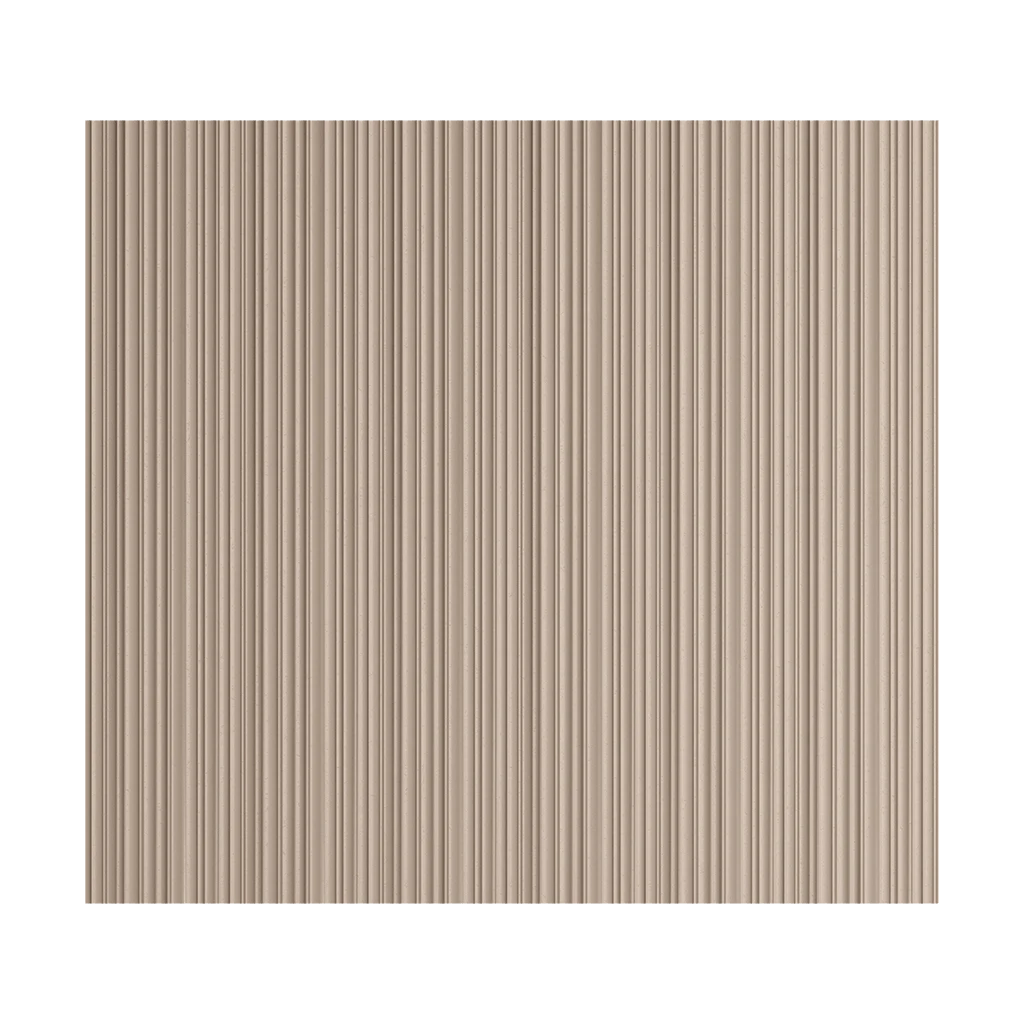
wooden planks on the wall — a tool of vertical rhythm. They structure the wall through repetition, create relief and shadow under side lighting, and add wooden texture where there used to be a monotonous plane.
Where do slats work most convincingly?
-
TV area — a background behind the screen made of dark or neutral slats reduces eye strain while watching and visually 'inserts' the TV into an architectural element.
-
Wall behind the sofa — an accent zone in the living room. Slats from floor to ceiling create a center of attraction without expensive finishing.
-
Hallway — the first wall a guest sees. A slat on a narrow side wall or opposite the entrance is an expressive technique with minimal costs.
-
Bedroom at the headboard — a warm wooden background instead of or behind the headboard. Soft, cozy, warming.
Decorative wooden strip without solid wood covering — the right choice: it is coated with the same oil or tint as the baseboard. A unified tone system is achieved effortlessly.
Installation rule: the gap between slats should be no less than the width of the slat. Slat 20 mm — gap 20–30 mm. Slat 30 mm — gap 30–40 mm. Denser installation creates a feeling of solid paneling rather than rhythmic decor.
Wooden layout: fine work with details
Wooden molding — this is a profile for spot finishing. Not a cornice or a batten — something more delicate: thin strips of solid wood that create framed panels on walls, cover material joints, and design transitions between planes.
Framed panels made from layout profiles are one of the most popular techniques in modern interiors. Rectangles made of thin 10–15 mm profile are glued to the wall using liquid nails according to pre-marking. Then everything is painted in one color — either to match the wall tone (for a delicate effect) or in a contrasting color (for a clear accent). This is a DIY technique, but with precise execution it looks like designer work.
Moldings and stucco: when classics demand more
Moldings made of polyurethane — are voluminous decorative profiles for classic and neoclassical interiors. Unlike flat layout profiles, moldings have a pronounced relief that is visible from a distance and creates an architectural sense of wall paneling. They are used for decorative friezes on walls, framing doorways and niches, and creating "insert" panels.
Decorative stucco — this is the next level of classic decor. Ceiling rosettes, brackets, consoles, ornamental friezes, coffered ceilings — all of this requires separate design. Stucco is chosen in advance, its installation points are measured, an installation scheme is developed — and only then do they proceed to the final finishing of the ceiling and walls.
Ceiling and zoning: wooden beams
Why a beam cannot be chosen at the last moment
Wooden beam on the ceiling — this is an element that requires the earliest purchase. Its installation presupposes the presence of attachment points in the ceiling: embedded parts, anchors, or mounting plates. If the floor is concrete — anchors can be installed at any time, but before the final finishing of the ceiling. If the ceiling is suspended or stretch — embedded parts are installed before the sheathing.
Those who decide to install beams after the ceiling has been covered with a stretch fabric will face a serious problem: the ceiling needs to be dismantled or special mounting units need to be made, which are expensive and difficult to execute.
Decorative wooden beam: difference from construction timber
This moment is important — and understanding it saves money and prevents disappointment. decorative wooden beam — this is a product originally intended for visual use. Smooth ends, finished surface, stable geometry, ready for final coating.
Construction timber is a structural material. Its job is to bear loads, not to be beautiful. The surface is not finished, geometry is unstable due to shrinkage and twisting, ends are unfinished. Placing construction timber on the ceiling, coating it with stain, and calling it a "beam" — you get an imitation that adds nothing to the interior except random lumber on the ceiling.
Beam as a zoning tool
Wooden beams on the ceiling in open-plan layouts — this is one of the best zoning techniques without walls. A transverse beam above the transition from the kitchen to the living room creates a psychological boundary between zones. A person crossing it feels the transition — without a physical barrier, without a wall, without losing light.
In a country house, several beams across the living room set the rhythm of the ceiling and make a high space proportionate. In a cafe or restaurant, beams create an atmosphere faster than any other decorative element: just three beams on the ceiling — and the hall gains character.
Scale rule for beams
The cross-section of a beam depends on the ceiling height and room area. For an apartment with a ceiling of 2.7 m — cross-section 60×80 mm or 80×100 mm, no more. For a country house with ceilings of 3.5–4 m — up to 120×150 mm. The spacing between beams is 0.8–1.5 m depending on the concept. A single beam as an accent — acceptable. Systematic beams with a rhythmic step — create an architectural ceiling.
Furniture parts: handles, legs, supports, and underframes
Why furniture parts should be chosen before final ordering of facades
Furniture Handles — это деталь, которая определяется до изготовления фасадов мебели. Причина в межосевом расстоянии (МЦ): размер 96 мм или 128 мм — это расстояние между точками крепления скобы. Фасад сверлится под конкретный МЦ. Если ручка выбрана после изготовления фасада с отверстиями 96 мм, а вы захотели другую ручку с МЦ 128 мм — нужно сверлить новые отверстия. Это портит фасад и создаёт ненужную работу.
Правильная последовательность: выбрать Wooden furniture handles → зафиксировать МЦ → передать размер производителю мебели → фасады сверлятся под выбранную ручку.
Ножки и опоры: влияние на высоту и стиль
furniture legs определяются одновременно с проектированием мебели, а не после её изготовления. Высота ножек влияет на итоговую высоту изделия: комод на ножках 120 мм — это совсем другая вещь, чем тот же корпус на ножках 50 мм. Высота определяет удобство использования, пропорцию в пространстве и визуальную лёгкость мебели.
Furniture legs без покрытия из массива — правильный выбор, если вы хотите согласовать их тон с плинтусом, дверьми и другими деревянными элементами. Обрабатываете одним составом — и система создана.
furniture leg из массива — несущий элемент для тяжёлой мебели. При её выборе ключевые параметры: сечение (от 50×50 мм для нагрузок свыше 50 кг на опору), порода (дуб или бук — твёрдые породы с высокой прочностью на изгиб), тип крепления (болтовое — надёжнее, чем посадка на клей или шкант без усиления).
Furniture Supports выбираются в комплекте с ножками — так обеспечивается единый стиль несущих элементов для всей мебели в помещении.
Подстолье: когда его выбирать и под что
Buy a pedestal нужно до финального определения столешницы — или одновременно с ней. Они должны совпасть по нескольким параметрам одновременно: высота (итоговая высота стола 750–760 мм минус толщина столешницы = высота подстолья), ширина и длина (подстолье должно быть меньше столешницы на 100–150 мм с каждой стороны для правильного свеса), порода дерева (в идеале — та же, что и столешница).
Buy table base A frame structure is a solution that ensures rigidity. A framed underframe with crossbars provides stability that cannot be achieved with four separate legs without connections. Lateral load when rocking the table is a critical moment that the frame structure withstands, but four legs without connections cannot.
Checklist: what to buy before starting finishing
| Renovation stage | What to buy in advance | Why it's important to do before the stage |
|---|---|---|
| Before rough work on the ceiling | Wooden beams, Decorative stucco | Embedded elements are needed for beam fastening; stucco requires marking |
| Before painting the ceiling | Ceiling cornice, Moldings made of polyurethane | Installing the cornice requires a puttied joint before painting |
| Before painting the walls | Wooden planks, Wooden molding | Marking of frame panels and slats — before painting |
| Before installing doors | Wooden baseboard | Baseboard profile is coordinated with architraves |
| Before ordering furniture fronts | Furniture Handles | Fronts are drilled for the selected handle's center distance |
| Before designing furniture | furniture legs, furniture legs | Leg height affects the final height of the furniture |
| Before ordering the countertop | wooden base | Undercounter dimensions are coordinated with countertop dimensions |
Common mistakes when purchasing decorative elements
A list worth reading twice — before and after renovation.
Baseboard bought after doors. The color and profile of the trim are already determined, but the baseboard is chosen "roughly similar." As a result, the joint at the doorway looks messy.
Cornice chosen after final ceiling painting. During installation, the ceiling near the joint gets damaged, leaving traces of putty and fasteners. Everything has to be repainted.
Slats bought without calculating spacing and length. The wall in the middle ends up divided by a non-multiple number of slats: the pattern breaks awkwardly. Or too few are bought, and the second batch has a different shade.
No allowance for cutting. 10% reserve is the minimum for baseboards and cornices. 15–20% for slats and moldings. Buying more from a different batch later means getting a tone mismatch.
Legs bought without calculating final height. The table or dresser ends up 20–40 mm higher or lower than needed. For a table, this is critical — ergonomics are compromised.
The underframe doesn't match the tabletop shape. A rectangular underframe under a round slab — corners protrude beyond the perimeter, looking awkward.
Different wood shades in one room. Baseboard in warm oak, slats in cold walnut, handles in light ash — the room looks like a wood species sample display, not an interior.
Molding and trim not stylistically coordinated. Thin modern slats + ornate decorative cornice with patterns = a stylistic conflict that cannot be fixed with paint.
How to create a budget for decorative elements
This is a practical block for those who want to create a full budget before starting renovations, rather than opening their wallet unexpectedly each time.
Linear elements
Linear elements include: cornice, baseboard, slats, trim, moldings. All are measured in linear meters.
Cornice. Room perimeter (sum of all walls) × 1.10 (10% allowance) = required length.
Baseboard. Room perimeter minus width of doorways × 1.15 = required length. Additionally, note that at external corners, baseboards are joined at 45° — this results in a loss of about 50–80 mm per corner.
Slats. Area of accent wall(s) ÷ (slat width + gap width) = number of slats. Add 10–15% for trimming.
Trim. Calculate total length of all frames: (height + width) × 2 × number of frames. 15% allowance.
Individual pieces
Unit items include: handles, legs, supports, under-tables, beams.
Handles. One handle per facade (cabinet door, drawer). For drawers — one per drawer regardless of width. For cabinet doors — one per door.
Legs and supports. Four per furniture item (table, dresser, nightstand, sofa) + 1–2 spare in case of defects.
Underframes. By number of tabletops. One tabletop — one underframe.
Beams. By ceiling pattern. Standard spacing 80–120 cm. Beam length = room width.
Coating and installation
A separate line in the estimate — coating: oil, tinting, varnish, wax. Calculated based on the total surface area of all wooden elements. Typically, one liter of oil covers 8–12 sq. m of surface depending on the species and texture.
Installation of linear elements: cornice and baseboard — approximately one hour of carpenter work per 15–20 linear meters. Battens — more labor-intensive: preparation, marking, installation, filling of attachment points — one day per wall of 12–15 sq. m.
Where to buy everything for finishing in one style
The main danger of fragmented purchasing is mismatch of shades, scales, and styles. When the cornice is bought in one place, the baseboard in another, the battens in a third, and the handles in a fourth, it is difficult to assemble them into a unified system. Each manufacturer works with different species, different tolerances, different coating compositions.
The solution is to purchase Solid Wood Items from one catalog: cornices, baseboards, battens, beams, handles, legs, supports, and underframes from the same species, without coating — for independent unified finishing.
The STAVROS catalog offers the full range of wooden decor for renovation:
-
solid wood ceiling cornices — from narrow minimalist to expressive classic profiles;
-
with a classic profile creates a sense of solidity, reliability. of different heights;
-
Decorative Planks for walls;
-
decorative solid wood beams for ceiling;
-
table bases and furniture frames.
Additionally — Polyurethane molding and moldings for classic and neoclassical interiors.
FAQ: Answers to Key Questions
What to buy for renovation in advance to avoid redoing the finish?
First of all — the cornice and baseboard: they affect the finishing paint technology. Then — slats and moldings: they determine wall markings. After that — handles and legs: they set parameters for furniture ordering. Last — underframes: after agreeing on countertop dimensions.
When to choose a ceiling cornice — before painting or after?
Before painting the ceiling and walls. Installation wooden cornice requires puttying the junction with the ceiling and wall. If the ceiling is already painted — that means additional work.
When to buy a wooden floor baseboard?
Before installing doors and architraves. Wooden baseboard and the door architrave must match in shape and color: it's better when the baseboard is chosen first.
What to choose first: doors, baseboard, or architraves?
Order: doors → architraves → baseboard. Doors set the color and style. Architraves — to match the doors. Baseboard — coordinated with architraves in profile height and tone.
When are wooden slats needed on the wall?
When vertical rhythm, wood texture, and wall structuring are needed without major renovations. Best places: accent wall in the living room, TV area, headboard in the bedroom, hallway. decorative wooden planks installed before furniture placement.
Do I need to buy furniture handles and legs in advance?
Mandatory — before ordering furniture facades. Furniture Handles determine the center for drilling facades. furniture legs affect the body height and must be considered during design.
How to calculate the allowance for baseboard, cornice, and slats?
Baseboard and cornice — 10–15% extra of the perimeter. Slats — 15–20% extra of the calculated quantity. Layout — 15%. It's better to have surplus than to buy from another batch with a shade mismatch.
Can wood and polyurethane molding be combined in one interior?
Yes, provided the coating color is uniform. Wooden baseboard и Moldings made of polyurethanepainted in one enamel, are perceived as a single system. Conflict arises only with different colors or fundamentally incompatible profile styles.
About the Company
STAVROS is a Russian manufacturer of wooden interior products from solid oak and beech. Own full-cycle production. The assortment covers the entire range of decor and moldings: ceiling cornices, baseboards, slats, beams, moldings, trims, furniture handles, legs, supports, underframes, and furniture frames. Additionally, polyurethane stucco and moldings for classic interiors. All wooden products are supplied without a finish coating: you determine the tone, shade, and composition for a specific interior. Custom orders according to sizes and drawings. Contact us to confirm shipping to your destination., pickup from Moscow and St. Petersburg. Loyalty programs for designers, architects, construction companies, and furniture manufacturers.