Article Contents:
- That moment when the renovation is almost ready — but something is off
- What is a batten: a definition that clarifies everything
- Batten and corner: an important distinction
- Corner — for corners
- Batten — for flat joints
- Wooden batten for paneling: the most common scenario
- Where joints occur when finishing with paneling
- Why Wooden, Not Plastic
- Batten for slopes: a beautiful transition after installing windows and doors
- Where exactly is a trim strip needed for slopes
- What to choose for a slope
- Trim strip for panels and slats: a current demand in modern renovation
- Where a trim strip is needed when installing panels
- How to close the gap between the wall and door frame: trim strip as an alternative
- How It Works in Practice
- Flat, round, corner: which trim strip shape to choose
- Flat trim strip
- Trim strip with a chamfer or shaped profile
- Semicircular or round trim strip
- Corner trim strip
- How to choose a shape
- How to choose the width of a batten: the "with a margin" principle
- Which material to choose for a batten: wood species and treatment
- Softwood species: pine and spruce
- Hardwood species: oak, ash, beech
- Batten for painting
- Batten for tinting or varnish
- Oil and wax
- What to pair a wooden batten with: the trim system as a whole
- Batten and baseboard
- Batten and casing
- Batten and molding
- Batten and slatted panels
- Full set: what the system looks like
- Batten in different interior styles: from a bathhouse to a city office
- Country house and cottage
- Bathhouse and sauna
- Scandinavian interior
- Classic and neoclassic
- Modern interior with wooden accents
- How to install a batten: the essentials
- Preparation
- Mounting methods
- Corner joining
- Painting after installation
- Mistakes when choosing a batten: how not to lose money and time
- Choosing a plastic profile for wooden finishing
- Taking a strip exactly the width of the gap
- Not accounting for wall unevenness
- Choosing a color without considering the overall system
- Setting too wide a profile on a small joint
- Not planning the joint between the trim and the baseboard
- Using a trim instead of a corner piece
- Forgetting about line repetition in the room
- Trim in projects: several practical examples
- Finishing a country house with clapboard
- Apartment with slatted panels
- Office with wooden window slopes
- Where to buy wooden trim: catalog with the right assortment
- STAVROS: wooden trim that finishes the renovation correctly
- FAQ: Answers to Popular Questions
- What is a trim strip for?
- How is a trim strip different from a corner piece?
- Can a wooden trim strip be used for paneling?
- How to choose the width of a trim strip?
- Can a wooden trim strip be painted?
- Which wood species to choose for a trim strip?
- How is a trim strip attached?
- Is a trim strip needed if there is already a casing?


That moment when the renovation is almost done — but something is off
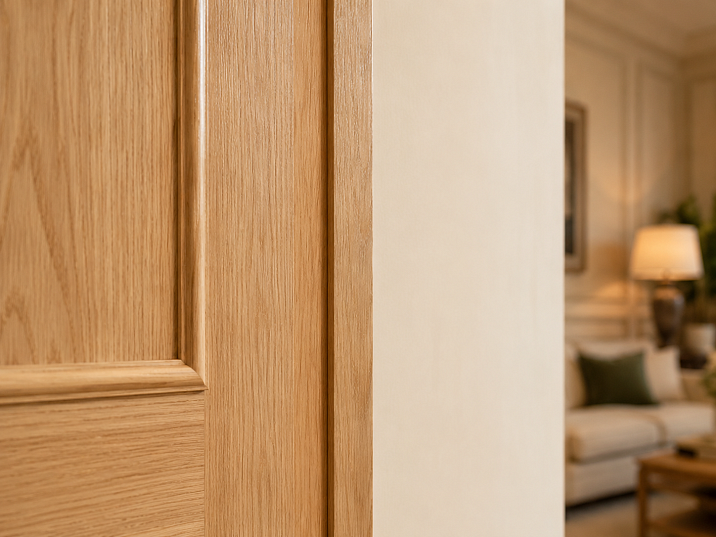
You've come a long way. The walls are paneled with clapboard, the panels are installed, the door is fitted, and the slopes are finished. The builders leave, you inspect the result — and your eye catches one detail. A thin gap along the door frame. An uneven joint between the clapboard and the opening. A gap where the panel meets the wall. A small but relentlessly noticeable detail that says: "the renovation isn't over yet."
That's exactly what wooden nashchelnik — a profile that solves the problem elegantly, quickly, and in the right material. Not with plastic, not with silicone, not with sealant from a can — but with a wooden strip that fits into the interior as the finishing touch of a professional craftsman.


What is a nashchelnik: a definition that clears everything up
The word "nashchelnik" speaks for itself: "on the gap." It is a decorative overlay strip that is mounted over a joint, gap, abutment, or installation clearance. Its task is to visually hide what shouldn't be seen: a technological gap, an uneven edge, the place where two materials meet and don't align perfectly.
Wooden cover strip — is a solid wood profile that, unlike plastic counterparts:
-
looks like part of the wood finish, not a technical patch;
-
can be painted, tinted, and varnished;
-
matches clapboard, trim, baseboards, and moldings;
-
lasts long without yellowing, delamination, or loss of shape.
A batten is not a structural element. It does not hold the wall and does not bear any load. But it is the visible finishing touch, and it determines whether the result looks complete or not.
Our factory also produces:


Batten and corner profile: an important distinction
Before choosing, you need to clearly understand: a batten is not the same as Wooden angle. These are different profiles with different tasks, and confusing them means getting the wrong result.
Get Consultation
Corner profile — for corners
Wooden angles for finishing — these are profiles with an L-shaped cross-section. They are installed on an external or internal corner — where two planes meet at a 90-degree angle. The corner profile holds the corner, protects it from damage, and makes the transition between planes neat.
Batten — for flat joints
Decorative batten — this is a flat or profiled strip that covers a joint on one plane or in an opening. It does not have an angular cross-section — it is applied on top, covering the gap on the left and right. This is a fundamentally different geometry of use.
Simply put:
-
A wall and a wall meet at a corner — a corner piece is needed.
-
The paneling ends at the door frame, and there is a gap between them — a trim strip is needed.
-
A panel joins another panel, and the joint is visible — a trim strip is needed.
-
The slope after window installation is not covered by a casing — a trim strip is needed.
Wooden trim strip for paneling: the most common scenario
batten for lining — perhaps the most common case for using this profile. Paneling is a popular finishing material for cottages, country houses, baths, saunas, and in recent years for city apartments in country, rustic, Scandinavian, or neoclassical styles.
The problem is that paneling is a material that requires neat junctions. And there are always many such junctions when covering walls.
Where joints occur when finishing with paneling
Junction with a door opening. Horizontal or vertical paneling boards approach the door frame, and a gap often remains here — due to wall unevenness, frame thickness, or installation features. The casing covers the main part, but the side junction of the paneling to the frame does not.
Junction with a window opening. Same story: the paneling approaches the slope or window frame, and this transition requires covering. batten for lining here it works as a transition strip.
The joint of the paneling with the ceiling. Where the vertical boards meet the ceiling, a horizontal transition is needed. This could be a baseboard, a cove molding, or a batten — depending on the width of the gap and the finishing style.
The joint of the paneling with the floor. The lower edge of the wall cladding and the baseboard — another place where an unsightly gap often appears.
Connection of different sections of cladding. If several walls are clad with paneling and they meet horizontally — the batten covers the joint.
Why wooden, not plastic
Plastic profiles are cheap and fast. But next to natural wooden paneling, plastic looks like a foreign body. It differs in gloss, texture, and feel. A space that uses wooden paneling deserves a wooden finish. Solid wood batten continues the material language of the finish without interrupting it.
Batten for slopes: a beautiful transition after installing windows and doors
Slopes are the internal surfaces of a window or door opening. After replacing a window or installing a new door, they often remain unfinished: traces of the old frame, mounting foam, and plaster irregularities are visible.
Most often, slopes are covered with architraves — and that is correct. But there are situations when an architrave is not enough or when an additional transition between the slope and the wall finish needs to be covered.
Where exactly is a trim strip needed for slopes
The junction of wooden trim and a plastered slope. If the wall is paneled with clapboard or wooden panels, and the slope is made of plaster, the transition between them requires covering. A trim strip here looks organic: it connects the two materials into a neat line.
The junction of a wooden slope to the frame. If the slope is finished with wood and abuts the window or door frame, the installation gap between them may be visible. A narrow trim strip covers this gap without compromising the appearance.
Transition of the slope to an internal corner. The corner between the slope and the wall often remains unfinished after installation. Here, you can use either a corner piece or a trim strip, depending on the geometry.
Gap after window replacement. When replacing an old window with a new double-glazed unit, the slopes are often redone. Technological gaps are filled with foam but then require final covering with a decorative strip.
What to choose for a slope
For slopes, a flat trim strip of moderate width—20–40 mm—works well. If the slope is wooden, the trim strip material should be of the same species. If the slope is plastered and painted, the trim strip can be painted the same color, making it almost invisible.
Trim strip for panels and slats: a relevant request in modern renovation
Slat panels, MDF boards with decorative surfaces, wooden inserts on walls—all of this is now actively used in residential and commercial interiors. And each such element has edges, junctions, and joints that need to be finished.
Rafter panels are mounted on the wall as a single system. But at the edges of this system—near the ceiling, floor, or adjacent wall—transitions remain. If the joint between the panel and the wall is not covered, it reads as a technical defect, even if the panel itself is installed perfectly.
Wooden cover strip closes this transition — neatly, in the same wood species, with the same finish. It does not draw attention to itself: its task is to be unobtrusive but necessary.
Where a batten is needed when installing panels
-
The side edge of the panel going into the corner of the room.
-
The top edge of the panel abutting the ceiling or ceiling cornice.
-
The joint of two different panels on the same wall (e.g., different sections).
-
The transition from the panel to a window or door slope.
-
The place where the panel meets a pilaster, column, or other protruding element.
What to cover the gap between the wall and the door frame: batten as an alternative
The door frame is installed. The casing is nailed on. But a gap remains between the casing and the wall, or between the frame and the paneling. This is a typical situation, especially if the walls are uneven — and they are almost always uneven.
Wooden casings have a fixed width and cover a standard gap. But if the wall is uneven, if the frame is slightly skewed, if the wall finish was added later — the casing may not be enough. A batten in this case is an elegant solution: it adds covering width without replacing the entire casing.
How this works in practice
The architrave strip is mounted next to the casing — on the side where the gap is visible. It serves as an additional covering strip. If the casing and the architrave strip are made of the same wood species and have the same tint, they are visually perceived as a single element.
For this application, a flat architrave strip with a width of 15–30 mm is suitable — enough to cover a standard gap and delicate enough not to overload the door opening.
Flat, round, corner: which shape of architrave strip to choose
The shape of the architrave strip determines where it is used and how it looks.
Flat architrave strip
The most common shape is a rectangular strip with a flat front surface. It is suitable for most standard tasks: covering joints on a single plane, adjoining frames, and covering gaps on slopes. Its minimalist geometry makes the flat architrave strip versatile.
The width of a flat architrave strip ranges from 15 to 80 mm depending on the task. For small gaps — 15–25 mm. For large gaps and transitions — 40–60 mm.
Architrave strip with a chamfer or shaped profile
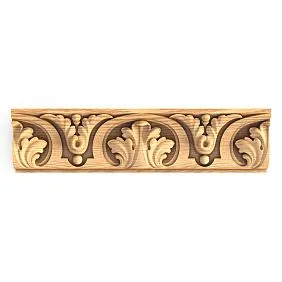
Some architrave strips have a slight profile along the edges — a chamfer, rounded corner, or small step. This makes them visually slightly more interesting than a flat strip and adds depth. It looks good in classic and neoclassical interiors.
Semicircular or round architrave strip
A semicircular profile in cross-section — soft, organic. This wooden nashchelnik is often used where a delicate decorative transition without sharp edges is needed. Suitable for paneling, wooden walls in a country style, saunas, baths, rustic kitchens.
Corner trim
A profile with a small angle in cross-section — not as pronounced as a corner, but sufficient to cover a joint in an opening where there is a slight depth difference. Used where two surfaces are in the same plane but with a small step.
How to choose a shape
| Task | Recommended shape |
|---|---|
| Close a gap in paneling | Flat or semicircular |
| Finish a slope | Flat with bevel |
| Hide a panel joint | Flat, narrow |
| Adjacent to the door frame | Flat, medium width |
| Decorative transition in a log house or bathhouse | Semi-circular |
| Joint on an uneven wall | Flat with extra width |
How to choose the width of a trim strip: the "with extra" principle
One of the most common questions is how wide should the trim strip be? The answer sounds simple but requires explanation.
First rule: the trim strip must cover the gap with extra on both sides. If the gap is 5 mm, a 10 mm wide strip won't work — at the slightest unevenness of the wall or shifting, the gap will become visible again. The minimum extra on each side is 5–10 mm.
Second rule: the width of the strip should match the scale of the finish. A massive wide strip on a thin joint of paneling will look heavy. Conversely, a too narrow strip on a wide slope won't do the job and will look out of place.
Third rule: the trim strip should fit into the molding system. If the room has Wooden Skirting Boards 70 mm wide, an 80 mm wide trim will compete with them. The width of the trim is usually less than the width of the baseboard and is proportional to the casing.
Width guidelines:
-
15–20 mm — for minimal gaps, decorative transitions.
-
25–35 mm — for standard paneling joints and abutments.
-
40–55 mm — for slopes and wider abutments.
-
60–80 mm — for noticeable gaps and specific applications.
What material to choose for the trim: wood species and treatment
wooden trims are made from different species — and the choice of species affects not only the appearance but also the durability.
Softwood species: pine and spruce
The most affordable and popular option for baths, saunas, cottages, country houses. Softwood is easy to work with, smells pleasant, and accepts paint and varnish coatings well. Under clear varnish, a softwood trim gives a warm, natural look. The downside is that softwoods are softer than hardwoods, so they wear out faster in high-traffic areas.
Hardwood species: oak, ash, beech
A denser and more durable material. An oak or ash nashchelnik looks more solid, holds its shape better under changing humidity, and maintains its surface without damage for longer. Suitable for high-end living spaces, living rooms, studies, and high-traffic hallways.
Nashchelnik for painting
If the nashchelnik is planned to be painted to match the wall or ceiling color, the wood species is less important than the surface quality. In this case, a well-sanded pine or spruce nashchelnik will work. The main thing is to prime and paint it the same color as the adjacent finish. Result: the nashchelnik becomes almost invisible, and the joint is neatly covered.
Nashchelnik for tinting or varnish
If it's important to preserve the natural look of the wood, choose a species that matches the other wooden elements in the interior. A nashchelnik tinted to the same color as the paneling, trim, or Wooden baseboard, is perceived as part of the system, not as a separate random element.
Oil and wax
For baths and saunas — special impregnations and oils resistant to high temperature and humidity. For living spaces — oil, wax, or matte varnish.
What to pair a wooden nashchelnik with: the trim system as a single whole
A nashchelnik works best when it is part of a system. Disparate profiles made of different materials and in different tints are not a system; they are a set of patches. A system is when all elements are made of the same material, with the same finish, and a unified visual language.
Batten and baseboard
Wooden Skirting Boards — a horizontal line along the entire perimeter of the room at the floor. The batten at the vertical joint of the paneling continues this language of wooden trim. When both elements are from the same species and in the same tint, the room looks cohesive.
Batten and casing
Wooden casings frame door and window openings. The batten covers what the casing does not — the side junction of the paneling, the gap near the slope. Together they create a complete framing of the opening.
Batten and molding
If used on walls Wooden moldings and baseboards as a decorative framework or frames — the batten integrates into this system without disrupting its rhythm.
Batten and slat panels
During installation of slatted panels the batten covers the side edges of the system — where the slats end at the ceiling, floor, or adjacent wall. Without this finish, the installation looks incomplete.
Complete set: what the system looks like
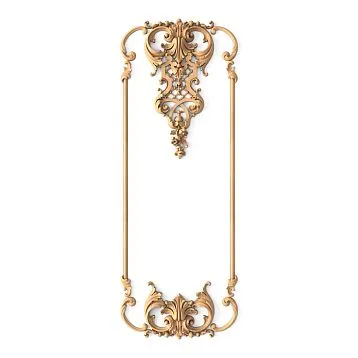
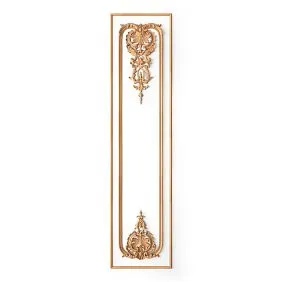
Imagine a room where the walls are paneled with clapboard. Along the lower perimeter is a baseboard of the same wood species. Around the openings are architraves in the same tint and profile. The batten covers all joints between the clapboard and the frames. Along the top edge is a wooden cornice or cove molding. Pogonazh iz massiva forms a unified architectural system — and it is precisely this result that distinguishes professional renovation from amateur work.
Batten in different interior styles: from a bathhouse to a city office
Country house and cottage
Here, the batten is in its natural environment. Wooden walls, clapboard, paneling. A semicircular or flat batten made of pine or spruce, coated with varnish, is an absolutely organic element. In a country house, the batten needs no introduction.
Bathhouse and sauna
Specifics of use: high humidity, temperature fluctuations, constant contact with steam. For a bathhouse, the batten must be made of a suitable wood species (linden, aspen, conifers) and treated with a special impregnation without harmful components. No nitro varnish — only natural oils or special bathhouse compounds.
Scandinavian interior
Bleached clapboard or light wooden panels. The batten is minimal, flat, matching the wall color or slightly contrasting. Lightness and purity are the main principles. Here, the batten should not attract attention.
Classicism and neoclassicism
If clapboard is used as an element of classic wall finishing, the batten can have a light profile: a chamfer, a rounded corner, a double leaf. This adds relief without heaviness.
Modern interior with wooden accents
Dark panels, slatted solutions, wood as an accent on one wall. The batten is thin, flat, in the same color or slightly darker. The task is not to decorate, but to complete.
How to install a batten: the main points briefly
Installation is simple, quick, and does not require professional tools.
Preparation
The surface must be clean and dry. If the batten will be painted — paint before or after installation, depending on the fastening method.
Methods of mounting
With nails or finishing nails. The classic method for wooden moldings. The finishing nail is driven in at an angle, countersunk below the surface with a nail set, and the spot is covered with wood putty. After painting, it is invisible.
With liquid nails. Suitable for lightweight strips on flat surfaces. The adhesive is applied to the back of the batten, the strip is pressed and held until dry.
With self-tapping screws and wall plugs. For thicker strips or for installation on an unstable surface. The screw is covered with a wooden plug.
Joining at corners
If the batten runs horizontally and vertically, the corner joint is made at 45 degrees — just like with baseboards and trim. This requires precise cutting but looks professional.
Painting after installation
If the batten is installed unpainted — after installation, it is painted together with the adjacent surface. Joints are pre-filled with acrylic sealant.
Mistakes when choosing a batten: how not to lose money and time
The mistakes here seem minor — until you see the result.
Choosing a plastic profile for wooden trim
The most painful mistake. Plastic next to wood — a visual conflict that catches everyone's eye. Wooden lining deserves a wooden batten. This principle has no exceptions.
Take the strip exactly the width of the gap
An 8 mm strip over an 8 mm gap is not an overlap, it's masking without a margin. At the slightest shift, the gap will reappear. Always take a margin of 5–10 mm on each side.
Not accounting for wall unevenness
If the wall has a wave or slope, a flat batten may not lie flush and will itself create gaps along the edges. In such cases, surface preparation or a wider strip is needed.
Choosing a color without considering the overall system
A batten in "light walnut" next to "dark oak" lining and a "white" trim — three different material messages on one wall section. The batten color should match one of the adjacent elements or be neutral.
Installing too wide a profile on a small joint
An 80 mm wide batten over a 3 mm joint is excessive. A wide strip draws more attention than the joint it covers deserves. The profile scale should be proportionate to the task.
Not planning the junction of the batten with the baseboard
The trim ends at the floor — and there it meets the baseboard. If this intersection is not thought out, an unsightly gap or overlap appears. Either the trim goes behind the baseboard, or it is cut at 45 degrees — but this must be decided before installation.
Use a trim instead of a corner piece
If the gap is in a real corner transition — the trim will not solve the problem correctly. For a corner, you need Wooden angle, not a flat overlay strip.
Forget about line repetition in the room
If trims are installed only at one opening, but not at another, it looks inconsistent. The system requires uniformity: if trims are used in a room, they should be everywhere there are similar joints.
Trim in projects: several practical examples
Finishing a country house with clapboard
Wooden house, clapboard on all walls and ceiling, solid wood doors, windows with wooden slopes. Trims are used:
-
vertically at all door frames — cover the clapboard joint;
-
horizontally at window slopes;
-
in places where ceiling and wall paneling meet at a corner.
The entire system is made of one wood species, with one stain, installed with precise cuts at the corners.
Apartment with slatted panels
Modern city apartment. One wall in the living room — solid wood slat panels. Along the edges of the panels are trims of the same width as the slats. Along the bottom edge is a baseboard. Along the top is a crown molding. The system reads as a single architectural surface.
Study with wooden window slopes
Study in a country house. Windows with deep wooden slopes. Trims cover the joint between the slope and the wall — around the entire window perimeter. Where the slope meets the windowsill, there is a small corner profile. Result: the slope looks like part of the room's wooden architecture.
Where to buy wooden trim: catalog with the right assortment
Buy wooden trim with the right width, profile, and wood species means getting a result that looks like a thoughtful finish, not a forced measure.
Buy wooden battens together with architraves, skirting boards, and moldings from the same collection is an opportunity to build a unified system solid wood trim, where each element matches the other in material and character.
Buy batten for paneling, buy solid wood trim with delivery — all this is available in the STAVROS catalog.
STAVROS: wooden trim that finishes the renovation properly
STAVROS — manufacturer and supplier of solid wood for residential and commercial interiors. The catalog includes battens, architraves, skirting boards, moldings, corners, slats, slatted panels, and trim made from hardwood and softwood species. All items are from proven solid wood, with precise cross-sections and ready or final treatment for painting.
Buy wooden batten with selection by width, profile and material — exactly what STAVROS offers. The gap should not be visible. And with the right trim strip, it won't be.
FAQ: Answers to popular questions
What is a trim strip for?
Trim strip is needed to close a gap, joint, abutment or installation clearance between finishing elements: paneling, panels, slopes, door and window frames.
How is a trim strip different from a corner piece?
A corner piece has an angular cross-section and is used to cover corner transitions. A trim strip is a flat or profiled overlay strip that covers a joint on a single plane or near an opening. Different tasks — different profiles.
Can a wooden trim strip be used for paneling?
Yes, this is the most common scenario. batten for lining covers abutments to door and window openings, joints between sections of cladding and transitions to the ceiling and floor.
How to choose the width of the trim strip?
The width should overlap the gap with a margin of 5–10 mm on each side. For small joints — 15–25 mm, for slopes and wider transitions — 35–55 mm.
Can a wooden architrave be painted?
Yes, a wooden architrave can be painted in any color, tinted, varnished, or oiled. This is one of the key advantages over plastic profiles.
What type of wood should be chosen for an architrave?
For country houses and baths — coniferous species (pine, spruce). For high-end residential spaces — oak, ash, beech. For painting — any species with good surface sanding.
How is the architrave attached?
With nails or finishing nails, with liquid nails, with screws and caps. The method depends on the weight of the strip and the type of base.
Is an architrave needed if there is already a casing?
It depends on the situation. If the casing does not cover all gaps, the architrave can complement it. If the casing covers everything neatly, the architrave is not needed.