Article Contents:
- PLT-003: not just "tall," but specific 160 × 16 mm
- Draw a 160 mm line along the wall — and the project will immediately become more honest
- Draw a line 160 mm along the wall — and the project will immediately become more honest
- From which point to measure the height
- Painter's tape instead of guesswork
- A paper template shows thickness better than a line
- A control strip is more accurate than any mock-up
- Height of the lower edge of the frame
- Full height of the frame
- Frame protrusion from the wall
- Access to the mounting
- Single socket
- Double horizontal block
- Vertical group
- Power and low-current frame nearby
- Socket behind furniture
- Keep PLT-003 and move sockets
- Choose a lower profile
- Change local layout
- Coordinate bypass of engineering element
- Order a control strip
- Decline PLT-003 in only one room
- The trim is high, but the outlet near the door is low
- Door stop in the PLT-003 zone
- Baseboard runs behind the furniture
- Baseboard ends at the side panel
- A cutout is made in the furniture
- Oak floor skirting board
- Beech skirting
- Moisture-resistant MDF skirting board
- Living room with TV area
- Bedroom with bedside sockets
- Which areas to subtract
- Angles do not reduce the perimeter, but affect cutting
- Material affects the reserve
- Problem areas increase uncertainty
- The reserve cannot be assigned mechanically
- Room plan
- Wall lengths
- Photos of the lower parts of the walls
- Heights of electrical installation products
- Trim sizes
- Pipes and radiators
- Selected material
- Finishing
- List of complex nodes
- Requirements for the control element
- Dry fitting
- Frame check
- Edge finishing
- Control after installation
- Choose based on an interior photo
- Measure from the subfloor
- Consider the center of the outlet
- Check only one wall
- Forget about the 16 mm thickness
- Set a universal minimum gap
- Assume the outlet is easy to raise
- Order the entire volume before the template
- Cut the profile on site without a drawing
- Do not approve the trim
- Do not show the profile to the furniture maker
- Close the inspection hatch
- Do not check radiator connections
- Buy material without layout
- Paint the entire batch at once
- Store planks vertically near the radiator
- Do not account for connected plugs
- Give the installer only the total length
- Choose the material before the geometry
- What size does PLT-003 have?
- What materials is PLT-003 made from?
- Can a 160 mm high skirting board cover a socket?
- What exactly should be measured on a socket?
- Why you can't rely only on the height of the center
- Is there a universal distance between the skirting board and the socket?
- How to check PLT-003 without buying the whole batch?
- Do I need to account for the finished floor?
- What to do if the floor covering is not yet installed?
- What to do if the socket crosses the 160 mm line?
- Can a cutout be made in the baseboard for a socket?
- Do all low sockets need to be relocated?
- How to test an internet socket?
- What to do with a free cable outlet?
- Will PLT-003 fit a tall door casing?
- What to do if PLT-003 is thicker than the door casing?
- Can the baseboard be run behind a built-in wardrobe?
- Do I need to inform the cabinet maker of the baseboard size?
- Can PLT-003 be installed under a radiator?
- Can an access panel be covered with a skirting board?
- Is moisture-resistant MDF suitable for any damp room?
- What to choose: oak or beech?
- Can PLT-003 be painted white?
- How to calculate the amount of baseboard?
- Should built-in furniture be subtracted from the perimeter?
- What margin is needed?
- When should the geometry of the planks be checked?
- How should the skirting board be stored before installation?
- Can the entire skirting board be painted first and then fitted?
- Is it necessary to check the connected plug?
- Where can I buy the wooden floor skirting board PLT-003?
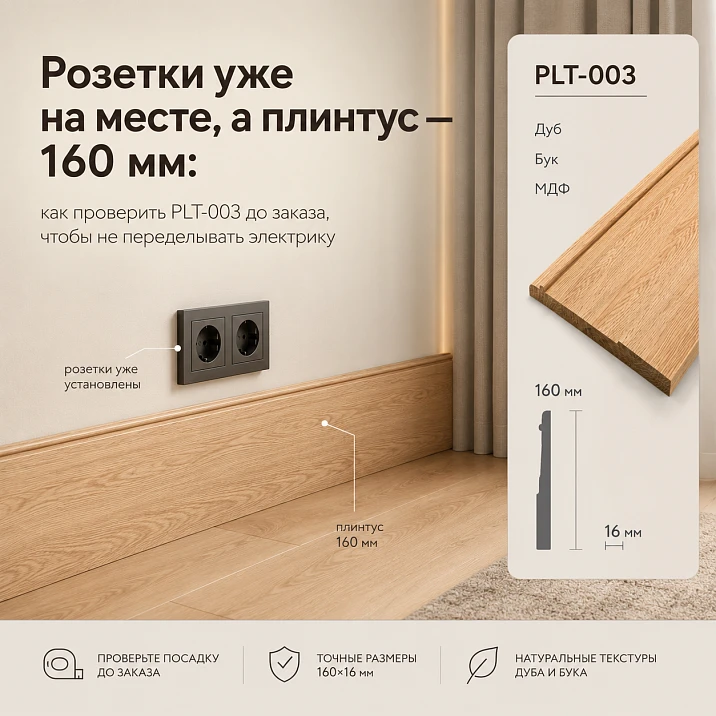
The renovation is almost finished. Walls are painted, doors are installed, sockets are in place, internet cables are run, radiators are connected. The last touch remains — to buy a wooden baseboard and close the joint between the floor and the wall. The buyer chooses a tall profile because a thin strip next to large casings looks too modest. On the product page, everything is convincing: the wooden baseboard PLT-003 has dimensions of 160 × 16 mm, is made of oak, beech, and moisture-resistant MDF, supports the scale of door decor, and makes the bottom line of the wall noticeable.
The problem is discovered not in the catalog, but on site. The top edge of the future baseboard runs across the socket frame. Elsewhere, the profile covers the TV cable outlet. Near the radiator, it hits a pipe, and in the walk-in closet, it lands on the bottom guide of the built-in wardrobe. The order is already placed, the material is chosen, the lengths are calculated — and suddenly you have to decide what to redo: the electrical work, the furniture, or the very idea of a tall baseboard.
Such a conflict rarely arises due to a bad product. The reason is usually simpler: the baseboard was chosen last and evaluated from a photo, not from a real strip 160 mm high on the finished wall. There is a big difference between the words "tall baseboard" and the specific profile PLT-003. Abstract height seems like a design parameter. Real 160 mm becomes an installation zone that can include sockets, cable outlets, hatches, pipes, door stops, and furniture.
Before wooden baseboard PLT-003 To move from the cart to the site, you need to conduct a detailed inspection of the room. It doesn't require complex software. A tape measure, painter's tape, photos, and a clear understanding of which surface to measure the height from are enough. These few hours protect against moving already installed sockets, repainting walls, and urgently replacing the profile with a less expressive one.
The baseboard was chosen last — and that's why it clashed with the electrical work
A tall wooden baseboard often appears late in the project. At the start of the renovation, the client chooses the floor, wall color, doors, and furniture. The electrician receives a plan with socket heights. Then door frames and casings are installed. Only closer to completion does it become noticeable that a regular narrow strip doesn't support the scale of the interior.
The desire arises to buy a wooden baseboard 160 mm high. The decision seems logical: a tall profile connects the floor with massive casings, makes the wall more architectural, and covers the noticeable lower area. But the electrical work already has its own geometry. The socket is installed not as a point on a drawing, but as a frame of a certain height. Below it remains a section of wall that could have been designed for a lower baseboard or not checked at all.
In a finished room, several systems collide at once:
-
finished floor level;
-
actual height of PLT-003;
-
lower and upper boundaries of the socket frame;
-
mounting part of the electrical installation product;
-
door casing protrusion;
-
thickness of the baseboard itself;
-
furniture plinths;
-
pipelines and radiator connections;
-
inspection zones;
-
future installation scenario.
The error occurs when only one dimension is considered — 160 mm. In reality, you need to check not only the height but also the thickness of 16 mm. The profile rises upward and simultaneously extends forward from the wall. Therefore, it may not overlap the outlet in height, but it can interfere with the decorative frame if it has a noticeable protrusion. Near the door, the thickness affects the joint with the architrave. Under a built-in wardrobe, it may conflict with the track or furniture front.
A tall skirting board cannot be viewed as a picture that will be applied to the wall after all work is done. It becomes an independent part of the room's architecture. The taller and more expressive the profile, the earlier it needs to be included in the project. If the renovation is already complete, this work will have to be done retroactively — through an on-site inspection.




PLT-003: not just "tall," but specific 160 × 16 mm
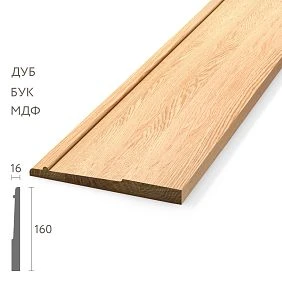
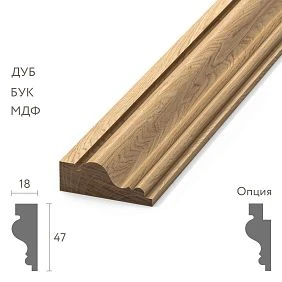
PLT-003 — a wooden floor skirting board with a height of 160 mm and a thickness of 16 mm. The product card presents options in oak, beech, and moisture-resistant MDF. The profile is designed to finish the joint between the wall and the floor and is perceived in the interior as a noticeable lower line, not as a narrow technical strip.
| Parameter | Confirmed value | What this changes on site |
|---|---|---|
| Article number | PLT-003 | Allows ordering a specific profile rather than a vague "tall skirting board" |
| Height | 160 мм | Forms a check strip from the finished floor upward |
| Thickness | 16 мм | Affects the protrusion from the wall, the joint with the architrave, furniture, and frames |
| Materials | Oak, beech, moisture-resistant MDF | Determine the pattern, finish, batch selection, and application scenario |
| Purpose | Floor skirting board | Covers the floor-to-wall junction and forms an architectural boundary |
| Profile character | High | Requires checking outlets, doors, pipes, and built-in furniture before ordering |
The size 160 × 16 mm cannot be shortened in the technical specification to the word "sixteenth" or "tall." For an electrician, the height of 160 mm is important. For a carpenter and installer, both figures are important. For a designer, the proportion relative to the trim, door, and room height is important.
The 16 mm thickness is especially noticeable where the baseboard ends. If the trim protrudes from the wall less, the profile may be thicker and extend forward. If a built-in cabinet is installed almost flush, 16 mm can change the junction. If the outlet frame overhangs the baseboard area, the front plane of the profile may hit it even with a small vertical gap.
Before purchasing, it is useful to compare PLT-003 with other items in the section wooden baseboards, moldings, and cornices. The comparison is not for endless selection. It shows whether the project has space for 160 mm or whether it is more reasonable to switch to a lower profile, keeping the electrical work without rework.
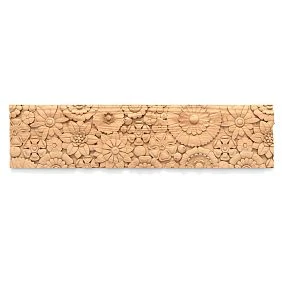
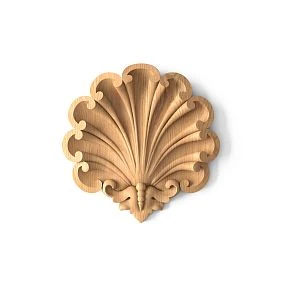
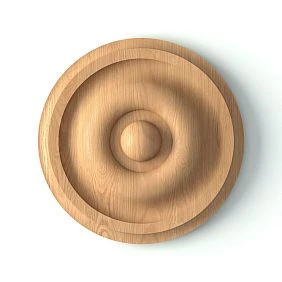
Our factory also produces:


Draw a 160 mm line on the wall — and the project will immediately become more honest
The most useful test is done before placing the order. On the wall, you need to show the actual height of PLT-003 from the finished floor. Not from the rough screed, not from the lower mark of the door frame, and not from the level that was in the project before laying the covering.
Work begins with the right base.
Get Consultation
From which point to measure the height
The lower point is the top of the finished floor covering. If the floor is already laid, the measurement is simple. If only individual sections are missing, the future thickness of the material, underlayment, and adhesive layer must be taken into account. An error of even a few millimeters can be critical near a low socket frame.
In a room with different coverings — for example, wood in the living area and tile at the entrance — the check is performed in each section. One mark cannot be transferred across the entire room if the levels differ.
Special attention is required at thresholds and transition points between rooms. The floor level in the hallway may differ from the level in the bedroom. Then the top line of the same PLT-003 will be at different heights relative to the door unit and sockets.
Painter's tape instead of guesswork
Measure 160 mm from the floor and draw a horizontal line with painter's tape. It is better not to limit yourself to a short mark near one socket. The strip should run along all walls where PLT-003 is planned.
The tape will show:
-
which sockets the top edge crosses;
-
where the baseboard comes too close to the frame;
-
which outlets will be inside the profile;
-
how the height relates to the architraves;
-
where the furniture plinths begin;
-
what happens under the radiator;
-
whether the inspection hatch is not blocked;
-
how the line is perceived at the room scale.
At this stage, it often turns out that the conflict exists not in one place, but in several. Moving one socket can still be discussed. Redoing all the lower electrical wiring around the perimeter is a different budget and timeline.
It is worth leaving the line on the wall for at least a few hours. At first glance, a high skirting board may seem too large because the lower part of the wall was previously empty. After the eye gets used to it, it will become clearer whether the height suits the room and doors.
A paper template shows the thickness better than a line
Painter's tape conveys the height but does not convey the 16 mm thickness. For complex junctions, it is useful to make a template from thick cardboard or thin board with a cross-section of 160 × 16 mm. Even a short fragment 300–500 mm long will help check the socket, architrave, cabinet, and pipe.
The template is applied to the wall the way the real profile will sit. Then look from the side: whether the front plane hits the frame, whether it protrudes relative to the architrave, whether access to the socket screws remains, and whether it interferes with opening the cabinet door.
If only cardboard a few millimeters thick is used, a spacer is added to it to achieve a real offset of 16 mm. Flat paper does not show a conflict with a protruding frame or furniture.
A control strip is more accurate than any mockup
If the project is expensive, the walls are complex, and the outlets are located low, it is reasonable to first obtain one control strip or agree on a profile sample. The real part shows the shape of the top edge, the actual abutment, and the visual scale.
Checking with a single strip is especially useful for oak and beech, when along with the geometry you need to evaluate the wood grain and future finish. However, the availability and possibility of ordering a control element should be clarified before placing the main batch.
Do not limit yourself to one room: create a map of the 160 mm strip
Checking only the living room creates a false sense of security. In the bedroom, outlets may be installed lower, in the hallway a wardrobe will appear, and in the study the baseboard will meet a cable duct.
For each room, it is convenient to create a separate line:
| Room | Outlets | Doors | Furniture | Engineering elements | Solution |
|---|---|---|---|---|---|
| Living room | Check the TV group and floor outlet | Two openings | Cabinet and wardrobe | Radiator | To be clarified after template |
| Bedroom | Bedside blocks | One opening | Built-in wardrobe | No | Check distance to frames |
| Hallway | Vacuum cleaner outlet | Three openings | Floor-to-ceiling cabinet | Heated floor, sensor | Coordinate the furniture unit |
| Office | Power and internet outlets | One opening | Table and shelving unit | Cable duct | Need to check connected plugs |
The map is useful not only for the client. It can be shared with the designer, electrician, furniture maker, and installer. All participants will see the same size — 160 × 16 mm — and will stop working with the vague word "high."
Which elements can fall into the high baseboard zone
A strip 160 mm high is rarely empty. Engineering and furniture units pass through it, which look insignificant on the general plan.
| Element | How a conflict arises | What to measure |
|---|---|---|
| 220 V outlet | The top of the baseboard overlaps the frame or comes close to it | Height of the frame's lower edge from the finished floor, full frame size, protrusion from the wall |
| Internet socket | The profile covers the port or interferes with plug connection | Lower edge, plug depth, cable direction |
| TV outlet | Cable exits in zone PLT-003 | Outlet center, cover plate size, cable bend radius |
| Free cable | Outlet planned "near the floor" but not tied to the baseboard | Exit point, slack length, future cover plug |
| Access hatch | The plinth covers the edge or prevents the door from opening | Bottom edge, opening direction, frame protrusion |
| Heating pipe | The profile hits a vertical or horizontal pipe | Diameter, distance from the wall, exit height |
| Radiator connection | No space left for installation and maintenance | Bottom point of the assembly, distance to the wall and floor |
| Door stop | The base hits the profile | Mounting position, height, and diameter |
| Lower cabinet guide rail | The plinth interferes with door installation or movement | Guide rail thickness, distance from the wall |
| Furniture base | Two lines collide or form an accidental step | Base height, furniture depth, and connection method |
| Floor-standing cabinet | The profile overlaps the cover and access | Overall dimensions and service direction |
| Sensor or thermostat | The bottom edge is too close to the top edge | Body size, access to fasteners |
The most common mistake is measuring only the center of the socket. For compatibility, the bottom edge of the entire decorative frame is needed. The center may be above 160 mm, but a large frame drops into the baseboard area.
Cables are no less dangerous. An exposed cable seems flexible: it can be "lifted a bit." But behind the wall, the wire exits through a specific hole, and the bend radius limits movement. The profile cannot be pressed against the cable or pinched between the wood and the wall.
Socket above a high baseboard: what dimensions are actually needed
The phrase "the socket is at a height of 200 mm" is almost useless until it is clear what exactly was measured. The center of the mechanism? The center of the frame? The bottom edge? The height from the subfloor? On site, these options give different results.
To check PLT-003, record four values.
Height of the bottom edge of the frame
This is the main vertical dimension. The measurement is taken from the finished floor to the lowest point of the decorative frame.
If the frame has a rounded corner, measure to the lowest point of the rounding. If several mechanisms are combined under a common frame, take its full contour into account.
Full frame height
It is needed to understand the scale of the node and the possibility of transfer. In a block of two or three sockets, the common frame differs from a single one.
The size helps to assess the visual composition as well. A large horizontal frame located almost flush with PLT-003 may look heavier than a small single socket at the same distance.
Frame protrusion from the wall
PLT-003 has a thickness of 16 mm. If the frame protrudes significantly, the upper part of the profile may hit it, even when there is a small gap vertically.
You need to measure not only the decorative cover, but also the connected plug, adapter, or network connector. Some plugs route the cable downward directly into the baseboard area.
Access to the mounting
The frame and mechanism sometimes need to be removed for maintenance. The baseboard should not cover the screws, latches, or hinder dismantling.
A universal gap number cannot be honestly assigned without a specific series of electrical installation products, installation method, and finishing project. One socket needs a small visual space, another will need more due to a protruding frame, complex mounting, or a wide decorative contour.
The safe logic is as follows: the baseboard does not touch the frame, does not overlap it, does not interfere with removal, and does not create a narrow gap that cannot be neatly painted or cleaned. The exact gap is approved on the template.
Single socket, double block, and a group of multiple mechanisms
Same center height does not mean the same risk.
Single socket
It is easier to move or bypass, but the frame may be large. Check the bottom point and protrusion.
If the socket is near a corner, additionally consider the length of the baseboard piece and the way the corner is finished. A narrow fragment between the corner and the frame may be inconvenient for installation.
Double horizontal block
The bottom boundary is usually uniform along the entire length. If PLT-003 comes close, the conflict becomes more noticeable because the horizontals run parallel.
Even a slight floor unevenness under a long frame can visually emphasize an uneven gap. Therefore, the check is performed on both edges of the block.
Vertical group
The lower mechanism may fall into the baseboard zone, although the upper ones are safely positioned. Sometimes the entire block has to be moved to maintain proportions.
Attempting to lift only the bottom element often breaks the unified frame or mounting grid.
Power and low-current frame side by side
The internet socket and power outlet may have different plugs and access requirements. Even if the decorative frames match, the connected cable hangs lower.
Socket behind furniture
Invisibility does not negate compatibility. The baseboard can block the plug, push the cabinet away from the wall, or restrict access.
Before ordering, photograph each group with a tape measure. A single overall photo of the room does not show millimeters.
How much space to leave above the top edge
The buyer often expects a single answer: "leave this many millimeters." But without a specific frame and mounting assembly, such a number creates false confidence.
The gap must solve five tasks:
-
The profile does not touch the decorative frame.
-
The socket can be disassembled and serviced.
-
A neat paintable wall area remains between the elements.
-
The connected plug or cable does not press against the baseboard.
-
The top line of PLT-003 does not look randomly pressed against the electrical fixtures.
Sometimes it is visually calmer to leave a noticeable gap. In another interior, the frame and the tall white baseboard may be positioned closer if their lines are aligned. But the decision is made not based on an abstract norm, but on a real template.
It is especially important to account for uneven flooring. If PLT-003 is installed along a long wall, the top edge must look level. Local height adjustment for a single socket can create a noticeable kink. You cannot simply "lower the baseboard in this section" if the bottom edge must meet the floor.
What to do if the sockets are already installed too low
A conflict does not mean automatic rejection of PLT-003. There are several commercially and technically different solutions. The choice depends on the number of problem points and the value of the high profile for the project.
Keep PLT-003 and relocate the sockets
This path is reasonable when the tall baseboard is essential and there are few low sockets. The relocation is performed by a qualified specialist, taking into account the wiring, wall finish, and project requirements.
Before deciding, calculate the full cost: dismantling, moving the mechanism, surface restoration, painting, and reinstallation. Sometimes one rework is cheaper than abandoning the entire architectural idea. Sometimes a dozen outlets turn a solution into unjustifiably complex.
You should not move the electrical wiring just because the profile has already been ordered. First, you need to make sure that PLT-003 really fits the doors, furniture, and the scale of the room. Otherwise, after the move, a second conflict will be discovered.
Choose a lower profile
If the electrical wiring is routed low throughout the room and the move affects many walls, a lower baseboard may be more rational. In the catalog wooden baseboards, moldings, and cornices you can compare other profiles by height and character.
Lowering the height should not be a random compromise. Check the new option next to the trim: a too-narrow baseboard can disrupt the proportion of the door unit.
Change the local layout
Sometimes the problem is on a short section behind furniture or near a technical hatch. You can agree on the end of the baseboard, the junction with the furniture plinth, or another structural transition. Such a solution is designed in advance, not cut on site as the situation demands.
If the baseboard ends before the outlet, the end point should look logical. A random end in the middle of the wall attracts more attention than the conflict itself.
Coordinate the bypass of the engineering element
Bypassing a pipe, box, or hatch requires a careful layout. An unauthorized decorative cutout in a high profile can look rough and weaken the part. First, a drawing of the joint is made, and it is decided how to finish the ends.
Order a control strip
If the conflict is on the border of a few millimeters, a sample removes the uncertainty. It shows the real shape, thickness, and abutment.
Decline PLT-003 in only one room
It is not necessary to change the baseboard throughout the whole house. In a utility room or an area with many low outlets, a different profile may be used. However, the transition between rooms needs to be thought through in the doorway.
Decision matrix: how many conflicts are acceptable before ordering
The number of problem points changes the economics of the solution. One low outlet and twelve low outlets are not the same task.
| Situation | Possible path | What to check before deciding |
|---|---|---|
| One outlet crosses the 160 mm line | Moving the socket or local adjustment of the project | Cost of wall restoration, wiring position, node visibility |
| Several sockets in one room are located low | Comparison of moving with a lower profile | Total cost of work and adjacency of the new profile to the trims |
| Low sockets are repeated throughout the apartment | Review of the baseboard height | Will a different size not destroy the overall interior concept |
| Conflict only behind built-in furniture | Designing the ending or furniture cutout | Access to socket, ventilation, case position |
| Baseboard touches only the protruding frame | Trial fitting and possible frame replacement | Mechanism compatibility, access for dismantling |
| Issue near pipe or hatch | Separate installation drawing | Maintenance, part durability, edge finishing |
| Distances unknown, but order is urgent | Control strip and re-measurement | Do not process main batch until confirmation |
The matrix helps avoid an emotional decision. The buyer sees a beautiful tall baseboard and doesn't want to give it up. The electrician, on the contrary, suggests choosing a lower strip to avoid returning to finished walls. The correct answer appears after counting conflicts and checking all adjacent nodes.
Why the cutout for an outlet almost always looks worse than it seems in the sketch
The buyer may suggest a simple solution: cut a rectangle for the frame in the upper part of PLT-003. On paper, this preserves both the baseboard and the outlet. In reality, the node often looks like a mistake.
Causes:
-
the high profile line is interrupted;
-
narrow sections of material appear around the frame;
-
the ends require separate finishing;
-
dismantling the outlet becomes more complicated;
-
the slightest inaccuracy is noticeable;
-
wood and MDF behave differently during local processing;
-
the cutout may fall on the relief part of the profile;
-
The cable or plug will still remain close.
A local cutout is only possible as a designed joinery unit, not as a universal recommendation. Its shape, strength, and finish are agreed upon before ordering. In most residential interiors, moving the outlet or using a different baseboard size looks cleaner.
A series of different cutouts looks especially questionable. If several outlets are installed on one wall at slightly different heights, the PLT-003 line will turn into a set of steps and recesses.
Doors are already installed: how PLT-003 will meet the trim
The 160 mm height is especially expressive next to a doorway. But a beautiful junction depends not only on the height. You need to compare the thickness and profile of the trim.
Before ordering, measure:
-
the width of the casing;
-
protrusion from the wall plane;
-
distance from the bottom of the trim to the floor;
-
shape of the lower part;
-
presence of a base or decorative shoe;
-
position of the door relative to the wall;
-
the actual thickness of PLT-003 is 16 mm.
If the casing is thicker than the baseboard, the profile usually fits it more smoothly. If PLT-003 protrudes further, the end becomes noticeable and requires a thoughtful finish. If the lower part of the casing has a complex relief, a simple right-angle joint may not work.
To avoid repeating the general theme of height selection, the specific question here is: will the already installed door unit force you to abandon 160 mm? Before purchasing, it is useful to match the baseboard height to the casings and then return to the full-scale template of PLT-003.
The casing is tall, but the outlet near the door is low
This is one of the most challenging areas. The baseboard must support the massive casing, but the electrical work limits the height. The problem cannot be solved by considering the elements separately.
Take a photo of the entire door unit: casing, outlet, floor, and the proposed 160 mm line. Sometimes moving one outlet near the opening preserves the correct junction throughout the room. In other cases, it is wiser to choose a lower profile.
Door stop in the PLT-003 zone
A wall-mounted stop or holder may be installed low. After installing a tall profile, it may be partially covered or lose its support. Its position should be included in the conflict list along with the outlets.
The floor stop also requires checking. It may not intersect with the profile directly, but after increasing the thickness of the bottom line, the door will stop in a different position.
Built-in wardrobe, kitchen plinth, and high skirting board
Furniture is often designed before decorative moldings. The wardrobe is placed flush against the wall, and the skirting board has to be cut off or routed behind the side panel.
PLT-003 has a thickness of 16 mm. This value affects the actual gap between the furniture and the wall. If the wardrobe is already installed without a cutout for the skirting board, the profile may not fit behind the cabinet. If the furniture is still in production, it is better to provide the designer with the exact cross-section.
Check three scenarios.
The skirting board passes behind the furniture
A gap is required not only in thickness but also in the shape of the upper part. The furniture may move away from the wall.
There may be electrical outlets behind the wardrobe. After installing PLT-003, the depth of the space will decrease, and the plug or power supply will no longer fit.
The skirting board ends at the side panel
The end will be visible. Neat finishing and an agreed termination point are required.
It is better to end the profile at a point related to the furniture geometry, rather than a few centimeters away from it without an explainable reason.
A cutout is made in the furniture
The cutout must match the actual profile, not a 160 × 16 mm rectangle, if the shape is more complex. A template or drawing is needed for this.
In the kitchen, a furniture plinth of a different height may adjoin PLT-003. An accidental step near the tall cabinet is especially noticeable. The solution is shown on the elevation before ordering both systems.
Radiators, pipes, and heating outlets
A high plinth under a radiator often looks appropriate: it continues the wall line and hides the bottom joint. But engineering connections may be located below 160 mm.
Check:
-
distance from the floor to the bottom point of the radiator;
-
position of the pipes;
-
diameter and offset of the pipes from the wall;
-
valves and connections;
-
access for maintenance;
-
decorative overlays;
-
ability to create a profile for the pipe;
-
space for installation tools.
The baseboard must not cover a connection that will require maintenance. The pipe must not be clamped with a wooden part. In the heating zone, temperature conditions and finishing are also important, so the joint is coordinated with the designer and installer.
If the pipe comes out of the floor close to the wall, a bypass is possible. It is better to do it on a test piece. The shape of the cutout should account not only for the diameter but also for the installation clearance.
The visual rhythm is assessed separately. Two asymmetrical cutouts for pipes on a tall profile are more noticeable than on a narrow baseboard.
Inspection hatches and hidden technical zones
The inspection hatch can be almost invisible until PLT-003 covers its lower edge. After that, the door does not open or can only be removed together with the baseboard.
Check:
-
where the hatch contour runs;
-
which direction it opens;
-
Is the cover removable?
-
Is access from below needed?
-
Does the frame protrude?
-
Can the boundary of the decorative trim be moved?
You cannot block technical access for the sake of a continuous line. In some projects, the baseboard becomes part of a removable panel, but that is a separate structure. It must be indicated in the drawing and understandable to maintenance personnel.
A similar problem arises with filters, manifolds, concealed valves, and control units. If their door looks like a regular section of wall, it is easy to forget about it when calculating the linear footage.
Oak, beech, or moisture-resistant MDF: the material is chosen after checking the geometry
The material does not resolve the conflict with the outlet. Any PLT-003 option maintains a height of 160 mm and a thickness of 16 mm. First, you need to confirm that the profile fits. Then choose the base and finish.
| PLT-003 material | Visual character | When to consider | What to Check |
|---|---|---|---|
| Oak | Expressive wood grain, noticeable natural texture | Interior with oak floor, doors, furniture, or a standalone wooden accent | Selection of shade, batch pattern, finishing system |
| Beech | Calmer perception of wood | Projects with suitable furniture wood species and chosen finish | Compatibility with floor and trim, coating test |
| Moisture-resistant MDF | Even base, convenient for a covering interior solution | Painted walls, white tall baseboard, projects without emphasis on wood grain | Preparation of a specific item, finish type, and room conditions |
Oak floor baseboard
Oak is especially noticeable at a height of 160 mm. The surface area is larger than that of a narrow profile, so the wood grain becomes part of the interior. On a long wall, the layout of planks and the transition of shades are important.
If the floor is also oak, the baseboard can either continue the material or, on the contrary, differ in finish. Matching the wood species does not guarantee the same color. A sample is needed.
An oak baseboard can complement doors or furniture, but it doesn't have to match them exactly in tone. What matters more is that the difference looks intentional and is repeated throughout the room.
Beech skirting board
Beech is chosen not as a "simpler oak," but as an independent material. It should match the furniture, doors, and planned finishes. Before ordering, it's important to understand whether the wood will be shown or covered with an opaque coating.
At a greater height, the beech surface also becomes noticeable. The sample should be evaluated vertically near the wall, not just horizontally on a table.
Moisture-resistant MDF baseboard
Moisture-resistant MDF is convenient when you need a tall white baseboard or another smooth opaque color. However, the word "moisture-resistant" does not mean the product can be used without verification in any wet area or subjected to constant contact with water. Operating conditions and the finishing system should be specified for each specific project.
If an MDF baseboard is planned for painting, surface preparation and compatible materials must be coordinated. You cannot automatically assume that any panel is ready for any enamel.
Tall white baseboard and outlets: color matching does not hide a poor gap
A white PLT-003 next to a white outlet frame may seem safe: the elements will blend. In practice, a too-tight gap is noticeable precisely because of the shadow line. Dust and slight unevenness amplify the problem.
If the baseboard and outlet are the same color, a clearly visible strip of wall between them or a pre-designed junction is still required. Don't expect paint to fix the geometry.
They work especially carefully with frames of complex shapes. Their bottom line may not be straight, but rounded. PLT-003 creates a strict horizontal line, and the proximity of two different contours looks accidental.
Shades of white also differ. The socket frame may be cooler or warmer than the painted MDF. The closer the elements are located, the more noticeable the difference.
How not to confuse PLT-003 with a regular board 160 mm high
The buyer sometimes compares the finished plinth with a straight strip of MDF or wood of the same height. The size matches, but the purpose and the external result differ.
PLT-003 is a profile for floor adjoining. It has a formed front geometry and a specific thickness. A regular board will require you to decide on your own:
-
the shape of the top edge;
-
treatment of the front side;
-
joint at corners;
-
junction with architraves;
-
finishing of ends;
-
installation;
-
stability of long parts;
-
repeatability of the batch.
A random blank may be lower in price, but it transfers more uncertain work to the site. A buyer who wants to buy a wooden skirting board as a finished interior element usually pays not only for the material, but also for a reproducible shape.
At the same time, PLT-003 cannot be considered more universal than all other profiles. Its strong point is the height of 160 mm. If this particular height conflicts with the electrical wiring, another ready-made skirting board may be more appropriate.
Practical scenarios by room
Living room with TV zone
Low-mounted sockets and internet outlets are often hidden behind a cabinet. A high baseboard may cover them or leave no room for plugs.
Check not only empty frames but also connected cables. The plug of a TV or network cable protrudes and may extend downward. If the cabinet must stand close to the wall, PLT-003 with a thickness of 16 mm will also change the gap.
On the wall with the TV, there may be several groups of outlets. Some are intended for a wall-mounted screen, others for a floor-standing cabinet. The entire wall cannot be considered safe based on one upper group.
Bedroom with bedside sockets
Sockets near the bed are sometimes installed low, aligned with the height of the nightstand. A 160 mm baseboard can come right up to them. Visual neatness is especially important here because the area remains exposed at the side of the furniture.
After installing the cabinet, access to the socket may be by hand
Which areas to subtract
Usually, doorways and areas where the profile is definitely not installed are subtracted. The entire length of built-in furniture should not be automatically subtracted: the baseboard may need to pass behind it or end at a specific point.
The area behind a freestanding wardrobe is also not always subtracted. The furniture may be moved, and the exposed wall would remain unfinished.
Corners do not reduce the perimeter, but they affect cutting.
External and internal corners require precise trimming. The more short sections there are, the harder it is to use leftovers.
Special attention is paid to bay windows, columns, niches, and short partitions between doors.
Material affects the reserve.
For oak and beech, pattern matching may be required. A short leftover of suitable length does not always match the shade of the adjacent plank. For paintable MDF, the layout may be different, but the risk of damage during installation is still considered.
Problem areas increase uncertainty.
If a special finish, pipe bypass, or removable section is planned near an outlet, material for testing should be considered separately.
The reserve cannot be assigned mechanically.
The same percentage does not suit a room with four straight walls and a corridor with many corners. Create a cutting map based on actual lengths and only then determine the allowance.
Example of a preliminary list:
| Section | Wall length | Deductions | Net length | Feature |
| Wall A | By measurement | Doorway | By calculation | Two low outlets |
| Wall B | By measurement | No | By calculation | Radiator and pipes |
| Wall B | By measurement | Cabinet partially | By node decision | Visible end |
| Wall G | By measurement | Access hatch | After drawing | Removable access |
Such a table is more useful than a single perimeter figure. It shows where installation is simple and where an additional solution will be required.
What to buy and check together with PLT-003
Buying a tall baseboard involves not only the profile itself. Coordinated decisions on height, installation, acceptance, and storage are needed.
| What to check or add | Why | When it matters most | Confirmed page |
| PLT-003 | Choose the material and check the size 160 × 16 mm | For precise ordering of a specific item | wooden baseboard PLT-003 |
| Other profiles | Compare the height if electrical wiring conflicts | With many low outlets | wooden baseboards, moldings, and cornices |
| Unit with doors | Coordinate the height and thickness with the architraves | When the doors are already installed | match the baseboard height to the casings |
| Acceptance of material | Eliminate issues before finishing and installation | For oak, beech, and long walls | Check the geometry and moisture of the baseboard |
| Mounting diagram | Prepare corners, joints, and the base | When installing yourself | Installation of Wooden Skirting Board |
| Storage | Preserve geometry before starting work | When installation is postponed | storage rules for wooden decor |
This table does not replace the electrical project. It helps to assemble a commercial route: choose a profile, confirm compatibility, accept material, store it until installation, and install without improvisation.
What to send to the manager before placing an order
The phrase "need PLT-003 for an apartment" does not provide enough information for a confident calculation. Prepare a short data package.
Room plan
On the plan, mark the walls, doorways, built-in furniture, and areas without baseboards.
Assign a designation to each wall. Then a photo like "wall B, outlet R-03" will be clearer than a dozen unlabeled shots.
Wall lengths
It is better to record measurements for each section, not just the overall perimeter.
Indicate short wall segments between doors separately. They are the hardest for distributing leftovers.
Photos of the lower parts of walls
Shoot from the front and from the side. Place a tape measure next to the outlets.
A general shot shows the location, a close-up shows dimensions and protrusions. Both are useful.
Heights of electrical installation devices
Indicate the lower edge of the frame from the finished floor, not just the center.
If the frame is not yet installed, record the model and the estimated external size, but perform the final check after installation.
Trim sizes
The width and the protrusion from the wall are needed.
For a complex trim, attach a side photo or a template.
Pipes and radiators
Show the exit points and access for maintenance.
Selected material
Oak, beech, or moisture-resistant MDF are fixed before the final calculation.
Finishing
It is necessary to indicate whether the wood grain is preserved or a covering solution is planned. Specific options are clarified on the product card.
List of complex nodes
Socket, pipe, hatch, furniture, door stop — every non-standard area gets a number and a photo.
Requirements for the control element
If a preliminary fitting is needed, this question is asked before the main purchase.
A well-prepared request does not guarantee that the manager will remotely resolve all installation issues. But it allows for faster identification of contradictions and prevents forming an order based on a single perimeter.
Acceptance of PLT-003: geometry matters no less than height
Even perfectly checked electrical work does not cancel material acceptance. The high profile runs in a long horizontal line, so deviations are noticeable.
Before finishing and cutting, you need to Check the geometry and moisture of the baseboard. Inspect the planks, compare them with each other, and lay them out along the walls.
Check:
- straightness;
- condition of the front surface;
- ends;
- profile match;
- wood grain and shade;
- absence of damage;
- material matches the order;
- quantity;
- suitability for the intended cutting plan.
Do not start finishing the entire batch until the test strip is fitted to the rosette and casing. After painting or staining, returning to geometric doubts becomes more expensive.
It is useful to sort the pieces by purpose. The most visually calm strips are kept for long open walls. Fragments with suitable length are distributed near doors and corners.
Storage until installation
The baseboard may arrive before the site is ready. Improper storage can alter the geometry of long pieces.
Use storage rules for wooden decor and do not leave strips casually leaning against a wall near a heating appliance or in a damp area.
The material is placed so that:
- pieces do not sag;
- packaging does not get wet;
- the surface was not scratched;
- the planks were not subjected to sharp heating;
- the marking for laying out was preserved;
- control elements were not mixed with waste.
Separately sign the parts intended for complex areas: near the door, socket, external corner, or pipe.
If installation is postponed, do not unpack the entire volume unnecessarily. The condition of the goods is checked upon receipt, not after several weeks.
Installation of PLT-003 near sockets
General principles are covered in the material about Installation of Wooden Skirting BoardIn the electrical node, an additional rule is added: before fixing, the profile is applied dry and access to the frame is checked.
The installer must see on the wall:
- top line 160 mm;
- frame boundaries;
- locations of concealed wiring, if known;
- mounting points;
- plank joints;
- endings;
- complex areas.
Do not drill the wall blindly near electrical routes. The mounting method and work safety are determined by a specialist based on the substrate and the project.
Dry fitting
The plank is trimmed to length but not permanently fixed. Check how it fits against the trim and the outlet.
Dry fitting is performed not only for the first piece. Each non-standard section is checked separately.
Frame check
The socket must remain removable. If the frame is removed downward or requires space around the perimeter, this must be taken into account.
Do not check only the appearance. Remove the frame and reinstall it with the template applied.
Edge finishing
Visible ends at furniture or technical units must not be left unfinished. The method depends on the material and finish.
Post-installation check
Plug in the plug or cable and ensure the profile does not interfere with operation.
The installed baseboard must allow normal cleaning of the surface around the socket. A too narrow gap will quickly fill with dust.
What not to do from scratch when the ready-made PLT-003 is chosen
A tall baseboard can be attempted to be assembled from an MDF strip, board, or random molding. But then the buyer will have to design the shape themselves, process the edges, repeat the profile on each plank, and solve the joints.
The ready-made PLT-003 allows focusing on truly important stages:
- checking the 160 mm strip;
- when choosing oak, beech, or moisture-resistant MDF;
- when laying out along the walls;
- when coordinating with the electrical work;
- finish;
- during installation.
There is no need to turn a finished renovation into an experiment in making a baseboard. The complexity of the project already lies in the outlets, doors, and furniture. There is no point in adding unstable homemade geometry to it.
At the same time, a ready-made profile does not eliminate the need for measuring. It reduces the number of unknowns: the size and article number are defined, so they can be honestly held against the wall and a decision can be made before purchasing the batch.
Mistakes that force you to redo the electrical work or change the baseboard
Choose based on an interior photo
The photo does not show the dimensions of your outlets and pipes. A tall profile may look proportional but not fit on the wall.
Measure from the subfloor
After laying the covering, the useful height will change.
Consider the center of the socket.
The bottom edge of the entire frame is needed.
Check only one wall.
Low outlets are often distributed across several rooms.
Forget about the 16 mm thickness.
There may be a vertical gap, but the frame will still hit the front plane.
Assign a universal minimum gap.
Without a specific frame and service method, the number is unreliable.
Assume that the socket is easy to raise.
The transfer affects the wiring and wall finishing.
Order the entire volume up to the template
The error repeats over dozens of meters.
Cut the profile on site without a drawing
The baseboard line is deteriorating, the ends remain rough.
Do not coordinate the trim
PLT-003 can protrude further than the door casing.
Do not show the profile to the furniture maker
The wardrobe or kitchen will not leave room for the 16 mm thickness.
Close the inspection hatch
Technical access cannot be sacrificed for a continuous line.
Not checking radiator connections
Installation and maintenance become impossible.
Buying material without layout
Oak or beech planks may require matching by pattern.
Immediately painting the entire batch
After finishing, it is harder to correct disputed joints.
Storing planks vertically near a radiator
Geometry may change before installation.
Not accounting for connected plugs
A flat socket fits, but an angled plug or adapter hits the PLT-003.
Give the installer only the total length.
Without a diagram of complex areas, decisions will be made directly on site.
Choose the material before the geometry.
A beautiful oak sample does not solve the problem of a low socket. The height is confirmed first.
Who PLT-003 is really suitable for
The profile is worth considering when the interior needs a noticeable bottom line, and the room allows for a height of 160 mm without conflicting with engineering elements.
PLT-003 is especially appropriate:
- next to large door trims;
- in rooms with high ceilings and calm walls;
- in projects with oak or beech decor;
- in painted interiors with a high white baseboard;
- with pre-designed electrical wiring;
- in rooms where outlets are located above the inspection line;
- in classical, neoclassical, and modern architectural compositions;
- on long walls where the profile can act as an independent horizontal line.
The material is chosen after checking the geometry. Oak and beech suit projects where wood texture is important. Moisture-resistant MDF is considered for smooth covering finishes and appropriate operating conditions.
The profile is especially convenient for a customer who is ready to perform the check before purchase, rather than adapting the finished wall after delivery.
When it's better to choose a different profile
PLT-003 may be unnecessary or technically inconvenient if:
- most of the outlets are located below the safe zone;
- There are many cable outlets around the perimeter;
- Radiator pipes run close to the wall;
- The trim is too thin and does not match the thickness;
- Built-in furniture is already installed without a gap;
- Inspection hatches are located near the floor;
- The room is small, and a height of 160 mm visually overloads the walls;
- The project does not allow relocating the electrical wiring;
- The client is not ready for complex local details;
- A lower profile solves the task without losing the composition.
Rejecting a specific item after an honest check is not a failure. It is much worse to order a tall baseboard and then try to force the finished room to conform to it.
How to buy wooden skirting board PLT-003 at STAVROS
Commercial order becomes simple after technical verification.
First, open the product card of the wooden skirting board PLT-003 and confirm that the size 160 × 16 mm fits all key walls. Then choose the material: oak, beech, or moisture-resistant MDF.
Before placing the order, prepare:
- wall lengths;
- opening map;
- number of internal and external corners;
- photos of sockets with dimensions;
- list of pipes and hatches;
- dimensions of platbands;
- connection points to furniture;
- selected material;
- finishing requirements;
- calculation of strips and reserve;
- need for a control fitting.
For a buyer looking for where to buy a wooden floor skirting board, it is important not to limit themselves to the price per item. The final cost of the project includes cutting, finishing, complex connections, and possible rewiring of electrical work. A good check before ordering reduces exactly the hidden costs.
Current price, availability, lengths of available items, surface preparation, and pickup conditions should be clarified in the product card or with a STAVROS manager. Do not transfer data from one modification to another without checking.
If you need a wooden floor skirting board in Saint Petersburg, it is useful to specify the address of the site, the total volume, and the expected installation date in the order. Pickup and delivery conditions are checked during checkout.
Ready sequence of actions before purchase
- Clarify the finished floor level.
- Draw a line of 160 mm along the walls.
- Mark the 16 mm thickness on complex joints.
- Measure the bottom edges of all socket frames.
- Check internet and TV outlets with connected cables.
- Apply pipes, radiator connections, and hatches.
- Compare PLT-003 with door trims.
- Pass the cross-section to the built-in furniture designer.
- Determine where the profile ends.
- Decide which sockets can actually be moved.
- Compare the cost of moving with choosing a different baseboard.
- Choose oak, beech, or moisture-resistant MDF.
- Make a cutting map for the walls.
- Add a justified reserve.
- Clarify the possibility of a control strip.
- Check the current card parameters.
- Coordinate the installation units.
- Only after that, place your order.
FAQ: sockets, height 160 mm, and purchase of PLT-003
What is the size of PLT-003?
PLT-003 has a size of 160 × 16 mm. The first digit sets the height from the floor, the second — the thickness and protrusion from the wall.
What materials is PLT-003 made of?
The card specifies oak, beech, and moisture-resistant MDF. The specific material is chosen considering the finish, floor, doors, and room conditions.
Can a 160 mm high skirting board cover an outlet?
Yes, if the lower edge of the frame is below the top line of the profile or too close to it. The check is performed from the finished floor.
What exactly should be measured on the outlet?
Measure the height of the lower edge of the decorative frame, the full size of the frame, and its protrusion from the wall. The center of the mechanism is not enough.
Why can't you rely only on the height of the center?
The center does not show the lower boundary of the frame. A large frame can drop into the PLT-003 zone, even though its center is located above 160 mm.
Is there a universal distance between the skirting board and the outlet?
No, there is no single number for all products. The gap must preserve installation, removal, plug connection, and neat wall finishing.
How to check PLT-003 without buying the entire batch?
Run a 160 mm strip of painter's tape and make a volumetric template 16 mm thick. For a complex project, clarify the possibility of a control strip.
Do I need to take the finished floor into account?
Yes. All heights are measured from the final floor surface, otherwise the baseboard line will be offset.
What to do if the flooring is not yet installed?
Calculate its full future thickness including the underlayment or adhesive layer. It is advisable to repeat the final check after the floor is installed.
What to do if the outlet crosses the 160 mm line?
You can discuss moving the outlet, choosing a lower profile, changing the junction point, or abandoning PLT-003 in a specific area. The decision is made before ordering.
Can a cutout be made in the baseboard for the outlet?
Technically, a separate junction can be designed, but a random cutout often looks rough and hinders maintenance. It cannot be considered a universal solution.
Do all low outlets need to be moved?
No. First, create a conflict map. Sometimes the problem concerns a single point, and sometimes the entire electrical system around the perimeter.
How to check the internet outlet?
Evaluate not only the frame, but also the connected plug with cable. The cable may descend into the PLT-003 zone.
What to do with the free cable outlet?
Fix the exit point and the future connection method. Do not clamp the cable with the baseboard or hide the connection without access.
Will PLT-003 fit a tall architrave?
It may fit, but you need to compare the height, thickness, and shape of the profiles. The protrusion of the architrave from the wall is especially important.
What to do if PLT-003 is thicker than the architrave?
A designed ending or another junction unit will be required. An accidentally protruding end will be noticeable.
Can the baseboard be run behind a built-in wardrobe?
Only if sufficient clearance is left and the furniture structure allows such a passage. The thickness of PLT-003 is 16 mm.
Do I need to inform the furniture maker of the baseboard size?
Yes. Provide the exact cross-section of 160 × 16 mm so that the furniture includes a gap or profile cutout.
Can PLT-003 be installed under a radiator?
Yes, if there is enough space and access to pipes, valves, and connections is maintained. The unit is checked before ordering.
Can an inspection hatch be covered with a skirting board?
No, if access disappears after that. For such a location, a separate removable or bypass unit is needed.
Is moisture-resistant MDF suitable for any wet room?
No. Moisture resistance does not mean unlimited contact with water. Application conditions and finishing must be clarified for the specific area.
What to choose: oak or beech?
The choice depends on the floor, doors, furniture, and future covering. Both wood species should be evaluated based on samples and layout.
Can PLT-003 be painted white?
The possibility and preparation depend on the selected material and specific item. For covering finishes, MDF is often considered, but the system should be confirmed before ordering.
How to calculate the amount of baseboard?
Add up the lengths of installation sections, subtract openings and areas without profile, then create a cutting map and add a justified reserve.
Should built-in furniture be subtracted from the perimeter?
Not always. First, decide whether the baseboard runs behind the furniture, ends at the side panel, or fits into a special cutout.
What reserve is needed?
The reserve depends on the number of corners, short sections, material, pattern matching, and complex joints. A universal percentage without layout is unreliable.
When should you check the geometry of the planks?
Immediately upon receipt, before cutting, finishing, and installation. It is useful to lay out the planks along the walls and match them by pattern.
How should the baseboard be stored before installation?
Follow the storage rules for wooden decor: avoid dampness, localized heat, bending, and surface damage.
Can the entire baseboard be painted first and then fitted?
It is better to first do a dry fit of a test piece. After full finishing, correcting geometry and problematic joints is more difficult.
Do I need to check the connected plug?
Yes. The plug body, adapter, and cable direction can take up more space than an empty socket.
Where to buy wooden floor plinth PLT-003?
A specific article number can be selected on the STAVROS website. Before placing an order, check the material, size, quantity, current price, and compatibility with the room.
A tall plinth starts not with an order, but with a line on the wall
PLT-003 with a height of 160 mm can noticeably change the interior. It supports large architraves, creates a confident lower horizontal line, and allows you to choose natural oak, beech, or moisture-resistant MDF. But the scale of the profile requires respect for the actual room.
Before purchasing, do not just ask whether a tall wooden plinth fits the style. Ask more precisely: is the 160 mm strip above the finished floor free, does the 16 mm thickness interfere with frames and furniture, is access to electrical wiring maintained, are doors, pipes, and hatches coordinated?
A line drawn with painter's tape sometimes saves the entire renovation. It shows the conflict before dozens of meters of profile are delivered to the room. After such a check, the decision becomes informed: move one socket, choose a different size, design the junction, or confidently buy PLT-003.
STAVROS company offers ready-made linear products with specific article numbers, materials, and sizes. This allows you to design not an abstract "tall plinth," but a real part. First, check PLT-003 on the wall, then create a layout, and only then place an order. Then the plinth will complete the interior, not become a reason for a repeat visit from an electrician.