Article Contents:
- Why a slatted partition with a stretch ceiling is a separate task
- What is a slatted partition next to a stretch ceiling
- Which STAVROS products can be used in such a partition
- Basic installation schemes: from embedded structure to self-supporting frame
- Embedded structure before stretch ceiling installation
- Niche for slats
- Installation after finished ceiling
- Self-supporting frame
- Kitchen-living room
- Hallway and living room
- Studio
- Bedroom
- Office or work area
- Commercial space
- Can slats be attached directly to a stretch ceiling?
- How to install slats for room zoning if the ceiling is already stretched?
- When is a mounting bracket needed for a slatted partition?
- What to do if the mounting bracket was not prepared in advance?
- Can slats be placed only between the floor and ceiling as a spacer?
- What spacing between slats should I choose?
- Which STAVROS slats are suitable for zoning?
- Why is molding needed in a slatted partition?
- Can a border or baseboard be used as a bottom base?
- What to buy together with the slats?
- Is a slatted partition suitable for a kitchen-living room?
- Is such a partition suitable for a hallway?
- Do I need to contact ceiling installers?
- How are ready-made elements better than random construction slats?
Slats for zoning a room with a stretch ceiling require a more careful approach than a regular decorative partition between the floor and concrete slab. The stretch fabric cannot be used as a load-bearing support, slats cannot be rigidly attached to it, it cannot be drilled, pressed, or loaded with a spacer structure. An error in the top assembly can ruin the ceiling, disrupt the geometry of the partition, and turn a beautiful zoning idea into an expensive rework.
At the same time, the very idea of a slatted partition remains very practical. Vertical wooden slats help separate the hallway from the living room, the kitchen from the relaxation area, the sleeping area from the workspace, and the dressing room from the room, without turning the space into a closed box. Light passes through the slats, air is not "trapped," the interior retains lightness, but the zone becomes clear. Therefore, buyers are increasingly looking not just for slats for room zoning, but for a ready-made system: which slats to buy, how to choose the spacing, how to secure the top, how to cover the bottom fasteners, how not to damage the stretch ceiling, and what to order along with the wooden elements.
STAVROS is interesting in such a task not only for individual slats or panels. The whole package is important here: STAVROS slatted panels, individual panel models, Pogonazh iz massiva, the lower decorative base, the top strip, the finishing trim, and Mounting and finishing materials. If you assemble these elements in advance, the partition looks not like a set of random planks, but like a well-thought-out interior structure.
The main task with a stretch ceiling is to separate the decorative and load-bearing functions. The slats can beautifully reach almost to the ceiling, create a vertical rhythm, and zone the room, but the load must be taken not by the stretch material, but by the embedded element, the main ceiling, the wall, the frame, or another rigid node. This is what distinguishes such an article from the general topic about wooden slats.


Why a slatted partition with a stretch ceiling is a separate task
A regular slatted partition is often imagined simply: floor, ceiling, with vertical slats between them. In reality, even without a stretch ceiling, such a structure requires precise calculation, verticality, fasteners, and bottom and top fixation. But when the room already has a stretch ceiling, the task becomes more complicated: the upper base is not a rigid building surface.
The stretch fabric works as a decorative membrane. It covers the main ceiling, hides utilities, creates a smooth plane, but is not intended for attaching wooden parts. If you try to fix the slats directly into the fabric, there is a risk of tearing, sagging, deformation, or damage to the harpoon system. Even if the slat visually "rests" against the ceiling, it does not mean it has received reliable support.
Therefore, the request "how to install slats for room zoning" with a stretch ceiling always needs to be clarified: is the ceiling already installed or not, is an embedded element provided, can a section of the fabric be opened, is there a wall nearby, is a floor-to-ceiling partition needed, or is a decorative frame sufficient. One solution is suitable for renovations at the rough work stage, another for a finished apartment where the ceiling is already stretched and cannot be damaged.
If the ceiling is not yet installed, the cleanest way is to plan for a mounting plate in advance. Then the top node of the future partition is attached to a rigid base, and the stretch ceiling fabric neatly bypasses the installation area or works around the prepared structure. If the ceiling is already installed, you have to find a scheme without direct load on the fabric: a frame, wall mounting, a top bar, floor support, coordination with ceiling installers.
You can quickly buy slats for room zoning, but the purchase itself should come after understanding the node. You cannot choose only a beautiful color or width. You need to understand where the load will be transferred, how the slats will stand vertically, what will cover the lower fasteners, what spacing between lamellas is needed, what the top line near the fabric will look like, and which STAVROS parts will help assemble a neat system.


What is a slatted partition next to a stretch ceiling
A slatted partition is a vertical structure made of wooden or decorative slats that divides a room without a solid wall. It can be light, almost transparent, or denser if the slats are placed frequently. It is used not for permanent room division, but for soft zoning: to mark a boundary, hide part of the view, separate a functional area, and maintain an airy feel.
With a stretch ceiling, such a partition must have a well-thought-out top scheme. It is important to understand: the slats can visually align with the ceiling, but technically they should not be supported by the fabric. The top part can be attached to a mounting plate, a rigid bar, an independent frame, a wall, or the main ceiling through a pre-prepared node. The earlier this node is planned, the neater the result looks.
Such a partition has several tasks. The first is spatial: to separate a zone but not completely close it off. The second is decorative: to add vertical rhythm, connecting the wall, floor, furniture, and ceiling. The third is practical: to hide the entrance area, partially separate the kitchen, design a passage, create a backdrop for a sofa or workspace. The fourth is comprehensive: the slats should match the lower base, trim, finishing, and adjacent wooden details.
That is why it is better to look not only at individual lamellas but also at Solid Wood Items the whole. The partition may involve slats, panels, trim, moldings, borders, decorative elements, and finishing materials. When everything is selected in a single logic, the structure looks cohesive.
Our factory also produces:


Which STAVROS products can be involved in such a partition
For a partition with a stretch ceiling, not only vertical slats are important. You need elements that will help assemble the bottom, top, side connections, cover fasteners, and prepare the surface for finishing. In a specific project, the composition may differ, but the selection logic remains the same: verticals, guides, decorative base, fasteners, finishing materials.
| Element | What it is for | How it helps with stretch ceilings | What to check before ordering |
|---|---|---|---|
| Slatted panels | Create vertical rhythm and decorative zoning | Allow you to select a ready-made wooden element instead of random planks | Dimensions, material, profile, application method in the product card |
| PAN-001 | One of the slatted panel models for interior tasks | Can be used as an option for a calm vertical composition | Current parameters and compatibility with the project |
| PAN-003 | Model for an expressive vertical pattern | Suitable for comparing with other panels by visual rhythm | Exact dimensions, material, and finish |
| PAN-007 | Another option for a slatted panel for selection | Helps to choose a different scale or vertical pattern | Parameters of a specific card |
| Molding | Needed for guides, slats, framing, and connecting parts | Helps create a rigid line without attaching to the panel | Product type, dimensions, material, purpose |
| Bottom border or baseboard | Covers the bottom fastening and sets the base at the floor | Makes the partition visually complete | Height, profile, combination with slats |
| Materials for installation and finishing | Needed for preparation, fixation, and finishing | Help assemble the structure neatly and complete the finishing | Compatibility with material, base, and future finishing |
A buyer often starts with the question "which slats to buy for zoning a room," but in a real project, a second question quickly arises: "how to fasten them and how to close the joints." If the slats are simply placed between the floor and the canvas, the result is a risky structure. If you think through the lower base, the upper strip, and the fastening method in advance, the partition looks neater and serves more stably.
To start, you can open the general section STAVROS slatted panels and compare available models. If you need specifics on the cards, you can separately view Slat panel PAN-001, Slatted panel PAN-003 и Slat panel PAN-007. Before ordering, it is important to check the current dimensions, materials, finish, and application conditions in the product cards.
Get Consultation
Main installation schemes: from embedded to self-supporting frame
Embedded before installing a stretch ceiling
The safest option is to provide an embedded element before installing the stretch ceiling. The embedded element creates a rigid base to which the upper node of the partition can be attached. In this case, the stretch fabric does not bear the load, but only neatly bypasses the prepared area or adjoins it according to the chosen technology.
This path is especially convenient if the renovation is still ongoing and the ceiling is not yet stretched. The designer, ceiling installers, and partition specialist coordinate the location, structure width, slat line, top rail, and fastening method in advance. This allows for precise height calculation, avoids accidental contact with the fabric, and achieves a clean top line.
For the buyer, this means a simple thing: it's better to buy wooden slats for room zoning not at the last moment, but at the design stage of the assembly. Even if the slats themselves are installed later, their width, spacing, overall partition thickness, and fastening method should be clear in advance. Then the embedded element will be exactly where it needs to be, not "approximately nearby."
Recess for Slats
A recess for slats is a solution for cases when you want a particularly neat appearance. The stretch ceiling does not intersect with the structure directly but bypasses the partition area. The slats are attached to a rigid base or top rail, while the fabric remains a decorative plane nearby.
This option looks good in modern interiors where clean geometry is important. The partition seems to emerge from a prepared ceiling assembly rather than accidentally pressing into the soft fabric. However, the recess needs to be designed in advance. After the ceiling is finished, it's more difficult to create because it requires intervention in an already installed system.
It's important for the buyer to understand: the recess does not replace the calculation of the partition itself. You still need to choose the slats, spacing, bottom base, material, finish, and fastening method. The recess solves the top assembly but does not eliminate the work with the other elements.
Installation After Finished Ceiling
The most common household situation: the renovation is already done, the stretch ceiling is installed, and you want to add a partition later. Here, you cannot act on the principle of "putting slats in a spacer." The stretch fabric must not be pinched, pressed through, or used as a support.
In such a situation, consider schemes with fastening to the floor and wall, a self-supporting frame, a top decorative rail that does not press on the fabric, or a solution coordinated with the ceiling installers. Sometimes partial dismantling or technical intervention is required, but this is resolved individually. The main thing is not to drill the fabric or try to attach the slats to a soft surface.
For a finished apartment, the bottom base is especially useful. It helps secure the slats at the floor, hide the fasteners, and set a straight line. The top can be resolved through a frame or rail, and lateral stabilization through the wall if the partition adjoins it. In such cases Pogonazh iz massiva becomes not just a decorative material, but part of the structural logic.
Self-supporting frame
A self-supporting frame is an option where the slats are fixed inside a rigid frame. Such a structure can stand between the lower and upper guides without transferring load to the stretch ceiling. The upper part of the frame must have its own support or fastening, and not rest on the ceiling as a load-bearing element.
The frame is especially appropriate if the partition cannot be attached to the main ceiling. It helps control the geometry, keep the slats at a consistent spacing, close the ends, and create a finished look. The frame must be calculated on-site: height, width, stability, floor attachment, possible wall fixation, and finishing method.
Visually, such a partition can look like a neat wooden screen. Technically, it is safer than trying to install slats 'wedged' between the floor and the stretch ceiling. But it is important not to confuse a decorative frame with a lightweight imitation. If the structure is tall, narrow, or located in a walkway area, the rigidity must be sufficient.
How to choose slats for room zoning
The choice begins not with color, but with the task. You need to understand what exactly the partition should do: slightly mark a boundary, hide the entry area, separate the kitchen from the living room, create a backdrop behind the sofa, partially enclose a sleeping area, or serve as a decorative accent. The spacing between slats, width of the structure, height, material, and density of the visual screen depend on the task.
If light zoning is needed, slats are placed with a large gap. The room remains bright, the partition hardly blocks the view, but a boundary appears. If partial privacy is needed, the spacing is made medium: light passes through, but the area is already more noticeably separated. If you need to hide a hallway, dressing room, or desk, the slats can be placed closer together, but it is important not to turn the structure into a solid wall.
The second parameter is height. With a stretch ceiling, you cannot simply measure the distance from the floor to the ceiling and make the slats exactly wedged. You need to account for the installation gap, the upper node, the possible frame, the presence of an embedded element, and the fastening method. The height of the wooden element depends on the chosen scheme. If there is an upper guide or strip, the slat can be attached to it without touching the ceiling.
The third parameter is material and finish. Wooden slats for room zoning look good in interiors with natural textures, wooden furniture, baseboards, panels, doors, or warm finishes. If the slats are to be painted, surface preparation and compatibility with the topcoat are important. If you want to preserve the wood texture, you need to evaluate the material, shade, and connection with the rest of the interior.
The fourth parameter is adjacent elements. The partition should not start "out of nowhere." It's better to finish the bottom with a base: molding, border, skirting board, or strip. The top should have a well-thought-out guide or frame. The side abutment should be a neat line to the wall or furniture. Then the slats look not like a set of verticals, but like an interior system.
Comparison of options for a partition with a stretch ceiling
| Solution | When it fits | Advantage | Limitation | What to buy or check |
|---|---|---|---|---|
| Embedded board to the ceiling | Renovation is still ongoing, the ceiling is not stretched | The neatest top node | Need to plan in advance | Slats, top strip, bottom base, fasteners |
| Niche for slats | Need a clean designer look | The canvas is not loaded, the structure appears built-in | More difficult after the finished ceiling | Ceiling layout, slats, linear elements |
| Frame after the finished ceiling | Ceiling already installed | Direct contact with the canvas can be avoided | Requires stiffness calculation | Slats, guides, attachment to floor/wall |
| Attachment to wall and floor | Partition adjoins the wall | The structure can be stabilized without a ceiling | Not always suitable for a freestanding screen | Bottom base, side fixation |
| Slats in tension | Seems like a simple option | Looks quick on the drawing | Cannot load the tension fabric | Better to replace with a frame or embedded part |
| Random construction slats | When they want to save on the system | Can be bought quickly | It is difficult to achieve neat geometry and finishing. | It is better to compare with ready-made interior elements. |
This table shows the main principle: a safe scheme always separates the stretch ceiling from the load. If the structure is held only because the slats are pressed against the ceiling, that is not a solution. If the upper node is connected to an embedded part, frame, wall, or main ceiling, the risk is lower, and the result looks more professional.
PAN-001, PAN-003, and PAN-007: how to consider models in a project
When a buyer chooses slats for room zoning to purchase, they often want to see specific models. In the SEO scheme for this topic, PAN-001, PAN-003, and PAN-007 are highlighted. These items should be considered as options for an interior slat composition, but the final choice depends on the product card: current sizes, material, finish, and purpose.
Slat panel PAN-001 can be a starting point for a calm vertical partition. It is worth looking at if a clear rhythmic structure without complex visual overload is needed. Before ordering, you need to check the card parameters and understand whether the model is suitable for the chosen installation scheme.
Slatted panel PAN-003 it is useful to compare if a different character of the vertical pattern is needed. In a slat partition, even a slight difference in profile or pitch changes the perception: the structure may look lighter, denser, stricter, or more decorative. Therefore, it is better to compare models not only by photo but also by how they will stand in a specific room.
Slat panel PAN-007 may be suitable for a different visual task if the buyer is looking for an alternative scale or pattern. With a stretch ceiling, not only the appearance of the panel is important, but also how it integrates into the upper and lower system. Any chosen model should be considered together with the guides, fastening, and final finishing.
If there is no understanding yet of which model is needed, it is better to start with the general section STAVROS slatted panels, and then open specific cards. This makes it easier to compare options and not get attached to the first photo you like.
How to use a skirting board, border, or molding as a lower base
The lower part of a slatted partition is often underestimated. The buyer thinks about how the slats will look at eye level but forgets that the verticals need to be secured at the floor, the fasteners hidden, and the structure tied to the room's finish. If the bottom looks haphazard, the entire partition loses its neatness.
A skirting board, border, or molding can serve as a lower base. Such a detail provides a straight line, covers the technical assembly, protects the bottom of the structure, and visually connects the slats to the floor. This is especially important in hallways, kitchen-living rooms, and walk-through areas where the lower edge of the partition is constantly visible.
In some projects, it is appropriate to use a MLD-043 solid wood border. It can be considered as a decorative element for the bottom line or as a connection with other moldings if the product parameters suit the specific task. Before ordering, you need to check the dimensions, profile, material, and compatibility with the selected slats.
Pogonazh iz massiva helps solve not only decorative but also practical issues: closing a joint, finishing an edge, assembling a guide, supporting the overall style. It is important not to perceive molding as a secondary detail. In a slatted partition, it often determines whether the structure will look finished.
A lower base is especially useful if the partition is installed after the renovation is complete. It helps to neatly integrate the new structure into the existing finish. If the floor is already laid, the skirting board installed, and the walls painted, the slats should look like a part of the interior, not a temporary insert. A well-chosen base solves exactly this problem.
How to choose spacing between slats
The gap between slats determines how transparent, dense, and decorative the partition will be. Too wide a gap will provide a light zone indication but will hardly obscure the view. Too narrow a gap can turn the structure into a heavy screen and visually shrink the room. A good gap is chosen based on the task, not a random picture.
| Task | Which gap to choose | What effect will be achieved | Where it's appropriate |
|---|---|---|---|
| Light zoning | Wider | Lots of air and light | Living room, studio, sofa area |
| Partial privacy | Medium | Balance of light and privacy | Bedroom, workspace, kitchen-living room |
| Hide the entrance area | Medium or denser | Less direct view | Hallway, corridor, entrance next to living room |
| Decorative accent | Rhythmic, uniform | Vertical pattern without heaviness | Hall, study, wall behind sofa |
| Almost a screen | Narrow | Strong zone separation | Dressing room, sleeping area, alcove |
| Commercial interior | Depends on movement scenario | Controls view and route | Salon, showroom, restaurant, office |
The step should be coordinated with the width of the slat. The same distance between narrow and wide lamellas looks different. A narrow slat with a large step gives a light graphic pattern. A wide slat with a small step quickly becomes an almost solid wall. Therefore, before ordering, it is better to make a simple calculation: the width of the partition, the width of one slat, the number of slats, the distance between them, and the final transparency.
With a stretch ceiling, the step also affects installation. The more slats, the more attachment points and the higher the requirements for the lower and upper guides. If the structure is high and the slats are placed frequently, the load on the nodes increases. This does not mean that a dense partition is impossible. It means that it cannot be assembled as a random decorative set without calculation.
Selection for different rooms
Kitchen-living room
In a kitchen-living room, slats help separate the cooking area from the relaxation area without blocking the light. The partition can stand next to the dining table, behind the sofa, at the entrance to the kitchen part, or between the island and the living room. With a stretch ceiling, it is important to understand in advance whether there are lights, tracks, ventilation outlets, or hidden communications in this area. The upper node should not conflict with the ceiling system.
For a kitchen-living room, a medium step is most often chosen. It gives a feeling of separation but does not completely close off the space. If the slats are too dense, the room may visually become smaller. If they are too sparse, the partition will be decorative but will hardly solve the zoning task.
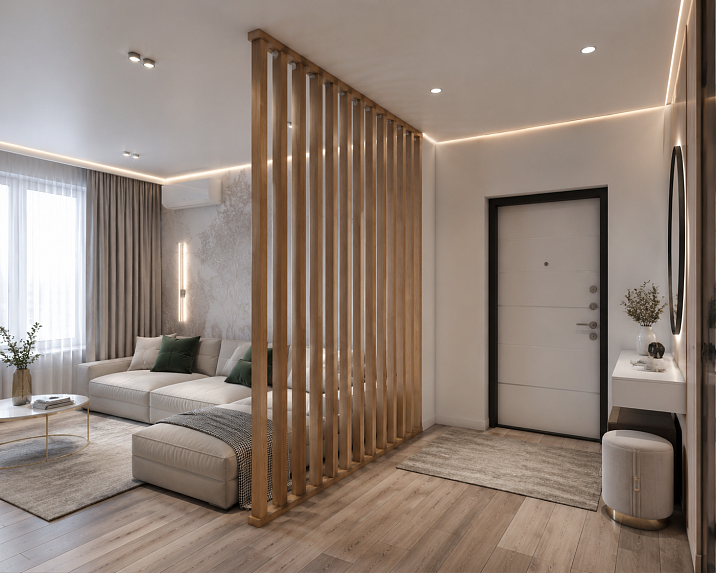
Hallway and living room
A partition between the hallway and the living room is one of the most practical scenarios. It hides the entrance area, shoes, closet, or door, but does not make the apartment dark. In such a place, the lower base is especially important: a baseboard, flooring, and entrance group often pass nearby. If the bottom is not designed, the slats look temporary.
Here, a denser step can be used because the task is to partially block the view. But the passage should remain convenient. If the slats are located near the traffic route, not only the appearance but also the stability of the structure must be considered.
Studio
In a studio, reiki often separates the bedroom, work area, or living room. The main thing is not to divide the space too rigidly. A stretch ceiling in a studio can be a single piece across the entire area, so the partition must fit without damaging the fabric. A self-supporting frame or a pre-prepared embedded element works well.
In a studio, style mistakes are especially noticeable. If the partition is not connected in color or material to the furniture, doors, baseboard, or floor, it looks alien. Therefore, wooden elements are best selected as part of the overall finish.
Bedroom
In the bedroom, reiki can separate the dressing room, vanity table, workspace, or bed from the entrance area. Softness and privacy are important here. The spacing can be medium or closer to dense, but it's important not to overload the room. If the ceiling is stretch, the top joint must be especially neat: the bedroom is usually perceived through calm lines and clean junctions.
Office or workspace
Reiki help separate a work corner without a permanent wall. This is convenient if the office is in the living room or bedroom. In such a zone, the partition should not only look good but also not interfere with light. It's better to check in advance how the reiki will cast shadows, where the desk is, how doors open, and cables run.
Commercial space
In a salon, showroom, cafe, office, or service studio, a slatted partition helps manage the flow of people. It can hide a service area, separate the reception, design a waiting area, or create a decorative background. Here, the quality of the joints is especially important: the visitor sees the structure up close, so the top, bottom, ends, spacing, and finish must be neat.
What not to make from scratch if there are ready-made STAVROS elements
The topic "how to install reiki for room zoning" easily turns into making everything from scratch yourself: buying random timber, sawing, sanding, adjusting, looking for strips for the top and bottom, figuring out how to hide the fasteners. This path is possible, but it increases the risk of errors. Especially near a stretch ceiling, where there is no room for rough fitting and forceful pressure on the fabric.
Ready-made STAVROS elements help reduce some of the uncertainty. The buyer does not have to look for random reiki without a clear profile, but can view STAVROS slatted panels. They don't have to select a bottom strip from unsuitable material, but can compare Pogonazh iz massiva and decorative elements. You can leave the fasteners exposed, but it's better to think through the base, border, strip, and finish.
This doesn't eliminate installation. The slats still need to be properly calculated, aligned, secured, and finished. But a ready-made interior element provides more predictable geometry and appearance than a random blank. The buyer focuses on the project: where the partition will be, what spacing is needed, how to arrange the top with a stretch ceiling, how to close the bottom, and what finish to choose.
The commercial route here is simple: first choose the slat elements, then select the linear components and bottom base, then check the materials for installation and finishing, and only then coordinate the installation scheme with the craftsman and ceiling specialists. This order reduces the risk that beautiful slats are purchased but technically cannot be neatly installed.
What to buy together with slats for a partition
Slats are only the visible part of the partition. For a neat result, a kit is needed. It may include guides, linear components, a bottom base, fasteners for the specific base, and materials for preparation and finishing. The exact composition depends on the project, but before ordering, it's useful to go through the main items.
| What to add to the purchase | Why this is needed | Where it is especially useful | What to Check | Link |
|---|---|---|---|---|
| Slatted panels | The basis of vertical zoning | Living room, studio, hallway, bedroom | Model, dimensions, material, finish | STAVROS slatted panels |
| PAN-001 | Option for selecting the rhythm of the partition | Restrained interior solutions | Card parameters | Slat panel PAN-001 |
| PAN-003 | Alternative model for comparison | More expressive vertical composition | Dimensions, material, compatibility | Slatted panel PAN-003 |
| PAN-007 | Another option for interior selection | Projects requiring a different scale | Current specifications | Slat panel PAN-007 |
| Molding | Top or bottom rail, side trim | Structures with frame and guides | Section, material, role in the node | Pogonazh iz massiva |
| Border | Decorative lower base or connecting element | Partition near the floor, next to the baseboard | Profile, height, combination with slats | MLD-043 solid wood border |
| Installation and finishing materials | Preparation, fixation, finish | Any project with wooden elements | Compatibility with base and material | Mounting and finishing materials |
| Adjacent wooden elements | Connection of partition with interior | When baseboards, moldings, and panels are needed | The overall style and material | Solid Wood Items |
This comprehensive approach is especially important for stretch ceilings. The top node cannot be solved on the spot by chance. The bottom node cannot be left uncovered. Finishing cannot be postponed until the slats are already in place and access to the ends is limited. The sooner the buyer sees the entire set, the lower the risk of rework.
How not to confuse slats, panels, linear elements, and partitions
In everyday speech, everything is often called "slats." But for purchasing and installation, it is useful to distinguish several things. Slats or slatted panels are the vertical part that creates zoning. Linear elements are long wooden components that can help with framing, guides, and covering joints. A border or baseboard is a decorative base that connects the partition to the floor. Materials for installation and finishing are a separate group, without which the structure may look incomplete.
If a buyer searches for "room zoning partition slats," they might think it is enough to buy only the vertical elements. But the partition itself is a system. It includes geometry, top, bottom, side connections, fasteners, finishing, and spacing calculation. Slats without these elements can look like a semi-finished product.
Do not confuse decorative wall slats with a freestanding partition. A wall panel is attached to the wall and works as surface finishing. A partition stands in space, so it has higher stability requirements. If the structure does not have a solid wall behind it, special attention must be paid to fastening and rigidity.
It is also useful to study the material about wooden slats for a partition. It helps to understand the broad scenario of choosing slats. And if you are interested in a more material and interior accent, you can look at the article Oak slat partition. In the current topic, the focus is different: stretch ceiling, top node, and safe installation without damaging the fabric.
Errors during installation near a stretch ceiling
The most dangerous mistake is to attach slats directly to the stretch fabric. The fabric does not bear load, does not replace the ceiling, and does not serve as a base for a wooden structure. Even a light slat can create a problem if it is fixed incorrectly or forced to press on the material.
The second mistake is to install slats in a spacer between the floor and the fabric. At first glance, this seems convenient: the vertical stands firmly, nothing needs to be drilled. But the spacer load is transferred to the soft plane, and the ceiling can deform. This approach is not suitable for a stretch ceiling.
The third mistake is not to provide an embedded element, even though the renovation is not yet finished. If the ceiling has not been installed yet, it is better to decide the location of the partition in advance. Fixing the upper node later is more difficult and expensive. An embedded element helps make the fastening clean, safe, and predictable.
The fourth mistake is not to coordinate the work with the ceiling installers. A stretch ceiling has its own fastening system, profiles, fabrics, and technological tolerances. A woodworker may work well with slats but not know the nuances of the ceiling system. If the node is complex, coordination between specialists is needed.
The fifth mistake is to use a weak lower guide. The top is often discussed because of the stretch ceiling, but the bottom also holds the structure. If the lower base is unstable, the slats can shift, vibrate, or look uneven. Therefore, the lower trim, border, or plank should be selected not only by appearance but also by function.
The sixth mistake is not to cover the fasteners. Even expensive wooden slats look rough if random screws, gaps, or technical overlays are visible at the bottom. Trim and decorative base help hide the mounting node and make the partition finished.
The seventh mistake is to choose too small a spacing. A dense partition may look beautiful in a picture, but in a small room, it takes away light and makes the space feel cramped. The spacing should be chosen based on the real task: light separation, privacy, or almost a screen.
The eighth mistake is not to check the verticality of each slat. In a slatted structure, any error is immediately visible. If one lamella deviates to the side, the rhythm is broken. The higher the partition, the more noticeable the deviation.
The ninth mistake is to buy elements without an overall system. You liked the slats separately, found a lower plank separately, bought fasteners randomly, and didn't think about the finish. As a result, the parts do not match in scale and purpose. It is better to assemble a kit in advance: slats, trim, base, fasteners, finish.
The tenth mistake is forgetting that wood is a living material. Wooden elements require careful storage, preparation, and finishing. They cannot be installed without checking the humidity of the room, the base, the finish, and the operating conditions. It is better to clarify current recommendations for a specific product before ordering.
Who this partition is suitable for, and who should choose a different solution
A slatted partition with a stretch ceiling is suitable for those who want to zone a room without a permanent wall. It is a good solution for studios, kitchen-living rooms, hallways, bedrooms, studies, dressing areas, and commercial spaces. It helps preserve light but makes the space more defined.
This solution is especially appropriate if the interior already has wood or wooden accents. The slats can be tied to doors, furniture, baseboards, panels, stairs, countertops, or decorative moldings. Then the partition looks not like a separate insert, but part of the overall finish.
The partition is also suitable for those who want to add vertical rhythm. In rooms with low furniture, a long wall, or an open plan, verticals help visually organize the space. With the correct spacing, the slats do not overload the room but add structure.
But there are cases when it is better to choose a different option. If the ceiling is already installed and intervention in the upper node is impossible, and the partition cannot be stabilized through a wall or frame, the project needs to be reconsidered. If complete sound or visual separation is needed, slats will not replace a wall. If the room is very small and dark, a too-dense partition can worsen the sense of space.
Also, you should not choose a slatted partition just because it looks trendy in photos. It must solve a specific task: separate, conceal, direct the gaze, frame a passage, or connect zones. Without a task, the structure can become a decorative obstacle.
Practical selection process before ordering
Start with the installation location. Determine where the partition will stand, what it can be attached to, if there is a wall nearby, what width of passage needs to be left, and whether the structure interferes with doors, furniture, lights, and traffic routes. With a stretch ceiling, immediately note: is the ceiling already installed or not yet.
Then choose the upper node scheme. If the ceiling is not yet installed, plan for a mounting plate or niche. If the ceiling is already installed, consider a frame, attachment to the wall and floor, and a top bar without load on the fabric. Do not proceed to purchasing slats until it is clear where the load-bearing part will be.
After that, determine the visual density. Draw or calculate the spacing between the slats. Imagine how much light should pass through the partition. For a hallway, more privacy may be needed; for a living room, more airiness; for a bedroom, a balance of privacy and softness.
Next, select STAVROS elements. Open STAVROS slatted panels, compare models, then look Pogonazh iz massiva for guides and finishing. If a lower decorative accent is needed, check MLD-043 solid wood border. For preparation and finishing, study Mounting and finishing materials.
Complete with calculations. Count the number of vertical elements, length of guides, bottom base, allowance for trimming, finishing materials. Before ordering, check product cards and clarify parameters with a STAVROS manager if the partition is non-standard.
How to buy slats for room zoning on STAVROS
It's best to start purchasing with an understanding of the scheme. If you just need a decorative rhythm on the wall, the task is simple. If you need a partition in the space, especially with a stretch ceiling, the task is more complex. So first determine: will the structure be wall-mounted, freestanding, framed, with a built-in element, or with wall attachment.
Then go to the section STAVROS slatted panels and compare suitable options. Don't limit yourself to the first model: open Slat panel PAN-001, Slatted panel PAN-003 и Slat panel PAN-007to see different options and check parameters.
After selecting vertical elements, choose a system around them. For guides, framing, and closing nodes, you may need Pogonazh iz massiva. For the bottom decorative line, you can consider MLD-043 solid wood border, if its parameters fit the project. For preparation, fastening, and finishing, check Mounting and finishing materials.
Before ordering, it is important to verify dimensions, material, finish, quantity, installation scheme, and room features. If the ceiling is already stretched, be sure to plan a safe top node. If the ceiling is not yet installed, discuss the embedded element or niche in advance. STAVROS helps select wooden elements, but the installation scheme itself must correspond to the actual base and site conditions.
FAQ: questions about slats for room zoning with a stretch ceiling
Can slats be attached directly to a stretch ceiling?
No. The stretch fabric is not a load-bearing base. Slats cannot be attached directly to the fabric, drilled into it, or used as a support. An embedded element, frame, attachment to the main ceiling, wall, floor, or another safe scheme is required.
How to install slats for room zoning if the ceiling is already stretched?
You need to consider options without load on the fabric: a self-supporting frame, attachment to the floor and wall, a top bar, a solution agreed with ceiling installers. The specific scheme depends on the installation location, height, partition width, and access to the main ceiling.
When is a mounting plate needed for a slatted partition?
A mounting plate is needed if the top of the partition must be fastened in the area of a stretch ceiling. It is better to plan it before installing the ceiling fabric. Then the slats or the top guide are attached to a rigid base, not to the decorative ceiling material.
What to do if the mounting plate was not installed in advance?
You should not try to attach the slats to the ceiling fabric, but look for an alternative scheme: a frame, wall mounting, a reinforced bottom base, or a technical solution through ceiling specialists. Sometimes the project has to be changed to avoid damaging the ceiling.
Can the slats be installed only between the floor and ceiling using a spacer?
This cannot be done with a stretch ceiling. The spacer load can deform or damage the fabric. The slats must be attached to rigid structural elements, not press against the soft ceiling plane.
What spacing between slats should be chosen?
For light zoning, choose a wider spacing; for partial privacy, a medium spacing; for an almost closed screen, a denser spacing. But the spacing must be coordinated with the slat width, room size, and purpose. In small rooms, too frequent slats can overload the interior.
Which STAVROS slats are suitable for zoning?
You can start with the section STAVROS slatted panels, then compare specific models: Slat panel PAN-001, Slatted panel PAN-003 и Slat panel PAN-007. The exact choice depends on dimensions, material, finish, and installation scheme.
Why is trim needed in a slat partition?
Trim helps finish the top, bottom, side junctions, guides, and conceal technical components. In a partition with a stretch ceiling, it is especially useful because it allows for a neater assembly without leaving visible fasteners.
Can a border or baseboard be used as a bottom base?
Yes, if the element's parameters suit the project. The bottom base helps conceal fasteners, create a straight line near the floor, and connect the slats with the rest of the finish. For this task, you can consider MLD-043 solid wood border, but before ordering, you need to check its dimensions and profile.
What to buy together with the slats?
In addition to the slats themselves, you may need trim, a bottom base, a top strip, fasteners, and materials for preparation and finishing. For selection, you can open Solid Wood Items и Mounting and finishing materials.
Is a slat partition suitable for a kitchen-living room?
Yes, this is one of the most successful scenarios. Slats help separate the kitchen from the relaxation area without completely blocking the light. With a stretch ceiling, you need to plan the top node in advance, especially if there are lights or utilities in the partition area.
Would such a partition be suitable for a hallway?
Yes. In a hallway, slats help conceal the entrance area while preserving light. It's better to use a medium or denser spacing, but don't forget about the passage width and structural stability. The bottom base is especially important here because the lower part of the partition is often in a high-traffic area.
Is it necessary to consult ceiling installers?
If the ceiling is already installed or the top node falls within the stretch ceiling area, coordination with ceiling installers is highly recommended. This helps avoid damage to the fabric, errors with the embedded element, and incorrect fastening.
How are ready-made elements better than random construction slats?
Ready-made interior elements are easier to match in appearance, profile, and compatibility with other trim. Random slats may require more adjustment, sanding, and finishing. For a partition in a residential interior, not only the cost of the part matters, but also the neat final appearance.
Conclusion: how to make a slatted partition without damaging the fabric
Slats for zoning a room with a stretch ceiling are not just a decorative idea, but a task with an important installation node. The stretch fabric cannot be used as a support. The top of the partition must be connected to an embedded element, frame, main ceiling, wall, or other rigid structure. The bottom is best finished with a guide, trim, border, or other neat base so that the slats stand straight and don't look random.
Before purchasing, you need to determine the location, fastening scheme, spacing between slats, degree of privacy, material, finish, and set of accompanying elements. Then you can select STAVROS slatted panelscompare PAN-001, PAN-003 and PAN-007, select Pogonazh iz massiva for guides and check Mounting and finishing materials.
A good partition doesn't start with trying to fix the slats "as it turns out", but with a well-thought-out system: the top doesn't load the canvas, the bottom is closed and stable, the pitch matches the task, the wood is connected to the interior, and all elements are selected in advance. Then the slatted partition doesn't damage the stretch ceiling, doesn't look like a temporary insert, and really helps to beautifully divide the room.