


Article Contents:
- What makes up the cost of slat finishing: the complete anatomy of the budget
- First component: the panels themselves
- Second component: additional elements
- Third component: moldings and cornices
- Fourth component: consumables
- Fifth component: installation cost
- Sixth component: delivery
- What affects the price of polyurethane moldings: breakdown by items
- First factor: polyurethane density
- Second factor: profile complexity
- Third factor: standard element length
- Fourth factor: presence of corner elements
- Fifth factor: surface for painting
- How to calculate a project by area, not by pieces: step-by-step methodology
- Step one: measurements and diagram
- Step two: panel area calculation
- Step three: linear meters of moldings calculation
- Step four: corner elements calculation
- Step five: consumables calculation
- Final calculation table
- Where hidden costs appear: risk map
- Risk one: uneven walls
- Risk two: non-standard angles
- Risk three: different material batches
- Risk four: forgotten zones
- Risk five: painting cost
- When moldings enhance the interior, and when they just increase the estimate
- When moldings work: five situations
- When moldings are unnecessary expenses
- Practical calculation tips: what they usually don't tell you
- Tip one: order samples before a large batch
- Tip two: calculate in one unit
- Tip three: reserve is not a luxury
- Tip four: molding to molding — one style
- Tip five: installation of slatted wall panels is done before moldings, always
- Tip six: calculate the cost per square meter of the finished wall, not individual items
- Slatted panels in specific rooms: what to calculate additionally
- Living room: accent wall and perimeter cornice
- Bedroom: headboard area and molding frame
- Hallway: lower zone and corridor rhythm
- Kitchen: only dining area, considering humidity
- Slatted panels with lighting: additional budget item
- How the price of slatted panels correlates with their value
- FAQ: questions about price and calculation
- About the Company STAVROS

The budget for a wall is a concept that deceptively seems simple. You bought panels, bought moldings, paid the master — that's the whole calculation. But that's exactly how situations arise when the estimate grows by one and a half times right during installation. When it turns out that additional elements were forgotten, that the molding doesn't align with the baseboard profile, that half as much adhesive was taken as needed, and delivery to Krasnoyarsk cost more than expected.
If you're currently thinking about buying slatted panels in Krasnoyarsk and adding polyurethane moldings to them — this article is written specifically for you. Not as an advertising catalog, but as an honest financial navigator: what to calculate, how to calculate, where money is lost and where, on the contrary, you can save without losing quality.
Let's go.


What makes up the cost of slatted finishing: the complete anatomy of the budget
The first and most common mistake in calculation is counting only the panels. The cost of slatted wall finishing is a system of six components. Missing any of them means getting a surprise at the end.


Component one: the panels themselves
slatted panels for walls— the main, but far from the only expense item. Their price is determined by four factors: material, format, finish, and manufacturer.
By material — three main categories:
-
MDF panels for painting — the most affordable option. A base of MDF with a density of 750–850 kg/m³ with a primed surface for painting. The price is an order of magnitude lower than solid wood, while the quality of the result with proper painting is excellent.
-
MDF with a finish coating (veneer, film, lacquer) — the mid-price segment. The coating is already applied at the factory and requires no additional painting.
-
Solid oak or ash — the top segment.Wooden slat panels— made of natural wood, they are 2–3 times more expensive than MDF counterparts, but they provide the living texture of the grain, which neither veneer nor film can reproduce.
By format — the length of the module affects the price. Long panels of 2700 and 3000 mm are more expensive to produce, but during installation they result in fewer transverse joints. For large surfaces, this is important both aesthetically and in terms of material consumption for trimming.
An important point for calculation: wall panel prices are always quoted per square meter or per piece of a specific format. Do not confuse these units. When converting to square meters, take the full area of the module (width × length), not just the 'usable' part — in a slatted panel, the usable area equals the total area.
Our factory also produces:


Component two: trim elements
Corner trims, end strips, starter and finishing profiles — these are what most people forget during the initial calculation. And they are precisely what determines the cleanliness of the final result.
Standard set of trim for one accent wall:
-
Corner trims — according to the number of external and internal corners that the panel field touches. Each corner — one trim or a pair (external + internal).
-
End strips — along the perimeter of the panel field that does not adjoin a molding or other architectural detail.
-
Cover strips — during installation in the area of door or window openings.
Trim elements account for 8–15% of the cost of the main panels. A small figure, but if it's not included in the estimate — a pause and an unplanned additional order will arise during installation.
Get Consultation
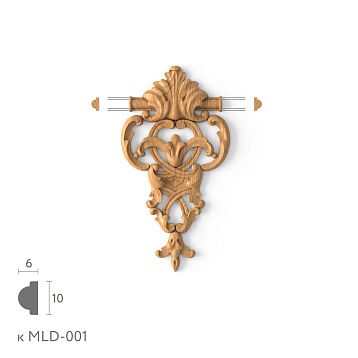
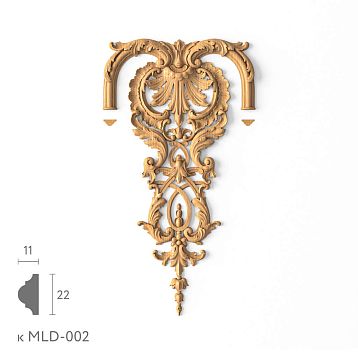
Component three: moldings and cornices
Moldings made of polyurethane— a separate budget item. Their cost is calculated in linear meters, so before purchasing you need to clearly understand: exactly where the molding goes, how many linear meters of each type, how many corner blocks or 45° cuts.
Typical areas for moldings in a project with slat panels:
-
Ceiling cornice along the perimeter of the room — perimeter length minus the width of openings
-
Waist molding at the border of the slatted panel and wall — length along the top edge of the panel field
-
Molding along the vertical borders of the panel field (if the panel does not cover the entire wall width)
-
Frame elements around niches or TV zone — perimeter of each frame
Ceiling molding made of polyurethane— the most substantial item in this section. On average, the perimeter of a 20 m² room is about 18–20 linear meters of cornice. For a 25 m² room — 20–22 linear meters.
Fourth component: consumables
This is an item rarely included in preliminary calculations — and then purchased additionally directly during installation.
Consumables include:
-
Mounting adhesive for moldings — calculate 1 tube per 8–10 linear meters of cornice with proper zigzag application
-
Finish putty for sealing molding joints — a small amount, but absolutely necessary
-
Fasteners for slatted panels — self-tapping screws or finishing nails, depending on the installation method
-
Primer for MDF for painting — if panels are to be painted
-
Paint — if panels and moldings are painted on-site
Consumables in total account for 5–10% of the cost of main materials. A small share, but in absolute terms — a noticeable amount for a large project.
Fifth component: installation cost
Installation of slatted panels and polyurethane decor — this is work that can be done independently.DIY Batten Panels— a quite realistic task with basic tools and care. However, if you hire professionals, the cost of work should be budgeted separately.
Typical rates (approximately, without reference to a specific market):
-
Installation of slatted panels — per square meter, including layout and additional elements
-
Installation of cornice and moldings — per linear meter, including corner trimming
-
Base preparation (if leveling is required) — separately
The cost of installation for a project in a living room with an area of 20 m² (one accent wall of 12–14 m² + perimeter moldings) typically amounts to 30–50% of the cost of the materials themselves. In Krasnoyarsk, rates may differ from those in Moscow or St. Petersburg in either direction.
Component six: delivery
The most unpredictable budget item when ordering from another city. Slatted panels are long, bulky cargo. Delivery by transport companies is calculated based on volumetric weight, and for a batch of panels for one room, the volumetric weight can be quite significant.
When planning your budget, request the delivery cost before finalizing the order — this will allow you to properly optimize the quantity of material ordered, taking logistics into account.
What affects the price of polyurethane moldings: a breakdown by items
buy polyurethane moldingcan be in a very wide price range. What lies behind this spread?
First factor: polyurethane density
A key technical parameter. Polyurethane moldings with a density of 80–120 kg/m³ are products with a rigid structure, clear profile edges, and stable geometry. Cheap products made of polyurethane with a density of 40–60 kg/m³ are soft, their edges are blurred, the profile deforms over time, and under mechanical stress — it dents without recovery.
The price difference between these categories is 30–50%. Saving on density results in replacing the decor after 3–4 years.
Factor two: profile complexity
A simple flat molding 20 mm wide is the most affordable. A medium-complexity stepped profile is more expensive. A rich classic profile with several reverse curves (cavetto, ogee, fillet) is the most expensive in this category. The complexity of the shape directly affects the cost of production tooling and the complexity of quality control.
When choosing a profile, you need to understand: the richer the profile, the more expressive the play of light and shadow — but also the higher the requirements for the quality of cutting and joining. A 45° miter cut for a complex profile requires an accurate miter saw and care.
Factor three: standard element length
The standard length of molding is 2000 mm. There are manufacturers offering elements 2500 and 3000 mm long. A longer element means fewer joints on the same wall length — a benefit both aesthetic and practical (less work on sealing joints). But long elements are more difficult to transport and require attention when packaging.
Factor four: availability of corner elements
Manufacturers that produce a complete system — straight molding elements plus 90° corner blocks — enable installation without miter cuts. This significantly simplifies the work and reduces the risk of unsightly joints. Corner blocks are priced separately — include them in the estimate according to the number of corners in the room.
Factor five: surface for painting
A quality polyurethane molding has a surface with minimal porosity — smooth, almost glossy. On such a surface, paint applies in one or two coats without priming. A cheap molding with a porous, rough surface will require primer, several coats of paint, and still will not give a perfect result.
How to calculate a project by area, not by pieces: a step-by-step methodology
Chaotic 'by eye' purchasing is a way to spend money twice. Proper calculation is done by area and linear meters, methodically, taking into account all items.
Step one: measurements and diagram
Before opening the catalog—grab a tape measure. Measure:
-
The length and height of each wall you plan to finish with slatted panels
-
The width and height of all door and window openings in these walls
-
The perimeter of the room for calculating the cornice
-
The height of the upper edge of the panel field if the panel is only in the lower zone
Draw a diagram on paper—at least a rough one. This will allow you to see the entire project as a whole, not in fragments.
Step two: calculating the panel area
Basic formula: area of the surface to be finished minus the area of openings.
Example: wall 4.0 m × 2.7 m = 10.8 m². Door opening in the wall 0.9 m × 2.1 m = 1.89 m². Net finishing area: 10.8 − 1.89 = 8.91 m².
Add a cutting allowance to this figure:
-
For a standard rectangular wall without complex sections — +10%
-
If there are non-standard openings, bevels, niches — +15%
-
For horizontal panel installation instead of vertical — +12%
In our example: 8.91 m² × 1.12 = ~10 m² to order.
Step three: calculating linear meters of moldings
Each zone is calculated separately:
Ceiling cornice: room perimeter minus door opening widths. Room 5.0 × 4.0 m: perimeter = (5.0 + 4.0) × 2 = 18.0 m. Door opening 0.9 m. Total cornice: 18.0 − 0.9 = 17.1 lm. Plus 5–8% allowance for corner cuts: ~18–18.5 lm.
Chair rail molding (if panels are only in the lower zone): length of all walls with panels along the top edge of the panel field. Plus 5% allowance.
Vertical moldings (along the side edges of the panel field): panel field height × number of vertical boundaries.
Frame moldings (niches, TV zones): perimeter of each frame. Frame 1.5 × 0.9 m: perimeter = (1.5 + 0.9) × 2 = 4.8 linear meters.
Step four: calculation of corner elements
Count the room corners affected by the molding. Standard rectangular room: 4 internal corners for the ceiling cornice. If using corner blocks — 4 pieces. If cutting at 45° — not needed, but a miter saw is required.
For chair rail molding and vertical elements: according to the number of external and internal corners in each zone.
Step five: calculation of consumables
Based on the total linear meters of moldings:
-
Mounting adhesive: 1 tube (300 ml) per 8–10 linear meters of cornice
-
Acrylic putty: small volume — 100–200 g for all joints
-
Paint: depends on the area and type of molding. For a ceiling cornice 60 mm high over 18 linear meters, paint consumption is minimal
For slatted panels for painting:
-
Primer: 1 liter per 8–10 m² of panel surface
-
Paint: according to the paint manufacturer's consumption rate for your MDF type, typically 100–150 ml/m² per coat
Final calculation table
| Position | Unit | Quantity | Note |
|---|---|---|---|
| Slatted panels | m² | area + 10–15% | With allowance for trimming |
| Corner overlays | pcs | by number of corners | External + internal |
| End trims | p.m. | around the perimeter of the field | Where there is no molding |
| Ceiling cornice | p.m. | perimeter − openings + 8% | Polyurethane |
| Waist molding | p.m. | along the top edge of the field + 5% | Polyurethane |
| Corner blocks | pcs | by the number of corners | Or cutting at 45° |
| Construction adhesive | tube | 1 per 8–10 l.m. of molding | For stucco decoration |
| Fasteners for panels | pack. | according to instructions | Screws or nails |
Where hidden costs appear: risk map
Hidden costs are what are not visible at the time of purchase but are discovered during installation. Knowing this map allows you to allocate a reserve in advance.
First risk: uneven walls
If the wall deviation exceeds 5 mm over 2 meters, panels cannot be glued directly. A frame is needed. The frame includes profiles, dowels, screws, a level, and additional time. When mounting on a frame, the usable area of the room is reduced by the thickness of the structure (usually 25–40 mm).
If the wall is critically uneven — you need to either level it (plaster, drywall) or include frame mounting in the estimate.Installation of batten panelsFrame mounting is 30–50% more expensive than direct mounting in terms of labor costs.
Second risk: non-standard angles
In most apartments, corners are not perfectly straight — a deviation of 2–5° from 90° is normal. When installing slatted panels and moldings, this means that a standard 45° cut does not create a perfect joint. Adjustment, additional cuts, and putty are needed.
Good corner blocks for polyurethane moldings partially solve this problem — they hide small angle inaccuracies. But with a deviation greater than 5°, additional preparation is required.
Third risk: different material batches
If you order the main batch of panels and then buy more a month later — there is a risk of color mismatch. Even within the same article, different production batches may have slight shade variations. For MDF to be painted, this is not critical — you paint it the same color. For veneered or laminated panels — it may be noticeable.
The solution is simple: order the entire volume in one batch with a 10–15% surplus, not in several stages.
Fourth risk: forgotten areas
During initial calculation, the following are often overlooked:
-
Window reveals — if the panel runs up to the window, the reveals also need to be finished.
-
Niche for switches and sockets — requires cutting panels, which increases waste.
-
Lower wall zone between the skirting board and the start of the panel field — requires a starter profile or decorative strip.
Slopes made of slatted panels— this is a separate, very effective technique that turns a window into an architectural element. But when calculating the area, they need to be accounted for separately.
Risk five: painting cost
If you choosepaintable slatted wall panels— factor in the costs for primer, paint, and painting labor. For DIY painting — only materials. When hiring a painter — painting a slatted surface is more expensive than painting a smooth wall: the surface is complex, the slats and gaps between them require thorough painting.
Professional advice: if the paint is chosen before installation, you can paint the panels before installing them — this significantly speeds up the work and improves the coating quality in hard-to-reach places.
When moldings enhance the interior, and when they just increase the estimate
This is a question rarely asked out loud, but it arises for everyone who sees the cost of a full set of moldings. Let's break it down honestly.
When moldings work: five situations
Situation one: slatted wall-to-ceiling transition. A slatted panel running from floor to ceiling meets the ceiling surface. Without a cornice, this transition looks unfinished: the panel end, the gap, the joint line—all are visible.Ceiling molding made of polyurethaneThis is not decoration—it is a necessary structural finishing element.
Situation two: top edge of a partial panel field. If the panel only goes up to a height of 100–130 cm, its top edge must be finished with molding. Without it, there is an exposed MDF end that absorbs moisture and dust, warps, and looks unfinished.
Situation three: structuring long walls. On a wall longer than 4 meters, a monotonous slatted rhythm begins to 'swim'—the eye doesn't know where to stop. Vertical moldings every 1.5–2 meters create an architectural division that organizes the space.
Situation four: framing accent zones.TV area with slatted panelsor a bedroom headboard with perimeter molding—this is the difference between 'finishing' and a 'design solution.' The frame turns a wall fragment into an architectural object.
Situation five: stylistic unity. In modern classic or neoclassical styles, slatted panels without a ceiling cornice look unfinished—the style dictates the presence of horizontal relief at the ceiling.
When moldings are unnecessary expenses
In minimalism with slatted panels matching the wall color. If the entire surface is a unified color field, and the panels 'dissolve' into the wall, additional molding disrupts the minimalist concept. Here, a direct joint with the ceiling and high-quality end finishing are sufficient.
With low ceilings (up to 2.5 m). A ceiling cornice reduces visual height. With a 2.4 m ceiling, an 80 mm high cornice reduces the perceived height to 2.3 m. In such rooms, it's better to use a thin, neutral molding of 20–30 mm or do without it altogether.
On a limited budget with one accent element. If the budget allows for slatted panels or moldings — choose panels. They create a greater visual impact for the same cost. Moldings are added next in line.
Practical calculation tips: what they usually don't tell you
Fifty years in the profession give one unconditional advantage — understanding where money and time are lost. Here's the essence.
First tip: order samples before a large batch
Slatted panels on a monitor and slatted panels in your hands are two different materials. A monitor doesn't convey texture, exact shade, weight, or density. A sample sized 30×30 cm costs little or is provided free. But it allows you to:
-
Verify the exact color in your lighting
-
Assess surface quality tactilely
-
Check the joining of two samples — continuity of the slat rhythm
One sample saves money on returning an unsuitable batch.
Second tip: calculate in one unit
Slatted panels — in square meters. Moldings — in linear meters. No 'approximately' or 'by eye'. A table with specific numbers for each item is not bureaucracy. It's a way to avoid overpaying or underbuying.
Third tip: having a surplus is not a luxury
A standard surplus of 10–15% for slatted panels is not excess. It's insurance against:
-
A defective item in the batch
-
Cutting errors
-
The need to buy more from another batch (with the risk of color mismatch)
-
Future minor repairs
Store leftover panels horizontally at room temperature — they'll come in handy.
Fourth tip: molding to molding — one style
Types of slat panelsYou can combine — MDF and solid wood in different zones. Moldings — you cannot mix styles. A flat modern molding and a classic stepped cornice in the same room create a stylistic conflict. Choose one profile for the ceiling cornice, one — for the dado molding. The scale can be different, the style — unified.
Tip five:Installation of slatted wall panelsis done before moldings, always
Sequence determines the quality of the final result. Panels are installed completely—with corner trims and extensions. Then decorative molding is installed: it covers the panel ends and creates clean lines. The reverse sequence forces you to trim already installed molding or put up with unsightly gaps.
Tip six: calculate the cost per square meter of the finished wall, not individual items
Psychologically, it's easier to estimate costs in the unit 'rubles per square meter of the finished accent wall.' This figure includes everything: panels, moldings, extensions, consumables, delivery, labor. This provides an honest understanding of the cost and allows comparison with alternatives—painting, wallpaper, tile.
Compared to most alternatives, slatted panels provide an incomparably higher visual result at a quite comparable cost per square meter.
Slatted panels in specific rooms: what to consider additionally
Living room: accent wall and perimeter cornice
Standard project for a living room in Krasnoyarsk: one accent wall behind the sofa or behind the TV. Wall area 4.0 × 2.7 m = 10.8 m² minus an opening or without openings. Plus a ceiling cornice around the room perimeter. Plus a frame molding around the TV zone, if provided.
Slatted panels in the living room interior— this is an investment that pays off visually many times over. One properly designed wall changes the perception of the entire room.
Bedroom: headboard area and molding frame
For a bedroom, standard calculation: panel on the wall behind the headboard — width of the bed plus 30–50 cm on each side, height from floor to ceiling or to a molding belt at 150–180 cm. Molding around the perimeter of the panel field — as a frame. Ceiling cornice throughout the bedroom.
slatted panels in the bedroomin wooden execution — from solid wood with light oil — provide that warm natural background, which cannot be achieved with paint or wallpaper.
Hallway: lower zone and corridor rhythm
Slatted panels in the hallway interiorin the lower zone — from floor to height 100–120 cm — protect walls mechanically and organize space visually. Molding belt along the upper edge. Calculation: sum up the corridor perimeter, subtract door openings, calculate the area of the lower zone.
Kitchen: only dining area, considering humidity
In the kitchen, calculation requires consideration of zoning: panels only outside the zone of direct steam exposure.Slatted panels in the kitchenin the dining area — this is the wall behind the table or opposite the kitchen set. Here both MDF with good lacquer coating and solid wood under lacquer are possible — with the correct choice of coating.
Slatted panels with lighting: additional budget item
If the project provides forSlatted panels with lighting— is a separate line item in the estimate. Backlighting requires:
-
Installation on a frame with a 20–30 mm air gap (instead of direct mounting)
-
LED strips of suitable power and color temperature
-
Power supply and dimmer (optional)
-
Cable channel or concealed wiring
The cost of backlighting varies depending on the length of the illuminated perimeter and the choice of LED system. Include this as a separate line item when planning.
How the price of slatted panels relates to their value
Ask yourself: what's the alternative? Wallpaper on the same wall is cheaper, but in 3–5 years it bubbles, fades, and can't be repaired locally. Painting is the simplest solution, but lacks texture and architectural character. Decorative plaster is interesting, but once you choose a texture, it's forever.
slatted wall panels for interior finishing— is a long-term solution. Properly installed panels made of quality material last 15–20 years without losing their appearance. Solid oak lasts even longer, with the possibility of surface restoration.
The cost per square meter of a properly finished slatted wall is not an expense for renovation. It's an investment in the quality of the space where you spend most of your life.
FAQ: Questions about price and calculation
How to calculate the number of slatted panels for one wall?
Wall area minus openings area, plus 10–15% margin. Divide by the area of one module (width × length) and round up to the nearest whole number of modules.
How many linear meters of molding are needed for a standard room?
For ceiling cornice: room perimeter minus door opening widths plus 8% margin. For a 4×5 m room — about 18 linear meters of cornice.
Buy slatted panels in Krasnoyarsk or order with delivery — which is more cost-effective?
Depends on the range of local suppliers. If the local market lacks the desired material, color, or format — ordering with delivery from the manufacturer with full packaging is often more cost-effective than compromising on material. Request delivery cost in advance.
How to install slatted panels— with adhesive or on a frame?
Adhesive + finishing fasteners — for even walls with deviations up to 5 mm. Metal profile frame — for deviations over 5 mm, when installing with lighting, or when needing to hide utilities.
What is a normal margin for trimming?
10% — for simple rectangular walls without openings. 15% — when there are openings, niches, non-standard corners. 20% — for horizontal installation or complex layout solutions.
Can reeded panels and moldings be installed independently?
Yes.DIY slatted wall panels— this is a realistic option with basic tools: level, tape measure, handsaw or miter saw, stapler or screwdriver. The only critical point is precise 45° miter cuts for moldings: a miter saw is needed for those.
How to avoid molding joints in the middle of a long wall?
Take elements of maximum length — 2500 or 3000 mm. For a wall 4 meters long, two elements with one joint closer to the corner, where it is less noticeable, are sufficient.
slatted modular wall panel— what is its advantage over linear slats?
A modular panel is a ready-to-install block with precisely maintained slat spacing. Linear slats on a backing install faster and provide a continuous, seamless rhythm when joined. Both options are correct — the choice depends on the desired result and room format.
About the company STAVROS
Calculation is ready. Items are determined. All that remains is to find a supplier who will provide quality material with precise technical specifications, proper packaging for delivery to Krasnoyarsk, and professional consultation on all project questions.
STAVROS — a Russian manufacturer of architectural materials for interior finishing. The STAVROS catalog presents a complete assortment for implementing projects of any complexity:
-
Buy slatted panels for walls— MDF for painting, MDF with coating, solid oak, WPC, in formats from 2400 to 3000 mm, wide selection of colors and textures
-
Moldings made of polyurethane— ceiling cornices, waist moldings, baseboards, corner elements — profiles for any style from minimalism to classic
-
Molded decor and overlays— frame systems, rosettes, cartouches for representative projects
-
Pogonazh iz massiva— wooden additional elements and profiles for finishing
STAVROS delivers to Krasnoyarsk and all regions of Siberia via transport companies with professional packaging. Consultation on calculating material quantity, selecting molding profiles, and checking item compatibility — free with order placement.
A budget calculated accurately the first time — that's the result STAVROS delivers.