Article Contents:
- Why an empty ceiling impoverishes even a good interior
- The floor is finished. The walls too. The ceiling — not.
- The chandelier hangs by itself
- Does the height go away or stay?
- Stretch ceiling, drywall, or stucco: when is each appropriate
- When a stretch ceiling is justified
- When drywall is justified
- When stucco instead of a complex ceiling is the best solution
- Ceiling rosette: the first step to an expensive ceiling
- How to choose a ceiling rosette: specific parameters
- Installing a rosette: simply about the main thing
- Rosette without a chandelier: ceiling medallion as a standalone accent
- Ceiling stucco: how to assemble the top of the room into a single system
- What a cornice around the perimeter gives
- Ceiling contour: how to create a "frame" on the ceiling
- How to calculate ceiling molding
- Polyurethane ceiling molding: width as a key parameter
- Polyurethane moldings on the ceiling: more than just a perimeter
- Cornice in the corner: basic level
- Ceiling contour: second level
- Wall molding and ceiling cornice: how they work together
- Ceiling moldings for different room types
- Ceiling decor without drywall: specific options
- Decorative stucco: when the ceiling needs more than just the center
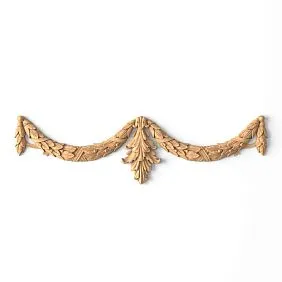
- Ceiling garlands and friezes
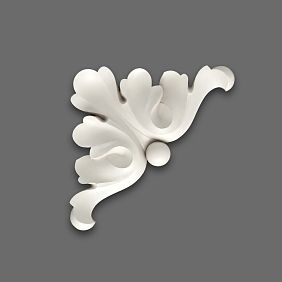
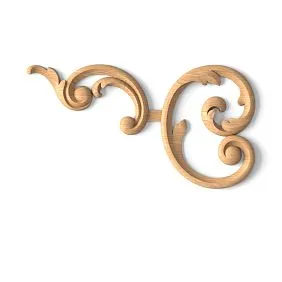
- Corner rosettes and cartouches
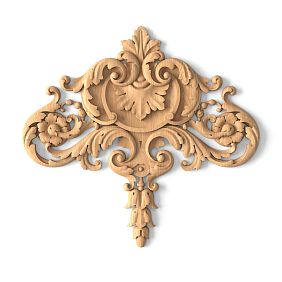
- Ceiling bas-reliefs in the central zone
- Stucco decor and decorative stucco: what's the difference
- Color and painting: how a single color creates an 'expensive' effect
- White on white: 'quiet' architecture
- Colored ceiling with white moldings
- Tinting with patina
- Stucco painting technology
- Ceiling decor installation: detailed instructions
- Surface Preparation
- Marking
- Adhesive and installation
- Joints and corners
- Painting — the final step
- What the finished system looks like: visual description of the result
- Three ready-made purchase scenarios
- Scenario 1: "The chandelier hangs alone"
- Scenario 2: "I want a beautiful ceiling without a stretch ceiling"
- Scenario 3: "The room is good, but the top is empty"
- About the company
- Frequently Asked Questions
Imagine a room. Beautiful walls — with moldings or just well-painted. Expressive furniture. Curtains with the right drape. A chandelier with character. And the ceiling. Just white. Just flat. Just nothing.
It is precisely this "just nothing" at the top that is the detail which subtly but noticeably lowers the level of the entire interior. The ceiling occupies a huge area. It is always in view — not directly, but peripherally. And when it is empty, at some point the gaze hits this white plane and reads: "they haven't finished here yet."
What usually happens next? A person thinks: "I need to install a stretch ceiling." Or: "I can put drywall with backlighting." And immediately — cost, deadlines, crew, dust, loss of height, a month of life in renovation.
But between "empty white ceiling" and "complex multi-level structure" there is a third path. It is called Ceiling molding. And it is much closer, simpler, and cheaper than it seems.
A ceiling can look expensive without stretch structures and drywall: Ceiling rosette gathers the chandelier, Moldings made of polyurethane set the line, Ceiling molding frames the top of the room, and calm painting turns a simple white ceiling into part of the interior architecture.
This is what this article is about. About how to make the ceiling look more expensive without complex renovations, without loss of height, without dust and crews. And about what exactly you need Buy molding, rosette, and moldings so that the top of the room stops being just white.


Why an empty ceiling impoverishes even a good interior
Let's start with an honest conversation about what happens to an interior when the ceiling remains unfinished.
The gaze in a room moves along a closed route: from wall to wall, from floor to furniture, from lights to details. The ceiling is the upper boundary of this route. If it is not designed, the gaze finds no stopping point and simply 'exits' the room through the top. The interior loses volume, integrity, and a sense of completeness.
This is not a subjective feeling — it's a visual mechanism. Architects and designers have long known: the three planes of a room (floor, walls, ceiling) must work as a single system. When one of them does not participate in this system, the balance is disrupted.


The floor is finished. The walls too. The ceiling — not.
This is the most common situation. Parquet or expensive flooring. Walls with quality paint, possibly with moldings or wallpaper. Furniture in place. And the ceiling — white, bare, flat. And not bad. Just absent.
Ceiling molding In such a situation, it works as a completion of the system. It does not add 'decoration for decoration's sake' — it introduces the ceiling into an architectural conversation with the other planes.
Our factory also produces:


The chandelier hangs by itself
This is a very specific situation within the overall problem. There is a chandelier — beautiful, expensive, well-chosen. And it simply hangs from the ceiling. One point in the void.
ceiling rose under the chandelier — this is precisely the element that radically changes the situation. It does not completely redo the ceiling. It simply gives the chandelier a frame. And it ceases to hang in the void — it becomes the center of an architecturally designed ceiling.
Get Consultation
Does the height go away or stay?
This is a fundamental question for most apartments. A stretch ceiling and drywall always take away 7–15 centimeters of height. With a standard ceiling height of 2.5–2.7 meters, this is significant.
Ceiling with molding does not reduce the height. The molding around the perimeter has a thickness of 15–30 mm — this is insignificant. The rosette is flat, flush with the surface. Decorative elements are also of negligible thickness. The entire architecture is created without losing centimeters.
Stretch ceiling, drywall, or stucco molding: when each is appropriate
Before talking about stucco molding as a solution, let's honestly consider the competition. When is a stretch ceiling or drywall really needed — and when is stucco molding the better choice?
When a stretch ceiling is justified
-
The ceiling has serious defects: cracks, unevenness, signs of leaks.
-
Hidden perimeter lighting or spotlights are needed.
-
Full concealment of utilities is required: pipes, ventilation, cables.
-
Ceiling height is from 3 meters — losing 10 cm is not critical.
When drywall is justified
-
Complex geometry is needed: arches, niches, multi-level structures.
-
Sound or thermal insulation through the ceiling is required.
-
Ceiling with very serious defects that cannot be fixed with putty.
When molding instead of a complex ceiling is the best solution
-
Ceiling is flat or has minor defects that can be fixed with putty.
-
Standard ceiling height (2.4–2.8 m) — every centimeter counts.
-
Want an expensive effect without renovation and dirt.
-
The budget is limited, but the result needs to be serious.
-
Interior style — classic, neoclassical, modern classic, eclectic.
-
No desire to live in renovation for several weeks.
| Parameter | Stretch ceiling | Drywall | Molding |
|---|---|---|---|
| Loss of height | 7–15 cm | 10–20 cm | 1.5–3 cm |
| Installation time | 1–2 days | Several weeks | Several hours |
| Complexity | Requires craftsmen | Requires craftsmen | Can be done independently |
| Cost | Medium/high | High | Low/medium |
| Effect | Functional | Constructive | Architectural |
Ceiling rosette: the first step to an expensive ceiling
If you rank ceiling decor elements by return on investment, the rosette comes first. It's one element. One installation. One decision — and the center of the ceiling instantly gains architectural significance.
Why does the rosette change the impression so much? Because it turns a technical point — the wire outlet location — into a decorative center. It says: "Here is the center. This is thought out." And the chandelier, which previously just hung, becomes the final element of a well-designed system.
How to choose a ceiling rosette: specific parameters
Chandelier diameter and rosette diameter. The rosette should be proportionate to the upper part of the chandelier — its shade, dome, or basket. If the chandelier is compact with a small upper element — a rosette of 200–300 mm. If the chandelier is large with a wide upper disc or basket — a rosette from 380–450 mm. A rosette smaller than the upper part of the chandelier looks "sunken" and loses its purpose. A rosette significantly larger looks like an independent element competing with the chandelier.
Ceiling height. For ceiling heights up to 2.6 m — a flat rosette with low relief (profile height 10–20 mm). For heights from 2.8 m — you can choose a more voluminous one with a more pronounced ornament. For heights from 3.2 m — a wide, large rosette with rich relief looks organic.
Ornament style. Geometric — for modern classic and neoclassical. Floral (leaves, flowers, scrolls) — for classic and historical styles. Minimalist with light relief — for a calm modern interior.
Color. In the vast majority of cases — matching the ceiling color. A white rosette on a white ceiling: the relief is read through shadow. This is "quiet" architecture — exactly what is needed for a calm, expensive effect. A contrasting rosette is a more aggressive solution, requiring confidence in style.
Installing a rosette: the main points simply
polyurethane rosette is mounted with specialized adhesive. The hole in the center aligns with the wire outlet point. The rosette is pressed against the ceiling, held until the adhesive sets, the perimeter joint is filled with acrylic putty, and painted.
The entire process takes a few hours — including the adhesive drying time. No complex tools, no craftsmen, no dust.
Rosette without a chandelier: ceiling medallion as a standalone accent
A rosette does not necessarily require a chandelier. In a room with spotlights or floor lamps as the main light source, a polyurethane ceiling medallion works as a decorative center — without a functional task, but with a strong architectural effect.
A ceiling center with a rosette is perceived as organized, well-thought-out — even without a chandelier. This is an important nuance for modern interiors with accent lighting.
Ceiling molding: how to assemble the top of the room into a unified system
The rosette works as the center. Ceiling molding — like the perimeter and the contour. Together they create a complete ceiling system — with a center, a frame, and a connection to the walls.
The main element of ceiling stucco molding is the perimeter cornice. This is an angular molding that is installed in the corner between the wall and the ceiling. It is what creates the "top frame" of the room.
What the perimeter cornice provides
Separates the wall and ceiling. A bare corner between the wall and ceiling is geometrically rigid and visually poor. The cornice softens this corner and creates a decorative transition. The wall now "ends" correctly — not abruptly, but with a finish.
Sets the horizontal line. The perimeter cornice is a strong horizontal line that "lowers" the ceiling to the right level and structures the upper tier of the room.
Supports curtains and the curtain rod. If curtains are mounted high (almost under the ceiling), the molding above the curtain rod visually connects the textile to the ceiling — and the curtains look like part of the architecture, not separate fabric.
Creates a sense of architectural completeness. A room with a perimeter cornice looks different than one without — even if this is the only change. The eye finds the top line and "reads" it as a finish.
Ceiling contour: how to create a "frame" on the ceiling
The next level after the cornice is the ceiling contour. This is a rectangular molding located on the ceiling with an offset from the cornice. Inside the contour is a rosette and chandelier. Outside is the space up to the cornice.
The contour on the ceiling creates a "frame" around the central area. This is a technique characteristic of classic interiors — but it works excellently in modern classic as well.
Indentation of the contour from the cornice: 30–60 cm. The contour profile is thinner than the cornice. For a 70 mm cornice — a contour of 30–40 mm.
This system of "cornice + contour + rosette" is a full-fledged ceiling architecture without a single stretch structure.
How to calculate ceiling molding
For a room 4 × 5.5 meters:
-
Perimeter = (4 + 5.5) × 2 = 19 meters.
-
15% margin = ~22 meters of cornice.
-
Corner inserts: 4 internal corners = 4 blocks (or cutting at 45°).
-
Ceiling contour (if needed): indentation of 50 cm from walls → (4 − 1 + 5.5 − 1) × 2 = 15 meters of molding.
Total for the basic system: ~22 meters of cornice + 4 corner elements + rosette + glue.
Buy ceiling stucco molding Need with a margin — and immediately with corner inserts. Ordering separately, as a rule, costs time and extra delivery expenses.
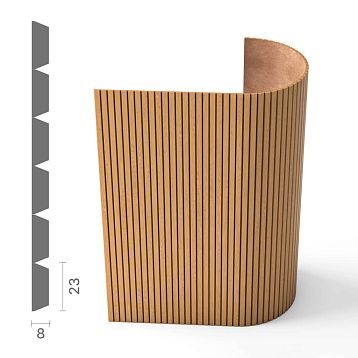
Ceiling molding made of polyurethane: width as a key parameter
Ceiling molding made of polyurethane is chosen primarily by width — based on ceiling height.
| Ceiling Height | Recommended molding width | Character |
|---|---|---|
| Up to 2.5 m | 40–55 mm | Delicate, light |
| 2.5–2.8 m | 55–80 mm | Standard |
| 2.8–3.2 m | 80–110 mm | Expressive |
| Above 3.2 m | From 110 mm | Grand |
A cornice that is too wide on a low ceiling feels oppressive. One that is too narrow on a high ceiling gets lost. Proportion is the key to the right result.
Polyurethane moldings on the ceiling: more than just a perimeter
Moldings made of polyurethane are traditionally associated with wall decor. But in a ceiling system, they work on several levels — and each one is important.
Cornice in the corner: the base level
The first and most obvious level: the corner molding (cornice) in the angle between the wall and ceiling. We discussed this above. It is the foundation of the entire system.
Ceiling contour: the second level
A flat molding located on the ceiling — a contour around the central zone. It is installed not in the corner, but directly on the ceiling plane. This is technically simpler than a corner cornice, but requires precise marking and straight lines.
Wall molding and ceiling cornice: how they work together
If there are molding frames on the walls, they should be stylistically compatible with the ceiling cornice. Not necessarily the same profile, but the same stylistic family: width, depth of relief, character of ornament.
When wall Buy polyurethane moldings from the same group as the ceiling cornice — the wall and ceiling system reads as an architectural whole. This is that very feeling of an "expensive, well-thought-out interior."
Ceiling moldings for different types of rooms
Living room. Cornice around the perimeter + rosette + ceiling contour if necessary. This is a standard system for a living room with a chandelier.
Bedroom. Delicate cornice + small rosette. In the bedroom, the quietness of decor is important — wide moldings and large rosettes can create a "ceremonial" feeling that does not match the logic of the space.
Study. Medium cornice, accent rosette, ceiling contour possible. A study with a ceiling stucco system creates a sense of authority and seriousness.
Hall and entryway. Neat cornice and small rosette. Even in the corridor, these elements work — they create "completeness" right at the entrance.
Commercial spaces: restaurant, salon, showroom. buy polyurethane moldings for a commercial interior means creating an expensive backdrop that clients photograph and recommend.
Ceiling decor without drywall: specific options
This is one of the key search queries, behind which lies a very clear pain: a person wants a beautiful ceiling but doesn't want renovations with drywall. What exactly can be done?
Option A: minimal. Rosette + painting. One element that changes the feel of the center. For a small room or for someone who wants to start cautiously.
Option B: basic. Cornice around the perimeter + rosette + painting. A full ceiling system without extra elements. Works in most rooms.
Option C: full. Cornice + ceiling contour + rosette + decorative accents on the ceiling if needed + painting. This is a formal ceiling system — for living rooms, halls, high ceilings.
None of these options require drywall, stretch ceiling construction, a team of workers, or lengthy renovations.
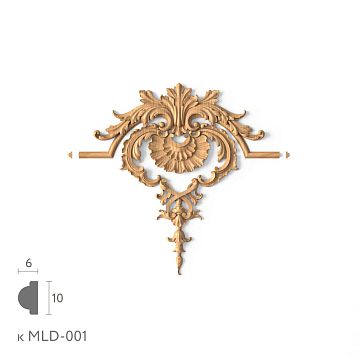
Decorative molding: when the ceiling needs more than just a center
Decorative stucco on the ceiling — these are elements added beyond the cornice and rosette. When are they needed?
When the room is large — for example, a living room of 25–30 sq. m. When the ceiling is high — from 3 meters. When the interior is formal and architectural richness is desired. When there is already a cornice and rosette, but between them there is a void that 'breaks' the system.
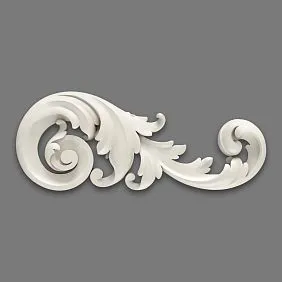
Ceiling garlands and friezes
A garland is a decorative element that is mounted along the ceiling contour or along the cornice. Leaf ornament, geometric frieze, ribbon decor. It fills the space between the cornice and the contour, making the transition from the perimeter to the center more saturated.
Corner rosettes and cartouches
Corner decorative elements in the four corners of the ceiling contour are a technique characteristic of historical interiors. In modern classics, it works more delicately: small corner overlays on the contour create "points" in the system.
Ceiling bas-reliefs in the central zone
If the ceiling is very high and the rosette in the center seems lonely, the space between the contour and the rosette can be filled with decorative elements: four symmetrical accents at the corners of the inner contour or four elements at the centers of its sides.
buy decorative moldings for the ceiling, it is needed after the basic system (cornice + rosette) is ready. Otherwise, it is difficult to visualize exactly where additional accents are needed.
Stucco decor and decorative stucco molding: what is the difference
Relief Decoration and decorative stucco molding are close but not identical concepts. Decorative stucco molding is a broader concept: includes cornices, moldings, rosettes, overlay elements. Stucco decor is specific overlay elements: medallions, cartouches, bas-reliefs, ornamental inserts.
For the ceiling system:
-
Cornice = ceiling stucco molding (linear element).
-
Rosette = ceiling stucco molding (central element).
-
Corner overlays, friezes, bas-reliefs on the ceiling = stucco decor.
Buy Molded Decoration For the ceiling — means adding a system of point accents that make the ceiling unique.
Color and painting: how a single color creates an 'expensive' effect
This is the final but very important element of the system. Ceiling stucco and moldings can be perfectly installed — but if the color is not thought out, the effect will be weaker.
White on white: 'quiet' architecture
The safest and most common option: all elements match the ceiling color — white or light cream. The relief is visible only through shadow. This is 'quiet' architecture that works in most interiors.
It is this principle that gives the feeling of 'expensive but not loud'. The eye sees the structure — cornice, rosette, outline — but they do not distract or compete with the rest of the interior.
Colored ceiling with white molding
A bolder option. The ceiling is painted in a rich tone — deep blue, soft green, warm terracotta — while the moldings and rosette remain white. The contrast effect makes the ceiling the main accent of the room.
This solution requires confidence in the color scheme. But when it works, the result is very expressive.
Toning with patina
A classic technique for historical styles: stucco is painted with a light tint — cream, ivory, warm white. The ceiling is a slightly cooler white. A subtle contrast creates depth that is associated with old interiors.
Stucco painting technology
-
After installation and puttying of joints — apply primer to the polyurethane. This improves paint adhesion.
-
The first coat of paint is thin, penetrating. Use a brush to fill all the details of the relief.
-
The second coat is thicker. Use a brush or a small velour roller.
-
If necessary, a third coat to even out the tone.
Water-based acrylic paint is the optimal choice. It adheres well to polyurethane, does not yellow, and is easy to refresh when needed.
Installation of ceiling decor: detailed instructions
Many people are afraid of installing ceiling decor. It seems that working with the ceiling is more difficult than with the wall. In practice, there is no fundamental difference. It is slightly less convenient physically, but technically not more difficult.
Surface preparation
The ceiling in the area where the cornice is installed must be clean — free of dust, blistering paint, and oil stains. If the ceiling was painted a long time ago, check the strength of the top layer: it should not peel off. Prime the surface.
Marking
Before installation, apply clear lines to the ceiling and wall (or only to the ceiling for the contour). The cornice must be strictly horizontal — check with a level. For the ceiling contour — strictly rectangular. The diagonals of the rectangle must be equal.
Adhesive and installation
Apply glue to the back of the molding in a zigzag or along the perimeter. Press the element against the surface and hold for 30–60 seconds (depends on the glue). After that, you can move on. For long elements (2-meter cornice) — use additional fixation: painter's tape or temporary support props.
Joints and corners
Joints between cornice sections — on straight sections, make butt joints at 90° or at a slight overlap angle. After the glue dries, fill the joints with acrylic putty. Corners — use corner blocks or cut at 45° on a miter box.
The rosette is mounted in the center of the ceiling. Determine the center: stretch two cords along the diagonals of the ceiling — the intersection point is the center.
Painting — the final step
All stucco is painted after installation and puttying. In a single color with the ceiling or in a selected shade. One coat of primer, two coats of paint — this is enough for an even, dense coating.
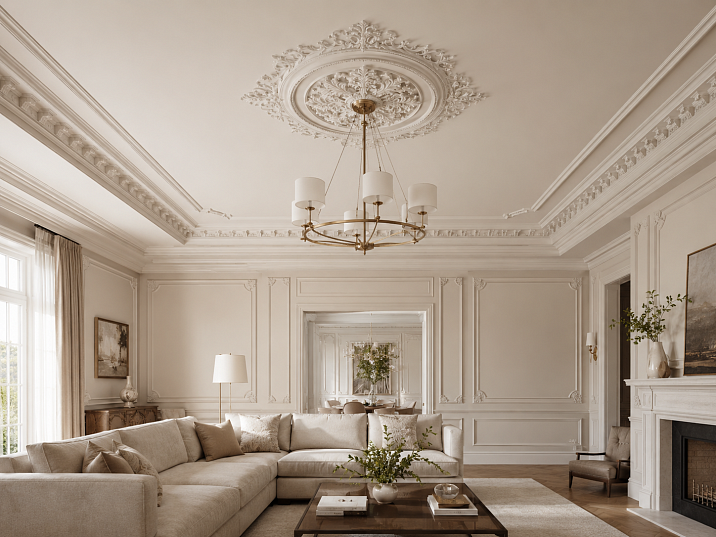
What the finished system looks like: visual description of the result
Imagine the room after everything is done.
You enter. Your gaze rises to the ceiling.
Along the perimeter — a neat horizontal line of the cornice. It softly marks the boundary between the wall and the ceiling. It doesn't shout. It's just there — and makes the top of the room complete.
In the center — a rosette around the chandelier. Together, the rosette and chandelier form the center. Not two separate details, but one system: a light fixture in an architectural frame.
If there is a ceiling contour — it creates a rectangular "frame" around the central zone. Outside the contour — a cornice. Inside — a rosette. The ceiling gains structure, rhythm, scale.
Everything is painted in a single white color. The relief is visible through shadow. This is not "decoration," this is architecture.
And most importantly: the ceiling is now part of the room — not just a plane above your head.
Three ready-made purchase scenarios
Scenario 1: "The chandelier hangs alone"
The fastest and most straightforward start.
What to buy:
-
Ceiling rosette — diameter for a specific chandelier.
-
Mounting adhesive.
-
Acrylic paint.
Installation time: a few hours.
Result: the center of the ceiling is finished. The chandelier has become part of the system, not just a light fixture.
Scenario 2: "I want a beautiful ceiling without a stretch ceiling"
A full-fledged system without complex renovations.
What to buy:
-
Ceiling molding — a cornice around the perimeter with corner inserts.
-
Ceiling moldings — for the contour (optional).
-
Construction adhesive, putty, paint.
Installation time: one to two days.
Result: a full-fledged ceiling architecture. A ceiling with stucco — without a single stretch structure.
Scenario 3: "The room is good, but the top is empty"
For those who want maximum results.
What to buy:
-
Ceiling Molding Purchase — a cornice and a ceiling contour.
-
Moldings made of polyurethane — if the walls also need to be connected to the ceiling.
-
Relief Decoration — corner accents on the contour.
-
Rosette — large, for a chandelier.
-
Glue, putty, paint.
Result: the ceiling as an architectural element of the interior. Buy moldings — the entire set at once means getting a stylistically unified system.
About the Company
STAVROS — Russian supplier of polyurethane stucco decor. STAVROS company offers a full range for ceiling decor without complex repairs: Ceiling molding — cornices and moldings for the perimeter, ceiling rosettes of various diameters and ornaments, Moldings made of polyurethane for ceiling contours and wall systems, Decorative stucco и Relief Decoration for accent zones.
All STAVROS products are made of solid, high-density extruded polyurethane. The material is moisture-resistant, does not deform with temperature changes, is easy to install with glue, and paints well with acrylic paint. Buy ceiling molding At STAVROS means getting professional advice on selecting elements, accurate quantity calculation, and fast delivery.
Frequently asked questions
How to decorate a ceiling without a stretch ceiling or drywall?
Ceiling molding, Ceiling rosette и Moldings made of polyurethane create architectural ceiling decor without structural changes, loss of height, or complex installation.
Do you need a ceiling rosette under a chandelier?
If the chandelier is noticeable — yes. The rosette creates an architectural frame, turning the suspension point into a decorative center of the ceiling. Without a rosette, even a beautiful chandelier hangs "technically."
Can ceiling stucco be glued in an ordinary apartment with low ceilings?
Yes. The main thing is to choose the right width of the cornice. With a ceiling of 2.5 m — molding 40–55 mm. With 2.7 m — 55–70 mm. A delicate profile does not overload the low space.
How to make the ceiling look more expensive without overloading?
A rosette in the color of the ceiling + a neat cornice around the perimeter + uniform painting. The relief is read through the shadow. This is "quiet" architecture — it creates the feeling of an expensive interior without obvious decor.
What to buy for a ceiling with stucco: a complete list.
Cornice (ceiling molding) around the perimeter + corner inserts or allowance for cutting + rosette + mounting adhesive + acrylic putty + primer + paint. Optional — ceiling contour and additional Relief Decoration.
How long does the adhesive take to dry on ceiling stucco?
Most specialized adhesives for polyurethane set in 30–60 minutes and reach full strength in 24 hours. It is better to putty joints and paint the next day after installation.
Can I install ceiling molding myself?
Yes. The main thing is precise marking and the right adhesive. The cornice is lightweight, cuts well, and holds firmly with adhesive. A team of craftsmen is not needed.