Article Contents:
- Why a photo of an interior is not a ready shopping list
- First, determine what exactly you liked in the photo
- Polyurethane moldings: how to replicate frames from a photo
- How to calculate the amount of molding
- Decorative stucco: how to choose a similar accent
- How the style of stucco affects the atmosphere
- Stucco decor: how to choose a detail that makes an interior recognizable
- How to choose the size of stucco decor from a photo
- Ceiling stucco: how to replicate a beautiful ceiling from a photo
- Connection between ceiling and wall stucco
- Why the ceiling rosette is important
- Why you don't need to copy a photo exactly
- Formulas for buying from a photo
- Photo with frames on the walls
- Photo with a chandelier and ceiling rosette
- Photo with a beautiful mirror in the interior
- Photo with a furniture facade with stucco
- Color and painting: how stucco looks 'built-in'
- Complete system: how to assemble a room from a photo step by step
- Key mistakes when selecting stucco molding from a photo
- About the company
- Frequently Asked Questions
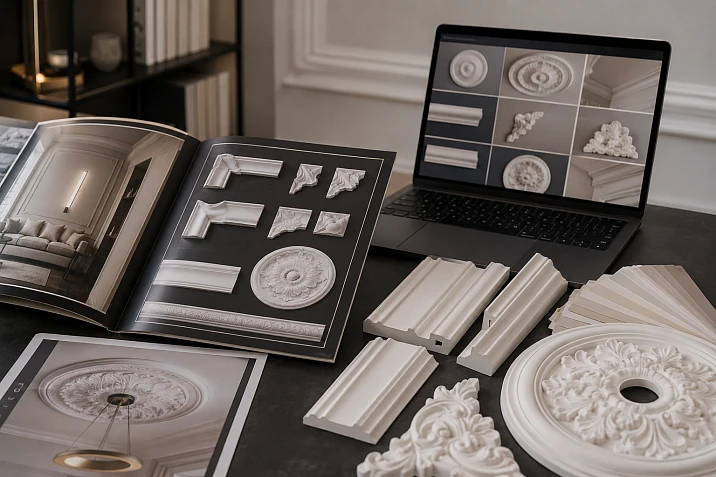
You scroll through Pinterest, look at a designer's card, open Instagram — and suddenly stop. A wall with beautiful frames, a ceiling with stucco ornament, a chandelier in a ring of a rosette, a mirror framed with relief elements. The image captivates you. You want it exactly like that — and nothing else. But what exactly to buy to replicate this effect? That's where the real work begins.
An interior photo is an emotion, a mood, an idea. But a photo doesn't give exact dimensions, doesn't tell you the width of the molding profile, the height of the ceiling ring, how many elements are needed for the room, or what they are called in the catalog. That's why thousands of people, inspired by a beautiful interior, get lost at the purchasing stage. Buy moldings — it's not just clicking a button in the cart. It's first breaking down the image into parts, understanding what exactly was used there, and then adapting it to your room.
This article is a detailed practical breakdown. How to look at an interior photo with stucco molding and see specific elements in it. How to translate inspiration into a shopping list. How not to make mistakes with scale, style, and quantity. Read carefully — and you'll be able to assemble your cart not blindly, but consciously.


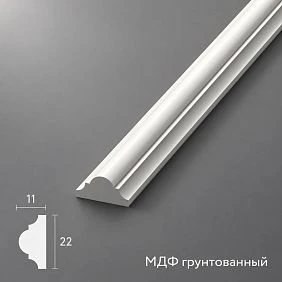
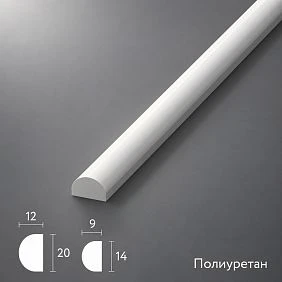




Why an interior photo is not a ready-made shopping list
This is the first and most important thing to accept. A beautiful picture with stucco molding helps you choose a direction, but doesn't replace selection. Between 'I want it like that' and 'here's what I need to buy' lies a whole chain of steps that most people skip. And that's where mistakes occur: ordering too thin moldings for a large room, buying decor without considering the wall's scale, choosing a ceiling rosette that gets lost under a high ceiling.
The photo doesn't show the actual ceiling height of that room. Even professional photography with a wide-angle lens distorts proportions — the space appears wider and taller than it actually is. A molding in the photo might seem like an elegant thin line, but in reality, it's a profile 7–8 centimeters wide with a pronounced relief. In the image, this simply isn't readable due to perspective and lighting.
The number of elements is also not visible. On a wall with beautiful frames in the photo, there could be six frames, eight, ten — depending on the wall's width and the rhythm of the pattern. It's not visible at what distance from the ceiling the frames start, what the gap between them is, how deep the relief is. And even less visible is what the stucco molding is painted with — in the wall color, with tinting, or with patina.
The photo shows the result but hides the process. The goal of this article is to teach you to read an interior photo like a professional designer: break down the image into elements, name each one correctly, and understand exactly what is needed Buy molding in the right combination.




First, determine what exactly you liked in the photo
Before going to the catalog, you need to answer one simple question: what exactly caught your eye in this photo? Often people say "beautiful stucco," but in reality, they were impressed by a specific element — the frames on the walls, or the ornament above the mirror, or the stucco ring under the chandelier, or the cornice line under the ceiling. These are different things, and each of them is a separate category in the catalog.
Let's break it down by zones.
Frames on the walls are moldings. A profile that forms a rectangular or square frame on the wall plane. It can be narrow and strict, wide and lush, with a simple straight cross-section or with a rich classical ornament.
The central relief inside the frame or above the furniture is Decorative stuccoan overlay element that creates an accent: a flower, a cartouche, a plant curl, a geometric shape.
The decoration above the mirror, console, headboard is Relief Decorationa standalone decorative element that "signs" the zone and makes it complete.
The circle under the chandelier on the ceiling is a ceiling rosette. A round relief element from the center of which the lighting fixture emerges. It can be modest and miniature, or it can have rich ornamentation and a large diameter.
The line along the perimeter of the ceiling is Ceiling molding, a ceiling cornice or molding at the ceiling. It frames the transition between the wall and the ceiling, creating a horizontal line that visually completes the space.
The repeating motif at the corners of frames or at the intersections of moldings is decor for moldings, corner elements. They give the frame a finished look and hide the joints during cutting.
When you look at a photo and understand exactly what was used there, it becomes easier. Now you are not looking for "stucco in general" — you are looking for a specific type of element, a specific scale, a specific style.
Our factory also produces:
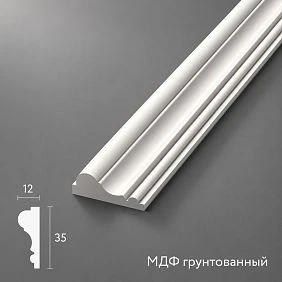
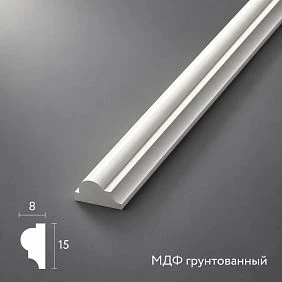


Polyurethane moldings: how to replicate frames from a photo
Frames on walls are one of the most popular elements in modern interiors. They are found in classic living rooms, in neoclassical bedrooms, in hallways with mirrors and consoles, in studies with libraries. Moldings made of polyurethane — this is exactly the element that creates a frame on the wall without complex installation and chasing.
The first thing to understand: in photos, moldings almost always look thinner than in reality. This is an optical effect. A wide profile on a large wall with a high ceiling looks proportionate — but in a two-dimensional image, it is difficult to assess. If you are looking at a photo of an interior with a ceiling of 3.5–4 meters and trying the same moldings on a ceiling of 2.7 meters — the result will be different. Higher spaces require more massive profiles. A standard apartment with a ceiling of 2.6–2.8 meters looks good with moldings 3–5 centimeters wide.
The second important thing: the width of the molding should match the size of the wall and the frames. For a large wall with a width of 4 meters or more, profiles with good relief — noticeable and readable — are suitable. For a small room or for frames in a niche, it is better to choose a calm, delicate molding that does not overload the space.
The third thing often forgotten: you need to count not only linear meters. You need to pre-design the number of frames, their sizes, and gaps. Frames on the wall are usually placed 10–15 centimeters from the floor (or baseboard), with a 10–15 centimeter gap from the ceiling molding. Between frames — a gap of 5 to 15 centimeters. All this needs to be calculated on paper or in an app before Buy polyurethane moldings.
What else influences the choice:
-
Relief style. A smooth rectangular profile — for minimalism and Scandinavian style. A profile with ionic, bead, or laurel ornament — for classic and neoclassical. A profile with smooth beveled edges — for a modern classic interior.
-
Section height. This is the thickness of the profile from the wall. The higher the section, the more voluminous the frame looks. In photos, a high section gives a pronounced shadow and depth — this is what creates the feeling of an "expensive" interior.
-
Color and finish. In most beautiful photos, the molding is painted in the wall color — white, ivory, light beige. This creates the effect of a monolithic space where frames are read only through relief and shadow.
Buy Moldings made of polyurethane and creating frames on walls is one of the most accessible interior transformations. A wall with several frames looks completely different than an empty wall — even with the same furniture, the same chandelier, the same wallpaper color.
Get Consultation
How to calculate the amount of molding
To avoid mistakes with purchasing, you need to calculate the perimeter of each frame. If a frame is 80×120 centimeters, its perimeter is 400 centimeters, that is 4 meters. Add 10–15% for cutting corners (45° angle). Total for one frame you need about 4.5–4.6 meters of molding. For a wall with three frames — about 14 meters including allowance.
Polyurethane moldings are sold by linear meter or in sticks of a certain length (usually 2 meters). Calculate in advance — this will save time and money.
Decorative molding: how to choose a similar accent
When a detail is visible in the photo — a relief element inside a frame, in the center of a wall, or above a doorway — it is most likely Decorative stucco. An overlay element that is attached to a wall or molding and creates an accent relief.
The main principle here is not to look for an exact copy from the photo, but to understand the motif. The motif is the theme of the ornament. Look at the shape: is it acanthus leaves or a stylized plant curl? Is it a geometric symmetrical shape? Is it a classic-style cartouche? Is it a shell, medallion, flower basket? When you identify the motif, the search becomes much easier.
In the decorative molding The elements are divided by type: corner overlays, central medallions, frame inserts, frieze strips, ornamental strips. You don't need the exact same detail as in the photo. You need a detail with the same mood — classic, restrained, lush, or laconic.
What else to consider when choosing:
-
Size. Decorative stucco in the center of a frame should be proportionate to the frame itself. If the frame is 80×120 centimeters, a central element of 15–20 centimeters will look delicate. An element of 35–40 centimeters will be accent and lush. The scale is often distorted in photos.
-
Pairing. If the elements in the photo are symmetrical — two per frame or two on each side of a mirror — you need to buy an even number. Decorative stucco in an interior almost always works in pairs.
-
Placement. The element can be inside the frame (in corners or center), above the frame, at the intersection of moldings, or as a standalone accent on the wall without a frame.
buy decorative moldings and placing it correctly means giving the wall narrative depth. An empty frame is geometry. A frame with decor is already a story.
How the style of stucco affects the atmosphere
Plant ornament (leaves, flowers, curls) creates a warm, organic atmosphere — works well in bedrooms, living rooms, dining rooms. Geometric ornament (diamonds, weaves, meander) — strictness and order, ideal for studies and classic living rooms. Naturalistic motifs (shells, baskets, garlands) — French classic, chateau, Provence. Minimalist relief (simple drops, leaves without detail) — modern neoclassicism.
Each style creates its own mood — and that is exactly the mood you saw in that very photo.
Stucco decor: how to choose a detail that makes the interior recognizable
There are elements that do not fit into frameworks and do not form a system, but it is they that create the "signature" of the space. These are Relief Decoration — independent relief details that are installed in specific accent zones.
Where stucco decor works best:
Above the mirror. One large element or a symmetrical pair on the sides — and the mirror turns from a utilitarian object into an architectural accent. It is these photos that most often end up in saves.
In the center of the frame. If a frame without a central element looks just like geometry, then one applied decor inside it — and it comes to life.
On furniture. The facade of a cabinet, the door of a chest of drawers, the edge of a chest of drawers — Buy Moldings and it can be glued to furniture just like to a wall. This is one of the cheapest ways to elevate the aesthetics of built-in furniture.
At the head of the bed. Above the headboard, place either one large medallion element, a horizontal ornamental strip, or a pair of applied details on the sides. All of this works in the area visible from the threshold—and it sets the mood for the bedroom.
Above the console. In the hallway or living room, a console with a mirror and stucco decor above it is a classic technique found in 90% of beautiful interior photos "in the classic style."
In a niche. A niche without decor is just a recess in the wall. A niche with Buy Molded Decoration inside is a full-fledged architectural element.
On the portal. Framing a door or fireplace opening with decorative overlays is one of the signs of high-quality finishing, which reads very well in photographs.
Polyurethane stucco decor is a lightweight material that does not require special installation. It is glued with construction adhesive or liquid nails, easily painted, and resistant to humidity. This means it can be used not only in the living room but also in the bathroom, kitchen, and hallway.
How to choose the size of stucco decor from a photo
If the photo shows a large element above the mirror and the mirror itself looks small, then the element is likely 30–50 centimeters. If the mirror is large and the decor looks delicate, the element might be 15–25 centimeters. Use the ratio as a guide: the decor above the mirror should be no wider than the mirror itself and no more than one-third of its height.
Ceiling stucco: how to replicate a beautiful ceiling from a photo
The ceiling is a special area. In photos, beautiful ceilings with stucco make a strong impression, but the ceiling is the hardest to adapt to your room. Three things matter here: ceiling height, the presence of a chandelier, and the scale of the room.
Ceiling molding — it is a combination of several elements. First of all, a cornice or molding around the perimeter of the ceiling. Then, a ceiling rosette for the chandelier. Then, if the ceiling is high or large, additional ornamental elements: coffers, friezes, central medallions.
How each of these elements works:
Ceiling cornice. The line around the perimeter of the ceiling is a horizontal line that visually "lowers" the ceiling and makes the space proportionate to a person. In a low room (up to 2.7 meters), a thin, delicate profile is sufficient. In a room with a ceiling of 3 meters or higher, a more massive cornice is needed.
Ceiling rosette. This is the central element of the ceiling. ceiling rosettes are selected based on the diameter of the chandelier and the height of the ceiling. If the chandelier is 60 centimeters in diameter, the rosette should be at least 50–60 centimeters in diameter — then it will frame the fixture and create a complete composition. If the rosette is smaller than the chandelier, it will get lost and look like a random detail.
Additional ceiling elements. Coffers (square recessed panels), ornamental medallions, frieze strips around the perimeter — these are tools for large ceilings from 3.5 meters. On low ceilings, they overload the space.
Buy ceiling molding and to compose it correctly means to create a ceiling that reads as a single architectural element, not as a set of random details.
Connection between ceiling and wall stucco
One of the mistakes when working with photos is to look only at the ceiling or only at the walls. In beautiful interior photos, stucco always works systematically: the ceiling cornice transitions into wall frames, the moldings on the walls match the width of the cornice on the ceiling, the rosette echoes the decor on the walls. This is called visual rhyme.
If you take the ceiling Buy moldings Without considering wall moldings, the result will be fragmentary. Choose elements from the same line or style. This ensures the unity and integrity you see in beautiful photos.
Why a ceiling rosette is important
In most 'ceiling' photos that inspire, the central rosette acts as a visual anchor. It's the point that draws the eye. Without a rosette, a ceiling with a cornice looks unfinished. With a rosette, it gains a center and becomes a standalone composition.
Select ceiling rosettes in a style that matches the wall moldings. If the walls have strict, straight frames, the rosette should be concise with a geometric pattern. If the walls are decorated in a classic style with acanthus leaves, the rosette should echo that motif.
Why you shouldn't copy a photo exactly
This is perhaps the most important section of this article. Trying to copy a photo exactly is a trap that most people fall into. Because even if you find exactly the same elements and install them in exactly the same layout, the result will still be different.
There are several reasons.
Different ceiling heights. What looks lush and grand with a 4-meter ceiling will feel oppressive and overwhelming with a 2.6-meter ceiling. In the photo, you're looking at someone else's height, not yours.
Different wall widths. Frames that look spacious on a 6-meter wide wall will feel cramped on a 3.5-meter wall. Conversely, small frames on a wide wall look timid.
Different lighting. In a photo with professional lighting setup, the stucco molding casts beautiful shadows that read as deep relief. In your apartment with a different window and light fixture arrangement, the same detail may look different — flatter or, conversely, sharper.
Different furniture. Stucco molding always interacts with furniture. If in the photo walls with frames are adjacent to low furniture, the frames start low. If you have tall cabinets or a dense arrangement, the scheme will be different.
Different scale. The most challenging: photos in magazines often feature premium-class interiors with non-standard elements. There, moldings may be custom-made with a non-standard profile. Your task is to replicate the spirit, not copy the article number.
The correct task statement is not "I want exactly like in the photo," but "I want the same mood — in my dimensions and in my room." This is a professional approach that always yields the best result.
Formulas for buying by photo
This is a practical block. We'll break down the four most common types of photos — and create a specific shopping list for each.
Photo with frames on walls
You see a wall with several rectangular frames made of moldings. Inside the frames, there may be a different color or decorative element.
What you need to buy:
-
Moldings made of polyurethane — the base of the frames. Calculate the perimeter of each frame + 15% allowance for trimming.
-
Decorative stucco — if there is an accent element inside the frames. Corner overlays or a central medallion.
-
Glue — special assembly adhesive for polyurethane decor.
-
Paint — in the color of the wall (for a monolithic effect) or with light tinting.
-
Putty — for sealing molding joints during installation.
What you don't need: additional tools, special skills, long installation. Molding frames are one of the simplest DIY projects in finishing.
Photo with a chandelier and ceiling rosette
You see a beautiful ceiling, in the center of which a chandelier is framed by a stucco ring, and a cornice or molding runs along the perimeter.
What you need to buy:
-
ceiling rosettes — the size is chosen according to the diameter of the chandelier.
-
Ceiling molding — cornice along the perimeter of the ceiling. Calculate the perimeter of the room + allowance for cutting corners.
-
Ceiling moldings — if the photo shows additional lines or a coffered structure.
-
Glue and paint.
Note: the socket is mounted before installing the chandelier. The wire comes out of the center of the socket. If you already have a chandelier, you don't have to remove it; the socket can be installed around it.
Photo of a beautiful mirror in an interior
You see a mirror with stucco elements above it or on the sides. The mirror looks like a piece of architecture.
What you need to buy:
-
Relief Decoration — one or two elements above the mirror. Size — no more than 30–40% of the mirror's width.
-
Decorative stucco — paired elements on the sides.
-
Moldings for framing — if the mirror needs to be additionally "fitted" into a frame.
-
Glue and paint to match the wall color.
This area works in a hallway, living room, bedroom above the headboard, and in the bathroom — provided that the polyurethane elements are resistant to humidity (they are).
Photo of a furniture facade with stucco molding
You see a wardrobe, a chest of drawers, or a kitchen set with relief overlays on the facades. The furniture looks expensive and unusual.
What you need to buy:
-
Thin Moldings made of polyurethane — to create a frame effect on the facades.
-
Small decorative elements Buy decorative stucco — corner overlays, central inserts.
-
Glue — contact adhesive or liquid nails.
-
Paint in the color of the facade — matte, for a uniform finish.
Furniture decor is a separate art that allows you to turn budget facades into something resembling expensive handmade furniture.
Color and painting: how stucco looks 'built-in'
In the most beautiful photos, stucco almost never stands out in a contrasting color. It is painted the same color as the wall — white on a white wall, cream on cream, gray on gray. This is called a monochrome presentation, and it creates the feeling that the stucco is part of the architecture, not glued-on decor.
How to replicate this:
-
Buy molding in white (most polyurethane elements come white).
-
Install it on the wall.
-
Cover the entire surface — both the wall and the moldings — with one finish paint. It's best to use matte paint with fine grain — it creates an even coating without glare.
-
If you want to add depth, go over the molding relief with tinted wax or glaze paint.
If you want a patina effect — highlight the relief with a darker tone — apply a base layer of darker paint, then a top layer of light paint. After drying, lightly sand the top layer in the relief areas with fine sandpaper. The relief will emerge lighter from sanding — this is classic patina.
Complete system: how to assemble a room from a photo step by step
If you have a beautiful photo of a room with stucco and want to create a similar interior at home, use this sequence.
Step 1. Photo analysis. Break down the image into zones: ceiling, walls, accents, furniture areas. Name each element: cornice, frames, rosette, decor above the mirror.
Step 2. Measurements of your room. Ceiling height, width and height of each wall, location of windows, doors, furniture. This is the basis for calculations.
Step 3. Scale adaptation. Compare the ceiling height in the photo with yours. If yours is lower, reduce the scale of elements by 20–30%. If the wall is narrower, reduce the number of frames or their size.
Step 4. Style selection. Determine the stucco motif: classic, minimalism, baroque, provence. Choose all elements in one style — both moldings and decorative stucco, and ceiling molding, and ceiling rosettes.
Step 5. List compilation. Write down: the number of linear meters of molding for frames, the number of molding for the ceiling cornice, the size and quantity of decorative elements, the diameter of the rosette, the amount of glue and paint.
Step 6. Purchase. Place an order with a 10–15% margin for trimming and possible installation errors.
Step 7. Installation and painting. Installation, puttying joints, primer, finish paint.
This is a systematic approach that yields a result close to that photo — but adapted specifically to your room.
Key mistakes when selecting stucco from a photo
Knowing the mistakes in advance, you will not repeat them.
Mistake one: buying by feel, without measurements. "I'll get something similar" ends with moldings not being enough or being too thin for your wall.
Mistake two: buying all elements in different styles. A classic ceiling rosette plus geometric moldings plus floral overlays — that's three different styles in one room. There will be no visual unity.
Mistake three: ignoring ceiling height. All scale calculations are based on ceiling height. This is the main parameter.
Mistake four: not considering painting. If you paint the stucco a different color than the wall, the result will be completely different from the photo.
Mistake five: skimping on the margin. The molding is cut at 45° — and each joint requires extra material. Without a margin, you risk reaching the last frame and being half a meter short.
About the Company
STAVROS — professional supplier of polyurethane stucco decor for interiors and facades. The STAVROS catalog offers a full range: Moldings made of polyurethane, Decorative stucco, Relief Decoration, Ceiling molding и ceiling rosettes. All products are made from European polyurethane — a lightweight, durable, moisture-resistant material that is easy to install and paint in any color. STAVROS works with private customers, designers, and construction companies across Russia, providing professional consultations on selection and calculation of elements. If you saw beautiful stucco in a photo and want to recreate that interior in your home — start with the STAVROS catalog.
Frequently asked questions
Can you select stucco based on a photo of an interior?
Yes. From a photo, you can determine the type of elements: moldings, decorative stucco, stucco decor, ceiling rosette, or ceiling molding. Then you need to adapt the sizes to your room — ceiling height, wall width, and number of frames.
How to understand which moldings are used in the photo?
Look at the width of the profile relative to the wall, the size of the frames, the height of the room, and the distance from the molding to the furniture. For an accurate selection, focus not only on the appearance but also on the measurements of your room.
Do I need to find exactly the same molding as in the photo?
Not necessarily. Most often, it's more important to replicate the composition: frames, symmetry, scale, color, and placement of the decor. A similar motif in the right scale gives the same effect.
What should I buy if I liked the wall with molding in the photo?
Usually you need Moldings made of polyurethane, Decorative stucco, glue, paint, and extra for trimming. If there are accent elements inside the frames, add Relief Decoration.
How to replicate a ceiling with molding from a photo?
You need to choose ceiling outlet to match the chandelier diameter, Ceiling moldings to match the room height and plan the painting — in the ceiling color, so the molding looks like part of the architecture.
Is polyurethane molding suitable for wet rooms?
Yes. Polyurethane is not afraid of moisture, does not swell, and does not lose its shape. Polyurethane stucco is suitable for kitchens and bathrooms — this is one of the main advantages of the material over plaster.
How much molding is needed for one frame?
Calculate the perimeter of the frame and add 15% for cutting corners. For example, a frame 80×120 cm has a perimeter of 4 meters plus about 60 centimeters of allowance. That totals about 4.6 meters per frame.
Can stucco be used on furniture?
Yes. Thin moldings and small decorative overlays are glued to the facades of cabinets, dressers, and kitchen sets. This is one of the most affordable ways to transform furniture without replacement.