Article Contents:
- What Counts as Architectural Trim in a U.S. Home?
- Match the product material to the exact location
- What to put in the cart first
- MLDPU-001: when the line should remain delicate
- MLDPU-004 and MLDPU-027: a small change in shape can matter
- MLDPU-002: a versatile middle weight
- MLDPU-003: emphasize one line instead of every line
- Start with the finished frame, not the profile alone
- Respect the trim already in the room
- Picture-frame molding on a painted wall
- Chair rail and horizontal decorative bands
- Applied paneling versus real panel construction
- Interior doors: don't confuse surface molding with door casing
- Cabinet fronts and furniture: check the substrate first
- Niches, TV walls, and transitions
- Crown molding has a different geometry
- Baseboards perform more than a decorative function
- Coordinate without matching everything perfectly
- Worked example: three 28-by-46-inch wall frames
- Account for cuts, miters, and patterns
- Room perimeter: useful for crown and baseboard, not enough for ordering
- Paint choices that work with the room
- Is decorative polyurethane molding the same as crown molding?
- Can I use polyurethane molding for picture-frame walls?
- What width molding should I use on an 8-foot wall?
- How much molding do I need for three wall frames?
- Can I use the same molding on a wall and cabinet?
- Are polyurethane decorative strips waterproof?
- Do I need to prime polyurethane molding before painting?
- Should I cut every miter at 45 degrees?
- How do I combine molding with a baseboard?
- What should I verify before buying from STAVROS for a U.S. project?
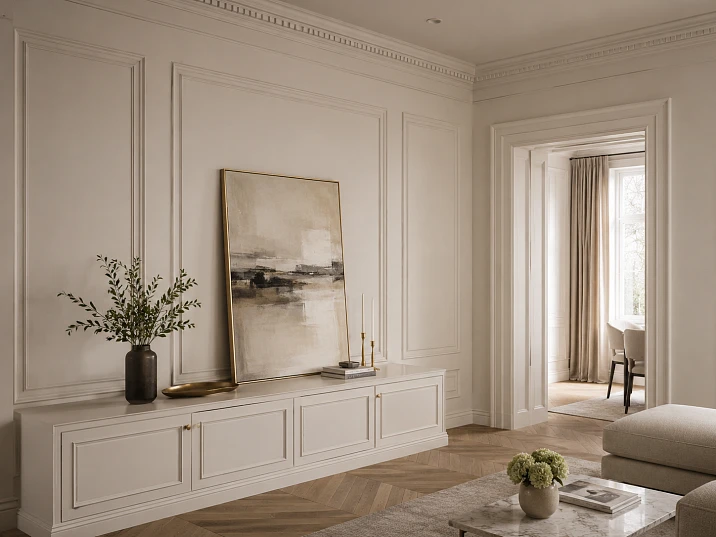
A well-chosen molding does more than fill the space between two finishes. It gives an otherwise plain room a readable structure: a narrow shadow line around a wall panel, a deliberate transition at the ceiling, or a repeated detail that connects doors, built-ins, and furniture. The challenge is deciding which profile belongs in each location—and how many full-length pieces you will actually need to finish the project.
In U.S. home-improvement language, the broad family is called architectural trim or decorative molding. Polyurethane trim molding refers specifically to profiles made from polyurethane; it does not automatically include every baseboard, crown molding, or decorative strip on the market. This guide translates the design logic of the original STAVROS article into a practical buying and installation plan for American homes, from an 8-foot-ceiling bedroom to a tall entryway or detailed living room. You will learn how to compare profile widths, build a trim schedule, budget for cuts, and coordinate products without confusing polyurethane with MDF or polystyrene.
For a quick starting point, browse the STAVROS polyurethane molding selection. Choose the actual product by code, not merely by a photograph that resembles the profile you saw elsewhere.




What Counts as Architectural Trim in a U.S. Home?
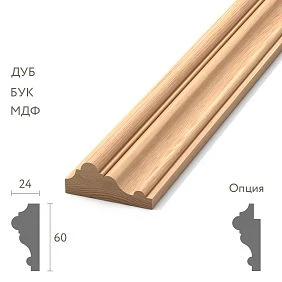
Architectural trim is a functional and visual category, not a single material. A wall frame is usually made from relatively narrow decorative molding. Baseboards conceal the floor-to-wall junction and provide a finished lower edge. Crown molding finishes the wall-to-ceiling transition. Chair rail, picture-frame molding, panel molding, door casing, and applied furniture trim create different kinds of boundaries. The appropriate cross-section, fastening method, and material can change from one task to another.
The Russian word pogonazh describes a family of long, constant-section pieces. In a U.S. specification, it is more helpful to name the exact piece: "polyurethane wall molding," "paintable baseboard," "crown molding," or "decorative cabinet trim." This keeps the order understandable to a contractor and prevents a decorative bead from being mistaken for a structural door casing or a floor-protection product.
A molding is a length of profile with a repeated cross-section. An onlay or applique is an individual decorative ornament, often used at a corner or in the center of a panel. A corner block is not necessarily the inside or outside corner of a room: it may be a decorative connector intended for a rectangular wall frame. These distinctions matter when you count pieces and prepare miter cuts.




Match the product material to the exact location
Polyurethane has useful potential for molded detail, precise decorative relief, and paintable wall applications. Polystyrene, high-density polystyrene, wood, and MDF are different materials with different installation requirements. In the current STAVROS catalog, the MLDPU products discussed below are explicitly listed as polyurethane, while the HIWOOD baseboard category lists polystyrene products. Never buy the latter assuming they are polyurethane just because both appear under decorative molding.
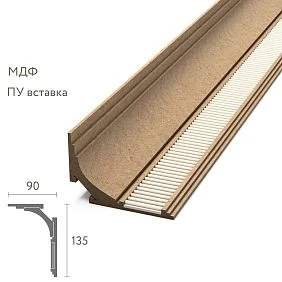
The same caution applies above the wall. Certain STAVROS ceiling-cornice products are made of polystyrene rather than polyurethane. A finished room can combine those materials beautifully, but the adhesive, primer, cutting method, and care instructions must match the material of each component. An integrated design does not require identical chemistry in every piece.
Наша фабрика также производит:
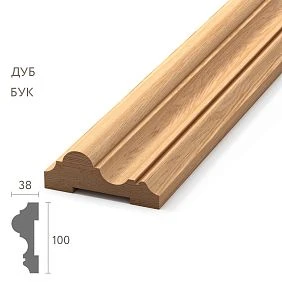
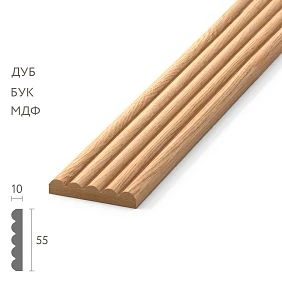
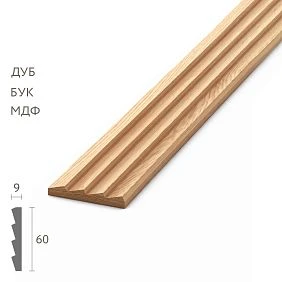
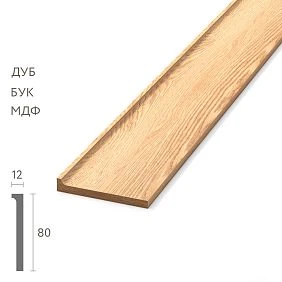
Смотреть весь Каталог продукции
A Fast Buying Guide: Choose the Profile by the Job
Before shopping, sketch a wall elevation and mark every planned trim run. The goal is to answer three practical questions: what line will the profile create, how pronounced should the shadow be, and what existing conditions will it have to meet? A decorative frame around a 24-inch cabinet door is not the same job as a molding repeated across a 15-foot feature wall.
| Project | Start with | What to check before buying |
|---|---|---|
| Small decorative wall frames | Slim polyurethane molding | Face width, projection, corner detail, stock length |
| Large living-room paneling | Medium or pronounced profile | Visual weight, clear opening inside the frame, repeat spacing |
| Subtle furniture or door-face detail | Fine bead or compact shaped molding | Hardware clearance, panel movement, finish compatibility |
| Decorative wall border or chair-rail effect | A continuous linear profile | Wall height, outlet locations, intersections with door casing |
| Crown molding around a room | Purpose-made ceiling cornice | Actual material, ceiling contact surfaces, corner geometry |
| Baseboard at floor level | Purpose-made baseboard | Floor movement gap, thickness, cleaning impact, material |
| Ornate framed wall panels | Molding plus compatible appliques | Matching profile geometry, left/right variants, quantity |
This table is a selection framework, not a promise that any one STAVROS molding is suitable for all seven jobs. A small decorative MLDPU piece can frame a wall panel, but it is not automatically a substitute for a full-size protective baseboard. If you need substantial floor protection, shop a product explicitly designed for that function.
Получить консультацию
What to put in the cart first
Start with straight molding in the exact size and material selected for the project. Add purpose-made corner pieces or onlays only if the drawing calls for them, then identify a compatible installation adhesive, joint treatment, and paint. Compare the quantities by individual stock lengths, not by an assumed linear-foot price. Confirm delivery arrangements for your destination rather than assuming that an English-language website guarantees U.S. domestic inventory or shipping.
Compare Five Real STAVROS Polyurethane Molding Profiles
The most useful way to choose decorative trim is to compare actual dimensions side by side. The following STAVROS MLDPU profiles are identified as polyurethane in the product listings. Each is offered in a nominal length of 2,600 mm, which converts to approximately 102.36 inches (8.53 feet). The profile dimensions describe the face and projection; a cross-section drawing reveals the exact contours and edges.
| STAVROS profile | Nominal width × projection | Approx. U.S. dimensions | Design role |
|---|---|---|---|
| MLDPU-001 | 10 × 6 mm | 0.39 × 0.24 in | Fine bead or delicate secondary border |
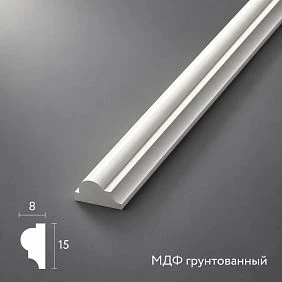
| MLDPU-004 | 15 × 8 mm | 0.59 × 0.31 in | Compact shaped wall or furniture trim |
| MLDPU-002 | 22 × 11 mm | 0.87 × 0.43 in | Medium frame with stronger shadow lines |
| MLDPU-003 | 35 × 12 mm | 1.38 × 0.47 in | Wider primary frame or architectural accent |
| MLDPU-027 | 14 × 9 or 20 × 12 mm | 0.55 × 0.35 or 0.79 × 0.47 in | Smooth rounded line; two size options |
These measurements come from individual product descriptions and the molding category, not a universal polyurethane specification. Rounding is appropriate when describing style, but use the published metric drawing for close-fitting assemblies, junctions, and mating parts. For MLDPU-027, state the chosen size explicitly; a product code without a size can be insufficient.
MLDPU-001: when the line should remain delicate
A narrow bead works best when a large, heavy frame would crowd the available area. Think of a shallow rectangle on a cabinet door, a fine inset line inside a larger wall frame, or a small repeating accent across a painted wall. Because the face is only about 0.39 inch, it creates detail without taking much space from the center of a frame. The trade-off is visibility: on a very large wall, a narrow bead may disappear in low or diffuse lighting.
Use MLDPU-001 polyurethane bead molding when the goal is refinement rather than a heavy architectural statement. For an accent wall viewed from across a generous living room, hold a sample in place before ordering. A sketch on paper can make even a tiny line look more prominent than it will at full scale.
MLDPU-004 and MLDPU-027: a small change in shape can matter
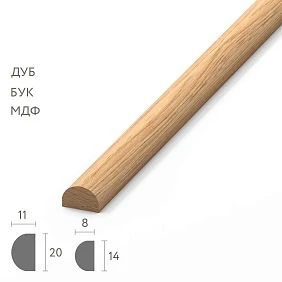
MLDPU-004 adds more definition than the smallest bead without reaching the visual weight of a broad panel mold. It can act as a single wall-frame outline or a modest decorative edge on cabinetry. MLDPU-027 offers a smoother half-round character in two sizes. That means these profiles can be similar in approximate face width yet create quite different shadows.
Instead of choosing solely on width, compare the cross-sections next to your door casing, baseboard, and planned wall color. A stepped profile often reads as more formal than a smooth rounded one. Neither is universally better; the answer depends on whether you want a quiet transition, a deliberate frame, or a second line nested inside a larger border.
MLDPU-002: a versatile middle weight
At about 0.87 inch wide, MLDPU-002 has enough presence to define wall frames without automatically dominating a standard-height room. It is a practical starting point for several equally spaced panels in a dining room or along a feature wall. The more developed cross-section gives light something to catch, particularly near a window or wall sconce. That same projection means you should also check passage clearance in narrow spaces.
Compare the MLDPU-002 molding details with the inside dimensions of the intended panels. Increasing the profile face width slightly reduces the opening inside each finished frame. If your frames are already narrow, this change can be noticeable.
MLDPU-003: emphasize one line instead of every line
MLDPU-003 measures approximately 1.38 inches across the face. It can establish a primary outer frame or a bold horizontal decorative band on a large wall. In an 8-foot-high room, avoid surrounding every door, wall panel, and built-in with an equally strong profile. Give the main feature room to breathe and let supporting lines become quieter. A 35 mm primary frame can work alongside a 10 or 15 mm inner accent, provided the gaps and joint details are deliberately designed.
The MLDPU-003 wide polyurethane profile is a style choice, not a load-bearing casing. Check door swing, hand clearance, and the existing trim depth before placing a projecting detail near a frequently used opening.
How to Size Trim for 8-, 9-, and 10-Foot Ceilings
U.S. homeowners frequently describe a room by its ceiling height: 8 feet in many existing houses, 9 feet in newer construction, and 10 feet or more in some formal spaces. These numbers help you judge scale, but there is no building-code rule that a certain ceiling height demands one exact molding width. The room's length, natural light, window casing, door height, furniture size, and desired architectural character all matter.
For an 8-foot ceiling, slim or medium wall molding often creates a clean panel treatment. The 0.39- to 0.87-inch widths in the STAVROS MLDPU range provide a useful starting spectrum. Wider molding can still work if it frames a single substantial feature instead of covering every surface. A 9-foot ceiling gives additional breathing room for larger panel openings, taller baseboards, and more clearly articulated transitions. At 10 feet or more, a wider main frame may look better proportioned, though excessive ornament can still make the room feel crowded.
Start with the finished frame, not the profile alone
Mark the proposed outer frame on the wall with low-tack painter's tape. Stand where you normally enter the room and where you normally sit. Check how the taped frame relates to the sofa back, a console table, the top of a door, and any switches. Then hold a strip sample against one side. This simple full-scale test reveals problems that a catalog thumbnail cannot.
Decide whether your frame measurement describes the outer edge, centerline, or inner opening of the molding. Write the choice on the plan. A change from 0.39-inch to 1.38-inch molding shifts the apparent inside border significantly if the outside dimensions stay the same. Without a clear reference, installers may cut every side accurately and still produce a frame different from the drawing.
Respect the trim already in the room
A room's existing door casing and baseboard are part of the design whether or not you plan to replace them. Their relief and width should influence your new wall molding. If the casing has a pronounced profile, a smooth panel line may complement it more successfully than a second elaborate ornament. If a wall has many narrow door openings, fewer larger panels generally read more clearly than numerous tiny frames.
Natural light can amplify relief. A molding that appears understated on an unlit sample board may cast a strong edge shadow when placed close to a bright window. Test the proposal at more than one time of day. Color also changes the result: painting molding and wall the same color reduces visual contrast while retaining texture.
Choose Between Wall Frames, Chair Rail, and Applied Paneling
All three treatments involve linear elements, but they organize a wall differently. Wall frames create distinct fields. A chair rail establishes a horizontal dividing line, often with different paint or wall treatment above and below. Applied paneling uses a grid of vertical and horizontal profiles to suggest paneled construction. You can combine them, but first decide which line is the main visual idea.
Picture-frame molding on a painted wall
A frame-based treatment is one of the most flexible applications for decorative polyurethane molding. Draw one large panel behind a bed, a balanced sequence of frames in a dining room, or a pair of taller rectangles on either side of a fireplace surround. Keep margins consistent unless a door or window provides a clear reason to break the rhythm. The goal is architectural order, not squeezing the maximum number of rectangles into a space.
When using multiple frames, fix the overall composition first. Let a central feature, such as a dining table or sofa, establish the axis. Then divide the remaining available width in a way that respects adjacent doors and corners. For smaller walls and furniture pieces, a compact profile such as MLDPU-004 may be more appropriate than the broader MLDPU-003. For more elaborate compositions, the STAVROS wall decor assortment offers a wider context for the design.
Chair rail and horizontal decorative bands
A horizontal trim line can separate a deeper lower paint color from a lighter upper wall, or it can visually anchor a set of rectangular panels. In an American home the familiar term is chair rail, although a particular decorative molding may not be engineered as impact-protective rail. If the location receives chair backs, strollers, or frequent contact, choose a product intended to withstand that service rather than relying on a delicate applied bead.
Consider placing the visual line in relation to window sills, countertop heights, and nearby wainscoting. The old rule of placing a rail at exactly one-third of wall height is not mandatory. Draw the line at several heights and view it from the doorway before fixing it. An elegant paint change is easier to execute when the horizontal profile doesn't run awkwardly through a switch plate or a door casing detail.
Applied paneling versus real panel construction
Surface-applied molding creates the appearance of framed panels without necessarily adding a new structural wall layer. True raised-panel or recessed-panel construction has different substrate, joinery, and tolerance requirements. Use decorative molding to create the visible rhythm, but do not imply that it reinforces a wall or replaces framing components. For cabinet doors, verify that the door material, finish, and hinge clearance can accept the proposed applied profile.
Trim Around Doors, Built-Ins, and Furniture
Decorative trim on a door or cabinet should improve the object without interfering with the way it works. A typical interior door is opened, pushed, cleaned, and occasionally struck by a bag or vacuum handle. A cabinet door has hinges, catches, and clearances that may be only a fraction of an inch. The more projecting the decorative molding, the more important it is to test those clearances before installation.
Interior doors: don't confuse surface molding with door casing
Door casing is a purpose-made trim assembly around the opening. Applied decorative molding is a surface detail that may be installed on the door leaf or as an accent near the casing. An MLDPU molding can add the impression of a framed panel to an otherwise plain door, but its small cross-section does not make it a structural replacement for door casing. Keep added trim clear of weatherstripping, the hinge swing, strike hardware, and any fire-door labeling or assembly requirements.
The simplest treatment uses two equally sized rectangles aligned along the door's vertical centerline. Before committing, measure the panel's clear area after deducting the hinge side, latch side, and top and bottom margins. Use masking tape to check whether a person's hand contacts the new profile when pulling the door. On doors in high-traffic spaces, a smaller, less projecting treatment may be more durable in everyday use.
Cabinet fronts and furniture: check the substrate first
Flat cabinet fronts can be transformed by applied polyurethane molding, especially when the overall finish will be repainted. However, a melamine, laminate, or factory-finished glossy door presents a different bonding surface from bare MDF. Adhesive selection must follow the exact surface, coating, and profile manufacturer's directions. A bond that works on a primed wall can fail on a low-energy plastic film. Test a hidden sample before buying a full room's worth of molding.
Keep decorative profiles away from door edges where fingers grasp the panel. On drawers, allow room for pulls and inspect how far the profile protrudes toward adjacent fronts. On a built-in bookcase, a thin bead may be appropriate for a decorative cabinet-panel effect; a broad stepped molding can make small doors feel visually cramped. This is one reason the 0.39-inch MLDPU-001 and 0.59-inch MLDPU-004 are useful comparison points for furniture projects.
Niches, TV walls, and transitions
In a media wall, molding can organize the composition without surrounding the television like a literal picture frame. Use the profile to outline a broader field, mark the transition to built-in cabinetry, or repeat the language of nearby doors. Leave adequate access to equipment ventilation and outlets. Decorative trim is not a substitute for electrical raceway, a load-bearing TV mount, or code-compliant cable management.
For a niche, plan the line at the face of the opening rather than placing relief where a shelf or door will make contact. The right profile depends on viewing distance: a deep line can make a shallow niche look busy, while a restrained one may help it read as part of the room's architectural grid. The most successful treatments coordinate with the existing finishes instead of attempting to make every exposed edge ornamental.
Crown Molding and Baseboards: Build a Coordinated Room, Not a Mismatched Order
In a fully trimmed room, the upper and lower boundaries influence the appearance of every wall frame. A prominent crown molding and a substantial baseboard can support a stronger panel profile. A very light ceiling line and simple baseboard generally pair better with quiet wall framing. This is a hierarchy of visual weight rather than a requirement to use the same pattern on every surface.
Crown molding has a different geometry
Purpose-made crown molding bridges the intersection of wall and ceiling. Its wall and ceiling contact surfaces, spring angle, and projection are chosen for that task. A narrow flat wall molding should not automatically be used as a substitute. Examine the STAVROS HIWOOD crown molding range when planning a complete upper transition. These listed cornices are polystyrene, even though they can be paired visually with polyurethane wall trim.
For ceiling profiles, verify the actual material before choosing adhesive or paint. Do not assume that a solvent-containing product that works on a wall molding will be safe for polystyrene. When a corner seems awkward, make a test piece before cutting the expensive visible run. Crown molding angles are not equivalent to a simple flat-picture-frame miter because the installed profile sits between two planes.
Baseboards perform more than a decorative function
Baseboards often protect the wall finish near floor level, cover construction movement gaps, and withstand regular cleaning. A fine polyurethane bead designed for ornamental wall frames may not have the height, backing geometry, or impact function of a baseboard. Use the baseboard product category to compare items made for floor-level installation; the catalog currently identifies HIWOOD products as polystyrene. When creating an all-white finish, the eye can read a room as coherent even when the components use different substrates.
Do not pack adhesive or caulk into a floating floor's required expansion space. Follow the flooring manufacturer's movement-gap instructions, and let the baseboard conceal that gap without locking the flooring in place. For new construction, also allow the wall and floor systems to reach the required condition before measuring and installing trim.
Coordinate without matching everything perfectly
The best room-wide scheme often has three levels: a clear outer boundary at the ceiling and floor, a medium-weight picture-frame profile on the principal wall, and small secondary details only where they are useful. Repeating a simple curve or step can provide cohesion without purchasing a complete ornamental family. If you add an applique or rosette, let it occupy a planned focal position rather than scattering accents at every junction.
Before ordering, compare samples in the same painted finish. A white polystyrene crown, a white polyurethane molding, and a white MDF casing may have different factory surface textures. A consistent compatible finish can visually unite them, but it will not erase differences in their profile geometry or dimensional movement. Prepare each according to its own instructions.
Molding Corners, Decorative Blocks, and Appliques
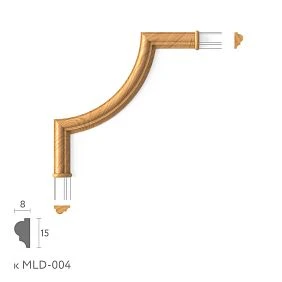
A mitered corner joins two straight pieces of the same profile. An ornamental corner is a separate design element that may interrupt, cap, or overlay that join. These two choices affect both the layout and the cut list. If a wall frame uses four ornamental corners, count four components per frame, not four inches of extra straight molding. Check whether the straight runs should terminate at the ornament's edges or continue behind it.
STAVROS offers decorative pieces for molding and a separate range of polyurethane appliques and onlays. Choose from these categories only after identifying the connection geometry. Product names that look similar do not prove that a corner fits a particular molding cross-section. Match item codes, size, projection, and the intended assembly shown in the drawings.
For large wall panels, decide whether the ornament has a visible directional pattern. A left-hand curl may not look right when simply rotated to the opposite side. A symmetrical corner may allow more freedom, but a mirrored left/right family needs the correct quantity of each. Large ornaments also reduce the available straight run. Draw their footprints at full size, particularly on narrow panels or near door casing.
If you prefer a pared-back contemporary design, skipping decorative corners may be the strongest decision. Four clean 45-degree miters can give a painted frame the look of quiet architectural millwork. The ornament should answer a design question, not exist merely because an accessory is sold alongside the molding.
How to Measure Polyurethane Trim in Linear Feet
A room measurement should turn into a cutting schedule, not merely a total. For straight decorative strips, calculate every horizontal and vertical segment. For a frame, a basic starting formula is 2 × width + 2 × height. But this is accurate only when the width and height are measured to the same cutting reference. Outside-edge dimensions, miter long-point dimensions, and centerline lengths are not interchangeable.
Write a numbered elevation for each wall. List the profile, the number of segments, the required finished dimension, and the direction of any patterned relief. Record stock length in inches for planning, then keep the manufacturer's exact metric measurement beside it for final shop instructions. The MLDPU profiles above come in 102.36-inch nominal sticks, which are longer than a standard 8-foot board. That additional length can be valuable for tall vertical wall-frame sides.
Worked example: three 28-by-46-inch wall frames
Suppose you plan three identical decorative frames. Each frame is 28 inches wide by 46 inches tall, measured at the profile's intended cut-length reference. Assume four mitered pieces per frame, all from one MLDPU profile, and no decorative corner blocks. Each frame requires two 46-inch sides and two 28-inch pieces. Across three frames you need six 46-inch cuts and six 28-inch cuts.
| Component | Quantity | Individual length | Total |
|---|---|---|---|
| Vertical sides | 6 | 46 in | 276 in |
| Top and bottom pieces | 6 | 28 in | 168 in |
| Total installed molding | 12 segments | — | 444 in (37 ft) |
A simple division gives 444 ÷ 102.36 = 4.34 stock lengths, so at least five sticks are necessary. But that theoretical minimum is not enough by itself; the cut pattern must also fit. Here it does. Cut two 46-inch sides from each of three sticks, and three 28-inch pieces from each of two additional sticks. The layout uses five 102.36-inch sticks before considering saw kerf and trimming the factory ends.
The five sticks provide 511.8 inches of nominal stock. The difference from the 444-inch installed total is about 67.8 inches, or 13.2% of stock. These leftovers are not automatically a mistake. They result from the way the required lengths fit into whole pieces. A less efficient cutting plan could require a sixth stick despite having the same installed perimeter. If this is your first molding project, consider purchasing an additional stick for a mistake or damaged cut after checking availability, return terms, and your budget.
Account for cuts, miters, and patterns
A miter's long point must be laid out according to the chosen measurement reference. A profile with a stepped or directional ornament may also require a matching cut orientation. Deduct the saw blade's kerf and plan for a small trim from damaged or irregular factory ends. The proposed five-stick layout has reasonable room for ordinary cuts, but a shop drawing still needs to confirm how the finished lengths are measured.
If you use corner blocks, redo the calculation. The distance between blocks is shorter than the original outside frame dimension, and the blocks become separate line items. If you add a second, inner frame to each panel, calculate its dimensions independently instead of adding an arbitrary percentage. Double frames can use substantially more material than the outside frame alone.
Room perimeter: useful for crown and baseboard, not enough for ordering
A 12-by-14-foot rectangular room has a nominal perimeter of 52 linear feet. That gives a starting length for continuous crown molding, assuming you are trimming all four walls. At the floor, subtract door openings and other runs that do not receive baseboard according to the floor plan. Then evaluate actual stock lengths, corners, and the opportunity to reuse offcuts.
For example, many HIWOOD cornices in the STAVROS range are supplied at about 78.74 inches (6.56 feet), not the 102.36-inch length of the MLDPU wall molding family. Dividing 52 by 6.56 gives about eight sticks as a length-only mathematical minimum, but an actual 12-by-14-foot crown layout may need more because of walls, corners, joint placement, and installation tolerances. Do not order eight pieces without drawing the cuts; count the pieces in the final layout.
What to Buy Alongside Polyurethane Decorative Molding
A good material list includes the finishing system, not just the visible profiles. The exact installation products depend on the wall, trim, environment, and manufacturer's requirements. On a sound painted drywall wall, prep may be straightforward. On tile, coated cabinetry, or a weak plaster surface, adhesive compatibility and preparation can become the controlling factors. Buying additional molding cannot compensate for poor adhesion.
- Chosen molding and size: Use the actual part numbers and required stock lengths from the cut schedule, with a reasoned allowance for waste.
- Compatible installation adhesive: Confirm that the adhesive is suitable for the polyurethane product and the receiving surface; account for cure time and temporary support.
- Joint finishing material: Use a paintable, appropriate product for visible joints and wall transitions where permitted by the installation system. A flexible perimeter caulk is not necessarily a structural miter-joint adhesive.
- Finish supplies: Primer only where required, compatible paint, clean applicators, low-tack tape, and small test panels for sheen and color.
- Layout and cutting tools: Tape measure, level or laser, fine marking pencil, miter box or saw, suitable cutting blade, and dust-control equipment.
- Ornaments and accessories: Count decorative corners, center pieces, and matching inserts as individual units; verify that they fit the selected profile.
For a closer look at bonding options and substrate preparation, read the STAVROS guide to adhesives for polyurethane molding. Use it as a planning reference, then follow the instructions for the actual adhesive you buy. No single construction adhesive is automatically suitable for all wall finishes and all decorative polymers.
Installation: A Controlled Sequence for a Cleaner Result
Start by checking the wall and laying out the entire composition. Make sure the surface is clean, dry, sound, and appropriately prepared for the chosen adhesive. Peeling paint, dust, or a glossy untested coating is a common reason decorative trim fails. Allow new paint to cure as its manufacturer specifies before bonding over it. When in doubt, test adhesion in a hidden area and assess the result after the stated cure period.
Next, use a pencil and level to mark the outer boundaries. For several adjacent frames, mark a common top and bottom datum so small measurement errors do not accumulate. Compare the spacing at the far end of the wall before cutting. Take note of outlets, wall sconces, thermostats, window trim, and door casing. Shift or resize the proposed panels on paper rather than cutting around unexpected conflicts at the last moment.
Cut a pair of sample miters from scrap stock before processing all twelve sides. Support the profile consistently in the cutting tool and keep the face orientation the same. The back of the profile must sit correctly against the wall; flipping a shaped profile changes which edge appears at the joint. Test a full corner dry before applying adhesive. With nested frames, complete and inspect the main outside frame before measuring the smaller inside one.
Apply adhesive according to the product instructions. Do not rely on an arbitrary bead size, tack time, or cure time taken from another brand. Press and support the molding as specified. Painter's tape may hold lightweight decorative strips temporarily, but some assemblies require other non-damaging bracing. Check the adhesive's working time so that you can adjust alignment before it grabs. Avoid smearing adhesive onto exposed painted surfaces.
After the bond reaches the appropriate stage, address visible joints according to the finishing system. Fill small nonstructural transition gaps where suitable, remove excess material, and allow complete drying before sanding or painting. A large corner gap is better corrected with proper recutting than concealed under a thick layer of filler. For a coordinated two-color finish, consult the STAVROS two-tone polyurethane molding painting guide.
Paint choices that work with the room
Painting molding and wall the same color is a reliable way to make architectural detail feel integrated. A contrasting trim color places more emphasis on every joint and alignment error, so it rewards precise installation. Satin or semigloss can make a narrow profile easier to clean but also highlights irregularities. Matte or eggshell can feel softer on broad decorative fields. Compare real samples in the room's natural and artificial light.
Check the product's supplied surface: a factory-primed molding, a bare substrate, and a mixed-material assembly may require different steps. Use a coating system compatible with every surface involved. Never assume that polyurethane and polystyrene accept the same solvent-containing primers. If the design includes a metal fixture, wood panel, or wallpaper, protect those finishes before applying paint or caulk.
Polyurethane, MDF, Wood, and Polystyrene: A Practical Comparison
Material choice should follow the project rather than a slogan. Polyurethane can be well suited to lightweight, detailed decorative molding, but different formulations have different properties. MDF is popular for paint-grade interior trim in dry conditions. Wood remains a strong option for structural millwork details and natural-grain finishes. High-density polystyrene can be appropriate for many baseboard and crown applications when supplied in profiles designed for them.
| Material | Useful characteristics | Confirm before selecting |
|---|---|---|
| Polyurethane decorative molding | Molded relief, paintable profile, compact wall applications | Product-specific impact resistance, adhesive, heat/moisture limitations |
| Primed MDF | Consistent paint-grade finish, familiar millwork workflow | Moisture exposure, sealed edges, weight, attachment method |
| Solid wood | Natural grain, traditional millwork, repairable surface in many cases | Seasonal movement, finish maintenance, species and joint design |
| High-density polystyrene | Purpose-made lightweight crown and baseboard options | Solvent sensitivity, product grade, approved paint and adhesive |
| Plaster | Traditional sculpted finish and heritage restoration character | Weight, breakage, mounting support and specialist finishing |
Do not treat all polystyrene as fragile packaging foam, or all polyurethane as a flexible rubber-like material. High-density polystyrene trim and rigid molded polyurethane can each have successful architectural uses. A detailed product specification is more useful than a material label alone. The STAVROS catalog itself spans several of these groups, so always read the material field on the item page.
Seven Mistakes That Increase Trim Costs
1. Buying by photograph instead of dimensions. A profile viewed in a close-up image has no reliable scale. Order a sample or compare its published width and projection to the real wall or cabinet panel.
2. Measuring only the total perimeter. A length total does not tell you whether the required straight cuts fit the available stock. Always create a cut list before deciding how many sticks to purchase.
3. Mixing materials without checking compatibility. A polystyrene crown, polyurethane wall molding, and MDF casing can coexist, but each needs an appropriate preparation and finishing process.
4. Making every detail equally bold. Strong crown, heavy baseboard, wide panel trim, and ornate corner blocks can compete. Establish one or two dominant lines and keep the rest supporting.
5. Adding decorative corner blocks at the end. Corner ornaments have real dimensions. They can shorten straight runs, narrow the frame opening, and change the number of required sticks.
6. Trusting adhesive to repair a bad substrate. Paint that peels, damp plaster, or dusty drywall may compromise even a correctly chosen adhesive. Repair the underlying issue first.
7. Assuming the English storefront means local U.S. supply. Product availability, cross-border delivery, currency, taxes, and packaging are separate questions. Confirm them with the seller before giving a contractor a promised delivery date.
Frequently Asked Questions About Polyurethane Trim Molding
Is decorative polyurethane molding the same as crown molding?
No. Polyurethane describes a material, while crown molding describes a job and installed geometry. Some crown profiles are polyurethane; others are wood, MDF, or polystyrene. The STAVROS HIWOOD crown category currently lists polystyrene cornices. A straight polyurethane wall molding is not automatically designed to bridge a ceiling corner.
Can I use polyurethane molding for picture-frame walls?
Yes, when the chosen product is intended for decorative wall trim and the surface is suitable for installation. Draw each frame, specify the measurement reference, and calculate cut lengths before ordering. For elaborate designs, review compatible corners and ornaments rather than mixing unrelated products. The STAVROS guide to decorative molding corners explains the distinction between frame connectors and room corners.
What width molding should I use on an 8-foot wall?
There is no universal width. A roughly 0.4- to 0.9-inch polyurethane profile is a sensible sample range for many restrained wall frames, while broader profiles can be effective for a single focal panel. The wall's dimensions, lighting, adjacent trim, and desired style determine the result. Test the profile on the actual wall before committing.
How much molding do I need for three wall frames?
It depends on the dimensions. For three frames measuring 28 by 46 inches at a consistent cut reference, you need six 46-inch segments and six 28-inch segments, totaling 444 inches or 37 linear feet. With the 102.36-inch STAVROS MLDPU stock length, a workable cutting schedule uses five sticks, before adding any contingency stock.
Can I use the same molding on a wall and cabinet?
Often the visual profile can carry through both applications, but the adhesive, substrate preparation, and clearance requirements may differ. A glossy cabinet coating can be more demanding than paint-grade drywall. Verify a test bond and check moving doors and drawer fronts before installation.
Are polyurethane decorative strips waterproof?
Do not treat the word polyurethane as proof that an entire installed assembly is waterproof. The material, finish, adhesive, wall surface, and exposure conditions all contribute. Normal household humidity is different from direct water contact, a shower enclosure, or an outdoor installation. Follow each component's specifications for the intended environment.
Do I need to prime polyurethane molding before painting?
Check the surface finish specified for the exact product. Some profiles are supplied with a paint-ready primed finish; others may need a compatible primer or surface preparation. A hidden sample is the safest way to confirm adhesion, sheen, and color before painting a whole wall of trim.
Should I cut every miter at 45 degrees?
For a flat rectangular frame with true 90-degree corners, matching 45-degree miters are conventional. Real walls and cabinetry are not always square. Test and adjust as needed; purpose-made decorative corner elements may have different connection geometry. Ceiling crown molding requires attention to its installed spring angle and should not be cut as if it were a flat wall frame.
How do I combine molding with a baseboard?
Choose the baseboard for its floor-level function and the wall molding for the desired ornament. Coordinate their visible shapes and paint finish, not necessarily their material. Do not let an applied wall molding block a floating floor's expansion gap or interfere with existing baseboard details.
What should I verify before buying from STAVROS for a U.S. project?
Prepare an itemized list of product codes, selected sizes, counts, corner components, and finishing requirements. Confirm U.S. delivery availability, actual total cost, import or tax obligations where relevant, lead time, and packaging with the seller before ordering. This guide does not make claims about domestic warehousing or guaranteed delivery to your address.
Final Purchase Checklist: Turn the Design into an Order
Before clicking Add to Cart, look at the actual wall with your layout taped in place. Confirm that panel dimensions, trim widths, and intervals work from the doorway and from your normal seating position. Select the polyurethane molding by its item code, record the exact dimensions, and compare the cross-section against adjacent casing and baseboards. Count straight segments by cutting schedule, then count decorative corners and onlays individually. Keep a separate line for adhesive, joint preparation, and the paint system.
A concise order might read: "Three decorative wall frames, 28 × 46 inches at the agreed cut reference, MLDPU-002, five full-length sticks for the planned cuts plus one contingency stick if budget allows; twelve mitered corners, no ornamental blocks; substrate-compatible adhesive and finish." That description is more useful than "about 40 feet of molding" because it tells everyone what is being built and how the stock will be cut.
Explore the STAVROS decorative molding catalog to compare profiles, or review the broader architectural decor collection if your room also needs ceiling accents, onlays, or other details. Select products from the confirmed specifications, not from assumptions about the entire category. When the main and supporting lines are chosen together, polyurethane trim molding becomes a measured architectural design decision rather than an improvised finishing purchase.