Article Contents:
- Why MDF baseboard reveals wall unevenness
- Which problems occur most often
- Baseboard pulls away from the wall along the entire length
- Gap at the top of the baseboard
- Corner doesn't align
- Joint along the length is visible
- Baseboard 'wanders' after installation
- End at the doorway looks rough
- After painting, gaps became more noticeable
- Which MDF baseboard is best to choose for uneven walls
- Base thickness: the thicker, the better it hides
- Height: why 80–100 mm is better than 60 mm
- Straight or shaped: which hides more
- Baseboard for painting: the best solution for uneven walls
- Glue, clips, or fasteners: what to choose for crooked walls
- Glue: when it works and when it fails
- Clips: convenience with proper geometry
- Additional fasteners: dowels and nails
- Combined installation: the best result for crooked walls
- Comparison table of fastening methods
- How to close the gap between the baseboard and the wall
- Sealant for MDF baseboard: application rules
- When the gap is too large
- How to finish MDF baseboard corners on uneven walls
- Diagnosing the corner before installation
- Inside corner: miter cut or 'notch'
- Outside corner: factory element or miter cut
- What to do if the corner 'wanders' along the entire height
- How to join MDF baseboard lengthwise on uneven walls
- Choosing the location for the joint
- Straight joint or at an angle
- Preparing the joint area
- Final joint finishing
- MDF baseboard for painting: why it's the best solution for complex walls
- Main advantage: final finishing hides everything
- Baseboard in wall color: the 'disappearing' effect
- How to properly prepare the baseboard for painting before installation
- Preparing the wall before baseboard installation
- Checking with a rule
- Removing old baseboard and preparing the base
- Priming the wall
- Doorway end: neat finishing
- Option 1: under the architrave
- Option 2: flush with the architrave
- Option 3: wooden corner as decorative finish
- Mistakes when installing MDF baseboard on uneven walls
- What to buy for neat installation
- Step-by-step guide: installing MDF baseboard on a crooked wall
- FAQ: Answers to Popular Questions
- About the Company STAVROS

Renovation is done. Walls painted, floor laid, doors installed. The last step — the baseboard. And here begins what no one warns about: MDF Skirting Board doesn't fit against the wall. A gap at the top. A gap in the corner. A wave along the length. The end at the door looks rough. Sound familiar?
This is not a defect of the baseboard. This is the reality of most Russian apartments: walls are crooked, corners are non-standard, surfaces have differences of 5–15 mm. MDF baseboard is a geometrically perfect straight plank, and it mercilessly shows every deviation of the base. That's why the question 'how to install MDF baseboard on an uneven wall' is one of the most pressing after finishing a renovation.
This article is a complete practical guide. We'll cover everything: profile selection, fastening methods, working with corners and joints, masking gaps, and final finishing. No theoretical digressions — only what works.


Why MDF baseboard reveals wall unevenness
Before looking for a solution, it's important to understand the mechanics of the problem. MDF is a dense, homogeneous material with no internal stresses. It doesn't bend under finger pressure. It doesn't "follow" a curved wall like a soft plastic profile does.
Place a straight 2-meter metal ruler on a wavy surface — and you'll see gaps. That's exactly how Baseboard MDF behaves on an uneven wall. Where the base is convex, the baseboard sits tight. Where it's concave, it pulls away, creating a visible gap.
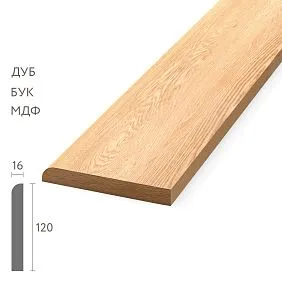
The second factor is the profile thickness. A standard MDF baseboard has a thickness of 9–16 mm. The thinner the profile, the less "body" it has to cover unevenness at the base. A thin strip presses at one point and pulls away at another. A wider, more massive baseboard base covers a larger area of unevenness near the floor.
The third factor is corners. In most apartments, there isn't a single perfectly right angle. 89°, 91°, 88° — that's the normal reality. A baseboard cut at exactly 45° in such a corner creates a gap on one side. Sometimes on both sides at once.
Understanding this mechanics is half the solution. The other half is the right tools and sequence of actions.


What problems occur most often
Before starting installation, it's important to correctly diagnose the specific problem with your wall. There are several, and each requires its own approach.
Our factory also produces:


The baseboard is pulling away from the wall along its entire length.
This is a classic case of wavy walls. The base alternately touches and pulls away. The cause is the wall "wandering" horizontally with an amplitude of 3–10 mm. The solution is combined installation: glue + clips with a fastening step of no more than 400 mm.
Get Consultation
Gap at the top of the baseboard
One of the most noticeable defects. The bottom edge of the baseboard rests on the floor, while the top edge pulls away from the wall. The cause is the wall base leaning outward or inward. When leaning outward, the baseboard rests on the protrusion and pulls away at the top. When leaning inward, the lower part does not reach the wall, while the upper part touches it.
The corner does not match
The joint in the corner separates, showing a gap at the apex or along the joint length. The cause is the corner not being 90°. Planks cut at 45° create a gap with any deviation from a right angle.
The joint along the length is noticeable
On long walls, two planks must be joined. If they are not joined in the same plane (due to wall unevenness), the joint is visible as a step.
The baseboard "wanders" after installation
Not fixed, moves when touched. The cause is the adhesive not bonding to the uneven surface, and the clips are installed with too large a spacing or not tightened.
The door frame edge looks rough
The MDF cut is visible at the end, there is no neat finish. This is not a wall problem — it's a problem of missing details: a decorative corner or a special cap.
After painting, the gaps became more noticeable
Paint emphasizes the texture. A thin gap that was invisible before painting becomes clearly visible after. The solution is to apply finishing putty to the joints before painting, not after.
Which MDF baseboard is best for uneven walls
Choosing the profile is the first and most important decision. It determines how easy the installation will be and how neat the result will look.
Base thickness: the thicker, the better it hides
Suitable for uneven walls MDF Skirting Board with a base thickness of at least 12–14 mm. The wide 'heel' of the baseboard covers a larger contact area with the wall. Where a thin profile would 'jump' over waves, a massive one lies more evenly.
A thin profile of 9 mm is for perfectly flat walls. On a curved surface, it doesn't help but only exposes the problem with even greater precision.
Height: why 80–100 mm is better than 60 mm
It may seem paradoxical, but a tall MDF baseboard of 80–100 mm is easier to install on a curved wall than a narrow 60 mm one. The reason: the wide front surface "covers" the lower part of the wall, where the most significant irregularities are usually concentrated. After installing a 100 mm baseboard, you visually "cover" the entire lower belt of the wall, hiding what would be visible through a 60 mm one.
More about choosing the height of the MDF baseboard can be found in a separate article — it details the proportions for each type of room.
Straight or shaped: which hides more
A straight MDF baseboard is clean, modern, minimalist. But it is "ruthless" to gaps: the flat surface does not create shadows, and any gap between the baseboard and the wall is immediately visible.
A shaped profile with a fillet or cove creates a shadow line at the top of the baseboard. This shadow "masks" a small gap. If the wall is uneven and perfect fit is not possible, a shaped profile visually "forgives" a small gap better than a straight one.
Conclusion for curved walls: a shaped profile with a pronounced top fillet + base thickness of 12–14 mm + height of 80–100 mm = minimally noticeable gaps with proper installation.
Baseboard for painting: the best solution for complex walls
— is a horizontal element that frames the room at the bottom of the walls where the wall meets the floor. Skirting boards perform several functions: they hide the technological gap between the wall and floor covering (necessary for thermal expansion), protect the lower part of the wall from mechanical damage, create visual completion, and may conceal wiring. on crooked walls — a strategically smart choice. Why? Because after installation, gaps and joints are filled, sanded, and painted to match the wall color. The final paint unites the baseboard and wall into a single surface, making minor gaps nearly invisible.
Additionally, a paintable baseboard can be repainted during work without replacing the entire profile. If a gap in one spot turns out larger than planned — you fill, sand, and paint. No traces left.
With a white baseboard that has a factory coating, this maneuver is not possible: any filling will require a full repaint. That's why White MDF Skirting Board on crooked walls requires especially careful preparation and installation — there is less room for error.
Glue, clips, or fasteners: what to choose for crooked walls
The question "what to glue MDF baseboard to the wall" is the most common in search queries. And not without reason: the method of fastening determines 80% of the result on uneven surfaces.
Glue: when it works and when it fails
Construction adhesive (acrylic, MS-polymer, liquid nails) is a quick solution for relatively flat walls. It is applied in a zigzag or dots on the back of the baseboard, then the plank is pressed against the wall and secured.
The problem with crooked walls: glue only holds where the baseboard touches the wall. On concave sections, there is air between the glue and the wall. Until the glue dries, the plank "wanders." After drying, it only holds at contact points. Any mechanical impact (vacuum cleaner bump, moving furniture) — and the baseboard detaches precisely in these "empty" spots.
For crooked walls, glue is only used in combination with other fastening methods. As a standalone method, it is not recommended.
Glue application rules:
-
Apply glue in a zigzag pattern without gaps along the entire length of the strip
-
On uneven surfaces, apply glue in dots with a minimum spacing of 100–150 mm
-
After applying glue, press the strip and immediately secure it with additional fasteners
-
Until the glue fully sets (24–48 hours), the baseboard must not be loaded
Clips: convenience with proper geometry
MDF baseboard clips — a hidden fastening system. The metal clip is attached to the wall with a dowel or screw, and the baseboard snaps on top. It looks neat, installation is quick, and the baseboard can be removed and reinstalled.
Key condition for clip operation: the wall must be sufficiently flat so that each clip is in the same plane as its neighbors. If clips are installed on different "bumps" and dips in the wall, the baseboard will bend between them, creating a wave along the top edge.
For uneven walls: clips are installed strictly along a tensioned cord or laser level, and thin spacers (washers, pieces of MDF) are placed under clips that fall on concave areas to compensate for the difference. Clip spacing on problem walls is 300–350 mm, not the standard 500–600 mm.
Additional fasteners: dowels and nails
Finishing nails ("pins") — driven with a pneumatic nailer or a nail set through the face of the baseboard. The head is countersunk, and the spot is filled with putty. Reliable, fast, but the filled spots are visible (especially on white baseboards).
Nail anchor through the baseboard — a reliable but rough method. The hole is covered with a matching plug. Used where other methods fail: on very uneven walls, concrete surfaces, and corners with large gaps.
Combined installation: the best result for uneven walls
The professional method for uneven walls is a combination:
-
Adhesive (MS polymer or acrylic) — along the entire length of the back surface
-
Finishing nails spaced 400–500 mm apart — hold until the adhesive sets
-
At problem corners and ends — a dowel or a clip
The adhesive ensures continuous contact along the entire length, while the nails hold it until it sets. After the adhesive dries, the nails can be considered just a backup: the main hold is from the adhesive.
More details about How to install MDF skirting board to various substrates — in the complete installation guide.
Comparative table of fastening methods
| Method | Suitable for curved walls | Disassembly | Visible elements |
|---|---|---|---|
| Adhesive only | No | No | No |
| Clips | Conditionally | Yes | No |
| Finish nails | Yes | No | Anchoring points |
| Nail anchor | Yes | No | Caps |
| Glue + nails | Yes | No | Anchoring points |
| Glue + clips | Yes | Yes | No |
How to close the gap between the baseboard and the wall
The gap is closed — meaning the renovation is finished neatly. The gap is not closed — meaning the work is not done, no matter how expensive the baseboard itself is.
Sealant for MDF baseboard: application rules
Sealant is a standard tool for masking the joint between the baseboard and the wall. But it must be used wisely, otherwise the result will be worse than the original gap.
Which sealant to use. Only acrylic water-based sealant that can be painted. Not silicone: silicone cannot be painted, and its surface "attracts" dust after drying. Silicone is only suitable in bathrooms and kitchens where there is no painting.
Gap size. Acrylic sealant works well for gaps up to 3–4 mm. If the gap is larger, you need to first fill it with putty (without polymer filler, regular finishing putty), let it dry, and then apply sealant over the surface for final sealing.
How to apply neatly. The "masking tape" method: tape the wall surface with painter's tape flush against the top edge of the baseboard. Apply sealant, smooth it with a wet finger, and immediately remove the tape (before the sealant sets). The line will be perfectly straight.
When sealant is not the solution. If the gap is caused by improper installation — the baseboard is poorly pressed, the adhesive hasn't set, or the clips are installed incorrectly — sealant only temporarily hides the problem. After a few months, the baseboard will shift, the sealant will crack, and the gap will reappear. The correct sequence: first eliminate the cause (improve the fastening), then mask the joint.
Sealant color. For baseboards to be painted — white sealant, which is painted the same way as the baseboard itself. For laminated white baseboards — white sealant without painting. For decorative wood-look baseboards — transparent or color-matched.
When the gap is too large
A gap larger than 5 mm is no longer a job for sealant. Here are three options:
Option 1: Dismantle and improve fastening. Remove the baseboard, install shims in areas where the wall dips, and reattach. Shims are cut pieces of MDF or plywood 2–5 mm thick, glued to the wall in recessed areas.
Option 2: Putty. The gap is filled with water-based finishing putty in several layers (each layer no more than 2 mm). After complete drying — sanding and painting. This method is labor-intensive but gives a monolithic result.
Option 3: Choosing a different profile. If the gaps along the entire length are 8–10 mm or more, this is a sign that the selected baseboard is not suitable for this wall. A profile with a larger base thickness or preliminary wall leveling is needed.
How to finish MDF baseboard corners on uneven walls
Corners are the most problematic area. Several issues converge here: uneven walls, a non-standard angle, and the need for precise cutting of two planks.
Corner diagnostics before installation
Before picking up the saw, measure the angle. Apply a protractor (electronic or mechanical) to both walls at the corner. Record the exact value. An angle of 87° — each plank is cut at 43.5°. An angle of 93° — at 46.5°.
If you don't have a protractor, use the 'template' method: press a piece of cardboard into the corner, trace both walls with a pencil, and divide the resulting angle with a bisector. An accuracy of 1–2° is sufficient for the job.
Internal corner: miter cut or 'notching'
The classic 45° miter cut (or half the actual angle) is the basic method. Use a miter saw with an adjustable angle. The blade should be fine-toothed (at least 60 teeth), otherwise the MDF will chip at the end.
If the angle is non-standard, the cut planks will have a gap at the apex or along the length. A small gap (1–2 mm) is sealed with sealant after installation. A gap of 3–5 mm requires additional finishing putty.
'Notching' (cutting one plank without a miter, overlapping) is a quick but rough method. It is only used where the corner will be covered by furniture or decor.
External corner: factory element or miter cut
The external corner is the most vulnerable spot. A miter cut on an external corner with a non-standard wall angle creates an even more noticeable gap than on an internal one. The MDF ends are exposed, the material is visible.
For uneven walls at external corners, factory decorative corner pieces are recommended. They completely hide the joint, do not require precise miter cutting, and with proper selection look neat even with significant angle deviations.
Factory Wooden corner bracket — an even more reliable solution. Solid wood stands monolithically in the corner, does not deform, holds the load, and simultaneously hides all joint imperfections. Paired with an MDF baseboard, a wooden corner element looks like a part of a well-thought-out finish, not like a "patch."
Detailed instructions for working with corners of wooden baseboard and miter cutting methods are discussed separately — there, all the nuances of working with non-standard angles are covered.
What to do if the angle "drifts" along the entire height
Sometimes the problem is not in the horizontal deviation of the angle, but in the walls at the corner "diverging" vertically: 89° at the bottom, 92° at the top. In this case, even a correctly miter-cut baseboard will not fit tightly along the entire height of the joint.
Solution: the miter cut is made based on the average angle value, gaps at the top and bottom (maximum 1–1.5 mm) are sealed with sealant. If the walls diverge significantly, only a factory corner element is used, which completely covers the joint area.
How to join MDF baseboards along the length on curved walls
Joining along the length on flat walls is a simple task. On curved walls, it requires preliminary preparation.
Choosing the location for the joint
First rule: the joint is made not where the planks end, but where it is advantageous. An advantageous location is a section of the wall without significant irregularities, not in plain sight when entering the room, in an area covered by furniture or decorative items.
Unfavorable location for the joint: a convex 'hump' on the wall, the most visible spot (front wall opposite the entrance), corner areas (planks there will be cut short anyway, an extra joint only adds fuss).
Straight joint or at an angle
Straight joint (end to end at 90°) is the simplest but most noticeable. Two cuts stand next to each other, and at the slightest shift of the planks, a gap is visible.
'Lock' joint at 45° is more complex to execute but practically invisible when done correctly. The beveled end covers any gap. Even if the planks move apart slightly, the bevel creates a shadow and hides the connection.
On curved walls, exclusively the 'lock' joint at 45° is recommended. A small additional effort in cutting yields a significantly neater result.
Preparing the area for the joint
Before installing the second plank, assess the plane of the already installed one. If the first plank has slightly "pulled away" from the wall at the joint area, press it down and secure it with a finishing nail or a clamp. The joint should be made at a point where both planks are in the same plane.
If it is impossible to ensure a single plane (the wall at the joint is very uneven), prepare a shim: a small piece of MDF or plywood glued to the wall at the joint point. It will create a level "platform" for the connection.
Final finishing of the joint
After installation, the joint is coated with sealant or finishing putty, sanded, and painted. For a paintable baseboard, this step is mandatory. For a laminated white baseboard, use white sealant without painting, but with careful smoothing.
A joint on an MDF baseboard is a task of precision, not force. Do not try to "cover up" a poorly made joint with a large amount of sealant. This will only increase the noticeable "bulge." It is better to redo the cut correctly.
MDF baseboard for painting: why it is the best solution for complex walls
This section deserves a separate and detailed discussion. Not because it is a promotional point, but because it is a practical fact confirmed by thousands of renovations.
Main advantage: final finishing hides everything
An MDF baseboard for painting goes through three stages of final finishing after installation: puttying all joints, gaps, and nail head areas → sanding → painting in two coats. After this process, the baseboard becomes part of the wall.
A 2 mm gap at the top edge? Covered with putty and painted over. A lengthwise joint? Sealed with sealant and painted. Nail head points? Puttied and invisible under the paint.
With laminated or decorative baseboards, this resource is absent. Any interference — a scratch, a stain, a sloppy joint — is visible on the factory surface. It is almost impossible to fix without leaving a trace.
Baseboard in the color of the wall: the "disappearance" effect
If the walls are painted in a specific color — gray, green, powdery, anthracite — the baseboard for painting is painted the same color. The wall and baseboard become a single surface. The boundary between them disappears.
This technique is actively used by designers in modern interiors. On crooked walls, it works doubly: when the baseboard has "dissolved" into the wall, the eye does not catch on small unevenness of the joint.
How to properly prepare a baseboard for painting before installation
Before installation: if you plan to paint after installation — preliminary priming of the baseboard ends with acrylic primer-isolator. MDF ends without primer absorb paint unevenly and darken.
After installation and final puttying: 1 coat of primer → first coat of acrylic enamel or water-based paint → light sanding P400–P600 → second finishing coat. It is better to paint with a "mini-rakel" brush or a small foam roller — they do not leave splashes and give a smooth surface.
Preparing the wall before installing the baseboard
This step is most often skipped — and it determines whether the result will be neat.
Check with a straightedge
Take a 2-meter long straightedge and apply it horizontally along the wall near the floor. Gaps between the straightedge and the wall are your "problem areas." Where the gap is more than 5 mm — preparation is necessary: either leveling with plaster, or pads under the clips, or a larger amount of glue.
This inspection is especially important in corners: at a distance of 20–30 cm from the corner, walls often have the greatest deviations.
Removing the old baseboard and preparing the base
If you are replacing an old baseboard, be sure to remove any remaining glue, wallpaper, or paint from the surface. Even a small buildup of old glue creates a local bump that will prevent the new baseboard from lying flat.
The surface in the installation area must be clean, dry, and free of peeling. Dust and loose plaster significantly reduce glue adhesion.
Priming the wall
On absorbent surfaces (aerated concrete, old plaster, wallpaper), the glue 'sinks' into the base and does not hold the baseboard. Apply a deep penetration primer to the installation area. This will double the glue's adhesion and reduce the risk of the baseboard coming off after a few months.
End at the doorway: a neat finish
The end of the baseboard at the doorway is the 'face' of the entire job. Here the baseboard ends, and how exactly it ends is immediately visible.
Option 1: under the trim
The baseboard goes under the door trim. If the trim was installed before the flooring and baseboard, the baseboard is simply cut to the width of the trim and tucked under it. The end is hidden, nothing is visible. The neatest option.
Option 2: flush with the trim
The end of the baseboard is flush with the front plane of the trim. The MDF end is exposed in this case. It needs to be carefully cut at 90°, sanded, primed, and painted. Without these steps, the exposed end will look like unfinished work.
Option 3: wooden corner as a decorative finish
Wooden corner bracket installed vertically at the point where the baseboard ends near the doorway. It hides the MDF end, decorates the transition, and simultaneously protects the corner from mechanical damage. For interiors with wooden doors and trims, it is the most logical and beautiful solution.
Errors when installing MDF baseboards on uneven walls
A list of the most common errors. Knowing these errors is a real insurance against rework a month after the work is completed.
1. Gluing the baseboard without a preliminary fitting. Before applying glue, the baseboard should be held against the wall "dry" to assess where and how much it gaps. Only then — base preparation and installation.
2. Not checking the wall with a long straightedge. The wall may look visually level — the straightedge will show reality. Skipping this step = surprises during installation.
3. Trying to fill a large gap with just sealant. Gap larger than 3–4 mm → first putty, then sealant. A large volume of sealant does not hold the load and cracks when drying.
4. Installing a baseboard that is too thin on a very uneven wall. A thin 9 mm profile cannot cover a 7–8 mm difference at the base. A more massive profile or preliminary leveling is needed.
5. Do not account for corner curvature. Cutting at 45° without measuring the actual angle will result in a gap 100% of the time on non-standard corners.
6. Make a joint on a problematic wall section. The joint should be moved to a smoother area, not placed where the plank happens to end.
7. Choose white baseboard without careful finishing. White color does not forgive mistakes: every gap and unevenness is visible. Either perfect work or baseboard for painting.
8. Not plan the end at a doorway. An end without a decorative cap or corner is exposed MDF, which looks like unfinished installation. This is a small detail worth planning in advance.
9. Installing baseboard on a damp wall. After plastering, the wall must dry completely (at least 4 weeks). A damp wall shrinks, and the fixed baseboard "warps" along with it.
10. Using silicone sealant instead of acrylic. Silicone cannot be painted. In living spaces with painted baseboards, only acrylic sealant.
What to buy for neat installation
Final list of materials and elements for full-fledged work with MDF baseboard on uneven walls:
MDF Skirting Board — with a thick base (12–14 mm), height 80–100 mm, straight or shaped profile. The choice depends on the interior style and the degree of wall unevenness.
MDF baseboard for painting — for walls of non-standard color or for the most "forgiving" installation. Allows you to finally hide all joints and gaps under layers of paint.
White MDF Skirting Board — for standard white interiors. Requires perfect preparation and clean installation. On uneven walls, it is used with mandatory finishing of joints.
solid wood baseboard — for areas with high durability requirements, for classic interiors. Solid wood allows for restoration and repainting multiple times.
Wooden corner bracket — for finishing external corners and ends of doorways. Hides all joints, does not require precise cutting, adds decorative appeal.
wooden molding — a horizontal element for framing walls. In complex interiors, it complements the baseboard, creating a unified lower decorative system.
Trimming Items — additional elements for joints, ends, transitions. Everything needed for a finished result without random details.
About which MDF baseboard to choose for a specific interior and floor covering is described in detail here — all scenarios are covered.
Step-by-step guide: installing MDF baseboard on a curved wall
For those who want a practical guide 'from A to Z' — a brief step-by-step instruction.
Step 1 — Diagnostics. Check the wall with a 2 m straightedge. Mark all areas with a gap greater than 3 mm with a pencil. Measure all corners with an angle finder.
Step 2 — Wall preparation. Clean the base from glue residue, dust, loose plaster. Apply primer to absorbent surfaces. Allow to dry.
Step 3 — Dry fit. Lay out the planks around the perimeter without fastening. Assess the fit, mark problem areas. Determine locations for lengthwise joints (choose flat sections of the wall).
Step 4 — Cutting corners. Measure the corners, set the required angle on the miter saw. Cut all corner sections. Check the dry fit in the corner.
Step 5 — Installation. Apply glue in a zigzag pattern to the back of the plank. Press against the wall. Immediately secure with finishing nails at 400–500 mm spacing. On problem areas — 250–300 mm spacing. Allow the glue to set (24 h).
Step 6 — Final finishing. Tape the top joint with painter's tape. Apply acrylic sealant. Smooth with a moistened finger. Remove the tape immediately. Allow to dry.
Step 7 — Filling nail holes. Fill finishing nail points with putty. Allow to dry. Sand smooth.
Step 8 — Painting (for paintable baseboard). Primer → first coat of paint → sanding with P400 → final coat.
FAQ: Answers to popular questions
Can MDF baseboard be installed on uneven walls?
Yes, it can. But it requires the right profile selection (thick base, height 80–100 mm), combined installation (glue + additional fasteners), and final finishing of joints with sealant or putty.
How to glue MDF baseboard to the wall?
Acrylic mounting adhesive or MS polymer adhesive. On very uneven walls, adhesive is used only in combination with finishing nails or clips — to hold until the adhesive sets.
What is better: adhesive or clips for MDF baseboard?
On crooked walls — a combination of adhesive and nails. Clips are good on even walls where all attachment points are in the same plane. On wavy walls, clips create a "wave" along the top edge of the baseboard.
How to close the gap between the baseboard and the wall?
Gap up to 3–4 mm — acrylic sealant for painting. Gap 4–8 mm — finishing putty in several layers, then sealant. Gap larger than 8 mm — dismantling and eliminating the cause (shims, leveling).
How to design the corners of MDF baseboard on crooked walls?
Internal corners: cut at the actual angle (not 45°, but half of the measured one), gaps — sealant. External corners: factory decorative corner or wooden corner — more reliable and neater than a miter cut on a crooked wall.
Which baseboard best hides unevenness?
Baseboard with a thick base (12–14 mm), height 80–100 mm, shaped profile with a top cove. Baseboard for painting is the best choice, as the final paint hides all touch-ups.
Can I paint MDF baseboard after installation?
Yes. Baseboard for painting is specifically designed for painting after installation. Sequence: primer (1 coat) → first coat of paint → sanding → finish coat.
What to do if the baseboard is coming away from the wall?
Remove it (carefully to avoid damaging the wall surface). Clean the base. Add shims on concave areas. Apply new glue. Secure with nails at 300 mm spacing. Allow to dry completely.
Is it necessary to level the walls before installing MDF baseboard?
For deviations up to 5 mm — proper fastening and final finishing are sufficient. For deviations of 8–15 mm — local leveling of the lower part of the wall is recommended (applying putty to protrusions and depressions). For deviations over 15 mm — full leveling is mandatory.
About the company STAVROS
Baseboard on a curved wall — a task with nuances. And the right material here matters as much as the right installation technique.
STAVROS is a Russian manufacturer of decorative products from natural solid wood and MDF with a full range for lower and upper interior finishing. The catalog includes MDF baseboards for painting and with factory coating, heights from 60 to 150 mm, with various profiles: straight, shaped, with a chamfer. The planks are made of dense MDF class E1, thickness 12–16 mm: exactly the parameter that matters on uneven walls.
The STAVROS range has everything needed for a finished result: Wooden corner pieces for finishing external corners and ends, Wooden moldings for horizontal wall framing, Trimming Items for all auxiliary tasks. Solid wood baseboards — for those who choose maximum durability and the possibility of multiple restorations.
STAVROS delivers products to Moscow, Saint Petersburg, and other cities in Russia. Find the right MDF Skirting Board height, profile, and decor, check availability and price — in the catalog on the website.