Article Contents:
- Short answer: what to order together with MN-241
- What is confirmed about furniture leg MN-241
- Why the installed plate is not yet a complete mounting kit
- What is included in one MN-241 item, and what needs to be agreed separately
- Included in the selected leg
- Determined separately
- Material
- Overall thickness
- Load-bearing thickness
- Internal structure
- Embedded plate
- Finishing
- Solid wood tabletop
- MDF tabletop
- Plywood countertop
- Panel with facing
- Plate dimensions
- Number of standard holes
- Hole diameter
- Hole shape
- Hole arrangement
- Plate orientation
- Conditional calculation example
- Beech for enamel
- Oak for transparent finish
- Mistake 1. Considering the installed plate a complete set
- Mistake 2. Buying screws only by the leg's article number
- Mistake 3. Relying on the overall thickness
- Mistake 4. Not accounting for the 2 mm plate
- Mistake 5. Measuring fastener length from the wrong point
- Mistake 6. Using the same fasteners for solid wood and MDF
- Mistake 7. Not obtaining the plate drawing
- Mistake 8. Not using all provided mounting points
- Mistake 9. Drilling without a depth stop
- Mistake 10. Drilling a finished painted countertop immediately
- Mistake 11. Pressing the plate with excessive force
- Error 12. Automatically buying a second plate
- Error 13. Forgetting about the orientation of the oval leg
- Error 14. Considering four legs a universal scheme
- Error 15. Not providing access for tightening
- Error 16. Not protecting the finished finish
- Error 17. Moving the table by the tabletop without checking
- Step 1. Determine the furniture
- Step 2. Calculate the final height
- Step 3. Determine the number of supports
- Step 4. Choose the wood species
- Step 5. Describe the tabletop
- Step 6. Get the plate drawing
- Step 7. Select the joint type
- Step 8. Calculate the working length
- Step 9. Calculate the quantity
- Step 10. Prepare the installation
- Step 11. Check rigidity
- Step 12. Place a single order
- Does the metal plate come with MN-241?
- Are screws for the countertop included?
- Why can't standard screws be included in the kit?
- What length should the screw be for MN-241?
- Do I need to account for the 2 mm thick plate?
- Can I use fasteners based on the total thickness of the tabletop?
- How do I find out the number of screws?
- Can I use only part of the holes?
- Do I need to pre-drill the tabletop?
- How do I avoid drilling through the tabletop?
- Is a separate mounting plate needed?
- Will the same fasteners work for solid wood and MDF?
- Can MN-241 be installed on a thin tabletop?
- Are four MN-241 enough for a large table?
- Is MN-241 suitable for a console?
- Can MN-241 be used without a tsarga?
- Which material should I choose — beech or oak?
- Do I need to paint the legs before installation?
- Can the fasteners be unscrewed multiple times?
- Are glides needed?
- What to do if the legs arrived without self-tapping screws?
- Can legs and fasteners be ordered in one shipment?
- What matters more: the length or the diameter of the fastener?
- Should a reserve of screws be kept?
- How to check the correctness of installation after assembly?

Intent buy the modern furniture leg MN-241 often arises after the table shape is determined, the tabletop is chosen, and the project is almost ready for assembly. The size of the support fits, the modern oval geometry supports the intended interior, and the beech or oak solid wood can be matched with the future finish. It seems that all that remains is to order the required number of legs, wait for delivery, and screw them to the tabletop.
However, at the moment of unpacking, a question may arise: there are metal plates on the legs, but no screws or bolts. Is the set incomplete? Did they forget to include something during assembly? Do I need to buy another mounting plate? Can I take any fastener of a suitable diameter from the nearest store?
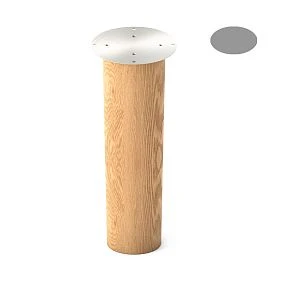
No, the absence of universal screws or bolts does not mean a packaging error. The MN-241 furniture leg has a standard metal plate 2 mm thick already installed, but the fasteners for connecting this plate to a specific tabletop are not included in the product item. And this is a fundamentally important difference. The same support can be installed on a tabletop made of solid wood, plywood, MDF, multilayer board, or composite material. The thickness, structure, strength of the load-bearing layer, and the location of inserts differ among these bases. One universal screw cannot work equally safely in all cases.
To ensure the legs do not arrive before the fasteners, and the installer does not have to select screws by eye, the set must be assembled before payment for the order. In addition to the MN-241 itself, it is necessary to determine in advance the tabletop material, its actual and load-bearing thickness, the number of standard holes in the plate, the type of connection, and the permissible depth of fastener entry. Then assembly does not turn into an experiment, and the screw does not come out on the front side of the table.
Short answer: what to order together with MN-241
The MN-241 product item includes a wooden support with an already installed metal mounting plate. The plate thickness is 2 mm. Screws, bolts, or other elements used to connect the plate to the tabletop are selected separately.
Before placing a full order, the following data will be required:
-
Number of legs according to the project.
-
Material of each support: beech or oak.
-
Planned wood finish.
-
Tabletop material.
-
Full thickness of the tabletop.
-
Thickness of the layer into which the fastener will actually enter.
-
Presence of decorative cladding, voids, honeycomb filler, or embedded insert.
-
Drawing or precise diagram of the installed plate.
-
Number and geometry of standard holes.
-
Type of fastener head compatible with the holes.
-
Allowable working length of the screw or self-tapping screw.
-
Number of fastening units per plate and per entire set.
-
Need for pre-drilling.
-
Need for reinforcing the tabletop.
-
Method for protecting the bottom ends of legs and flooring.
The main mistake is to start the selection with the words: "Give me screws for MN-241." The leg article number indicates which support is chosen, but does not reveal the tabletop construction. The correct request sounds different: "I need fasteners for the installed MN-241 plate under a tabletop of such-and-such material and such-and-such thickness."




What is confirmed about the furniture leg MN-241
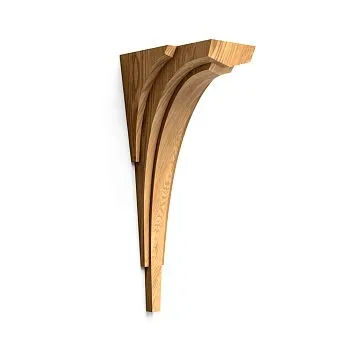
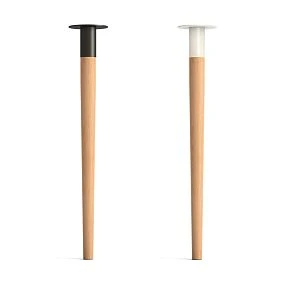
MN-241 is a tall modern wooden support designed for dining and writing tables, work surfaces, and consoles. Its dimensions are 742 × 160 × 95 mm. The model is made of beech and oak, belongs to the "Prestige" quality category, and is supplied with an installed metal plate.
Unlike a traditional turned leg with alternating spheres, rings, and waists, MN-241 has a laconic streamlined shape. The oval cross-section makes the support expressive but does not turn it into a classic decorative baluster. This geometry suits furniture where the structural element should remain noticeable while not conflicting with a smooth tabletop, straight fronts, and calm room architecture.
| Parameter | Confirmed value | What this means for the order |
|---|---|---|
| Article number | MN-241 | The article number must be specified in the invoice, order, and installation sheet |
| Product type | Modern furniture leg | This is a separate support, not a ready-made underframe |
| Size | 742 × 160 × 95 mm | The height and dimensions should be matched with the tabletop and the final furniture height |
| Material | Beech or oak | The wood species is chosen together with the finishing system |
| Quality category | «Prestige» | The specific configuration is specified in the order |
| Purpose | Dining and writing tables, work desks, consoles | The stability of the finished furniture is still checked based on the entire structure |
| Installation method | Directly to the tabletop through the installed plate | A compatible and sufficiently sturdy base is required |
| Mounting plate | Mounted on the leg | There is no need to automatically purchase a second plate |
| Plate thickness | 2 мм | The thickness is included in the calculation of the working length of the fastener |
| Fastening to the tabletop | Not included | Screws or self-tapping screws are selected based on the actual tabletop |
| Price and availability | Checked before ordering | Current information should be viewed in the card of the selected option |
The size of 742 mm should not be perceived as the final table height. The thickness of the tabletop is added to it, and if there are pads, inserts, an intermediate frame, or other structural elements, their height is also added. For example, the same leg under a tabletop with a thickness of 20 and 40 mm will give a different final seating. Therefore, first determine the desired height of the work surface, then subtract the thickness of all elements above the support, and only then confirm the model.
For a buyer who is still comparing the shape, height, and purpose of supports, it is useful to open catalog of legs for tabletop. But when MN-241 is already selected, the further question is not about finding another leg, but about assembling a complete mounting kit.
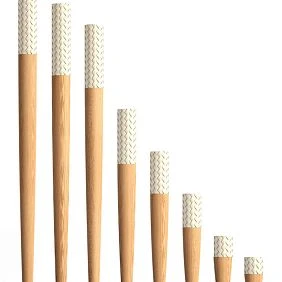
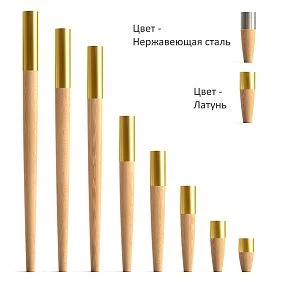
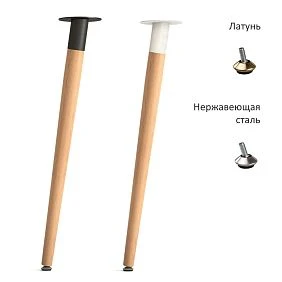
Our factory also produces:



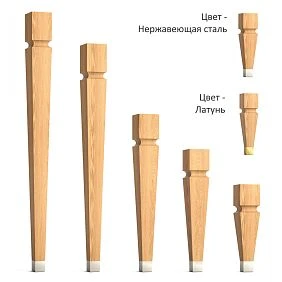
Why an installed plate is not yet a complete mounting kit
The metal plate and fasteners perform different tasks.
The plate forms a seating unit on the upper end of the leg. It distributes the force between the wooden support and several attachment points, sets the position of the holes, and helps connect the leg to the tabletop. In the MN-241 model, this part is already attached to the support.
Screws or self-tapping screws do another job: they press the plate to the tabletop and are held inside its material. Their effectiveness depends not only on the plate itself, but also on the base. A self-tapping screw that works well in solid wood cannot be transferred without checking to loose MDF, thin plywood, a hollow panel, or a board with a decorative layer and a weak core.
Let's imagine two identical MN-241 units. The first is installed under an oak tabletop made of solid material. The second is installed under a panel that has a decorative facing on the outside, while the load-bearing layer is significantly thinner than the total thickness. The plates on the legs are the same. However, the fastener length, thread shape, hole preparation, and allowable insertion depth will differ.
This is why completeness cannot be assessed only visually. The leg looks ready: there is a metal part with holes on top. But the readiness of the support itself does not equal the readiness of the entire table for installation.
The buyer must have two separate questions addressed:
-
what is included in the MN-241 product item;
-
how this item will be connected to a specific tabletop.
If the second question is left for the installer to handle "later," the entire project depends on which fasteners happen to be in their vehicle or workshop. For inexpensive temporary furniture, this approach is already risky. For a tall solid wood support used as part of a dining or writing table, it is even more unacceptable.
Get Consultation
What is included in one MN-241 item, and what needs to be agreed upon separately
One MN-241 item is one furniture leg, not a set of four supports and not a complete kit for assembling a table. The quantity of products is determined by the project.
If the project specifies four legs, the invoice must include four product items or one MN-241 line with a quantity of 4 pieces. If the design requires six supports, two end supports, or another solution, the quantity changes. You cannot automatically assume that any table is necessarily assembled on four legs.
Included in the selected leg
-
wooden support MN-241;
-
selected material — beech or oak;
-
size 742 × 160 × 95 mm;
-
installed metal mounting plate;
-
thickness of the installed plate is 2 mm.
Separately determined
-
number of legs;
-
color and finishing system;
-
fastening between the plate and the tabletop;
-
number of fastening elements;
-
need for washers, bushings, or other intermediate components;
-
need for an anchor plate;
-
need for pilot drilling;
-
template for marking;
-
protection of the bottom end and floor;
-
packaging of the complete mounting kit according to one bill of materials.
The point of this breakdown is not to complicate the purchase. On the contrary, it removes the false expectation that all the metal parts needed for any base are already in the box.
Why the manufacturer does not include one universal screw
At first glance, a universal fastener seems convenient. Bought a leg — got a bag of screws — immediately assembled the table. But the universality here would be only superficial.
The same screw may turn out to be:
-
too short for reliable retention in a thick tabletop;
-
too long for a thin base;
-
unsuitable in thread for MDF;
-
dangerous for a panel with a thin load-bearing layer;
-
incompatible with the shape of the hole in the plate;
-
too wide for the standard hole;
-
too thin for the head to properly press the plate;
-
unsuitable for a detachable connection;
-
requiring different hole preparation;
-
dangerous for the front decorative layer.
Even the phrase "wooden tabletop" does not provide a complete answer. It could be solid wood, glued panels, plywood construction, veneered board, MDF with facing, or a composite panel. The visible surface may look similar, but the internal structure can be completely different.
Moreover, not only the material matters, but also the direction of the load. A tall leg transmits not just a single vertical force to the joint. When a person leans on the edge of the table, moves the furniture, or accidentally pushes the tabletop, a tendency to wobble arises at the joint. The plate must remain tightly pressed, and the fasteners must stay in the base without gradually enlarging the holes.
Consequently, a package of "identical screws for all occasions" would create a dangerous illusion of a ready-made engineering solution. The absence of such a package forces the fasteners to be linked to the actual project—exactly where it is needed.
Selection begins not with the screw, but with the tabletop's specification sheet
A person who wants to order legs and fasteners in one delivery must first describe the tabletop. Phrases like "regular wooden" or "thick, should withstand it" are not enough.
Specific information is needed for confident selection.
Material
You need to name not the decorative color, but the structural material. "Under oak" could mean solid oak, oak veneer on MDF, laminated board with a wood pattern, or a multilayer panel. The fasteners are held not in the pattern or veneer, but in the internal load-bearing layer.
Overall thickness
Thickness is measured at the installation point of the leg, not along the decorative edge in another part of the tabletop. The product may have a thickened edge, an applied rim, or a false end that creates the impression of a massive slab. In the center, a thinner base remains.
Load-bearing thickness
This is the thickness of the layer into which the fastener can safely enter. It does not always coincide with the total thickness. If a decorative overlay is glued on the bottom and a thick finishing layer is applied on top, the entire height cannot be used as the working depth.
Internal structure
It is necessary to determine whether the panel is solid. There may be voids, lightweight filler, channels, a weak core, or a zone where the fastener will not provide the required holding force.
Embedded insert
An embedded insert is a reinforced element installed in advance at the attachment point. It can be a section of stronger material, an internal strip, a metal part, or other designed reinforcement. The mere presence of an embedded insert does not determine the fastener: its material, thickness, and location are needed.
Finishing
If the tabletop is already painted or coated with a clear finish, an error during drilling can damage the finished visible surface. If the finish has not yet been applied, it is reasonable to carry out marking and trial assembly before the final finish.
Until this data is available, it is too early to choose the specific length and diameter of the fastener. The type of connection can be discussed, but a final specification cannot be issued.
Solid wood, MDF, and plywood: why the same thickness does not mean the same fastener
Let's imagine three tabletops with a thickness of 30 mm. The first is made of solid wood, the second of MDF, and the third of multi-layer plywood. On a tape measure, they are the same. For MN-241, the height of the final table will also be the same. But the behavior of the fastener differs.
| Base | What to check | Main risk | Possible solution direction |
|---|---|---|---|
| Solid wood | Wood species, grain direction, distance to edge, moisture content, absence of defects | Splitting, fastener pull-out, loosening due to improper drilling | Selecting fasteners for wood and pilot holes |
| MDF | Density, thickness of the load-bearing layer, hole positioning, possibility of reassembly | Chipping, hole enlargement, weak holding at shallow depth | Reinforcement, suitable thread, insert or other joint |
| Plywood | Number and quality of layers, thickness, edge placement, material condition | Delamination, exit to the face side, damage to the thin edge | Controlled drilling and matching of working length |
| Composite panel | Layer diagram and actual mounting location | Hitting a weak or hollow zone | Relocating the mounting point or installing an anchor |
| Hollow countertop | Frame, filler, position of reinforcements | Fastener enters a void and barely holds the plate | Design reinforcement or another installation method |
The table does not assign a ready-made fastener. It shows why one size is not enough. The base has a structure, and it is the structure that determines the mounting assembly.
Solid wood tabletop
Solid wood is perceived as the most understandable material: wood and a wooden leg are joined with wooden fasteners or a self-tapping screw. But here too, one cannot act without calculation. Holes located close to the edge can cause cracking. A pilot hole that is too large reduces thread retention. One that is too small increases the risk of splitting or damaging the fastener.
It is necessary to consider the grain direction, distance between holes, width of the support area, countertop wood species, and insertion depth. Particular care is taken with narrow cantilevers, where the plate may end up close to the longitudinal edge.
MDF tabletop
MDF is more uniform in appearance than natural wood, but fastener retention depends on the density and condition of the board. You cannot automatically use the same screw that was chosen for solid wood. If over-tightened, the material around the hole is damaged. With repeated removal and reinstallation, initial retention may also decrease.
If the table is planned to be transported disassembled, this scenario needs to be considered in advance. The project may require not a regular one-time connection, but a serviceable joint with a suitable insert or embedded part.
Plywood tabletop
Plywood consists of layers of veneer. A well-designed joint can be strong, but with incorrect preparation, delamination, chipping, and damage to the outer layer are possible. The thickness of the plywood must be confirmed by measurement, not just by the name in the supplier's invoice.
Special attention is paid to the edges. If the hole is located too close to the end, even sufficient overall thickness does not guarantee a good result.
Panel with facing
Veneer, plastic, paint system, or another decorative layer changes not only the appearance. When the drill bit or fastener exits, the damage becomes immediately visible. Sometimes the face layer is difficult to restore without repainting or replacing the entire part.
Therefore, before installation, it is useful to do a test drilling on a scrap piece of the same material. Such a sample shows how the base behaves, whether it delaminates, and how accurately the depth stop works.
Total and load-bearing thickness are not the same thing
One of the most dangerous mistakes sounds like this: "The tabletop is 40 mm thick, so a screw shorter than 40 mm will definitely not come out."
This is incorrect for several reasons.
First, part of the fastener's length passes through a 2 mm thick metal plate. If there are washers, spacers, or other parts between the plate and the tabletop, they also reduce the depth of entry.
Second, the length of some types of fasteners is measured differently. You cannot compare the numbers on the packaging without understanding from which point the manufacturer measures the length and how the head is positioned in the hole.
Third, the tabletop itself may be non-uniform. Of the 40 mm, only part is sometimes a solid load-bearing material.
Fourth, the fastener cannot be brought flush to the face surface. A safe margin of material must remain between the tip and the top layer. Its size is determined by the design, material, and recommendations of a specialist for the specific project.
Fifth, the drill bit when preparing the hole can also go deeper than the calculated mark. Therefore, both the working length of the fastener and the drilling depth need to be controlled.
It is useful to distinguish four values:
-
the full thickness of the tabletop;
-
the thickness of the load-bearing layer;
-
the depth of the prepared hole;
-
actual depth of fastener entry.
If at least one value is unknown, the final selection is not complete.
How to read the drawing of the installed plate MN-241
Photos of the leg help assess the shape, but for fastening a drawing or precise plate diagram is needed. You should look not only at the outer contour.
Plate dimensions
The plate size shows how much space will be required on the underside of the tabletop. This is important near the edge, routed groove, cable channel, drawer, or another component.
Number of standard holes
You cannot count holes from a reduced photo. You need to obtain the exact value. The number of fastening units per leg and for the entire order depends on it.
If the plate has multiple holes, it does not mean that some can be left empty without consequences. The usage pattern must match the plate's purpose and the joint design. The decision "we'll screw in two screws instead of all, since the table is light" does not confirm the reliability of the joint.
Hole diameter
The diameter limits the size of the rod and the head of the fastener. A screw that is too wide will not fit. One that is too narrow may not provide proper clamping, especially if the head does not overlap the hole adequately.
Shape of holes
Holes can be cylindrical, countersunk, elongated, or of other shapes. The head must be positioned so that the plate is pressed evenly and does not deform.
Location of holes
The distance between holes and from a hole to the edge of the tabletop is important. Even good fasteners will not fix an unfortunate position where one hole falls into a weak zone or comes too close to the end.
Plate orientation
MN-241 has a pronounced oval cross-section. Before drilling, you need to understand how each leg will be oriented relative to the long and short sides of the table. Otherwise, all plates may be attached correctly, but the supports themselves may end up turned in different directions.
If you need broader information about studs, plates, threaded inserts, and the structure of the lower furniture assembly, it is covered in the material about how to choose fasteners for furniture legs. For MN-241, only the applicable part from this general topic needs to be taken: the plate is already present, so the connection between it and the tabletop is calculated.
What does a plate thickness of 2 mm mean
Two millimeters may seem like an insignificant value, especially next to a countertop several centimeters thick. But when calculating fasteners, they cannot be ignored.
The plate is located between the head of the fastener and the countertop material. Consequently, part of the screw length passes through the metal and does not participate in holding inside the base. If you add a washer or gasket, the working depth becomes even smaller.
The plate thickness affects several issues at once:
-
what part of the length the fastener will spend in the metal;
-
where its entry into the countertop will begin;
-
how much the head will protrude or be recessed;
-
whether the head will hit a structural protrusion;
-
whether the actual depth of threaded engagement is sufficient;
-
what margin will remain to the front surface.
You can't reason only like this: "A screw is 30 mm long, the tabletop is 30 mm, so everything fits." First, you need to establish the method of measuring the screw's length. Then subtract the thickness of the plate and all intermediate layers. Only the remaining part can enter the tabletop.
Working length of the fastener: which section actually holds the leg
In the context of this project, the working part of the fastener can be considered the portion that actually enters the load-bearing material of the tabletop and creates retention.
The general calculation principle looks like this:
Depth of entry into the load-bearing layer = length of the fastener from its bearing surface to the tip − thickness of the metal plate − thickness of washers, spacers, and non-load-bearing intermediate layers.
The obtained value is compared not with the decorative edge height, but with the actual thickness of the load-bearing base at the attachment point.
Conditional calculation example
Suppose we consider a fastener where the distance from the bearing surface of the head to the tip is 25 mm. The plate takes up 2 mm. Between the plate and the base, according to the design, there is a spacer 1 mm thick.
Then the calculated entry depth will be:
25 − 2 − 1 = 22 mm.
This is not a recommendation to use fasteners of 25 mm length. The example shows the calculation mechanics. After obtaining 22 mm, you still need to check:
-
whether such depth is sufficient for the selected material;
-
whether it does not exceed the permissible value;
-
whether a safe layer remains to the front surface;
-
whether the fastener diameter matches the hole in the plate;
-
whether the thread is suitable for the base;
-
whether pre-drilling is required;
-
whether the selected assembly can be reused.
If the countertop has a full thickness of 30 mm, you cannot automatically assume that the remainder is 8 mm. Inside, there may be non-load-bearing layers, and the method of measuring the fastener may differ. Therefore, first check the drawing and construction, then calculate.
Why you cannot rely only on the number on the screw packaging
The packaging usually indicates the nominal length. But different heads and measurement standards can change the actual position of the tip relative to the plate.
For fasteners with a countersunk head, the length may be measured including the head. For an element with a protruding head, the measurement may start below it. In an elongated or countersunk hole, the plate also positions the head differently than in a simple flat hole.
Therefore, for ordering, you need not the phrase "30 mm screws," but a description:
-
type of fastener;
-
head shape;
-
length measurement method;
-
shank and thread diameter;
-
unthreaded section, if any;
-
fastener material and coating;
-
compatibility with the hole;
-
estimated depth of entry into the countertop.
It is especially dangerous to mix fasteners from different packages if their markings are similar but the geometry of the heads differs. In the installation list, it is better to specify the exact name rather than just the length.
How not to drill through the countertop
The screw exiting onto the front surface is not the only possible defect. Before fully exiting, the fastener can lift fibers, create a bulge, crack the coating, or press through the thin top layer. Therefore, the check should consider not only the visible tip.
The safe sequence looks like this:
-
Measure the full thickness of the countertop in the area of each leg.
-
Clarify the composition and thickness of all layers.
-
Find the load-bearing section where the fastener should be held.
-
Obtain the drawing of the plate.
-
Determine the position of all holes.
-
Select the connection type for the material.
-
Calculate the actual entry depth.
-
Leave the design allowance to the front surface.
-
Limit the depth of pre-drilling.
-
Perform a test on a sample.
-
Check the first assembled unit before installing the remaining legs.
-
Only after checking, repeat the operation on the entire set.
Using painter's tape on the drill instead of a full stop does not always provide accuracy: the mark may shift, be hidden under chips, or be passed by inertia. For a critical part, a controlled stop or another reliable method of limiting is needed.
The installer must also consider the length of the drill tip. If the working cylindrical part has entered to the specified depth, the point is already below. This nuance is especially important for thin tabletops.
When pre-drilling is required
A pilot hole helps guide the fastener, reduces the risk of splitting, and controls placement. However, its diameter and depth are not chosen arbitrarily.
A hole that is too narrow creates high resistance. This increases the risk of damaging the fastener, cracking the workpiece, or tearing off the head during overtightening.
A hole that is too wide reduces the amount of material that the threads grip. As a result, the screw turns more easily, but the connection may end up weak.
A hole that is too deep brings the drill bit closer to the face surface and reduces the working zone.
A hole that is too shallow forces the tip of the fastener to pass through unprepared material on its own. In some wood species and constructions this is acceptable, in others it is dangerous.
Therefore, it cannot be universally stated that MN-241 is always installed without pre-drilling or, conversely, always requires a hole of a specific diameter. The decision is made after selecting the specific fastener and analyzing the countertop.
It is practically useful to provide the installer with three values:
-
the diameter of the pilot drill;
-
the depth of the hole;
-
the allowable tightening torque or the requirement not to overtighten the connection.
If the exact torque wasn't calculated, it doesn't mean the screw can be tightened to a stop with a powerful tool. Excessive force can strip the holding material before the craftsman feels a problem.
When a thin tabletop needs an insert nut
The installed plate distributes the load over its area, but it doesn't automatically make a weak tabletop stronger. If the load-bearing layer is thin, loose, hollow, or awkwardly positioned, reinforcement will be required.
An insert nut may be needed when:
-
fasteners don't get sufficient entry depth;
-
holes fall into a weak inner layer;
-
repeated disassembly of furniture is planned;
-
the tabletop has a lightweight construction;
-
the support is located close to the edge;
-
the joint experiences noticeable wobbling;
-
there is no apron or other rigid frame under the tabletop;
-
the furniture has a large length or complex geometry;
-
the table is used as a work surface with variable loads;
-
the design of a narrow console requires additional stabilization.
The embedded reinforcement is designed before final finishing. Adding reinforcement after painting and assembly is more difficult: you have to disassemble the product, open the internal structure, or change the position of the legs.
It is also important to understand that the word "embedded" itself does not guarantee reliability. If a small plate is glued to a weak layer, it can tear off along with it. The reinforcement must transfer the load to a truly strong part of the tabletop or frame.
Why you don't need to automatically buy a second mounting plate for MN-241
In the section where you can buy furniture fittings for installation, plates, foot pads, and other components are presented. But the presence of separate fittings in the catalog does not mean that every item needs to be added to MN-241.
The leg already has its own metal plate installed. Therefore, an additional plate is not a mandatory part of the order just because the customer needs fasteners.
Automatic purchase of a second plate creates several problems:
-
dimensions and holes may not match;
-
an additional part will change the height of the assembly;
-
an unnecessary intermediate layer will appear;
-
you will have to figure out again how to connect the two plates;
-
the load may be transferred not as intended by the leg design;
-
the buyer will pay for a part that does not solve the original problem.
The problem is formulated not as "the leg lacks a plate," but as "the existing plate is not connected to the tabletop." Therefore, fasteners are selected for the standard plate, not a replacement of the already installed assembly.
An additional plate can only appear in a separately designed structure when its necessity is confirmed by a drawing. A specific hardware model cannot be assigned without verification.
How to determine the number of fastening units
The quantity is calculated not by the number of legs themselves, but by the number of standard holes used in each plate.
Basic principle:
Total number of fastening units = number of provided fastenings on one plate × number of legs.
If the project allows for a technical reserve, it is added as a separate line after the main calculation. The reserve should not mask the lack of precise information.
For example, the phrase "let's take a pack of fifty pieces, that should surely be enough" does not replace a bill of materials. The installer still needs to understand how many screws are used per leg, whether they are identical, and where they are installed.
In the invoice or picking table, it is worth separating:
| Position | Quantity per leg | Number of legs | Total quantity | Note |
|---|---|---|---|---|
| MN-241 | 1 | As per project | As per project | Beech or oak |
| Standard plate | Already installed | Equal to the number of legs | Included in the legs | Thickness 2 mm |
| Main fastening | According to the plate drawing | As per project | Calculated value | Type determined by the tabletop |
| Technical reserve | Not related to the assembly | — | By agreement | Separately from the main quantity |
| Foot pad or floor protection | One per support or as per project | As per project | After checking the size | Compatibility is confirmed separately |
You cannot reduce the number of mounting points just because the chosen screw seems strong. A large diameter of one element does not automatically make it a replacement for several standard fasteners. The plate is designed as a system, and changing the layout requires justification.
Marking the legs: the same offset is important not only for aesthetics
The tall oval support is especially noticeable. If one MN-241 is shifted by a few millimeters or rotated differently, the error is visible across the entire height.
Before drilling, you need to specify:
-
distance from the long edge of the tabletop;
-
distance from the end;
-
orientation of the oval cross-section;
-
symmetry of the right and left supports;
-
position relative to the apron, underframe, drawers, and cable channels;
-
tool access to each head;
-
possibility of subsequent tightening;
-
free space for legs.
Marking is done from a single baseline. Do not sequentially measure the position of the second leg from the first, the third from the second, and the fourth from the third. This way, a small error accumulates. It is better to reference each point to one verified geometric base.
A full-size plate template is useful. It marks the outer contour, axes, holes, and the direction of the oval leg. The template is applied to each position in the same orientation.
After marking, the legs are temporarily installed without final tightening and evaluated from below and from the side. At this stage, it is easier to detect that one support is turned the wrong way or interferes with a person's seating.
The plate holds the leg, but does not support the entire table
Even a perfectly selected fastener solves a local task: it connects one plate to the base. It does not automatically account for the overall rigidity of the furniture.
A tall table may wobble not because the screws hold poorly, but because the geometry of the structure does not resist lateral forces. The longer the
Features of MN-241 for a dining table
For a dining table, not only dimensions matter, but also behavior in everyday use. People lean on the tabletop with their hands, load it with dishes, move it during cleaning, and sometimes lift it by one edge. Children may push the furniture or hang on the edge. All these actions create variable forces.
For a dining model, you need to check:
- whether there is enough space between the legs for chairs;
- whether the oval cross-section interferes with seating;
- whether the final height matches the chairs;
- whether the plates are located too close to the edge;
- does the tabletop withstand local fastening;
- is a hidden reinforcing frame needed;
- are the bottom edges protected from moisture during cleaning;
- can the fasteners be tightened after a period of use.
For those who are still choosing supports for different sizes and styles of tables, it is more convenient to first Buy wooden table legs from a curated selection, comparing MN-241 with other models. If the choice has already been made, the specification should include not only the legs, but also all data on the tabletop.
MN-241 for writing and work desk
A writing desk is often perceived as less loaded than a dining table. In practice, it has its own complexities:
- a cabinet or pull-out block limits the position of the plates;
- cables run under the tabletop;
- brackets, sockets, and cable trays are installed;
- a person regularly leans on the front edge;
- a heavy monitor creates constant load in a specific area;
- the table is moved when connecting equipment;
- the legs may interfere with the chair or feet.
Before drilling, not only the contours of the plates but also all other elements should be marked on the underside. Mounting holes must not intersect with the cable channel, socket block cup, or groove.
The final height is checked separately. MN-241 has a height of 742 mm, so with a standard tabletop, the finished work surface will be higher than the leg itself. Whether this seating is suitable is determined by the specific user, chair, and table thickness.
What changes when installing MN-241 on a console
A console often has a small depth and is located near a wall. These features both help and complicate the project.
A small tabletop weighs less, but a narrow base resists tipping over worse. The plates have to be placed closer to the edges. There may not be enough space on the underside for free placement of holes. If the console stands alone and is not fixed to the wall, stability requires especially careful checking.
Before buy wooden legs for console, you need to determine:
- tabletop depth;
- position of each plate;
- distance of holes to edges;
- need for wall fixation;
- presence of rear crossbar or frame;
- free opening of doors and drawers;
- location of baseboard;
- possibility to move furniture flush against the wall;
- Stability under load on the front edge.
Wall mounting, if required by the project, is selected separately based on the wall material. It is not part of the standard MN-241 plate's function and does not replace the connection of the legs to the tabletop.
Beech or oak: the leg material is chosen together with the finish
MN-241 is available in beech and oak. Both wood species are suitable for manufacturing furniture supports, but the visual result and behavior during finishing differ.
| Criterion | Beech | Oak |
| Wood grain pattern | More even and calm | More pronounced and contrasting |
| Use under opaque enamel | Convenient for a smooth painted result | Possible, but the expressive texture is hidden |
| Transparent finish | Gives a restrained surface | Emphasizes the natural grain |
| Matching to the tabletop | Suitable when color and a calm texture matter | Suitable when you need to connect the support with an oak surface |
| What to check | Test coating and evenness of tone | Match of grain, pores, and shade after finishing |
| Commercial scenario | Leg for enamel or calm tinting | Leg for oil, varnish, tinting, or an expressive wooden interior |
Beech for enamel
If the legs need to match a painted underframe, facades, or other furniture, beech is often considered a convenient base. However, the color name from the catalog does not guarantee a match. The result is affected by the primer, number of coats, application method, gloss, and lighting.
It is better to paint all legs of one set at the same time using one material system. Repainting a single support separately after a few months may result in a noticeable difference.
Oak for transparent finish
Oak is chosen when the texture should remain part of the design. In this case, not only the nominal color but also the visual character of the tabletop needs to be coordinated. An oak leg and an oak top may differ in cut, pattern, and ability to accept staining.
A test coating is done on a sample of the same wood species and preparation. Comparison should be made after the finish has fully dried, not immediately after application.
Detailed information about execution categories and material can be found in the section describing quality of beech and oak products for furniture legs.
An unpainted leg offers freedom but requires a finishing plan
MN-241 refers to supports that can be selected for custom finishing. This is convenient if the table needs to match kitchen facades, doors, wall panels, or other furniture.
However, the phrase "we will paint it later" is too vague. Before ordering, it is advisable to choose at least a direction:
- opaque enamel;
- clear varnish;
- oil;
- tinting compound;
- combined system;
- finish in the color of the countertop;
- contrasting color.
The finishing plan affects the installation sequence. If the legs are attached first and then painted, the plate and fasteners will interfere with processing the upper area. If the finish is fully completed before the fitting, careless drilling or tools may damage the surface.
Practical order:
- Get the legs.
- Check the article number, dimensions, material, and quantity.
- Do a dry fitting.
- Mark the location of the plates.
- Check the fasteners on the sample.
- Perform preliminary assembly.
- Disassemble the structure.
- Carry out final finishing.
- Protect the finished surfaces.
- Perform final installation.
For projects with a custom color, you can in advance choose furniture supports without coating and assemble all elements in one batch. This makes it easier to coordinate the material, geometry, and finish before starting work.
What to buy together with MN-241
A full order is not necessarily a large box of random hardware. It is a coordinated set where each item solves a specific task.
| What to add | What it is for | What to check before purchase | Is it always necessary |
| Fastening the plate to the tabletop | Connect the leg to the base | Material, working length, diameter, head, number of holes | Yes, if the installer doesn't have suitable fasteners |
| Embedded plate or reinforcement | Create a strong zone in a weak base | The countertop structure and load transfer | Only per project |
| Washers or spacers | Change the clamp or separate materials | Compatibility with the head and length calculation | Not always |
| Guide drill | Prepare holes | Diameter and depth | For the selected fastener |
| Depth stop | Do not drill through the countertop | Compatibility with the drill bit | Recommended for limited thickness |
| Layout template | Repeat the position of all legs | Exact contour of the plate | Useful for multiple supports |
| Protection of the bottom edge | Reduce wood contact with the floor | Size and method of installation | According to operating conditions |
| Thrust bearing | Protect the floor covering | Size of the lower part of the leg and load | As per project |
| Finishing materials | Get the desired color and protection | Compatibility with beech or oak | If legs are supplied without finish |
| Packaging of fasteners by components | Do not mix up parts on site | Labeling of each set | Especially useful for the installation crew |
Washers, gaskets, and floor glides cannot be added automatically. Each additional thickness changes the leg position and the calculation of the working length. Even a soft protective part under the bottom end can slightly alter the final height and level of the table.
Practical scenario No. 1: solid wood dining table
Initial situation: a solid wood tabletop is chosen, four MN-241 legs, and a clear finish. The customer believes it is enough to order four legs and standard wood screws.
The correct sequence starts with a drawing:
- Confirm the countertop size.
- Mark the installation zones for the plates.
- Measure the thickness in these zones.
- Check the distance of the holes from the edge.
- Clarify the direction of the grain.
- Obtain the number and size of the plate holes.
- Select fasteners suitable for the specific countertop material.
- Calculate the insertion depth considering the 2 mm plate.
- Determine the pilot drilling.
- Make a test cut on the array offcut.
- Assemble one leg.
- Check the clamp and absence of damage.
- Repeat the marking according to the template.
- After assembly, check the rocking of the entire structure.
Even with a thick tabletop, you cannot skip checking the distance to the edge. A tall support creates a lateral lever, and incorrectly positioned holes can weaken the wood over time.
Practical scenario No. 2: MDF writing desk
The tabletop is painted, and a cable tray is provided underneath. The overall thickness seems sufficient, but the structure has not yet been tested.
Before ordering fasteners, you need to find out:
- density and grade of MDF;
- actual thickness;
- presence of decorative or reinforced layers;
- possibility of installing embedded inserts;
- location of the cable tray;
- whether the table is expected to be disassembled;
- whether a test hole can be made on a sample.
If the table will need to be disassembled during a move, a regular self-tapping screw that is unscrewed from the same hole several times may lose its holding power. Such a scenario should be considered in advance and a serviceable joint should be designed.
A weak base cannot be compensated for with excessively long fasteners. If there is no strong layer inside, additional length does not create reliability. It only increases the risk of damaging the front side.
Practical scenario No. 3: plywood tabletop for a workstation
Plywood is visually thinner than solid wood, so the buyer immediately worries about the screw coming out. This is useful caution, but checking the length alone is not enough.
It is necessary to assess:
- quality and thickness of plywood;
- condition of layers;
- distance of holes from the edge;
- face veneer;
- drilling depth;
- possibility of chipping the bottom layer;
- positioning of supports relative to the load.
Test drilling is performed with a drill of the same diameter and at the same depth as planned for final installation. Then the selected fastener is screwed through a metal sample of equal thickness or through the standard plate, if possible without damaging the product.
After unscrewing, the condition of the hole is assessed. If the layers have separated, the edge has lifted, or the fastener spins easily, the scheme must be reconsidered.
Practical scenario No. 4: narrow console near a wall
For the console, two or four MN-241 are selected, but the tabletop depth is small. The plate takes up almost the entire available width.
Here it is especially important not to move the holes closer to the edge without checking. Possible solutions are discussed before drilling:
- change the tabletop depth;
- shift the legs;
- add internal reinforcement;
- provide a rear frame;
- coordinate wall mounting;
- choose a different base;
- change the number and position of supports.
Fastening to the tabletop and securing the console to the wall are different assemblies. One should not accidentally replace the other.
Practical scenario #5: the tabletop looks thick but has a weak core
The customer sees a 50 mm edge and is confident that a long screw can be used. After examining the construction, it turns out that only the outer layers are solid, while the inside is made of lightweight material.
Installing a standard plate directly into such an area does not provide the required holding strength. It is necessary to find the internal frame or provide an embedded insert. If there is no reinforcement, the leg positions are tied not to a nice offset from the edge, but to the actual load-bearing scheme of the panel.
It is precisely in such projects that visual thickness is especially deceptive. The mounting drawing is more important than a photo of the edge.
How not to confuse MN-241 with a ready-made underframe
Individual furniture legs allow you to freely choose the distance between supports, tabletop size, and orientation. But this freedom means that the rigidity is designed by the customer or furniture specialist.
A ready-made underframe usually has a connected structure: a frame, crossbars, or other elements that hold the geometry. Four separate MN-241 legs have no such common connection unless it is created by the tabletop, apron, or hidden frame.
| Separate MN-241 | Ready-made table base |
| The position of each leg is set by the project | The geometry of the supports is already connected by the structure |
| You can change the distance between supports | Base dimensions are limited by the model |
| Easier to create a visually free bottom | Rigidity is often provided by the overall frame |
| Precise marking of all plates is required | Marking is done according to the base attachment points |
| Fasteners are calculated for each plate | Fasteners are calculated for the entire underframe |
| Responsibility for stability lies with the furniture design | Part of the load-bearing scheme is already built into the product |
For a buyer who needs a maximally free modern composition, MN-241 may be a better fit. If the project does not involve calculating the position of individual supports, it makes sense to consider a connected structure.
Mistakes that result in having legs but no way to assemble the table
Mistake 1: Considering the installed plate as a complete set
The plate is included, but the fasteners for the tabletop are not. If you don't add them to the list, assembly will stop.
Mistake 2: Buying screws only by the leg's article number
MN-241 does not specify the material and thickness of your tabletop. Without this data, specific fasteners cannot be selected.
Mistake 3: Relying on the overall thickness
A decorative edge, cladding, or hollow core can make the actual load-bearing layer significantly thinner.
Mistake 4: Not accounting for the 2 mm plate
These 2 mm reduce the area that goes into the base. Additional washers and spacers reduce it even further.
Error 5. Measuring fastener length from the wrong point
Nominal length depends on the head shape and measurement standard. The actual working geometry is needed.
Error 6. Using the same fastener for solid wood and MDF
Materials differ in thread retention and drilling behavior.
Error 7. Not obtaining the plate drawing
Without the drawing, it is impossible to confidently determine the number of holes, their diameter, position, and head type.
Error 8. Not using all provided mounting points
Arbitrarily reducing the number of screws changes the plate's behavior.
Error 9. Drilling without a depth stop
Even a correctly calculated screw will not save the countertop if the pilot hole is drilled too deep.
Error 10. Drilling directly into a finished painted countertop
First, check the pattern on a sample and perform a dry fit.
Error 11. Pressing the plate with excessive force
Overtightening damages the material around the hole, deforms the metal, or strips the threaded retention.
Error 12. Automatically buying a second plate
The MN-241 already has a standard plate installed. You need fasteners for it, not a random additional adapter.
Error 13. Forgetting about the orientation of the oval leg
All fasteners may be tightened, but the supports may end up rotated differently.
Error 14. Assuming four legs is a universal scheme
The number and placement of supports depend on the size, weight, and rigidity of the structure.
Error 15. Not providing access for tightening
After installing drawers, cable trays, or decorative panels, fastener heads may become inaccessible.
Error 16. Not protecting the finished trim
Metal tools easily damage the painted or lacquered surface of the leg.
Error 17. Moving the table by the tabletop without checking
Sudden lateral force stresses the joint. Moving rules must be defined for the finished furniture.
Who MN-241 is suitable for
The model is worth considering when you need:
- a tall modern solid wood support;
- size 742 × 160 × 95 mm;
- noticeable oval geometry;
- free space under the tabletop;
- individual choice of distance between legs;
- execution in beech or oak;
- possibility to choose your own finish;
- installation under a dining or writing table;
- creation of a console;
- mounting directly to the tabletop through an already installed plate.
MN-241 is especially appropriate in a project where the support should be part of the design. It is not hidden behind a heavy decorative apron if the concept is based on clean lines and visible verticals.
In which cases the model may not be suitable
It is better to avoid this choice or reconsider the design if:
- a low leg is required for a cabinet or sofa;
- the tabletop is too thin and reinforcement is impossible;
- there is no solid zone inside the panel for mounting;
- the project does not allow local installation of plates;
- a fully ready connected frame is needed;
- it is impossible to ensure stability without a stretcher;
- the final height with the selected tabletop is too large;
- the oval shape does not match the geometry of the furniture;
- there is no way to coordinate the fasteners;
- The assembler is not ready to work according to the drawing;
- Frequent disassembly is expected, but the serviced unit is not designed for it;
- The legs must arrive already with universal fasteners for an unknown tabletop.
Rejecting an unsuitable model is not a loss. In the general category, you can choose wooden furniture legs of a different height, shape, and installation method.
What to check in the cart before payment
The cart should answer not only the question “which legs are selected,” but also the question “is the project ready for assembly.”
Check:
- whether the article number MN-241 is specified;
- whether the quantity matches the project;
- is the material fixed;
- is the size confirmed;
- is the quality category agreed;
- is the future finish specified;
- is the presence of a plate on each leg confirmed;
- is the plate thickness of 2 mm specified;
- is it noted that the fastening to the tabletop is not included;
- are the tabletop data transferred;
- is the number of fastening units calculated;
- is the working length determined;
- are the accompanying elements selected;
- is floor protection provided;
- does the delivery of legs and mounting components match.
If the cart contains only four legs and the project has no separate fastener list, the order is not yet ready for installation.
What should be recorded in the invoice
The invoice is not a place for a long engineering calculation, but critical differences in it must be read unambiguously.
Example structure:
| Parameter | What to specify |
| Product | Modern furniture leg MN-241 |
| Quantity | As per project |
| Size | 742 × 160 × 95 mm |
| Material | Beech or oak |
| Quality category | «Prestige» |
| Finishing | Agreed system either without coating |
| Plate | Installed, thickness 2 mm |
| Fastening to the tabletop | Not included in the leg item |
| Tabletop | Material and actual thickness |
| Fastening | separate agreed item |
| Number of fasteners | By number of holes and legs |
| additional elements | As per project |
| Price and availability | Current as of the date of issue |
| Delivery | Agreed method and contents of shipment |
If fasteners are purchased elsewhere, it is still useful to keep a note in the invoice for legs indicating their absence. This way, the craftsman will not look for a package that was not originally included in the delivery.
What to pass to the installer
Even correctly purchased parts can be installed incorrectly if only a box without a diagram arrives at the site.
The installer is provided with:
- Countertop plan with dimensions.
- Installation axes for each leg.
- Oval cross-section direction.
- Offsets from all edges.
- Plate drawing.
- Number of holes.
- Exact fastener designation.
- Working insertion depth.
- Diameter and depth of pre-drilling.
- Information about the countertop material.
- Position of embedded inserts.
- Tightening limitations.
- Trial assembly procedure.
- Requirement to check the first node.
- Scheme for final furniture inspection.
It is useful to sort fasteners into bags: "leg 1", "leg 2", and so on. Even if all elements are identical, labeling still helps control the quantity.
Ready sequence of actions before purchase
Step 1. Determine the furniture
Record whether MN-241 will be used for a dining table, desk, work surface, or console.
Step 2. Calculate the final height
Add 742 mm, the thickness of the tabletop, and the thickness of all intermediate elements. Compare the result with the seating and purpose of the furniture.
Step 3. Determine the number of supports
Do not use four legs as an automatic value. Check the length, width, mass, and construction.
Step 4. Choose the wood species
Specify beech or oak, taking into account the finish and tabletop material.
Step 5. Describe the tabletop
Specify the material, full and load-bearing thickness, internal structure, and embedded inserts.
Step 6. Get the plate drawing
Check the number, diameter, and location of the holes.
Step 7. Select the connection type
Coordinate the screw, bolt, threaded insert, or other component for the specific base.
Step 8. Calculate the working length
Account for the 2 mm plate and all intermediate layers.
Step 9. Calculate the quantity
Multiply the number of fasteners used for one plate by the number of legs.
Step 10. Prepare for installation
Determine the drill bit, depth, stop, and template.
Step 11. Check rigidity
Ensure that the tabletop, frame, and leg placement resist wobbling.
Step 12. Place a single order
Verify the MN-241 card, fasteners, floor protection, finish, and delivery.
How to formulate a request for MN-241
A well-composed request saves several rounds of clarification. It can be formatted as follows.
Modern furniture legs MN-241 are required.
Quantity: ______ pcs.
Size: 742 × 160 × 95 mm.
Material: beech / oak.
Quality category: "Prestige".
Future finish: ____________________.
Furniture purpose: dining table / writing desk / console / other.
Tabletop:
- material — ____________________;
- full thickness — ______ mm;
- thickness of the load-bearing layer — ______ mm;
- internal structure — ____________________;
- presence of an embedded insert — yes / no;
- material of the embedded insert — ____________________.
Please confirm:
- presence of an installed plate on each leg;
- plate thickness of 2 mm;
- number of standard holes;
- diameter and shape of holes;
- absence of fastening to the tabletop in the product item;
- compatible type of fastening for the specified base;
- allowable working depth;
- number of fastening units per leg;
- total quantity per order;
- current price;
- availability;
- delivery set;
- the ability to send legs and agreed components in one shipment.
Such a request shifts the conversation from a general "what to attach with" to verifiable parameters.
How to buy MN-241 on STAVROS and not lose mounting parts
The first step is to open the card and view the price of MN-241 in beech or oak. Then you need to select the quantity and check whether the model matches the project in height and shape.
After that:
- Fix the material.
- Prepare information about the countertop.
- Request a drawing of the plate.
- Confirm the absence of fastening to the base.
- Confirm the connection type.
- Calculate the quantity.
- Add suitable mounting elements.
- Check the finish.
- Verify the invoice contents.
- Check current availability and delivery.
Do not order legs and a random pack of screws at the same time just to have everything in one cart. The value of a complete set is not in the number of items, but in their compatibility.
FAQ: questions about MN-241, the plate, and fasteners
Is the metal plate included in MN-241?
Yes. The metal mounting plate is already installed on the leg. Its thickness is 2 mm.
Are self-tapping screws for the countertop included?
No. The fasteners between the installed plate and the countertop are selected separately.
Why can't standard self-tapping screws be included in the kit?
Because countertops differ in material, thickness, internal structure, and load-bearing capacity. One screw cannot be equally safe for solid wood, MDF, plywood, and hollow panels.
What length should the screw be for MN-241?
There is no universal value. The length is determined after checking the countertop, plate thickness, head shape, intermediate layers, and required entry depth.
Do I need to account for a 2 mm thick plate?
Yes. Part of the fastener length passes through the plate and does not enter the countertop material.
Can I use fasteners based on the total thickness of the countertop?
No. You need to determine the thickness of the load-bearing layer at the actual mounting point. The decorative edge and internal base may differ.
How to find out the number of screws?
Get the plate drawing and determine the number of provided fasteners. Then multiply this number by the number of legs.
Can only some of the holes be used?
Without confirmation from the designer or manufacturer, the standard scheme should not be changed. The plate must work through the provided mounting points.
Is it necessary to pre-drill the tabletop?
This depends on the material, fasteners, and design. The diameter and depth of the hole are determined after selecting the connection.
How to avoid drilling through the tabletop?
Use the calculated depth, a reliable stop, and a test sample. Take into account the length of the drill tip and do not work only by a visual mark.
Is a separate mounting plate needed?
Not automatically. The own plate is already installed on MN-241. An additional part is used only according to a separate drawing.
Will the same fasteners work for solid wood and MDF?
Not necessarily. Materials hold threads differently and react to drilling.
Can MN-241 be installed on a thin tabletop?
The possibility depends on the material, load-bearing thickness, and presence of reinforcement. Sometimes an embedded insert, hidden frame, or design modification is required.
Are four MN-241 units enough for a large table?
This cannot be stated without calculation. The number of supports depends on size, weight, tabletop rigidity, distance between legs, and presence of a frame.
Is MN-241 suitable for a console?
Yes, the model is designed for consoles as well. But for narrow furniture, stability, hole distance from the edge, and the need for wall mounting are checked separately.
Can MN-241 be used without a crossbar?
A design with direct attachment to the tabletop is possible, but overall rigidity must be calculated. The plate connects the leg to the base but does not replace the entire table's structural scheme.
Which material to choose — beech or oak?
Beech is convenient for calm opaque finishes and even tinting. Oak is chosen when natural texture needs to be emphasized. The final decision depends on the tabletop and coating system.
Do the legs need to be painted before installation?
Finishing is more convenient to do after fitting and checking the installation, but before final assembly. This reduces the risk of damaging the finished surface during initial drilling.
Can fasteners be unscrewed multiple times?
This depends on the base and the type of connection. If the table needs to be regularly disassembled, a serviceable mounting assembly is designed in advance.
Are floor glides needed?
They may be needed to protect the floor and the bottom edge, but the specific type is selected based on the size of the support, the floor covering, and operating conditions.
What to do if the legs arrived without screws?
Do not buy the first suitable package. First measure the tabletop, clarify the material, get the plate diagram, and only then select the fasteners.
Can legs and fasteners be ordered in one shipment?
Yes, if the required mounting positions are agreed upon in advance. The application must specify the tabletop design and the estimated quantity.
What is more important: the length or the diameter of the fastener?
Both parameters work together with the thread shape, head, base material, and hole preparation. You cannot choose one parameter separately from the others.
Should a reserve of screws be left?
A small technical reserve is permissible according to the rules of a specific project, but the main quantity is calculated first. The reserve does not replace an accurate bill of materials.
How to check the correctness of installation after assembly?
Check the tightness of all plates, the absence of fastener rotation, the same orientation of the legs, stability on a flat surface, and the absence of wobbling. After the first period of use, the connections are inspected again.
MN-241 should be purchased not separately from the table, but together with the mounting solution
The main question here is not whether a pack of self-tapping screws is included in the box. What matters is something else: is it known in advance how the tall wooden support will be connected to a specific tabletop.
MN-241 already has a metal plate with a thickness of 2 mm. This is a confirmed part of the product. Fasteners to the base are not included, because each customer has their own base. Consequently, the full order is built according to the chain:
MN-241 → number of supports → beech or oak → future finish → tabletop material → full and load-bearing thickness → plate scheme → number of holes → type of fastener → working length → total quantity → installation check.
Skipping any link means transferring an unresolved issue to the site. Sometimes it ends up just with wasted time. Sometimes — with extra holes, damaged paint, a weak connection, or a screw that came out on the front surface.
Before paying for the order, check three critical things: what exactly is included in MN-241, what material the fastener will go into, and what part of it will actually be inside the load-bearing layer. After that, you can agree on the quantity, drilling, and the installation bill of materials.
STAVROS allows you to select the support itself, compare options made of beech and oak, check current specifications, and assemble a set for a specific furniture project. But the finished result begins not when the legs are delivered, but when all parts — from the tabletop to the last fastener — are described in one clear specification.