Article Contents:
- What exactly people buy under the name “unfinished leg”
- Geometry is approved before choosing color
- Upon receipt, check the parts before starting finishing
- Why the fastening is checked before primer and enamel
- How to prepare the surface and preserve the shape
- A test finish is needed on a real leg
- Furniture legs for enamel painting: color and smoothness are assessed separately
- Beech and oak under enamel: what influences the choice
- Tinting, oil and clear lacquer require a different sample
- Turned legs are checked around the entire circumference
- On carved legs, the finish must preserve fine details
- On geometric legs, flat surfaces and edges are important
- The set is finished according to a single approved sample
- The finish is agreed upon with the specific furniture
- How to record unfinished legs in the specification
- When painted legs are ready for final installation
- When it is more convenient to choose legs with a ready-made finish
- Where to buy furniture legs for painting

If a mounting hole has to be relocated after the enamel has been applied, drilling brings additional work with it: surface repair, color restoration, and re-drying. That is why furniture legs intended for painting are first test-fitted to the base and only then finished. Even a successful color will not compensate for a mismatched mounting plate or excess support height.
For a workshop, buying a ready-made unfinished part makes it possible to separate the shaping from the painting. The profile has already been chosen, while the shade, visible texture, and gloss can be matched to a specific piece of furniture. To take advantage of this, you need to determine the surface condition in advance, check the fastening, and approve a sample that the entire set will be made to.

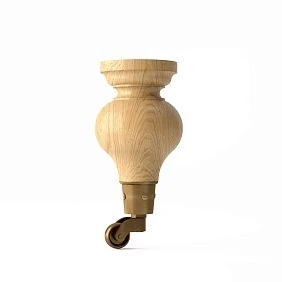

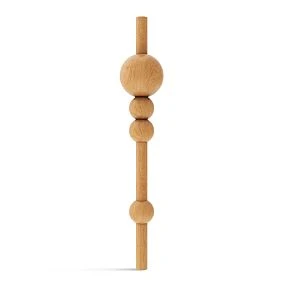
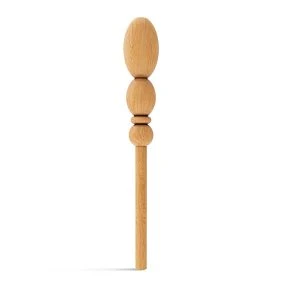
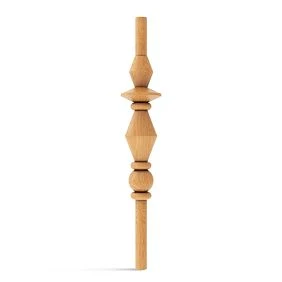
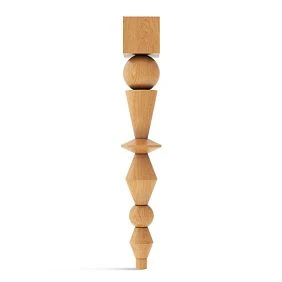
What exactly is bought under the name “unpainted leg”
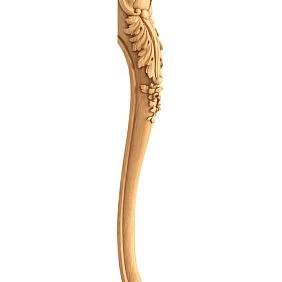
A ready-made leg without a coating and a joinery blank solve different tasks. The first already has its dimensions and profile formed. The second may still require turning, milling, or other processing that will determine the final shape. The word “blank” in an order description without clarification does not show which operations remain for the workshop.
| Condition of the part | What is already determined | What the buyer should check |
|---|---|---|
| Ready-made leg with a coating | Geometry and the selected factory finish | Fastening compatibility, color, and coating condition |
| Ready-made unpainted leg | Geometry of the specific version | Surface preparation and suitability for your own finishing system |
| Joinery blank | Base dimensions and material | What operations are required to produce a finished leg |
In the section unfinished furniture legs STAVROS choose a finished geometry without a final coating. However, the absence of paint does not in itself mean that the part can be sent straight to painting. The requirements of a specific primer, stain or oil may call for additional preparation.
Unpainted furniture legs are ordered with the article number, size and material specified. Sanding, treatment of the mounting points and the scope of supply are clarified separately. This way the supplier and the workshop have the same understanding of which operations have already been performed and what remains to be done before assembly.




Geometry is approved before choosing the color
First, check the height of the furniture with the legs installed, the top section of the leg and its mounting point. The widest part of a turned profile may be located considerably below the mounting plate. Therefore, the maximum diameter from the overall dimensions cannot automatically be used as the size of the area on which the cabinet rests.
A hypothetical example: the cabinet body is 620 mm high, and the required overall height is 780 mm. This leaves 160 mm for the installed leg. If a separately positioned plate and a glide do indeed add a total of 6 mm to the leg height, the leg itself must provide 154 mm. If the plate is recessed or the leg size already includes the glide, they must not be added again. This is a calculation for a specific design, not a standard product size.
Before ordering, check the drawing of the selected version. In the section drawings and models you can search for available materials; the availability of the required document is checked for a specific article number.
At the same time, record the number and location of the supports. Furniture may have additional central legs that differ from the visible ones. They must not be lost in the order simply because the painted set on the sketch looks like four identical parts.
Our factory also produces:
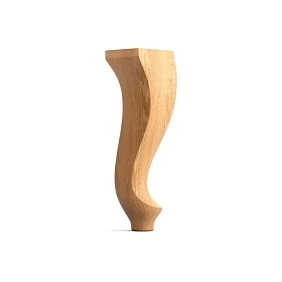
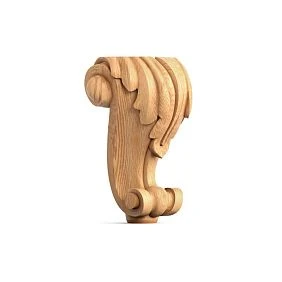
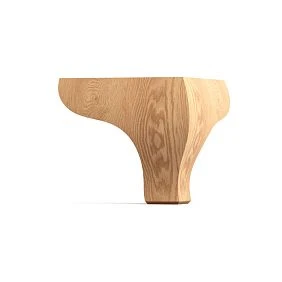
Upon receipt, the parts are checked before finishing begins
The received set is first checked against the order: item code, selected size, material, quantity and agreed surface condition. Then the top platform, bottom end, protruding parts of the profile and the intended fastening points are inspected. Edge damage during transport is easier to record before sanding than after primer has been applied.
To check pairing, the parts are placed side by side in the same position. A visible difference in height is first compared with the drawing and the measurement method: comparing along a sloped decorative surface can produce an error. If the design assumes a certain orientation, it is taken into account already during layout.
For a clear finish, additionally check the grain pattern and the original shade of the wood. Natural variation is not always a defect, but it may be undesirable for this particular set. Such a decision is made before painting.
After delivery from different temperature conditions, the parts are prepared for work taking into account the wood storage requirements and the selected coating. There is no universal expectation of "until tomorrow morning" here. A surface that is damp after transfer, condensation or a noticeably different temperature of the parts is a reason to postpone applying the material and sort out the conditions in the workshop.
Get Consultation
Why fastening is checked before primer and enamel
The trial assembly should answer several specific questions: does the fastener fit on the top platform, is there enough room for the tool, does the leg of the adjacent part get in the way, and does its position match the project. If drilling, trimming or changing the seating point is needed, it is easier to discover this on an unpainted surface.
The timing for installing a metal insert is determined by the design of the joint and the finishing technology. One insert is conveniently installed in advance and its thread protected, while another is installed after painting into a prepared hole. The rule "all hardware must be installed before primer" does not suit every connection.
In the furniture for furniture legs there are mounting plates, studs and base glides. The compatibility of the selected items and their presence in the set are checked separately. A visually suitable plate does not yet confirm that the joint is suitable for the specific furniture.
Threads and precise mating surfaces are protected from accidental coating buildup. If wood gluing is planned, the condition of the glue areas must be agreed with the adhesive requirements: a decorative coating can impair the bond. A single test leg allows checking a local joint, but stability is assessed on the fully assembled product.
How to prepare the surface and preserve the shape
First, the part is inspected under side lighting. It helps reveal scratches, raised grain, crushed areas and residual contamination that are lost under even overhead lighting. Not only the outer side is checked: after assembly, the side areas and lower profile transitions may also remain visible.
Then clarify what preparation the manufacturer of the selected finishing system specifies. The sanding sequence, cleaning requirements and admissibility of moistening differ. Therefore, the casual advice "always finish with the finest abrasive" does not replace the technology: the condition of the wood affects both coating adhesion and absorption of the tinting composition.
Sanding must remove the defect while preserving the geometry. On a flat surface, it is important not to round over the edge; on a turned part, not to alter the transition between the bead and the neck; on a carved part, not to erase a fine line of the ornament. Heavier treatment of just one leg can make it noticeably different from the others even after opaque painting.
Dust is removed from recesses and holes by a method compatible with the coating. Any impregnated wipe or cleaner is first checked for permitted use: a product convenient for cleaning is not necessarily suitable for the surface before painting. The prepared part is handled with clean hands or suitable gloves.
A test finish is needed on an actual leg
A flat board shows the general direction of the color but does not reproduce the behavior of the composition in recesses, on end grain and at profile transitions. For final approval, it is useful to use a leg of the same article, material and surface condition as those that will go into production.
The sample goes through the entire planned sequence: mechanical preparation, sanding, priming if necessary, application of color and a protective layer, if provided by the system. Evaluation after the stain alone will be incomplete when the subsequent coating changes the shade or gloss.
The finished sample is examined around the entire circumference next to the facade or another part being matched. Check opacity, pore definition, gloss uniformity and legibility of the relief. Choose lighting close to the future location of the furniture; a phone photo helps record the arrangement of parts but does not replace comparing color in person.
В product samples you can check the available options for an initial introduction to the material. The availability of a sample of the required leg is confirmed separately. If a full-fledged support is purchased for testing, it is decided in advance whether it will remain the workshop's reference sample or, after testing, will become part of the finished set. The quantity of the next order depends on this.
Furniture legs for enamel painting: color and smoothness are assessed separately
An opaque enamel can hide the original color of the wood while preserving a visible pore pattern. Therefore, the request "paint it white" is not enough to agree on the result. The customer and the craftsman need to decide whether visible texture is acceptable or a smooth surface without it showing through is required.
In the second case, preparation may include additional operations to fill the pores and level the surface. Their composition is determined by the wood, the profile and a compatible material system. Trying to solve everything with one thick coat of enamel can worsen the appearance of transitions and fine relief.
The primer is chosen according to its purpose and compatibility with subsequent layers. For light finishes, it is especially important to check on a test piece that there is no undesirable color change. If the system requires an isolating material, it is applied according to the instructions and not replaced with an arbitrary additional coat of paint.
The comparison is made after the specified finish has been completed. A uniform white surface immediately after application does not yet show the final smoothness and gloss. When agreeing, it is convenient to state the result concretely: "Pores are acceptable, the color is opaque, the gloss is matte" or "The texture must not be visible, the surface is smooth." These two specifications may require different preparation of the same leg.
Beech and oak under enamel: what influences the choice
Beech furniture legs are considered for opaque painting partly because of the relatively fine wood texture. But the species does not eliminate the need to control sanding, lamella joints and local surface repairs. Beech with insufficient preparation will not become smooth just by applying enamel.
Oak legs can also be painted with opaque finishes. Whether this choice is rational depends on the project: a suitable model, an agreed material for other parts, or a desire to preserve the pore pattern may prove more important than a transparent coating. If, however, a completely smooth opaque surface is required, the expressiveness of the oak pattern ceases to be an advantage in its own right, and preparation must be assessed separately.
In addition to the species, the preparation of the wood for finishing is taken into account. In the description quality of STAVROS wooden products requirements differ for products intended for enamel and for tinting. Selection by shade and grain pattern is important when the wood remains visible; for an opaque coating, the criteria may be different.
The quality designation should not be confused with the degree of sanding or the presence of a coating. All these characteristics are recorded separately. Also, the word "solid wood" by itself does not promise manufacture from a single whole piece: the composition of the part and the admissibility of glued joints are clarified for the selected version.
Tinting, oil and clear lacquer require a different sample
For tinting, the combination of the original wood grain pattern and the future color is assessed. Two unfinished legs that suit the same opaque enamel may differ noticeably after staining. Therefore, a set for a transparent or semi-transparent finish is selected before the composition is applied.
Particular attention is paid to transitions in the direction of the fibers and to end-grain areas. They may take the composition differently than the longitudinal surface. On a shaped leg, this difference sometimes becomes part of the pattern, and sometimes looks like an undesirable spot. The decision is made on a three-dimensional sample after all the agreed processing.
| Expected result | What is checked on the sample |
|---|---|
| Tinted wood | Shade, legibility of the fibers and differences between areas |
| Oil finish | Change in the original color, uniformity of application and requirements for removing excess |
| Clear lacquer finish | Change in tone, gloss and surface appearance after all coats |
| Light semi-transparent finish | Pigment showing in the pores while maintaining the required lightness |
A stain is not considered standalone protection without checking the product's purpose. The need for a subsequent coating is determined by the chosen system. Also, the transparency of the material does not guarantee that the color of dry wood will be preserved: the desired "natural" look should be shown on a sample rather than described only by the name of the composition.
Turned legs are checked around the entire circumference
У turned furniture legs the coating passes through the beads, necks and recesses. In these areas, the direction of application and the viewing conditions change. A side that looks even at first glance may hide a run on the opposite part of the profile.
Before painting, plan how to hold and rotate the part. The support or hanger must not leave a mark on the visible surface or interfere with finishing the required areas. Using a mounting hole for holding is allowed only when this does not damage the fit and is consistent with paint protection.
On the test piece, compare the thickness of the visual layer in narrow transitions, the absence of sags under the beads and the uniformity of gloss. After drying, rotate the part again, inspecting it in side light. This is more useful than evaluating only the frontal silhouette.
If the profile is complex, first practice the application sequence on a single piece. Evaluate the corrected sample again: changing the painting method may improve one transition while creating excess material in another. Transfer the already verified sequence of actions to the set.
On carved legs, the finish must preserve fine details
When painting carved furniture legs it is important not to lose the distinction between a raised area, a recess, and a thin incised contour. Excess material in the recesses can visually simplify the pattern, even if the color has come out even.
Preparation is checked on the most hard-to-reach areas. Dust deep in the carving, an unpainted spot behind a raised area, or a buildup of primer along a thin line often go unnoticed when viewed from above. The sample is examined from several angles and next to an unpainted part to see how much the legibility of the ornament has changed.
If patina is specified, not only its color but also its placement is approved: which recesses are highlighted and how thoroughly the raised parts are cleaned. The wording "patina as usual" does not ensure a consistent result across a set, especially if different craftsmen work on it.
On the back or less visible side, the finish specified by the design is preserved. It is risky to assume it is invisible in advance: with a freestanding chair or table, the view differs from the catalog image. Which areas are seating surfaces and must remain protected from the coating is determined separately.
On geometric legs, the flat faces and edges matter
У geometric furniture legs a calm shape makes differences between adjacent faces especially noticeable. Uneven sanding, a mark from a holding fixture, or inconsistent gloss can read more strongly than on a complex relief.
The preparation of the flat face is checked under raking light. When processing, the edge retains its specified shape: an accidentally rounded corner changes the silhouette and the character of light reflection. If rounding is required by the coating technology, its size is agreed upon for all parts rather than created by arbitrary pressure during sanding.
The test leg is placed in its intended working position. This shows which face is turned toward the viewer and how the color joins the lower line of the body. For angled supports, the installation direction is also taken into account: identically painted parts do not form a correct set if their orientation is mixed up.
For opaque finishes, compare adjacent surfaces after the entire layer system is complete. For control purposes, it helps to turn each part with the same face toward the light source. Otherwise, a difference in lighting can easily be mistaken for a difference in coating quality and lead to unnecessary rework.
The set is coated according to a single approved sample
For a repeatable result, record the preparation sequence, the materials used, the application method and the agreed gloss level. Precise product designations and the parameters actually used are required, not an entry like “white paint in two coats.” Mixing and application are carried out according to the system manufacturer's instructions.
The sample is assigned an internal designation, for example “ОТ-01”. This is a workshop finish reference number, not a STAVROS article number. The project, leg material and approval date are indicated next to it. If the technology changes, the new sample is designated separately so that the previous sample does not accidentally return to production.
The set is marked before finishing. For a model with four supports, the positions can be indicated: front left, front right, rear left and rear right. The marking is placed on an acceptable hidden area or a separate tag is used. It must not contaminate the surface, interfere with assembly or require subsequent removal together with the paint.
Parts from different projects are stored separately, even if the article number matches. White enamel, dark enamel and tinting each require their own samples and records. Before assembly, the entire set is laid out side by side: individual legs may have passed inspection each on its own, but a difference in shade or gloss is discovered precisely when compared together.
The finish is approved in relation to specific furniture
The sample is compared with the material that will be next to it after assembly. A white facade, a sofa fabric and an oak tabletop place different demands on the same support color.
| Furniture | What to compare the sample with | What to determine in advance |
|---|---|---|
| Dresser, wardrobe or cabinet | Front, side panel, bottom rail | Whether the legs continue the body color or stand out separately |
| Sofa or armchair | Upholstery and visible wooden parts | Matching the armrests or a coordinated contrast |
| Table | Tabletop and aprons | Whether the same tone and the same visible texture are needed |
for dresser, wardrobe and cabinet it is useful to place the sample under the edge of the body. A support in shadow may be perceived differently from a front standing vertically in the light.
Choosing Sofa legs or chairand a real fabric sample is placed next to it. Approving a color from a separate photograph does not show how the textures combine.
У legs for the table an appearance identical to the countertop does not necessarily mean identical finishing technology. The operating conditions of the surfaces differ. Color compatibility is checked on finished samples of each system, without replacing the requirements for their application with visual similarity.
How to record unfinished legs in the specification
The entry "wooden legs — 4 pieces" does not explain what will arrive at the workshop and what needs to be done. Finishing requires a link between the purchased part, the fastening, and the approved result.
| Specification field | What to specify |
|---|---|
| Part | Item code, selected dimensions and finish |
| Material and surface | Species, quality for finishing, agreed preparation |
| Delivery condition | Without coating; assembly operations performed, if provided for |
| Mounting | Reference to the assembly drawing and specific hardware positions |
| Quantity | Quantity per item, number of items, additional copies |
| Finishing | Internal designation and technology record |
| Sample | Where it is stored, when it is approved, whether it is included in the supplied furniture |
The quantity is counted after the sample is approved. Suppose two identical cabinets are being made, each with four legs. The furniture requires eight supports. If the first trial leg is suitable for installation and is included in one of the sets, seven more will be needed. If it is kept in the workshop as a reference, eight more are purchased after the sample.
The reserve is listed as a separate line with a clear purpose. It must not imperceptibly replace a missing part in the main set. For repeat orders, the agreed version of the specification is used: the same item code without material and size may describe an insufficiently precise specification.
When painted legs are ready for final installation
Surface drying and the coating reaching readiness for load are different stages. The part may no longer be tacky but can still take marks from tight packaging or an installation tool. The permissible time for assembly, packaging and start of use is determined by the instructions for the material used and the actual drying conditions.
Before installation, check the thread, the seating points and the areas that were protected from painting. When removing the protection, do not pull on the formed edge of the coating. If an obstructing ridge is found, remove it in a way that does not damage the geometry or the adjacent finish. Pushing the fastener through an undried layer cannot be considered normal fitting.
Tools and accessories must not leave marks on visible faces. The leg is installed according to the joint design, without arbitrarily increasing the tightening force to eliminate skew. The cause of the skew is sought in the seating, the fastening or the base.
After assembly, check the position of all supports, the furniture's bearing and its stability under the intended conditions. Even color and matching height of the parts do not confirm the strength of the structure. The performance of the joints and the absence of unwanted movement are assessed separately. At this stage, the finished furniture is accepted, not just the quality of the leg painting.
When it is more convenient to choose legs with a ready-made finish
Own finishing is justified when the supports need to be matched to a specific front, to replicate the customer's sample, or to include the legs in the workshop's process. But if a suitable color has already been chosen and the dimensions and fastening have been fully verified, you can consider furniture legs with finish.
It is worth comparing the full work through to a finished set. For an unpainted part, preparation, a sample, materials, labour, drying space and result inspection are added to the purchase. For a ready-painted leg, only compatibility checks and careful installation remain. The ability to avoid doing your own painting does not eliminate the need to check the shade next to the furniture.
If the fastening still requires drilling or modification of the mounting surface, this is taken into account before purchasing a ready finish. Mechanical modification may require refinishing, and the expected reduction in work will disappear.
The chosen version is agreed against the product page or with the supplier. The existence of a painted products category does not mean that any unpainted model is available in an arbitrary colour. For a small order, it is especially useful to establish in advance what exactly can be obtained ready-made and which operations will still remain with the workshop.
Where to buy furniture legs for painting
Choosing furniture legs for painting at STAVROS is convenient starting from a specific project: the furniture's purpose, item code, dimensions, material and a verified fastening. After that, the surface condition and a trial sample are agreed. This procedure allows you to order a component with a clear scope of further work.
Before payment, the availability of the chosen version, the scope of delivery and the lead time are confirmed. A workshop planning repeat purchases will find it useful to review conditions for manufacturers, and to check the shipping and payment terms in the section payment and delivery. The start date for painting is tied to confirmed receipt of the parts and approval of the sample.
For a specific request, it is enough to provide the specification and explain the expected finish: a covering enamel with an acceptable texture, a smooth opaque surface, or a tint with a visible wood grain. These formulations help clarify the version, but only an approved sample confirms the final result.
It is sensible to order the entire set of furniture legs for painting after checking this sample and the mounting assembly. Then purchasing, painting and assembly rely on the same data: the chosen part, a working fastening and a real sample that the workshop can reproduce.