Article Contents:
- What is confirmed about NPU-190 and what needs to be learned about microcement
- Why this topic does not duplicate the article on decorative plaster and molding
- First check the composition: size 50 × 82 mm, relief 8 mm, slats, and the actual scale of the wall
- Slats as the main accent
- Microcement is the main background
- NPU becomes a bright contrast
- Photo A
- Photo B
- 1. Residual microcement sample
- 2. Test board made with the same system
- 3. Hidden or low-visibility area
- 4. Central field
- Contrasting NPU-190
- In the color of the slats
- Multicolor decorative painting
- Paint before installation
- Painting after installation
- 1. Do not install NPU-190
- 2. Find a microcement specialist and inspect the coating
- 3. Create a separate test sample with the closest possible system
- Mistake 1. Start with the adhesive without checking the composition itself
- Mistake 2. Consider any microcement as the same surface
- Mistake 3. Sand the center of the wall without the manufacturer's instructions
- Mistake 4. Wipe the surface with a random solvent
- Mistake 5. Test the adhesive in the middle of the accent wall
- Mistake 6. Consider 41 cm² as the actual bonding area
- Mistake 7. Apply "more" adhesive
- Mistake 8. Move the NPU along the wall after contact with the adhesive
- Error 9. Masking a microcement crack with a patch
- Error 10. Promising seamless dismantling
- Step 1. Size
- Step 2. Position
- Step 3. Light
- Step 4. Slats
- Step 5. Microcement
- Step 6. Finish
- Step 7. Documentation
- Step 8. Test
- Step 9. The Future
- Step 10. The Solution
- Can NPU-190 be glued to microcement without sanding?
- If the microcement is coated with polyurethane varnish, does that mean the polyurethane NPU is definitely compatible?
- Can the adhesive be tested on an area behind the slat panel?
- What to do if the craftsman left a test patch of microcement?
- Can NPU-190 be glued to microcement that was applied a week ago?
- Is a primer needed under NPU-190?
- Can NPU-190 be removed later and microcement restored without a trace?
- Will NPU-190 suit very textured microcement?
- What matters more before buying: checking the adhesive or the size?
- Where can I see other overlays if NPU-190 is too small?
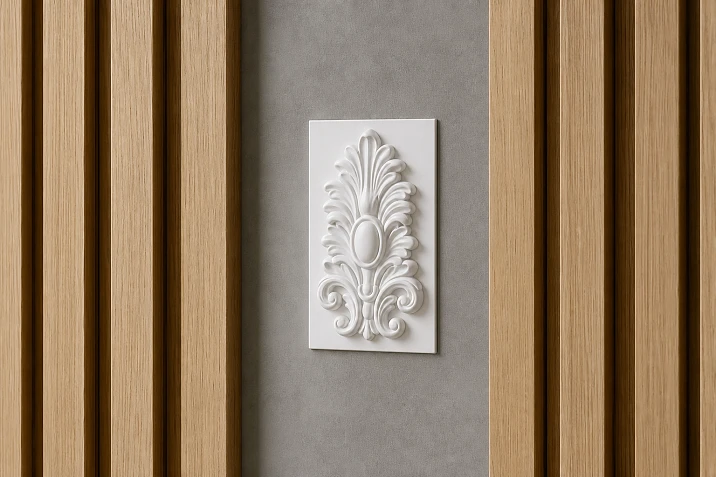
The slat panels are already installed. The smooth field between them is finished with microcement. The color, texture, and light on the wall have already turned out as desired. And only after the renovation is complete does a new idea emerge: add a small carved decorative overlay NPU-190 to the finished surface.
This is a completely different task than designing molding before finishing.
When the wall is not yet finished, the position of the decorative element can be incorporated into the base technology: prepare the spot, coordinate the installation, then apply the overall finish. Here the order is reversed:
expensive finishing is already done → the surface cannot be thoughtlessly sanded, primed, or damaged → first, it must be proven that NPU-190 is compositionally needed at all and that the specific microcement system allows safe installation on its finish layer.
For the current NPU-190, the following are confirmed:
-
product type — carved decorative overlay;
-
material — polyurethane;
-
size — 50 × 82 × 8 mm;
-
current price — 690 ₽;
-
The product is sold separately.
For this topic, a small size is an advantage only in a compositional sense: a full-size template is easy to make before purchase. But size is not proof of the adhesive's compatibility with microcement.
Therefore, the main conclusion of the article is this:
NPU-190 can be considered for a finished microcement surface only after two independent checks — visual and technical.
The first answers the question:
Is a small carved overlay needed between already active slat panels?
Second:
Can it be securely attached to your specific microcement finish layer without unacceptable risk of peeling, staining, matte marks, damage to the protective coating, or damage during future removal?
If one of the two tests fails, the correct purchase is 0 pieces.
If both pass, you can buy the decorative molding NPU-190 50 × 82 mm already as a confirmed decision, not as an experiment on a finished wall.
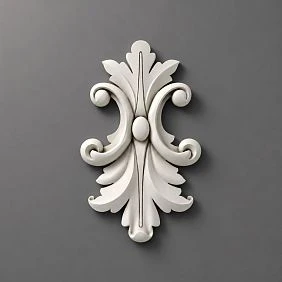
What is confirmed about NPU-190 and what needs to be found out about microcement
| Parameter | What is known |
|---|---|
| Article number | NPU-190 |
| Type | Carved decorative overlay |
| Material | Polyurethane |
| Size | 50 × 82 × 8 mm |
| Current price | 690 ₽ |
| Quantity in the original scenario | 1 pc. |
| Renovation stage | microcement is already finished |
| Mounting base | is not defined by the word "microcement"; the specific finish layer needs to be established |
| Universal adhesive | is not assigned without checking the coating system |
| Main risk | damage or alter an already finished decorative finish |
The official STAVROS card confirms NPU-190 50 × 82 × 8 mm made of polyurethane and a price of 690 ₽.
With microcement, the situation is fundamentally different.
"Microcement" is the name of a decorative coating system, but the final surface may include individual protective layers. For example, in the official Topciment technology, after the last layer of microcement, a sealing stage is applied: the manufacturer describes a primer/sealer and a polyurethane protective varnish. This does not mean that every manufacturer's system is structured exactly the same way. But the example shows the main principle: the actual surface to which the adhesive will be pressed may not be the mineral microcement itself, but its protective finish.
Hence the rule:
first identify the top layer of your system, then check its compatibility with the installation.




Why this topic does not duplicate the article about decorative plaster and stucco molding
STAVROS already has a large article about stucco decor and decorative plaster on the wall.
It answers the broad question of combining:
-
textured finishes;
-
microcement;
-
moldings;
-
frames;
-
stylistics.
There is also a separate STAVROS material about slat panels in interiors, which directly mentions the combination of slats and microcement as a contrast between mineral texture and linear wooden rhythm.
The new article addresses a different user intent:
what to do if both the slats and microcement are already fully finished, and one NPU-190 is desired to be added after the renovation is complete.
There is no need to redesign the entire wall here.
One must not go into an encyclopedia:
-
what types of plasters exist;
-
how to choose microcement;
-
which slats are better;
-
how to create a molding frame.
The value of the page is in the retrofit after the finish.
After it, the reader should be able to:
-
check the NPU-190 with a 50 × 82 mm template;
-
understand what the top layer of microcement is;
-
find the documentation for their system;
-
exclude incompatible actions;
-
choose a safe testing method;
-
decide whether to buy one NPU-190 or leave the surface untouched.
Our factory also produces:

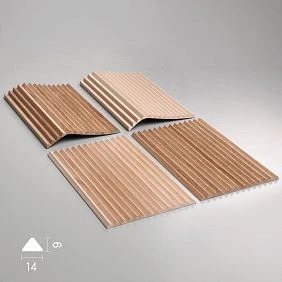
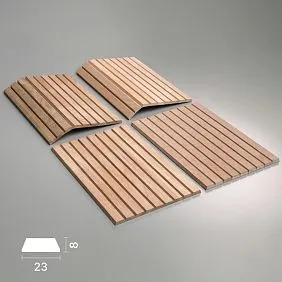
First, check the composition: size 50 × 82 mm, relief 8 mm, slats, and the real scale of the wall
The most expensive mistake in this scenario is to jump straight to the adhesive question.
Before the glue, there is a simpler question:
Does NPU-190 actually improve the wall?
If not, adhesion testing is not needed.
The product is 50 mm wide and 82 mm high. On a large field between slat panels, it can:
-
turn out to be a neat local accent;
-
get lost;
-
look random;
-
conflict with the vertical rhythm;
-
create an unjustifiably classic motif in a minimalist microcement field.
Therefore, the first tool is not the mounting compound, but paper.
Make a template 50 × 82 mm.
If possible, print not only the rectangle, but also the silhouette of the NPU-190 itself at 1:1 scale.
Check:
-
center of the smooth field;
-
slight offset;
-
position closer to furniture or a lamp, if present;
-
view from the main distance;
-
photo on a phone;
-
daylight and evening light.
No surface is damaged in the process.
An 8 mm relief cannot be checked with a flat template
Paper only answers questions of width and height.
The NPU-190 has another dimension — 8 mm in thickness/relief.
It affects:
-
shadow;
-
visual depth;
-
the nature of the combination with microcement;
-
perception next to the slatted relief.
A flat white rectangle can look almost invisible.
A real carved overlay under side lighting will appear more active.
Therefore, after a successful paper test, there is a second stage — assessing the physical depth.
For this, it is better to:
-
view the 3D/drawing of the product;
-
evaluate the NPU-190 in person or on a sample, if possible;
-
simulate the protrusion with a simple mockup about 8 mm thick;
-
check the shadow on the wall without glue.
This is especially useful if the slat panels are already backlit.
Then two different reliefs appear on one wall:
deep vertical texture of the slats + a small carved accent on the mineral surface.
If both start to compete, it is better not to buy NPU-190 even if installation is technically acceptable.
Microcement between the slats is already a strong finish in itself
The finished microcement field is not an empty painted wall.
It has:
-
tonal unevenness;
-
texture;
-
the nature of the spatula movement;
-
matte finish or another finish;
-
its own play of light.
Next to it, slat panels provide:
-
a vertical rhythm;
-
depth;
-
shadows;
-
another material.
That is, the wall already consists of at least two expressive systems.
NPU-190 becomes the third.
This is not prohibited, but requires hierarchy.
Get Consultation
Rails are the main accent
NPU is best made as calm as possible in color.
Microcement — the main background
The overlay can work as a thin relief mark.
NPU becomes a bright contrast
This is the riskiest option: a small element gets too much attention and may look random.
For retrofitting after repair, it is better to first check the minimally contrasting version.
Technical inspection of finished microcement: layer system, finish, documentation, and adhesion test
To decide on installation, it is not enough to know:
"microcement on the wall."
You need to find out what exactly is on the surface today.
Different manufacturers and systems have different sequences. But in professional microcement systems, the process usually does not end with the last decorative layer. On top there may be:
-
a special primer;
-
pore-filling layer;
-
protective varnish;
-
polyurethane sealer;
-
another finish provided by the manufacturer.
It is this top layer that first comes into contact with the installation compound.
Therefore, the compatibility question is not formulated as:
"Does polyurethane adhere to microcement?"
But like this:
"Does the specific manufacturer of the microcement system allow the adhesive bonding of a decorative element to a specific already applied protective finish, and by what method?"
This is much more accurate.
If the system brand is known, you need:
-
microcement name;
-
finish coating name;
-
application date;
-
operating instructions;
-
recommendations for additional bonding of elements;
-
master or contractor data.
If the system is unknown, technical uncertainty is higher.
In such a situation, the risk cannot be compensated with a "stronger adhesive."
First, try to recover information from:
-
contract;
-
queues;
-
material banks;
-
correspondence with the master;
-
process photos;
-
coating passport.
Why you shouldn't trust the universal advice "microcement is rough, so the adhesive will take hold"
Visual texture and actual surface are different things.
Microcement may look matte and mineral, but have a protective coating on top.
Conversely, the same material name may be used in different systems.
Therefore, a visual finger test does not determine:
-
chemical compatibility;
-
strength of the top layer;
-
adhesion of the finish to the substrate;
-
possibility of future dismantling.
Even if the installation compound adheres well to the top layer, a second question remains:
how well is the top layer itself bonded to the rest of the wall system?
If the weak link turns out to be not the adhesive but the finish coating, NPU-190 may come off together with part of the finish.
That is why for finished microcement, not only the adhesion “adhesive → wall” matters, but the entire chain:
NPU-190 → installation compound → protective finish → microcement system → substrate.
The area of a 50 × 82 mm rectangle is not equal to the actual adhesive contact area
The dimensions of NPU-190 can be calculated:
50 × 82 = 4100 mm² = 41 cm².
But 41 cm² cannot be used as the actual bonding area.
The reason is simple.
The back side of the decorative item may:
-
have a relief;
-
have technological features;
-
not contact the base with the entire area of the overall rectangle.
Based on the available card data, the exact back contact area of NPU-190 cannot be confidently determined.
Therefore, the article does not calculate the "load per square centimeter" and does not conclude:
"the element is small, so any adhesive will hold it."
Such a calculation would be artificial.
Correct output:
Small size facilitates compositional fitting, but does not eliminate the need to check the actual mounting surface.
The paper template should pass the test "better with it than without it"
For a finished wall, it is especially useful not to ask:
"where to place the NPU-190?"
First, you need to ask:
"is it needed at all?"
Take two photos from the same point.
Photo A
Wall without template.
Photo B
NPU-190 template 50 × 82 mm at the selected position.
Then compare not a single detail, but the entire wall.
Check:
-
has the composition become more cohesive;
-
has a clear accent appeared;
-
has the calmness of the microcement been lost;
-
has the wall become more fragmented;
-
does the overlay look random.
If the answer is not obvious, that is already an argument not to touch the finished finish.
For a retrofit, weak visual benefit does not justify the technical risk.
If the NPU-190 is barely visible from the main distance, that is not a reason to automatically increase the contrast
The small size of 50 × 82 mm means that on a wide wall the overlay may get lost.
The most common reaction:
-
make it gold;
-
paint it black;
-
add bright light;
-
add a second one;
-
surround it with a frame.
But then the original theme changes.
NPU-190 ceases to be a small local accent and becomes the beginning of a more complex composition.
Before such complication, it's better to admit:
perhaps NPU-190 is too small for this field.
Then professional options:
-
choose a different scale;
-
move the NPU-190 to a smaller surface;
-
leave the microcement clean.
To select other models, you can Buy decorative polyurethane overlays after checking the desired scale.
The slats on the sides themselves create a frame for the microcement
When the microcement is between two slat fields, the inner edges of the slats already perform a strong architectural function.
They:
-
highlight the smooth center;
-
create vertical boundaries;
-
form a contrast of textures;
-
make the middle an independent zone.
This is an important argument against excessive decor.
Sometimes a smooth field looks "empty" only in a close-up photo, but at room scale it is already assembled by the side slats.
NPU-190 is needed only if the central zone really lacks one small ornamental accent.
If the slats already create a full frame, and the microcement has a beautiful hand-applied texture, an empty center can be stronger.
Where to place NPU-190: the center is not mandatory
The small overlay does not have to be strictly at the geometric center of the field.
It can have other anchors:
-
a piece of furniture;
-
a light fixture;
-
a painting;
-
console;
-
axis of the doorway;
-
composition of objects at the bottom.
But for finished microcement, each shift needs to be checked carefully.
Why?
Because after gluing, the position becomes difficult to reverse.
If the overlay is removed, a mark may remain on the finish.
Therefore, before installation, you need to fix a single approved coordinate, rather than moving the real NPU along the wall in search of a place.
First, the paper.
Only then the product.
The placement height should be checked together with the furniture and the person
On an empty wall, a small NPU-190 can easily look too high or too low.
It needs to be assessed in the real interior.
If below is:
-
console;
-
a pedestal;
-
an armchair;
-
sofa;
-
table;
the overlay should have a clear connection to this zone or deliberately be independent.
A useful test:
-
place the furniture in its final position;
-
place the template;
-
sit or stand at the main viewpoint;
-
take a photo;
-
check that the person does not block the accent;
-
compare with an empty wall.
The article does not set a universal height.
It teaches to start from an already finished object.
What exactly to ask the microcement specialist before installation
If you still have contact with the contractor, this is the most useful source of technical information.
Questions are better asked specifically.
Not:
"Can something be glued here?"
But:
-
What microcement system was used?
-
What is the name of the final protective layer?
-
Is there a technical data sheet for this coating?
-
Does the manufacturer allow gluing decorative elements after the finish?
-
Which adhesives or chemical groups are prohibited?
-
Is surface preparation needed?
-
Is local matting or sanding allowed?
-
How to restore the finish if the element is ever removed?
-
Is there any leftover material or a test sample?
It is better to keep the answers in writing.
Why is this useful?
In a year, the name of the coating will be forgotten, but the decorative element will remain on the wall.
The safest adhesion test is not on the central part of the finished wall.
If the documentation requires a sample, its location must be chosen wisely.
Priority:
1. Residual microcement sample
The best option.
If the craftsman kept a test panel, a piece of the board, or a color sample, the test does not risk the main wall.
2. Test board made with the same system
Suitable if it can be reproduced:
-
base;
-
microcement;
-
protective finish.
3. Hidden or low-visibility area
Only if the coating manufacturer allows such a test and the owner understands that the mark may be irreversible.
4. Central field
This is the worst place for an experiment.
Especially if the microcement has a complex hand-applied texture that cannot be locally replicated invisibly.
Main principle:
first prove compatibility outside the accent zone, rather than using a beautiful wall as a laboratory.
It cannot be promised that the adhesive test will be fully reversible
Even if the mounting compound is removed from some surfaces without a trace, a specific microcement finish may behave differently.
Possible consequences:
-
change in matteness;
-
glossy spot;
-
peeling of the protective layer;
-
local color change;
-
mechanical scratch;
-
difference after cleaning.
Therefore, the test is considered truly safe only when:
-
it is recommended by the system manufacturer;
-
it is performed on a sample;
-
or the possible trace is acceptable.
You cannot write:
"stick a piece of masking tape/glue and then remove it — nothing will happen."
For an unknown system, this is a promise without basis.
Sanding finished microcement under NPU-190 "for better adhesion" is not allowed according to universal advice
In standard installation recommendations, the idea is often found:
make the surface rough.
For already finished microcement, it cannot be applied automatically.
Grinding can affect:
-
protective varnish;
-
sealer;
-
local matteness;
-
color;
-
texture;
-
water and dirt repellent properties of a specific system.
If the coating manufacturer explicitly provides for local preparation for bonding, follow their instructions.
If there is no such recommendation, unauthorized grinding of the central spot creates a problem even before installation.
What will happen if NPU-190 later turns out to be unsuitable?
A section with a different texture will remain on the wall.
Therefore, the rule for retrofit:
do not destroy the finish for the sake of hypothetical adhesion improvement, unless this action is confirmed for a specific system.
Degreasing also cannot be reduced to the phrase "wipe with a solvent"
The finished decorative surface requires a compatible cleaning method.
A random solvent can:
-
alter the lacquer;
-
create a stain;
-
remove the shine;
-
soften the coating;
-
change the color.
Even a universal household cleaner can leave a film.
Therefore, before installation, you need to ask the microcement manufacturer:
-
what is allowed to clean the surface with;
-
is neutral washing required;
-
how long should the surface dry after cleaning;
-
are there any prohibited chemical agents.
The article deliberately does not specify a particular solvent.
This is more correct than giving a "convenient" advice and damaging the finished wall.
Surface condition and reversibility: when it is better not to touch finished microcement at all
Sometimes the idea of an overlay arises not from design, but because the microcement already has:
-
a stain;
-
a small crack;
-
chip;
-
delamination;
-
unsuccessful patch.
There is a temptation:
to cover this NPU-190.
This is a risky scenario.
If the problem is only cosmetic and the base is stable, a decorative overlay could theoretically be part of the design.
But if the microcement:
-
is peeling;
-
cracks due to the base;
-
is crumbling;
-
has a weak top layer,
the overlay does not fix the cause.
Moreover, the mounting system will rest precisely on the problematic area.
Therefore, NPU-190 is not used as a "band-aid" on unstable coating.
First, the microcement is repaired according to its manufacturer's technology.
Then they decide again whether decor is needed.
Why installation on slats and installation on smooth microcement are different tasks
In this article, NPU-190 is placed only on the smooth field between the slat panels.
Not on the slats themselves.
Causes:
-
The slats have a relief;
-
The contact surface will be different;
-
The scale will change;
-
The overlay may cover the gaps;
-
The ornament will start to conflict with the linear rhythm.
Slat panels remain an adjacent material and a visual frame.
If the task is to select the panels themselves, a commercial link can naturally be included within the article. buy wall slat panels.
But installing NPU-190 on microcement should not be mixed with the installation technology for slat panels.
The closer NPU-190 is to the edge of the slat field, the more important it is to check the shadows.
Microcement and slats have different planes.
A slat panel can protrude relative to a smooth wall.
NPU-190 adds another 8 mm of its own relief.
If you place it close to the edge of the slat, the shadows may merge.
This creates a visual node:
edge of the slat panel → deep vertical shadow → short gap → carved relief of NPU.
Sometimes it's beautiful.
Sometimes a small patch gets lost near a much stronger texture.
Therefore, for a mockup it's useful to check at least three distances:
-
close to the rails;
-
middle position;
-
closer to the center of the smooth field.
There's no need to preset standard 50, 100, or 150 mm.
There is no such standard.
You need to choose a distance that works in the specific composition.
If microcement has a pronounced trowel pattern, NPU-190 may land on a visually "busy" spot
Microcement is rarely perceived as a uniform solid background.
It may contain:
-
clouds of color;
-
transitions;
-
spatula arcs;
-
darker areas;
-
light zones.
If the NPU-190 is placed directly on an expressive spot, it may:
-
hide a beautiful part of the texture;
-
create too complex a center;
-
visually "break" the pattern.
Therefore, the template should be moved not only relative to the wall geometry, but also relative to the specific microcement pattern.
A good position is often found in a calmer area.
This way the overlay is readable, and the decorative surface does not lose its value.
One overlay for 690 ₽ can create a disproportionately high risk for expensive finishes.
This is the central commercial idea.
The price of the product is 690 ₽.
The article does not know and does not invent the cost of finished microcement in a specific interior.
But it is obvious that restoring decorative finishes may include:
-
calling a specialist;
-
selecting materials;
-
local restoration;
-
reapplication of finish;
-
attempt to match the existing color and pattern.
Therefore, the decision cannot be judged by logic:
"the overlay is cheap, you can try it."
On the contrary.
The more valuable the existing surface, the higher the requirements for proof of compatibility.
A commercially honest formula:
do not risk a finished wall for a product costing 690 rubles if its installation compatibility is not confirmed.
Adhesion after repair should be considered potentially difficult to reverse
If NPU-190 is installed on finished microcement, it is better to proceed from a conservative assumption:
future removal may leave marks.
Until a specific finish manufacturer and a specific mounting system confirm reversibility, one cannot promise:
-
"removes without a trace";
-
"the lacquer will not be damaged";
-
"the stain can be easily painted over."
This affects the choice of location.
Do not stick NPU-190 "to try it for a week."
A real fitting should happen before the adhesive.
After the adhesive, it is already installation.
If the interior is removable or the decor may change soon, permanent installation may be a bad decision
There are scenarios where the very idea of retrofit is too temporary.
For example:
-
rented apartment;
-
showroom with seasonal display;
-
salon where the brand zone changes annually;
-
the space is being prepared for sale;
-
the owner is not yet sure about the style.
In such cases, the desire to add NPU-190 may be temporary.
If the mounting potentially damages microcement, permanent installation is not justified.
Better:
-
leave the surface;
-
use other reversible decor, if allowed;
-
return to stucco molding during the next renovation.
This is a typical example where technical capability does not equal practical feasibility.
Color and light of NPU-190 on microcement: how not to turn a small overlay into a random sign
After technical compatibility, the question of color arises.
NPU-190 has a small format and carved relief.
If you paint it close to the color of microcement, it works through:
-
shadow;
-
shape;
-
small volume.
This is the calmest scenario next to slat panels.
Contrasting NPU-190
May be appropriate if the interior already has:
-
black hardware;
-
brass;
-
graphite;
-
another repetitive accent.
But a small contrasting detail can seem random.
In the color of the slats
Only suitable after a real test application.
Polyurethane does not replicate the natural texture of wood.
A solid brown next to oak can look artificial.
Multi-color decorative painting
For a small patch on microcement, this is the most active option.
It quickly turns a delicate retrofit into a separate ornamental center.
So it's better not to start with it.
Painting NPU-190 is better done before installation or after — it depends on the wall finish
Finished microcement has a particular problem: painting work near it can create a risk of stains.
Painting before installation
Advantages:
-
less work directly on the microcement;
-
easier to paint over the relief;
-
you can do a test paint separately.
Disadvantages:
-
after installation, local correction may be needed;
-
you cannot guarantee a perfect transition at the edge in advance.
Painting after installation
Advantages:
-
you can work with already fixed geometry.
Disadvantages:
-
you need to protect the microcement very carefully;
-
accidental paint can get on the finish.
For a finished expensive wall, it is often more logical to move experimental painting as much as possible outside the wall.
But the specific paint system also needs to be selected for polyurethane and the required finish.
Masking tape itself requires caution on decorative finishes.
Even regular masking can be sensitive for some coatings.
Therefore, you cannot automatically advise:
"tape the microcement and paint it."
You need to check the finish manufacturer's recommendations:
-
whether tape is allowed;
-
what kind;
-
how long after applying the coating;
-
how to remove it.
If microcement has been applied recently, it is especially important to observe the period of full readiness of the finish for use, rather than relying on the fact that the surface is "already dry to the touch."
The period after applying microcement is important even if the wall looks ready
The topic says: microcement has already been applied.
But this does not always mean:
the entire system has fully achieved its operational properties.
Finish coatings have their own drying and curing modes.
For example, the official manufacturer Topciment sets specific intervals between layers of its primer and polyurethane sealer and separately controls the moisture of the coating before the protective layer.
Exact timing cannot be transferred from this to another product.
But a correct universal conclusion can be drawn:
if the renovation has been completed recently, you need to find out from the manufacturer of your specific system the period after which additional installation impacts are allowed on the finish.
Do not install according to the principle:
"we finished yesterday, today it doesn't stick anymore — so it's fine."
What to do if the microcement brand is unknown
This is an unpleasant but real scenario.
The renovation was done by the previous owner.
The craftsman is unavailable.
The cans have been thrown away.
There is no documentation.
In such a situation, the article should not pretend that technical uncertainty can be resolved with one universal adhesive.
There are three reasonable paths.
1. Do not install NPU-190
The most conservative.
Suitable if the decorative value is small.
2. Find a microcement specialist and inspect the coating
They can help determine the type of finish and assess the risks.
3. Create a separate test sample with the closest possible system
But if the system is unknown, there is still no absolute identity.
Therefore, an unknown material always increases the risk.
For an overlay costing 690 ₽, this risk is often not justified.
After checking, save a short "surface passport"
If you managed to recover data about the microcement, it is useful to save it along with a photo of the wall.
Minimum set:
-
system manufacturer;
-
microcement name;
-
protective finish name;
-
application date;
-
permitted cleaning method;
-
information about permissible adhesion;
-
name of the mounting compound, if NPU-190 is ultimately installed.
This is useful not only for the overlay itself.
In a few years, the information will be needed for:
-
local repair;
-
removal of decor;
-
repainting;
-
installation of new furniture;
-
adding another wall element.
A finished decorative wall becomes much easier to maintain if its technology is not lost after the renovation is completed.
Installation after finishing: composition, amount of adhesive, marking, and protection of the finished surface
The buyer may have a logical thought:
since NPU-190 is made of polyurethane, you just need adhesive for polyurethane molding.
this is not enough.
The installation compound simultaneously interacts with:
-
the back side of NPU-190;
-
the top protective layer of microcement.
Therefore, compatibility must be confirmed for both sides of the joint.
You cannot choose a composition just because:
-
it is sold next to stucco molding;
-
it is "very strong";
-
it is suitable for mineral bases in general;
-
it was once used to glue molding onto paint.
Ready-made microcement may have its own protective layer, and it is its instructions that take priority over the wall.
STAVROS has a separate section materials for installation and finishing, but the mere presence of installation materials in the catalog does not replace checking compatibility with a specific microcement system.
There is no need to apply more adhesive for "insurance"
With a small overlay, erroneous logic easily arises:
If the surface is questionable, I'll apply more of the compound.
The amount of adhesive does not turn an incompatible pair of materials into a compatible one.
Excess can:
-
spill over the edge;
-
get onto the microcement;
-
create a stain;
-
complicate cleaning;
-
change the NPU seating depth.
Therefore, installation is performed according to the instructions of the selected system, not on the principle of "the more, the safer."
The article is conscious
Therefore, on dark microcement it is especially important to check the option in the tone of the wall.
Only after this does it make sense to consider contrast.
The same applies to very light microcement and black NPU.
Contrast should not be a way to "make a small product work."
If the scale is not suitable, color will not solve the problem.
The overlay should have a clear role: accent, link, or detail — but not everything at once.
Before purchasing, it is useful to formulate one phrase:
NPU-190 is needed here to ________.
Good answers:
-
give a small carved accent on a calm field;
-
link classic furniture with modern slats;
-
repeat the existing pattern in the room;
-
add a delicate vertical detail.
Weak answer:
it just seems like something is missing.
If the role is not defined, the risk of accidental retrofitting is high.
A finished surface does not have to accept another element just because there is physically free space.
Commercial solution: 0 or 1 NPU-190 and when to choose a different decor
The correct solution is 0 pieces if at least one of the critical conditions is met:
-
the 50 × 82 mm pattern gets lost on the wall;
-
the overlay conflicts with the slat rhythm;
-
microcement is self-sufficient;
-
the system brand is unknown and technical compatibility cannot be confirmed;
-
the finish manufacturer does not allow the required installation method;
-
the test is only possible in the center of the finished wall;
-
adhesion requires destroying the finish, and restoration is not guaranteed;
-
NPU is intended to be used to mask delamination or cracks;
-
the interior will soon be changing;
-
future dismantling must be completely traceless, but this is not confirmed.
This is not a "sales failure."
This is proper commercial assistance.
When one NPU-190 is justified
One overlay for 690 ₽ makes sense if:
-
size 50 × 82 mm passed the visual test;
-
relief of 8 mm fits the light;
-
position approved without glue;
-
microcement system is known;
-
top finish is known;
-
manufacturer allows installation;
-
installation compound is compatible with polyurethane and finish;
-
test sample is done safely, if required;
-
the surface is stable;
-
the owner accepts the possible complexity of future dismantling.
Then you can buy exactly 1 NPU-190.
The quantity here does not require calculation.
The main work is in checking the risk.
If you want more decor, that is a different article and a different project
After trying on one NPU-190, a desire may appear:
-
add a second one;
-
build a vertical pair;
-
make a frame;
-
connect with a molding;
-
add corner elements.
But the original theme should stop there.
Why?
Because each new element:
-
increases the number of adhesive points;
-
increases the risk of damaging microcement;
-
changes the composition;
-
brings the wall closer to a full stucco system.
If such a system is needed, it is better to design it separately rather than build it from random solutions after renovation.
For a larger selection, available Polyurethane moldings.
Mistakes that can ruin the finished finish
Error 1. Starting with glue without checking the composition itself
Why it happens: the product is inexpensive and seems small.
Consequence: technical risk arises for the sake of decor that is not needed at all.
Check: template 50 × 82 mm.
How to avoid: first the visual solution, then the technology.
Error 2. Considering any microcement as the same surface
Why it happens: one name of the material.
Consequence: the specific sealer/varnish is ignored.
Check: establish the brand and finish.
How to avoid: read the system layer by layer.
Error 3. Sanding the center of the wall without manufacturer's instructions
Why it occurs: the desire to improve adhesion.
Consequence: the finish changes locally.
Check: whether such an operation is in the documentation.
How to avoid: do not damage the coating based on universal advice.
Error 4. Wiping the surface with a random solvent
Why it occurs: the usual preparation for bonding.
Consequence: a stain or a change in gloss.
Check: the approved cleaning method.
How to avoid: use only a compatible method.
Error 5. Testing adhesive in the middle of an accent wall
Why it happens: need to quickly check adhesion.
Consequence: the test leaves a mark.
Check: whether there is a sample.
How to avoid: move the test out of the accent zone.
Error 6. Considering 41 cm² as the actual bonding area
Why it happens: multiplying 50 × 82 mm.
Consequence: a false engineering conclusion about reliability is made.
Check: actual rear geometry.
How to avoid: do not calculate unknown contact area.
Error 7. Apply "more" glue
Why it occurs: wanting a safety margin.
Consequence: the compound comes out onto microcement.
Check: installation system instructions.
How to avoid: do not replace compatibility with quantity.
Error 8. Move NPU along the wall after contact with glue
Why it occurs: position is not approved.
Consequence: marks and contamination.
Check: is there final marking.
How to avoid: do all position searching with a paper template.
Error 9. Masking a microcement crack with an overlay
Why it occurs: the defect is convenient to cover up.
Consequence: the cause remains, and installation proceeds over an unstable area.
Check: condition of the coating.
How to avoid: first repair the finish.
Error 10. Promising a traceless dismantling
Why it occurs: the small size creates a sense of reversibility.
Consequence: the sealer gets damaged during removal.
Check: documentation and test.
How to avoid: consider permanent installation as difficult to reverse until proven otherwise.
What to check 15 minutes before deciding to buy
Step 1. Size
Make a template 50 × 82 mm.
Step 2. Position
Find one clear coordinate.
Step 3. Light
Check the relief layout about 8 mm or evaluate the 3D.
Step 4. Battens
See if the overlay gets lost next to the vertical rhythm.
Step 5. Microcement
Write down the system brand.
Step 6. Finish
Find out the name of the protective layer.
Step 7. Documentation
Check whether the manufacturer allows gluing.
Step 8. Test
Determine where adhesion can be safely tested.
Step 9. Future
Imagine that the NPU needs to be removed in three years.
Is a possible trace acceptable?
Step 10. Decision
Only two answers:
1 × NPU-190
or
0 × NPU-190.
Practical algorithm from finished wall to installation
-
Do not touch microcement with a tool.
-
Measure the smooth field between the slat panels.
-
Make a template NPU-190 50 × 82 mm.
-
Check at least two positions.
-
Photograph both.
-
Compare with the wall without decor.
-
Check the scale from the main distance.
-
Evaluate the 8 mm relief in real light.
-
Approve the color concept.
-
Determine the brand of microcement.
-
Determine the protective finish.
-
Find the technical documentation.
-
Contact the craftsman or manufacturer if in doubt.
-
Check the approved cleaning method.
-
Do not sand the visible area without direct recommendation.
-
Check the installation compound on both sides of the joint.
-
If a test is required, use a sample.
-
Check whether the finish itself is stable.
-
Do not mask an NPU base defect.
-
Confirm one final coordinate.
-
Do a dry fit of the actual NPU-190.
-
Check that the relief does not conflict with the rails.
-
Organize wall protection in a manner acceptable for the finish.
-
Perform installation according to the instructions of the compatible system.
-
Do not move the element along the wall after bonding begins unless necessary.
-
Remove any possible excess only in a manner permitted for the finish.
-
Allow the mounting system to achieve its properties according to its instructions.
-
Check the result during the day and in the evening.
-
Save data about the coating and the applied compound.
-
If any technical stage is not confirmed — stop before installation.
After passing this algorithm, you can Buy decorative polyurethane overlays or specify a specific NPU-190.
Decision matrix: buy NPU-190 or leave microcement untouched
| Condition | Solution |
| The template looks random | 0 NPU |
| NPU gets lost next to the rails | a different scale or 0 NPU |
| Microcement is already self-sufficient | 0 NPU |
| The size 50 × 82 mm looks appropriate | proceed to technical verification |
| The microcement system is known | check its documentation |
| The finish layer is unknown | do not glue until identification |
| The manufacturer allows gluing | select a compatible mounting system |
| Destructive preparation of the accent wall is needed | evaluate abandoning NPU |
| There is a test sample | test adhesion on it |
| Testing is only possible in the center of the wall | do not experiment unnecessarily |
| The coating is unstable | first repair the microcement |
| Future traceless dismantling is mandatory but not confirmed | decline |
| Visual and technical checks passed | 1 × NPU-190 for 690 ₽ |
If NPU-190 is not suitable: what alternatives to look at next
If the template shows that NPU-190 50 × 82 mm is too small, do not enhance it with contrast or add a second one just to make the purchase "work."
The logical next step is to compare others Polyurethane decorative appliques and choose a scale that is actually readable on your microcement field.
If the idea grew from a single overlay into a full architectural composition, it is more useful to look at the entire section moldings from polyurethane and design the system up to the next finishing stage, rather than building up decor with random adhesive points on an already finished wall.
If the question concerns adjacent vertical fields, you can buy slat panels for walls for interior finishing or first study solutions with slats and decorative plaster.
For the technical part, it is useful to separately look at Mounting and finishing materials, but you still need to choose a specific mounting compound after checking the microcement finish.
If none of the options gives a convincing result, microcement left without additional molding is a full-fledged design solution, not an "unfinished wall."
Bottom line: the main thing is not to prove that NPU-190 can be glued, but to prove that it is worth interfering with the finished microcement for its sake
NPU-190 is a small carved decorative polyurethane overlay measuring 50 × 82 × 8 mm. Current price is 690 ₽.
The product itself is simple.
The complexity comes from the repair stage.
Microcement is already finished, and the top protective layer can be technologically more important than the decorative mineral coating itself.
Therefore, you cannot work here using a universal scheme:
“degrease → sand → glue.”
Each of these steps must be acceptable for the specific system.
The correct sequence is different:
mock-up 50 × 82 mm → composition check → finish identification → documentation review → safe compatibility test → approval of permanent position → installation.
If NPU-190 is visually unnecessary, it is not purchased.
If the surface is unknown and the risk cannot be assessed, it is not glued.
If microcement has a defect, the microcement is repaired first.
If guaranteed residue-free removal is required, and reversibility is not confirmed, permanent installation is not suitable.
And only when both the design and the technology are confirmed, a reasonable basket is 1 × NPU-190 for 690 ₽.
Thus, the article solves a real problem for the owner of a finished interior: not to "find a way to glue molding at any cost," but to understand when a small decorative accent truly warrants intervention in an already completed expensive surface.
FAQ
Can NPU-190 be glued to microcement without sanding?
There is no universal answer. You need to check the recommendations of the manufacturer of the specific microcement system and its protective finish. It is not worth sanding a finished accent surface on your own based only on general advice.
If the microcement is coated with polyurethane varnish, does that mean the polyurethane NPU is definitely compatible?
No. The same word "polyurethane" in the names of materials is not proof of adhesive compatibility. Data on the specific finish and mounting compound are needed.
Can the adhesive be tested in an area behind the slat panel?
Only if that area truly has the same microcement build-up and the manufacturer allows such a test. If the substrate or finish there differs, the test is not representative.
What to do if the craftsman left a test patch of microcement?
This is the best candidate for testing. If the sample is made with the same system and the same finish, you can safely check the appearance and compatibility on it without risking the main wall.
Can NPU-190 be glued onto microcement that was applied a week ago?
The readiness time depends on the specific system and protective coating. You should rely on the manufacturer's technical documentation, not just on the fact that the surface is already dry.
Is a primer needed under NPU-190?
Only if the compatible installation technology for the specific finish requires it. You cannot automatically apply an unknown primer to finished microcement.
Can NPU-190 be removed later and the microcement restored without a trace?
This cannot be guaranteed without testing and data on the specific coating. Permanent adhesive installation should be considered potentially difficult to reverse.
Will NPU-190 be suitable for very textured microcement?
You need to check the actual contact plane. If the surface has a pronounced relief, installation and visual seating become more complicated. The article does not promise universal compatibility with any texture.
What is more important before buying: to check the glue or the size?
First, the size and composition. If NPU-190 does not improve the wall, there is no point in subjecting the finished finish to technical tests.
Where can I see other overlays if NPU-190 is too small?
In the section decorative polyurethane overlays STAVROS you can choose a different scale while keeping the same principle of checking the finished surface.