Article Contents:
- Why buy a single leg when a cabinet needs four
- Project sample vs. replacement leg: what's the difference
- At what stage to order a trial furniture leg
- What to measure on a single trial leg
- Leg height, furniture height, and clearance under the cabinet
- Why the top cross-section needs to be checked separately
- How to assemble a trial lower assembly
- What to check on the mounting hardware
- What a sample will show about beech and oak
- Why a test stain is done before purchasing a batch
- Turned, carved, and geometric leg: different checks
- Turned leg: profile and transitions
- Carved leg: direction and relief
- Geometric leg: facets and slope
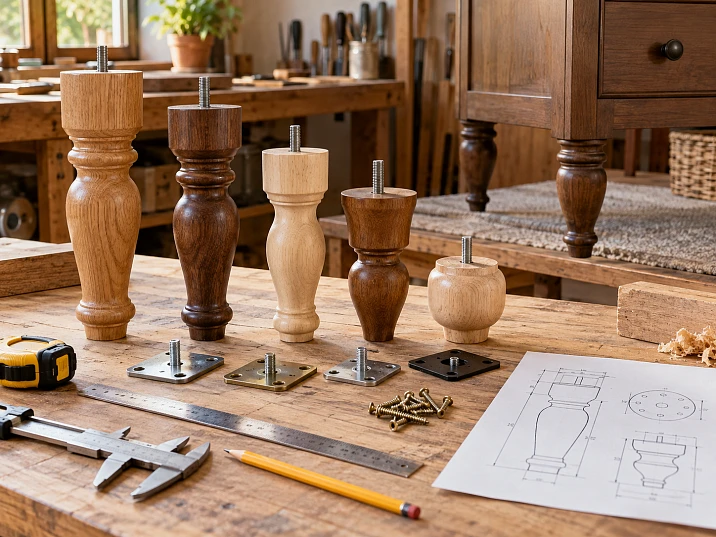
The cabinet's height has already been calculated, the facade pattern has been chosen, and the cutting plan has been outlined. In the photo, the wooden leg looks suitable. But after delivery, it turns out that its top plate protrudes beyond the rail, and the fastener lands too close to the edge of the bottom. You have to change the lower assembly — or look for another support for the finished carcass.
Such a check can be done earlier. Order one part, take measurements, assemble a test joint, and apply the chosen finish. After that, the working drawing will include a specific support with a clear fastening, and the purchase will include the required quantity of verified parts.
This is why people buy furniture supports individually. The first leg becomes a sample for the project: it helps coordinate the design, appearance, and finish before ordering the full set or a small batch.


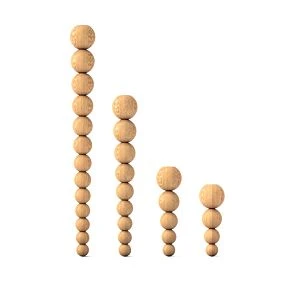
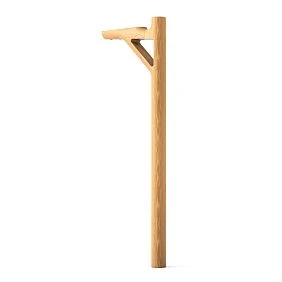
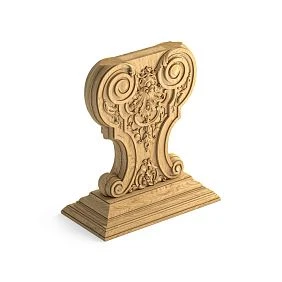
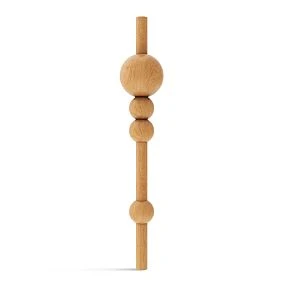
Why buy one support if the cabinet needs four
A single wooden leg lets you answer questions that are hard to resolve from an image. What does the profile look like next to the front? Does the mounting plate fit under the cabinet? Is it convenient to install the fasteners? Do you get the desired shade after finishing?
A sample part is especially useful when a workshop is using a specific model for the first time. The catalog size is enough for a preliminary selection, but it does not describe the entire assembly. The position of the hole, the protrusion of the relief, and the fit against the apron can sometimes change the decision more than a few millimeters of overall height.
At the same time, the purpose of the sample should be defined in advance. To check the appearance, the part can be left intact. To practice drilling, it may need to be modified. If after that you also need a final finishing reference, one copy may not be enough. Buying by the piece lets you match the quantity to your checks, rather than necessarily limiting yourself to one leg at any cost.




A project sample vs. a replacement leg: what's the difference
When repairing, the starting point is the existing furniture. You need to replicate the height, shape, and mounting of the surviving legs. The options for changing the design are usually limited.
In a new project, the solution can still be adjusted. Enlarge the mounting area, change the position of the apron, recalculate the cabinet height, choose a different part size. That is why a trial leg is evaluated against the requirements of the future furniture, not by its similarity to the old leg.
The result of the check becomes an approved option for production. A simple conclusion like "it looks like the picture, so we can take it" is not enough here: the assembler must understand where to place the part, and the purchaser must know exactly which item to repeat in the order.
Our factory also produces:
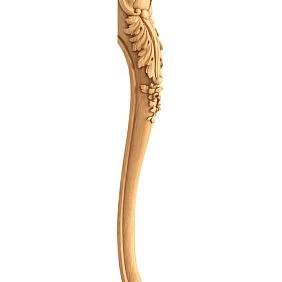


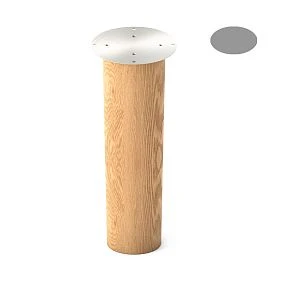
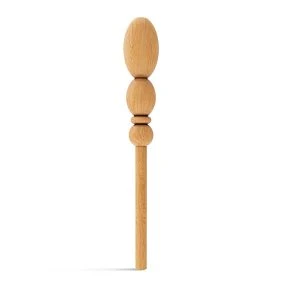
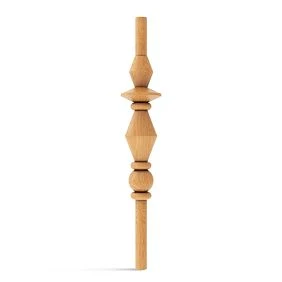
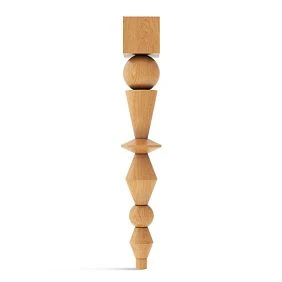
At what stage should you order a trial furniture leg?
A convenient moment is after the preliminary selection of the design, but before the final cutting and drilling of the cabinet. The purpose of the furniture, the desired height, the position of the bottom panel, and the type of finish are already known. Based on these conditions, you can choose several suitable models and order the most likely option.
The working sequence looks like this:
- Define the requirements for the furniture and the lower assembly.
- Choose the support model, size, wood species, and surface finish option.
- Receive a sample part and the hardware needed for verification.
- Check the dimensions, connection, installed height, and finish.
- Approve the support together with the mounting assembly.
- Complete the working drawings and calculate the procurement.
The support and the fastening are selected in coordination. In a free project, you can first find a suitable leg and then refine the hardware. If the workshop already uses a specific fastening system or must preserve the existing lower assembly, these constraints are taken into account from the very beginning.
It is useful to clarify the lead time for the main batch right away. A sample unit purchased from stock does not yet confirm that any quantity of the same variant will be available by the time the series is launched.
Get Consultation
What to measure on one sample support
Start by comparing the received part with the selected item: article number, size, wood species, and finish. Then take the measurements that affect your project. For straight sections, a ruler, square, and calipers will work; a complex profile is easier to assess together with the drawing and a template of the mounting area.
| What to Check | Which solution the size is needed for |
|---|---|
| Overall height of the wooden part | Match the sample with the selected finish |
| Maximum width and depth or diameter | Check the overall dimensions and protrusion beyond the body |
| Top cross-section | Assess the fit against the bottom and side rail |
| Actual contact area | Place the support and fasteners in the mounting joint |
| Bottom section | Select the floor glide and check contact with the floor |
| Profile and relief protrusions | Avoid collision with adjacent parts |
| Position and parameters of existing holes | Approve the hardware and further processing |
Decode the size letters in the catalog according to the drawing of the specific item. You must not transfer the meaning of one designation to another product group or assume that three numbers always describe height, width, and depth in the usual order.
Also record the measurement points. "Top — 60 mm" without explanation is of little help: it could be the width of a square section, the diameter of a round pad, or the maximum size of a protrusion. A photo with marked measurement boundaries will save you from repeated clarifications.
Leg height, furniture height, and clearance under the cabinet
These are three different dimensions. The height of the wooden part describes the leg itself. The installed height shows the distance from the floor to the selected mounting plane of the cabinet. The clearance is measured from the floor to the lowest part that limits passage under the furniture.
Suppose a cabinet 790 mm high is being designed. From the mounting plane to the top of the cabinet — 630 mm. This means the support assembly must provide another 160 mm. This is a conditional calculation example, not the parameters of a specific item.
A trial wooden support has a height of 180 mm, but in the intended connection its top 20 mm extend above the mounting plane. If there are no other height-adding elements, the installed dimension will be 160 mm. The total height of the cabinet will be 630 + 160 = 790 mm.
Now let's add a stretcher whose lower edge is located 35 mm below the same mounting plane. The clearance under it will then be 160 − 35 = 125 mm. Using the catalog value of 180 mm to estimate passage under the furniture would be a mistake.
Final furniture height = cabinet height above the mounting plane + distance from the floor to that plane after installing the support.
The mounting plate, base glide and adjustment can change the second dimension. Take them into account based on their actual position in the joint. The stud length is not automatically added or subtracted: part of it may be inside the leg and the body without changing the distance between them.
To check the clearance, find the lowest obstacle: the rail, the overhang of the front, the central support or another element. If a specific appliance must fit under the furniture, compare its dimensions with the actual free passage, including the areas between the legs.
Why the top section needs to be checked separately
A leg of the required height may not fit at the mounting point. A wide top section will protrude from under a narrow rail. A too-small pad will not allow the chosen plate to be placed. A rounding that is almost invisible in a photo will reduce the flat contact surface.
Mark the full outline of the support and the fastener positions on the underside of the body. Then check where the panel edge, the joint with the side panel, the groove and other holes run. The nominal area of the bottom does not yet mean that all of it is available for mounting.
When choosing supports for a chest of drawers, wardrobe and cabinet match the top section with the base structure. The category helps narrow the search, but compatibility with a specific body is confirmed by the dimensions and the design of the joint.
Also inspect the assembly from the side. If the support had to be shifted to accommodate the fastener, the setback from the front and the visible part of the profile will change. Such a change is best assessed before it goes into all products in the series.
How to assemble a trial lower assembly
For the first test fit, it is not necessary to make the entire cabinet. You can assemble a fragment of the base that replicates the working structure: the material and thickness of the bottom, the position of the rail, the reinforcement, the fasteners and the setbacks. A joint with a thick board will not show how the same support behaves in an assembly made of a different, thinner panel.
Secure the test piece on a stable workbench or a fixture intended for the work. Attach the support, check the contact and the layout. After installation, assess whether the intended surfaces fit fully, whether the relief interferes, and whether there is access to the fasteners. For a directional part, mark the side facing the front.
Such an assembly helps to notice the inconvenience of the operation as well. For example, the plate is placed under the bottom, but after installing the side rail, one screw is already inaccessible. Then you need to change the assembly sequence or the joint itself. In a series, such a small detail will repeat on every item.
The test piece checks the local connection. The stability of the furniture, load distribution, and operation of the entire structure are assessed on a full-scale prototype according to the project requirements. You cannot place the carcass on a single test leg or assume that checking an individual fastener confirms the allowable load of the finished product.
What to check on fastening hardware
Buy hardware for the test assembly together with the support, when the intended connection scheme is known. In the section hardware for furniture supports there are different types of fasteners and glides; they must be selected according to the design of your joint.
For a threaded connection, compare the diameter and thread pitch, the length of the joined sections, the depth of the holes, and the method of installing the mating part. Matching the diameter alone does not confirm compatibility. The stud must not rest against the bottom of the hole before the connection takes its intended position.
On the mounting plate, check the overall dimensions, the location of the holes, and the position relative to the support. If the plate sets a tilt, it must match the project. For the threaded insert, check the requirements for the pilot hole and the base material. The drilling depth is set taking into account the remaining thickness of the part, not just the length of the fastener.
Separately inspect the lower end and the glide. Does the size fit? How is it retained? Does it add height? Does the intended design allow the required orientation of the support to be achieved without weakening the connection? These questions are best resolved on the sample, and the selected item numbers should be recorded together with the leg.
Do not assume that the threaded rod, plate, or base plate are included. The scope of supply and hole preparation are clarified for the selected item. If additional machining is required for installation, include it in the working documentation and time estimate for the batch.
What a sample will show about beech and oak
A single support gives an idea of a specific version: the wood, shape, and surface preparation. A beech sample cannot reliably show how the same model will look in oak. For a direct comparison, both materials are needed, preferably with the finish that is intended for the project.
Beech can be considered for opaque enamel if the goal is to achieve a consistent color for the carcass and legs. On a test piece, check the preparation, how the primer performs, and the appearance of the finished coating. The choice of species does not eliminate these steps and by itself does not guarantee the required smoothness.
Oak is often chosen when the wood grain should remain visible. In that case, the sample is examined next to the front, rail, or tabletop: the prominence of the pores, the tone, and how the grain combines are assessed. The same species name does not yet promise that two different parts will look the same after tinting.
Information about the quality of solid wood products helps you understand the material and finish options. When ordering, specify the exact surface finish: a test on one preparation does not confirm the result on another.
Natural wood varies in grain and shade. A sample provides a reference point, but does not promise that all subsequent legs will look like exact copies of it. If a clear finish makes the differences especially noticeable, determine in advance which variations are acceptable and how you will match parts within a single set.
Why a test finish is done before purchasing the batch
The shade on a flat swatch and on a three-dimensional support may be perceived differently. Shadows appear on the relief, it is harder to distribute the material in the recesses, and the highlight on a rounded profile changes when rotated. Therefore, the entire selected finishing system is checked on the sample.
For self-finishing, choose Unfinished furniture legs. First perform the preparation required by the technology, then apply the primer, colorant, and protective coating in the required sequence. The compositions, interlayer treatment, and holding times are coordinated according to the manufacturers' instructions. Stain, oil, lacquer, and enamel are options of different solutions; it is not necessary to apply them all in succession for testing.
Record the materials used, the application method, the number of layers, and the holding conditions. If the shade was obtained by mixing, save the proportions. Without this information, a successful test finish is difficult to reproduce on the next batch, even when the first part is right in front of you.
The result should be evaluated after the drying and property development of the coating required by the technology. Compare the support with the body sample under consistent lighting. A photo is convenient for discussion, but the color on the screen does not replace comparison of physical parts.
Also note the labor intensity. If on the selected relief you have to spend a long time removing excess material and touching up the recesses, this affects the finishing time for the entire series. For a small order, such operations are sometimes more important than a small difference in the price of the legs themselves.
If considering furniture legs with finish, order a sample of exactly the required finish. You will need to check the combination with the body, the appearance, and the installation of the finished surface. An unfinished option will not confirm the color of the painted delivery.
Turned, carved, and geometric support: different checks
The type of surface affects both the appearance and the ease of processing. Therefore, a full-fledged part is more useful than a random offcut of the same wood when you need to match the specific leg model.
Turned support: profile and transitions
У turned furniture supports assess the maximum diameter, the tapers, the transition to the upper section, and the visible length after installation. A beautiful profile may almost entirely disappear behind the apron. Then only the lower fragment will remain visible in the furniture, and the proportions will differ from those in the catalog photo.
During a trial finish, see how the coating lies on the radii and in narrow transitions. For installation, check the available cross-section in the hole area. The outer diameter of the widest part does not describe the thickness of the wood where the fastener will be.
Carved support: direction and relief
У carved furniture supports mark the front side. If the project provides for left and right versions, these are different items that must be coordinated separately. Rotating one part does not always replace the mirrored version.
Place the sample against a fragment of the facade and the apron: check whether the ornament is overlapped and whether the character of the carving matches the rest of the decor. Evaluate the finish both in the recesses and on the protrusions. It is their combination that creates the play of light and shadow for which such a leg is chosen.
Geometric support: facets and inclination
У geometric furniture supports check the orientation of the planes relative to the carcass. For an inclined leg, the installation direction and the position of the floor contact point are important. The length along the inclined part is not equal to the vertical distance from the floor to the carcass.
Straight facets are convenient to compare with the facade lines on a trial fragment. After finishing, inspect the planes and edges under side lighting: this makes it easier to see differences in the coating that are lost in a frontal view.
What cannot be checked with a single support
A sample helps select a component and validate local installation. It does not show how stable the entire item is, how the base will behave under uneven load, or whether additional central supports are needed.
After the local assembly is approved, the next check is performed on the assembled prototype with the specified set of supports. For furniture with different front and rear legs, a separate central support, or mirrored components, each position is considered individually. The fitting result of one model cannot be automatically applied to the others.
This also applies to wooden sofa supports: testing a leg on a frame fragment does not confirm the performance of the entire frame. The load capacity of the finished furniture is determined by the design and relevant tests. Adding up the nominal values of individual legs and treating the resulting sum as the permissible load of the sofa is incorrect.
If tests were performed to evaluate the joint that could damage the component, its further use is considered separately. A good appearance after testing does not yet make such an item suitable for installation in the customer's product.
How to turn a sample into an approved item for series production
After verification, compile the information into a single card. It should link the component, fastening, finish, and specific project. Then production will not rely on the craftsman's memory or search for the needed photo in messages.
| Card field | What to record |
|---|---|
| Product and installation location | Furniture model, front, rear, or central position |
| Support | Full SKU and product link |
| Finish | Selected size, wood, surface preparation |
| Verified dimensions | Values and measurement points, specified height |
| Installation | Hardware, hole pattern, orientation and assembly sequence |
| Finishing | Materials and technology or the exact finish option |
| Quantity | Number of parts for this item per product |
| approval | Date, responsible person, physical sample reference |
Attach photos of the part and the assembled unit, as well as the working drawing. Sample measurements are useful for design, but by themselves they do not define supply tolerances. If a specific dimension is critical for the joint, its requirements must be agreed separately.
In a uniform set, the approved version is repeated. If different front and rear supports are intended, create separate rows with their own characteristics and quantities. This preserves the design intent, and an accidental replacement with an "almost identical" leg becomes noticeable before assembly.
How to calculate the full order after a sample
Suppose a workshop produces eight cabinets, each requiring four identical supports. The production requirement is 8 × 4 = 32 pieces. One trial leg has already been purchased. The subsequent order depends on its purpose.
If the sample is kept for reference, all 32 production parts must be purchased separately. If it is fully suitable for furniture, matches the approved specification, and it has been decided to use it in the set, only 31 remain to be ordered. The reserve is calculated separately, based on the specific project risks.
| Decision about the sample | Supports for eight cabinets in the new order | Reserve in the new order | Total to order now |
|---|---|---|---|
| Keep the sample separately | 32 | 0 | 32 |
| Use a suitable sample in the furniture | 31 | 0 | 31 |
| Keep the sample and add two spare parts | 32 | 2 | 34 |
| Use a sample and add two spare parts | 31 | 2 | 33 |
Here, the last column shows only the new purchase: the trial support purchased earlier is not included in it. The two spare parts are a conditional example, not a mandatory norm.
For different models, count each item separately. For a cabinet with two front and two rear supports, eight units will require 16 parts of each type. A total of "32 legs" will not replace such a breakdown in the order. Plates, studs, and glides are calculated according to their own configuration.
When it is better to leave the sample in the workshop
A physical sample is needed if it will be referred to during incoming inspection, painting, and repeat purchases. It is especially useful to keep it when the body and supports are finished in different areas: both sides get a common reference for comparison.
Label the sample and store it together with the card, or indicate its storage location in the card. On the label, it is enough to indicate the project designation, article number, finish variant, and approval date. Do not apply the inscription directly to the area used for color matching.
Different specimens may be needed for checking dimensions and color. A part with several experimental paint coats is poorly suited to serve as the sole reference for the finished surface. A support with additional holes may remain useful for explaining installation, but its condition must be clearly indicated.
The decision to keep the sample is made before calculating the main purchase. Otherwise, the first cabinet will take the last control part, and if the painting area asks a question, only a photograph will remain in the workshop. If the sample is nevertheless included in the furniture, determine in advance how you will confirm the repeatability of the next batch.
When a familiar support should be checked again
A new sample is needed not only when the leg model changes. Sometimes the article number remains the same, but the conditions of use change so much that the old check no longer answers the project's questions.
A different bottom thickness changes the mounting conditions. Moving the apron affects contact and access to the screws. A new wood species requires a fresh assessment of appearance and finish. Even a familiar color applied using a different material system must be confirmed with a test coat.
When changing the support size, also check the drawing: you cannot assume that only the height has increased while the top plate and other sections remain the same. If the furniture has become taller, wider, or has been given a different purpose, the assessment of the entire structure may also need to be revised.
The scope of the re-check is chosen based on the change. For a new color on an unchanged part, the main task is the finish. For a new mounting plate, it is the connection and the installed height. This way the workshop does not repeat all actions without reason, but checks exactly what has changed.
How to order a single wooden support as a sample
On the STAVROS page, conditions for manufacturers shipping from a single unit is specified. This allows you to first purchase a trial part and then proceed to ordering the quantity calculated for the project. Please confirm the availability of the required version and the main delivery time when ordering.
When choosing furniture legs individually, specify the full article number, size, wood species, and surface condition. If you plan to paint them yourself, you need a variant that matches the future preparation and painting technology. If the furniture is to be fitted with ready-painted supports, the trial piece must have exactly the agreed coating.
In the request, it is convenient to state the purpose right away: “One part for checking the mounting assembly and finish; after approval, a batch for eight cabinets is planned.” Attach the connection diagram if you need to clarify a specific dimension, hole preparation, or fastener composition. Such a request gives the supplier more useful information than asking to find a leg “roughly like in the photo.”
Section product samples can be used for additional familiarization with materials and profiles. But a wood or other product sample does not replace a full-size support when checking its geometry and installation. The availability of a separate sample of the specific chosen leg should be confirmed.
Before placing an order, look at payment and delivery terms. In the project schedule, allow time for receiving the part, assembly, and completing the trial finish. The sample delivery date is not yet its approval date.
What to check when the main batch arrives
First, compare the delivery against the approved card: items, quantities, dimensions, wood, and surface finish. Inspect the parts and the condition of the attachment areas. Before releasing the batch to work, make sure you received the agreed variant, not a different size version of a familiar model.
Organize the check of critical installation dimensions according to the project requirements. The fact that the sample fit successfully does not cancel incoming inspection. If a discrepancy is found, first determine its cause and impact on assembly; you should not start reworking the entire batch in the same way without a decision on the design.
For a clear finish, examine future sets side by side. Differences in wood grain may be acceptable for the batch as a whole, but noticeable on adjacent front legs of the same cabinet. Appearance matching is carried out within the agreed requirements and taking into account the available quantity of parts.
Before starting all products, assemble the first set on the prototype or the first item according to the procedure accepted in the workshop. Check the final height, orientation, and assembly sequence. If the working scheme required a change, enter it into the documentation before repeating the operation on the remaining cabinets.
How to repeat an order without searching through photos again
For a reorder, save the item code together with the link, selected size, species, finish, and hardware. Add the approval date and project designation. The name “wooden leg for a cabinet” is too general, and a photo does not show the thread parameters and the hidden part of the joint.
Before repurchasing, compare the current product card with the saved requirements. Clarify the availability of the required finish and the delivery time. If a replacement is needed, agree on the new variant before ordering the series: a visually similar part may require different marking or change the height of the furniture.
The decision to buy furniture supports after checking the sample gives the workshop a specific reference point. It is known what to order, how to install it, and what the finishing result should be. The first piece-by-piece purchase fulfilled its purpose when this information can be passed to another craftsman — and used to assemble the next piece of furniture.